
TOOLS for P-250 Installation Guide 1
SPECIAL NOTICES
• The software and this Installation Guide are exclusive copyrights of Yamaha Corporation.
• Use of the software and this guide is governed by the SOFTWARE LICENSING AGREEMENT which the purchaser fully agrees to upon breaking the seal of the
software packaging. (Please read carefully the AGREEMENT at the end of this guide before installing the application.)
• Copying of the software or reproduction of this guide in whole or in part by any means is expressly forbidden without the written consent of the manufacturer.
•Yamaha makes no representations or warranties with regard to the use of the software and documentation and cannot be held responsible for the results of the use of
this guide and the software.
• This disc is a CD-ROM. Do not attempt to play the disc on an audio CD player. Doing so may result in irreparable damage to your audio CD player.
• Copying of the commercially available music data is strictly prohibited except for your personal use.
• The company names and product names in this Installation Guide are the trademarks or registered trademarks of their respective companies.
• Future upgrades of application and system software and any changes in specifications and functions will be announced separately.
• Depending on the version of your operating system, the screen shots and messages shown in this guide may differ to those that you see on your computer screen.
BESONDERE HINWEISE
• Dieses Programm und diese Installationsanleitung sind im Sinne des Urheberrechts alleiniges Eigentum der Yamaha Corporation.
• Die Benutzung des Programms und dieser Anleitung unterliegt der SOFTWARE-LIZENZVEREINBARUNG, mit der sich der Erwerber durch Öffnen des Siegels der
Programmverpackung uneingeschränkt einverstanden erklärt. (Bitte lesen Sie die VEREINBARUNG am Ende dieser Anleitung vor Installation der Anwendung
sorgfältig durch.)
• Das Kopieren der Software und die Reproduktion dieser Anleitung, in welcher Form auch immer, in Teilen oder als Ganzes, sind nur mit schriftlicher Genehmigung
des Herstellers erlaubt und sonst ausdrücklich verboten.
•Yamaha leistet keinerlei Garantie hinsichtlich der Benutzung des Programms und der zugehörigen Dokumentation und übernimmt keine Verantwortung für die
Ergebnisse der Benutzung dieser Anleitung oder des Programms.
• Bei dieser CD handelt es sich um eine CD-ROM. Versuchen Sie bitte nicht, diese CD-ROM auf einem Audio-CD-Player abzuspielen, da dies zu irreparablen Schäden
am Audio-CD-Player führen kann.
• Das Kopieren im Handel erhältlicher Musikdaten ist nur für Ihren Privatgebrauch zulässig und sonst streng untersagt.
• Die in dieser Installationsanleitung erwähnten Firmen- und Produktnamen sind Warenzeichen bzw. eingetragene Warenzeichen der betreffenden Firmen.
• Zukünftige Aktualisierungen von Anwendungs- und Systemsoftware sowie jede Änderung der technischen Daten und Funktionen werden separat bekanntgegeben.
• Je nach der Version Ihres Betriebssystems unterscheiden sich die hier dargestellten Screenshots und Meldungen von der tatsächlichen Anzeige auf Ihrem
Computermonitor.
REMARQUES PARTICULIERES
• Les droits d’auteurs (copyright) de ce logiciel et de ce manuel d’installation appartiennent exclusivement à Yamaha Corporation.
•L’usage de ce logiciel et de ce manuel est défini par l’accord de licence auquel l’acheteur déclare souscrire sans réserve lorsqu’il ouvre le sceau de l’emballage du
logiciel. (Veuillez donc lire attentivement l’accord de licence du logiciel situé à la fin de ce manuel avant d’installer le logiciel.)
•Toute copie du logiciel et toute reproduction totale ou partielle de ce manuel, par quel moyen que ce soit, est expressément interdite sans l’autorisation écrite du fabricant.
•Yamaha n’offre aucune garantie en ce qui concerne l’utilisation du logiciel et de la documentation. Yamaha ne peut en aucun cas être tenu responsable des dommages
éventuels résultant de l’utilisation de ce manuel et de ce logiciel.
• Ce disque est un CD-ROM. N’essayez donc pas de l’insérer dans un lecteur de CD audio. Vous risqueriez d’endommager ce dernier de manière irréversible.
•Toute copie de données musicales commercialisées est formellement interdite, sauf pour usage personnel.
• Les noms des firmes et des produits apparaissant dans ce manuel d’installation sont des marques commerciales ou des marques déposées appartenant à leurs
détenteurs respectifs.
• Les remises à jour du programme et du système ainsi que toute modification des caractéristiques et fonctions seront annoncées séparément.
• En fonction de la version du système d’exploitation que vous utilisez, les captures d’écran et les messages qui figurent dans ce manuel peuvent différer de ceux qui
apparaissent sur l’écran de votre ordinateur.
AVISOS ESPECIALES
• El copyright del software y de la guía de instalación es propiedad exclusiva de Yamaha Corporation.
• La utilización de este software y de esta guía debe ajustarse al CONTRATO PARA USO DE SOFTWARE BAJO LICENCIA, con el que el comprador manifiesta su
total conformidad al abrir el paquete de software. (Lea detenidamente el CONTRATO que se incluye al final de esta guía antes de instalar la aplicación).
• La copia del software o la reproducción total o parcial de este manual por cualquier medio sin la autorización escrita del fabricante está expresamente prohibida.
•Yamaha no asume responsabilidad alguna ni ofrece garantía alguna en relación con el uso del software y de la documentación, y no puede ser declarada responsable
de los resultados de la utilización de este manual ni del software.
• Este disco es un CD-ROM. No intente reproducirlo en un reproductor de CD de audio, porque al hacerlo se podrían causar daños irreparables en el reproductor.
• Queda terminantemente prohibida la copia de datos musicales disponibles comercialmente, excepto para uso personal.
• Los nombres de compañías y de productos que aparecen en esta guía de instalación son marcas o marcas registradas de sus respectivas compañías.
• Las futuras actualizaciones de la aplicación y del software del sistema, y cualquier cambio en las especificaciones y funciones, se anunciarán independientemente.
•Según las versiones del sistema operativo, las capturas de pantalla y los mensajes que aparecen en esta guía podrían diferir de los que aparecen en la pantalla del ordenador.
English
DeutschFrançaisEspañol
TOOLS for P-250
TOOLS for P-250
Installation Guide/Installationshandbuch/
Manuel d’installation/Guía de instalación
Installation Guide/Installationshandbuch/
Manuel d’installation/Guía de instalación

2 TOOLS for P-250 Installation Guide
English
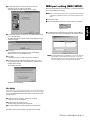
Important Notices about the CD-ROM
Data Types
This CD-ROM includes application software.
Please refer to page 4 (Windows) and 10 (Macintosh) for details about the software and how to install it.
These applications allow you to transfer data between your computer and the P-250.
Never attempt to play back the included CD-ROM on an audio CD player. Doing so may result in damage to your hearing as well as to your CD player/
audio speakers.
Operating System (OS)
The applications in this CD-ROM are provided in versions for both Windows and Macintosh operating systems. The installation procedure and the
applications themselves differ depending on the operating system that you are using. Please refer to the appropriate installation instructions.
→
Windows Read page 3, 6, 14.
→
Macintosh Read page 3, 11, 14.
Media format
The P-250 and the File Utility software are compatible with the MS-DOS format media.

TOOLS for P-250 Installation Guide 3
English
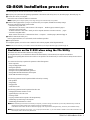
CD-ROM installation procedure
The following steps are the same for both Windows and Macintosh.
1
Verify that your system meets the operating requirements of the software (File Utility, driver, etc.) (Windows page 6, Macintosh page 11).
2
Connect the P-250 to your computer.
Refer to the owner’s manual for details on connections.
n
Depending on the computer system you are using, some types of connections may not be possible.
3
Install the driver appropriate for your type of connection into your computer, and make the necessary settings.
The arrow symbols shown below represent cables.
• Connection using a USB cable
USB connector of the P-250
↔
USB connector of the computer … Windows page 6, Macintosh page 11
• Connection using a serial cable
TO HOST connector of the P-250
↔
Serial port of the computer (RS-232C or RS-422 connector) … page 8
• Connection using MIDI cables
MIDI connector of the P-250
←
MIDI interface device
→
Computer … Windows page 6, Macintosh page 11
4
Install the software (File Utility, etc.)
Refer to pages 6 (Windows) or 11 (Macintosh) for the installation procedure.
5
Start up the software.
For subsequent operation, refer to the owner’s manual for each software program (online help/PDF manual).
n
In order to view PDF files, you will need to install Acrobat Reader in your computer (Windows page 6, Macintosh page 11).
Limitations on the P-250 when using the File Utility
The TOOLS for P-250 CD-ROM contains a File Utility program.
By using this software, you can transfer files between the internal memory of the P-250 and your computer, and edit them.
There are some operating states of the P-250 in which it is not possible to use the File Utility or in which some File Utility functions are not
available.
You cannot use File Utility to perform file operations in the following states.
• Demo song mode
• Song recording/playback mode
• During file operations
• During the various [SONG FILE] operations
• During the various [PERFORM.FILE] operations
• During MIDI bulk data transmission and reception
• While MIDI transmission is stopped
The following operations cannot be performed while File Utility is running.
• File operations
• Song loading
• Song playback
•Track button on/off
The following operations cannot be performed on the P-250.
• Changing the filename extension of a file
• Japanese display in the LCD screen
• Creating a folder
• Copying a folder from the computer to the storage memory
•Transmitting a protected song to the computer
•Transmitting path information to a device
n
When transferring a file between the P-250 and your computer, you must set the type of characters on your P-250 ([CharacterCode]) to match the
language of the operating system for the computer in which you installed File Utility.
If the character code of the P-250 does not match the language of the computer that is running File Utility, the file may not be handled correctly.
n
On the P-250, the File Utility ID is fixed at “1”. If you specify an ID other than “1,” you will be unable to transmit or receive data. For details on the
File Utility ID, refer to the File Utility PDF manual.

4 TOOLS for P-250 Installation Guide
English
For Windows Users
Contents of the CD-ROM
The CD-ROM contains a variety of applications (with installers) and data in the following folders.
Folder Name Application Name Contents
Acroread_ Acrobat Reader
*1
*2
*1 Unfortunately, Yamaha makes no guarantee concerning the stability of this program nor can it offer user support for it.
PDF (Portable Document Format) viewer. Enables you to view each PDF manual
for the applications.
FileUtil_ File Utility
*2
*2 The applications are supplied with online/PDF manuals.
*You can start the File Utility as either a stand-alone software or a plug-in application in the Open Plug-in Technology compatible application. See next page for
details about Open Plug-in Technology.
Enables you to manage files in the storage memory on the P-250.
USBdrv_ YAMAHA USB MIDI Driver (for Win98, Me) Enables your computer to communicate with the P-250 when your computer and
the P-250 are connected using a USB cable.
USBdrv2k_ YAMAHA USB MIDI Driver (for Win2000, XP)
Mididrv_ YAMAHA CBX Driver Allows the serial port of your computer to be connected directly to the P-250 so
that MIDI messages can be transferred.
SongData Demonstration Song Enables you to use the File Utility to transmit data to the P-250 so you can enjoy
demo song (SMF file) playback on the P-250.

TOOLS for P-250 Installation Guide 5
English
You can start the File Utility software as either a stand-alone software or a plug-in application in the Open Plug-in Technology compatible applica-
tion.
Refer to the owner's manual of the client application (sequencer, etc.) for details on using the File Utility as a plug-in software.
OPT Level Implementation for the File Utility
This chart shows the OPT-compatibility of the File Utility.
n
Certain operations may not work as expected if there is no corresponding function in the client application (sequencer, etc.). The highest level of implemen-
tation for the client application is indicated in the OPT logo (which appears along with the version information in the application).
About Open Plug-in Technology
Open Plug-in Technology (OPT) is a newly developed software format that allows control over MIDI devices from a music software sequenc-
er. For example, this allows you to start up and operate various parts of your music system, such as plug-in board editors, and mixing control
editors - directly from an OPT-compatible sequencer, without having to use each separately. This also makes it unnecessary to set MIDI
drivers for each application, streamlining your music production system and making all operations more convenient and seamless.
About the OPT Levels
The client application and its compatibility with OPT can be divided into three levels, as shown below.
Level 1
– OPT Panels provides basic support for opening and displaying OPT control panels that can transmit data via the
clients’ external MIDI ports.
Typically this will allow basic hardware editor control panels to operate properly.
Level 2
– OPT Processors provides support for real-time MIDI processors and panel automation.
Typically this will allow both real-time and offline MIDI effects (e.g. Arpeggiators, transposers etc.) to operate properly and
supply automation to OPT panels.
Level 3
– OPT Views provides support for edit views and MIDI processors/panels that require direct access to client sequencer
storage structures. Typically this will allow sophisticated MIDI edit views to be supported (e.g. List editors, Auto Accompa-
niment, Data Checkers etc.).
OPT levels of the client application
File Utility operation
Operation support Operation limits
VIEWS (Level3) Yes None
PROCESSORS (Level2) Yes None
PANELS (Level1) No —

6 TOOLS for P-250 Installation Guide
English
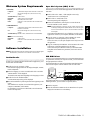
Minimum System Requirements
n
Depending on your operating system, it may be necessary to satisfy con-
ditions in addition to those listed below.
• File Utility (including MIDI setup)
• USB MIDI Driver
•YAMAHA CBX Driver
Software Installation
n
For details about the application software which has no installation guide
described below, refer to the online manual of each software.
Acrobat Reader
In order to view the PDF manuals included with each application, you’ll
need to install Acrobat Reader.
n
If an older version of Acrobat Reader is installed on your PC, you’ll need
to uninstall it before proceeding.
1
Double-click on the “Acroread_” folder.
Five different language folders will be displayed.
2
Select the language you want to use and double-click on its folder.
“ar******.exe” file will be displayed. (“***” indicates the Acrobat
Reader version and the selected language.)
n
The file name might change if the application software has been upgrad-
ed.
3
Double-click on the “ar******.exe.”
Acrobat Reader Setup Dialog box will be displayed.
4
Execute the installation by following the on-screen directions.
After installation is complete, the Acrobat folder appears on your
PC (in Program Files, as the default).
For information on using the Acrobat Reader, refer to the Reader
Guide in the Help menu.
USB MIDI Driver
To operate the P-250 from your computer via USB, you’ll need to install
the appropriate driver software.
The USB-MIDI driver is software that transfers MIDI data back and
forth between sequence software and the P-250 via a USB cable.
→
Windows 98/Me users See below.
→
Windows 2000 users See page 7.
→
Windows XP users See page 8.
n
Before you install the USB MIDI driver, you can minimize the pos-
sibility of problems by putting your computer in the following state.
• Close all applications and windows that you are not using.
• Disconnect all cables from the P-250 except for the cable
whose driver you are installing.
●
Installing the driver on a Windows 98/Me system
1
Start the computer.
2
Insert the included CD-ROM into the CD-ROM drive.
3
Make sure the POWER switch on the P-250 is set to OFF and use
the USB cable to connect the USB terminal of the computer (or the
USB hub) to the USB terminal of the P-250. When the P-250 is
turned on, the computer automatically displays the “Add New Hard-
ware Wizard.” If the Add New Hardware Wizard does not appear,
click “Add New Hardware” in the Control Panel.
n
For Windows Me users, check the radio button to the left of “Auto-
matic search for a better driver (Recommended)” and click [Next].
The system automatically starts searching and installing the driver.
Proceed to Step 8. If the system does not detect the driver, select
“Specify the location of the driver (Advanced)” and specify the CD-
ROM drive’s root directory (e.g., D:\) to install the driver.
Windows 98
Windows Me
Computer:
PC with 160 megahertz (MHz); Intel® Pentium®/
Celeron® family
OS:
Windows® 98/98SE/Me/2000/XP Home Edition/XP
Professional
Available Memory:
32 MB or more
Hard Disk:
6 MB or more
Display:
640
×
480, High Color (16 bit)
Computer:
PC (with USB port) with 166 megahertz (MHz);
Intel® Pentium®/Celeron® family
OS:
Windows® 98/98SE/Me/2000/XP Home Edition/XP
Professional
Available Memory:
32 MB or more
Hard Disk:
2 MB or more
OS:
Windows® 95/98/98SE/Me/NT4.0/2000/XP Home
Edition/XP Professional
Uninstalling the application software
Follow the procedure below to remove the installed software.
Select [Start]
→
[Settings]
→
[Control Panel]
→
[Add/Remove
Programs]
→
[Install/Uninstall] to specify the item you wish to
remove, then click [Add/Remove...]. A dialog panel appears. Fol-
low the instructions on screen to uninstall the application soft-
ware.
n The menu or button names may vary depending on the OS.
Computer
USB cable
Driver
Sequence
Software
P-250
MODULATION
PITCH
P-200X
ELECTRONIC PIANO
HIGHHI-MID
MASTER EQUALIZERVOICE/PERFORMANCETEMPOSONGSONG BALANCE
MASTER VOLUME
POWER
LOW
MIDI SETTING
CHORUS
REVERBSPLITCONTRAST
XG
8
16
B
YESNO
D
A
C
BASS
15
7
PERFORM. FILE
EDIT
MASTER EQ
VARIATION
PERFORMANCE
VOICE
EDIT
VIBRA-
PHONE
GUITAR
14
6
SYNTH.PAD
13
5
E.PIANO
3
HARPSI
-
CHORDCLAVI.
ORGAN 1
EXIT
9 BA
1
GRAND
PIANO 1
EXTRA SONG
FILE
PANEL
LOCKTRACKS
TRACK
TOPSONG SELECT
KEYBOARDSONG
MIN
ON OFF
MAX
RECSTART/STOP
SYNCHRO STARTNEW SONG
1
TRACK
2MIDI OUT
ORGAN 2
10
2
GRAND
PIANO 2
STRINGS
11
3
E.PIANO
1
CHOIR
12
4
E.PIANO
2
OTHER SETTING
LO-MID MID
DOWNSONG SETTING UP
USB
HOST SELECT MIDI ASSIGNABLE FOOT PEDAL
AC INLET
MIDI THRU OUT IN AUX
4
SOSUTENUTO
2
SUSTAIN
1
SOFT
3
PC-2
TO HOST
USBMac
OUTPUT
RL/MONO
INPUT
RL/MONO

TOOLS for P-250 Installation Guide 7
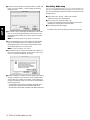
English
4 Click [Next].
The window below enables you to select the search method.
5 Check the radio button to the left of “Search for the best driver for
your device. (Recommended).” Click [Next].
The window below enables you to select a location in which to
install the driver.
6 Check the “CD-ROM drive” box and uncheck all other items. Click
[Next].
n The system may ask you to insert a Windows CD-ROM while it
checks for the driver. Specify the USBdrv_ directory of the CD-ROM
drive (such as D:\USBdrv_\) and continue the installation.
n When using the Windows 98, specify the USBdrv_ directory of the
CD-ROM drive (such as D:\USBdrv_\) and continue the installation.
7 When the system detects the driver on the CD-ROM and is ready for
installation, it displays the following screen.
Make sure that the “YAMAHA USB MIDI Driver” is listed, and
click [Next]. The system starts the installation.
8 When the installation is complete, the following screen appears.
Click [Finish].
n Some computers may take about ten seconds to show this screen after
the installation is complete.
Windows 98
Windows Me
The driver has been installed.
● Installing the driver on a Windows 2000 sys-
tem
1 Start the computer and use the “Administrator” account to log into
Windows 2000.
2 Select [My Computer | Control Panel | System | Hardware | Driver
Signing | File Signature Verification], and check the radio button to
the left of “Ignore -Install all files, regardless of file signature” and
click [OK].
3 Insert the included CD-ROM into the CD-ROM drive.
4 Make sure the POWER switch on the P-250 is set to OFF and use
the USB cable to connect the USB terminal of the computer (or the
USB hub) to the USB terminal of the P-250. When the P-250 is
turned on, the computer automatically displays the “Found New
Hardware Wizard.” Click [Next].
5 Check the radio button to the left of “Search for a suitable driver for
my device. (Recommended).” Click [Next].
The window that appears enables you to select a location in which to
install the driver.
6 Check the “CD-ROM drives” box and uncheck all other items. Click
[Next].
n The system may ask you to insert a Windows CD-ROM while it
checks for the driver. Specify the “USBdrv2k_” directory of the CD-
ROM drive (such as D:\USBdrv2k_\) and continue the installation.
7 When the installation is complete, the system displays “Completing
the Found New Hardware Wizard.” Click [Finish].
n Some computers may take about ten seconds to show this screen after
the installation is complete.
8 Restart the computer.
The driver has been installed.

8 TOOLS for P-250 Installation Guide
English
● Installing the driver on a Windows XP system
1 Start the computer.
2 Select [Start | Control Panel].
If the control panel appears as shown below, click “Switch to Clas-
sic View” in the upper left of the window.
All control panels and icons will be displayed.
3 [System | Hardware | Driver Signing | File Signature Verification],
and check the radio button to the left of “Ignore -Install all files,
regardless of file signature” and click [OK].
4 Click the [OK] button to close System Properties, and then click
“X” in the upper right of the window to close the Control Panel.
5 Insert the included CD-ROM into the CD-ROM drive.
6 Make sure the POWER switch on the P-250 is set to OFF and use
the USB cable to connect the USB terminal of the computer (or the
USB hub) to the USB terminal of the P-250. When the P-250 is
turned on, the computer automatically displays the “Found New
Hardware Wizard.”
7 Check the radio button to the left of “Search for a suitable driver for
my device. (Recommended).” Click [Next].
The system starts the installation.
8 When the installation is complete, the system displays “Completing
the Found New Hardware Wizard.” Click [Finish].
n Some computers may take about ten seconds to show this screen after
the installation is complete.
9 Restart the computer.
The driver has been installed.
Serial Driver
1 Double-click on the “Mididrv_” folder.
“Setup.exe” file will be displayed.
2 Double-click on the “Setup.exe” file.
When the setup has been initialized, the “Welcome” window will
appear.
3 Click [Next].
The “Select operation” window will appear.
4 Click the radio button to the left of “Install YAMAHA CBX Driver.”
Click [Next].
5 The license agreement for the YAMAHA CBX Driver will be dis-
played. Please read it carefully.
6 Click [Yes].
The “Select COM port” window will appear.

TOOLS for P-250 Installation Guide 9
English
7 Click the radio button to the left of the COM port to use.
Normally you will use COM1. Click [Next].
“Select the number of MIDI output ports” will appear.
8 Click the radio button to the left of the “Use multiple MIDI output
ports” and click [Next].
The MIDI driver will be installed, and the “MIDI Mapper Question”
window will appear.
9 Click [Yes].
The system displays the following message “Set the HOST
SELECT switch on a tone module to PC-2.”
0 Click [OK].
A message will inform you that setup has been completed.
A In order for the newly installed YAMAHA CBX Driver to take
effect, make sure that “Yes, I want to restart my computer now” is
installed, and click [OK].
The computer will restart.
The driver has been installed.
File Utility
Once you‘ve installed this software program, you can use your compu-
ter to access and organize data stored to media connected to the P-250
(Storage memory).
1 Double-click on the “FileUtil_” folder in the CD-ROM.
“Setup.exe” file will be displayed.
2 Double-click on the “Setup.exe” file.
The File Utility setup dialog will be displayed.
3 Execute the installation by following the on-screen directions.
For details, refer to the on-line Help or the PDF owner’s manual.
MIDI port setting (MIDI SETUP)
Before setting the MIDI port on the File Utility, you should set the MIDI
port from the MIDI SETUP toolbar.
n When you start the File Utility as a plug-in application in the Open Plug-
in Technology compatible application, refer to the PDF manual of File
Utility.
1 Start the File Utility.
2 Click the MIDI Setup button in the Toolbar called up via step #1.
3 In the MIDI Setup window called up via step#2, click the [▼] but-
ton at the right end of each box and make the port settings as shown.
n In order for MIDI ports to be available here, you’ll need to select the
relevant MIDI port within the application software —File Utility.
This is the port that you’ll use in the various software. For details on
setting the MIDI port, refer to the PDF manual of File Utility.
MIDI Setup button

10 TOOLS for P-250 Installation Guide
English
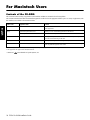
For Macintosh Users
Contents of the CD-ROM
The CD-ROM contains a variety of applications (with installers) and data are contained in the following folders.
The CD-ROM includes three folders: International and Japanese. Double-click on the appropriate folder to open it. A variety of applications (with
their installers) are included in the International folder.
• OMS® and are trademarks of Opcode Systems, Inc.
Folder Name Application Name Contents
Acroread_ Acrobat Reader
*1
*2
*1 Unfortunately, Yamaha makes no guarantee concerning the stability of this program nor can it offer user support for it.
PDF (Portable Document Format) viewer. Enables you to view each PDF manual
for the applications.
OMS_ Open Music System (OMS) 2.3.8
*2
*2 The applications are supplied with online/PDF manuals.
Enables you to use several MIDI applications on the Mac OS.
OMS Setup for YAMAHA Contains the OMS Setup files for the Yamaha P-250.
USBdrv_ YAMAHA USB MIDI Driver Enables your computer to communicate with the P-250 when your computer and
the P-250 are connected using a USB cable.
FileUtil_ File Utility
*2
Enables you to manage files in the storage memory on the P-250.
SongData Demonstration Song Enables you to use the File Utility to transmit data to the P-250 so you can enjoy
demo song (SMF file) playback on the P-250.

TOOLS for P-250 Installation Guide 11
English
Minimum System Requirements
• File Utility
• USB MIDI Driver
n Turn off virtual memory.
Software Installation
n For details about the application software which has no installation guide
described below, refer to the owner’s manual of each software.
Acrobat Reader
In order to view the PDF manuals included with each application, you’ll
need to install Acrobat Reader.
1 Double-click on the “Acroread_” folder.
Four different language folders will be displayed: English, German,
French and Spanish.
2 Select the language you want to use and double-click on its folder.
“Reader Installer” will be displayed.
The Installer name may differ depending on the language you select.
3 Double-click on the “Reader Installer.”
Acrobat Reader Setup Dialog will be displayed.
4 Execute the installation by following the directions appearing on the
screen.
After installation is complete, the Acrobat folder appears on your
computer (in Hard Disk, as the default).
For information on using the Acrobat Reader, refer to the Reader
Guide in the Help menu.
Open Music System (OMS) 2.3.8
OMS allows you to use several MIDI applications on the Mac OS at the
same time.
1 Double-click on the “OMS_” folder (English version only).
“Install OMS 2.3.8” will be displayed.
2 Double-click on “Install OMS 2.3.8.”
OMS Setup Dialog will be displayed.
3 Execute the installation by following the on-screen directions.
After the installation, select “Restart.”
n After the installation is complete, you may possibly encounter an er-
ror message warning that the installer did not close. In this case, go to
the “File” menu and select “Quit” to close the installer. Then reboot
the computer.
After restarting the Macintosh, you will find the “Opcode”/“OMS
Applications” folder on your computer (Hard Disk, as the default).
4 Copy the “OMS_2.3_Mac.pdf” in the CD-ROM to the “OMS
Applications” folder (drag-and-drop it to the folder).
Refer to the “OMS_2.3_Mac.pdf” (English version only) how to use
the application.
5 Copy the “OMS Setup for YAMAHA” in the CD-ROM to the “OMS
Applications” folder (drag-and-drop it to the folder).
In the “OMS Setup for YAMAHA” folder you will find the OMS
Setup files for the Yamaha tone generators, which can be used as
templates.
USB MIDI Driver
To operate the P-250 from your computer via USB, you’ll need to install
the appropriate driver software.
The USB-MIDI driver is software that transfers MIDI data back and
forth between sequence software and the P-250 via a USB cable.
First install OMS before you install the USB-MIDI driver. Also, after
installing the driver, you will need to set up OMS (above).
1 Start the computer.
2 Insert the included CD-ROM into the CD-ROM drive. The system
displays the CD-ROM icon on the desktop.
Computer: A Macintosh computer with a PowerPC or later CPU
OS: Mac OS 8.0 through 9.2.2 (Mac OS X is not sup-
ported.)
Available Memory: 6 MB or more
Hard Disk: 4 MB or more (except for OMS)
Display: 640 × 480, 256 colors or more
Other: OMS 2.3.3 or later (included in the CD-ROM in the
package)
Computer: A Macintosh computer with a USB connector and a
PowerPC or later CPU
OS: Mac OS 8.6 through 9.2.2 (Mac OS X is not sup-
ported.)
Available Memory: 64 MB or more (128 MB or more is recommended)
Hard Disk: 2 MB or more
Other: OMS 2.3.3 or later (included in the CD-ROM in the
package)
Computer
Sequence
Software
OMS
Driver
USB cable
P-250
MODULATION
PITCH
P-200X
ELECTRONIC PIANO
HIGHHI-MID
MASTER EQUALIZERVOICE/PERFORMANCETEMPOSONGSONG BALANCE
MASTER VOLUME
POWER
LOW
MIDI SETTING
CHORUS
REVERBSPLITCONTRAST
XG
8
16
B
YESNO
D
A
C
BASS
15
7
PERFORM. FILE
EDIT
MASTER EQ
VARIATION
PERFORMANCE
VOICE
EDIT
VIBRA-
PHONE
GUITAR
14
6
SYNTH.PAD
13
5
E.PIANO
3
HARPSI
-
CHORDCLAVI.
ORGAN 1
EXIT
9 BA
1
GRAND
PIANO 1
EXTRA SONG
FILE
PANEL
LOCKTRACKS
TRACK
TOPSONG SELECT
KEYBOARDSONG
MIN
ON OFF
MAX
RECSTART/STOP
SYNCHRO STARTNEW SONG
1
TRACK
2MIDI OUT
ORGAN 2
10
2
GRAND
PIANO 2
STRINGS
11
3
E.PIANO
1
CHOIR
12
4
E.PIANO
2
OTHER SETTING
LO-MID MID
DOWNSONG SETTING UP
USB
HOST SELECT MIDI ASSIGNABLE FOOT PEDAL
AC INLET
MIDI THRU OUT IN AUX
4
SOSUTENUTO
2
SUSTAIN
1
SOFT
3
PC-2
TO HOST
USBMac
OUTPUT
RL/MONO
INPUT
RL/MONO

12 TOOLS for P-250 Installation Guide
English
3 Double-click the CD-ROM icon and double-click the “Install USB
Driver” icon in the “USBdrv_” folder to display the following
installation screen.
4 The “Install Location” box displays the destination of the installa-
tion. If you wish to change the destination disk or folder, use the
[Switch Disk] button and the pop-up menu to specify the desired
destination.
n This box usually displays the start-up disk as the destination.
5 Click the [Install] button. The system displays the following mes-
sage: “This installation requires your computer to restart after
installing this software. Click Continue to automatically quit all
other running applications.” Click [Continue].
n To cancel the installation, click [Cancel].
6 The installation starts. If the driver has already been installed, you
will receive the following message. To return to step 3, press [Con-
tinue]. To complete the installation, click [Quit].
7 When the installation is complete, the system displays the following
message: “Installation was successful. You have installed software
which requires you to restart your computer.” Click [Restart]. The
computer automatically restarts. You can locate the installed files in
the following locations:
• System Folder | Control Panels | YAMAHA USB MIDI Patch
• System Folder | Extensions | USB YAMAHA MIDI Driver
• System Folder | OMS Folder | YAMAHA USB MIDI OMS Driver
File Utility, MIDI Setup
Once you‘ve installed these software programs, you can use your com-
puter to access and organize data stored to media connected to the P-250
(Storage memory).
1 Double-click on the “FileUtil_” folder in the CD-ROM.
“Install File Utility” file will be displayed.
2 Double-click on the “Install File Utility” file.
The File Utility installation dialog will be displayed. Execute the
installation by following the on-screen directions.
3 After installing, restart the computer.
For details, refer to the on-line Help or the PDF owner’s manual.

TOOLS for P-250 Installation Guide 13
English
Setting up OMS
(For USB connection)
The OMS studio setup file for the P-250 is contained in the included
CD-ROM. This studio setup file is used for setting up OMS.
n Before performing the following procedure, the OMS and USB MIDI
Driver should be installed.
1 Use a USB cable to connect the USB terminal of the computer (or
the USB hub) to the USB terminal of the P-250 and turn the P-250’s
power on.
2 Start the computer.
3 Insert the included CD-ROM into the CD-ROM drive of your Mac-
intosh computer.
The CD-ROM icon appears on the desktop.
4 Double-click on the CD-ROM icon, “OMS_”, and “OMS Setup for
YAMAHA.”
The file “P-250-USB” appear. Copy these to the hard disk on your
computer.
n If you want to use a serial connection instead of using USB, please
copy and use the following files.
• “P-250-Printer”
Use this for serial connection via the printer port.
• “P-250-Modem”
Use this for serial connection via the modem port.
n When using the serial connection for the File Utility, set the MIDI
Out:/ MIDI In: setting in the OMS Port Setup to MIDI Time Piece-
Printer, or MIDI Time Piece-Modem.
5 Double-click on the “P-250-USB” file to start the OMS Setup.
6 After starting the OMS Setup, the Studio setup file double-clicked in
step #5 opens.
n If “ ” is not indicated at the right of the setup file name, select
“Make Current” from the “File” menu and execute the save opera-
tion.
The OMS studio setup has been completed.
n After the OMS studio setup above has been completed, your compu-
ter will recognize only the P-250 as a MIDI instrument. If you use an-
other MIDI instrument in addition to the P-250 or you add a second
P-250 to the existing system, you should create an original Studio
Setup file. For details, refer to the on-line manual supplied with the
OMS.
Indicates this setup is available
Depending on the Macintosh and operating system version that you
are using, the included studio setup file for the P-250 still may not
work even after you have performed the above steps. (MIDI trans-
mission and reception will not be possible even if the setup is valid.)
In this case, use the following procedure to re-create the setup file.
1 Connect the P-250 and Macintosh via USB or serial cable, and
turn on the power of the P-250.
2 Start up OMS Setup, and from the “File” menu, choose “New
setup.”
3 The OMS driver search dialog box will appear. Check [Modem]
or [Printer] if you are using a serial connection. Uncheck both of
these if you are using a USB connection.
4 Click the [Find] button to search for the device.
When the search has succeeded, the OMS Driver Setting dialog
box will display the following.
For a USB connection: USB-MIDI 1
For a serial connection: MIDI Time Piece-Modem (Printe_)
• If the device was found correctly, click the [OK] button to pro-
ceed.
• If the device was not found, re-check that the cable connec-
tions are correct, and repeat the procedure from step 1.
5 Make sure that the port is shown below the device that was found.
(In the case of the P-250, this will be a name such as USB-MIDI,
Modem, or Printer.) Check the check box for the port, and then
click the [OK] button.
6 A dialog box will appear, allowing you to name the file that will
be saved. Input the desired filename, and click [Save].
This completes OMS setup.
7 From the “Studio” menu, choose “Test,” and click the port icon.
If a channel sounds on the P-250, the system is operating cor-
rectly.
For details on using OMS, refer to OMS_2.3_Mac.pdf, included with
OMS.

14 TOOLS for P-250 Installation Guide
English
Troubleshooting
The driver cannot be installed.
• Is the USB cable connected correctly?
→ Check the USB cable connection.
→ Disconnect the USB cable, then connect it again.
•[Windows] Is the USB function enabled on your computer?
→ When you connect the P-250 to the computer for the first time, if
the “Add New Hardware Wizard” does not appear, the USB func-
tion on the computer may be disabled. Perform the following
steps.
1 Double-click “System” in the Control Panel to open the System Prop-
erties window.
2 Double-click the “Device Manager” tab and make sure that no “!” or
“x” marks appear at “Universal serial bus controller” or “USB Root
Hub.” If you see an “!” or “x” mark, the USB controller is disabled.
For more information, refer to the owner’s manual of your computer.
•[Windows] Is any unknown device registered?
→ If driver installation fails, the P-250 will be marked as an
“Unknown device,” and you will not be able to install the driver.
Delete the “Unknown device” by following the steps below.
1 Double-click “System” in the Control Panel to open the System Prop-
erties window.
2 Double-click the “Device Manager” tab. With the “View devices by
type” check box checked, look for “Other devices.”
3 If you find “Other devices,” double-click it to extend the tree to look
for “Unknown device.” If one appears, select it and click the
[Remove] button.
4 Remove the USB cable from the P-250, and make the connection
again.
5 Install the driver again.
When controlling the P-250 from your computer via
USB, the P-250 does not operate correctly or no
sound is heard.
• Did you install the driver?
• If you are using a Macintosh, did you install OMS before installing
the USB MIDI driver?
• Is the USB cable connected correctly?
• Are the volume settings of the tone generator, playback device, and
application program set to the appropriate levels?
•Have you selected an appropriate port in the application software?
• Are you using the latest USB MIDI driver?
The latest driver can be downloaded from the
www.yamahasynth.com Web site.
• Is the HOST SELECT switch set correctly?
Playback response is delayed.
• Does your computer satisfy the system requirements?
• Is any other application or device driver running?
[Macintosh]
→ Turn off virtual memory.
→ Disable AppleTalk.
Cannot suspend or resume the computer correctly.
• Do not suspend the computer while the MIDI application is running.
• If you are using Windows 2000 or Windows XP, you may not be able
to suspend/resume normally, depending on the particular
environment (USB Host Controller, etc.). Even so, simply
disconnecting and connecting the USB cable will allow you to use
the P-250 functions again.
How can I delete or re-install the driver?
[Windows Me/98]
1 When the P-250 is recognized correctly, double-click “System” in the
Control Panel to open the System window.
2 Double-click the “Device Manager” tab, select “YAMAHA USB
MIDI Driver” and delete it.
3 Use the MS-DOS prompt or Explorer to delete the following three
files.
n To delete these files using Explorer, select “Fol Options” from the
Tool (View) menu, and select “Show all files (and folders).”
• \WINDOWS\INF\OTHER\YAMAHAP-250.INF
• \WINDOWS\SYSTEM\Xgusb.drv
•
\WIN
DOWS\SYSTEM\Ymidusb.sys
4 Disconnect the USB cable.
5 Restart the computer.
6 Re-install the driver.
[Macintosh]
1 Delete the files in the following locations:
• System Folder | Control Panels | YAMAHA USB MIDI Patch
• System Folder | Extensions | USB YAMAHA MIDI Driver
• System Folder | OMS Folder | YAMAHA USB MIDI OMS
Driver
2 Restart the computer.
3 Install the driver and set up OMS.

TOOLS for P-250 Installation Guide 15
English
MEMO

16 TOOLS for P-250 Installation Guide
SOFTWARE LICENSING AGREEMENT
The following is a legal agreement between you, the end user, and Yamaha Corporation (“Yamaha”). The enclosed Yamaha software program is
licensed by Yamaha to the original purchaser for use only on the terms set forth herein. Please read this licensing agreement with care. Opening this
package indicates that you accept all terms outlined herein. If you do not agree to the terms, return this package unopened to Yamaha for a full refund.
1. GRANT OF LICENSE AND COPYRIGHT
Yamaha grants you, the original purchaser, the right to use one copy of the enclosed software program and data (“SOFTWARE”) on a single-user
computer system. You may not use it on more than one computer or computer terminal. The SOFTWARE is owned by Yamaha and is protected by
Japanese copyright laws and all applicable international treaty provisions. You are entitled to claim ownership of the media in which the
SOFTWARE is included. Therefore, you must treat the SOFTWARE like any other copyrighted materials.
2. RESTRICTIONS
The SOFTWARE program is copyrighted. You may not engage in reverse engineering or reproduction of the SOFTWARE by other conceivable
methods. You may not reproduce, modify, change, rent, lease, resell, or distribute the SOFTWARE in whole or in part, or create derivative works
from the SOFTWARE. You may not transmit or network the SOFTWARE with other computers. You may transfer ownership of the SOFTWARE
and the accompanying written materials on a permanent basis provided that you retain no copies and the recipient agrees to the terms of the licensing
agreement.
3. TERMINATION
The licensing condition of the software program becomes effective on the day that you receive the SOFTWARE. If any one of the copyright laws
or clauses of the licensing conditions is violated, the licensing agreement shall be terminated automatically without notice from Yamaha. In this
case, you must destroy the licensed SOFTWARE and its copies immediately.
4. PRODUCT WARRANTY
Yamaha warrants to the original purchaser that if the SOFTWARE, when used in normal conditions, will not perform the functions described in the
manual provided by Yamaha, the sole remedy will be that Yamaha will replace any media which proves defective in materials or workmanship on
an exchange basis without charge. Except as expressly set forth above, the SOFTWARE is provided “as is,” and no other warranties, either expressed
or implied, are made with respect to this software, including, without limitation the implied warranties of merchantability and fitness for a particular
purpose.
5. LIMITED LIABILITY
Your sole remedies and Yamaha’s entire liability are as set forth above. In no event will Yamaha be liable to you or any other person for any
damages, including without limitation any incidental or consequential damages, expenses, lost profits, lost savings or other damages arising out of
the use or inability to use such SOFTWARE even if Yamaha or an authorized dealer has been advised of the possibility of such damages, or for any
claim by any other party.
6. GENERAL
This license agreement shall be interpreted according to and governed by Japanese laws.
English

TOOLS for P-250 Installationshandbuch 17
SOFTWARE-LIZENZVEREINBARUNG
Die folgende Vereinbarung ist eine rechtsgültige Vereinbarung zwischen Ihnen, dem Endanwender, und der Yamaha Corporation (“Yamaha”).
Yamaha erteilt dem ursprünglichen Käufer für das beiliegende Yamaha-Softwareprogramm ausschließlich zu den hier ausgeführten Bedingungen
eine Lizenz zur Verwendung. Bitte lesen Sie diese Lizenzvereinbarung sorgfältig. Durch das Öffnen dieser Packung bringen Sie zum Ausdruck, daß
Sie alle darin enthaltenen Bedingungen akzeptieren. Wenn Sie nicht mit den Bedingungen einverstanden sind, können Sie die Packung ungeöffnet
an Yamaha zurückgeben; der Kaufpreis wird in voller Höhe zurückerstattet.
1. ERETILUNG VON LIZENZ UND COPYRIGHT
Yamaha erteilt Ihnen, dem ursprünglichen Käufer, das Recht, ein Exemplar des beiliegenden Softwareprogramms und der darin enthaltenen Daten
(“SOFTWARE”) als Einzelperson auf jeweils einem Computer zu verwenden. Sie dürfen sie nicht auf mehr als einem Computer bzw. einer
Computerstation verwenden. Die SOFTWARE bleibt im Besitz von Yamaha und ist durch japanische Copyrightgesetze sowie alle anwendbaren
internationalen Vertragsbestimmungen geschützt. Sie haben ein Anspruchsrecht auf das Eigentum an den Medien, denen die SOFTWARE beiliegt.
Daher müssen Sie die SOFTWARE wie alle anderen durch Copyright geschützten Materialien behandeln.
2. EINSCHRÄNKUNGEN
Die SOFTWARE ist durch Copyright geschützt. Sie dürfen Sie weder analysieren noch durch anderweitige Methoden reproduzieren. Sie dürfen die
SOFTWARE weder ganz noch teilweise reproduzieren, modifizieren, verändern, gegen Entgelt oder unentgeltlich verleihen, verkaufen oder
vertreiben, und Sie dürfen auf der Grundlage der SOFTWARE keine Ableitungen erstellen. Sie dürfen die SOFTWARE nicht an andere Computer
senden oder in Netzwerke einspeisen. Sie dürfen das Eigentum an der SOFTWARE und den schriftlichen Begleitmaterialien auf unbefristeter Basis
unter den Voraussetzungen übertragen, daß Sie keine Kopien zurückbehalten und sich der Empfänger mit den Bedingungen der Lizenzvereinbarung
einverstanden erklärt.
3. BEENDIGUNG
Die Lizenzbedingung des Softwareprogramms wird am Tag, an dem Sie die SOFTWARE erhalten, wirksam. Falls ein Copyrightgesetz oder eine
Bestimmung der Lizenzbedingungen verletzt wird, wird automatisch und ohne Benachrichtigung durch Yamaha die Lizenzvereinbarung beendet.
In diesem Fall müssen Sie die lizensierte SOFTWARE und ihre Kopien unverzüglich vernichten.
4. PRODUKTGARANTIE
Yamaha garantiert dem ursprünglichen Käufer, daß, falls die SOFTWARE bei Verwendung unter normalen Bedingungen nicht die in der von
Yamaha bereitgestellten Anleitung beschriebenen Funktionen erfüllt, die einzige Abhilfe darin bestehen wird, daß Yamaha auf Austauschbasis
kostenlos jedes Medium ersetzen wird, das Material- oder Verarbeitungsfehler aufweist. Abgesehen von dem oben Ausgeführten wird die
SOFTWARE “wie die Ware liegt und steht” geliefert, und es werden keine anderen ausdrücklichen oder stillschweigenden Garantien hinsichtlich
dieser Software übernommen, einschließlich, aber nicht beschränkt auf, die stillschweigenden Garantien für handelsübliche Qualität und Eignung
für einen bestimmten Einsatzzweck.
5. BESCHRÄNKTE HAFTUNG
Ihre einzige Abhilfe und die gesamte Haftung Yamahas bestehen in dem oben Ausgeführten. Keinesfalls haftet Yamaha Ihnen oder einer anderen
Person gegenüber für etwaige Schäden, einschließlich, aber nicht beschränkt auf, zufällige Schäden oder Folgeschäden, Kosten, Verdienstausfall,
verlorene Ersparnisse oder andere Schadenersatzansprüche, die aus der Verwendung der SOFTWARE oder aus der Tatsache hervorgehen, daß diese
SOFTWARE nicht verwendet werden konnte, selbst wenn Yamaha oder ein autorisierter Händler über die Möglichkeit derartiger
Schadenersatzansprüche informiert wurde, oder für etwaige andere Ansprüche einer anderen Partei.
6. ALLGEMEINES
Diese Lizenzvereinbarung soll gemäß und in Übereinstimmung mit den japanischen Gesetzen ausgelegt werden.
Deutsch

18 TOOLS for P-250 Manuel d’installation
CONTRAT DE LICENCE DE LOGICIEL
Ceci est un contrat entre vous-même, l’utilisateur final, et Yamaha Corporation (« Yamaha »). Le logiciel Yamaha ci-inclus est concédé sous licence
par Yamaha à l’acheteur original et ne peut être utilisé que dans les conditions prévues aux présentes. Veuillez lire attentivement ce contrat de
licence. Le fait d’ouvrir ce coffret indique que vous acceptez l’ensemble des termes du contrat. Si vous n’acceptez pas lesdits termes, renvoyez le
coffret non ouvert à Yamaha pour en obtenir le remboursement intégral.
1. CONCESSION DE LICENCE ET DROITS D’AUTEUR
Yamaha vous concède le droit d’utiliser, en tant qu’acheteur original, un exemplaire du logiciel et des données afférentes à celui-ci (« LOGICIEL »)
sur un ordinateur pour utilisateur unique. Vous n’êtes pas autorisé à utiliser ces éléments sur plus d’un ordinateur ou terminal d’ordinateur. Le
LOGICIEL est la propriété de Yamaha. Il est protégé par les dispositions relatives au droit d’auteur contenues dans la législation japonaise et les
traités internationaux. Vous êtes en droit de revendiquer l’appartenance du support du LOGICIEL. A ce titre, vous devez traiter le LOGICIEL
comme tout autre élément protégé par le droit d'auteur.
2. RESTRICTIONS
Le LOGICIEL est protégé par le droit d’auteur. Vous n’êtes pas autorisé à reconstituer la logique du LOGICIEL ou à reproduire ce dernier par
quelque autre moyen que ce soit. Vous n’êtes pas en droit de reproduire, modifier, prêter, louer, revendre ou distribuer le LOGICIEL en tout ou
partie, ou d’utiliser le LOGICIEL à des fins de création dérivée. Vous n’êtes pas autorisé à transmettre le LOGICIEL à d’autres ordinateurs ou à
l’utiliser en réseau.
Vous êtes en droit de céder, à titre permanent, le LOGICIEL et la documentation imprimée qui l’accompagne, sous réserve que vous n’en conserviez
aucun exemplaire et que le bénéficiaire accepte les termes du présent contrat.
3. RESILIATION
Les conditions énoncées dans le présent contrat de licence prennent effet à compter du jour où le LOGICIEL vous est remis. Si l’une quelconque
des dispositions relatives au droit d’auteur ou des clauses du contrat ne sont pas respectées, le contrat de licence sera résilié de plein droit par
Yamaha, ce sans préavis. Dans ce cas, vous devrez immédiatement détruire le LOGICIEL concédé sous licence ainsi que les copies réalisées.
4. GARANTIE PRODUIT
Si, dans des conditions normales d’utilisation, le LOGICIEL ne remplit pas les fonctions décrites dans le manuel fourni, Yamaha s’engage vis-à-vis
de l’acheteur original à remplacer gratuitement, sur la base d’un échange, tout support reconnu défectueux par suite d’un défaut de matière première
ou d’un vice de fabrication. Ceci constitue le seul recours opposable à Yamaha. Hormis dans les cas expressément énoncés plus haut, le LOGICIEL
est livré « en l’état » et toute autre garantie expresse ou implicite le concernant, y compris, de manière non limitative, toute garantie implicite de
qualité marchande et d’adéquation à un usage particulier, est exclue.
5. RESPONSABILITE LIMITEE
Votre unique recours et la seule responsabilité de Yamaha sont tels qu’énoncés précédemment. En aucun cas Yamaha ne pourra être tenu
responsable, par vous-même ou une autre personne, de quelques dommages que ce soit, notamment et de manière non limitative, de dommages
indirects, frais, pertes de bénéfices, pertes de fonds ou d’autres dommages résultant de l’utilisation ou de l’impossibilité d’utiliser le LOGICIEL,
même si Yamaha ou un distributeur agréé ont été prévenus de l’éventualité de tels dommages, ou de quelque autre revendication formulée par une
tierce partie.
6. REMARQUE GENERALE
Le présent contrat de licence est régi par le droit japonais, à la lumière duquel il doit être interprété.
Français

TOOLS for P-250 Guía de instalación 19
CONTRATO DE LICENCIA DE SOFTWARE
El presente es un acuerdo legal entre usted, el usuario final, y Yamaha Corporation (“Yamaha”). El programa Yamaha incluido está licenciado por
Yamaha al comprador original para utilizar únicamente según los términos establecidos aquí. Lea atentamente este contrato de licencia. La apertura
de este paquete supone la aceptación de todas las condiciones descritas aquí. Si no acepta los términos de este acuerdo, devuelva este paquete intacto
a Yamaha para una devolución total del importe pagado.
1. CESIÓN DE LICENCIA Y COPYRIGHT
Yamaha cede, al comprador original, el derecho a utilizar una copia del programa e información incluidos (“SOFTWARE”) en un sistema
informático de un solo usuario. No puede utilizarlo en más de un ordenador o terminal. El SOFTWARE es propiedad de Yamaha y está protegido
por las leyes japonesas de copyright y por todas las provisiones de los tratados internacionales de copyright. Tiene derecho a reclamar la propiedad
del soporte en el que se incluye el SOFTWARE. Por consiguiente, debe considerar el SOFTWARE de igual forma que otros materiales sujetos a
copyright.
2. RESTRICCIONES
El SOFTWARE está sujeto a copyright. No debe desmontar ni analizar el SOFTWARE por otros métodos concebibles. No puede reproducir,
modificar, cambiar, alquilar, arrendar, revender, o distribuir el SOFTWARE, en todo o en parte, o crear trabajos derivados del mismo. No puede
transmitir ni utilizar en red el SOFTWARE con otros ordenadores. Puede transferir la propiedad del SOFTWARE y los materiales escritos que
acompañan al mismo de forma permanente siempre que no realice copias y que el destinatario acepte los términos de este acuerdo de licencia.
3. FINALIZACIÓN
La condición de licencia del programa es efectiva en el día que reciba el SOFTWARE. Si se infringe alguna de las leyes o cláusulas de copyright
de las condiciones de licencia, el acuerdo de licencia se considerará finalizado de forma automática sin previo aviso por Yamaha. En este caso, debe
destruir el SOFTWARE con licencia y sus copias inmediatamente.
4. GARANTÍA DEL PRODUCTO
Yamaha garantiza al comprador original que si el SOFTWARE, utilizado en condiciones normales, no realiza las funciones descritas en el manual
proporcionado por Yamaha, lo único que hará Yamaha será sustituir cualquier soporte que sea defectuoso, tanto en lo que se refiere a materiales
como a mano de obra, cambiándolo sin cargo alguno. Excepto en los términos anteriores, el SOFTWARE se entrega “tal cual,” y sin garantías de
ningún tipo, expresas o implícitas, incluyendo, sin limitaciones las garantías implicadas de comerciabilidad y de conveniencia para un propósito
particular.
5. RESPONSABILIDAD LIMITADA
Su único recurso y la total responsabilidad de Yamaha son los anteriormente establecidos. En ningún caso Yamaha será responsable ante el usuario
o ante cualquier otra persona por daños, sin limitaciones de daños indirectos o imprevistos, gastos, pérdidas, u otros daños causados por el uso o la
poca habilidad en el uso de dicho SOFTWARE aunque Yamaha o un distribuidor autorizado le haya advertido de la posibilidad de estos daños, o
reclamaciones de cualquier otra parte.
6. GENERAL
Este acuerdo de licencia se rige y elabora de acuerdo con las leyes japonesas.
Español

20 TOOLS for P-250 Installation Guide
MEMO

TOOLS for P-250 Installation Guide 21
MEMO

210APAP1.3-01A0
Printed in Japan
WA45410
This document is printed on recycled chlorine free (ECF) paper with soy ink.
Auf Recycling-Umweltpapier mit Sojatinte gedruckt.
Ce document a été imprimé sur du papier recyclé non blanchi au chlore avec de
l'encre d'huile de soja.
Este docmento se ha impreso reciclado en papel sin cloro alguno, con tinta de
soja.
-
 1
1
-
 2
2
-
 3
3
-
 4
4
-
 5
5
-
 6
6
-
 7
7
-
 8
8
-
 9
9
-
 10
10
-
 11
11
-
 12
12
-
 13
13
-
 14
14
-
 15
15
-
 16
16
-
 17
17
-
 18
18
-
 19
19
-
 20
20
-
 21
21
-
 22
22


en otros idiomas
- français: Yamaha P-250 Le manuel du propriétaire
- italiano: Yamaha P-250 Manuale del proprietario
- English: Yamaha P-250 Owner's manual
- Deutsch: Yamaha P-250 Bedienungsanleitung
- русский: Yamaha P-250 Инструкция по применению
- Nederlands: Yamaha P-250 de handleiding
- português: Yamaha P-250 Manual do proprietário
- dansk: Yamaha P-250 Brugervejledning
- polski: Yamaha P-250 Instrukcja obsługi
- čeština: Yamaha P-250 Návod k obsluze
- svenska: Yamaha P-250 Bruksanvisning
- Türkçe: Yamaha P-250 El kitabı
- suomi: Yamaha P-250 Omistajan opas
- română: Yamaha P-250 Manualul proprietarului
Artículos relacionados
-
Yamaha CLP-175 Guía de instalación
-
-
Yamaha MOTIF 6 El manual del propietario
-
Yamaha CLP-170 Guía de instalación
-
Yamaha ES6 El manual del propietario
-
-
-
-