

2 Multi Type Air Conditioner
Multi Type Air Conditioner Owner’s Manual
TABLE OF CONTENTS
FOR YOUR RECORDS
Write the model and serial numbers here:
Model #
Serial #
You can find them on a label on the side of each unit.
Dealer's Name
Date Purchased
■ Staple your receipt to this page in the event you need
it to prove date of purchase or for warranty issues.
READ THIS MANUAL
Inside you will find many helpful hints on how to use
and maintain your air conditioner properly. Just a little
preventive care on your part can save you a great deal
of time and money over the life of your air conditioner.
You'll find many answers to common problems in the
chart of troubleshooting tips. If you review our chart of
Troubleshooting Tips first, you may not need to call
for service at all.
PRECAUTION
• Contact the authorized service technician for
repair or maintenance of this unit.
• Contact the installer for installation of this unit.
• The air conditioner is not intended for use by
young children or invalids without supervision.
• Young children should be supervised to ensure
that they do not play with the air conditioner.
• When the power cord is to be replaced,
replacement work shall be performed by
authorized personnel only using only genuine
replacement parts.
• Installation work must be performed in
accordance with the National Electric Code by
qualified and authorized personnel only.
Safety Precautions.........................3
Operating Instructions...................8
Care and maintenance.................23
Before you call for service..........25

ENGLISH
Owner's Manual 3
Safety Precautions
Safety Precautions
To prevent injury to the user or other people and property damage, the following instructions must be
followed.
■ Incorrect operation due to ignoring instruction will cause harm or damage. The seriousness is classified
by the following indications.
This symbol indicates the possibility of death or serious injury.
This symbol indicates the possibility of injury or damage to properties only.
■ Meanings of symbols used in this manual are as shown below.
Be sure not to do.
Be sure to follow the instruction.
■ Installation
Do not use a defective or
underrated circuit breaker.
Use this appliance on a
dedicated circuit.
• There is risk of fire or electric
shock.
For electrical work, contact
the dealer, seller, a qualified
electrician, or an Authorized
Service Center.
• Do not disassemble or repair
the product. There is risk of fire
or electric shock.
Always ground the product.
• There is risk of fire or electric
shock.
Install the panel and the
cover of control box
securely.
• There is risk of fire or electric
shock.
Always install a dedicated
circuit and breaker.
• Improper wiring or installation
may cause fire or electric shock
Use the correctly rated
breaker or fuse.
• There is risk of fire or electric
shock.

■ Operation
4 Multi Type Air Conditioner
Safety Precautions
Do not modify or extend the
power cable.
• There is risk of fire or electric
shock.
Do not install, remove, or
re-install the unit by
yourself (customer).
• There is risk of fire, electric
shock, explosion, or injury.
Be cautious when
unpacking and installing
the product.
• Sharp edges could cause injury.
Be especially careful of the
case edges and the fins on the
condenser and evaporator.
For installation, always contact the
dealer or an Authorized Service Center.
• There is risk of fire, electric
shock, explosion, or injury.
Do not install the product on
a defective installation stand.
• It may cause injury, accident, or
damage to the product.
Be sure the installation area
does not deteriorate with age.
• If the base collapses, the air
conditioner could fall with it,
causing property damage,
product failure, and personal
injury.
Do not plug or unplug the
power supply plug during
operation.
• There is risk of fire or electric
shock.
Do not touch(operate) the
product with wet hands.
• There is risk of fire or electrical
shock.
Do not place a heater or
other appliances near the
power cable.
• There is risk of fire and electric
shock.
Do not let the air conditioner run for a
long time when the humidity is very high
and a door or a window is left open
.
• Moisture may condense and
wet or damage furniture.
Take care to ensure that power
cable could not be pulled out
or damaged during operation.
• There is risk of fire or electric
shock.
Do not place anything on
the power cable.
• There is risk of fire or electric
shock.

ENGLISH
Owner's Manual 5
Safety Precautions
Do not allow water to run
into electric parts.
• It may cause There is risk of
fire, failure of the product, or
electric shock.
Do not store or use flammable
gas or combustibles near the
product.
• There is risk of fire or failure of
product.
Do not use the product in a
tightly closed space for a
long time.
• Oxygen deficiency could occur.
When flammable gas leaks,
turn off the gas and open a
window for ventilation
before turn the product on.
• Do not use the telephone or
turn switches on or off.
There is risk of explosion or fire
If strange sounds, or small or
smoke comes from product. Turn
the breaker off or disconnect the
power supply cable.
• There is risk of electric shock or
fire.
Stop operation and close the window
in storm or hurricane. If possible,
remove the product from the window
before the hurricane arrives.
• There is risk of property
damage, failure of product, or
electric shock.
Do not open the inlet grill of the
product during operation.
(Do not touch the electrostatic
filter, if the unit is so equipped.)
• There is risk of physical injury,
electric shock, or product
failure.
When the product is soaked
(flooded or submerged),
contact an Authorized
Service Center.
• There is risk of fire or electric
shock.
Be cautious that water
could not enter the product.
• There is risk of fire, electric
shock, or product damage.
Gasolin
Ventilate the product from time to time
when operating it together with a stove, etc.
• There is risk of fire or electric shock.
Turn the main power off when cleaning or
maintaining the product.
• There is risk of electric shock.

6 Multi Type Air Conditioner
■ Installation
Safety Precautions
■ Operation
Always check for gas
(refrigerant) leakage after
installation or repair of product.
• Low refrigerant levels may
cause failure of product.
Install the drain hose to ensure
that water is drained away
properly.
• A bad connection may cause
water leakage.
Keep level even when
installing the product.
• To avoid vibration or water
leakage.
Do not install the product where the
noise or hot air from the outdoor unit
could damage the neighborhoods.
• It may cause a problem for your
neighbors.
Use two or more people to lift
and transport the product.
• Avoid personal injury.
Do not install the product
where it will be exposed to
sea wind (salt spray) directly.
•
It may cause corrosion on the product.
Corrosion, particularly on the condenser
and evaporator fins, could cause product
malfunction or inefficient operation
.
90˚
When the product is not be used for a long
time, disconnect the power supply plug or
turn off the breaker.
• There is risk of product damage or failure, or
unintended operation.
Take care to ensure that nobody could step
on or fall onto the outdoor unit.
• This could result in personal injury and product
damage.
Do not expose the skin directly to cool air
for long periods of time.
(Don't sit in the draft.)
• This could harm to your health.
Do not use the product for special purposes, such as
preserving foods, works of art, etc. It is a consumer
air conditioner, not a precision refrigeration system.
• There is risk of
damage or
loss of property.

ENGLISH
Owner's Manual 7
Safety Precautions
Do not block the inlet or
outlet of air flow.
• It may cause product failure.
Use a soft cloth to clean. Do
not use harsh detergents,
solvents, etc.
• There is risk of fire, electric
shock, or damage to the plastic
parts of the product.
Do not touch the metal parts of
the product when removing the
air filter. They are very sharp!
• There is risk of personal injury.
Wax
Thinner
Do not step on or put
anyting on the product.
(outdoor units)
• There is risk of personal injury
and failure of product.
Always insert the filter
securely. Clean the filter
every two weeks or more
often if necessary.
•
A dirty filter reduces the efficiency
of the air conditioner and could
cause product malfunction or
damage.
Do not insert hands or other
objects through the air inlet
or outlet while the product
is operated.
• There are sharp and moving
parts that could cause personal
injury.
Do not drink the water
drained from the product.
• It is not sanitary and could
cause serious health issues.
Use a firm stool or ladder
when cleaning or
maintaining the product.
• Be careful and avoid personal
injury.
Replace the all batteries in the
remote control with new ones
of the same type. Do not mix
old and new batteries or
different types of batteries.
• There is risk of fire or explosion
Do not recharge or disassemble the
batteries. Do not dispose of batteries in a
fire.
• They may burn or explode.
If the liquid from the batteries gets onto your skin
or clothes, wash it well with clean water. Do not
use the remote if the batteries have leaked.
• The chemicals in batteries could cause burns or
other health hazards.

8 Multi Type Air Conditioner
Plasma
Signal receptor
RESET
Timer Cancel
Program Week Holiday
SET/CLR
MinHour
Heater
Humidify
AUTO
AUTO SWING
JET
OPERATION
FAN SPEED
Program set
SUB FUNCTION
SET TEMP
Room Temp
HI
MED
LO
Defrost
Filter
Preheat
Out door
Timer
On
Set no. Time
Off
01 03 05 07 09 11 13 15 17 19 21 23
Time
Operation unit
3
7
8
9
10
11
12
13
2
1
5
4
6
15
14
ZONE
1234
Operating Instructions
Operating Instructions
Name and Function of Remote Controller
1. Operation display
Displays the operation conditions.
2. On/Off Button
Operation starts when this button is pressed, and
stops when the button is pressed again.
3. Set Temperature Button
Used to set the temperature when the desired
temperature is obtained.
4. FAN Operation Button
Used to circulate room air without cooling or
heating.
5. Fan Speed Button
Used to set desired fan speed.
6. Operation Mode Selection Button
Used to select the operation mode.
• Auto Operation Mode.
• Cooling Operation Mode.
• Soft Dry Operation Mode.
• Heating Operation Mode.(except cooling model)
7. Timer Cancel Button
Used to cancel the timer.
8. Timer Set Button
Used to set the timer when the desired time is
obtained.
9. Week Button
Used to set a day of the week.
10. Program Button
Used to set the weekly timer.
11. Holiday Button
Used to set a holiday of the week.
12. Time Set Button
Used to set the time of the day and change the
time in the weekly timer Function.
13. Set and Clear Button
Used to set and clear the weekly timer.
14. Room Temperature Checking Button
Used to check the room temperature.
15. Reset Button
Used to set the current time and clear the setting
time.
❈
Display temperature can be different from actual room temperature if the remote controller is
installed at the place where sun-rays are falling directly or the place nearby heat source.

ENGLISH
Owner's Manual 9
A/CL
7
9
2
8
5
6
4
1
3
Operating Instructions
Optional Function
• WIRELESS REMOTE CONTROLLER(OPTIONAL)
This air-conditioner is equipped with wired remote controller basically. But if you want to have the wireless
remote controller, you pay for it.
Signal transmitter
Transmits the signals to the signal receptor.
1. FAN Operation Button
Used to circulate room air without cooling or heating.
2. Cooling Operation Button
3. Soft Dry Operation Button
Used to dehumidify without overcooling.
4. Heating Operation Button
(Heat pump model only)
5. Timer Set Button
Used to set the timer when the desired time is obtained.
Then the wired remote controller is set up to 24 hours by
an hour but the wireless remote controller is set up to 7
hours by an hour. Therefore, if you want to set over 7
hours, use the wired remote controller.
6. Fan Speed Button
Used to set the desired fan speed.
7. On/Off Button
Operation starts when this button is pressed, and stops
when the button is pressed again.
8. Set Temperature Button
Used to set the temperature when the desired
temperature is obtained
9. Auto Operation Button
CAUTION : for handling the Remote Controller
• Aim at the signal receptor on the wired remote controller so as to operate.
• The remote control signal can be received at a distance of up to about 7m.
• Be sure that there are no obstructions between the remote controller and the signal
receptor.
• Do not drop or throw the remote controller.
• Do not place the remote controller in a location exposed to direct sunlight, or near the
heating unit, or any other heat source.
• Block a strong light over the signal receptor with a curtain or etc. so as to prevent the
abnormal operation. (ex:electronic quick start, ELBA, inverter type fluorescent lamp)

10 Multi Type Air Conditioner
AUTO SWING
HI
ZONE
Operation unit Program set
Room Temp
MED
LO
AUTO
JET
Heater
Defrost
Filter
Preheat
Humidify
Out door
Timer
On
Set no. Time
Off
01 03 05 07 09 11 13 15 17 19 21 23
1234
OPERATION
FAN SPEED
SUB FUNCTION
SET TEMP
Time
AUTO SWING
HI
ZONE
Operation unit Program set
Room Temp
MED
LO
AUTO
JET
Heater
Defrost
Filter
Preheat
Humidify
Out door
Timer
On
Set no. Time
Off
01 03 05 07 09 11 13 15 17 19 21 23
1234
OPERATION
FAN SPEED
SUB FUNCTION
SET TEMP
Time
AUTO SWING
HI
ZONE
Operation unit Program set
Room Temp
MED
LO
AUTO
JET
Heater
Defrost
Filter
Preheat
Humidify
Out door
Timer
On
Set no. Time
Off
01 03 05 07 09 11 13 15 17 19 21 23
1234
OPERATION
FAN SPEED
SUB FUNCTION
SET TEMP
Time
AUTO SWING
HI
ZONE
Operation unit Program set
Room Temp
MED
LO
AUTO
JET
Heater
Defrost
Filter
Preheat
Humidify
Out door
Time
Timer
On
Set no. Time
Off
01 03 05 07 09 11 13 15 17 19 21 23
1234
OPERATION
FAN SPEED
SUB FUNCTION
SET TEMP
Hour
Min
Week
RESET
Operating Instructions
Set the Current Time and a day of the Week
1
Press the ' ' button.
Each time the button is pressed, the number is changed from 00 to 23.
You can set the number of the current hour.
2
Press the ' ' button.
Each time the button is pressed, the number is increased from 00 to 59.
You can set the number of the current minute.
3
Press ' ' button.
Each time the button is pressed, a day of the week is shifted from sunday to saturday.
You can set the day of the week.
4
Press the ' ' button.
If you want to reset the current time and a day of the week, click the Reset button.
Hour
Min
Week
RESET

ENGLISH
Owner's Manual 11
Week
Program
SET/CLR
MinHour
AUTO SWING
Time
HI
ZONE
Operation unit
Room Temp
MED
LO
AUTO
JET
Heater
Defrost
Filter
Preheat
Humidify
Out door
Timer
On
Set no.
Off
1234
OPERATION
FAN SPEED
SUB FUNCTION
SET TEMP
Program set
01 03 05 07 09 11 13 15 17 19 21 23
Time
AUTO SWING
Program set
Time
HI
ZONE
Operation unit
Room Temp
MED
LO
AUTO
JET
Heater
Defrost
Filter
Preheat
Humidify
Out door
Timer
On
Set no.
Off
1234
OPERATION
FAN SPEED
SUB FUNCTION
SET TEMP
01 03 05 07 09 11 13 15 17 19 21 23
Time
Program
Operating Instructions
Weekly Programming
4
Press the Program button again to finish weekly programmining.
1
Press the Program button.
The remote controller is displayed like a picture. Then ' ', ' ' and '01' is blinked.
2
Press the ' ' button.
Press button repeatedly until desired mode appears.
For example, if you want Thu, press button 4 times.
3
Select the time you want.
Press or button, then blinking letter is shown.
If you press button, then ' ' shape appears.
' ' shape means that five o'clock is reserved.
Using below buttons, you can reserve time.
* For example, the air-conditioner is on 6,7,8 and 13~22 o'clock.
Program set
Week
Week
Week
MinHour
SET/CLR
unit
05

12 Multi Type Air Conditioner
AUTO SWING
Program set
Time
HI
ZONE
Operation unit
Room Temp
MED
LO
AUTO
JET
Heater
Defrost
Filter
Preheat
Humidify
Out door
Timer
On
Set no.
Off
1234
OPERATION
FAN SPEED
SUB FUNCTION
SET TEMP
01 03 05 07 09 11 13 15 17 19 21 23
Time
Operating Instructions
Holiday Setting
Timer Setting(Delay start/Pre-set stop)
If Tuesday is a holiday in this week, you may set a holiday.
1.Press the Program button.
2. Press the Week button.
Select the Tuesday.
3. Press the Holiday button.
Then the remote controller will be displayed ' '.
The outside rectangular means holiday.
4. Press the Program button again to finish holiday
setting.
Program
Program
1. Press the Timer button
to turn Timer on or off.
This function is used to turn on or turn off in several hours.
Timer
2. Change the timer setting until the desired time is set.
MinHour
3. If you want to cancel the timer setting, press the Cancel button.
Cancel
Week
Holiday

ENGLISH
Owner's Manual 13
Plasma
RESET
Timer Cancel
Program Week Holiday
SET/CLR
MinHour
Heater
Humidify
AUTO
AUTO SWING
JET
OPERATION
FAN SPEED
Program set
SUB FUNCTION
SET TEMP
Room Temp
HI
MED
LO
Defrost
Filter
Preheat
Out door
Timer
On
Set no. Time
Off
01 03 05 07 09 11 13 15 17 19 21 23
Time
Operation unit
3
1
4
2
ZONE
1234
Operating Instructions
Operation Mode
Cooling Mode
Cooling Mode
Soft Dry Mode
Auto Mode
(Cooling Model)
Soft Dry Mode
Heating Mode
Auto Mode
(Heat Pump Model)
Operation Procedure
1
st
2nd
3rd
4th
On/Off Button
Operation Mode Selection Button
Room Temperature Setting Button
Indoor Fan Speed Selection Button

14 Multi Type Air Conditioner
COOLING MODEL
Cooling Operation Soft Dry Operation
AUTO SWING
ZONE
Operation unit Program set
Room Temp
MED
LO
AUTO
JET
Heater
Defrost
Filter
Preheat
Humidify
Out door
Time
Timer
On
Set no. Time
Off
01 03 05 07 09 11 13 15 17 19 21 23
1234
OPERATION
FAN SPEED
SUB FUNCTION
SET TEMP
HI
AUTO SWING
HI
ZONE
Operation unit Program set
Room Temp
MED
AUTO
JET
Heater
Defrost
Filter
Preheat
Humidify
Out door
Time
Timer
On
Set no. Time
Off
01 03 05 07 09 11 13 15 17 19 21 23
1234
OPERATION
FAN SPEED
SUB FUNCTION
SET TEMP
LO
Auto Operation
AUTO SWING
LO
ZONE
Operation unit Program set
Room Temp
MED
AUTO
JET
Heater
Defrost
Filter
Preheat
Humidify
Out door
Time
Timer
On
Set no. Time
Off
01 03 05 07 09 11 13 15 17 19 21 23
1234
OPERATION
FAN SPEED
SUB FUNCTION
SET TEMP
HI
Operation Display
AUTO SWING
ZONE
Operation unit Program set
Room Temp
MED
LO
AUTO
JET
Heater
Defrost
Filter
Preheat
Humidify
Out door
Time
Timer
On
Set no. Time
Off
01 03 05 07 09 11 13 15 17 19 21 23
1234
OPERATION
FAN SPEED
SUB FUNCTION
SET TEMP
HI
AUTO SWING
Room Temp
HI
ZONE
Operation unit Program set
MED
AUTO
JET
Heater
Defrost
Filter
Preheat
Humidify
Out door
Time
Timer
On
Set no. Time
Off
01 03 05 07 09 11 13 15 17 19 21 23
1234
OPERATION
FAN SPEED
SUB FUNCTION
SET TEMP
LO
AUTO SWING
HI
ZONE
Operation unit Program set
Room Temp
LO
AUTO
JET
Heater
Defrost
Filter
Preheat
Humidify
Out door
Time
Timer
On
Set no. Time
Off
01 03 05 07 09 11 13 15 17 19 21 23
1234
OPERATION
FAN SPEED
SUB FUNCTION
SET TEMP
MED
Operation Display
AUTO SWING
ZONE
Operation unit Program set
Room Temp
MED
LO
AUTO
JET
Heater
Defrost
Filter
Preheat
Humidify
Out door
Time
Timer
On
Set no. Time
Off
01 03 05 07 09 11 13 15 17 19 21 23
1234
OPERATION
FAN SPEED
SUB FUNCTION
SET TEMP
HI
AUTO SWING
HI
ZONE
Operation unit Program set
Room Temp
MED
AUTO
JET
Heater
Defrost
Filter
Preheat
Humidify
Out door
Time
Timer
On
Set no. Time
Off
01 03 05 07 09 11 13 15 17 19 21 23
1234
OPERATION
FAN SPEED
SUB FUNCTION
SET TEMP
LO
AUTO SWING
ZONE
Operation unit Program set
Room Temp
MED
LO
AUTO
JET
Heater
Defrost
Filter
Preheat
Humidify
Out door
Time
Timer
On
Set no. Time
Off
01 03 05 07 09 11 13 15 17 19 21 23
1234
OPERATION
FAN SPEED
SUB FUNCTION
SET TEMP
HI
AUTO SWING
ZONE
Operation unit Program set
Room Temp
MED
LO
AUTO
JET
Heater
Defrost
Filter
Preheat
Humidify
Out door
Time
Timer
On
Set no. Time
Off
01 03 05 07 09 11 13 15 17 19 21 23
1234
OPERATION
FAN SPEED
SUB FUNCTION
SET TEMP
HI
HEAT PUMP MODEL
Cooling Operation Soft Dry Operation Heating Operation Auto Operation
Operation Display
To raise the Temperature.
To lower the Temperature.
AUTO SWING
ZONE
Operation unit Program set
Room Temp
MED
LO
AUTO
JET
Heater
Defrost
Filter
Preheat
Humidify
Out door
Time
Timer
On
Set no. Time
Off
01 03 05 07 09 11 13 15 17 19 21 23
1234
OPERATION
FAN SPEED
SUB FUNCTION
SET TEMP
HI
Operating Instructions
Cooling Operation Mode
2
Select Cooling Operation.
Press the Operation Mode Selection Button.
Each time the button is pressed, the operation mode is shifted in the arrow direction.
1
Press the On/Off Button.
4
Set the fan speed.
3
Set the temperature
lower than the room
temperature.
• The temperature can be set
within a range of 18°C ~ 30°C
by 1°C .
• Select the fan speed in three steps- high, low, medium.
• The display shows high fan speed.
• Each time the button is pressed, the fan speed mode is shifted.

ENGLISH
Owner's Manual 15
COOLING MODEL
Cooling Operation Soft Dry Operation Auto Operation
AUTO SWING
ZONE
Operation unit Program set
Room Temp
MED
LO
AUTO
JET
Heater
Defrost
Filter
Preheat
Humidify
Out door
Time
Timer
On
Set no. Time
Off
01 03 05 07 09 11 13 15 17 19 21 23
1234
OPERATION
FAN SPEED
SUB FUNCTION
SET TEMP
HI
AUTO SWING
HI
ZONE
Operation unit Program set
Room Temp
MED
AUTO
JET
Heater
Defrost
Filter
Preheat
Humidify
Out door
Time
Timer
On
Set no. Time
Off
01 03 05 07 09 11 13 15 17 19 21 23
1234
OPERATION
FAN SPEED
SUB FUNCTION
SET TEMP
LO
AUTO SWING
LO
ZONE
Operation unit Program set
Room Temp
MED
AUTO
JET
Heater
Defrost
Filter
Preheat
Humidify
Out door
Time
Timer
On
Set no. Time
Off
01 03 05 07 09 11 13 15 17 19 21 23
1234
OPERATION
FAN SPEED
SUB FUNCTION
SET TEMP
HI
Operation Display
AUTO SWING
ZONE
Operation unit Program set
Room Temp
MED
LO
AUTO
JET
Heater
Defrost
Filter
Preheat
Humidify
Out door
Time
Timer
On
Set no. Time
Off
01 03 05 07 09 11 13 15 17 19 21 23
1234
OPERATION
FAN SPEED
SUB FUNCTION
SET TEMP
HI
AUTO SWING
HI
ZONE
Operation unit Program set
Room Temp
MED
AUTO
JET
Heater
Defrost
Filter
Preheat
Humidify
Out door
Time
Timer
On
Set no. Time
Off
01 03 05 07 09 11 13 15 17 19 21 23
1234
OPERATION
FAN SPEED
SUB FUNCTION
SET TEMP
LO
AUTO SWING
ZONE
Operation unit Program set
Room Temp
MED
LO
AUTO
JET
Heater
Defrost
Filter
Preheat
Humidify
Out door
Time
Timer
On
Set no. Time
Off
01 03 05 07 09 11 13 15 17 19 21 23
1234
OPERATION
FAN SPEED
SUB FUNCTION
SET TEMP
HI
AUTO SWING
ZONE
Operation unit Program set
Room Temp
MED
LO
AUTO
JET
Heater
Defrost
Filter
Preheat
Humidify
Out door
Time
Timer
On
Set no. Time
Off
01 03 05 07 09 11 13 15 17 19 21 23
1234
OPERATION
FAN SPEED
SUB FUNCTION
SET TEMP
HI
HEAT PUMP MODEL
Cooling Operation
Soft Dry Operation Heating Operation Auto Operation
Operation Display
Operating Instructions
Soft Dry Operation Mode
This mode dehumidifies without overcooling.
3
During Soft Dry Operation.
• The indoor fan speed is automatically set to the low, so the shift of the indoor fan speed is
impossible because it's already being set to the best speed for Dry Operation by Micom
Control.
2
Select Soft Dry Operation.
Press the operation Mode Selection Button.
Each time the button is pressed, the operation mode is shifted in the arrow direction.
1
Press the On/Off Button.

16 Multi Type Air Conditioner
AUTO SWING
ZONE
Operation unit Program set
Room Temp
MED
LO
AUTO
JET
Heater
Defrost
Filter
Preheat
Humidify
Out door
Time
Timer
On
Set no. Time
Off
01 03 05 07 09 11 13 15 17 19 21 23
1234
OPERATION
FAN SPEED
SUB FUNCTION
SET TEMP
HI
AUTO SWING
HI
ZONE
Operation unit Program set
Room Temp
MED
AUTO
JET
Heater
Defrost
Filter
Preheat
Humidify
Out door
Time
Timer
On
Set no. Time
Off
01 03 05 07 09 11 13 15 17 19 21 23
1234
OPERATION
FAN SPEED
SUB FUNCTION
SET TEMP
LO
AUTO SWING
ZONE
Operation unit Program set
Room Temp
MED
LO
AUTO
JET
Heater
Defrost
Filter
Preheat
Humidify
Out door
Time
Timer
On
Set no. Time
Off
01 03 05 07 09 11 13 15 17 19 21 23
1234
OPERATION
FAN SPEED
SUB FUNCTION
SET TEMP
HI
AUTO SWING
ZONE
Operation unit Program set
Room Temp
MED
LO
AUTO
JET
Heater
Defrost
Filter
Preheat
Humidify
Out door
Time
Timer
On
Set no. Time
Off
01 03 05 07 09 11 13 15 17 19 21 23
1234
OPERATION
FAN SPEED
SUB FUNCTION
SET TEMP
HI
Cooling Operation Soft Dry Operation Heating Operation Auto Operation
Operation Display
AUTO SWING
ZONE
Operation unit Program set
Room Temp
MED
LO
AUTO
JET
Heater
Defrost
Filter
Preheat
Humidify
Out door
Time
Timer
On
Set no. Time
Off
01 03 05 07 09 11 13 15 17 19 21 23
1234
OPERATION
FAN SPEED
SUB FUNCTION
SET TEMP
HI
AUTO SWING
HI
ZONE
Operation unit Program set
Room Temp
MED
AUTO
JET
Heater
Defrost
Filter
Preheat
Humidify
Out door
Time
Timer
On
Set no. Time
Off
01 03 05 07 09 11 13 15 17 19 21 23
1234
OPERATION
FAN SPEED
SUB FUNCTION
SET TEMP
LO
AUTO SWING
HI
ZONE
Operation unit Program set
Room Temp
LO
AUTO
JET
Heater
Defrost
Filter
Preheat
Humidify
Out door
Time
Timer
On
Set no. Time
Off
01 03 05 07 09 11 13 15 17 19 21 23
1234
OPERATION
FAN SPEED
SUB FUNCTION
SET TEMP
MED
Operation Display
AUTO SWING
ZONE
Operation unit Program set
Room Temp
MED
LO
AUTO
JET
Heater
Defrost
Filter
Humidify
Out door
Time
Timer
On
Set no. Time
Off
01 03 05 07 09 11 13 15 17 19 21 23
1234
OPERATION
FAN SPEED
SUB FUNCTION
SET TEMP
HI
Preheat
To raise the Temperature.
To lower the Temperature.
AUTO SWING
ZONE
Operation unit Program set
Room Temp
MED
LO
AUTO
JET
Heater
Defrost
Filter
Preheat
Humidify
Out door
Time
Timer
On
Set no. Time
Off
01 03 05 07 09 11 13 15 17 19 21 23
1234
OPERATION
FAN SPEED
SUB FUNCTION
SET TEMP
HI
AUTO SWING
Preheat
ZONE
Operation unit Program set
Room Temp
MED
LO
AUTO
JET
Heater
Filter
Humidify
Out door
Time
Timer
On
Set no. Time
Off
01 03 05 07 09 11 13 15 17 19 21 23
1234
OPERATION
FAN SPEED
SUB FUNCTION
SET TEMP
HI
Defrost
Operating Instructions
Heating Operation Mode (Heat pump model only)
2
Select Heating Operation.
Press the Operation Mode Selection Button.
Each time the button is pressed, the operation mode is shifted in the arrow direction.
3
Set the temperature.
4
Set the fan speed.
5
This air-conditioner is set to the hot start control in
order not to discharge the cold air during the
heating operation. This time, the remote controller
indicates ‘Preheat’.
6
If the outdoor temperature is too low during the
heating operation, this air-conditioner is set to the
defrosting operation and the remote controller
indicates ‘Defrost’.
1
Press the On/Off Button.
• Select the fan speed in three steps - high, low, medium.
• The display shows high fan speed
• Each time the button is pressed, the fan speed mode is shifted.
• The temperature can be set within a
range of 16˚C ~ 30˚C by 1˚C.

ENGLISH
Owner's Manual 17
AUTO SWING
ZONE
Operation unit Program set
Room Temp
MED
LO
AUTO
JET
Heater
Defrost
Filter
Preheat
Humidify
Out door
Time
Timer
On
Set no. Time
Off
01 03 05 07 09 11 13 15 17 19 21 23
1234
OPERATION
FAN SPEED
SUB FUNCTION
SET TEMP
HI
AUTO SWING
HI
ZONE
Operation unit Program set
Room Temp
MED
AUTO
JET
Heater
Defrost
Filter
Preheat
Humidify
Out door
Time
Timer
On
Set no. Time
Off
01 03 05 07 09 11 13 15 17 19 21 23
1234
OPERATION
FAN SPEED
SUB FUNCTION
SET TEMP
LO
AUTO SWING
ZONE
Operation unit Program set
Room Temp
MED
LO
AUTO
JET
Heater
Defrost
Filter
Preheat
Humidify
Out door
Time
Timer
On
Set no. Time
Off
01 03 05 07 09 11 13 15 17 19 21 23
1234
OPERATION
FAN SPEED
SUB FUNCTION
SET TEMP
HI
AUTO SWING
ZONE
Operation unit Program set
Room Temp
MED
LO
AUTO
JET
Heater
Defrost
Filter
Preheat
Humidify
Out door
Time
Timer
On
Set no. Time
Off
01 03 05 07 09 11 13 15 17 19 21 23
1234
OPERATION
FAN SPEED
SUB FUNCTION
SET TEMP
HI
HEAT PUMP MODEL
Cooling Operation
Soft Dry Operation Heating Operation Auto Operation
Operation Display
COOLING MODEL
Cooling Operation
Soft Dry Operation Auto Operation
AUTO SWING
ZONE
Operation unit Program set
Room Temp
MED
LO
AUTO
JET
Heater
Defrost
Filter
Preheat
Humidify
Out door
Time
Timer
On
Set no. Time
Off
01 03 05 07 09 11 13 15 17 19 21 23
1234
OPERATION
FAN SPEED
SUB FUNCTION
SET TEMP
HI
AUTO SWING
HI
ZONE
Operation unit Program set
Room Temp
MED
AUTO
JET
Heater
Defrost
Filter
Preheat
Humidify
Out door
Time
Timer
On
Set no. Time
Off
01 03 05 07 09 11 13 15 17 19 21 23
1234
OPERATION
FAN SPEED
SUB FUNCTION
SET TEMP
LO
AUTO SWING
LO
ZONE
Operation unit Program set
Room Temp
MED
AUTO
JET
Heater
Defrost
Filter
Preheat
Humidify
Out door
Time
Timer
On
Set no. Time
Off
01 03 05 07 09 11 13 15 17 19 21 23
1234
OPERATION
FAN SPEED
SUB FUNCTION
SET TEMP
HI
Operation Display
HEAT PUMP MODEL
AUTO SWING
ZONE
Operation unit Program set
Room Temp
MED
LO
AUTO
JET
Heater
Defrost
Filter
Preheat
Humidify
Out door
Time
Timer
On
Set no. Time
Off
01 03 05 07 09 11 13 15 17 19 21 23
1234
OPERATION
FAN SPEED
SUB FUNCTION
SET TEMP
HI
AUTO SWING
ZONE
Operation unit Program set
Room Temp
MED
LO
AUTO
JET
Heater
Defrost
Filter
Preheat
Humidify
Out door
Time
Timer
On
Set no. Time
Off
01 03 05 07 09 11 13 15 17 19 21 23
1234
OPERATION
FAN SPEED
SUB FUNCTION
SET TEMP
HI
COOLING MODEL
To raise the Temperature.
To lower the Temperature.
To raise the Temperature.
(When you feel too cool or cold.)
To lower the Temperature.
(When you feel too warm or hot.)
Cold Cool Proper Warm Hot
Operating Instructions
Auto Operation Mode
1
Press the On/Off Button.
3
2
To select Auto Operation, press the Operation Mode Selection button.
Each time the button is pressed, the operation mode is shifted in the direction of the arrow.
During Auto Operation:
❏ You can switch the indoor fan speed.
❏ The system will automatically switch from the cooling mode to the heating mode as the room temperature
and set temperature.(Heat pump model only)
Set the temperature lower than the room themperature.
The temperature can be set within a range of 18˚C ~ 30˚C by 1˚C.
Set the temperature upper or lower than the standard temperature.
The temperature can be set within a range of -2 ~ 2 by 1 level.
(This indication will be shifted to the initial
Auto Mode Display state after 4 seconds.)

18 Multi Type Air Conditioner
AUTO SWING
ZONE
Operation unit Program set
Room Temp
MED
LO
AUTO
JET
Heater
Defrost
Filter
Preheat
Humidify
Out door
Time
Timer
On
Set no. Time
Off
01 03 05 07 09 11 13 15 17 19 21 23
1234
OPERATION
FAN SPEED
SUB FUNCTION
SET TEMP
HI
AUTO SWING
HI
ZONE
Operation unit Program set
Room Temp
MED
AUTO
JET
Heater
Defrost
Filter
Preheat
Humidify
Out door
Time
Timer
On
Set no. Time
Off
01 03 05 07 09 11 13 15 17 19 21 23
1234
OPERATION
FAN SPEED
SUB FUNCTION
SET TEMP
LO
AUTO SWING
HI
ZONE
Operation unit Program set
Room Temp
LO
AUTO
JET
Heater
Defrost
Filter
Preheat
Humidify
Out door
Time
Timer
On
Set no. Time
Off
01 03 05 07 09 11 13 15 17 19 21 23
1234
OPERATION
FAN SPEED
SUB FUNCTION
SET TEMP
MED
Operating Instructions
FAN Operation
3
Each time Indoor Fan Speed button is pressed, the fan speed mode is shifted in the
arrow direction.
1
Press the On/Off Button.
2
Press FAN Operation Button.
• Fan speed is high.
• Fan speed is low.
• Fan speed is medium.
* You can't set the temperature in Fan Operation mode. To exit this mode, press 'Operation Mode'
button.

ENGLISH
Owner's Manual 19
Plasma
AUTO SWING
ZONE
1234
Operation unit
Humidify
JET
AUTO
Program set
Room Temp
HI
MED
LO
Heater
Defrost
Filter
Preheat
Out door
Time
Timer
On
Set no. Time
Off
01 03 05 07 09 11 13 15 17 19 21 23
Timer Cancel
Program Week
Hour Min
Holiday
SET/CLR
RESET
OPERATION
FAN SPEED
SUB FUNCTION
SET TEMP
Operating Instructions
Child Lock Function
Operation procedure
1. To set the Child-Lock Function
Press the Timer button and Minute Set button for three seconds. Then the
operation mode shift to child lock mode and it is displayed ‘
CL
’ in the operation
display.
When you press any button in this time, the remote controller is not converted to
any selected mode and the ‘
CL
’ is displayed in the remote controller for about three
seconds. But the Room Temperature function is operated in spite of child lock
mode.
2. To cancel the Child-Lock Function
Press the Timer button and Minute Set button for three seconds. Then the
child-lock mode is cancelled and the preselected mode is displayed in the
remote controller.
This is the Function that any children cannot used to the air-conditioner.

20 Multi Type Air Conditioner
Operating Instructions
Telephone Control Operation(optional)
Calling from outside, you can start the air conditioner to keep the room comfortable.
Even though you went out with the air conditioner on, you can turn it off using the phone outside.
1. Dial the number which is connected with the air
conditioner.
2. After ringing 5 times.
3. You can hear the "Beep" sound (if the air
conditioner is off), then press "0" "0" "7" "8"
accordingly.
4. With the sound "Beep, Beep" the air conditioner
starts on.
5. Hang up the phone.
TURN ON
1. Dial the number which is connected with the air
conditioner.
2. After ringing 5 times.
3. You can hear the "Beep Beep" sound (if the air
conditioner is on), then press "0" "0" "7" "9"
accordingly.
4. With the sound "Beep---" the air conditioner is
turned off.
5. Hang up the phone.
TURN OFF
❐ This product works after telephone rings 5 times.
❐ If internal user picks up the phone before 5 rings, Telephone control function does not work.
❐ If user doesn't push the telephone button 25 seconds after beep, Telephone control function doesn't work.
❐ If it is connected through EPABX system, Tele control doesn't work.
NOTICE
ON
OFF
OFFOFF
ON
ONON OFF

ENGLISH
Owner's Manual 21
Operating Instructions
Telephone Control Operation(When using along with ARS telephone)
Calling from outside, you can start the air conditioner to keep the room comfortable.
Even though you went out with the air conditioner on, you can turn it off using the phone outside.
1. Dial the number which is connected with the air
conditioner.
2. OGM guide is provided after signal sound rings
four times and then "Beep"(sounds from
telephone itself) sounds so that outside
recording can be done.
3. Slowly press password "0" "0" "7" and "8" in
order.
4. With the sound "Beep, Beep" the air conditioner
starts on.
5. Hang up the phone.
TURN ON
1. Dial the number which is connected with the air
conditioner.
2. OGM guide is provided after signal sound rings
four times and then "Beep"(sounds from
telephone itself) sounds so that outside
recording can be done.
3. Slowly press password "0" "0" "7" and "9" in
order.
4. With the sound "Beep---" the air conditioner is
turned off.
5. Hang up the phone.
TURN OFF
❐ The numbers of response bell should be adjusted to four times if pressing "Out-of-office" button or taking other
action for automatic response.
❐ The recording time of OGM (Outgoing Message) should be less than approximately 15 seconds.
❐ If it is connected to key phone, it cannot be worked.
NOTICE
ON
OFF
OFFOFF
ON
ONON OFF

22 Multi Type Air Conditioner
ROOM TEMP.
OPERATION STOP
SET TEMP. -0.5°C)
OPERATION START
SET TEMP. +0.5°C)
INDOOR FAN
More 3 minutes
OUTDOOR FAN/COMP
SETTING
FAN SPEED
SETTING
FAN SPEED
SETTING
FAN SPEED
LOW COOL
OPERATION
LOW COOL
OPERATION
High
Speed
ON OFF OFFON ON
Operating Instructions
Operation Details
• Cooling Operation Mode
When the room temperature is higher than the set temperature, it operates in cooling mode at the set
temperature, the set fan speed, and then it will be in automatically turn off when the room temperature
reaches the set temperature +0.5°C.
Helpful information
Airflow speed and cooling capacity.
The cooling capacity indicated in the specification is
the value when the fan speed is set to high, and the
capacity will be lower at low or medium fan speed.
High fan speed is recommended when you wish to
cool the room quickly.
Self-Diagnosis Function
'CH' will flash in the remote controller display when a problem occurs. Then please contact your dealer.
• After main power is on, Fan will start 7 seconds later.

ENGLISH
Owner's Manual 23
B
e
n
z
e
n
e
S
C
O
U
R
I
N
G
C
L
B
A
R
G
E
R
S
I
N
N
E
R
Air filters
Air outlet vent
(Side)
(Rear)
Air outlet
vents
Air intake
vents
Piping
Care and maintenance
Care and maintenance
Indoor Unit
Caution: Before performing any maintenance, turn off the main power to the system.
Grille, Case, and Remote Control
❏ Turn the system off before cleaning. To clean,
wipe with a soft, dry cloth. Do not use bleach or
abrasives.
: Supply power must be disconnected
before cleaning the indoor unit.
NOTICE
❏
Never use any of the followings:
• Water hotter than 40°C
Could cause deformation and/or
discoloration.
• Volatile substances
Could damage the surfaces
of the air conditioner.
1. Clean the filter with a vacuum or warm, soapy
water.
• If very dirty, wash with a solution of
detergent in lukewarm water.
• If hot water (50°C or more) is used, filter
may be deformed.
2. After washing with water, dry well in the shade.
3. Re-install the air filter.
Air Filter
The air filters behind Indoor unit
(the suction side) should be checked and cleaned
once every 2 weeks or more often if necessary.

24 Multi Type Air Conditioner
Care and maintenance
When the air conditioner is not going to be used for a long time.
When air conditioner is not going to be used for a long time.
1. Operate the air conditioner on Air circulation mode for 2 to 3 hours.
• This will dry out the internal parts.
2. Turn off the circuit breaker.
CAUTION Turn off the circuit breaker when the air conditioner is not going to be used
for a long time. Dirt may collect and may cause a fire.
When the air conditioner is to be used again.
• Check that the air inlet and outlet of the indoor/outdoor unit are not blocked.
Do not overcool the room.
This is not good for your health
and wastes electricity.
Keep blinds or curtains
closed.
Do not let direct sunshine enter
the room when the air
conditioner is in operation.
Make sure that the doors
and windows are shut tight.
Avoid opening doors and
windows as much as possible
to keep the cool air in the room.
Clean the air filter regularly.
Blockages in the air filter
reduce the airflow and lower
cooling and dehumidifying
effects. Clean at least once
every two weeks.
Ventilate the room
occasionally.
Since windows are kept closed,
it is a good idea to open them
and ventilate the room now and
then.
Operation Tips

ENGLISH
Owner's Manual 25
Before you call for service...
Before you call for service...
Check the following points before requesting repairs or service.... If the malfunction persist, please contact your
dealer.
Troubleshooting Tips! Save time and money!
The air conditioner does not
operate.
The room has a peculiar odor.
It seems that condensate is
leaking from the air Conditioner.
Air conditioner does not operate
for about 3 minutes when restart.
Does not cool or heat effectively.
The air conditioner operation is
noisy.
Crack sound is heard.
Remote control display is faint, or
no display at all.
• Have you made a mistake in timer operation?
• On first starting, the indoor unit operates in
fifteen seconds.
• Has the fuse blown or has the circuit breaker
been tripped?
• Check that this is not a damp smell exuded by
the walls, carpet, furniture or cloth items in the
room.
• Condensation occurs when the airflow from the
air conditioner cools the warm room air.
• This is the protector of the mechanism.
• Wait about three minutes and operation will
begin.
• Is the air filter dirty? See air filter cleaning
instructions.
• The room may have been very hot when the
room air conditioner was first turned on. Allow
time for it to cool down.
• Has the setting temperature been set
incorrectly?
• Are the indoor unit's air inlet or outlet vents
obstructed?
• For a noise that sounds like water flowing.
-This is the sound of freon flowing inside the air
conditioner unit.
• For a noise that sounds like the compressed air
releasing into atmosphere.
-This is the sound of the dehumidifying water
being processed inside the air conditioning
unit.
• This sound is generated by the
expansion/contraction of the inlet grille, etc. due
to changes of temperature.
• Has the circuit breaker been tripped?
12
-
-
-
-
23
14, 17
-
-
-
Case Explanation See page

26 Multi Type Air Conditioner
Memo

LG
Aire acondicionado de
canalización de techo
MANUAL DEL PROPIETARIO
IMPORTANTE
• Le rogamos que lea este manual del propietario con
cuidado y completamente antes de instalarlo y operar su
aparato de aire acondicionado.
• Le rogamos que guarda este manual del propietario para
futura referencia antes de leerlo completamente.
ESPAÑOL
MODELOS: LMNC092BTG0
LMNC122BTG0
LMNC182BTG0
LMNC242BYG0
LMNH092BTG0
LMNH122BTG0
LMNH182BTG0
LMNH242BYG0

2 Aire acondicionado de canalización de techo
Aire acondicionado de canalización de techo Manual del usuario
ÍNDICE
PARA SU REGISTRO
Escriba aquí el modo y los números de serie :
Nº modelo
Nº serie
Puede encontrarlos en la etiqueta de la parte lateral de
cada unidad.
Nombre del establecimiento
Fecha de compra
■
Grape su recibo a esta página en caso de que lo
necesite para demostrar la fecha de compra para
servicios de garantía.
LEA ESTE MANUAL
En el interior encontrará muchos consejos útiles sobre cómo
utilizar y mantener debidamente su aparato de aire
acondicionado. Sólo unos pequeños cuidados preventivos por
su parte le podrán ahorrar mucho tiempo y dinero a lo largo de
la vida útil de su aparato de aire acondicionado. Encontrará
muchas respuestas a problemas comunes en la tabla de
consejos para la resolución de pequeños problemas. Si revisa
primero nuestra tabla de Consejos para la resolución de
problemas, quizás no debe llamar al equipo de servicio.
PRECAUCIONES
• Contacte con el técnico de servicio autorizado para reparar o
mantener esta unidad.
• Póngase en contacto con el instalador para proceder a la
instalación de este aparato.
• Este aparato de aire acondicionado no está diseñado para ser
utilizado por niños de corta edad ni por personas disminuidas
sin supervisión.
• Deberían supervisarse a los niños de corta edad para asegurarse
de que no juegan con el aparato de aire acondicionado.
• Cuando ha de recambiarse el cable de alimentación, sólo
personal autorizado llevará a cabo las tareas de recambio y
utilizando únicamente piezas de recambio.
• Las tareas de instalación deben realizarse de acuerdo con el
Código Eléctrico Nacional y sólo puede llevarlas a cabo personal
cualificado y autorizado.
Precauciones de seguridad......3
Instrucciones de utilización .....8
Cuidados y mantenimiento.....23
Antes de llamar al servicio
técnico......................................25

Precauciones de seguridad
Manual de Usurio 3
ESPAÑOL
Precauciones de seguridad
Para evitar lesiones al usuario o a otras personas y daños a la propiedad, siga estas
instrucciones.
■ Una operaci’on incorrecta por ignorar las instrucciones provocará lesiones o daños. La
seriedad se clasifica por las siguientes indicaciones.
■ Significados de los símbolos utilizados en este manual.
ADVERTENCIA
PRECAUCIÓN
Este símbolo indica la posibilidad de muerte o de seria lesión.
Este símbolo indica sólo la posibilidad de lesión o daño a la propiedad.
Prohibido.
Recuerde seguir las instrucciones.
ADVERTENCIA
■ Instalación
No utilice un interruptor automático
defectuoso o de valor nominal inferior
al correspondiente. Utilice un circuito
específico para este aparato.
• Existe riesgo de incendio o
descarga eléctrica.
Para trabajos eléctricos, póngase en
contacto con el distribuidor, vendedor,
técnico cualificado o centro de
asistencia técnica autorizado.
• No desmonte ni repare el
aparato. Existe riesgo de
incendio o descarga eléctrica.
Realice siempre la conexión
del aparato a tierra.
• Existe riesgo de incendio o
descarga eléctrica.
Instale correctamente el
panel y la cubierta de la caja
de control.
• Existe riesgo de incendio o
descarga eléctrica.
Instale siempre un circuito y
un interruptor específico.
• Un cableado o instalación
inadecuados pueden provocar
un incendio o una descarga
eléctrica.
Utilice el interruptor o
fusible de valor nominal
adecuado.
• Existe riesgo de incendio o
descarga eléctrica.

Precauciones de seguridad
4 Aire acondicionado de canalización de techo
■ Operación
No modifique ni extienda el
cable de alimentación.
• Existe riesgo de incendio o
descarga eléctrica.
No instale, retire ni vuelva a
instalar la unidad por sí
mismo (cliente).
• Existe riesgo de incendio,
descarga eléctrica , explosión o
lesiones.
Tenga cuidado al desembalar
e instalar el aparato.
•
Los bordes afilados podrían provocar
lesiones. Tenga especial cuidado con
los bordes de la caja y las aletas del
condensador y evaporador.
Para la instalación, póngase en
contacto siempre con su vendedor o
centro de asistencia técnica autorizado.
• Existe riesgo de incendio,
descarga eléctrica, explosión o
lesiones.
No instale el aparato en una
superficie de instalación
insegura.
• Podría causar lesiones,
accidentes o daños en el
aparato.
Asegúrese de que el soporte
de instalación no se deteriora
con el tiempo.
• Si el soporte cae, el aire
acondicionado también puede
caer, causando daños
materiales, avería del aparato y
lesiones personales.
No enchufe ni desenchufe la
clavija de alimentación
durante el funcionamiento
• Existe riesgo de incendio o
descarga eléctrica.
No toque (ni maneje) el
aparato con las manos
mojadas.
• Existe riesgo de incendio o
descarga eléctrica.
No coloque una estufa ni
otros aparatos cerca del
cable de alimentación.
• Existe riesgo de incendio y
descarga eléctrica.
No deje funcionando el aire
acondicionado durante mucho tiempo
cuando la humedad sea muy alta y haya
una puerta o ventana abierta.
• Podría condensarse la humedad
y mojar o dañar el mobiliario.
Asegúrese de que el cable de
alimentación no pueda estirarse
o dañarse durante el
funcionamiento.
• Existe riesgo de incendio o
descarga eléctrica.
No coloque nada sobre el
cable de alimentación.
• Existe riesgo de incendio o
descarga eléctrica.

Precauciones de seguridad
Manual de Usurio 5
ESPAÑOL
No permita que entre agua
en las partes eléctricas.
• Existe riesgo de incendio, avería
del aparato o descarga eléctrica.
No almacene ni utilice gas
inflamable o combustibles
cerca del aparato.
• Existe riesgo de incendio o avería
del aparato.
No utilice el aparato en un
espacio cerrado durante un
periodo prolongado de tiempo.
• Podría producirse una falta de
oxígeno.
Si hay fugas de gas, apague
el gas y abra una ventana
para ventilar antes de
encender el aparato.
• No utilice el teléfono ni encienda o
apague los interruptores.
Existe riesgo de explosión o
incendio.
Si oye algún ruido extraño, huele o ve
salir humo del aparato. Desconecte el
interruptor automático o desconecte el
cable de alimentación.
• Existe riesgo de incendio o
descarga eléctrica.
Detenga el funcionamiento y cierre la
ventana en caso de tormenta o huracán. Si
es posible, retire el aparato de la ventana
antes de que llegue el huracán.
• Existe riesgo de daños materiales,
avería del aparato o descarga
eléctrica.
No abra la parrilla de entrada del aparato
mientras está en funcionamiento. (No
toque el filtro electrostático, si la unidad
dispone del mismo).
• Existe riesgo de lesiones
personales, descarga eléctrica o
avería del aparato.
Si el aparato se moja (inundado
o sumergido), póngase en
contacto con un centro de
asistencia técnica autorizado.
• Existe riesgo de incendio o
descarga eléctrica.
Tenga cuidado de que no
entre agua en el aparato.
• Existe riesgo de incendio,
descarga eléctrica o daños en el
aparato.
Gasolin
Ventile el aparato de vez en cuando si lo
utiliza junto con una estufa, etc.
• Existe riesgo de incendio o descarga eléctrica.
Desconecte la alimentación principal al limpiar o
realizar el mantenimiento del aparato.
• Existe riesgo de descarga eléctrica.

Precauciones de seguridad
6 Aire acondicionado de canalización de techo
■ Instalación
PRECAUCIÓN
■ Operación
Compruebe siempre las fugas de
gas (refrigerante) después de la
instalación o reparación del aparato.
• Niveles bajos de refrigerante
pueden producir una avería del
aparato.
Instale la manguera de drenaje
para asegurarse de que el agua
se drena correctamente.
• Una mala conexión puede causar
fugas de agua.
Instale el aparato bien
nivelado.
• Para evitar las vibraciones o fugas
de agua.
No instale el aparato donde el ruido o el
aire caliente de la unidad exterior
pueda molestar a los vecinos.
• Podría tener problemas con los
vecinos.
Levante y transporte el
aparato entre dos o más
personas.
• Evite lesiones personales.
No instale el aparato donde
quede expuesto directamente al
viento del mar (rocío salino).
•
Podría causar corrosión en el aparato. La
corrosión, particularmente en las aletas del
condensador y del evaporador, podría
causar un funcionamiento defectuoso del
aparato o un funcionamiento ineficaz.
90˚
Cuando no vaya a utilizar el aparato durante
un largo periodo de tiempo, desenchufe la
clavija de alimentación o apague el
interruptor automático.
• Existe riesgo de daños en el aparato o avería, o
funcionamiento intempestivo.
Asegúrese de que nadie se siente o apoye
sobre la unidad exterior.
• Podrían producirse lesiones personales y daños en el
aparato.
No se exponga directamente al aire frío
durante largos periodos de tiempo. (No se
siente en la corriente de aire).
• Podría ser perjudicial para su salud.
No utilice este aparato para fines específicos, como la conservación de
alimentos, obras de arte, etc. Se trata de un aire acondicionado de
consumo, no de un sistema de refrigeración de precisión.
• Existe riesgo
de daños
o pérdidas
materiales.

Precauciones de seguridad
Manual de Usurio 7
ESPAÑOL
No bloquee la entrada ni la
salida del flujo de aire.
• Podría causar una avería en el
aparato.
Utilice un paño suave para
limpiar. No utilice detergentes
abrasivos, disolventes, etc.
• Existe riesgo de incendio,
descarga eléctrica o daños en las
partes de plástico del aparato.
No toque las partes de metal del
aparato al sacar el filtro del aire.
¡Son muy afiladas!
• Existe riesgo de lesiones
personales.
Wax
Thinner
No se suba ni coloque nada
sobre el aparato. (unidades
exteriores)
• Existe riesgo de lesiones
personales y avería del aparato.
Inserte siempre el filtro correctamente.
Limpie el filtro cada dos semanas o
más a menudo, si fuera necesario.
• Un filtro sucio reduce la eficacia
del aire acondicionado y puede
producir un funcionamiento
defectuoso o daños.
No introduzca las manos u otros objetos en la
entrada o salida del aire acondicionado
mientras el aparato esté en funcionamiento.
• Hay partes afiladas y móviles que
podrían producir lesiones
personales.
No beba el agua que drena
el aparato.
• No es potable y podría causar
graves problemas en la salud.
Utilice un taburete o
escalera firme cuando limpie
o realice el mantenimiento
del aparato.
• Tenga cuidado y evite lesiones
personales.
Sustituya todas las pilas del
mando a distancia por pilas
nuevas del mismo tipo. No
mezcle pilas nuevas y viejas o
diferentes tipos de pilas.
• Existe riesgo de incendio o
explosión.
No cargue ni desmonte las pilas. No tire las
pilas al fuego.
• Podrían arder o explotar.
Si entra líquido de las pilas en contacto con la piel
o ropa, lávela inmediatamente con agua. No utilice
el mando a distancia si las pilas tienen fugas.
• Los productos químicos de
las pilas podrían causar
quemaduras u otros
perjuicios a la salud. .

Recettore di segnali
Plasma
RESET
Timer Cancel
Program Week Holiday
SET/CLR
MinHour
Heater
Humidify
AUTO
AUTO SWING
JET
OPERATION
FAN SPEED
Program set
SUB FUNCTION
SET TEMP
Room Temp
HI
MED
LO
Defrost
Filter
Preheat
Out door
Timer
On
Set no. Time
Off
01 03 05 07 09 11 13 15 17 19 21 23
Time
Operation unit
3
7
8
9
10
11
12
13
2
1
5
4
6
15
14
ZONE
1234
Instrucciones de utilización
8 Aire acondicionado de canalización de techo
Funciones del mando a distancia -Tapa abierta
1. Pantalla de Parámetros
Muestra las condiciones de funcionamiento.
2. Botón “On/Off” (Encendido/Apagado)
El aparato se pone en marcha cuando se pulsa este
botón y se detiene cuando se vuelve a pulsar.
3. Botón “Set Temperature”
(Ajuste de la Temperatura)
Se utiliza para ajustar la temperatura cuando se
alcanza la temperatura deseada.
4. Botón “FAN Operation” (Funcionamiento del
VENTILADOR)
Se utiliza para hacer que circule el aire de la
habitación sin refrigeración o calefacción.
5.
Botón de calentador eléctrico (Opcional)
Esté acostumbrado al conjunto la Calentadora
Eléctrica.
6. Botón “FAN Speed”
(Velocidad del VENTILADOR)
Se utiliza para ajustar la velocidad que se desea del
ventilador.
7. Botón “Operation Mode Selection” (Selección del
Modo de Funcionamiento)
Se utiliza para seleccionar el modo de funcionamiento.
• Modo de Funcionamiento Automático.
• Modo de Funcionamiento para Refrigeración.
• Modo de Funcionamiento “Soft Dry” (Seco Suave).
• Modo de Funcionamiento para Calefacción. (Excepto
modelo de refrigeración)
8. Botón “Timer Cancel” (Cancelación del
Temporizador)
Se utiliza para cancelar el temporizador.
9. Botón “Timer Set” (Ajuste del Temporizador)
Se utiliza para ajustar el temporizador cuando se
obtiene la hora deseada.
10. Botón “Week” (Semana)
Se utiliza par ajustar el día de la semana.
11. Botón “Weekly Timer” (Temporizador Semanal)
Se utiliza para ajustar el temporizador semanal.
12. Botón “Holiday” (Festivo)
Se utiliza para ajustar un día festivo de la semana.
13. Botón “Time Set” (Ajuste de la Hora)
Se utiliza para ajustar la hora del día y para cambiar
la hora en la función de temporizador semanal.
14. Botón “Set and Clear” (Ajuste y Borrado)
Se utiliza para ajustar y borrar el temporizador
semanal.
15. Botón “Room Temperature Checking”
(Comprobación de la Temperatura de la Habitación)
Se utiliza para comprobar la temperatura de la habitación.
❈
La temperatura del display puede ser diferente de la temperatura real de la habitación si el
control remoto se ha instalado expuesto a la luz solar directa o junto a una fuente de calor.
Instrucciones de utilización

Instrucciones de utilización
Manual de Usurio 9
ESPAÑOL
A/CL
7
9
2
8
5
6
4
1
3
Función opcional
• Control remoto inalámbrico(opcional)
Este aparato de aire acondicionado está equipado con un mando a distancia con cable.
Sin embargo, podrá adquirir un mando a distancia inalámbrico si lo desea.
Transmisor de señal
Transmits las señales al acondicionador
de aire.
1. Botón de VENTILADOR
Se usa para que el aire de la habitación circule sin enfriar
ni calentar.
2. Botón de operación de Enfriamiento
3. Botón de operación de secado suave
Usado para deshumedecer sin sobre-enfriamiento.
4. Botón de operación de calefacción
(Modelo sólo bomba de calor)
5. BOTONES DE PROGRAMACIÓN DE LAS HORAS DE
ARRANQUE/PARO
Se usa para fijar el temporizador cuando se obtiene el
tiempo deseado.
Entonces el contolador remote con hilos se programa
hasta 24 horas, hora a hora, pero el controlador remoto
sin hilos se programa hasta 7 horas, hora por hora. Por lo
tanto, si desea programar más de 7 horas, utilice el
controlador remoto con hilos.
6. Botón de velocidad del ventilador
Se usa para fijar la temperatura de ventilador deseada.
7. BOTÓN ARRANQUE/PARO
Se pone en funcionamiento al accionar este botón y se
detiene al volverlo a accionar.
8. Botón de selección de temperatura
Se usa para fijar la temperatura cuando se obtiene la
temperatura deseada.
9. Botón Modo Auto
PRECAUCIÓN: Tenga cuidado al manejar el mando a distancia
• Dirijan el mando a distancia hacia el receptor de señal del acondicionador de aire en
funcion.
• La señal del mando a distancia pueds ser recibida hasta una distancia de 7 metros,
aproximadamente.
• Asegurénse de que entre el mando a distancia y el receptor de señal, no hay ningún
obstáculo.
• Eviten que el mando a distancia caiga al suelo y no lo descuiden.
• No dejen el mando a distancia expuesto a la luz directa del sol, ni cerca de fuentes de calor.

Instrucciones de utilización
10 Aire acondicionado de canalización de techo
AUTO SWING
HI
ZONE
Operation unit Program set
Room Temp
MED
LO
AUTO
JET
Heater
Defrost
Filter
Preheat
Humidify
Out door
Timer
On
Set no. Time
Off
01 03 05 07 09 11 13 15 17 19 21 23
1234
OPERATION
FAN SPEED
SUB FUNCTION
SET TEMP
Time
AUTO SWING
HI
ZONE
Operation unit Program set
Room Temp
MED
LO
AUTO
JET
Heater
Defrost
Filter
Preheat
Humidify
Out door
Timer
On
Set no. Time
Off
01 03 05 07 09 11 13 15 17 19 21 23
1234
OPERATION
FAN SPEED
SUB FUNCTION
SET TEMP
Time
AUTO SWING
HI
ZONE
Operation unit Program set
Room Temp
MED
LO
AUTO
JET
Heater
Defrost
Filter
Preheat
Humidify
Out door
Timer
On
Set no. Time
Off
01 03 05 07 09 11 13 15 17 19 21 23
1234
OPERATION
FAN SPEED
SUB FUNCTION
SET TEMP
Time
AUTO SWING
HI
ZONE
Operation unit Program set
Room Temp
MED
LO
AUTO
JET
Heater
Defrost
Filter
Preheat
Humidify
Out door
Time
Timer
On
Set no. Time
Off
01 03 05 07 09 11 13 15 17 19 21 23
1234
OPERATION
FAN SPEED
SUB FUNCTION
SET TEMP
Hour
Min
Week
RESET
Fije la hora actual y un día de la semana.
1
Pulse el botón ‘ ’.
Cada vez que se pulsa el botón, el n˙mero cambia de 00 a 23.
Usted debe ajustar el n˙mero de la hora actual.
2
Pulse el botón ‘ ’.
Cada vez que se pulsa el botón, el n˙mero aumenta de 00 a 59.
Usted debe ajustar el n˙mero del minuto actual.
3
Pulse el botón “ ”. (Día de la semana)
Cada vez que se pulsa el botón cambia el día de la semana desde “Sunday” (Domingo) a “Saturday” (Sábado).
Usted debe ajustar el día actual de la semana.
4
Pulse el botón ‘ ’.
Si desea reajustar la hora actual y un día de la semana, p˙lselo de nuevo.
Hour
Min
Week
RESET

Instrucciones de utilización
Manual de Usurio 11
ESPAÑOL
Week
Program
SET/CLR
MinHour
AUTO SWING
Time
HI
ZONE
Operation unit
Room Temp
MED
LO
AUTO
JET
Heater
Defrost
Filter
Preheat
Humidify
Out door
Timer
On
Set no.
Off
1234
OPERATION
FAN SPEED
SUB FUNCTION
SET TEMP
Program set
01 03 05 07 09 11 13 15 17 19 21 23
Time
AUTO SWING
Program set
Time
HI
ZONE
Operation unit
Room Temp
MED
LO
AUTO
JET
Heater
Defrost
Filter
Preheat
Humidify
Out door
Timer
On
Set no.
Off
1234
OPERATION
FAN SPEED
SUB FUNCTION
SET TEMP
01 03 05 07 09 11 13 15 17 19 21 23
Time
Program
Programar semanal
4
Pulse el botón de programa de nuevo para finalizar la programación semanal.
1
Pulse el botón Program.
El panel de mando toma el aspecto siguiente. Entonces, parpadean , .
2
Pulse el botón ' '.
Presione repetidamente el botón ' ' hasta que aparezca el modo deseado.
Por ejemplo, si desea Thu (Jueves), presione
4 veces el botón ' '.
3
Seleccione el tiempo que desea.
Presione el botón de , , luego se mostrará la letra palpitante.
Si presiona el botón , entonces aparecerá ' '.
' ' significa que está reservado a las cinco.
Utilizando los botones abajo, puede reservar la hora.
* Por ejemplo, el aire acondicionado está en 6, 7, 8 y 13 ~ 22 horas.
Program set
Week
Week
Week
MinHour
SET/CLR
unit
05

Instrucciones de utilización
12 Aire acondicionado de canalización de techo
AUTO SWING
Program set
Time
HI
ZONE
Operation unit
Room Temp
MED
LO
AUTO
JET
Heater
Defrost
Filter
Preheat
Humidify
Out door
Timer
On
Set no.
Off
1234
OPERATION
FAN SPEED
SUB FUNCTION
SET TEMP
01 03 05 07 09 11 13 15 17 19 21 23
Time
Ajuste de un día festivo
Ajuste del temporizador (El Comienzo de la demora/de la Parada del conjunto Pre)
Si martes es una vacación en esta semana, usted puede poner una vacación.
1. Pulse el botón “Program”.
(Programa)
4. Pulse el botón de programa de nuevo para
finalizar la programación vacacional.
2. Pulse el botón “Week”.
(Semana)
3. Pulse el botón “Holiday”.
(Festivo)
El mando a distancia mostrará después ‘ ’.
El rectángulo exterior significa festivo.
Program
Program
1. Pulse el botón “Timer”.
(Temporizador)
Esta función se está acostumbrada a prende o apaga en varias horas.
Timer
2. Cambie la configuración del temporizador hasta
ajustar la hora deseada.
MinHour
3. Si desea cancelar el temporizador, pulse el botón “Cancel”.
(Cancelar)
Cancel
Week
Holiday

Instrucciones de utilización
Manual de Usurio 13
ESPAÑOL
RESET
Timer Cancel
Program Week Holiday
SET/CLR
MinHour
Humidify
AUTO
AUTO SWING
JET
OPERATION
FAN SPEED
Program set
SUB FUNCTION
SET TEMP
Room Temp
HI
MED
LO
Heater
Defrost
Filter
Preheat
Out door
Timer
On
Set no. Time
Off
01 03 05 07 09 11 13 15 17 19 21 23
Time
Operation unit
3
1
4
2
ZONE
1234
Modo frío
Modo deshumidificación
Modo frío
Modo Automático
Modo Automático
Modo deshumidificación
Modo calor
(Modelo bomba de calor)
(Modelo sólo frío)
Modo de funcionamiento
Procedimiento de funcionamiento
1st
2
nd
3rd
4
th
Botón de encendido / apagado
Botón de selección del modo de
funcionamiento
Botón de selección de la temperatura de
la habitación
Botón de selección de la velocidad del
ventilador interior

Instrucciones de utilización
14 Aire acondicionado de canalización de techo
MODELO SÓLO FRIO
Modo frío Deshumidificación
ZONE
Operation unit Program set
Room Temp
MED
LO
AUTO
JET
Heater
Defrost
Filter
Preheat
Humidify
Out door
Time
Timer
On
Set no. Time
Off
01 03 05 07 09 11 13 15 17 19 21 23
1234
OPERATION
FAN SPEED
SUB FUNCTION
SET TEMP
HI HI
ZONE
Operation unit Program set
Room Temp
MED
AUTO
JET
Heater
Defrost
Filter
Preheat
Humidify
Out door
Time
Timer
On
Set no. Time
Off
01 03 05 07 09 11 13 15 17 19 21 23
1234
OPERATION
FAN SPEED
SUB FUNCTION
SET TEMP
LO
Modo Auto
LO
ZONE
Operation unit Program set
Room Temp
MED
AUTO
JET
Heater
Defrost
Filter
Preheat
Humidify
Out door
Time
Timer
On
Set no. Time
Off
01 03 05 07 09 11 13 15 17 19 21 23
1234
OPERATION
FAN SPEED
SUB FUNCTION
SET TEMP
HI
Pantalla de Parámetros
Pantalla de Parámetros
AUTO SWING
ZONE
Operation unit Program set
Room Temp
MED
LO
AUTO
JET
Heater
Defrost
Filter
Preheat
Humidify
Out door
Time
Timer
On
Set no. Time
Off
01 03 05 07 09 11 13 15 17 19 21 23
1234
OPERATION
FAN SPEED
SUB FUNCTION
SET TEMP
HI
HI
ZONE
Operation unit Program set
Room Temp
MED
AUTO
JET
Heater
Defrost
Filter
Preheat
Humidify
Out door
Time
Timer
On
Set no. Time
Off
01 03 05 07 09 11 13 15 17 19 21 23
1234
OPERATION
FAN SPEED
SUB FUNCTION
SET TEMP
LO
ZONE
Operation unit Program set
Room Temp
MED
LO
AUTO
JET
Heater
Defrost
Filter
Preheat
Humidify
Out door
Time
Timer
On
Set no. Time
Off
01 03 05 07 09 11 13 15 17 19 21 23
1234
OPERATION
FAN SPEED
SUB FUNCTION
SET TEMP
HI
ZONE
Operation unit Program set
Room Temp
MED
LO
AUTO
JET
Heater
Defrost
Filter
Preheat
Humidify
Out door
Time
Timer
On
Set no. Time
Off
01 03 05 07 09 11 13 15 17 19 21 23
1234
OPERATION
FAN SPEED
SUB FUNCTION
SET TEMP
HI
MODELO BOMBA DE CALOR
Modo frío Deshumidificación Calor (Bomba de calor) Modo Auto
Pantalla de Parámetros
Para aumentar la temperatura.
Para disminuir la temperatura.
ZONE
Operation unit Program set
Room Temp
MED
LO
AUTO
JET
Heater
Defrost
Filter
Preheat
Humidify
Out door
Time
Timer
On
Set no. Time
Off
01 03 05 07 09 11 13 15 17 19 21 23
1234
OPERATION
FAN SPEED
SUB FUNCTION
SET TEMP
HI
ZONE
Operation unit Program set
Room Temp
MED
LO
AUTO
JET
Heater
Defrost
Filter
Preheat
Humidify
Out door
Time
Timer
On
Set no. Time
Off
01 03 05 07 09 11 13 15 17 19 21 23
1234
OPERATION
FAN SPEED
SUB FUNCTION
SET TEMP
HI
Room Temp
HI
ZONE
Operation unit Program set
MED
AUTO
JET
Heater
Defrost
Filter
Preheat
Humidify
Out door
Time
Timer
On
Set no. Time
Off
01 03 05 07 09 11 13 15 17 19 21 23
1234
OPERATION
FAN SPEED
SUB FUNCTION
SET TEMP
LO
HI
ZONE
Operation unit Program set
Room Temp
LO
AUTO
JET
Heater
Defrost
Filter
Preheat
Humidify
Out door
Time
Timer
On
Set no. Time
Off
01 03 05 07 09 11 13 15 17 19 21 23
1234
OPERATION
FAN SPEED
SUB FUNCTION
SET TEMP
MED
Modo frío
2
Para seleccionar el modo Frío.
Accione el botón de selección del modo de funcionamiento.
Cada vez que accione el botón, el modo de operación cambia siguiendo la dirección de la flecha.
1
Accione el botón
ON/OFF(ARRANQUE/PARO).
4
Ajustar la velocidad del ventilador.
3
Elija una temperatura
inferior a la de la
temperatura de la
habitación.
•
La temperatura puede
seleccionarse en la franja de
18°C- 30°C en incrementos de
un grado.
•
Seleccione la velocidad del ventilador en tres fases - alto, bajo, medio.
• La pantalla muestra velocidad del ventilador alta.
• Cada vez que se presiona el botón, se cambia el modo de velocidad del ventilador.

Instrucciones de utilización
Manual de Usurio 15
ESPAÑOL
MODELO SÓLO FRIO
Modo frío Deshumidificación Modo Auto
ZONE
Operation unit Program set
Room Temp
MED
LO
AUTO
JET
Heater
Defrost
Filter
Preheat
Humidify
Out door
Time
Timer
On
Set no. Time
Off
01 03 05 07 09 11 13 15 17 19 21 23
1234
OPERATION
FAN SPEED
SUB FUNCTION
SET TEMP
HI HI
ZONE
Operation unit Program set
Room Temp
MED
AUTO
JET
Heater
Defrost
Filter
Preheat
Humidify
Out door
Time
Timer
On
Set no. Time
Off
01 03 05 07 09 11 13 15 17 19 21 23
1234
OPERATION
FAN SPEED
SUB FUNCTION
SET TEMP
LO LO
ZONE
Operation unit Program set
Room Temp
MED
AUTO
JET
Heater
Defrost
Filter
Preheat
Humidify
Out door
Time
Timer
On
Set no. Time
Off
01 03 05 07 09 11 13 15 17 19 21 23
1234
OPERATION
FAN SPEED
SUB FUNCTION
SET TEMP
HI
Pantalla de Parámetros
ZONE
Operation unit Program set
Room Temp
MED
LO
AUTO
JET
Heater
Defrost
Filter
Preheat
Humidify
Out door
Time
Timer
On
Set no. Time
Off
01 03 05 07 09 11 13 15 17 19 21 23
1234
OPERATION
FAN SPEED
SUB FUNCTION
SET TEMP
HI
HI
ZONE
Operation unit Program set
Room Temp
MED
AUTO
JET
Heater
Defrost
Filter
Preheat
Humidify
Out door
Time
Timer
On
Set no. Time
Off
01 03 05 07 09 11 13 15 17 19 21 23
1234
OPERATION
FAN SPEED
SUB FUNCTION
SET TEMP
LO
ZONE
Operation unit Program set
Room Temp
MED
LO
AUTO
JET
Heater
Defrost
Filter
Preheat
Humidify
Out door
Time
Timer
On
Set no. Time
Off
01 03 05 07 09 11 13 15 17 19 21 23
1234
OPERATION
FAN SPEED
SUB FUNCTION
SET TEMP
HI
ZONE
Operation unit Program set
Room Temp
MED
LO
AUTO
JET
Heater
Defrost
Filter
Preheat
Humidify
Out door
Time
Timer
On
Set no. Time
Off
01 03 05 07 09 11 13 15 17 19 21 23
1234
OPERATION
FAN SPEED
SUB FUNCTION
SET TEMP
HI
MODELO BOMBA DE CALOR
Modo frío Deshumidificación Calor (Bomba de calor) Modo Auto
Pantalla de Parámetros
Deshumidificación
Este modo retira la humedad sin producir sobreenfriamiento.
3
Durante el funcionamiento Soft Dry (Seco Suave).
• La velocidad del ventilador interno se establece de forma automática al mínimo, de forma
que no se puede cambiar la velocidad del ventilador interno, ya que el Control Micom ha
establecido con anterioridad la velocidad más adecuada para el funcionamiento en modo
“Dry”.
2
Abra la tapa del mando a distancia.
Para seleccionar el modo Deshumidificación, accione el botón de selección del modo de
funcionamiento. Cada vez que accione el botón, el modo de operación cambia siguiendo la dirección
de la flecha.
1
Accione el botón ARRANQUE/PARO.

Instrucciones de utilización
16 Aire acondicionado de canalización de techo
ZONE
Operation unit Program set
Room Temp
MED
LO
AUTO
JET
Heater
Defrost
Filter
Preheat
Humidify
Out door
Time
Timer
On
Set no. Time
Off
01 03 05 07 09 11 13 15 17 19 21 23
1234
OPERATION
FAN SPEED
SUB FUNCTION
SET TEMP
HI
HI
ZONE
Operation unit Program set
Room Temp
MED
AUTO
JET
Heater
Defrost
Filter
Preheat
Humidify
Out door
Time
Timer
On
Set no. Time
Off
01 03 05 07 09 11 13 15 17 19 21 23
1234
OPERATION
FAN SPEED
SUB FUNCTION
SET TEMP
LO
ZONE
Operation unit Program set
Room Temp
MED
LO
AUTO
JET
Heater
Defrost
Filter
Preheat
Humidify
Out door
Time
Timer
On
Set no. Time
Off
01 03 05 07 09 11 13 15 17 19 21 23
1234
OPERATION
FAN SPEED
SUB FUNCTION
SET TEMP
HI
ZONE
Operation unit Program set
Room Temp
MED
LO
AUTO
JET
Heater
Defrost
Filter
Preheat
Humidify
Out door
Time
Timer
On
Set no. Time
Off
01 03 05 07 09 11 13 15 17 19 21 23
1234
OPERATION
FAN SPEED
SUB FUNCTION
SET TEMP
HI
Modo frío Deshumidificación Calor (Bomba de calor) Modo Auto
Pantalla de Parámetros
ZONE
Operation unit Program set
Room Temp
MED
LO
AUTO
JET
Heater
Defrost
Filter
Preheat
Humidify
Out door
Time
Timer
On
Set no. Time
Off
01 03 05 07 09 11 13 15 17 19 21 23
1234
OPERATION
FAN SPEED
SUB FUNCTION
SET TEMP
HI HI
ZONE
Operation unit Program set
Room Temp
MED
AUTO
JET
Heater
Defrost
Filter
Preheat
Humidify
Out door
Time
Timer
On
Set no. Time
Off
01 03 05 07 09 11 13 15 17 19 21 23
1234
OPERATION
FAN SPEED
SUB FUNCTION
SET TEMP
LO
HI
ZONE
Operation unit Program set
Room Temp
LO
AUTO
JET
Heater
Defrost
Filter
Preheat
Humidify
Out door
Time
Timer
On
Set no. Time
Off
01 03 05 07 09 11 13 15 17 19 21 23
1234
OPERATION
FAN SPEED
SUB FUNCTION
SET TEMP
MED
ZONE
Operation unit Program set
Room Temp
MED
LO
AUTO
JET
Heater
Defrost
Filter
Preheat
Humidify
Out door
Time
Timer
On
Set no. Time
Off
01 03 05 07 09 11 13 15 17 19 21 23
1234
OPERATION
FAN SPEED
SUB FUNCTION
SET TEMP
HI
Pantalla de Parámetros
AUTO SWING
ZONE
Operation unit Program set
Room Temp
MED
LO
AUTO
JET
Heater
Defrost
Filter
Humidify
Out door
Time
Timer
On
Set no. Time
Off
01 03 05 07 09 11 13 15 17 19 21 23
1234
OPERATION
FAN SPEED
SUB FUNCTION
SET TEMP
HI
Preheat
AUTO SWING
Preheat
ZONE
Operation unit Program set
Room Temp
MED
LO
AUTO
JET
Heater
Filter
Humidify
Out door
Time
Timer
On
Set no. Time
Off
01 03 05 07 09 11 13 15 17 19 21 23
1234
OPERATION
FAN SPEED
SUB FUNCTION
SET TEMP
HI
Defrost
Para aumentar la temperatura.
Para disminuir la temperatura.
Modo Calor (Solamente en el modelo con bomba de calor)
2
Seleccione la función de calentamiento
Para seleccionar el modo Calor, accione el botón de selección del modo de funcionamiento. Cada
vez que accione el botón, el modo de operación cambia siguiendo la dirección de la flecha.
3
Fijar la temperatura
4
Seleccionar la velocidad del ventilador.
5
Este aire acondicionado está predeterminado para trabajar con
el control de inicio en caliente, para no descargar el aire frío
durante el funcionamiento en calentamiento. Esta vez, el
control remoto indica ‘PREHEAT’.
6
Si la temperatura exterior es demasiado baja durante el
funcionamiento en calentamiento, el aire acondicionado está
preparado para activar la función de descongelado y el
control remoto indica ‘DEFROST’.
1
Presione el botón de inicio / parada.
• Seleccione la velocidad del ventilador en tres fases - alto, bajo, medio.
• La pantalla muestra velocidad del ventilador alta.
• Cada vez que se presiona el botón, se cambia el modo de velocidad del ventilador.
•
La temperatura puede seleccionarse
en la franja de 16°C- 30°C en
incrementos de un grado.

Instrucciones de utilización
Manual de Usurio 17
ESPAÑOL
ZONE
Operation unit Program set
Room Temp
MED
LO
AUTO
JET
Heater
Defrost
Filter
Preheat
Humidify
Out door
Time
Timer
On
Set no. Time
Off
01 03 05 07 09 11 13 15 17 19 21 23
1234
OPERATION
FAN SPEED
SUB FUNCTION
SET TEMP
HI
HI
ZONE
Operation unit Program set
Room Temp
MED
AUTO
JET
Heater
Defrost
Filter
Preheat
Humidify
Out door
Time
Timer
On
Set no. Time
Off
01 03 05 07 09 11 13 15 17 19 21 23
1234
OPERATION
FAN SPEED
SUB FUNCTION
SET TEMP
LO
ZONE
Operation unit Program set
Room Temp
MED
LO
AUTO
JET
Heater
Defrost
Filter
Preheat
Humidify
Out door
Time
Timer
On
Set no. Time
Off
01 03 05 07 09 11 13 15 17 19 21 23
1234
OPERATION
FAN SPEED
SUB FUNCTION
SET TEMP
HI
ZONE
Operation unit Program set
Room Temp
MED
LO
AUTO
JET
Heater
Defrost
Filter
Preheat
Humidify
Out door
Time
Timer
On
Set no. Time
Off
01 03 05 07 09 11 13 15 17 19 21 23
1234
OPERATION
FAN SPEED
SUB FUNCTION
SET TEMP
HI
ZONE
Operation unit Program set
Room Temp
MED
LO
AUTO
JET
Heater
Defrost
Filter
Preheat
Humidify
Out door
Time
Timer
On
Set no. Time
Off
01 03 05 07 09 11 13 15 17 19 21 23
1234
OPERATION
FAN SPEED
SUB FUNCTION
SET TEMP
HI
ZONE
Operation unit Program set
Room Temp
MED
LO
AUTO
JET
Heater
Defrost
Filter
Preheat
Humidify
Out door
Time
Timer
On
Set no. Time
Off
01 03 05 07 09 11 13 15 17 19 21 23
1234
OPERATION
FAN SPEED
SUB FUNCTION
SET TEMP
HI
ZONE
Operation unit Program set
Room Temp
MED
LO
AUTO
JET
Heater
Defrost
Filter
Preheat
Humidify
Out door
Time
Timer
On
Set no. Time
Off
01 03 05 07 09 11 13 15 17 19 21 23
1234
OPERATION
FAN SPEED
SUB FUNCTION
SET TEMP
HI HI
ZONE
Operation unit Program set
Room Temp
MED
AUTO
JET
Heater
Defrost
Filter
Preheat
Humidify
Out door
Time
Timer
On
Set no. Time
Off
01 03 05 07 09 11 13 15 17 19 21 23
1234
OPERATION
FAN SPEED
SUB FUNCTION
SET TEMP
LO LO
ZONE
Operation unit Program set
Room Temp
MED
AUTO
JET
Heater
Defrost
Filter
Preheat
Humidify
Out door
Time
Timer
On
Set no. Time
Off
01 03 05 07 09 11 13 15 17 19 21 23
1234
OPERATION
FAN SPEED
SUB FUNCTION
SET TEMP
HI
Para bajar la Temperatura.
(Cuando usted se siente también entibiar o caliente.)
Para levantar la Temperatura.
(Cuando usted se siente refresca tambié o el resfriado.)
Cold Cool Proper Warm Hot
MODELO SÓLO FRIO
Modo frío Deshumidificación Modo Auto
Pantalla de Parámetros
Modo frío Deshumidificación Calor (Bomba de calor) Modo Auto
Pantalla de Parámetros
MODELO BOMBA DE CALOR
MODELO SÓLO FRIO
MODELO BOMBA DE CALOR
Para aumentar la temperatura.
Para disminuir la temperatura.
El Modo de la Operación del auto
1
Presione el botón de inicio / parada.
3
2
A Ia Operación selecta del Auto, aprieta el Botón de la Selección del Modo de la Operación
Cada vez que el botón se aprieta, el modo de la operación se cambia en la dirección de la flecha.
Durante la Operación del Auto:
❏ Usted puede cambiar la velocidad interior de ventilador.
❏ El wil del sistema automáticamente interruptor del modo que refresca al modo que calienta, o de la
calefacción a la refrigeración, debe ser hecho manualmente reponer.(Modelo bomba de calor sólo)
Ponga la temperatura más bajo que la temperatura de la
habitación. La temperatura puede ser puesta dentro de una
distancia de 18˚C~30˚C por 1˚C.
Ponga la temperatura superior o más baja que la
temperatura uniforme. La temperatura puede ser puesta
dentro de una distancia de -2~2 por 1 nivel.
(Esta indicación será cambiada al estado inicial del
Despliegue del Modo del Auto después de 4 segundos.)

Instrucciones de utilización
18 Aire acondicionado de canalización de techo
AUTO SWING
ZONE
Operation unit Program set
Room Temp
MED
LO
AUTO
JET
Heater
Defrost
Filter
Preheat
Humidify
Out door
Time
Timer
On
Set no. Time
Off
01 03 05 07 09 11 13 15 17 19 21 23
1234
OPERATION
FAN SPEED
SUB FUNCTION
SET TEMP
HI
AUTO SWING
HI
ZONE
Operation unit Program set
Room Temp
MED
AUTO
JET
Heater
Defrost
Filter
Preheat
Humidify
Out door
Time
Timer
On
Set no. Time
Off
01 03 05 07 09 11 13 15 17 19 21 23
1234
OPERATION
FAN SPEED
SUB FUNCTION
SET TEMP
LO
AUTO SWING
HI
ZONE
Operation unit Program set
Room Temp
LO
AUTO
JET
Heater
Defrost
Filter
Preheat
Humidify
Out door
Time
Timer
On
Set no. Time
Off
01 03 05 07 09 11 13 15 17 19 21 23
1234
OPERATION
FAN SPEED
SUB FUNCTION
SET TEMP
MED
Funcionamiento del ventilador
3
Cada vez que se presione el selector de velocidad del ventilador interior, el modo de velocidad
del ventilador se conmuta en la dirección que indica la flecha.
1
Presione el botón de inicio / parada.
2
Presione el botón de funcionamiento de
VENTILADOR.
• La velocidad del ventilador es alta.
• La velocidad del ventilador es baja.
• La velocidad del ventilador es media.
* No se puede establecer la temperatura en el modo Fan Operation(Funcionamiento ventilador).
Pulse el botón “Operation Mode” (modo funcionamiento) para salir de este modo.

Instrucciones de utilización
Manual de Usurio 19
ESPAÑOL
AUTO SWING
ZONE
1234
Operation unit
Humidify
JET
AUTO
Program set
Room Temp
HI
MED
LO
Heater
Defrost
Filter
Preheat
Out door
Time
Timer
On
Set no. Time
Off
01 03 05 07 09 11 13 15 17 19 21 23
Timer Cancel
Program Week
Hour Min
Holiday
SET/CLR
RESET
OPERATION
FAN SPEED
SUB FUNCTION
SET TEMP
Función de bloqueo para niños.
Evita que los niños puedan utilizar el aire acondicionado.
Procedimiento operativo
1. Para seleccionar la función de bloqueo para niños
Pulse el botón Timer y el botón Minute Set durante tres segundos. El
modo operativo cambiará al bloqueo para niños y se visualizará 'CL'
en la pantalla. Al pulsar cualquier botón, el panel de mandos no
funcionará y mostrará 'CL' durante 3 segundos. Pero la función de
temperatura de la habitación seguirá activa, a pesar de tener activado
el bloqueo.
2. Para cancelar la función de bloqueo para niños
Pulse el botón Timer y el botón Minute Set durante tres segundos.
El bloqueo quedará cancelado y se visualizar en el panel de mando el
modo preseleccionado.

Instrucciones de utilización
20 Aire acondicionado de canalización de techo
Funcionamiento del control telefónico (opcional)
1. Marque el número al que está conectado el aire
acondicionado.
2. Cuando haya sonado 5 veces.
3. Podrá oír un pitido (si el aire acondicionado está
apagado). Pulse "0" "0" "7" "8".
4. Cuando oiga el pitido 2 veces, el aire acondicionado se
pondrá en funcionamiento.
5. Cuelgue el teléfono.
ENCENDIDO
1. Marque el número al que está conectado el aire
acondicionado.
2. Cuando haya sonado 5 veces.
3. Se puede oir el sonido "bip bip" (si el acondicionador de
aire está encendido), luego oprima "0" "0" "7" "9" según
corresponde.
4. Cuando escuche un pitido, el aire acondicionado se
habrá apagado.
5. Cuelgue el teléfono.
APAGADO
❐ Este producto funciona cuando el teléfono ha sonado 5 veces.
❐ Si el usuario interno levanta el teléfono antes de 5 llamadas, a función Control de teléfono, no opera.
❐ Si el usuario no pulsa el botón del teléfono en aproximadamente 25 segundos después del bip, la función Control de teléfono
no opera.
❐ Si se encuentra conectado mediante el sistema EPABX, la función de control a distancia no funciona.
NOTA
ENCENDIDO
APAGADO
APAGADO
APAGADO
ENCENDIDO
ENCENDIDO
ENCENDIDO APAGADO
Llamando desde el exterior, puede poner en marcha el aire acondicionado para mantener una temperatura agradable. Incluso si
ha dejado el aire acondicionado en funcionamiento, puede apagarlo por medio de una llamada telefónica desde el exteriora

Instrucciones de utilización
Manual de Usurio 21
ESPAÑOL
Funcionamiento del control telefónico (Al utilizar junto con teléfono ARS)
1. Marque el número al que está conectado el aire
acondicionado.
2. La guía OGM es proveído después de cuatro timbres de
sonido en forma de señal y luego del sonido "bip"(sonido
del teléfono mismo) de tal forma que la grabación externa
pueda ser realizada.
3. Presione lentamente la contraseña "0" "0" "7" y "8" en
orden.
4. Cuando oiga el pitido 2 veces, el aire acondicionado se
pondrá en funcionamiento.
5. Cuelgue el teléfono.
ENCENDIDO
1. Marque el número al que está conectado el aire
acondicionado.
2. La guía OGM es proveído después de cuatro timbres de
sonido en forma de señal y luego del sonido "bip"(sonido
del teléfono mismo) de tal forma que la grabación externa
pueda ser realizada.
3. Presione lentamente la contraseña "0" "0" "7" y "9" en
orden.
4. Cuando escuche un pitido, el aire acondicionado se
habrá apagado.
6. Cuelgue el teléfono.
APAGADO
❐ Los números del timbre de contestación estará ajustado para cuatro veces si presiona el botón "Out-of-office"(fuera de la
oficina) o tomando otra acción para la contestación automática.
❐ El tiempo de la grabación de OGM (Mensaje de salida) debe ser menos que 15 segundos aproximadamente.
❐ Si está conectado al teléfono principal, no funciona.
NOTA
ENCENDIDO
APAGADO
APAGADO
APAGADO
ENCENDIDO
ENCENDIDO
ENCENDIDO APAGADO
Llamando desde el exterior, puede poner en marcha el aire acondicionado para mantener una temperatura agradable. Incluso si
ha dejado el aire acondicionado en funcionamiento, puede apagarlo por medio de una llamada telefónica desde el exterior.

Instrucciones de utilización
22 Aire acondicionado de canalización de techo
TEMP. HABITACIÓN
FIN DE LA FUNCIÓN
TEMP. FIJADA - 0.5°C
INICIO DE LA FUNCIÓN
TEMP. FIJADA +0.5°C
VENTILADOR INTERIOR
Más 3 minutos
VENTILADOR
EXTERIOR/COMP.
FIJANDO VELOCIDAD DEL
VENTILADOR
FIJANDO VELOCIDAD DEL
VENTILADOR
FIJANDO VELOCIDAD DEL
VENTILADOR
FUNCIÓN
FRÕO LENTO
FUNCIÓN
FRÕO LENTO
COMP.ON COMP.ONCOMP.ON
COMP. OFFCOMP. OFF
Velocidad
Rápida
Detalles de funcionamiento
Función de diagnóstico automático
La palabra 'CH' se iluminará en la pantalla del control remoto, cuando se presente un problema. En ese caso,
póngase en contacto con su distribuidor.
• El ventilador comenzará a funcionar 7 segundos después de conectarlo al suministro eléctrico.
Modo de refrigeración
Cuando la temperatura de la habitación es superior a la temperatura fijada, la unidad funciona en modo de
refrigeración para alcanzar la temperatura fijada, con la velocidad del ventilador seleccionado. Se apagará cuando
la temperatura de la habitación alcance la temperatura fijada +0.5°C.
Información útil
Velocidad del ventilador y capacidad de refrigeración.
La capacidad de refrigeración indicada en las
especificaciones es el valor que se obtiene con la
velocidad rápida del ventilador. La capacidad disminuye
si el ventilador funciona a velocidad lenta o media.
La velocidad rápida del ventilador está recomendada
para cuando quiera refrigerar la habitación en poco
tiempo.

Cuidados y mantenimiento
Manual de Usurio 23
ESPAÑOL
Filtros de aire
Salida de aire
Unidad interior
ATENCIÓN: antes de efectuar cualquier operación de mantenimiento, apague el interruptor
principal del sistema.
Rejilla, tapa y mando a distancia
❏ Apague el sistema antes de limpiarlo. Para
limpiarlo utilice un paño seco y suave. No utilice
lejía ni abrasivos.
La toma de energía debe estar desconectada antes
de limpiar la unidad interior.
NOTA
❏ Nunca utilice lo siguiente:
• Agua a una temperatura superior a los 40°C
Podría provocar deformaciones y/o pérdida de
color.
• Sustancias volátiles.
Podrían dañar las superficie del aire
acondicionado.
1. Limpie el filtro con un aspirador o con agua
templada con un poco de jabón.
• Si estuviera muy sucio, lávelo con una solución de
detergente en agua tibia.
• Si se utiliza agua caliente (a 50°C o más), el filtro
puede deformarse.
2. Después de lavar con agua, déjelo secar a la
sombra.
3. Vuelva a colocar el filtro de aire.
Filtros de Aire
Los filtros de aire situados en la parte trasera de la
unidad interior (el lado de succión) deben
examinarse y limpiarse quincenalmente o más a
menudo si es necesario.
B
e
n
z
e
n
e
S
C
O
U
R
I
N
G
C
L
B
A
R
G
E
R
S
I
N
N
E
R
Cuidados y mantenimiento

Cuidados y mantenimiento
24 Aire acondicionado de canalización de techo
Cuando el acondicionador de aire no vaya a ser utilizado durante un largo período.
Consejos para la utilización
Cuando acondicionador de aire no vaya a ser utilizado durante
un largo período.
1. Haga funcionar el aparato en modo ventilación durante 2 o 3 horas.
• Esto secará los componentes interiores del aparato.
2. Turn off the circuit breaker.
PRECAUCIÓN Turn off the circuit breaker when the air conditioner is not going to be
used for a long time. Dirt may collect and may cause a fire.
Cuando vaya a utilizar el acondicionador de aire de nuevo.
• Compruebe que la entrada de aire y la salida de las unidades interiores y exteriores no están obstruidas.
No refrigere exageradamente
la habitación.
No es bueno para su salud y
malgasta electricidad.
Mantenga corridas cortinas
o persianas.
No permita que el sol directo entre
en la habitación cuando el
acondicionador de aire esté en
funcionamiento.
Asegúrese de que la puerta
y las ventanas están
completamente cerradas.
Evite al máximo abrir puertas y
ventanas para que el aire frío no
salga de la habitación.
Limpie el filtro de aire con
regularidad.
Las obstrucciones en el filtro de
aire reducen el flujo de aire y
disminuye el poder de refrigeración
y deshumidificación. Limpielos
quincenalmente o más a menudo.
Ventile la habitación de vez
en cuando.
Ya que las ventanas permanecen
cerradas, es una buena idea
abrirlas y ventilar la habitación de
vez en cuando.

Antes de llamar al servicio técnico...
Manual de Usurio 25
ESPAÑOL
Compruebo los siguientes puntos antes de solicitar una reparación o servicio técnico... Si los problemas
persisten, póngase en contacto con su distribuidor o servicio técnico.
Resolución de Problemas! ¡Ahorre tiempo y dinero!
No funciona.
Se percibe un olor particular en
la habitación.
Parece que se escapa
condensación del aire
acondicionado.
El aire acondicionado no
funciona durante unos tres
minutos al activarlo.
No refrigera o calienta
eficazmente.
El equipo de aire acondicionado
parece ser ruidoso.
La pantalla del control remoto
está poco iluminada. O está
complrtamente apagada.
Se oye un crujido.
• ¿Ha cometido un error en las funciones de
programación?
• Cuando se enciende por primera vez, la unidad
interna funciona a los quince segundos.
• ¿Se ha fundido el fusible o ha saltado el
automático?
• Compruebe que no sea olor a humedad que
provenga de las paredes, la moqueta, los muebles
o los tejidos que pueda haber en la habitación.
• La condensación tiene lugar cuando el flujo de
aire del acondicionador de aire enfría el aire
caliente de la habitación.
• Es una función de seguridad del acondicionador
de aire.
• Espere tres minutos y empezará a funcionar.
• ¿Está sucio el filtro de aire? Consulte las
instrucciones para limpieza del filtro de aire.
• La habitación estaba muy caliente cuando el aire
acondicionado se puso en marcha. Dele tiempo a
refrigerarla.
• ¿Ha fijado una temperatura incorrecta?
• ¿Están obstruidas las entradas o salidas de aire
de la unidad interior?
• Si es un ruido que se parece al fluir del agua.
- Es el sonido del freón que circula por el interior
de la unidad de aire acondicionado.
• Si es un ruido que se parece al de la liberación de
aire comprimido en la atmósfera.
- Es el sonido del agua de deshumidificación al
ser procesada dentro de la unidad de aire
acondicionado.
• ¿Ha saltado el automático?
• Este sonido se produce por la
expansión/contracción de la rejilla de entrada de
aire, etc. debido a los cambios de temperatura.
12
-
-
-
-
23
14, 17
-
-
-
Caja Explicación Ver página
Antes de llamar al servicio técnico...

Fuente de corriente
Instalación (para 60 Hz)
Fabricante
(Oficina) LG Electronics Inc., LG Twin Towers, 20, Yoido-dong, Youngdungpo-gu,
Seúl 150-606, Corea Tel: 82-2-3777-7974
(Fábrica) LG Changwon 2nd fábrica, 76, Seong San Dong, Changwoncity,
Gyeong Nam, 641-713, Corea Tel: 82-55-269-3480
Importador
LG Electronics México S.A de C.V. Av. Sor Juana Ines de la Cruz No 555. Col. San Lorenzo,
Tlalnepantla, Edo de Mex. Tel: 5321 1900
Esta unidad requiere una alimentación eléctrica monofásica, con terminal a tierra con un voltaje
de 220V, 60Hz de corriente alterna.
• Requisitos de la instalación Eléctrica
Para Seguridad personal:
• Este aparato deberá conectarse debidamente a tierra.
• No corte ni elimine en ninguna circunstancia la terecera espiga del cordón eléctrico.
• Recomendamos que no utilice cordón de extensión o adaptador con este aparato.
• Siga los códigos eléctricos nacionales o los códigos y ordenanzas locales.
• Si el suministro de corriente eléctrica no cumple las especificaciones antes mencionadas
llame a un electricista autoriazdo.
• El cableado de aluminio de las casas puede plantear problemas especiales, consulte con
electricista autorizado.
• Esta unidad requiere de un circuito separado, que sirva sólo para esta aplicación.
26 Aire acondicionado de canalización de techo

ESPAÑOL
POLIZA DE GARANTIA
CONDICIONES
LG Electronics México, S.A. de C.V. GARANTIZA LOS AIRES ACONDICIONADOS LG
POR EL TERMINO DE DOS AÑOS EN TODAS SUS PARTES Y CINCO AÑOS EN
COMPRESOR, CONTRA CUALQUIER DEFECTO DE FABRICACION A PARTIR DE LA
FECHA DE ENTREGA DEL PRODUCTO BAJO LAS SIGUIENTES
1. PARA HACER EFECTIVA ESTA GARANTIA ES NECESARIO PRESENTAR ESTA POLIZA
DEBIDAMENTE SELLADA POR LA CASA VENDEDORA O FACTURA DE COMPRA EN
CUALQUIERA DE LOS CENTROS DE SERVICIO QUE SE INDICAN EN EL ANEXO.
2. LA EMPRESA SE COMPROMETE A REPARAR O CAMBIAR, EL PRODUCTO DEFECTUOSO
SIN NINGUN CARGO PARA EL CLIENTE Y CUBRIR LOS GASTOS QUE SE DERIVEN DE LA
PRESENTE GARANTIA.
3. EL TIEMPO DE REPARACION EN NINGUN CASO SERA MAYOR DE 30 DIAS CONTADOS A
PARTIR DE LA FECHA DE RECEPCION DEL PRODUCTO EN CUALQUIERA DE LOS SITIOS
DONDE PUEDE HACERSE EFECTIVA ESTA GARANTIA.
4. LAS REFACCIONES Y PARTES PARA LA REPARACION DEL APARATO QUE AMPARA ESTA
POLIZA PODRAN SER ADQUIRIDAS EN LOS CENTROS DE SERVICIO AUTORIZADOS.
ESTA GARANTIA NO ES VALIDA EN LOS SIGUIENTES CASOS
A) SI EL PRODUCTO NO HA SIDO OPERADO CONFORME AL INSTRUCTIVO ANEXO.
B) SI NO SE HAN OBSERVADO LAS ADVERTENCIAS SEÑALADAS.
C) DAÑOS OCASIONADOS POR FENOMENOS NATURALES COMO INCENDIO, INUNDACION,
TEMBLORES, RAYOS, DESCARGAS ELECTRICAS.
D) DAÑOS POR GOLPES, RASPADURAS, ROTURAS EN EL PRODUCTO Y EN SUS ACCESORIOS.
E) SI EL PRODUCTO HA TRATADO DE SER REPARADO O INSTALADO POR NO AUTORIZADAS POR:
LG Electronics México, S.A. de C.V.
CENTRO DE SOLUCION AL CLIENTE
Teléfono Lada sin costo 01 (800) 347 1919 y en el México 5321 1900
Fax Lada sin costo 01 (800) 507 3300 y en el México 5321 2929
NOTA: EN CASO DE EXTRAVIO DE LA PRESENTE GARANTIA EL CONSUMIDOR PUEDE SOLICITAR UNA REPOSICION, PREVIA PRESENTACION
CON FACTRUA DE COMPRA CON EL PROVEEDOR O DIRECTAMENTE A LG ELECTRONICS MEXICO.
México S.A de C.V.
Av Sor Juana Inés de la Cruz No 555. Col. San Lorenzo, Tlalnepantla, Edo de Mex. Tel. 5321 1900
SELLO Y FIRMA
PRODUCTO:
MODELO:
SERIE:
DISTRIBUIDOR:
DIRECCION: COLONIA
FECHA DE ENTREGA
CIUDAD EDO.
LMNC092BTG0, LMNC122BTG0, LMNC182BTG0, LMNC242BYG0,
LMNH092BTG0, MNH122BTG0, LMNH182BTG0, LMNH242BYG0
CENTRO DE SERVICIO DIRECTO.
México
55 5321 1900
Av. Sor Juana Ines de la Cruz No.555, Col. San Lorenzo Tlalnepantla , Edo. Mex., C.P. 54033
Guadalajara 33 3647 4986
Bermudas No. 146, Col. Vista Hermosa, Monterrey ,Nuevo Leon, C.P. 64000
Monterrey 81 8347 7120
Av.Arcos No. 687, Col. Jardines del Bosque ,Guadalajara ;Jalisco
Mérida 999 926 7900
Prol. Montejo calle 56-B no. 479 -B, Col. Prol. Paseo de Montejo , Merida , Yucatan, C.P. 97127

-
 1
1
-
 2
2
-
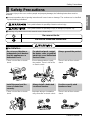 3
3
-
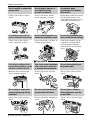 4
4
-
 5
5
-
 6
6
-
 7
7
-
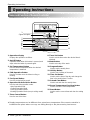 8
8
-
 9
9
-
 10
10
-
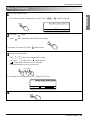 11
11
-
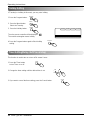 12
12
-
 13
13
-
 14
14
-
 15
15
-
 16
16
-
 17
17
-
 18
18
-
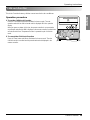 19
19
-
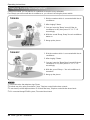 20
20
-
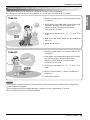 21
21
-
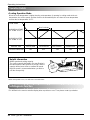 22
22
-
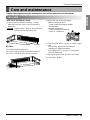 23
23
-
 24
24
-
 25
25
-
 26
26
-
 27
27
-
 28
28
-
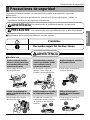 29
29
-
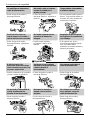 30
30
-
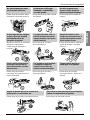 31
31
-
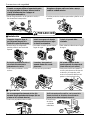 32
32
-
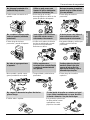 33
33
-
 34
34
-
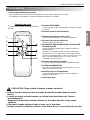 35
35
-
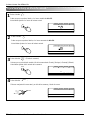 36
36
-
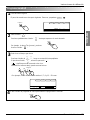 37
37
-
 38
38
-
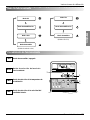 39
39
-
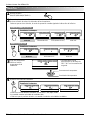 40
40
-
 41
41
-
 42
42
-
 43
43
-
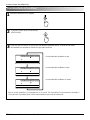 44
44
-
 45
45
-
 46
46
-
 47
47
-
 48
48
-
 49
49
-
 50
50
-
 51
51
-
 52
52
-
 53
53
-
 54
54


LG TMNH122BTG0 El manual del propietario
- Tipo
- El manual del propietario
- Este manual también es adecuado para
en otros idiomas
- English: LG TMNH122BTG0 Owner's manual
Artículos relacionados
-
LG TMNC182T5AA.AMBALAT El manual del propietario
-
LG TBNC182TSA0 El manual del propietario
-
LG MB09AHL Manual de usuario
-
-
-
-
LG ABNH306GLAC.ANWALAR Manual de usuario
-
LG MB18AHL.N21 Manual de usuario
-
LG AMNH126BTG0 Manual de usuario
-