La página se está cargando...

ASSEMBLY INSTRUCTIONS
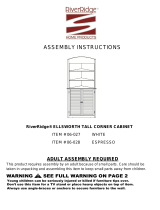
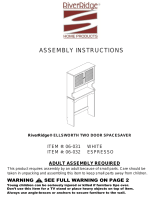
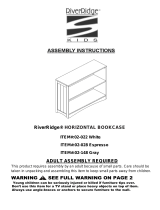
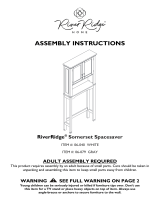
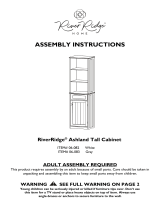
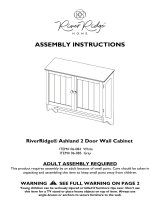
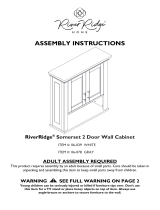
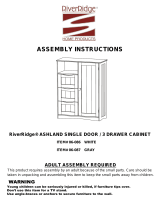
RiverRidge® ELLSWORTH TWO DOOR WALL CABINET
ITEM# 06-023 WHITE
ITEM# 06-024 ESPRESSO
ADULT ASSEMBLY REQUIRED
This product requires assembly by an adult because of small parts. Care should be
taken in unpacking and assembling this item to keep small parts away from children.
WARNING SEE FULL WARNING ON PAGE 2
Young children can be seriously injured or killed if furniture tips over.
Don’t use this item for a TV stand or place heavy objects on top of item.
Always use angle-braces or anchors to secure furniture to the wall.

Send requests for missing or damaged parts replacements by email to:
customer.serv[email protected] or call toll free 1-(844)-223-5201 or order parts on line at
www.riverridgehome.com
THIS SHELF UNIT WILL HOLD UP TO 25 POUNDS PER SHELF OR A TOTAL OF 50 POUNDS. DO
NOT LOAD EACH SHELF WITH MORE THAN 25 POUNDS OR 50 POUNDS TOTAL WEIGHT.
OVERLOADING WITH MORE THAN 25 POUNDS PER SHELF OR 50 POUNDS TOTAL WEIGHT MAY
CAUSE THE SHELF TO FALL FROM THE WALL AND CAUSE SERIOUS INJURY OR DEATH.

PARTS LIST
NO
PARTS
QTY
DESCRIPTION
1
1PC
TOP BOARD
2
1PC
LEFT SIDE PANEL
3
1PC
RIGHT SIDE PANEL
4
1PC
RIGHT DOOR
5
1PC
LEFT DOOR
6
1PC
REAR TOP BAR
7
1PC
CROSS BAR
8
1PC
SHELF
9
1PC
BOTTOM BOARD

NO
PARTS
QTY
DESCRIPTION
10
1PC
LOWER BACK BOARD
11
1PC
TOP BACK BOARD
12
1PC
MIDDLE BACK BOARD
A
10PC
CAM BOLT
B
10PC
CAM LOCK
C
18PC
WOOD DOWEL
D
4PC
METAL HINGE
E
1PC
MAGNET
F
2PC
MAGNET PLATE

NO
PARTS
QTY
DESCRIPTION
G
2PC
KNOB
H
2PC
MACHINE SCREW
4x20mm
J
22PC
WOOD SCREW 3x10mm
K
2PC
SCREW 3x14mm
M
24PC
BACK BOARD SCREW
2.5x12mm
N
2PC
LONG SCREW 4x40mm
O
2PC
PLASTIC ANCHOR
TOOLS NEEDED FOR ASSEMBLY: FLAT & PHILLIPS SCREWDRIVER (NOT INCLUDED)
THE USE OF POWER SCREWDRIVER IS NOT RECOMMENDED

STEP 1
STEP 1
1. Screw 4 cam bolts (A) into pre-threaded holes on top board (1).
2. Insert 2 wood dowels (C) into dowel holes on top board (1).
3. Attach magnet (E) to top board by inserting 2 screws (K) through holes on magnet (E) and tighten to top
board (1).
STEP 2
STEP 2
1. Screw 3 cam bolts (A) into pre-threaded holes on left side panel (2).
2. Insert 7 wood dowels (C) into dowel holes on left side panel (2).
3. Attach 2 metal hinges (D) to left side panel (2) by inserting 6 wood screws (J) through holes on metal hinges
(D) and tighten to left side panel (2).

STEP 3
STEP 3
1. Screw 3 cam bolts (A) into pre-threaded holes on right side panel (3).
2. Insert 7 wood dowels (C) into dowel holes on right side panel (3).
3. Attach 2 metal hinges (D) to right side panel (3) by inserting 6 wood screws (J) through holes on metal hinges
(D) and tighten to right side panel (3).
STEP 4
STEP 4
1. Insert one screw (J) through hole on magnet plate (F) and tighten to right door (4).
2. Attach knob (G) to right door (4) by inserting one screw (H) through hole on right door (4) and tighten to knob
(G).
3. Repeat above steps to assemble left door (5).

STEP 5
STEP 5
1. Insert 2 wood dowels (C) into dowel holes on lower back board (10).
STEP 6
STEP 6
1. Attach lower back board (10) to bottom board (9) by inserting wood dowels (C) to holes on bottom board (9).

STEP 7
STEP 7
1. Attach rear top bar (6), shelf (8), bottom board (9) and lower back board (10) to left side panel (2) by inserting
cam bolts (A) into cam lock holes and inserting wood dowels (C) into dowel holes on rear top bar (6), shelf
(8), bottom board (9) and lower back board (10).
2. Insert 3 cam locks (B) into cam lock holes on lower back board (10) and bottom board (9) and rotate cam
locks (B) clockwise to secure cam bolts (A).
STEP 8
STEP 8
1. Insert cross bar (7) into hole on left side panel (2).
2. Attach right side panel (3) to assembled unit by inserting wood dowels (C) into dowel holes and inserting
cam bolts (A) into cam lock holes on rear top bar (6), shelf (8), bottom board (9) and lower back board (10)
and inserting cross bar (7) into hole on right side panel (3).
3. Insert 3 cam locks (B) into cam lock holes on lower back board (10) and bottom board (9) and rotate cam
locks (B) clockwise to secure cam bolts (A).

STEP 9
STEP 9
1. Attach top board (1) to assembled unit by inserting wood dowels (C) into dowel holes and inserting cam
bolts (A) into cam lock holes on left and right side panel (2) and (3).
2. Insert 4 cam locks (B) into cam lock holes on left and right side panel (2) and (3) and rotate cam locks (B)
clockwise to secure cam bolts (A).
STEP 10
STEP 10
1. Attach top back board (11) and middle back board (12) to assembled cabinet by inserting 24 screws (M)
through holes on upper back board (11) and middle back board (12) and tighten to back of cabinet.

STEP 11
STEP 11
1. Attach left door (5) to left side panel (2) by inserting 4 screws (J) through holes on hinge (D) and tighten to
left door (5).
2. Repeat above step to assemble right door (4).
STEP 12
STEP 12
1. Place drawing with hole positions on wall in desired position and drill 2 holes.
2. Insert 2 plastic anchors (O) into holes and attach cabinet in place by inserting 2 screws (N) through holes on
back of cabinet and tighten cabinet to wall.

ENJOY YOUR NEW RiverRidge® CABINET NOW!
Attention Adults: Cabinet should be checked periodically for damage or loose screws/parts. Take
appropriate action necessary to correct hazards such as tightening of screws and taking any
damaged parts away from children.
Warning Please make sure your item is secured to the wall, per
assembly instructions.
Thank you for purchasing this RiverRidge® Home Products item. We hope you enjoy it and
consider purchasing other RiverRidge® items.
Send requests for missing or damaged parts replacements by email to:
customer.serv[email protected] or call toll free 1-(844)-223-5201 or order parts on line at
www.riverridgehome.com
RiverRidge® is a registered trademark of Sourcing Solutions, Inc., Hudson, WI 54016.

INSTRUCCIONES DE ENSAMBLAJE
GABINETE DE PARED DE DOS PUERTAS ELLSWORTH RiverRidge®
ARTÍCULO N.° 06-023 BLANCO
ARTÍCULO N.° 06-024 CAFÉ ESPRESSO
REQUIERE QUE UN ADULTO REALICE EL ENSAMBLAJE
Este producto requiere que un adulto lleve a cabo el ensamblaje debido a las piezas pequeñas.
Debe tener cuidado al desempacar y ensamblar este artículo para mantener las piezas
pequeñas alejadas de los niños.
ADVERTENCIA VEA LA ADVERTENCIA COMPLETA
EN LA PÁGINA 2
Los niños pequeños pueden resultar gravemente heridos o muertos si el
mueble vuelca. No utilice este artículo como soporte para el televisor ni
coloque objetos pesado sobre él. Siempre utilice abrazaderas de ángulo
o anclajes para fijar el mueble a la pared.

Envíe las solicitudes de reemplazos de piezas faltantes o dañadas por correo electrónico a:
customer.service@ssi-rr.com o llame sin costo al 1-(844)-223-5201, o bien pida las piezas
en línea en www.riverridgehome.com
ESTA UNIDAD DE REPISAS PUEDE GUARDAR HASTA 25 LIBRAS POR REPISA O UN TOTAL DE
50 LIBRAS. NO CARGUE CADA REPISA CON MÁS DE 25 LIBRAS O 50 LIBRAS DE PESO TOTAL.
LA SOBRECARGA CON MÁS DE 25 LIBRAS POR REPISA O 50 LIBRAS DE PESO TOTAL PUEDE
OCASIONAR QUE LA REPISA SE CAIGA DE LA PARED Y OCASIONE LESIONES GRAVES O
INCLUSO LA MUERTE.

LISTA DE PIEZAS
N.°
PIEZAS
CANT.
DESCRIPCIÓN
1
1 PIEZA
TABLERO SUPERIOR
2
1 PIEZA
PANEL IZQUIERDO
3
1 PIEZA
PANEL DERECHO
4
1 PIEZA
PUERTA DERECHA
5
1 PIEZA
PUERTA IZQUIERDA
6
1 PIEZA
BARRA SUPERIOR
TRASERA
7
1 PIEZA
BARRA TRANSVERSAL
8
1 PIEZA
REPISA
9
1 PIEZA
TABLERO INFERIOR

N.°
PIEZAS
CANT.
DESCRIPCIÓN
10
1 PIEZA
TABLERO TRASERO
INFERIOR
11
1 PIEZA
TABLERO TRASERO
SUPERIOR
12
1 PIEZA
TABLERO TRASERO
MEDIANO
A
10 PIEZAS
PERNO DE ANCLAJE
B
10 PIEZAS
PESTILLO DE LEVA
C
18 PIEZAS
PASADOR DE MADERA
D
4 PIEZAS
BISAGRA DE METAL
E
1 PIEZA
IMÁN
F
2 PIEZAS
PLACA DE IMÁN

N.°
PIEZAS
CANT.
DESCRIPCIÓN
G
2 PIEZAS
PERILLA
H
2 PIEZAS
TORNILLO PARA
METALES
4x20mm
J
22 PIEZAS
TORNILLO PARA
MADERA
3x10mm
K
2 PIEZAS
TORNILLO
3x14mm
M
24 PIEZAS
TORNILLO DEL TABLERO
POSTERIOR
2.5x12mm
N
2 PIEZAS
TORNILLO LARGO
4x40mm
O
2 PIEZAS
ANCLAJE PLÁSTICO
HERRAMIENTAS NECESARIAS PARA EL ENSAMBLAJE: DESTORNILLADORES PLANO
Y PHILLIPS (NO INCLUIDOS) NO SE RECOMIENDA EL USO DE UN DESTORNILLADOR
ELÉCTRICO

PASO 1
PASO 1
1. Atornille los 4 pernos de anclaje (A) en los agujeros previamente roscados del tablero superior (1).
2. Inserte los 2 pasadores de madera (C) en los agujeros para los pasadores del tablero superior (1).
3. Fije el imán (E) al tablero superior (1) al insertar 2 tornillos (K) a través de los agujeros en el imán (E) y apriete
al tablero superior (1).
PASO 2
PASO 2
1. Atornille los 3 pernos de anclaje (A) en los agujeros previamente roscados del panel izquierdo (2).
2. Inserte 7 pasadores de madera (C) dentro de los agujeros de los pasadores del panel izquierdo (2).
3. Fije las 2 bisagras de metal (D) al panel izquierdo (2) al insertar los 6 tornillos de madera (J) a través de los
agujeros en las bisagras de metal (D) y apriete el panel izquierdo (2).

PASO 3
PASO 3
1. Atornille los 3 pernos de anclaje (A) en los agujeros previamente roscados en el panel derecho (3).
2. Inserte 7 pasadores de madera (C) dentro de los agujeros de los pasadores en el panel derecho (3).
3. Fije las 2 bisagras de metal (D) al panel derecho (3) al insertar los 6 tornillos de madera (J) a través de los
agujeros en las bisagras de metal (D) y apriete el panel derecho (3).
PASO 4
PASO 4
1. Inserte un tornillo (J) a través del agujero en la placa de imán (F) y apriete la puerta derecha (4).
2. Fije la perilla (G) a la puerta derecha (4) al insertar un tornillo (H) a través del agujero en la puerta derecha (4)
y apriete la perilla (G).
3. Repita los pasos anteriores para ensamblar la puerta izquierda (5).

PASO 5
PASO 5
1. Inserte los 2 pasadores de madera (C) en los agujeros para los pasadores del tablero trasero inferior (10).
PASO 6
PASO 6
1. Fije el tablero trasero inferior (10) al tablero inferior (9) insertando los pasadores de madera (C) en los
agujeros del tablero inferior (9).

PASO 7
PASO 7
1. Fije la barra superior trasera (6), repisa (8), tablero inferior (9) y tablero trasero inferior (10) al panel del lado
izquierdo (2) al insertar los pernos de anclaje (A) en los agujeros de bloqueo de anclaje e insertar los
pasadores de madera (C) en los agujeros de pasadores en la barra superior trasera (6), repisa (8), tablero
inferior (9) y tablero trasero inferior (10).
2. Inserte 3 pestillos de leva (B) en los agujeros de pestillo de leva en el tablero trasero inferior (10) y el tablero
inferior (9) y gire los pestillos de anclaje (B) hacia la derecha para asegurar los pernos de anclaje (A).
PASO 8
PASO 8
1. Inserte la barra transversal (7) en el panel izquierdo (2).
2. Fije el panel derecho (3) a la unidad ensamblada al insertar los pasadores de madera (C) en los agujeros de
madera e insertar los pernos de anclaje (A) en los agujeros de perno de anclaje en la barra superior trasera
(6), repisa (8), tablero inferior (9) y el tablero trasero inferior (10) e inserte la barra transversal (7) en el
agujero en el panel lateral derecho (3).
3. Inserte 3 pestillos de leva (B) en los agujeros de pestillo de leva en el tablero trasero inferior (10) y el tablero
inferior (9) y gire los pestillos de anclaje (B) hacia la derecha para asegurar los pernos de anclaje (A).

PASO 9
PASO 9
1. Fije el tablero superior (1) en la unidad ensamblada al insertar los pasadores de madera (C) en los agujeros
de pasador e inserte los pernos de anclaje (A) en los agujeros de pestillo de leva en el panel lateral izquierdo
y derecho (2) y (3).
2. Inserte 4 pestillos de leva (B) en los agujeros de pestillo de leva en el panel lateral derecho y izquierdo (2) y (3)
y gire los pestillos de leva (B) hacia la derecha para asegurar los pernos de anclaje (A).
PASO 10
PASO 10
1. Fije el tablero trasero superior (11) y el tablero trasero medio (12) en el gabinete ensamblado al insertar
24 tornillos (M) a través de los agujeros en el tablero trasero superior (11) y el tablero trasero medio (12) y
apriete a la parte trasera del gabinete.

PASO 11
PASO 11
1. Fije la puerta izquierda (5) al panel lateral izquierdo (2) al insertar los 4 tornillos (J) a través de los agujeros
en la bisagra (D) y apriete a la puerta izquierda (5).
2. Repita los pasos anteriores para ensamblar la puerta derecha (4).
PASO 12
PASO 12
1. Coloque el dibujo con las posiciones de los agujeros sobre la pared en la posición deseada y perfore
2 agujeros.
2. Inserte 2 anclajes plásticos (O) en los agujeros y fije el gabinete en su lugar al insertar 2 tornillos (N) a través
de los agujeros en la parte posterior del gabinete y apriete este a la pared.
Pared

¡DISFRUTE DE SU NUEVO GABINETE RiverRidge® AHORA!
Atención adultos: Deben revisar el gabinete periódicamente para ver si hay tornillos/piezas
dañadas o sueltas. Tomen una acción adecuada y necesaria para corregir los peligros, tal como
apretar los tornillos y alejar cualquier pieza dañada de los niños.
Advertencia Asegúrese de que su artículo esté fijo a la pared, según
las instrucciones de ensamblaje.
Gracias por comprar este artículo de los Productos para el hogar de RiverRidge®. Esperamos que
lo disfrute y que considere comprar otros artículos de RiverRidge®.
Envíe las solicitudes de reemplazos de piezas faltantes o dañadas por correo electrónico a:
customer.service@ssi-rr.com o llame sin costo al 1-(844)-223-5201, o bien pida las piezas
en línea en www.riverridgehome.com
RiverRidge® es una marca comercial registrada de Sourcing Solutions, Inc., Hudson, WI 54016.
/