
렌즈후드 사용설명서
Kr
鏡頭罩
Ch
Ck
Paraluce Manuale di Istruzioni
It
Zonnekap Gebruikshandleiding
Nl
Objektivhuv Bruksanvisning
Se
Parasol de objetivo Manual de Instrucciones
Es
Parasoleil d’objectif Manuel d’instructions
Fr
Gegenlichtblende Bedienungsanleitung
De
Lens Hood Instruction Manual
En
Jp
Printed in Japan
SB4G00200101 (B1)
6MAW23B1--
English
HN-CP12
1
2
3
4
5
1
2
c
d
7/Figure 7/Abbildung 7/Figure 7/Figura 7/Bild 7
a e
b f
c
d
1/Figure 1/Abbildung 1/
Figure 1/Figura 1/Bild 1
2/Figure 2/Abbildung 2/
Figure 2/Figura 2/Bild 2
a
b
f
5/Figure 5/Abbildung 5/
Figure 5/Figura 5/Bild 5
6/Figure 6/Abbildung 6/
Figure 6/Figura 6/Bild 6
4/Figure 4/Abbildung 4/Figure 4/Figura 4/Bild 4
3/Figure 3/Abbildung 3/Figure 3/Figura 3/Bild 3
A
B
Deutsch Français Español Svenska
Thank you for your purchase of an HN-CP12 lens hood for
Nikon COOLPIX 8400 digital cameras. The HN-CP12 pro-
tects the lens and blocks unwanted light, reducing ghost-
ing and enhancing contrast. Be sure to read this manual
thoroughly before use.
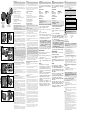
Parts of the HN-CP12
Lens hood
a Hood mounting guide
b Hood positioning guide
c Filter adjustment window
cover
d Circular polarizing fi lter
adjustment window
Hood adapter ring
e Adapter mounting guide
f Positioning ring
Before attaching the HN-CP12:
• Turn the camera off and wait for the lens to retract
• Remove the camera lens cap
1. If you will be using a fi lter (available separately), attach it
to the camera lens as described in the fi lter manual.
2. Remove the hood adapter ring from the lens hood (Fig-
ure 1).
3. Remove the lens ring from the camera (Figure 2) and
store it in a safe place.
4. Attach the hood adapter ring as shown in Figure 3A.
5. Align the adapter mounting guide (
) with the mount-
ing guide on the lens hood (
) and turn the hood in
the direction shown until it clicks into place (Figure 3B).
Confi rm that the hood positioning guide (
) is aligned
with the adapter mounting guide.
Attaching the HN-CP12
/Lens hood/
Gegenlichtblende/
Parasoleil d’objectif/
Parasol del objetivo/objektivhuv
e
1
2
3
/
Hood adapter ring/
Gegenlichtblendenadapter
/
Bague adaptatrice du
parasoleil/
Anillo adaptador del
parasol/
Huvadapterring
Using the FF-CP10 CPL Circular Polarizing Filter
If you are using an optional FF-CP10 CPL circular po-
larizing fi lter, open the fi lter adjustment window cover
and position the fi lter adjustment ring (Figure 5). Af-
ter adjusting the fi lter, close the fi lter adjustment win-
dow. For more information, see the documentation
provided with the fi lter.
6. Rotate the positioning ring in the direction shown in
Figure 4, stopping when the adapter mounting guide
(
쐏
) is aligned with the mark on the bottom of the
camera (
쐄
).
Reversing the Lens Hood for Transport
The lens hood can be reversed to reduce the amount of
space it occupies during transport.
1. Turn the camera off and wait for the lens to retract.
2. Turn the lens hood counterclockwise until it clicks and
then remove it as shown (Figure 6).
3. Reverse the lens hood and press it lightly while turning it
in the direction shown, stopping when it clicks into place
(Figure 7).
Cautions
• Be careful not to scratch the lens while attaching or
removing the hood.
• The lens will retract when the camera is turned off. Be
careful that your fi ngers are not pinched between the
lens and camera body as the lens retracts.
• Light from the built-in Speedlight and optional fl ash
units may be eclipsed by the lens hood. Remove the
lens hood and hood adapter ring when using a fl ash.
• “Ghosting” and fl are may appear in photographs if the
circular polarizing fi lter adjustment window is left open
during shooting. Close the window before shooting.
• Do not hold the camera by the lens hood or fi lter adjust-
ment window cover alone. The camera could become
detached and fall, damaging the equipment.
• Reverse the lens hood or remove the lens hood and
hood adapter ring when transporting the camera.
• Do not take pictures while the lens hood is reversed. The
hood will obstruct the infrared receiver, interfering with
remote control photography, and prevent the Speedlight
from popping up, causing an error to be displayed in the
shooting display.
• Before attaching the lens cap with the lens hood re-
versed or in place, remove the cord and store it in a safe
place.
Gracias por adquirir el parasol de objetivo HN-CP12 para
cámaras digitales COOLPIX 8400 de Nikon. El HN-CP12
protege el objetivo y evita fuentes de luz no deseadas, por
lo que se reduce la aparición de espectros en la fotografía
y mejora el contraste de la imagen. Le rogamos lea atenta-
mente este manual antes de utilizar el parasol.
Componentes del HN-CP12
Parasol del objetivo
a Indicación de montaje del parasol
b Indicación de posicionamiento del parasol
c Tapa de la ventana de ajuste del fi ltro
d Ventana de ajuste del fi ltro polarizador circular
Anillo adaptador del parasol
e Indicación de montaje del adaptador
f
Anillo de posicionamiento
Antes de acoplar el HN-CP12:
• Apague la cámara y espere a que se repliegue el ob-
jetivo.
• Quite la tapa del objetivo de la cámara.
1. Si va a utilizar un fi ltro (a la venta por separado), acó-
plelo al objetivo de la cámara tal como se indique en el
manual del fi ltro.
2.
Quite el anillo adaptador del parasol del objetivo (fi gura 1).
3. Quite el anillo del objetivo de la cámara (fi gura 2) y
guárdelo en un lugar seguro.
4. Acople el anillo adaptador del parasol tal como muestra
la fi gura 3A.
5. Alinee la indicación de montaje del adaptador (
) con
la indicación de montaje situada en el parasol del obje-
tivo (
) y gire el parasol en la dirección indicada hasta
que encaje en su lugar (fi gura 3B). Asegúrese de que
la indicación de posicionamiento del parasol (
) esté
alineada con la indicación de montaje del adaptador.
Acoplar el parasol HN-CP12
Utilización de un fi ltro polarizador circular FF-CP10
CPL
Si utiliza un fi ltro polarizador circular FF-CP10 CPL,
abra la tapa de la ventana de ajuste del fi ltro y colo-
que el anillo de ajuste del fi ltro (fi gura 5) y, después
de ajustar el fi ltro, cierre la ventana. Para obtener
más información, consulte la documentación que se
adjunta con el fi ltro.
6. Gire el anillo de posicionamiento en la dirección indica-
da en la fi gura 4 hasta que la indicación de montaje del
adaptador (
쐏
) esté alineada con la marca situada en la
parte inferior de la cámara (
쐄
).
Invertir la posición del parasol del objetivo
para su transporte
Al transportarlo, es posible invertir la posición del parasol
del objetivo para reducir así el espacio que ocupa.
1. Apague la cámara y espere a que el objetivo se replie-
gue.
2. Gire el parasol del objetivo en sentido contrario a las
agujas del reloj hasta que oiga un clic, y entonces retí-
relo tal como se indica en la fi gura 6.
3. Invierta la posición del parasol y ejerza una suave pre-
sión mientras lo gira en la dirección indicada hasta que
encaje en su posición correcta (fi gura 7).
Precauciones
• Tenga cuidado de no rayar el objetivo al acoplar o retirar
el parasol.
• El objetivo se repliega al apagar la cámara. Tenga cuida-
do de no pillarse los dedos entre el objetivo y el cuerpo
de la cámara cuando el objetivo se repliegue.
• Es posible que la luz del fl ash incorporado o de otras uni-
dades de fl ash opcionales se vea eclipsada por el parasol
del objetivo. Cuando utilice un fl ash, quite el parasol del
objetivo y el adaptador del parasol.
• Es posible que aparezcan “espectros” y destellos en las
fotografías si al disparar se deja abierta la ventana de
ajuste del fi ltro polarizador circular. Antes de hacer una
fotografía, cierre la ventana.
• No sostenga la cámara únicamente por el parasol del
objetivo o por la tapa de la ventana del ajuste del fi ltro,
ya que la cámara podría desprenderse y caer al suelo y,
como consecuencia, podría dañarse.
• Invierta la posición del parasol del objetivo o retire el
parasol y el anillo adaptador del parasol cuando vaya a
transportar la cámara.
• No haga fotografías cuando el parasol del objetivo se
encuentre en posición invertida, ya que el parasol podría
obstruir el receptor de infrarrojos, con lo que se difi culta
la realización de fotografías por control remoto y se im-
pide el levantamiento del fl ash, lo que provoca la apari-
ción de un mensaje de error en el indicador de disparo.
• Antes de colocar la tapa del objetivo cuando el parasol
del objetivo está montado en la cámara o se encuentra
en posición invertida, quite el cable y guárdelo en un
lugar seguro.
Vielen Dank für Ihr Vertrauen in Nikon-Produkte. Die
Gegenlichtblende HN-CP12 ist ausschließlich für die
Verwendung mit der Nikon-Digitalkamera COOLPIX 8400
vorgesehen. Sie verhindert unerwünschten Lichteinfall ins
Kameraobjektiv von Lichtquellen außerhalb des Bildfelds
und reduziert so Streulicht und Geisterbilder und erhöht
den Kontrast der Aufnahmen. Bitte lesen Sie diese Bedie-
nungsanleitung aufmerksam durch, bevor Sie die Gegen-
lichtblende verwenden.
Komponenten der Gegenlichtblende HN-CP12
Gegenlichtblende
a Montagemarkierung
b Arretierungsmarkierung
c Abdeckung des
Filtereinstellfensters
d Einstellfenster für
Zirkularpolfi lter
Gegenlichtblendenadapter
e Montagemarkierung
f Arretierungsring
Bevor Sie die Gegenlichtblende HN-CP12 an der
Kamera befestigen:
• Schalten Sie die Kamera aus und warten Sie, bis das
Objektiv in die Transportposition zurückgefahren ist.
• Nehmen Sie den Objektivdeckel von der Kamera ab.
1. Wenn Sie mit einem Filter (optionales Zubehör) foto-
grafi eren wollen, montieren Sie es wie in der Anleitung
zum Filter beschrieben an das Objektiv der Kamera.
2. Nehmen Sie die Gegenlichtblende vom Gegenlichtblen-
denadapter ab (Abbildung 1).
3.
Entfernen Sie den Gewindering von der Kamera (Abbil-
dung 2) und verwahren Sie ihn an einem Ort auf, an dem
er gut geschützt ist und Sie ihn schnell wiederfi nden.
4. Schrauben Sie den Gegenlichtblendenadapter an wie in
Abbildung 3-A gezeigt.
5. Setzen Sie die Gegenlichtblende so an den Adapter an,
dass die Montagemarkierung des Adapters (
) und die
Montagemarkierung der Gegenlichtblende (
) einan-
der gegenüberstehen. Drehen Sie die Gegenlichtblende
in Pfeilrichtung, bis sie einrastet (Abbildung 3-B). Die
Gegenlichtblende ist korrekt montiert, wenn die Arre-
tierungsmarkierung (
) der Blende und die Montage-
markierung des Adapters einander gegenüberstehen.
Montage der Gegenlichtblende HN-CP12
Verwendung des Zirkularpolfi lters FF-CP10 CPL
Wenn Sie mit dem Zirkularpolfi lter FF-CP10 CPL fo-
tografi eren, können Sie den Polarisationswinkel wie
folgt einstellen: Öffnen Sie die Abdeckung des Ein-
stellfensters und bewegen Sie den Justierring in die
gewünschte Stellung (Abbildung 5). Verschließen Sie
das Fenster wieder mit der Abdeckung, um Streulicht-
einfall zu vermeiden. Ausführlichere Informationen
zum Fotografi eren mit Polarisationsfi lter fi nden Sie in
der Anleitung zum Filter.
6. Drehen Sie den Arretierungsring des Adapters in die in
Abbildung 4 gezeigte Richtung, bis sich die Montage-
markierung des Adapters (
쐏
) auf einer Linie mit der
Markierung auf der Kameraunterseite befi ndet (
쐄
).
Transport der Gegenlichtblende
Wenn Sie die Gegenlichtblende nicht mehr verwenden
wollen, können Sie sie umgekehrt auf den Gegenlicht-
blendenadapter schrauben. Auf diese Weise können sie
die Gegenlichtblende Platz sparend transportieren.
1. Schalten Sie die Kamera aus und warten Sie, bis das
Objektiv in die Transportposition zurückgefahren ist.
2. Drehen Sie die Gegenlichtblende gegen den Uhrzeiger-
sinn, bis sie sich aus der Rastposition löst und nehmen
Sie sie vom Adapter ab (Abbildung 6).
3.
Drehen Sie die Gegenlichtblende herum und schrauben
Sie sie mit leichtem Druck in Pfeilrichtung auf den Ge-
genlichtblendenadapter, bis sie einrastet (Abbildung 7).
Wichtige Hinweise
• Achten Sie darauf, dass Sie das Objektiv nicht verkratzen, wenn
Sie die Gegenlichtblende befestigen oder entfernen.
• Wenn die Kamera ausgeschaltet wird, fährt das Objektiv in
die Transportposition zurück. Achten Sie beim Zurückfahren
des Objektivs darauf, dass Sie nicht ihre Finger zwischen dem
Objektiv und dem Kameragehäuse einklemmen.
• Beim Fotografi eren mit dem integrierten Blitzgerät oder ex-
ternen Blitzgeräten sollten Sie die Gegenlichtblende und den
Gegenlichtblendenadapter abnehmen, da diese sonst Schatten
ins Bildfeld werfen.
• Nach dem Justieren des Zirkularpolfi lters sollten Sie das Einstell-
fenster unbedingt verschließen, da sich sonst in den Aufnah-
men Streulicht-Effekte oder Linsenrefl exe störend bemerkbar
machen können.
• Halten Sie die Kamera stets am Body und niemals an der Ge-
genlichtblende allein fest, andernfalls kann die Kamera herun-
terfallen und beschädigt werden.
• Vor dem Transport der Kamera sollten Sie die Gegenlichtblende
umgekehrt am Gegenlichtblendenadapter befestigen oder Ge-
genlichtblende und Adapter von der Kamera abnehmen.
• Fotografi eren Sie nicht, wenn die Gegenlichtblende umgekehrt
am Adapter befestigt ist. Die Gegenlichtblende blockiert in
dieser Stellung das integrierte Blitzgerät (beim Versuch, das
Blitzgerät aufzuklappen, erscheint eine Fehlermeldung auf dem
Monitor) und verdeckt den Infrarotsensor, sodass keine Fernbe-
dienung der Kamera möglich ist.
• Der Objektivdeckel kann auch bei montierter Gegenlichtblende
(sowohl in Gebrauchs- als auch in umgekehrter Stellung) auf
das Objektiv aufgesetzt werden, jedoch müssen Sie dafür seine
Sicherungsschnur entfernen. Verwahren Sie die Sicherungs-
schnur an einem geschützten Ort.
Nous vous remercions d’avoir fait l’acquisition d’un pa-
rasoleil d’objectif HN-CP12 destiné aux appareils photo
numériques Nikon COOLPIX 8400. Le HN-CP12 protège
l’objectif et bloque la lumière indésirable, ce qui réduit
le nombre d’images parasites et optimise le contraste.
Veuillez lire attentivement le présent mode d’emploi avant
toute utilisation.
Éléments du HN-CP12
Parasoleil d’objectif
a Repère de fi xation du parasoleil
b Repère de positionnement du parasoleil
c Volet de la fenêtre de réglage du fi ltre
d Fenêtre de réglage du fi ltre polarisant circulaire
Bague adaptatrice du parasoleil
e Repère de fi xation de la bague adaptatrice
f Bague de positionnement
Fixer le HN-CP12
Avant de fi xer le HN-CP12 :
• Mettez l’appareil photo hors tension et attendez que
l’objectif soit rentré
• Retirez le bouchon d’objectif de l’appareil photo
1. Si vous avez l’intention d’utiliser un fi ltre (disponible
séparément), fi xez-le sur l’objectif de l’appareil photo
comme décrit dans le manuel du fi ltre.
2. Retirez la bague adaptatrice du parasoleil (Figure 1).
3. Retirez la bague d’objectif de l’appareil photo (Figure 2)
et rangez-la dans un endroit sûr.
4. Fixez la bague adaptatrice du parasoleil comme indiqué
Figure 3A.
5. Alignez le repère de fi xation de la bague adaptatrice
(
) avec celui du parasoleil (
) puis tournez le para-
soleil dans la direction indiquée jusqu’à ce qu’il s’en-
clenche (Figure 3B). Vérifi ez que le repère de position-
nement du parasoleil (
) est aligné avec le repère de
fi xation de la bague adaptatrice.
Utilisation du fi ltre polarisant circulaire CPL FF-CP10
Si vous utilisez un fi ltre polarisant circulaire CPL FF-
CP10 (optionnel), ouvrez le volet de la fenêtre de ré-
glage du fi ltre et ajustez la bague de réglage du fi ltre
(Figure 5). Après avoir réglé le fi ltre, fermez la fenêtre
de réglage du fi ltre. Pour en savoir plus, consultez la
documentation livrée avec le fi ltre.
6. Tournez la bague de positionnement dans la direction
indiquée Figure 4 jusqu’à ce que le repère de fi xation de
la bague adaptatrice (
쐏
) soit aligné avec le repère situé
sous l’appareil photo (
쐄
).
Retourner le parasoleil lors du transport
Il est possible de retourner le parasoleil afi n de réduire la
place qu’il occupe lorsque vous le transportez.
1. Mettez l’appareil photo hors tension et attendez que
l’objectif soit rentré.
2. Tournez le parasoleil dans le sens inverse des aiguilles
d’une montre jusqu’au déclic puis retirez-le comme
indiqué dans l’illustration (Figure 6).
3. Retournez le parasoleil et appuyez légèrement dessus
tout en le tournant dans la direction indiquée jusqu’à
ce qu’il s’enclenche (Figure 7).
Avertissements
• Faites attention de ne pas rayer l’objectif en fi xant ou en
retirant le parasoleil.
• L’objectif se rétracte lorsque l’appareil est mis hors ten-
sion. Faites attention de ne pas vous pincer les doigts
entre l’objectif et le boîtier de l’appareil photo lorsque
l’objectif se rétracte.
• La lumière provenant du fl ash intégré et des fl ashes op-
tionnels risque d’être bloquée par le parasoleil. Retirez
ce dernier ainsi que sa bague adaptatrice lors de l’utilisa-
tion d’un fl ash.
• Des « images parasites » risquent d’apparaître sur les
photos si la fenêtre de réglage du fi ltre polarisant circu-
laire est ouverte au cours de la prise de vue. Fermez cette
fenêtre avant de photographier.
• Ne tenez pas uniquement l’appareil photo par le para-
soleil ou par le volet de la fenêtre de réglage du fi ltre.
L’appareil photo pourrait se détacher et tomber, endom-
mageant l’ensemble de l’équipement.
• Retournez le parasoleil ou retirez ce dernier et sa bague
adaptatrice lorsque vous transportez l’appareil photo.
• Ne prenez pas de photos lorsque le parasoleil est re-
tourné. Celui-ci cacherait alors le récepteur infrarouge,
gênant le fonctionnement de la télécommande, et em-
pêcherait le fl ash intégré de sortir, entraînant l’appari-
tion d’une erreur sur le moniteur/viseur de l’appareil.
• Avant de fi xer le bouchon d’objectif sur le parasoleil,
qu’il soit retourné ou non, retirez le cordon et rangez-le
dans un endroit sûr.
Tack för att du valde objektivhuven HN-CP12 för digitalka-
meran Nikon COOLPIX 8400. HN-CP12 skyddar objektivet
och blockerar oönskat ljus vilket minskar skuggning och
ökar kontrasten. Läs bruksanvisningen noggrant innan du
använder huven.
HN-CP12:s delar
Objektivhuv
a Huvmonteringsstyrning
b
Huvpositioneringsstyrning
c Filterjusteringsfönstret
lucka
d Justeringsfönster för cir-
kulärt polariserande fi lter
Huvadapterring
e
Adaptermonteringsstyrning
f Positioneringsring
Innan du monterar HN-CP12:
• Stäng av kameran och vänta på att objektivet dras in
• Ta bort kamerans objektivskydd
1. Om du ska använda ett fi lter (säljes separat), monterar
du det på kamerans objektiv enligt anvisningarna i fi l-
trets bruksanvisning.
2. Ta bort huvadapterringen från objektivhuven (bild 1).
3. Ta bort objektivringen från kameran (bild 2) och lägg
den på en säker plats.
4. Montera huvadapterringen enligt bild 3A.
5. Passa in adaptermonteringsstyrningen (
) med objek-
tivhuvens monteringsstyrning (
) och vrid sedan huven
i den angivna riktningen tills den klickar på plats (bild
3B). Bekräfta att huvpositioneringsstyrningen (
) är
inpassad med adaptermonteringsstyrningen.
Montera HN-CP12
Använda det cirkulärt polariserande fi ltret FF-CP10
CPL
Om du använder det cirkulära polariserande fi ltret FF-
CP10 CPL (tillval) öppnar du fi lterjusteringsfönstrets
lucka och riktar sedan in fi lterjusteringsringen (bild 5).
När du har justerar fi ltret stänger du fi lterjusterings-
fönstret. Mer information fi nns i den dokumentation
som medföljer fi ltret.
6. Vrid positioneringsguiden i den riktning som anges i
bild 4 och stanna när adaptermonteringsstyrningen (
쐏
)
är inpassad mot markeringen längst ned på kameran
(
쐄
).
Fälla objektivhuven bakåt för transport
Det går att fälla objektivhuven bakåt så att den tar upp
mindre plats under transport.
1. Stäng av kameran och vänta på att objektivet dras in.
2. Vrid objektivhuven moturs tills det klickar och ta sedan
bort den enligt bild 6.
3. Fäll objektivhuven bakåt och tryck försiktigt på den
samtidigt som du vrider den i den angivna riktningen
och stanna när den klickar på plats (bild 7).
Försiktighetsåtgärder
• Var försiktig så att du inte repar objektivet när du mon-
terar eller tar bort huven.
• Objektivet dras in när kameran stängs av. Var försiktigt
så att dina fi ngrar inte kläms mellan objektivet och ka-
merahuset när objektivet dras in.
• Ljus från den inbyggda blixten och eventuella externa
blixtar kan skymmas av objektivhuven. Ta bort objektiv-
huven och huvadaptern när du ska använda blixt.
• “Skuggning” och refl exer kan uppstå i bilder om juste-
ringsfönstret för det cirkulärt polariserande fi ltret lämnas
öppet under fotografering. Stäng fönstret innan du tar
bilden.
• Håll aldrig kameran enbart i objektivhuven eller fi lter-
justeringsfönstret. Kameran kan lossa och falla och
skadas.
• Fäll tillbaka huven eller ta bort objektivhuven och huva-
dapterringen när du transporterar kameran.
• Ta inte bilder när objektivhuven är tillbakafälld. Huven
blockerar IR-mottagaren vilket stör fotografering med
fjärrkontroll och hindrar blixten att fällas upp vilket inne-
bär att ett felmeddelande visas i displayen.
• Innan du monterar objektivkåpan med objektivhuven
tillbakafälld eller på plats, måste du ta bort sladden och
förvara den på en säker plats.
La página se está cargando...
Transcripción de documentos
HN-CP12 English 日本語 De Gegenlichtblende Bedienungsanleitung このたびはニコンデジタルカメラ COOLPIX8400 用レンズフード HN-CP12 をお買い上げいただき、 ありがとうございます。レンズフー ドは、画像に悪影響を及ぼす光線をカットし、ゴーストやフレアを減 少させ画像のコントラストを向上させる効果があるほか、レンズ面の 保護にも役立ちます。 レンズフードをご使用になる前に、この使用説明書をよくお読みくだ さい。 Fr Parasoleil d’objectif Manuel d’instructions 安全上のご注意 Jp レンズフード 使用説明書 En Lens Hood Instruction Manual Es Parasol de objetivo Manual de Instrucciones Se Objektivhuv Bruksanvisning Nl Zonnekap Gebruikshandleiding It Paraluce Manuale di Istruzioni Ck 遮光罩 使用说明书 Ch 鏡頭罩 使用說明書 ご使用の前に「安全上のご注意」をよくお読みのうえ、正しくお使いくだ さい。この「安全上のご注意」は製品を安全に正しく使用していただき、 あなたや他の人々への危害や財産への損害を未然に防止するために、重要 な内容を記載しています。お読みになった後は、お使いになる方がいつで も見られる場所に必ず保管してください。なお、カメラ本体の使用説明書 に記載されている「安全上のご注意」もあわせてお読みください。 表示について 表示と意味は次のようになっています。 注意 この表示を無視して、誤った取り扱いをすると、人が傷害を負 う可能性が想定される内容および物的損害の発生が想定される 内容を示しています。 お守りいただく内容の種類を、次の絵表示で区分し、説明しています。 絵表示の例 Kr 렌즈후드 사용설명서 記号は、禁止(してはいけないこと)の行為を告げる物です。図の中 や近くに具体的な禁止内容(左図の場合は分解禁止)が描かれています。 注意 Printed in Japan SB4G00200101 (B1) 6MAW23B1-- d カメラのレンズ可動部に注意すること 指がはさまれてケガの原因となることがあります。 3. Remove the lens ring from the camera (Figure 2) and store it in a safe place. 4. Attach the hood adapter ring as shown in Figure 3A. b c d レンズフード位置指標 【フードアダプタリング】 e アダプタ着脱指標 f 回転部 フィルター操作窓カバー 円偏光フィルター操作窓 レンズフードを取り付ける前に: Hood adapter ring/ Gegenlichtblendenadapter/ Bague adaptatrice du parasoleil/ Anillo adaptador del parasol/ Huvadapterring c レンズフード /Lens hood/ Gegenlichtblende/ Parasoleil d’objectif/ Parasol del objetivo/objektivhuv 1 レンズフードとフードアダプタリングを取り外します(図 1)。 2) 。 2 ・カメラからレンズリングを取り外します(図 取り外したレンズリングは、なくさないように大事に保管して ください。 3 フードアダプタリングをカメラに取り付けます(図 3-A) 。 ・ フードアダプタリングは矢印の方向に確実にねじ込んでくださ い。 3-B) 。 4 ・レンズフードをフードアダプタリングに取り付けます(図 アダプタ着脱指標( )に、レンズフード着脱指標( )を合わせ、 カチッと音がするまで矢印の方向に回して、レンズフードを取 り付けます。 ・ レンズフード位置指標( )がアダプタ着脱指標( )に合って いることを確認してください。 5 フードアダプタリングの回転部を矢印の方向に回して、アダプタ 着脱指標( )を、カメラの底面にある指標( )に合わせます 図 1/Figure 1/Abbildung 1/ Figure 1/Figura 1/Bild 1 A (図 4) 。 ・ レンズフードが正しく取り付けられていない場合は、 「ケラレ」 が生じることがあります。撮影を行う前に、撮影画面でケラレ が無いことを確認してください。 図 2/Figure 2/Abbildung 2/ Figure 2/Figura 2/Bild 2 ■ ニコンデジタルカメラ COOLPIX 用フィルター(別売) を使用する場合 B 1 レンズ先端にフィルターを取り付けます。 ・ フィルターの取り付け方法は、ご使用のフィルターの使用説明 書をご覧ください。 2 「レンズフードの取り付け方法」の手順 1 ∼ 5 を行います。 円偏光フィルター FF-CP10CPL を使用する場合: 図 3/Figure 3/Abbildung 3/Figure 3/Figura 3/Bild 3 ・ 円偏光フィルター FF-CP10CPL を使用する場合は、フィルター 操作窓カバーを開けて、円偏光フィルターの回転リングを操作し ます(図 5) 。回転リングを操作した後は、フィルター操作窓カバー をしっかりと閉じてください。円偏光フィルターについては、フィ ルターの使用説明書をご覧ください。 ■ レンズフードを取り付けたままカメラを運ぶ場合 撮影間の移動など、レンズフードを取り付けたままカメラを運びたい 場合には、レンズフードを逆の向きに取り付けて簡易収納することを おすすめします。簡易収納すると、場所を取らず便利です。 OFF にします。 1 ・カメラの電源を レンズが収納されていることを確認してください。 2 図 4/Figure 4/Abbildung 4/Figure 4/Figura 4/Bild 4 レンズフードを、矢印の方向にカチッと音がするまで回して取り外 します(図 6) 。 3 レンズフードの向きを逆にして、レンズフードをフードアダプタリ ングに取り付けます(図 7) 。 ・ カメラに向かって軽く押さえながら、カチッと音がするまで矢 印の方向に回して、レンズフードを取り付けます。 ■ ご注意 図 5/Figure 5/Abbildung 5/ Figure 5/Figura 5/Bild 5 図 6/Figure 6/Abbildung 6/ Figure 6/Figura 6/Bild 6 図 7/Figure 7/Abbildung 7/Figure 7/Figura 7/Bild 7 1. If you will be using a filter (available separately), attach it to the camera lens as described in the filter manual. 注意 ・ カメラの電源を OFF にして、レンズが収納されていることを確 認してください。 ・ カメラのレンズキャップを取り外してください。 フードアダプタリング / Before attaching the HN-CP12: • Turn the camera off and wait for the lens to retract • Remove the camera lens cap 2. Remove the hood adapter ring from the lens hood (Figure 1). ■ レンズフードの取り付け方法 f Attaching the HN-CP12 分解したり、修理・改造をしないこと 破損などによるケガの原因になることがあります。 【レンズフード】 a レンズフード着脱指標 b Lens hood Hood adapter ring a Hood mounting guide e Adapter mounting guide b Hood positioning guide f Positioning ring c Filter adjustment window cover d Circular polarizing filter adjustment window Parts of the HN-CP12 分解禁止 ■ 各部名称 a e Thank you for your purchase of an HN-CP12 lens hood for Nikon COOLPIX 8400 digital cameras. The HN-CP12 protects the lens and blocks unwanted light, reducing ghosting and enhancing contrast. Be sure to read this manual thoroughly before use. ・ レンズフードの着脱時には、レンズにキズを付けないように気を付 けてください。 ・ カメラの電源を OFF にすると、繰り出したレンズが収納されます。 その際、指をはさまないようご注意ください。 ・ レンズフードを取り付けたまま、内蔵スピードライトまたは外付け スピードライトを使用すると、「ケラレ」を生じることがあります。 スピードライト撮影を行う場合は、レンズフードとフードアダプタ リングを必ず取り外してください。 ・ 円偏光フィルター操作窓を開けたまま撮影すると、ゴーストやフレ アが発生することがあります。撮影する際は、円偏光フィルター操 作窓をしっかりと閉じてください。 ・ レンズフードをカメラに取り付けた状態で、レンズフードまたは フィルター操作窓カバーだけを持たないでください。落下などの事 故によるカメラ破損の原因となります。 ・ カメラを持ち運ぶときは、レンズフードを簡易収納するか、レンズ フードとフードアダプタリングを取り外してください。 ・ 簡易収納した状態では、撮影を行わないでください。リモコン受光部が さえぎられ、正しくリモコン撮影を行うことができません。また、内蔵 スピードライトがポップアップできないため、液晶モニタ(または電子 ビューファインダー)に警告メッセージが表示される場合があります。 ・ レンズフードをカメラに取り付けた状態、または簡易収納の状態 でレンズキャップを取り付ける場合は、レンズキャップ用ひもを 事前にレンズキャップから取り外してください。取り外したレンズ キャップ用ひもは、なくさないように大事に保管してください。 5. Align the adapter mounting guide (�) with the mounting guide on the lens hood (�) and turn the hood in the direction shown until it clicks into place (Figure 3B). Confirm that the hood positioning guide (�) is aligned with the adapter mounting guide. Using the FF-CP10 CPL Circular Polarizing Filter If you are using an optional FF-CP10 CPL circular polarizing filter, open the filter adjustment window cover and position the filter adjustment ring (Figure 5). After adjusting the filter, close the filter adjustment window. For more information, see the documentation provided with the filter. 6. Rotate the positioning ring in the direction shown in Figure 4, stopping when the adapter mounting guide (쐏) is aligned with the mark on the bottom of the camera (쐄). Reversing the Lens Hood for Transport The lens hood can be reversed to reduce the amount of space it occupies during transport. 1. Turn the camera off and wait for the lens to retract. 2. Turn the lens hood counterclockwise until it clicks and then remove it as shown (Figure 6). 3. Reverse the lens hood and press it lightly while turning it in the direction shown, stopping when it clicks into place (Figure 7). Cautions • Be careful not to scratch the lens while attaching or removing the hood. • The lens will retract when the camera is turned off. Be careful that your fingers are not pinched between the lens and camera body as the lens retracts. • Light from the built-in Speedlight and optional flash units may be eclipsed by the lens hood. Remove the lens hood and hood adapter ring when using a flash. • “Ghosting” and flare may appear in photographs if the circular polarizing filter adjustment window is left open during shooting. Close the window before shooting. • Do not hold the camera by the lens hood or filter adjustment window cover alone. The camera could become detached and fall, damaging the equipment. • Reverse the lens hood or remove the lens hood and hood adapter ring when transporting the camera. • Do not take pictures while the lens hood is reversed. The hood will obstruct the infrared receiver, interfering with remote control photography, and prevent the Speedlight from popping up, causing an error to be displayed in the shooting display. • Before attaching the lens cap with the lens hood reversed or in place, remove the cord and store it in a safe place. Deutsch Français Vielen Dank für Ihr Vertrauen in Nikon-Produkte. Die Gegenlichtblende HN-CP12 ist ausschließlich für die Verwendung mit der Nikon-Digitalkamera COOLPIX 8400 vorgesehen. Sie verhindert unerwünschten Lichteinfall ins Kameraobjektiv von Lichtquellen außerhalb des Bildfelds und reduziert so Streulicht und Geisterbilder und erhöht den Kontrast der Aufnahmen. Bitte lesen Sie diese Bedienungsanleitung aufmerksam durch, bevor Sie die Gegenlichtblende verwenden. Komponenten der Gegenlichtblende HN-CP12 Gegenlichtblende a Montagemarkierung b Arretierungsmarkierung c Abdeckung des Filtereinstellfensters d Einstellfenster für Zirkularpolfilter Gegenlichtblendenadapter e Montagemarkierung f Arretierungsring Gracias por adquirir el parasol de objetivo HN-CP12 para cámaras digitales COOLPIX 8400 de Nikon. El HN-CP12 protege el objetivo y evita fuentes de luz no deseadas, por lo que se reduce la aparición de espectros en la fotografía y mejora el contraste de la imagen. Le rogamos lea atentamente este manual antes de utilizar el parasol. Tack för att du valde objektivhuven HN-CP12 för digitalkameran Nikon COOLPIX 8400. HN-CP12 skyddar objektivet och blockerar oönskat ljus vilket minskar skuggning och ökar kontrasten. Läs bruksanvisningen noggrant innan du använder huven. Componentes del HN-CP12 Éléments du HN-CP12 Parasol del objetivo a Indicación de montaje del parasol b Indicación de posicionamiento del parasol c Tapa de la ventana de ajuste del filtro d Ventana de ajuste del filtro polarizador circular Objektivhuv Huvadapterring a Huvmonteringsstyrning e Adaptermonteringsstyrning b Huvpositioneringsstyrning f Positioneringsring c Filterjusteringsfönstret lucka d Justeringsfönster för cirkulärt polariserande filter Parasoleil d’objectif a Repère de fixation du parasoleil b Repère de positionnement du parasoleil c Volet de la fenêtre de réglage du filtre d Fenêtre de réglage du filtre polarisant circulaire Bague adaptatrice du parasoleil e Repère de fixation de la bague adaptatrice f Bague de positionnement Fixer le HN-CP12 Bevor Sie die Gegenlichtblende HN-CP12 an der Kamera befestigen: • Schalten Sie die Kamera aus und warten Sie, bis das Objektiv in die Transportposition zurückgefahren ist. • Nehmen Sie den Objektivdeckel von der Kamera ab. Avant de fixer le HN-CP12 : • Mettez l’appareil photo hors tension et attendez que l’objectif soit rentré • Retirez le bouchon d’objectif de l’appareil photo 1. Si vous avez l’intention d’utiliser un filtre (disponible séparément), fixez-le sur l’objectif de l’appareil photo comme décrit dans le manuel du filtre. 2. Retirez la bague adaptatrice du parasoleil (Figure 1). 2. Nehmen Sie die Gegenlichtblende vom Gegenlichtblendenadapter ab (Abbildung 1). 3. Retirez la bague d’objectif de l’appareil photo (Figure 2) et rangez-la dans un endroit sûr. 3. Entfernen Sie den Gewindering von der Kamera (Abbildung 2) und verwahren Sie ihn an einem Ort auf, an dem er gut geschützt ist und Sie ihn schnell wiederfinden. 4. Fixez la bague adaptatrice du parasoleil comme indiqué Figure 3A. 4. Schrauben Sie den Gegenlichtblendenadapter an wie in Abbildung 3-A gezeigt. 5. Setzen Sie die Gegenlichtblende so an den Adapter an, dass die Montagemarkierung des Adapters (�) und die Montagemarkierung der Gegenlichtblende (�) einander gegenüberstehen. Drehen Sie die Gegenlichtblende in Pfeilrichtung, bis sie einrastet (Abbildung 3-B). Die Gegenlichtblende ist korrekt montiert, wenn die Arretierungsmarkierung (�) der Blende und die Montagemarkierung des Adapters einander gegenüberstehen. Verwendung des Zirkularpolfilters FF-CP10 CPL Wenn Sie mit dem Zirkularpolfilter FF-CP10 CPL fotografieren, können Sie den Polarisationswinkel wie folgt einstellen: Öffnen Sie die Abdeckung des Einstellfensters und bewegen Sie den Justierring in die gewünschte Stellung (Abbildung 5). Verschließen Sie das Fenster wieder mit der Abdeckung, um Streulichteinfall zu vermeiden. Ausführlichere Informationen zum Fotografieren mit Polarisationsfilter finden Sie in der Anleitung zum Filter. 6. Drehen Sie den Arretierungsring des Adapters in die in Abbildung 4 gezeigte Richtung, bis sich die Montagemarkierung des Adapters (쐏) auf einer Linie mit der Markierung auf der Kameraunterseite befindet (쐄). Transport der Gegenlichtblende Wenn Sie die Gegenlichtblende nicht mehr verwenden wollen, können Sie sie umgekehrt auf den Gegenlichtblendenadapter schrauben. Auf diese Weise können sie die Gegenlichtblende Platz sparend transportieren. 1. Schalten Sie die Kamera aus und warten Sie, bis das Objektiv in die Transportposition zurückgefahren ist. 2. Drehen Sie die Gegenlichtblende gegen den Uhrzeigersinn, bis sie sich aus der Rastposition löst und nehmen Sie sie vom Adapter ab (Abbildung 6). 3. Drehen Sie die Gegenlichtblende herum und schrauben Sie sie mit leichtem Druck in Pfeilrichtung auf den Gegenlichtblendenadapter, bis sie einrastet (Abbildung 7). Wichtige Hinweise • Achten Sie darauf, dass Sie das Objektiv nicht verkratzen, wenn Sie die Gegenlichtblende befestigen oder entfernen. • Wenn die Kamera ausgeschaltet wird, fährt das Objektiv in die Transportposition zurück. Achten Sie beim Zurückfahren des Objektivs darauf, dass Sie nicht ihre Finger zwischen dem Objektiv und dem Kameragehäuse einklemmen. • Beim Fotografieren mit dem integrierten Blitzgerät oder externen Blitzgeräten sollten Sie die Gegenlichtblende und den Gegenlichtblendenadapter abnehmen, da diese sonst Schatten ins Bildfeld werfen. • Nach dem Justieren des Zirkularpolfilters sollten Sie das Einstellfenster unbedingt verschließen, da sich sonst in den Aufnahmen Streulicht-Effekte oder Linsenreflexe störend bemerkbar machen können. • Halten Sie die Kamera stets am Body und niemals an der Gegenlichtblende allein fest, andernfalls kann die Kamera herunterfallen und beschädigt werden. • Vor dem Transport der Kamera sollten Sie die Gegenlichtblende umgekehrt am Gegenlichtblendenadapter befestigen oder Gegenlichtblende und Adapter von der Kamera abnehmen. • Fotografieren Sie nicht, wenn die Gegenlichtblende umgekehrt am Adapter befestigt ist. Die Gegenlichtblende blockiert in dieser Stellung das integrierte Blitzgerät (beim Versuch, das Blitzgerät aufzuklappen, erscheint eine Fehlermeldung auf dem Monitor) und verdeckt den Infrarotsensor, sodass keine Fernbedienung der Kamera möglich ist. • Der Objektivdeckel kann auch bei montierter Gegenlichtblende (sowohl in Gebrauchs- als auch in umgekehrter Stellung) auf das Objektiv aufgesetzt werden, jedoch müssen Sie dafür seine Sicherungsschnur entfernen. Verwahren Sie die Sicherungsschnur an einem geschützten Ort. Svenska Nous vous remercions d’avoir fait l’acquisition d’un parasoleil d’objectif HN-CP12 destiné aux appareils photo numériques Nikon COOLPIX 8400. Le HN-CP12 protège l’objectif et bloque la lumière indésirable, ce qui réduit le nombre d’images parasites et optimise le contraste. Veuillez lire attentivement le présent mode d’emploi avant toute utilisation. Montage der Gegenlichtblende HN-CP12 1. Wenn Sie mit einem Filter (optionales Zubehör) fotografieren wollen, montieren Sie es wie in der Anleitung zum Filter beschrieben an das Objektiv der Kamera. Español 5. Alignez le repère de fixation de la bague adaptatrice (�) avec celui du parasoleil (�) puis tournez le parasoleil dans la direction indiquée jusqu’à ce qu’il s’enclenche (Figure 3B). Vérifiez que le repère de positionnement du parasoleil (�) est aligné avec le repère de fixation de la bague adaptatrice. Anillo adaptador del parasol e Indicación de montaje del adaptador f Anillo de posicionamiento Acoplar el parasol HN-CP12 Antes de acoplar el HN-CP12: • Apague la cámara y espere a que se repliegue el objetivo. • Quite la tapa del objetivo de la cámara. 1. Si va a utilizar un filtro (a la venta por separado), acóplelo al objetivo de la cámara tal como se indique en el manual del filtro. 4. Acople el anillo adaptador del parasol tal como muestra la figura 3A. 5. Alinee la indicación de montaje del adaptador (�) con la indicación de montaje situada en el parasol del objetivo (�) y gire el parasol en la dirección indicada hasta que encaje en su lugar (figura 3B). Asegúrese de que la indicación de posicionamiento del parasol (�) esté alineada con la indicación de montaje del adaptador. Retourner le parasoleil lors du transport Invertir la posición del parasol del objetivo para su transporte Avertissements • Faites attention de ne pas rayer l’objectif en fixant ou en retirant le parasoleil. • L’objectif se rétracte lorsque l’appareil est mis hors tension. Faites attention de ne pas vous pincer les doigts entre l’objectif et le boîtier de l’appareil photo lorsque l’objectif se rétracte. • La lumière provenant du flash intégré et des flashes optionnels risque d’être bloquée par le parasoleil. Retirez ce dernier ainsi que sa bague adaptatrice lors de l’utilisation d’un flash. • Des « images parasites » risquent d’apparaître sur les photos si la fenêtre de réglage du filtre polarisant circulaire est ouverte au cours de la prise de vue. Fermez cette fenêtre avant de photographier. • Ne tenez pas uniquement l’appareil photo par le parasoleil ou par le volet de la fenêtre de réglage du filtre. L’appareil photo pourrait se détacher et tomber, endommageant l’ensemble de l’équipement. • Retournez le parasoleil ou retirez ce dernier et sa bague adaptatrice lorsque vous transportez l’appareil photo. • Ne prenez pas de photos lorsque le parasoleil est retourné. Celui-ci cacherait alors le récepteur infrarouge, gênant le fonctionnement de la télécommande, et empêcherait le flash intégré de sortir, entraînant l’apparition d’une erreur sur le moniteur/viseur de l’appareil. • Avant de fixer le bouchon d’objectif sur le parasoleil, qu’il soit retourné ou non, retirez le cordon et rangez-le dans un endroit sûr. 2. Ta bort huvadapterringen från objektivhuven (bild 1). 3. Ta bort objektivringen från kameran (bild 2) och lägg den på en säker plats. 5. Passa in adaptermonteringsstyrningen (�) med objektivhuvens monteringsstyrning (�) och vrid sedan huven i den angivna riktningen tills den klickar på plats (bild 3B). Bekräfta att huvpositioneringsstyrningen (�) är inpassad med adaptermonteringsstyrningen. 6. Gire el anillo de posicionamiento en la dirección indicada en la figura 4 hasta que la indicación de montaje del adaptador (쐏) esté alineada con la marca situada en la parte inferior de la cámara (쐄). 3. Retournez le parasoleil et appuyez légèrement dessus tout en le tournant dans la direction indiquée jusqu’à ce qu’il s’enclenche (Figure 7). 1. Om du ska använda ett filter (säljes separat), monterar du det på kamerans objektiv enligt anvisningarna i filtrets bruksanvisning. 3. Quite el anillo del objetivo de la cámara (figura 2) y guárdelo en un lugar seguro. 6. Tournez la bague de positionnement dans la direction indiquée Figure 4 jusqu’à ce que le repère de fixation de la bague adaptatrice (쐏) soit aligné avec le repère situé sous l’appareil photo (쐄). 2. Tournez le parasoleil dans le sens inverse des aiguilles d’une montre jusqu’au déclic puis retirez-le comme indiqué dans l’illustration (Figure 6). Innan du monterar HN-CP12: • Stäng av kameran och vänta på att objektivet dras in • Ta bort kamerans objektivskydd 4. Montera huvadapterringen enligt bild 3A. Utilización de un filtro polarizador circular FF-CP10 CPL Si utiliza un filtro polarizador circular FF-CP10 CPL, abra la tapa de la ventana de ajuste del filtro y coloque el anillo de ajuste del filtro (figura 5) y, después de ajustar el filtro, cierre la ventana. Para obtener más información, consulte la documentación que se adjunta con el filtro. 1. Mettez l’appareil photo hors tension et attendez que l’objectif soit rentré. Montera HN-CP12 2. Quite el anillo adaptador del parasol del objetivo (figura 1). Utilisation du filtre polarisant circulaire CPL FF-CP10 Si vous utilisez un filtre polarisant circulaire CPL FFCP10 (optionnel), ouvrez le volet de la fenêtre de réglage du filtre et ajustez la bague de réglage du filtre (Figure 5). Après avoir réglé le filtre, fermez la fenêtre de réglage du filtre. Pour en savoir plus, consultez la documentation livrée avec le filtre. Il est possible de retourner le parasoleil afin de réduire la place qu’il occupe lorsque vous le transportez. HN-CP12:s delar Använda det cirkulärt polariserande filtret FF-CP10 CPL Om du använder det cirkulära polariserande filtret FFCP10 CPL (tillval) öppnar du filterjusteringsfönstrets lucka och riktar sedan in filterjusteringsringen (bild 5). När du har justerar filtret stänger du filterjusteringsfönstret. Mer information finns i den dokumentation som medföljer filtret. 6. Vrid positioneringsguiden i den riktning som anges i bild 4 och stanna när adaptermonteringsstyrningen (쐏) är inpassad mot markeringen längst ned på kameran (쐄). Fälla objektivhuven bakåt för transport Det går att fälla objektivhuven bakåt så att den tar upp mindre plats under transport. 1. Stäng av kameran och vänta på att objektivet dras in. 2. Vrid objektivhuven moturs tills det klickar och ta sedan bort den enligt bild 6. Al transportarlo, es posible invertir la posición del parasol del objetivo para reducir así el espacio que ocupa. 3. Fäll objektivhuven bakåt och tryck försiktigt på den samtidigt som du vrider den i den angivna riktningen och stanna när den klickar på plats (bild 7). 1. Apague la cámara y espere a que el objetivo se repliegue. Försiktighetsåtgärder 2. Gire el parasol del objetivo en sentido contrario a las agujas del reloj hasta que oiga un clic, y entonces retírelo tal como se indica en la figura 6. 3. Invierta la posición del parasol y ejerza una suave presión mientras lo gira en la dirección indicada hasta que encaje en su posición correcta (figura 7). Precauciones • Tenga cuidado de no rayar el objetivo al acoplar o retirar el parasol. • El objetivo se repliega al apagar la cámara. Tenga cuidado de no pillarse los dedos entre el objetivo y el cuerpo de la cámara cuando el objetivo se repliegue. • Es posible que la luz del flash incorporado o de otras unidades de flash opcionales se vea eclipsada por el parasol del objetivo. Cuando utilice un flash, quite el parasol del objetivo y el adaptador del parasol. • Es posible que aparezcan “espectros” y destellos en las fotografías si al disparar se deja abierta la ventana de ajuste del filtro polarizador circular. Antes de hacer una fotografía, cierre la ventana. • No sostenga la cámara únicamente por el parasol del objetivo o por la tapa de la ventana del ajuste del filtro, ya que la cámara podría desprenderse y caer al suelo y, como consecuencia, podría dañarse. • Invierta la posición del parasol del objetivo o retire el parasol y el anillo adaptador del parasol cuando vaya a transportar la cámara. • No haga fotografías cuando el parasol del objetivo se encuentre en posición invertida, ya que el parasol podría obstruir el receptor de infrarrojos, con lo que se dificulta la realización de fotografías por control remoto y se impide el levantamiento del flash, lo que provoca la aparición de un mensaje de error en el indicador de disparo. • Antes de colocar la tapa del objetivo cuando el parasol del objetivo está montado en la cámara o se encuentra en posición invertida, quite el cable y guárdelo en un lugar seguro. • Var försiktig så att du inte repar objektivet när du monterar eller tar bort huven. • Objektivet dras in när kameran stängs av. Var försiktigt så att dina fingrar inte kläms mellan objektivet och kamerahuset när objektivet dras in. • Ljus från den inbyggda blixten och eventuella externa blixtar kan skymmas av objektivhuven. Ta bort objektivhuven och huvadaptern när du ska använda blixt. • “Skuggning” och reflexer kan uppstå i bilder om justeringsfönstret för det cirkulärt polariserande filtret lämnas öppet under fotografering. Stäng fönstret innan du tar bilden. • Håll aldrig kameran enbart i objektivhuven eller filterjusteringsfönstret. Kameran kan lossa och falla och skadas. • Fäll tillbaka huven eller ta bort objektivhuven och huvadapterringen när du transporterar kameran. • Ta inte bilder när objektivhuven är tillbakafälld. Huven blockerar IR-mottagaren vilket stör fotografering med fjärrkontroll och hindrar blixten att fällas upp vilket innebär att ett felmeddelande visas i displayen. • Innan du monterar objektivkåpan med objektivhuven tillbakafälld eller på plats, måste du ta bort sladden och förvara den på en säker plats.-
 1
1
-
 2
2


Nikon PARASOLEIL D-OBJECTIF HN-CP12 -COOLPIX 8400 Manual de usuario
- Tipo
- Manual de usuario
- Este manual también es adecuado para
en otros idiomas
- français: Nikon PARASOLEIL D-OBJECTIF HN-CP12 -COOLPIX 8400 Manuel utilisateur
- italiano: Nikon PARASOLEIL D-OBJECTIF HN-CP12 -COOLPIX 8400 Manuale utente
- English: Nikon PARASOLEIL D-OBJECTIF HN-CP12 -COOLPIX 8400 User manual
- Deutsch: Nikon PARASOLEIL D-OBJECTIF HN-CP12 -COOLPIX 8400 Benutzerhandbuch
- Nederlands: Nikon PARASOLEIL D-OBJECTIF HN-CP12 -COOLPIX 8400 Handleiding
- svenska: Nikon PARASOLEIL D-OBJECTIF HN-CP12 -COOLPIX 8400 Användarmanual
Artículos relacionados
-
Nikon WC-E75 Wide-Angle Converter Lens Manual de usuario
-
-
-
-
-
-
Nikon AF-S DX NIKKOR 18-140mm f/3.5-5.6G ED VR Manual de usuario
-
-
-