Commercial Electric 51405191 Guía del usuario
- Tipo
- Guía del usuario
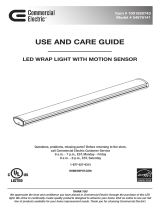
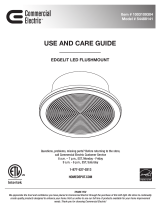
El Commercial Electric 51405191 es una luz de seguridad para exteriores con dos cabezales que proporciona una potente iluminación para áreas oscuras alrededor de tu hogar o negocio. Con su sensor de fotocélula incorporado, esta luz se enciende automáticamente al anochecer y se apaga al amanecer, lo que la hace perfecta para iluminar entradas, patios y otras áreas donde se necesita iluminación adicional. La luz también cuenta con un ajuste de brillo regulable, lo que te permite personalizar el nivel de iluminación según tus necesidades.
El Commercial Electric 51405191 es una luz de seguridad para exteriores con dos cabezales que proporciona una potente iluminación para áreas oscuras alrededor de tu hogar o negocio. Con su sensor de fotocélula incorporado, esta luz se enciende automáticamente al anochecer y se apaga al amanecer, lo que la hace perfecta para iluminar entradas, patios y otras áreas donde se necesita iluminación adicional. La luz también cuenta con un ajuste de brillo regulable, lo que te permite personalizar el nivel de iluminación según tus necesidades.


-
 1
1
-
 2
2
-
 3
3
-
 4
4
-
 5
5
-
 6
6
-
 7
7
-
 8
8
-
 9
9
-
 10
10
-
 11
11
-
 12
12
-
 13
13
-
 14
14
-
 15
15
-
 16
16


Commercial Electric 51405191 Guía del usuario
- Tipo
- Guía del usuario
El Commercial Electric 51405191 es una luz de seguridad para exteriores con dos cabezales que proporciona una potente iluminación para áreas oscuras alrededor de tu hogar o negocio. Con su sensor de fotocélula incorporado, esta luz se enciende automáticamente al anochecer y se apaga al amanecer, lo que la hace perfecta para iluminar entradas, patios y otras áreas donde se necesita iluminación adicional. La luz también cuenta con un ajuste de brillo regulable, lo que te permite personalizar el nivel de iluminación según tus necesidades.
en otros idiomas
Artículos relacionados
-
 Commercial Electric 54676141 Instrucciones de operación
-
 Commercial Electric 54074441 Guía de instalación
-
 Commercial Electric 54479112 Instrucciones de operación
-
 Commercial Electric 54488141 Instrucciones de operación
-
Commercial Electric 54655241-4PK Guía de instalación
-
 Commercial Electric 53602141-4PK Guía de instalación
-
 Commercial Electric 54677641-4PK Manual de usuario
-
 Commercial Electric 54259141 Manual de usuario


