DreamGEAR DGDSI-1915 El manual del propietario
- Categoría
- Accesorios de la consola de juegos
- Tipo
- El manual del propietario
Este manual también es adecuado para

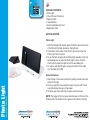
Photo Light
USER’S GUIDE
PACKAGE CONTENTS:
• Photo Light
• 1 Set of Screen Protectors
• Cleaning Cloth
• 1 Extra Battery
• User’s Guide/Warranty Card
• Registration Card
GETTING STARTED:
Photo Light:
1. With the Nintendo DSi closed, place the Photo Light over the top
of the DSi with the flash located on the right side.
2. Press down on the sides of the Photo Light until you hear the
Photo Light click into place.
3. To use the flash, simply push the Photo Light upwards. A light will
automatically turn on when the Photo Light is open. Once the
Photo Light is closed, the light turns off to save battery life.
4. To remove, with the DSi open, simply unhook the Photo Light
from the sides of the DSi.
Screen Protectors:
1. Peel the top of the screen protector by pulling the red and white
sticker to the right.
2. Once you peel the screen protector apart, the part with the red
and white sticker belongs on the screen.
3.The sticky part is the side that you place onto the screen.
NOTE: The bigger of the 2 screen protectors goes on the top of the
Nintendo DSi. The smaller of the 2 goes on the bottom of the DSi.

POUR ASSISTANCE TECHNIQUE
VEUILLEZ CONTACTER : 1-877-999-DREAM
Ou visitez-nous sur le Web @ www.dreamgear.net
PARA SOPORTE TÉCNICO
CONTACTE AL: 1-877-999-DREAM
o visítenos en la web @ www.dreamgear.net
PARA COMENZAR:
Luz de foto:
1. Con el Nintendo DSi cerrado, coloque la luz de foto sobre la
parte superior del DSi con el flash ubicado en el lado derecho.
2. Presione hacia abajo en los lados de la luz de foto hasta que
escuche un clic que indica que está fijo en su lugar.
3. Para usar el flash, simplemente empuje la tapa del flash hacia
arriba. Se encenderá automáticamente una luz cuando se abra
la luz de foto. Una vez que la luz de foto se cierra, la luz se
apaga para prolongar la vida útil de la batería.
4. Para retirar, con el DSi abierto, simplemente desenganche la luz
de foto de los lados del DSi.
Protectores de pantalla:
1. Desprenda la parte superior del protector de pantalla tirando el
autoadhesivo rojo y blanco hacia la derecha.
2. Una vez que haya desprendido el protector de pantalla, la parte
con el autoadhesivo rojo y blanco pertenece a la pantalla.
3. La parte adhesiva es el lado que coloca sobre la pantalla.
NOTA: el protector de pantalla más grande va en la parte superior
del Nintendo DSi. El protector de pantalla más pequeño va en la
parte inferior del Nintendo DSi.
CONTENIDO DEL PAQUETE:
• Luz de foto
• 1 Juego de protectores de pantalla
• Almohadilla limpiadora
• Guía del usuario/Tarjeta de garantía
• Tarjeta de inscripción
DÉMARRAGE:
Photo Light:
1. Une fois la Nintendo DSi fermée, placez le Photo Light au
dessus de la DSi, en prenant garde à ce que la lampe soit du
côté droit.
2. Appuyez sur les bords du Photo Light jusqu'à entendre un
déclic une fois que le Photo Light est en place.
3. Pour utiliser la lampe, poussez le Photo Light vers le haut. La
lumière s’allume automatiquement quand le Photo Light est
ouvert. Quand le Photo Light est fermé, la lumière s’éteind
directement pour économiser la batterie.
4. Pour l’enlever, une fois la DSi ouverte, séparez le Photo Light
des bords de la DSi.
Films Protecteurs:
1. Décollez le film protecteur en tirant l'autocollant rouge et blanc à
droite.
2. Une fois que vous l’avez décollé, la partie avec l’autocollant
rouge et blanc doit aller sur l’écran.
3. La partie autocollante doit être placée au contact de l’écran.
NOTE: Le plus grand des 2 films protecteurs s'adapte sur l'écran
supérieur de la Nintendo DSi. Le plus petit sur l'écran inférieur
de la DSi.
CONTENU DU PACK:
• Le Photo Light Plus
• 1 Jeu de Films de Protection
• Une Chiffonnette de Nettoyage
• Le Manuel d’Utilisation / Carte de Garantie Produit
• La Carte d’Enregistrement Produit
Transcripción de documentos
PACKAGE CONTENTS: • Photo Light • 1 Set of Screen Protectors • Cleaning Cloth • 1 Extra Battery • User’s Guide/Warranty Card • Registration Card GETTING STARTED: Photo Light: 1. With the Nintendo DSi closed, place the Photo Light over the top of the DSi with the flash located on the right side. 2. Press down on the sides of the Photo Light until you hear the Photo Light click into place. 3. To use the flash, simply push the Photo Light upwards. A light will automatically turn on when the Photo Light is open. Once the Photo Light is closed, the light turns off to save battery life. 4. To remove, with the DSi open, simply unhook the Photo Light from the sides of the DSi. USER’S GUIDE Photo Light Screen Protectors: 1. Peel the top of the screen protector by pulling the red and white sticker to the right. 2. Once you peel the screen protector apart, the part with the red and white sticker belongs on the screen. 3.The sticky part is the side that you place onto the screen. NOTE: The bigger of the 2 screen protectors goes on the top of the Nintendo DSi. The smaller of the 2 goes on the bottom of the DSi. CONTENIDO DEL PAQUETE: • Luz de foto • 1 Juego de protectores de pantalla • Almohadilla limpiadora • Guía del usuario/Tarjeta de garantía • Tarjeta de inscripción CONTENU DU PACK: • Le Photo Light Plus • 1 Jeu de Films de Protection • Une Chiffonnette de Nettoyage • Le Manuel d’Utilisation / Carte de Garantie Produit • La Carte d’Enregistrement Produit PARA COMENZAR: DÉMARRAGE: Luz de foto: Photo Light: 1. Con el Nintendo DSi cerrado, coloque la luz de foto sobre la parte superior del DSi con el flash ubicado en el lado derecho. 2. Presione hacia abajo en los lados de la luz de foto hasta que escuche un clic que indica que está fijo en su lugar. 3. Para usar el flash, simplemente empuje la tapa del flash hacia arriba. Se encenderá automáticamente una luz cuando se abra la luz de foto. Una vez que la luz de foto se cierra, la luz se apaga para prolongar la vida útil de la batería. 4. Para retirar, con el DSi abierto, simplemente desenganche la luz de foto de los lados del DSi. 1. Une fois la Nintendo DSi fermée, placez le Photo Light au dessus de la DSi, en prenant garde à ce que la lampe soit du côté droit. 2. Appuyez sur les bords du Photo Light jusqu'à entendre un déclic une fois que le Photo Light est en place. 3. Pour utiliser la lampe, poussez le Photo Light vers le haut. La lumière s’allume automatiquement quand le Photo Light est ouvert. Quand le Photo Light est fermé, la lumière s’éteind directement pour économiser la batterie. 4. Pour l’enlever, une fois la DSi ouverte, séparez le Photo Light des bords de la DSi. Protectores de pantalla: 1. Desprenda la parte superior del protector de pantalla tirando el autoadhesivo rojo y blanco hacia la derecha. 2. Una vez que haya desprendido el protector de pantalla, la parte con el autoadhesivo rojo y blanco pertenece a la pantalla. 3. La parte adhesiva es el lado que coloca sobre la pantalla. NOTA: el protector de pantalla más grande va en la parte superior del Nintendo DSi. El protector de pantalla más pequeño va en la parte inferior del Nintendo DSi. PARA SOPORTE TÉCNICO CONTACTE AL: 1-877-999-DREAM o visítenos en la web @ www.dreamgear.net Films Protecteurs: 1. Décollez le film protecteur en tirant l'autocollant rouge et blanc à droite. 2. Une fois que vous l’avez décollé, la partie avec l’autocollant rouge et blanc doit aller sur l’écran. 3. La partie autocollante doit être placée au contact de l’écran. NOTE: Le plus grand des 2 films protecteurs s'adapte sur l'écran supérieur de la Nintendo DSi. Le plus petit sur l'écran inférieur de la DSi. POUR ASSISTANCE TECHNIQUE VEUILLEZ CONTACTER : 1-877-999-DREAM Ou visitez-nous sur le Web @ www.dreamgear.net-
 1
1
-
 2
2


DreamGEAR DGDSI-1915 El manual del propietario
- Categoría
- Accesorios de la consola de juegos
- Tipo
- El manual del propietario
- Este manual también es adecuado para