
THANK YOU
create quality products designed to enhance your home. Visit us online to see our full line of products available for your home improvement
needs. Thank you for choosing Hampton Bay!
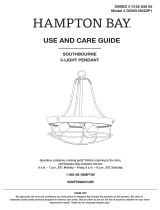
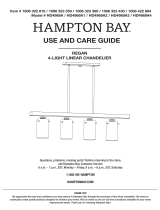
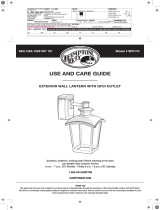
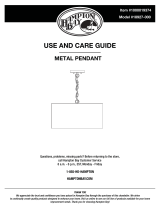
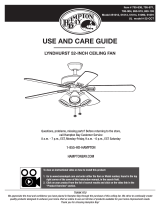
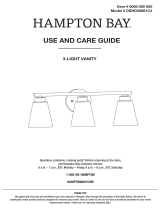
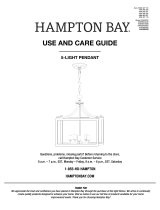
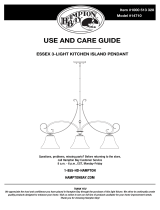
USE AND CARE GUIDE
WALL SCONCE
Questions, problems, missing parts? Before returning to the store,
call Hampton Bay Customer Service
8 a.m. - 7 p.m., EST, Monday – Friday, 9 a.m. – 6 p.m., EST, Saturday
1-855-HD-HAMPTON
HAMPTONBAY.COM
Item #1006493260 1006633042
Model #65163 65164

2
Table of Contents
Safety Information .................................. 2
Warranty .......................................... 2
Pre-Installation ..................................... 3
Planning Installation ............................... 3
Tools Required .................................... 3
Hardware Included ................................. 3
Package Contents ................................. 3
Installation ........................................ 4
Care and Cleaning .................................. 5
Troubleshooting .................................... 5
Safety Information
IMPORTANT SAFETY INSTRUCTIONS
Review these basic electrical guidelines before you begin this
installation.
□Use tools with insulated handles and ladders made of wood or
□
and workshop.
□Never disable grounding devices. Ensure all appliances that
require grounding are properly grounded.
□Meet or exceed all electrical code requirements that cover the
work you are doing.
□Always work with enough light to see what you are doing. It is
easy to make a mistake when you work in dim light.
□When in doubt about the safety of any electrical repair or test,
call in a professional.
WARNING: Before touching any wire, use a voltage tester
to ensure it is not live.
WARNING: When you check for voltage in a receptacle,
check both outlets as each may be controlled by a separate
wiring circuit.
WARNING: Before working on a circuit, go to the main
service panel and remove the fuse or trip the breaker that
controls the circuit.
WARNING: When replacing fuses, turn off the main power
hand behind your back to prevent electricity from making a
complete circuit through your chest. Touch a plug fuse only
by its insulated rim. Remove cartridge fuses with a fuse
impeller.
WARNING:
correct branch circuit conductor.
CAUTION:
expressly approved by the party responsible for compliance
could void the user’s authority to operate the equipment.
Warranty
3-YEAR LIMITED WARRANTY
purchase. If within this period the product is found to be defective in material or workmanship, the product must be returned, with a copy
of the bill of sale as proof of purchase, to the original place of purchase. The manufacturer will, at its option, repair, replace, or refund the
misuse, accidental damage, improper handling and/or installation, and specially excludes liability for direct, incidental, or consequential
damages. As some states do not allow exclusions or limitations on an implied warranty, so the above exclusions and limitations may not
Contact the Customer Service Team at 1-855-HD-HAMPTON or visit www.HAMPTONBAY.com.

3
Pre-Installation
PLANNING INSTALLATION
Compare all parts with the Hardware Included and Package Contents sections. If any part appears missing or damaged, do not install this
product and contact the Customer Service team at 1-855-HD-HAMPTON.
TOOLS REQUIRED
Safety
goggles
Phillips
screwdriver
Electrical
tape
Wire
stripper
HARDWARE INCLUDED
NOTE: Hardware not shown to actual size.
Part Description Quantity
AA Crossbar 1
BB Outlet box screw 2
CC Mounting screw 2
DD Wire connector 3
EE Decorative nut 2
FF Washer 2
PACKAGE CONTENTS
Part Description Quantity
A Canopy with socket 1
B Shade 1
C Socket ring 1
DDecorative accent 1
BB CC DD EE
C
D
A
B
Please contact 1-855-HD-HAMPTON for further assistance.
AA
FF

4
Installation
2Making the electrical connections
□
wire from the outlet box.
□Secure all connections together with the wire connectors
(DD) and wrap electrical tape (not included) around the wire
connectors (DD).
□Push all excess wire and wire connections back into the
outlet box.
DD
White
Black
Ground
1Installing the crossbar
□Make sure the power is off.
□Pull the supply wires out of the outlet box.
□Install the mounting screws (CC) on the mounting
□Fasten the crossbar (AA) to the outlet box
Install the mounting screws (CC) on the mounting
crossbar (AA) so they protrude.
3Attaching the canopy
□
□Place the canopy (A) over the mounting cross bar (AA).
□Secure the canopy (A) to the mounting screws (CC)
using the decorative nuts (EE).
□Align the mounting holes on the canopy (A) to the
mounting screws (CC).
Please contact 1-855-HD-HAMPTON for further assistance.
AA
BB
CC
negative wire from the outlet box, the positive wires (black)
Connect the negative wire (white) from the fixture to the
AA
CC
BB
A
EE
DD
FF

5
Installation
5Installing the shade and light bulb
□
□
D
B
C
1
D
4Attaching the decorative accent
□Secure the decorative accent (D) to the canopy with the socket (A).
Please contact 1-855-HD-HAMPTON for further assistance.
Secure the shade (B) to the decorative accent (D)
using the socket ring (C).
Install a medium base, 60 Watt maximum, light bulb (1)
(not provided) into the socket.
A
CAUTION: Caulk completely around the area where canopy
meets the wall surface with silicone caulking compound to
prevent water from seeping into the outlet box.

6 HAMPTONBAY.COM
Please contact 1-855-HD-HAMPTON for further assistance.
Care and Cleaning
WARNING:
the fuse at the fuse box.
□
□
Troubleshooting
Problem Problem Solution
The light will not illuminate. The power is off. Ensure the power supply is on.
There is a faulty wire connection.
electrician if you are not comfortable troubleshooting
wiring issues.
There is a faulty switch. Test or replace the switch.
The bulb is burned out. Replace the bulb.
The fuse blows or the circuit breaker
trips when the light is illuminated.
There are crossed wires, or the power
wire is not properly grounded.
Check the wire connections.

Questions, problems, missing parts? Before returning to the store,
call Hampton Bay Customer Service
8 a.m. – 7 p.m., EST, Monday – Friday, 9 a.m. – 6 p.m., EST, Saturday
1-855-HD-HAMPTON
HAMPTONBAY.COM
Retain this manual for future use.

GRACIAS
crear productos de calidad diseñados para mejorar su hogar. Visítenos en línea para ver nuestra línea completa de productos disponibles
GUÍA DE USO Y CUIDADO
MONTAJE DE PARED
¿Tiene preguntas o problemas, o le faltan piezas? Antes de devolver a la tienda,
llame a Atención al Cliente de Hampton Bay
Lunes a viernes de 8 a.m. a 7 p.m., EST, y los sábados de 9 a.m. a 6 p.m., EST
1-855-HD-HAMPTON
HAMPTONBAY.COM
Artículo #1006493260 1006633042
Modelo #65163 65164

2
Índice
Información de seguridad ............................ 2
Garantía. . . . . . . . . . . . . . . . . . . . . . . . . . . . . . . . . . . . . . . . . . . 2
Antes de la instalación ............................... 3
........................ 3
Herramientas requeridas ............................ 3
Herraje incluido ................................... 3
Contenido del paquete .............................. 3
Instalación ........................................ 4
Cuidado y limpieza .................................. 5
Resolución de problemas ............................. 5
Información de seguridad
INSTRUCCIONES DE SEGURIDAD IMPORTANTES
Revise estas directrices eléctricas básicas antes de comenzar la
instalación.
□Use herramientas con mangos aislados y escaleras hechas
□Disponga de extintores de polvo químico en la cocina,
□Nunca desactive los dispositivos de conexión a tierra.
□Cumpla o exceda los requisitos del código eléctrico relacionados
a la tarea que está realizando.
□
□Si tiene dudas sobre la seguridad de una reparación o prueba
eléctrica, llame a un profesional.
ADVERTENCIA: Antes de tocar un cable, use un
ADVERTENCIA:
tomacorriente, compruebe ambas salidas ya que podrían
estar conectadas a diferentes circuitos.
ADVERTENCIA: Antes de trabajar en un circuito, vaya
al panel de servicio principal y quite el fusible o abra el
disyuntor que controla el circuito.
ADVERTENCIA: Antes de volver a colocar los fusibles,
corte la electricidad. Asegúrese de tener las manos y los
pies secos, y coloque una mano detrás de la espalda para
evitar que la electricidad haga un circuito completo a través
de su pecho. Toque el fusible solo por el aro aislado. Quite
los fusibles de cartucho con un extractor de fusibles.
ADVERTENCIA:
para asegurarse de que se use el conductor del circuito de
derivación correcto.
PRECAUCIÓN:
autorizados expresamente por la parte responsable del
cumplimiento podrían anular la autoridad del usuario para
usar el equipo.
Garantía
GARANTÍA LIMITADA POR 3 AÑOS
El fabricante garantiza que esta lámpara estará libre de defectos en materiales y mano de obra por un periodo de tres años a partir de la
fecha de su compra. Si durante este lapso, el producto resulta defectuoso en cuanto a material o mano de obra, deberá devolverlo al lugar
de la compra original, junto con una copia de la factura de venta como comprobante de la compra. El fabricante, según su criterio, reparará,
sustituirá o reembolsará el precio de la compra al comprador o consumidor original. Esta garantía no cubre los focos ni que el dispositivo
responsabilidad por daños directos, incidentales o emergentes. Puesto que algunos estados no permiten las exclusiones o limitaciones
en una garantía implícita, es posible que las exclusiones y limitaciones anteriores no se apliquen. Esta garantía le brinda derechos legales
Comuníquese con el equipo de Atención al Cliente al 1-855-HD-HAMPTON o visite www.HAMPTONBAY.com.

3 HAMPTONBAY.COM
Comuníquese al 1-855-HD-HAMPTON para recibir asistencia adicional.
Antes de la instalación
PLANIFICACIÓN DE LA INSTALACIÓN
este producto y póngase en contacto con el Equipo de Servicio al Cliente al 1-855-HD-HAMPTON.
HERRAMIENTAS REQUERIDAS
Lentes
protectores
Destornillador
Phillips
Cinta
eléctrica
Alicates
pelacables
HERRAJE INCLUIDO
NOTA: El herraje no se muestra en su tamaño real.
Pieza Descripción Cantidad
AA Barra transversal 1
BB Tornillo para la caja
del tomacorriente
2
CC Tornillo de montaje 2
DD Conector de cables 3
EE Tuerca decorativa 2
CONTENIDO DEL PAQUETE
Pieza Descripción Cantidad
A Cubierta con
portalámparas
1
B Pantalla 1
C 1
DAcento decorativo 1
BB CC DD EE
AA
C
D
A
B
Anillo del
portalámparas
FF
FF Arandela 2

4
Instalación
1 Instalación de la barra transversal
□
□Jale los cables de alimentación de la caja del tomacorriente.
□Instale los tornillos de montaje (CC) en la barra transversal
de montaje (AA) de manera que sobresalgan hacia abajo.
□Ajuste la barra transversal de montaje (AA) a la caja de
salida con los tornillos para la caja del tomacorriente (BB).
2 Conexiones eléctricas
□Conecte el cable negativo (blanco) de la lámpara al cable
negativo de la caja del tomacorriente, los cables positivos
(negro) de la lámpara a los cables positivos de la caja del
tomacorriente y el cable de conexión a tierra (desnudo)
de la lámpara al cable de conexión a tierra de la caja
□Fije todas las conexiones con los conectores de cables
(DD) y coloque cinta eléctrica (no incluida) alrededor de
□Pase los excesos de cable y las conexiones hacia atrás en la
caja del tomacorriente.
DD
Blanco
Negro
Conexión
a tierra
3 Instalación de la cubierta
3
□
□Alinee los orificios del cánope (A) con los tornillos
de montaje (CC).
Alinee el cánope (A) en la barra transversal (AA).
AA
CC
BB
A
EE
DD
AA
BB
CC
□Fije la cubierta (A) a los tornillos de montaje (CC) con
las tuercas decorativas (EE).
FF

5 HAMPTONBAY.COM
Comuníquese al 1-855-HD-HAMPTON para recibir asistencia adicional.
5
Installation
5Instalación de la pantalla y la bombilla
□Asegure la pantalla (B) al acento decorativo (D)
utilizando el anillo del casquillo (C).
□
4Adjunte el acento decorativo
□Asegure la tapa (D) al canope (A).
B
C
1
D
D
A
Instale una bombilla de base mediana de 60 vatios como
máximo (1) (no incluida) en el portalámparas.
PRECAUCIÓN: para evitar que el agua se infiltre en la caja de
distribución, aplique la masilla de calafatear de silicona alrededor de
toda el área de la placa que hace contacto con la superficie de la pared.

6 HAMPTONBAY.COM
Comuníquese al 1-855-HD-HAMPTON para recibir asistencia adicional.
Cuidado y limpieza
ADVERTENCIA: Antes de limpiar el portalámparas, desconecte
la alimentación de la lámpara abriendo el disyuntor o quitando el
fusible de la caja de fusibles.
□
□Espere que la lámpara se seque por completo antes de volver a conectar la electricidad.
Resolución de problemas
Problema Problema Solución
La luz no se enciende. El suministro de alimentación está apagado. Asegúrese de que el suministro de alimentación
esté encendido.
Hay una falla en la conexión de los cables. Revise el cableado. Comuníquese con un electricista
resolviendo problemas de cableado.
Hay un interruptor defectuoso.
El foco está fundido. Sustituya la bombilla.
El fusible se funde o el disyuntor se
dispara cuando se enciende la luz.
Los cables están cruzados o el cable de
alimentación no está bien conectado a tierra.
Revise las conexiones de los cables.

¿Tiene preguntas o problemas, o le faltan piezas? Antes de devolver a la tienda,
llame a Atención al Cliente de Hampton Bay
Lunes a viernes de 8 a.m. a 7 p.m., EST, y los sábados de 9 a.m. a 6 p.m., EST
1-855-HD-HAMPTON
HAMPTONBAY.COM
Guarde este manual para su uso futuro.
-
 1
1
-
 2
2
-
 3
3
-
 4
4
-
 5
5
-
 6
6
-
 7
7
-
 8
8
-
 9
9
-
 10
10
-
 11
11
-
 12
12
-
 13
13
-
 14
14


en otros idiomas
- English: Hampton Bay 65163 User guide
Artículos relacionados
-
 Hampton Bay DSHD19522P1 Instrucciones de operación
-
 Hampton Bay HD4969A2 Manual de usuario
-
 Hampton Bay 31343 Guía del usuario
-
 Hampton Bay 18927-000 Guía de instalación
-
 Hampton Bay 51012 Guía de instalación
-
 Hampton Bay DSHD32661C4 Instrucciones de operación
-
 Hampton Bay 7949HBDBDI Guía de instalación
-
 Hampton Bay 14708 Instrucciones de operación
-
 Hampton Bay 14710 Instrucciones de operación
-
none 14707 Instrucciones de operación


