Bosch HMV5052U/01 El manual del propietario
- Categoría
- Cocina
- Tipo
- El manual del propietario
Este manual también es adecuado para

Microwave
Use and Care Manual
800 SERIES
HMV5052U
' BOSCH
I I ,,'_
i: _ ,lij
• :_¢J
Invented for life
L.
.J
J'
??'I'.'me :..... . ;..,, '_;j,,,,_=.,?,
mmmm,.......
J
....j
...,,
iiiiiiiiiiiiiiiiiii...............................
!I
i! i _
Iii _I
i'
j', .........................
iI
i
,................. i ,"f,_

Table of Contents
Safety Definitions .......................................................... 3
IMPORTANT SAFETY INSTRUCTIONS ........................ 4
,_, PRECAUTIONS TO AVOID POSSIBLE EXPOSURE
TO EXCESSIVE MICROWAVE ENERGY .......................... 4
GROUNDING INSTRUCTIONS .......................................... 4
TV / Radio Interference ....................................................... 5
Intended Use ......................................................................... 5
Child Safety ........................................................................... 5
Cleaning Safety ..................................................................... 5
Cooking Safety ...................................................................... 5
In Case of Fire ...................................................................... 6
Liquids .................................................................................... 6
Cooking Items ....................................................................... 6
Cooking Utensils .................................................................. 7
Glass Tray / Turntable Ring ............................................... 7
Exhaust Mode Operation .................................................... 7
Thermometers ....................................................................... 7
Pacemakers ........................................................................... 7
State of California Proposition 65 Warnings ................... 7
Fan Motor Operation ........................................................... 7
Room Venting with Carbon Filter ...................................... 7
Causes of damage ......................................................... 8
Protecting the environment .......................................... 8
Getting started ............................................................... 9
Parts ........................................................................................ 9
Oven specifications .............................................................. 9
Control panel ......................................................................... 9
Accessories ........................................................................ 10
Before using the appliance for the first time ............ 11
Cleaning accessories ...................................................... 11
Operation ...................................................................... 12
Setting the clock ................................................................ 12
Setting the Kitchen Timer ................................................. 12
Operating the Ventilation Fan ......................................... 12
Turning the Surface Light on/off ..................................... 12
Turning the turntable on / off .......................................... 12
Operating the microwave ................................................. 12
Adding cook time (+30 Seconds) .................................. 13
Auto Defrost ....................................................................... 14
Sensor Reheat ................................................................... 15
Sensor Cook ...................................................................... 15
Panel Lock .......................................................................... 16
Settings ................................................................................ 16
Convenience Operation .............................................. 17
Popcorn ............................................................................... 17
Beverage ............................................................................. 17
Keep Warm ......................................................................... 17
More Modes ....................................................................... 18
Cooking Charts ........................................................... 18
Cooking meat in your microwave .................................. 18
Cooking poultry in your microwave ............................... 19
Cooking eggs in your microwave .................................. 19
Cooking vegetables in your microwave ....................... 19
Cooking seafood in your microwave ............................ 20
Cleaning and Maintenance ......................................... 20
Cleaning .............................................................................. 20
Maintenance ....................................................................... 22
Troubleshooting .......................................................... 23
Bosch ®Support ........................................................... 24
Before Calling Service ...................................................... 24
Data Plate ........................................................................... 24
Service ................................................................................ 24
Parts and Accessories ..................................................... 25
STATEMENT OF LIMITED PRODUCT WARRANTY ... 25
What this Warranty Covers & Who it Applies to ......... 25
How Long the Warranty Lasts ........................................ 25
Repair/Replace as Your Exclusive Remedy ................ 25
Out of Warranty Product .................................................. 25
Warranty Exclusions ......................................................... 26
Additional information on products, accessories,
replacement parts and services can be found at
www.bosch-home.com and in the online shop
www.bosch-home.comluslstore

We
This Bosch Appliance is made by
BSH Home Appliances Corporation
1901 Main Street, Suite 600
Irvine, CA 92614
Questions?
1-800-944-2904
www.bosch-home.com/us
look forward to hearing from you!
Safety Definitions
WARNING
This indicates that death or serious injuries may
occur as a result of non-observance of this warning.
CAUTION
This indicates that minor or moderate injuries may
occur as a result of non-observance of this warning.
NOTICE: This indicates that damage to the appliance or
property may occur as a result of non-compliance with
this advisory.
Note: This alerts you to important information and/or
tips.

A
IMPORTANT SAFETY INSTRUCTIONS
READ ALL INSTRUCTIONS BEFORE USING THE APPLIANCE
PRECAUTIONS TO AVOID POSSIBLE
EXPOSURE TO EXCESSIVE MICROWAVE
ENERGY
(1) Do not attempt to operate this oven with the door
open, since open-door operation can result in harmful
exposure to microwave evergy. It is important not to
defeat or tamper with the safety interlocks.
(2) Do not place any object between the oven front face
and the door or allow soil or cleaner residue to
accumulate on sealing surfaces.
(3) Do not operate the oven if it is damaged. It is
particularly important that the oven door close properly
and that there is no damage to the:
o door (bent)
o hinges and latches (broken or loosened)
o door seals and sealing surfaces.
(4) The oven should not be adjusted or repaired by
anyone except properly qualified service personnel.
Improper installation, service or maintenance can cause
injury or property damage. Refer to this manual for
guidance. Refer all servicing to a factory authorized
service center.
WARNING
To reduce the risk of burns, electric shock, fire, injury to
persons, or exposure to excessive microwave energy,
read all instructions before using the appliance.
WARNING
If the information in this manual is not followed exactly,
fire or shock may result causing property damage or
personal injury.
When using electrical appliances basic safety
precautions should be followed, including the
following:
Read and follow the specific "PRECAUTIONS TO AVOID
POSSIBLE EXPOSURE TO EXCESSIVE MICROWAVE
ENERGY" found in the section "Microwave Safety" in the
Safety Instructions chapter.
This appliance must be grounded. Connect only to
properly grounded outlet (see GROUNDING
INSTRUCTIONS).
Install or locate this appliance only in accordance with
the provided installation instructions.
Some products such as whole eggs and sealed
containers - for example, closed glass jars - are able to
explode and should not be heated in this oven.
Use this appliance only for its intended use as described
in the manual. Do not use corrosive chemicals or vapors
in this appliance. This type of oven is specifically
designed to heat, cook, or dry food. It is not designed for
industrial or laboratory use.
As with any appliance, close supervision is necessary
when used by children (see CHILD SAFETY).
This appliance should be serviced only by qualified
service personnel. Contact nearest authorized service
facility for examination, repair, or adjustment.
Do not cover or block any vents or openings on the
appliance.
Do not store this appliance outdoors. Do not use this
product near water - for example, near a kitchen sink, in
a wet basement, near a swimming pool, or similar
locations.
Suitable for plug-connected only:
(1) Do not immerse cord or plug in water.
(2) Keep cord away from heated surfaces.
(3) Do not let cord hang over edge of table or counter.
(4) Do not operate this appliance if it has a damaged
cord or plug, if it is not working properly, or if it has
been damaged or dropped.
When cleaning surfaces of door and oven that come
together on closing the door, use only mild, nonabrasive
soaps, or detergents applied with a sponge or soft cloth.
See door surface cleaning instructions in chapter
"Cleaning and Maintenance".
To reduce the risk of fire in the oven cavity:
o Do not overcook food. Carefully attend appliance
when paper, plastic, or other combustible materials
are placed inside the oven to facilitate cooking.
o Remove wire twist-ties from paper or plastic bags
before placing bag in oven.
o If materials inside the oven ignite, keep oven door
closed, turn oven off, and disconnect the power cord,
or shut off power at the fuse or circuit breaker panel.
o Do not use the cavity for storage purposes. Do not
leave paper products, cooking utensils, or food in the
cavity when not in use.
GROUNDING INSTRUCTIONS
This appliance must be grounded. Grounding reduces
risk of electric shock by providing a safe pathway for
electric current in the event of a short circuit. This oven is
equipped with a cord having a grounding wire with a
grounding plug. The plug must be plugged into an outlet
that is properly installed and grounded. See
INSTALLATION INSTRUCTIONS.
Consult a qualified electrician or servicer if grounding
instructions are not completely understood, or if doubt
exists as to whether the oven is properly grounded.
Do not use an extension cord. If the product power cord
is too short, have a qualified electrician install a three-
slot receptacle. This oven should be plugged into a
separate 60 Hertz circuit with the electrical rating as
shown in specifications table. When the oven is on a
circuit with other equipment, an increase in cooking
times may be required and fuses can be blown.
Microwave operates on standard household current,
110-120 V.
4

A
IMPORTANT SAFETY INSTRUCTIONS
READ ALL INSTRUCTIONS BEFORE USING THE APPLIANCE
TV ! Radio Interference
This appliance generates and uses ISM frequency
energy. If not installed and used properly, in strict
accordance with the manufacturer's instructions, it may
cause interference to radio and television reception. It
has been type tested and found to comply with limits for
ISM equipment pursuant to part 18 of FCC rules, which
are designed to provide reasonable protection against
such interference in a residential installation. However,
there is no guarantee that interference will not occur in a
particular installation. Turn the appliance on and off to
determine if it causes interference. Try the following to
correct the interference:
o Clean door and sealing surface of the oven.
o Reorient the receiving antenna of the radio or
television.
o Relocate the microwave oven with respect to the
receiver.
o Move the microwave oven away from the receiver.
o Plug the microwave into a different outlet so that the
oven and the receiver are on different branch circuits.
The manufacturer is not responsible for any radio or TV
interference caused by unauthorized modification to this
microwave oven. It is the responsibility of the user to
correct such interference.
Intended Use
This appliance is intended for normal family household
use only. It is not approved for outdoor use. See the
Warranty. If you have any questions, contact the
manufacturer.
Do not use the cavity for storage purposes. Do not leave
paper products, cooking utensils, or food in the cavity
when not in use.
Do not operate oven when room humidity is excessive.
This oven is suitable for use above both gas and electric
cooking equipment 36" (914 mm) or less wide.
Child Safety
Do not allow children to use this appliance. Failure to do
so can result in burns or serious injury to children.
Children and pets should not be left alone or unattended
in the area where the appliance is in use. They should
never be allowed to play in its vicinity, whether or not the
appliance is in use.
When children become old enough to use the appliance,
it is the legal responsibility of the parents or legal
guardians to ensure that they are instructed in safe
practices by qualified persons.
Do not allow anyone to climb, stand, lean, sit, or hang on
any part of an appliance, especially a door, warming
drawer, or storage drawer. This can damage the
appliance, and the unit may tip over, potentially causing
severe injury.
Cleaning Safety
Clean exhaust filters frequently - Do not allow grease to
accumulate on the hood or filters. Fire could result.
Use care when cleaning the exhaust filters. Corrosive
cleaning agents, such as lye-based oven cleaners may
damage the filter (Refer to the CLEANING section in this
manual).
Clean turntable roller rest and oven floor frequently to
prevent excessive noise.
CAUTION
Grease left on filters can remelt and move into the vent.
WARNING
Be sure the entire appliance (including the grease filters
and light bulbs) has cooled and grease has solidified
before attempting to clean any part of the appliance.
Cooking Safety
CAUTION
To avoid personal injury or property damage, observe
the following:
o Do not leave oven unattended while in use.
o Do not store flammable material next to or in the
oven.
o When flaming foods under the microwave, always
turn the fan on.
o Do not operate the oven while empty. This could
damage the oven and result in a risk of fire.
o Do not store or use corrosive chemicals, vapors,
flammables or nonfood products in or near this
appliance. It is specifically designed for use when
heating or cooking food. The use of corrosive
chemicals in heating or cleaning will damage the
appliance and could result in injury.
o Do not dry clothes, newspapers or other
materials in the oven. Do not use newspapers or
paper bags for cooking. Fire could result.
o Do not use recycled paper products unless
labeled safe for microwave use. They may
contain impurities which may cause sparks and
result in fires when used.
o Always use potholders when removing items from
the oven. The cooking container and the glass
tray can be hot even if the oven is cool.
o Whenever possible, do not operate the ventilation
system during a cooktop fire. However, do not
reach through fire to turn it off.
o Do not mount over sink.
5

A
IMPORTANT SAFETY INSTRUCTIONS
READ ALL INSTRUCTIONS BEFORE USING THE APPLIANCE
o Do not store anything directly on top of the
appliance surface when the appliance is in
operation.
o Oversized food or oversized metal utensils
should not be inserted in a microwave oven as
they may create a fire or risk of electric shock.
o Do not clean with metal scouring pads. Pieces
can burn off the pad and touch electrical parts
involving a risk of electric shock.
o Do not store any materials, other than
manufacturer's recommended accessories, in
this oven when not in use.
o Do not cover racks or any other part of the oven
with metal foil. This will cause overheating of the
oven.
In Case of Fire
If materials inside an oven should ignite:
1. Keep door closed
2. Turn appliance off
3. Unplug the appliance or shut off at fuse or circuit
breaker
Liquids
Liquids, such as water, coffee, or tea could be
overheated. They can be heated beyond the boiling point
without appearing to boil. For example, visible bubbling
or boiling when the container is removed from the
microwave oven is not always present. THIS COULD
RESULT IN VERY HOT LIQUIDS SUDDENLY BOILING
OVER WHEN THE CONTAINER IS DISTURBED OR A
UTENSIL IS INSERTED INTO THE LIQUID.
To reduce the risk of injury to persons:
o Do not overheat the liquid.
o Stir the liquid both before and halfway through heating.
o Use extreme care when inserting a spoon or other
utensil into the container.
o Do not use straight sided containers with narrow
necks.
o After heating, allow the container to stand in the
microwave oven for a short time before removing.
Cooking Items
Eggs: Do not cook or reheat whole eggs, with or without
shell. Steam buildup in whole eggs may cause them to
explode, and possibly damage the oven or cause injury.
Reheating sliced hard-boiled eggs and cooking
scrambled eggs is safe.
Popcorn: Use only popcorn in packages designed and
labeled for microwave use, or pop it in a microwave oven
corn popper. Follow popcorn manufacturers' directions
and use a brand suitable for the wattage of your oven.
Do not continue to heat after popping has stopped.
Popcorn will scorch or burn. Do not leave oven
unattended..
CAUTION
When using pre-packaged microwave popcorn, check
package weight before using the popcorn function. Set
the oven for the weight of the popcorn package. If these
instructions are not followed, popcorn may not pop
adequately or may ignite and cause fire.
Foods with nonporous skins: Potatoes, tomatoes, sweet
potatoes, apples, whole squash and sausages are
examples of foods with nonporous skins, These types of
foods must be pierced before cooking to prevent them
from exploding.
Baby food / Baby formula: Do not heat baby bottles or
food in microwave oven. The glass jar or the surface of
food may appear warm while the interior can burn the
infant's mouth and esophagus.
Deep fat frying: Do not deep fat fry in oven. Oil can be
heated beyond ideal temperatures very quickly in a
microwave oven. Temperatures can climb high enough
for the cooking oils to reach their respective flash points
and burst into flames. The heated oil may bubble and
spatter causing possible damage to the oven and
perhaps result in burns. Additionally, microwave-safe
utensils may not be able to withstand the temperature of
the hot oil, and could result in the utensil shattering, if it
contains a slight imperfection, scratch or chip.
Home Canning / Drying foods / Small quantities of
foods: Do not use microwave oven for home canning or
heating of any closed jar. Pressure will build up and the
jar may explode. In addition, the oven cannot maintain
the food at the proper canning temperature. Improperly
canned food may spoil and be dangerous to consume.
Small quantities of food or foods with low moisture
content can dry out, burn or catch on fire.
Do not dry meats, herbs, fruits or vegetables in your
oven.
Proper cooking depends on time set and weight of food.
If you use a smaller portion than recommended and
cook at the time for the recommended portion, fire could
result.
6

A
IMPORTANT SAFETY INSTRUCTIONS
READ ALL INSTRUCTIONS BEFORE USING THE APPLIANCE
Browning dishes:. Microwave browning dishes or grills
are designed for microwave cooking only. Preheating
times vary depending on the size of the browning dish
and food being cooked. Always follow instructions
provided by the browning dish or grill manufacturer. Do
not preheat browning dishes more than 6 minutes.
Oven roasting bags: If an oven bag is used for
microwave cooking, prepare according to package
directions. Do not use wire twist-ties to close bags,
instead use nylon ties, cotton string or a strip cut from
the open end of the bag. Make six 1/2"(1 2.7 mm) slits by
closure. Place oven cooking bag in a dish slightly larger
than the food being cooked.
Cooking Utensils
See also Microwave Utensil Guide.
Cooking utensils, the glass tray and racks get hot during
microwaving. Always use potholders when removing
items from the oven. Allow the glass tray and the metal
racks (if used) to cool before handling.
Do not use metal utensils, or dishes with metallic trim in
the oven.
When using aluminum foil in the oven, allow at least 1"
(25.4 mm) of space between foil and interior oven walls
or door.
The glass tray and the metal racks (if used) will get hot
during cooking. The cooking container and the glass tray
can be hot even if the oven is cool.
Never use paper, plastic, or other combustible materials
that are not intended for cooking.
When cooking with paper, plastic, or other combustible
materials, follow manufacturer's recommendations on
product use. Do not use paper towels which contain
nylon or synthetic fibers. Heated synthetics could melt
and cause paper to ignite
Do not heat sealed containers or plastic bags in oven.
Food or liquid could expand quickly and cause container
or bag to break. Pierce or open container or bag before
cooking.
Glass Tray / Turntable Ring
Do not operate the oven without the turntable roller rest
and the glass tray in place.
Do not operate the oven without the glass tray in place.
Improper cooking or damage to the oven could result.
Verify that the glass tray is properly positioned and
turning when the oven is in use.
Note: The glass tray can turn in either direction.
Only use the glass tray designed for this oven. Do not
substitute any other tray.
Allow the glass tray to cool before cleaning or placing in
water.
Do not place food directly on the glass tray. Always place
food in a microwave safe dish.
Always replace the turntable ring and the glass tray in
their proper positions.
The turntable ring must always be used for cooking
along with the glass tray.
Exhaust Mode Operation
When the microwave is operated in exhaust mode
simultaneously with a different burner, care must be
taken to ensure that there is an adequate supply of fresh
air which will be needed by the burner for combustion.
WARNING
Avoid carbon monoxide poisoning - Provide adequate air
intake so combustion gases are not drawn back into the
room.
Thermometers
Do not use regular cooking thermometers in oven. Most
cooking thermometers contain mercury and may cause
electrical arc, malfunction, or damage to the oven.
Pacemakers
To avoid pacemaker malfunction, consult physician or
pacemaker manufacturer about effects of microwave
energy on pacemaker.
State of California Proposition 65
Warnings
WARNING
This product contains chemicals known to the State of
California to cause cancer, birth defects or other
reproductive harm.
Fan Motor Operation
After using the oven the fan motor can rotate to cool the
electric components. This is perfectly normal, and you
can take out the food from the oven while the fan
operates.
Room Venting with Carbon Filter
The charcoal filter, which was enclosed with your
microwave oven, binds the odorous substances.
Note: If no charcoal filter is installed, it is not possible to
bind the odorous substances in the cooking vapours.
SAVE THESE INSTRUCTIONS.
7

Causes of damage
NOTICES:
o Metal - e.g. a spoon in a glass - must be kept at least
1" (2 cm) from the oven walls and the inside of the
door. Sparks could irreparably damage the glass on
the inside of the door.
o Water in the hot oven interior: Never pour water into
the hot oven interior. Steam is produced. Damage to
the enamel can arise due to the temperature change.
o Do not leave moist groceries in a closed oven for an
extended period of time. It can lead to corrosion inside
the oven.
o Fruit juice can leave stains in the oven. Always remove
fruit juice immediately and wipe up first with a damp
and then a dry cloth.
o Cooling with the appliance door open: only allow the
oven cavity to cool when it is closed. Even if the
appliance door is only open a little, front panels of
adjacent units could be damaged over time.
o Highly soiled door seal: the appliance door will no
longer close properly during operation if the door seal
is highly soiled. Adjoining furniture fronts may be
damaged. Always keep the door seal clean.
o Appliance door as a seat or storage surface: do not
stand, sit or hang on the appliance door. Do not place
any cookware or accessories on the appliance door.
o Inserting accessories: depending on the appliance
type, accessories can scratch the door pane when
closing the appliance door. Always slide accessories
fully into the oven interior.
o Do not hold or carry the appliance by the door handle.
The door handle cannot carry the weight of the device
and could break off, or the hinges can be damaged.
o Operating the microwave without food in the oven
cavity may lead to overloading. Never run the
microwave unless there is food in the oven cavity. An
exception to this rule is a short ovenware test (see the
section "Microwave, suitable ovenware"), or an
AutoChef mode that needs pre-heating.
o Always set the microwave power as recommended for
the food. High power settings can overheat foods very
quickly. The turntable may jump if overloaded.
Protecting the environment
Unpack the appliance and dispose of the packaging in
line with environmental requirements.

Getting started
Parts
Front view
1 2
i
Oven light
The oven light turns off to save energy after two minutes
with the door open. To turn the light back on close the
door and open it again.
Oven specifications
Power Supply 120 V AC, 60 Hz
Cooking Power 1.100 W
Frequency 2.450 MHz
Cavity Volume 2.1 cubic ft. (60 L)
Control panel
Bottom view
i i
5 4
7
1 Top vent grill
2 Display
3 Control panel
4 Door handle
5 Window
6 Surface lights
7 Ventilation filters
Cooling Fan
The cooling fan runs during all cooking modes. The fan
can be heard when it is running, and warm air may be
felt as it is released from the oven vent. The fan may also
run after the oven is off.
Oven Vent
The oven vent is located at the top of the unit. Warm air
may be released from the vent before, during and after
cooking. It is normal to see steam escaping from the
vent, and condensation may collect in this area. This
area may be warm when the oven is in use. Do not block
the vent, since it is important for air circulation.
Touch keys
You can activate a function by briefly touching the
corresponding touch key. Each time you touch a key a
short beep will sound. A long beep will tell you that you
have made an invalid input.
Touch key
Settings
Clock
Turntable
(on/off)
Sensor Reheat
Sensor Cook
Auto Defrost
Popcorn
Function
Change basic settings
Set time of day
Switches turntable on or off
Reheat food with automatic settings
Cook food with automatic settings
Defrost food with automatic settings
Select popcorn bag size

Touchkey Function
Beverage Heat beverages, select beverage size
Keep Warm Set Keep Warm feature
More Modes Enter more modes for convenience
cooking
Power Level Set power level for microwave opera-
tion
+30 Seconds Add 30 seconds to microwave timer
Kitchen Timer Set kitchen timer
0- 9 Use the number keys to enter cus-
tomized values
Vent (high/low) Turn kitchen ventilation feature on/off
Light Turn surface light on/off
Clear/Off Clear entered value/turn appliance
off
Start/Enter Confirm input, start operation
Display elements
The display gives you information on the current settings
of your appliance. Blinking display symbols indicate that
an input is required.
Accessories
How to fit the turntable
1. Place the roller rest a in the recess in the oven cavity.
2. Let the turntable b slot in place in the drive c in the
centre of the floor of the oven cavity.
Note: Do not use the appliance if the turntable is not in
place. Ensure that it is properly slotted into place and
rotates freely when the microwave is operated.
Using the metal rack
The metal rack gives you extra space when cooking in
more than one container at the same time.
1. Place rack securely in the four plastic supports.
START
SENS.
F
ozlb
mmimmlmlmi
88:88
Keep Warm mode
Vent fan on
Panel lock on
Turntable off
Kitchen timer
Defrost
Confirmation with Start/Enter key
required when blinking
Sensing in progress
Temperature in °F
Numeric display shows weight in
Ounces/Pounds
Status bar for microwave power level
Numeric display for time, temperature
or weight, depending on the unit dis-
played next to it
Note: Rack must not touch metal walls or back of
microwave.
2. Place equal amounts of food both above and below
rack.
Note: Amount of food must be approximately the
same in both containers to balance out cooking
energy.
• , CAUTION
o Do not use the rack to pop popcorn.
o The rack must be on the four plastic supports
when used.
o Use the rack only when cooking food on two
positions.
o Do not cook with rack on the floor of the
microwave oven.
o The rack can get hot during microwaving. Allow
the rack to cool down before handling.
10

Microwave utensil guide
Suitable ovenware
o Heat-resistant glass, glass-ceramic:
Utility dishes, loaf dishes, pie plates, cake plates, liquid
measuring cups, casseroles and bowls without
metallic trim (e.g. Pyrex®,Anchor Hocking TM, Coming
Ware ®, etc.).
o China:
Bowls, cups, serving plates and platters without
metallic trim.
o Plastic films and wraps:
Plastic wrap (as a cover) - lay the plastic wrap loosely
over the dish and press it to the sides. Vent plastic
wrap by turning back one edge slightly to allow excess
steam to escape. The dish should be deep enough so
that the plastic wrap will not touch the food.
o Microwave-safe plastics:
Use microwave-safe plastic dishes, cups, semi-rigid
freezer containers and plastic bags for short cooking
times. Use these with care because the plastic may
soften from the heat of the food.
Paper products:
Paper towels, wax paper, parchment paper, paper
napkins and paper plates with no metallic trim or
design. Look for the manufacturers label for any
special instructions for use in the microwave oven.
Unsuitable ovenware
o Metal utensils and cookware:
Metal shields the food from microwave energy and
produces uneven cooking. Also, avoid metal skewers,
thermometers or foil trays. Metal utensils can cause
arcing, which can damage your microwave oven.
o Metal decoration:
Bowls, cups, serving plates and platters with metallic
trim.
Aluminum foil:
Avoid large sheets of aluminum foil because they
hinder cooking and may cause harmful arcing. Use
small pieces of foil to shield poultry legs and wings.
Keep ALL aluminum foil at least 1 inch (2.5 cm) from
the side walls of the oven cavity and door of the
microwave.
o Wood:
Wooden bowls and boards will dry out and may split
or crack when you use them in the microwave oven.
Baskets made of wood will react in the same way.
o Tightly covered cookware:
Be sure to leave openings for steam to escape from
covered cookware. Pierce plastic pouches of
vegetables or other food items before cooking. Tightly
closed pouches may explode.
o Brown paper:
Avoid using brown paper bags. They absorb heat and
can burn.
o Flawed or chipped cooking utensils:
Any utensil that is cracked, flawed or chipped may
break in the oven.
o Metal twist ties:
Remove metal twist ties from plastic or paper bags.
They become hot and could cause a fire.
Ovenware test
Do not turn on the microwave unless there is food inside.
The following ovenware test is the only exception to this
rule.
Perform the following test if you are unsure whether your
ovenware is suitable for use in the microwave:
1. Heat the empty ovenware at maximum power for 1/2to
1 minute.
2. Check the temperature occasionally during that time.
The ovenware should still be cold or warm to the touch.
The ovenware is unsuitable if it becomes hot or sparks
are generated.
Before using the appliance for the first time
Appliance must be properly installed by a qualified
technician before use.
Remove all packing materials from inside and outside
the oven.
o While cool, wipe with a clean, damp cloth and dry.
o There may be a slight odor from your new appliance;
this is normal and will disappear after a short time.
o Optimum cooking results depend on proper cookware
being used.
o Read and understand all safety precautions and Use
and Care Manual information.
Execute the following sections prior to operating:
The appliance must be completely fitted and connected.
Cleaning accessories
Before using accessories for the first time, thoroughly
clean them with hot soapy water and a soft dish cloth.
11

Operation
Setting the clock
The clock can be set in 12-hour mode.
1. Touch Clock once.
2. Enter the time using the number keys.
Example: To set the clock to 12:41 type in 1 2 4 1.
3. Touch Clock to confirm.
The time of day is displayed.
Setting the Kitchen Timer
You can set a timer value of up ot 99 minutes and
99 seconds.
1. Touch Kitchen Timer.
f_f_, f_f_
The _ symbol lights up and LaLa.Lauis blinking.
2. Enter the desired time using the number keys.
3. Touch Kitchen Timer to confirm.
The Kitchen Timer starts counting down.
Once the set time has elapsed 4 beeps will sound. To
stop the beep, touch Kitchen Timer.
To cancel the kitchen timer, touch Kitchen Timer again
or open the appliance door.
Operating the Ventilation Fan
The Vent feature moves steam and other cooking vapors
from the cooking surface of the range below the
microwave oven.
You can set four different vent speeds.
Set the vent feature by touching Vent (high/low). The
ventilation symbol ITiiTI will light up on the display.
Vent level Touch Vent (high/ Display
low) key
I
4 (high) once H ,
3 twice
2 3 times
1 (low) 4 times uu'n
OFF 5 times OFF
Note: If the temperature gets too hot around the
microwave oven, the fan of the vent feature will
automatically turn on at the lowest setting to cool the
oven. The fan will automatically turn off when the internal
parts are cool. When this occurs, the vent cannot be
manually turned off.
Turning the Surface Light on/off
The appliance is equipped with a cooking surface light,
to light the surface underneath the appliance.
With the Light key you can set two brightness levels.
Brightness Touch Light key
High once
Low twice
Off three times
Turning the turntable on / off
For best cooking results, leave the turntable on. It can be
turned off for large dishes.
To turn the turntable off, touch Turntable (on/off) once.
The _ symbol and na-a-L--_- lights up briefly. Touch the
key again to turn the turntable on. The _ symbol and
Lan lights up briefly.
• , CAUTION
o Sometimes the turntable can become hot. Be
careful touching the turntable during and after
cooking.
o Do not run the oven empty.
o Do not operate the oven without the turntable in
place.
Operating the microwave
The appliance must be turned off.
1. Enter the desired cooking duration with the number
keys. The timer display will fill in from right to left.
Example: To set a microwave cooking time of
20 minutes and 30 seconds, enter the numbers
2 0 3 0. START is blinking.
2. You can start microwave operation with the default
power level 10 by touching Start/Enter,
or-
you can adjust the power level. Touch Power Level.
The default power level n_ ,-_
_-L _Lais blinking. The
segments in the bar underneath the number display
also indicate the power level.
3. Enter the desired power level using the number keys.
pa
L and the selected power level and START are
blinking in the display.
4. Touch Start/Enter to start microwave operation.
The microwave timer will start to count down.
The microwave timer can be changed during operation
by touching +30 Seconds.
The power level can be changed during operation. To
display the set power level, touch Power Level.
Once the microwave time has run out, four beeps will
sound. The appliance turns off and the clock is
displayed.
12

Opening appliance door during operation
Opening the appliance door during operation will
interrupt the current mode. Close the appliance door and
then touch Start/Enter to resume operation.
Cancel operation
Touch Clear/Off to cancel the active oven mode. The
appliance turns off and the clock is displayed.
The cooling fans may continue to run for a while and then
switch off automatically.
Microwave power levels
The 10 power levels available with this microwave will
help you to adjust to the power output best suited for the
food type you are preparing. As with any food
preparation in the microwave, it is best to follow the
microwave instructions that are printed on the food
packaging.
The table below provides suggested power levels for
various types of food that can be prepared in the
microwave.
Power Micro- Use for
level wave
output
ILa 100%
High
90%
80%
"_ 70%
I
,S 60%
S
50%
h' 40%
30%
Boiling water
Cooking ground meat
Making candy
Cooking fresh fruit & vegetables
Cooking fish & poultry
Preheating browning dish
Reheating beverages
Cooking bacon slices
Reheating meat slices quickly
Saute onions, celery & green pep-
pers
All reheating
Cooking scrambled eggs
Cooking breads & cereal products
Cooking cheese dishes & veal
muffins, brownies & cup-Cooking
cakes
Cooking
Cooking
whole poultry
pasta
Cooking meat
Cooking custard
Cooking spare ribs, rib roast & sir-
loin roast
Cooking less tender cuts of meat
Reheating frozen packaged foods
Thawing meat, poultry & seafood
Cooking small quantities of food
Finish cooking casseroles, stew &
some sauces
Melting chocolate
Power Micro- Use for
level wave
output
2 20%
i 10%
Softening butter & cream cheese
Softening ice cream
Raise yeast dough
Suggestions for best results
To help you achieve the best possible results from your
microwave oven, read the following suggestions below:
o Storage temperature
Foods taken from the freezer or refrigerator take
longer to cook than the same foods would at room
temperature.
o Size
Small pieces of food cook faster than large ones.
Pieces similar in size and shape will cook more evenly
when cooked together. For more even results, reduce
the power levels when cooking large pieces of food.
o Natural moisture
Very moist foods cook more evenly because
microwave energy heats water molecules very
efficiently.
o Stirring
Stir foods such as casseroles and vegetable from the
outside to the center to distribute the heat more
evenly. This will allow the food to cook faster. Constant
stirring is not necessary.
o Turn over items
Turn over foods such as pork chops, roasts or whole
cauliflower halfway through the cook time. This will
help to expose all sides equally to microwave energy.
o Food placement
Place delicate areas of food items, such as asparagus
tips, toward the center of the turntable tray.
o Food arrangement
Arrange unevenly shaped foods, such as chicken
pieces or salmon, with the thicker or meatier parts
toward the outside of the turntable tray.
o Let food stand
After removing the food from the microwave, cover the
food with foil or a casserole lid and let it stand to finish
cooking. This will help the food finish cooking in the
center and avoids overcooking the outer edges. The
length of stand time depends on the density and
surface area of the food items.
Wrapping in paper towels or wax paper
Sandwiches and many other food types containing
pre-baked bread should be wrapped prior to placing in
the microwave to help prevent the food items from
drying out while heating.
Adding cook time (+30 Seconds)
This time-saving feature will let you quickly add
30 seconds to any cook time. +30 Seconds will also start
the microwave with 30 seconds at 100% power level.
Each time you touch the +30 Seconds key, 30 seconds
will be added to the cook time.
13

Auto Defrost
With the Auto Defrost feature you can defrost three
different types of food by entering the weight. The ideal
defrost time will be calculated by the program.
Setting Auto Defrost
Irr
1. Touch Auto Defrost once. oct i and START are
blinking and the _ symbol lights up in the display.
Auto Defrost programs
Program Food Weight range
no.
oc,- i Ground meat 0.5- 31bs
irr '_
oct- c Meat pieces 0.5 - 3 Ibs
(steaks, chops)
irr '_
oct- 3 Poultry pieces 0.5 - 3 Ibs
Tips for defrosting
• , WARNING
2. Touch Auto Defrost repeatedly until the desired
program number is shown in the display. Check the
menu label at the bottom of the oven cavity or see
program table below.
3. Touch Start/Enter. n n
u.u Ib is blinking in the display.
4. Enter the weight of the food using the number keys.
5. Touch Start/Enter to start the program.
When auto defrost is finished 4 beeps will sound. The
appliance turns off and the clock is displayed.
Note: A beep sounds during defrosting for all food
programs to turn food over or separate pieces.
Opening appliance door during operation
Opening the appliance door during operation will
interrupt the current mode. Close the appliance door and
then touch Start/Enter to resume operation.
Cancel operation
Touch Clear/Off to cancel the active oven mode. The
appliance turns off and the clock is displayed.
The cooling fans may continue to run for a while and then
switch off automatically.
Defrosting suggestions for meat
For best results, please read these suggestions when
defrosting meat.
HEALTH RISK
Liquid will be produced when defrosting meat or
poultry. Drain off this liquid when turning meat and
poultry, and under no circumstances, use it for other
purposes, or allow it to come into contact with other
foods.
o Always enter the weight in Ibs when using the defrost
by weight feature (see program table).
o Use the defrost mode for raw food items only.
o Defrosting gives best results when food to be thawed
is a minimum of 0 ° F (taken directly from a freezer). If
the food has been stored in a refrigerator-freezer that
does not maintain a temperature of 5 ° F or below,
always program a lower food weight or lower cook
time to prevent cooking the food.
o If the frozen food is stored outside the freezer for up to
20 minutes, enter a reduced cook time or weight.
o The shape of the package will alter the defrosting time.
Shallow rectangular food packets defrost more quickly
than a deep frozen block of food.
o Separate pieces as they begin to defrost. Separated
frozen pieces of food defrost better.
o Shield warm areas of food with small pieces of
aluminum foil, if they start to heat up.
Use small pieces of aluminum foil to shield food items
like chicken wings, leg tips and fish tails.
Do not allow aluminum foil to touch the oven cavity
when defrosting.
Meat Weight range
Ground meat 0.5 to 2 Ibs
(8 to 48 oz)
Steaks, chops or fish 0.5 to 3 Ibs
(8 to 48 oz)
Chicken pieces 0.5 to 3 Ibs
(8 to 48 oz)
Suggestions
After each stage, remove any pieces of food that are nearly defrosted. Let
stand covered with foil for 5 to 10 minutes.
Ater each stage, rearrange the food. If there are any warm or thawed por-
tions of food, shield them with narrow pieces of aluminum foil. Remove any
pieces of food that are nearly defrosted. Let stand covered for about 5 to 10
minutes.
After each stage, rearrange or remove any pieces of food that are nearly
defrosted. Let stand covered for 10 to 20 minutes.
14

Sensor Reheat
The Sensor Reheat feature lets you reheat dinner plates
or casseroles (8-1 2 oz.) for your cooking convenience.
Setting Sensor Reheat
1. Touch Sensor Reheat once. SF - i and START are
blinking in the display.
2. Touch Sensor Reheat repeatedly until the desired
program number is shown in the display. Check the
menu label at the bottom of the oven cavity or see
program table below.
3. Touch Start/Enter to start sensor reheat mode. The
appliance starts sensing, SENS. lights up in the
display. The microwave is operating during sensing.
When sensing is complete, two short beeps will sound
and the calculated cook time will start to count down.
Once sensor reheat is finished 4 beeps will sound. The
appliance turns off and the clock is displayed.
Note: Do not open the door during the sensing
process, or the program will be cancelled. Once the
calculated cook time is displayed you can open the door
to stir, turn or rearrange the food. Touch Start/Enter to
resume operation.
Notes
o Cover with vented plastic wrap or wax paper.
o Reheat food on a microwaveable dinner plate.
Cancel operation
Touch Clear/Off to cancel the active oven mode. The
appliance turns off and the clock is displayed.
The cooling fans may continue to run for a while and then
switch off automatically.
Sensor Reheat programs
Program Food Quantity
no.
SF - i Dinner plate 1 serving
S_- - 2 Casserole, pasta 1 to 4 servings
Reheat cooking suggestions
Food Directions
Dinner
plate
Use only pre-cooked, refriger-
ated foods. Cover plate with
vented plastic wrap or waxed
paper, tucked under plate. If
food is not hot enough after
heating with the Reheat feature,
continue heating using manual
time and power level setting.
Contents:
Casse-
role, Pasta
o 3-4 oz. meat, poultry or fish
(up to 6 oz. with bone)
o 1/2 cup starch (potatoes,
pasta, rice, etc.)
o 1/2 cup of vegetables (about
3-4 oz.)
Cover plate with lid or vented
plastic wrap. If food is not hot
enough after heating with the
Reheat feature, continue heat-
ing using manual time and
power level setting.
Stir foods once before serving.
Contents:
o Casserole: refrigerated foods
(such as beef stew or lasa-
gna)
o Pasta: Canned spaghetti and
ravioli, refrigerated foods
Quantity
1 serving
(1 plate)
1 to4
servings
Sensor Cook
Sensor Cook allows you to cook many of your favorite
foods without selecting cooking times and power levels.
The microwave oven automatically determines the
required cooking time for each food item.
For best results for cooking by sensor, follow these
recommendations:
o Food cooked with the sensor system should start from
normal storage temperature.
o Turntable tray, glass tray and outside of container
should be dry.
o Foods should always be covered loosely with
microwavable plastic wrap, wax paper or lid.
o Do not open the door or touch Clear/Off key during
sensing time. When sensing time is over, the oven
beeps twice and the remaining cooking time will
appear in the display. At this time you can open the
door to stir, turn or rearrange the food.
15

Setting Sensor Cook
1. Touch Sensor Cook once. So- i and START are
blinking.
2. Touch Sensor Cook repeatedly until the desired
program number is shown in the display.
3. Touch Start/Enter to start sensor cook mode. SENS.
lights up in the display and the appliance starts
sensing.
When sensing is complete, two short beeps will sound
and the calculated cook time will start to count down.
Once sensor cook is finished 4 beeps will sound. The
appliance turns off and the clock is displayed.
Note: Do not open the door during the sensing
process, or the program will be cancelled. Once the
calculated cook time is displayed you can open the door
to stir, turn or rearrange the food. Touch Start/Enter to
resume operation.
Cancel operation
Touch Clear/Off to cancel the active oven mode. The
appliance turns off and the clock is displayed.
The cooling fans may continue to run for a while and then
switch off automatically.
Sensor Cook programs
Food QuantityProgr.
no.
c-l
S 7
C-C
_,
C-D
I'- II
DC - 7
Cooking tips
Baked 1 - 4 potatoes After cooking,
Potato (8 - 32 oz) allow to stand
wrapped in foil
for 5 minutes.
Sweet Potato 1-4 potatoes After cooking,
(8 - 32 oz) allow to stand
wrapped in foil
for 5 minutes.
Fresh 8 - 24 oz No water is
Vegetable (0.5 - 1.5 Ibs) needed if vege-
tables have just
been washed.
Add
2 tablespoons
water per
8 ounces of
fresh vegeta-
bles.
Frozen 8 - 24 oz Add
Vegetable (0.5 - 1.5 Ibs) 1 tablespoon
water per
4 ounces of fro-
zen vegetables.
Progr. Food Quantity Cooking tips
no.
Sc - S Ground Meat 8- 24 oz After cooking,
(0.5 - 1.5 Ibs) allow to stand,
covered, for 3 -
4 minutes.
Sc - _ Fish/Seafood 8- 24 oz Roll thin edges
(0.5- 1.5 Ibs) underneath.
Arrange in a
ring around
microwaveable
dish.
S
c - "7 Brown Rice 0.5- 2 cups Use a high-
(dry rice) sided casserole
dish. Do not
cover. Use
1 cup rice to
3 cups water.
Sc - 8 White Rice 0.5 - 2 cups Use a high-
(dry rice) sided casserole
dish and lid.
Use 1 cup rice
to 2 cups water.
_c - _ Frozen Follow package
Entrees instructions for
venting, cutting
plastic film, etc.
Panel Lock
The panel lock feature is very useful when cleaning the
control panel. The lock will prevent accidental
programming when wiping the control panel clean.
To activate the panel lock:
Touch and hold Clear/Off for more than 3 seconds. The
symbol lights up in the display, a double beep
sounds.
To deactivate the panel lock:
Touch and hold Clear/Off for more than 3 seconds. The
symbol disappears from the display. The panel is
unlocked.
Settings
The following basic settings of your appliance can be
adjusted to your personal preferences.
Display Function Touch
Settings key
,
,7o Key sounds on/off once
1 - on
2 - off
r i
L _o Clock display in stand-by twice
mode on/off
1 - on
2 - off
16

Changing the settings
Example: Turn clock display on/off.
1. Touch Settings twice.
F i FtFF Ft
L _o and ,..,--,- or un alternate in the display.
2. Touch the number key 1 to turn the clock display on,
touch 2 to turn the clock display off.
3. Touch Start/Enter.
4. Touch Clear/Off to exit the settings menu.
Note: You can only change one setting at a time. To
change another setting, you have to exit the settings
menu first and begin from step 1.
Convenience Operation
Popcorn
CAUTION
Do not leave oven unattended while popping corn.
Popcorn may ignite and cause fire.
Setting Popcorn mode
The popcorn feature lets you pop 3 different bag sizes of
commercially packaged microwave popcorn. Use the
following table to determine the setting to use:
Bag size Touch Popcorn key
1.2 oz. (default setting) once
2.5 oz. twice
3.5 oz. 3 times
Example: Pop a 3.5 oz. bag of popcorn automatically:
1. Popcorn three times. 3 and START are blinking in the
display.
2. Touch Start/Enter.
The appliance starts to count down. Once the
microwave time has elapsed 4 beeps will sound. The
appliance turns off and the clock is displayed.
Cancel operation
Touch Clear/Off to cancel the active oven mode. The
appliance turns off and the clock is displayed.
The cooling fans may continue to run for a while and then
switch off automatically.
Beverage
The beverage feature heats between 0.5 and 2 cups of a
beverage. Use the table below to determine the setting to
use.
Pro- Amount Touch
gram No. Beverage key
1 0.5 cups (about 8 oz) once
2 1 cup (about 16 oz) twice
3 1.5 cups (about 24 oz) 3 times
4 2 cups (about 32 oz) 4 times
Example: Heat 1 cup of a beverage.
1. Touch Beverage twice. 2 and START are blinking in
the display.
2. Touch Start/Enter.
Once the cook time has elapsed, 4 beeps will sound.
The appliance turns off and the clock is displayed.
Cancel operation
Touch Clear/Off to cancel the active oven mode. The
appliance turns off and the clock is displayed.
The cooling fans may continue to run for a while and then
switch off automatically.
Keep Warm
You can keep cooked food warm in your microwave
oven for up to 60 minutes.
_k CAUTION
WHEN USING KEEP WARM MODE, FOLLOW
THESE GUIDELINES:
o Do not use the Keep Warm mode to heat cold
food.
o Be sure to maintain proper food temperature. The
USDA recommends holding hot food at 140 °F
(60 °C) or warmer.
o DO NOT warm food longer than one hour.
Setting Keep Warm
1. Touch Keep Warm. The _ symbol lights up and
f_f_, f_f_
uu.uu is blinking in the display.
2. Enter the desired time using the number keys.
3. Touch Start/Enter.
Once the set Keep Warm time has elapsed, the
appliance keeps beeping until Clear/Off is pressed.
Notes
o Use the Keep Warm mode to keep cooked foods hot
and ready to serve.
o Food cooked covered should remain covered during
Keep Warm.
o Pastry items (pies, turnovers, etc.) should be
uncovered.
o Complete meals kept warm on a dinner plate can be
covered during Keep Warm.
17

Cancel operation
Touch Clear/Off to cancel the active oven mode. The
appliance turns off and the clock is displayed.
The cooling fans may continue to run for a while and then
switch off automatically.
More Modes
The More Modes feature offers you five more convenient
programs.
Available modes
Mode no. Name
1 Melt butter
2 Melt chocolate
3 Soften ice cream
Soften cream cheese
Time defrost
Input
1 = 2 tablespoons
2 =1/4 cup
3 = 1/2cup
1 = 1 cup
2 = 2 cups
1 =4oz.
2=8oz.
3 = 16oz.
4 = 32oz.
5 = 48 oz.
1 =3oz.
2=6oz.
3=8oz.
Enter defrost time
Setting More Modes
1. Touch More Modes once. i and START are blinking in
the display.
2. Touch More Modes repeatedly until the desired
program number is shown in the display. Check the
menu label at the bottom of the oven cavity or see
program table above.
3. Touch Start/Enter. For modes 1 to 4: i and START is
blinking on the display. For mode 5: LaLa.LaLais blinking
in the display.
4. Enter the desired weight category (mode 1 - 4) or
enter the desired defrost time (mode 5) with the
number keys.
5. Touch Start/Enter to start operation.
Once the cook time has elapsed, 4 beeps will sound.
The appliance turns off and the clock is displayed.
Cancel operation
Touch Clear/Off to cancel the active oven mode. The
appliance turns off and the clock is displayed.
The cooling fans may continue to run for a while and then
switch off automatically.
Cooking Charts
The charts can be used as a guide. Follow package or
recipe directions.
Cooking meat in your microwave
Be sure to place prepared meats on a microwave-safe
roasting rack in a microwave-safe dish. Start cooking the
meat fat side down and if necessary, use narrow strips of
aluminum foil to shield any bone tips or thin meat areas.
After cooking, check the temperature in several places
before letting the meat stand the recommended time.
Please note that the temperatures in the following charts
are temperatures at removal time; the temperature will
rise during the standing period.
Meat
Roast beef boneless
(up to 4 Ibs.)
Roast pork boneless
or bone-in
(up to 4 Ibs.)
Power level Cook time Directions
High (10) for first
5 minutes, then
medium (5)
High (10) for first
5 minutes, then
medium (5)
12-17 min./lb, for 160 ° F
(71 °C) (Medium)
14-19 min./lb, for 170 ° F
(76°C) (Well Done)
15-20 min./lb, for 170 ° F
(76°C) (Well Done)
Expect a 10 ° F rise in the temperature during the standing period.
Place roast beef fat-side down on
roasting rack. Cover with wax paper.
I-urn over half way through cooking.
Let stand* 10-15 minutes.
Place roast pork fat-side down on
roasting rack. Cover with wax paper.
Turn over half way through cooking.
Let stand* 10-15 minutes.
18

Stand time
Meat Doneness Remove from oven
Beef Medium 150°F (65°C)
Well done 160°F (71 °C)
Pork Medium 150°F (65°C)
Well done 160°F (71 °C)
Poultry Dark meat 150°F (65°C)
Light meat 160°F (71 °C)
After standing (10-15 min.)
150°F (65°C)
160°F (71°C)
150°F (65°C)
160°F (71°C)
150°F (65°C)
160°F (71°C)
Cooking poultry in your microwave
Be sure to place poultry on a microwave-safe roasting
rack in a microwave-safe dish. Cover poultry with wax
paper to prevent splattering. Use narrow strips of
aluminum foil to shield any bone tips or thin meat areas,
or areas that start to overcook. After cooking, check the
temperature in several places before letting the meat
stand the recommended time.
Meat Power level Cook time
Whole chicken medium high (7)180 ° F 7-10 min./Ib
(up to 4 Ibs.) (82°C) dark meat170 ° F
(76°C) dark meat
Chicken pieces medium high (7)180 ° F 7-10 min./Ib
(up to 4 Ibs.) (82°C) dark meat170 ° F
(76°C) dark meat
Directions
Place chicken breast-side down on roasting rack.
Cover with wax paper. Turn over half way through
cooking. Cook until juices run clear and meat near
bone is no longer pink. Let stand for 5-10 min.
Place chicken bone-side down on dish, with thick-
est portions toward the inside of dish. Cover with
wax paper. Turn over half way through cooking.
Cook until juices run clear and meat near bone is
no longer pink. Let stand for 5-10 min.
Cooking eggs in your microwave
o Never cook eggs in the shell and never warm hard-
cooked eggs in the shell; they can explode.
o Always pierce yolk on whole eggs to keep them from
bursting.
o Cook eggs just until set; they will become tough if
overcooked.
o Cooking scrambled eggs is safe.
Cooking vegetables in your microwave
o Vegetables should be washed just before cooking.
Rarely is extra water needed. If dense vegetables such
as potatoes or carrots are being cooked, add about
1/4cup of water.
o Small vegetables (sliced carrots, peas, lima beans,
etc.) will cook faster than larger vegetables.
o Whole vegetables, such as potatoes, acorn squash or
corn on the cob, should be arranged in a circle on the
turntable before cooking. They will cook more evenly if
turned over halfway through cooking.
o Always place vegetables like asparagus and broccoli
with the stem ends pointing towards the edge of the
dish and the tips toward the center.
o When cooking cut vegetables, always cover the dish
with a lid or vented microwavable plastic wrap.
o Whole, unpeeled vegetables such as potatoes, sweet
potatoes, squash, eggplant, etc., should have their
skin pricked in several locations before cooking to
prevent them from bursting.
o For more even cooking, stir or rearrange whole
vegetables halfway through the cook time.
o Most of the time, the denser the food, the longer the
required standing time. For example, a baked potato
should stand for 5 minutes before serving, while a dish
of peas may be served immediately.
19

Cooking seafood in your microwave
Place fish in a microwave-safe dish. Be sure to always
cook fish until it flakes easily with a fork. Use a tight
cover to steam fish; a lighter cover of wax paper or paper
towel provides less steaming. And be sure not to
overcook fish; check it for doneness at a minimum
cooking time before cooking longer.
Seafood Power level Cook time
Fish steaks up to medium high (7) 7-11 min./Ib
11/2Ibs
Fish fillets up to medium high (7) 7-11 min./Ib
11/2Ibs.
Shrimp up to medium high (7) 7-11 min./Ib
11/2Ibs.
Directions
Arrange fish on roasting rack with meaty portions
towards the outside of rack. Cover with wax paper.
Turn over and rearrange halfway through cook time.
Cook until fish flakes easily with fork.
Let stand 3-5 mins.
Arrange fillets in a baking dish, turning any thin pieces
under. Cover with wax paper. If over 1/2inch thick, turn
over and rearrange halfway through cook time. Cook
until fish flakes easily with fork.
Let stand 2-3 mins.
Arrange shrimp in a baking dish without overlapping or
layering. Cover with wax paper. Cook until firm and
opaque, stirring 2 or 3 times.
Let stand 5 mins.
Cleaning and Maintenance
WARNING
Be sure the entire appliance (including the grease
filters and light bulbs) has cooled and grease has
solidified before attempting to clean any part of the
appliance.
WARNING
Make sure the appliance and lights are cool and
power to the appliance has been turned off before
replacing the light bulb(s). Failure to do so could
result in electrical shock or burns.The lenses (if
equipped) must be in place when using the
appliance.The lenses (if equipped) serve to protect
the light bulb from breaking.The lenses (if equipped)
are made of glass. Handle carefully to avoid
breaking. Broken glass can cause an injury.
WARNING
Light socket is live when door is open if main power
supply is not turned off.
Cleaning
Cleaning Guide
o For best performance and for safety reasons, keep the
oven clean inside and outside. Take special care to
keep the inner door panel and oven front frame free of
food and grease build-up.
o Never use abrasive scouring powder or pads on the
microwave. Wipe the microwave oven inside and out
with a soft cloth and and warm (not hot) mild detergent
solution. Then rinse and wipe completely dry.
o Wipe spatters immediately with a wet paper towel,
especially after cooking greasy foods like chicken or
bacon.
Clean your microwave oven weekly or more often, if
needed.
Never operate the oven without food in the oven cavity;
this can damage the magnetron tube or glass tray.
You may wish to leave a cup of water standing inside
the oven when it is not in use to prevent damage if the
oven is accidentally turned on.
20

Part Recommendations
Oven cavity
Wire rack
Glass turntable tray
Turntable roller rest
Door glass
Painted surfaces
Stainless steel sur-
faces
Plastic & Controls
Printed areas
(words & numbers)
Keep inside (cavity) of the oven clean. Food particles and spilled liquids can stick to the
oven walls, causing the oven to work less efficiently.
Wipe up spills immediately. Use a damp, clean cloth and mild soap. DO NOT use harsh
detergents or abrasive cleaners.
To help loosen baked-on food particles or liquids, heat 2 cups of water (add the juice of
1 lemon if you desire to keep the oven fresh smelling) in a 4 cup microwave-safe dish at
High power for 5 minutes or until boiling. Let stand in oven cavity for 1 or 2 minutes.
Wash with soapy water. Rinse thoroughly and dry, or gently rub with cleansing powder or
soap-filled pads as directed.
Remove glass turntable tray from the oven when cleaning the oven cavity and tray.
NOTICE: To prevent the glass turntable from breaking, handle with care and do not put it in
water immediately after cooking.
Wash the glass turntable tray in warm soapy water or in the dishwasher.
Clean with warm, soapy water. Rinse thoroughly and dry.
Wash with soap and water or glass cleaner. Use Fantastik ® or Formula 409 ® on a clean
sponge or paper towel and wipe clean. Avoid using abrasive cleaners, like powder cleaning
agents, steel wool pads and oven cleaners.
If steam accumulates inside or outside the oven door, wipe with a soft cloth. Steam can
accumulate when operating the oven in high humidity and in no way indicates microwave
leakage.
Clean with hot soapy water or apply Fantastik ®or Formula 409 ¢ to a clean sponge or paper
towel and wipe clean. Avoid using abrasive cleaners, like powder cleaning agents, steel wool
pads and oven cleaners.
Always wipe or rub in the direction of the grain. Clean with a soapy sponge, then rinse and
dry, or wipe with Fantastik ®sprayed on a paper towel. Protect and polish with Stainless Steel
Magic ¢ and a soft cloth. Remove water spots with a cloth dampened with white vinegar. Do
not use any cleanser that contains chlorine as these may rust the stainless steel
When cool, clean with soapy water, rinse and dry.
Do not use abrasive cleaners or petroleum based solvents.
Cleaning the oven vent filters
The oven ventilation filters should be removed and
cleaned often; generally at least once every month.
1. To remove the ventilation filters, slide the filter to the
rear. Then pull filter downward and push to the other
side. The filter will drop out. Repeat for the 2nd filter.
• , CAUTION
To avoid risk of personal injury or property damage,
do not operate oven vent without filters properly in
place.
2. Soak the ventilation filters in hot water using a mild
detergent. Rinse well and shake to dry. Do not use
ammonia or wash in a dishwasher. The aluminum on
the filter will corrode and darken.
3. To reinstall an oven ventilation filter, slide it into the
side slot, then push up and toward oven to lock.
Reinstall the 2nd filter using the same procedure.
21

Maintenance
Surface light replacement
CAUTION
To avoid risk of personal injury or property
damange, wear gloves when replacing the light
bulbs.
3. Pull the vent grill away from the unit.
t
1. Unplug the microwave oven or turn off power at the
main circuit breaker.
2. Remove the bulb cover mounting screws at both light
positions under the microwave.
4. Remove the screw at the front of the light cover and
carefully pull out the light cover.
3. Replace bulb with 30 watt appliance bulb.
4. Replace bulb cover and mounting screw.
5. Plug the microwave back into the power supply or turn
the power back on at the main circuit breaker.
Oven light replacement
1. To replace light bulb, first disconnect power to the
microwave oven at the circuit breaker panel or by
unplugging.
2. Remove the vent grill mounting screws.
5. Open light cover located behind filter mounting by
carefully pulling up on the front edge.
6. Remove old light bulb and replace only with equivalent
30 watt bulb available from parts distributor. Bulbs are
also available at most hardware stores or lighting
centers.
_¢:iiiiii.................
Note: DO NOT USE BULB LARGER THAN 30 WATTS.
22

7.Replacethemicrowaveovenlightcoverbycarefully
pushingintoplace.Makesurethelightcoverslips
underneaththeridgeattherearofthecavity.Replace
thefixingscrewatthefrontofthelightcover.Replace
thecharcoalfilter.Pushtheventgrillbackintoplace
(engagingboththebottomandtoptabs)andreplace
theventgrillmountingscrews
Charcoal filter replacement
The charcoal filter, which was included with your
microwave oven, is used for nonvented, recirculated
installation (Room Venting). The filter should be replaced
every 6 to 12 months depending on use.
1. Disconnect power to the microwave oven at the circuit
breaker panel or by unplugging.
2. Remove the vent grill mounting screws.
3. Pull the vent grill away from the unit.
t
4. Change the charcoal filter.
5. Carefully push the vent grill back into place and
replace the screws removed in Step 2.
Note: If no charcoal filter is installed, it is not possible
to bind the odorous substances in the cooking vapors.
Replacement filters can be purchased from the Bosch
eshop, www.bosch-home.com/us/store.
Part number 00676120
Troubleshooting
If you encounter a problem, it often will merely be
something minor. Before you call customer service,
consider the suggestions and instructions below:
Suggestion
Problem
Neither the microwave's display
nor oven operates.
o Properly insert the plug into a grounded power outlet.
o Remove the plug from the outlet, wait 10 seconds, then plug the microwave in
again.
o Reset the household circuit breaker or replace any blown fuses.
o Plug a different appliance into the power outlet. If the other appliance will not
operate, have a qualified electrician repair the outlet.
o Plug the microwave into a different power outlet.
Oven display works, but the o Make sure the oven door is closed securely and completely.
oven will not operate, o Check to see if packing material or other materials are stuck to the door seal.
o Check for damage to the oven door.
o Press the Clear/Off key twice and attempt to re-enter cooking instructions.
Note: If the oven is set to cook for more than 30 minutes at 100% power level, it will automatically adjust itself to a
80% power level after 30 minutes to avoid overcooking.
23

Problem Suggestion
Power goes off before the cook o If there has been a power interruption, remove the plug from the outlet; wait
time has elapsed. 10 seconds, then plug the microwave in again. If there was a power outage, the
time indicator in the display will show 00:00.
o Reset the clock and any cooking instructions.
o Reset the household circuit breaker or replace any blown fuses.
o Press the Clear/Off key twice and attempt to re-enter cooking instructions.
o Plug a different appliance into the power outlet. If the other appliance will not
operate, have a qualified electrician repair the outlet.
o Plug the microwave into a different power outlet.
Food is cooking too slowly. Make sure the oven is on a separate 20 amp circuit line. Operating another appli-
ance on the same circuit can cause a voltage drop. If necessary, move the micro-
wave to its own circuit.
Microwave is sparking, arcing Remove any metallic utensils, cookware or metal ties from the oven cavity, tf using
occurs, aluminum foil, use only narrow strips and allow at least one inch between the foil
and the interior oven walls.
Turntable makes noises or o Clean the turntable, roller ring and oven cavity bottom.
sticks.
o Make sure the turntable and roller ring are positioned correctly.
Using the microwave causes TV This is similar to the interference caused by other small appliances, such as hair
or radio interference, dryers. Move your microwave further away from other appliances, like your TV or
radio.
Note: If the oven is set to cook for more than 30 minutes at 100% power level, it will automatically adjust itself to a
80% power level after 30 minutes to avoid overcooking.
Bosch®Support
Before Calling Service
See the Use and Care Manual for troubleshooting
information. Refer to the Warranty in the Use and Care
Manual.
To reach a service representative, see the contact
information at the front of the manual. Please be
prepared with the information printed on your product
data plate when calling.
Data Plate
The data plate shows the model and serial number. Refer
to the data plate on the appliance when requesting
service.
The data plate can be found on the inside of the
appliance.
To avoid having to search for each piece of information
when calling, you can enter the four items needed in the
spaces provided below.
Model No.
FD-No.
Date of Purchase
Customer Service
Keep your invoice or escrow papers for warranty
validation if service is needed.
Service
We realize that you have made a considerable
investment in your kitchen. We are dedicated to
supporting you and your appliance so that you have
many years of creative cooking.
Please don't hesitate to contact our Customer Support
Department if you have any questions or in the unlikely
event that your Bosch@ appliance needs service. Our
service team is ready to assist you.
USA
800-944-2904
www.bosch-home.com/us/su pport
Canada
800-944-2904
www.bosch-home.ca/en/su pport
24

Parts and Accessories
Parts, filters, descalers, stainless steel cleaners and more
can be purchased in the Bosch ® eShop or by phone.
USA
www.bosch-home.com/us/store
Canada
Marcone 800-482-6022
or
Reliable Parts 800-941-9217
STATEMENT OF LIMITED PRODUCT WARRANTY
What this Warranty Covers & Who it
Applies to
The limited warranty provided by BSH Home Appliances
Corporations ("BSH") in this Statement of Limited
Product Warranty applies only to the Bosch appliance
("Product") sold to you, the first using purchaser,
provided that the Product was purchased:
o For your normal, household (non-commercial) use,
and has in fact at all times only been used for normal
household purposes.
o New at retail (not a display, "as is", or previously
returned model), and not for resale, or commercial
use.
o Within the United States or Canada, and has at all
times remained within the country of original purchase.
The warranties stated herein apply only to the first
purchaser of the Product and are not transferable.
BSH reserves the right to request proof of purchase at
the time any warranty claim is submitted to confirm that
the Product falls within the scope of this limited product
warranty.
Please make sure to return your registration card; while
not necessary to effectuate warranty coverage, it is the
best way for BSH to notify you in the unlikely event of a
safety notice or product recall.
How Long the Warranty Lasts
BSH warrants that the Product is free from defects in
materials and workmanship for a period of three hundred
sixty-five (365) days from the date of purchase. The
foregoing timeline begins to run upon the date of
purchase, and shall not be stalled, tolled, extended, or
suspended, for any reason whatsoever.
This Product is also warranted to be free from cosmetic
defects in material and workmanship (such as scratches
of stainless steel, paint/porcelain blemishes, chip, dents,
or other damage to the finish of the Product), for a period
of thirty (30) days from the date of purchase or closing
date for new construction. This cosmetic warranty
excludes slight color variations due to inherent
differences in painted and porcelain parts, as well as
differences caused by kitchen lighting, product location,
or other similar factors. This cosmetic warranty
specifically excludes any display, floor, "As Is", or "B"
stock appliances.
Repair/Replace as Your Exclusive Remedy
During this warranty period, BSH or one of its authorized
service providers will repair your Product without charge
to you (subject to certain limitations stated herein) if your
Product proves to have been manufactured with a defect
in materials or workmanship. If reasonable attempts to
repair the Product have been made without success,
then BSH will replace your Product (upgraded models
may be available to you, in BSH's sole discretion, for an
additional charge). All removed parts and components
shall become the property of BSH at its sole option. All
replaced and/or repaired parts shall assume the identity
of the original part for purposes of this warranty and this
warranty shall not be extended with respect to such
parts. BSH's sole liability and responsibility hereunder is
to repair manufacturer-defective Product only, using a
BSH-authorized service provider during normal business
hours. For safety and property damage concerns, BSH
highly recommends that you do not attempt to repair the
Product yourself, or use an un-authorized servicer; BSH
will have no responsibility or liability for repairs or work
performed by a non-authorized servicer. If you choose to
have someone other than an authorized service provider
work on your Product, THIS WARRANTY WILL
AUTOMATICALLY BECOME NULL AND VOID. Authorized
service providers are those persons or companies that
have been specially trained on BSH products, and who
possess, in BSH's opinion, a superior reputation for
customer service and technical ability (note that they are
independent entities and are not agents, partners,
affiliates or representatives of BSH). Notwithstanding the
foregoing, BSH will not incur any liability, or have
responsibility, for the Product if it is located in a remote
area (more than 100 miles from an authorized service
provider) or is reasonably inaccessible, hazardous,
threatening, or treacherous locale, surroundings, or
environment; in any such event, if you request, BSH
would still pay for labor and parts and ship the parts to
the nearest authorized service provider, but you would
still be fully liable and responsible for any travel time or
other special charges by the service company, assuming
they agree to make the service call.
Out of Warranty Product
BSH is under no obligation, at law or otherwise, to
provide you with any concessions, including repairs, pro-
rates, or Product replacement, once this warranty has
expired.
25

Warranty Exclusions
The warranty coverage described herein excludes all
defects or damage that are not the direct fault of BSH,
including without limitation, one or more of the following:
o Use of the Product in anything other than its normal,
customary and intended manner (including without
limitation, any form of commercial use, use or storage
of an indoor product outdoors, use of the Product in
conjunction with air or water-going vessels).
o Any party's willful misconduct, negligence, misuse,
abuse, accidents, neglect, improper operation, failure
to maintain, improper or negligent installation,
tampering, failure to follow operating instructions,
mishandling, unauthorized service (including self-
performed "fixing" or exploration of the appliance's
internal workings).
o Adjustment, alteration or modification of any kind.
o A failure to comply with any applicable state, local,
city, or county electrical, plumbing and/or building
codes, regulations, or laws, including failure to install
the product in strict conformity with local fire and
building codes and regulations.
o Ordinary wear and tear, spills of food, liquid, grease
accumulations, or other substances that accumulate
on, in, or around the Product.
o Any external, elemental and/or environmental forces
and factors, including without limitation, rain, wind,
sand, floods, fires, mud slides, freezing temperatures,
excessive moisture or extended exposure to humidity,
lightning, power surges, structural failures surrounding
the appliance, and acts of God.
In no event shall BSH have any liability or responsibility
whatsoever for damage to surrounding property,
including cabinetry, floors, ceilings, and other structures
or objects around the Product. Also excluded from this
warranty are Products on which the serial numbers have
been altered, defaced, or removed; service visits to teach
you how to use the Product, or visits where there is
nothing wrong with the Product; correction of installation
problems (you are solely responsible for any structure
and setting for the Product, including all electrical,
plumbing or other connecting facilities, for proper
foundation/flooring, and for any alterations including
without limitation cabinetry, walls, floors, shelving, etc.);
and resetting of breakers or fuses.
TO THE EXTENT ALLOWED BY LAW, THIS WARRANTY
SETS OUT YOUR EXCLUSIVE REMEDIES WITH
RESPECT TO PRODUCT, WHETHER THE CLAIM ARISES
IN CONTRACT OR TORT (INCLUDING STRICT LIABILITY,
OR NEGLIGENCE) OR OTHERWISE. THIS WARRANTY
IS IN LIEU OF ALL OTHER WARRANTIES, WHETHER
EXPRESS OR IMPLIED. ANY WARRANTY IMPLIED BY
LAW, WHETHER FOR MERCHANTABILITY OR FITNESS
FOR A PARTICULAR PURPOSE, OR OTHERWISE,
SHALL BE EFFECTIVE ONLY FOR THE PERIOD THAT
THIS EXPRESS LIMITED WARRANTY IS EFFECTIVE. IN
NO EVENT WILL THE MANUFACTURER BE LIABLE FOR
CONSEQUENTIAL, SPECIAL, INCIDENTAL, INDIRECT,
"BUSINESS LOSS", AND/OR PUNITIVE DAMAGES,
LOSSES, OR EXPENSES, INCLUDING WITHOUT
LIMITATION TIME AWAY FROM WORK, HOTELS AND/
OR RESTAURANT MEALS, REMODELLING EXPENSES
IN EXCESS OF DIRECT DAMAGES WHICH ARE
DEFINITIVELY CAUSED EXCLUSIVELY BY BSH, OR
OTHERWISE. SOME STATES DO NOT ALLOW THE
EXCLUSION OR LIMITATION OF INCIDENTAL OR
CONSEQUENTIAL DAMAGES, AND SOME STATES DO
NOT ALLOW LIMITATIONS ON HOW LONG AN IMPLIED
WARRANTY LASTS, SO THE ABOVE LIMITATIONS MAY
NOT APPLY TO YOU. THIS WARRANTY GIVES YOU
SPECIFIC LEGAL RIGHTS, AND YOU MAY ALSO HAVE
OTHER RIGHTS WHICH VARY FROM STATE TO STATE.
No attempt to alter, modify or amend this warranty shall
be effective unless authorized in writing by an officer of
BSH.
26

Contenido
Definiciones de Seguridad ......................................... 28
INSTRUCCIONES DE SEGURIDAD IMPORTANTES .. 29
,_,PRECAUCIONES PARA EVITAR UNA POSIBLE
EXPOSICI©N A UNA EXCESIVA CANTIDAD DE
ENERGfA DE MtCROONDAS ......................................... 29
INSTRUCCIONES PARA LA CONEXt©N A TIERRA ... 30
Interferencia con la TV/radio .......................................... 30
Uso previsto ....................................................................... 30
Seguridad de los ni_os .................................................... 30
Seguridad en la limpieza ................................................. 30
Seguridad al cocinar ........................................................ 31
En caso de incendio ......................................................... 31
Liquidos ............................................................................... 31
Arficulos de cocina ........................................................... 32
Utensilios de cocina ......................................................... 32
Charola de vidrio/anillo de la bandeja giratoria .......... 33
Operacion en modo de salida ........................................ 33
Termometros ...................................................................... 33
Marcapasos ........................................................................ 33
Advertencias en virtud de la Proposicion 65
del estado de California ................................................... 33
Funcionamiento del motor del ventilador ..................... 33
Ventilaci6n de ambiente con filtro de carbon .............. 33
Causas para los dahos ............................................... 34
Proteccion del medio ambiente ................................. 34
Como comenzar ........................................................... 35
Componentes ..................................................................... 35
Especificaciones del horno ............................................. 35
Panel de control ................................................................ 35
Accesorios .......................................................................... 36
Antes de usar el horno por primera vez .................... 38
Limpieza de accesorios .................................................. 38
Operacion ..................................................................... 38
Programacion del reloj ..................................................... 38
Programaci6n del temporizador de cocina .................. 38
Manejo del ventilador de ventilaci6n ............................. 38
Encendido/Apagado de la luz de superficie ............... 39
Encendido/Apagado del plato giratorio ....................... 39
Programacion del microondas ....................................... 39
A_adido de tiempo de coccion (+30 Seconds
[+30 segundos]) ................................................................ 40
Auto Defrost (Descongelar automa.ticamente) ............ 41
Sensor Reheat (Recalentar por sensor) ....................... 42
Sensor Cook (Coccion por sensor) ............................... 43
BIoqueo de panel .............................................................. 44
Valores ................................................................................ 44
Funcionamiento practico ............................................ 44
Popcorn (Palomitas de mafz) ......................................... 44
Beverage (Bebida) ............................................................ 45
Mantener caliente .............................................................. 45
More Modes (Ma.s modos) ............................................. 46
Cuadros de coccion .................................................... 46
Cocinar carne de res en su horno de microondas .... 46
Coccion de carne de ave en su horno de
microondas ........................................................................ 47
Coccion de huevos en su horno microondas ............. 47
Coccion de verduras en su microondas ...................... 47
Coccion de frutos de mar en su horno microondas .. 48
Limpieza y mantenimiento ......................................... 48
Limpieza .............................................................................. 48
Mantenimiento ................................................................... 50
Resolucion de problemas .......................................... 52
Soporte de Bosch ® ...................................................... 53
Antes de Ilamar al servicio ............................................ 53
Placa de datos .................................................................. 53
Servicio tecnico ................................................................. 53
Piezas y accesorios .......................................................... 53
DECLARACION DE GARANT|A LIMITADA DEL
PRODUCTO .................................................................. 54
Cobertura de esta garanfia y a quienes se aplica ..... 54
Duracion de la garanfia ................................................... 54
Reparaci6n/reemplazo como Onico recurso ............. 54
Producto fuera de garanfia ............................................ 54
Exclusiones de la garanfia .............................................. 55
Encontrara. ma.s informacion sobre productos,
accesorios, piezas de repuesto y servicios en internet:
www.bosch-home.com y tambien en la tienda online:
www.bosch-home.com/us/store
27

Este electrodomestico de Bosch es hecho por
BSH Home Appliances Corporation
1901 Main Street, Suite 600
Irvine, CA 92614
sPreguntas?
1-800-944-2904
www.bosch-home.com/us
iEsperamos oir de usted!
Definiciones de Seguridad
ADVERTENCIA
Esto indica que se pueden producir lesiones graves
o la muerte si no se cumple con esta advertencia.
ATENCION
Esto indica que pueden producirse lesiones leves o
moderadas si no se cumple con esta advertencia.
AVISO: Esto indica que puede producirse un da_o al
electrodomestico o a la propiedad como resultado de la
falta de cumplimiento de este aviso.
Nota: Esto Io alerta sobre informacion y/o consejos
importantes.
28

A
INSTRUCCIONES DE SEGURIDAD IMPORTANTES
LEER TODAS LAS INSTRUCCIONES ANTES DE UTILIZAR EL APARATO
,PRECAUCIONES PARA EVITAR UNA
POSIBLE EXPOSICION A UNA EXCESIVA
CANTIDAD DE ENERGIA DE
MICROONDAS
(1) No intente manejar este horno con la puerta abierta,
ya que el funcionamiento con la puerta abierta puede
tener como consecuencia una exposici6n nociva a la
energfa de microondas. Es importante no anular los
enclavamientos de seguridad ni interferir en estos.
(2) No coloque ningOn objeto entre la parte delantera del
horno y la puerta ni permita que se acumulen suciedad
ni restos de limpiador en las superficies sellantes.
(3) No maneje el horno si esta. da_ado. Es de particular
importancia que la puerta del horno cierre correctamente
y que no haya da_os en:
o la puerta (doblada);
o las bisagras y las trabas (rotas o fiojas);
o los sellos y las superficies sellantes de la puerta.
(3) Ninguna persona debe ajustar ni reparar el horno a
menos que se trate de personal de servicio tecnico
adecuadamente calificado. La instalaci6n, el servicio
tecnico o el mantenimiento incorrectos pueden causar
lesiones o da_os materiales. Consulte este manual para
su orientacion. Remita todas las reparaciones a un
centro de servicio tecnico autorizado por la fa.brica.
ADVERTENCIA
Para reducir el riesgo de quemaduras, descarga
electrica, incendio, heridas a personas o exposicion a
una excesiva cantidad de energfa de microondas, Lea
todas las instrucciones antes de usar el aparato.
ADVERTENCIA
Si no digue la informaci6n de este manual exactamente,
se puede ocasionar un incendio o una descarga
electrica que puede causar da_os materiales o lesiones
personales.
AI utilizar aparatos electricos, deben seguirse
precauciones de seguridad basicas, entre las que se
incluyen las siguientes:
Lea y siga las "PRECAUCIONES PARA EVITAR UNA
POSIBLE EXPOStCI©N A UNA EXCEStVA CANTIDAD DE
ENERGfA DE MICROONDAS" especfficas que se
encuentran en la secci6n "Seguridad con el microondas"
en el capftulo Instrucciones de seguridad.
Este aparato debe estar conectado a tierra. Conectelo
solo a una toma de corriente electrica correctamente
conectada a tierra (consulte las INSTRUCCIONES DE
CONEXION A TIERRA).
Instale o ubique este aparato Onicamente de acuerdo
con las instrucciones de instalaci6n provistas.
Algunos productos, como huevos enteros y recipientes
sellados -por ejemplo, tarros de cristal cerrados-
pueden explotar y no deben ser calentados en este
horno.
Utilice este aparato solo para su uso previsto, segOn se
describe en el manual. No utilice productos qdmicos
corrosivos ni vapores en este aparato. Este tipo de
horno esta. especfficamente dise_ado para calentar,
cocinar o secar alimentos. No esta. dise_ado para uso
industrial ni en laboratorios.
AI igual que con cualquier electrodomestico, se requiere
una estricta supervisi6n cuando los ni_os utilicen este
electrodomestico. (Consulte SEGURIDAD DE LOS
NINOS).
Este aparato debe recibir servicio tecnico Onicamente de
personal de servicio tecnico calificado.Comunfquese con
el centro de servicio tecnico autorizado ma.s cercano
para solicitar que Io examinen, reparen o ajusten.
No cubra ni bloquee ninguna ventilaci6n o abertura del
aparato.
No almacene este aparato a la intemperie.No use este
producto cerca del agua, por ejemplo, cerca de un
fregadero de cocina, en un sotano h0medo, cerca de
una alberca ni en lugares similares.
Solo apto por conexion electcrica con enchufe:
(1) No sumerja el cable ni el enchufe en agua.
(2) Mantenga el cable alejado de las superficies
calientes.
(3) No permita que el cable cuelgue del borde de la
mesa ni de la superficie de trabajo.
(4) No haga funcionar este aparato si tiene un cable o
un enchufe da_ados, si no funciona adecuadamente, ni
si se ha da_ado o se ha cafdo.
AI limpiar las superficies de la puerta y del horno que se
unen al cerrar la puerta, aplique Onicamente jabones o
detergentes suaves, no abrasivos, con una esponja o un
paso suave. Consulte las instrucciones de limpieza de la
superficie de la puerta en el capftulo "Limpieza y
mantenimiento".
Para reducir el riesgo de incendio en la cavidad del
horno:
No cocine los alimentos excesivamente. Preste
especial atencion al aparato cuando coloque adentro
papel, pla.stico u otros materiales combustibles para
facilitar la coccion.
o Retire los cierres de alambre de las bolsas de papel o
pla.stico antes de colocarlas en el horno.
o Si los materiales que esta.n dentro del horno se
prenden fuego, mantenga cerrada la puerta del horno,
apa.guelo y desconecte el cable de alimentaci6n o
corte la alimentaci6n electrica desde el panel de
fusibles o disyuntor.
o No use la cavidad del horno para almacenar
elementos. No deje productos de papel, utensilios de
cocina ni alimentos dentro de la cavidad del horno
cuando no este en uso.
29

A
INSTRUCCIONES DE SEGURIDAD IMPORTANTES
LEER TODAS LAS INSTRUCCIONES ANTES DE UTILIZAR EL APARATO
INSTRUCCIONES PARA LA CONEXION A
TIERRA
Este aparato debe estar conectado a tierra. La conexion
a tierra reduce el riesgo de descarga electrica
proporcionando un cable de escape para la corriente
electrica si se produce un cortocircuito electrico. Este
horno viene equipado con un cable con un hilo de
conexi6n a tierra y un enchufe para conexion a tierra. El
enchufe debe colocarse en una toma de corriente
adecuada que este correctamente instalada y conectada
a tierra. Consulte las INSTRUCCIONES DE
INSTALACI©N.
Consulte a un electricista o a un centro de servicio
tecnico calificado si no comprende la totalidad de las
instrucciones de conexion a tierra o si tiene alguna duda
respecto de si el horno esta. correctamente conectado a
tierra.
No use un cable de extensi6n. Si el cable de
alimentaci6n del producto es demasiado corto, haga
que un electricista calificado instale un recepta.culo de
tres ranuras. Este horno debe enchufarse en un circuito
de 60 hercios por separado, con la capacidad electrica
nominal que se muestra en la tabla de especificaciones.
Cuando el horno esta. en un circuito con otro equipo, es
posible que se requiera un aumento en los tiempos de
coccion y que los fusibles se quemen.
El microondas funciona con la corriente esta.ndar del
hogar, de 110a 120V.
Interferencia con la TV/radio
Este aparato genera y usa energfa con frecuencia ISM.
Si no se instala y utiliza correctamente, en estricto
cumplimiento con las instrucciones del fabricante, puede
causar interferencia en la recepcion de radio y televisi6n.
Su tipo ha sido probado, y se ha determinado que
cumple con los Ifmites para los equipos ISM, en virtud de
la parte 18 de las normas de la Comision Federal de
Comunicaciones (Federal Communications Commission,
FCC), destinadas a proporcionar una proteccion
razonable contra dicha interferencia en una instalaci6n
residencial. Sin embargo, no se garantiza que no se
producira.n interferencias en una instalaci6n en
particular. Encienda y apague el aparato para determinar
si causa interferencia, tntente alguna de las siguientes
soluciones para corregir la interferencia:
o Limpie la puerta y la superficie sellante del horno.
o Cambie la orientacion de la antena de recepcion de
radio o televisi6n.
o Cambie la ubicaci6n del horno microondas con
respecto al receptor.
o Aleje el horno microondas del receptor.
o Enchufe el horno microondas en una toma de
corriente diferente para que el horno y el receptor
esten enchufados a circuitos derivados diferentes.
El fabricante no es responsable de ninguna interferencia
de radio o TV causada por una modificacion no
autorizada a este horno microondas. Es responsabilidad
del usuario corregir dicha interferencia.
Uso previsto
Este electrodomestico ha sido dise_ado para uso
domestico normal Onicamente. No esta. aprobado para
uso en exteriores. Consulte la garanfia. Si tiene alguna
pregunta, comunfquese con el fabricante.
No use la cavidad del horno para almacenar elementos.
No deje productos de papel, utensilios de cocina ni
alimentos dentro de la cavidad del horno cuando no este
en uso.
No haga funcionar el horno cuando la humedad
ambiente sea excesiva.
Este horno es apto para usar tanto sobre equipos de
cocina a gas como electricos de 36 pulg. (914 mm) de
ancho o menos.
Seguridad de los nifios
No permita que los ni_os utilicen este electrodomestico,
a menos que sean supervisados de cerca por un adulto.
Los ni_os y las mascotas no deben que dar solos o sin
vigilancia en el a.rea donde se utilice el electrodomestico.
Nunca se les debe permitir jugar cerca del
electrodomestico, independientemente de que este en
funcionamiento o no.
Cuando los ni_os tienen la edad adecuada para utilizar
el electrodomestico, es responsabilidad legal de los
padres o tutores legales asegurarse de que reciban las
instrucciones sobre pra.cticas seguras por parte de
personas calificadas.
No deje que nadie se suba, pare, incline, siente o
cuelgue de cualquier parte de un electrodomestico,
especialmente una puerta, cajon calentador o caj6n para
almacenamiento. Esto puede da_ar el electrodomestico,
y la unidad puede caerse y, posiblemente, causar
lesiones graves.
Seguridad en la limpieza
Limpie los filtros del escape con frecuencia: no permita
que se acumule grasa en la campana ni en los filtros.
Podrfan producirse incendios.
Sea cuidadoso al limpiar los filtros del escape.Los
agentes de limpieza corrosivos, como limpiadores para
hornos a base de lejfa, pueden da_ar el filtro (consulte la
seccion LIMPtEZA de este manual).
Limpie con frecuencia el lugar donde se apoyan los
rodillos del plato giratorio y el suelo del horno para evitar
ruidos excesivos.
ATENCION
La grasa acumulada en los filtros puede volver a
derretirse y entrar en la abertura de ventilaci6n.
30

A
INSTRUCCIONES DE SEGURIDAD IMPORTANTES
LEER TODAS LAS INSTRUCCIONES ANTES DE UTILIZAR EL APARATO
ADVERTENCIA
Aseg0rese de que todo el aparato (incluidos los filtros
antigrasa y las la.mparas de luz, si corresponde) se haya
enfriado y de que la grasa se haya solidificado antes de
intentar limpiar cualquier parte del aparato.
Seguridad al cocinar
ATENCION
Para evitar lesiones personales o dafios materiales,
debe tenerse en cuenta Io siguiente:
o Supervisar el horno en todo momento durante su
USO.
o No colocar material inflamable al lado del homo
o en su interior.
o AI flambear alimentos debajo del microondas,
encender siempre el ventilador.
o No poner en marcha el homo si esta. vado. Esto
podrfa da_ar el homo y conllevarfa un riesgo de
incendio.
o No almacenar ni utilizar productos qufmicos
corrosivos, vapores, materiales inflamables o
productos no alimentarios cerca o dentro del
aparato. Esta. especialmente dise_ado para
utilizarse mientras se calienta o cocina la comida.
El uso de productos qufmicos corrosivos para el
calentamiento o la limpieza provocara, da_os en
el aparato y podrfa causar lesiones personales.
o No secar ropa, papel u otros materiales en el
homo. No utilizar papel periodico ni bolsas de
papel para cocinar. Podrfa generarse un
incendio.
o No utilizar productos de papel reciclado a menos
que se hayan aprobado para su uso con
microondas. Podrfan contener impurezas que
podrfan generar chispas y provocar incendios.
o Utilizar siempre pa_os o guantes de cocina para
retirar objetos del horno. El recipiente para
cocinar al vapor y la charola de cristal pueden
estar calientes aunque el homo se haya enfriado.
o Siempre que sea posible, evitar el uso del
sistema de ventilaci6n si se produce un incendio
en la placa de cocci6n. No obstante, no se debe
atravesar el fuego con la mano para intentar
apagarlo.
o No montar encima del fregadero.
o No colocar nada directamente encima de la
superficie del aparato cuando este en
funcionamiento.
o No deben introducirse alimentos ni utensilios
meta.licos que sean demasiado grandes, ya que
podrfan provocar un incendio o una descarga
electrica.
o No limpiar con estropajos meta.licos. Podrfan
desprenderse trozos del estropajo y entrar en
contacto con piezas electricas, Io que supondrfa
un riesgo de descarga electrica.
o Cuando no se utilice el horno, no almacenar en
el ningOn objeto aparte de los accesorios
recomendados por el fabricante.
o No cubrir las rejillas ni ninguna otra parte del
horno con papel de aluminio. Esto causara, el
sobrecalentamiento del horno.
En caso de incendio
Si los materiales dentro de un horno se prenden fuego:
1. Mantenga la puerta cerrada
2. Apague el electrodomestico
3. Desenchufe el electrodomestico o corte la
alimentaci6n electrica desde el panel de fusibles o el
disyuntor.
Liquidos
Los Ifquidos, como el agua, el cafe o el te, podrfan
calentarse excesivamente. Pueden calentarse hasta
pasar el punto de ebullicion, sin que parezca que esta.n
hirviendo. Por ejemplo, no siempre se observan burbujas
ni borbotones al retirar el recipiente del horno
microondas. ESTO PUEDE HACER QUE LOS LiQUIDOS
MUY CALtENTES HIERVAN Y SE DESBORDEN
REPENTINAMENTE AL MOVER EL RECIPtENTE O AL
COLOCAR UN UTENSILIO DENTRO DEL L[QUtDO.
Para reducir el riesgo de heridas a personas:
o No caliente el Ifquido excesivamente.
o Revuelva el Ifquido antes de calentarlo y a mitad del
proceso.
o Sea muy cuidadoso al insertar una cuchara u otro
utensilio en el recipiente.
o No use recipientes de lados rectos con cuellos
estrechos.
o Despues de calentarlo, deje reposar el recipiente en el
horno microondas durante un breve perfodo antes de
retirarlo.
31

A
INSTRUCCIONES DE SEGURIDAD IMPORTANTES
LEER TODAS LAS INSTRUCCIONES ANTES DE UTILIZAR EL APARATO
Articulos de cocina
Huevos: No cocine ni recaliente huevos enteros, con o
sin ca.scara. La acumulacion de vapor en los huevos
enteros puede hacer que exploten y, posiblemente,
dar_en el horno o provoquen una lesi6n. Recalentar
huevos duros rebanados y cocinar huevos revueltos es
seguro.
Palomitas de maiz: Use solo palomitas de mafz en
envases diser_ados y etiquetados para uso en horno
microondas, o prepa.relas en un recipiente para
palomitas de mafz apto para horno microondas. Siga las
indicaciones de los fabricantes de palomitas de mafz y
use una marca apta para el vataje de su horno. No siga
calentando despues de que las palomitas de mafz hayan
terminado de reventar. Las palomitas de mafz se
chamuscara.n o quemara.n. No deje el horno sin
supervision.
ATENCION
AI usar palomitas de mafz preenvasadas para
microondas, verifique el peso del envase antes de usar
la funcion para palomitas de mafz. Programe el horno
para el peso indicado en el envase de palomitas de
mafz. Si no se siguen estas instrucciones, es posible que
las palomitas de mafz no revienten correctamente, o que
se prendan fuego y provoquen un incendio.
alimentos con bajo contenido de humedad pueden
secarse, quemarse o incendiarse.
No deshidrate carnes, hierbas, frutas ni verduras en su
horno.
Una coccion correcta depende de la programacion del
tiempo y del peso de los alimentos. Se puede producir
un incendio si usa una porcion ma.s pequer_a que la
recomendada y la cocina durante el tiempo de la
porcion recomendada.
Fuentes para dorar:.Las fuentes o parrillas para dorar en
microondas esta.n diser_adas para cocinar Onicamente
en microondas. Los tiempos de precalentamiento varfan
segOn el tamar_o de la fuente para dorar y los alimentos
que se van a cocinar. Siempre siga las instrucciones
proporcionadas por el fabricante de la fuente o de la
parrilla para dorar. No precaliente las fuentes para dorar
ma.s de 6 minutos.
Bolsas para asar en horno: Si se usa una bolsa para
horno para la cocci6n en microondas, prepa.rela segOn
las indicaciones del envase. No use cierres de alambre
para cerrar las bolsas; en su lugar, use cierres de nailon,
cordones de algod6n o una tira cortada del extremo
abierto de la bolsa. Haga seis cortes de 1/2pulg.
(12.7 mm) cerca del cierre. Coloque la bolsa para
cocinar en horno en una fuente un poco ma.s grande que
los alimentos que se van a cocinar.
Alimentos con piel no porosa: entre los ejemplos de
alimentos con piel no porosa se encuentran papas,
tomates, camotes, calabazas enteras y salchichas. Estos
tipos de alimentos deben pincharse antes de la coccion
para evitar que exploten.
Alimento para bebes/Formula para bebes: no caliente
biberones ni alimentos en el horno microondas. El
recipiente de vidrio o la superficie de los alimentos
pueden parecer tibios, mientras que el interior puede
quemar la boca y el es6fago del nitro.
Alimentos fritos con abundante aceite: no frfa en
abundante aceite en el horno. En un horno microondas,
el aceite puede calentarse muy ra.pidamente y superar
las temperaturas ideales. Las temperaturas pueden
aumentar Io suficiente como para que los aceites para
cocinar alcancen sus puntos de infiamacion respectivos
y se prendan fuego. El aceite caliente puede producir
burbujas y salpicar, Io que puede causar posibles dar_os
al horno, y quiza.s, quemaduras. Adema.s, es probable
que los utensilios aptos para microondas no soporten la
temperatura del aceite caliente, ya que se pueden
romper, incluso si tienen una mfnima imperfeccion, rayon
o esta.n descascarados.
Enlatado casero/deshidratacion de alimentos/
pequehas cantidades de alimentos: No utilice el horno
microondas para enlatados caseros ni para calentar
ning0n tarro cerrado. Esto hace que la presion se
acumule, yes posible que explote el tarro. Adema.s, el
horno no puede mantener los alimentos a la temperatura
adecuada del enlatado. Los alimentos mal enlatados se
pueden echar a perder, y consumirlos puede ser
peligroso. Las pequer_as cantidades de alimentos o los
Utensilios de cocina
Consulte tambien la Guia de utensilios para
microondas.
Los utensilios de cocina, la bandeja de cristal y los
racks se calientan durante el funcionamiento del
microondas. Siempre use agarradores al retirar los
elementos del horno. Deje que la bandeja de cristal y los
racks de metal (si se utilizan) se enfrfen antes de
manipulados.
No use utensilios de metal ni recipientes con bordes de
metal en el horno.
AI utilizar film de aluminio en el homo, deje, al menos,
1 pulg. (25.4 mm) de espacio entre el film y las paredes
interiores o la puerta del horno.
La bandeja de cristal y los racks de metal (si se utilizan)
se calentara.n durante la cocci6n.EI recipiente para
cocinar al vapor y la bandeja de cristal pueden estar
calientes aun cuando el horno este fifo.
Nunca use papel, pla.stico ni otros materiales
combustibles que no hayan sido diser_ados para
cocinar.
AI cocinar con papel, pla.stico u otros materiales
combustibles, siga las recomendaciones del fabricante
sobre el uso del producto. No use toallas de papel que
contengan nailon o fibras sinteticas. Las fibras sinteticas
calientes pueden derretirse y hacer que el papel se
prenda fuego.
32

A
INSTRUCCIONES DE SEGURIDAD IMPORTANTES
LEER TODAS LAS INSTRUCCIONES ANTES DE UTILIZAR EL APARATO
No caliente recipientes sellados con calor ni bolsas de
pla.stico en el horno. Los alimentos o el Ifquido podrfan
expandirse ra.pidamente y hacer que el recipiente o la
bolsa se rompan. Perfore o abra el recipiente o la bolsa
antes de cocinar.
Charola de vidrio/anillo de la bandeja
giratoria
No maneje el homo sin que el apoyo rodante del plato
giratorio y la bandeja de cristal esten en su lugar.
No opere el horno sin colocar la charola de vidrio en su
lugar. De Io contrario, se pueden producir una cocci6n
inadecuada o da_os al horno. Verifique que la charola
de vidrio este bien colocada y que gire cuando el horno
esta. en uso.
Nota: La charola de vidrio puede girar en cualquiera de
las dos direcciones.
Utilice solo la bandeja de cristal dise_ada para este
horno. No la reemplace con ninguna otra bandeja.
Deje que la bandeja de cristal se enfrfe antes de
limpiarla o colocarla en agua.
No coloque los alimentos directamente en la bandeja de
cristal. Siempre coloque los alimentos en una fuente
apta para microondas.
Siempre vuelva a colocar el anillo de la bandeja giratoria
y la charola de vidrio en sus posiciones correctas.
Siempre debe usarse el anillo de la bandeja giratoria
para cocinar junto con la charola de vidrio.
Advertencias en virtud de la Proposicion
65 del estado de California
ADVERTENCIA
Este producto contiene una o ma.s sustancias qufmicas
que el estado de California sabe que provocan ca.ncer,
defectos congenitos, u otro da_o reproductivo.
Funcionamiento del motor del ventilador
Luego de usar el horno, el motor del ventilador puede
girar para enfriar los componentes electricos. Esto es
perfectamente normal, y se pueden retirar los alimentos
del horno mientras el ventilador esta. funcionando.
Ventilacion de ambiente con filtro de
carbon
El filtro de carb6n vegetal, que se incluy6 con su horno
de microondas, absorbe las sustancias olorosas.
Nota: Si no hay un filtro de carb6n vegetal instalado, no
se absorbera.n las sustancias olorosas de los vapores de
cocci6n.
CONSERVE ESTAS INSTRUCCIONES.
Operacion en modo de salida
Cuando se utiliza el microondas en modo de escape
simulta.neamente con un quemador diferente, se debe
asegurar que haya un suministro de aire fresco
suficiente, que sera. necesario para la combusti6n en el
quemador.
ADVERTENCIA
Evite la intoxicaci6n por mon6xido de carbono:
proporcione una entrada de aire suficiente para que los
gases de la combusti6n no vuelvan a ingresar en la
habitaci6n.
Termometros
No use term6metros de cocina comunes en el horno. La
mayorfa de los term6metros de cocina contienen
mercurio y pueden causar arcos electricos, mal
funcionamiento o da_os al horno.
Marcapasos
Para evitar el mal funcionamiento de un marcapasos,
consulte con el medico o el fabricante del marcapasos
acerca de los efectos de la energfa de microondas en el
marcapasos.
33

Causas para los dafios
AVISOS:
o El metal -p. ej., una cuchara en una copa- debe
mantenerse alejado, como mfnimo, 1 pulg. (2 cm) de
las paredes del horno y del interior de la puerta. Las
chispas podrfan provocar da_os irreparables en el
cristal del interior de la puerta.
o Agua en el interior del horno caliente: Nunca vierta
agua en el interior del horno caliente. Se produce
vapor. Se puede da_ara el esmalte debido al cambio
de temperatura.
o No deje alimentos hOmedos en un horno cerrado por
un perfodo prolongado de tiempo. Puede conducir a
la corrosion dentro del horno.
El jugo de frutas puede dejar manchas en el horno.
Siempre retire inmediatamente el jugo de frutas y
limpie primero con un trapo hOmedo y luego con uno
seco.
Enfriamiento con la puerta del equipo abierto:
Solamente deje enfriar la ca.mara de coccion con la
puerta cerrada, lncluso cuando la puerta del equipo
estgt abierta solamente una peque_a rendija, con el
tiempo los frentes de los muebles cercanos pueden
resultar da_ados.
o Sello de la puerta muy sucio: si el sello de la puerta
esta. muy sucio, la puerta ya no se cerrardt
correctamente durante el funcionamiento del equipo.
Los frentes de los muebles cercanos pueden da_arse.
Mantenga siempre limpio el sello de la puerta.
La puerta del equipo como asiento o superficie de
almacenamiento: no pararse, sentarse o colgarse en
la puerta del equipo. No coloque ningOn recipiente o
accesorios sobre la puerta.
Insercion de accesorios: dependiendo del tipo de
equipo, los accesorios pueden rayar el panel de la
puerta al cerrarla. Siempre deslice completamente los
accesorios en el interior del horno.
o No sujete ni traslade el aparato toma.ndolo de la
manija de la puerta. Esta no puede soportar el peso
del dispositivo y podrfa romperse, o las bisagras
pueden da_arse.
o El manejo del microondas sin alimentos en la cavidad
del horno puede provocar sobrecarga. Nunca haga
funcionar el microondas, a menos que haya alimentos
en la cavidad del horno. Una excepcion a esta regla
es una breve prueba de utensilios para horno
(consulte la seccion "Microondas, utensilios para
horno adecuados"), o un modo AutoChef que necesite
precalentamiento.
o Siempre programe la potencia del microondas segOn
Io recomendado para el alimento. Los valores altos de
potencia pueden calentar excesivamente los
alimentos demasiado rdtpido. El plato giratorio puede
saltar siesta, sobrecargado.
Proteccion del medio ambiente
Saque el equipo de su empaque y elimine este de forma
ecologica.
34

Como comenzar
Componentes
Vista frontal
1 2
i
Vista inferior
i i
5 4
Ventilacion del horno
La ventilacion del horno esta ubicada en la parte
superior de la unidad. Es posible que salga aire tibio de
la abertura de ventilacion antes, durante y despues de la
coccion. Es normal que salga vapor de la abertura de
ventilacion y que se acumule condensacion en esta
area. Esta area puede estar tibia cuando el horno esta
en uso. No bloquee la ventilacion, dado que es
importante para que circule el aire.
Luz del horno
La luz del horno se apaga para ahorrar energfa despues
de que hayan transcurrido dos minutos con la puerta
abierta. Para volver a encender la luz, cierre la puerta y
vuelva a abrirla.
Especificaciones del horno
Alimentacion 120 V CA, 60 Hz
electrica
Potencia de coccion 1100 W
Frecuencia 2450 MHz
Volumen de la 2.1 ft cObicos (60 I)
cavidad
Panel de control
7
1 Grill superior de ventilacion
2 Display
3 Cuadro de mandos
4 Manija de la puerta
5 Ventana
6 Luces de la superficie
7 Filtros de ventilacion
Ventilador de refrigeracion
El ventilador de refrigeracion funciona durante todos los
modos de coccion. El ventilador se puede escuchar
cuando esta funcionando, yes posible que sienta que
sale aire caliente de la abertura de ventilaci6n del horno.
Es posible que el ventilador funcione despues de que el
homo este apagado.
35

Teclasdigitales
Puedeactivarunafunci6npulsandobrevementelatecla
digitalcorrespondiente.Cadavezquepulseunatecla,
sonardtunbipbreve.Unbipprolongadoleindicara,que
haingresadounvalorinva.lido.
Tecla digital Funcion
Settings Cambia los valores ba.sicos
(Valores)
Clock (Reloj) Programa la hora del dfa
Turntable (on/ Enciende o apaga el plato giratorio
off) (Plato girato-
rio [encendido/
apagado])
Sensor Reheat Recalienta los alimentos con valores
(Recalenta- automa.ticos
miento por
sensor)
Sensor Cook Cocina los alimentos con valores
(Coccion por automa.ticos
sensor)
Auto Defrost Descongela los alimentos con valo-
(Descongelar res automa.ticos
automa.tica-
mente)
Popcorn (Palo- Selecciona el tama_o de la bolsa de
mitas de mdz) palomitas de mdz
Beverage Calienta bebidas, selecciona el
(Bebida) tama_o de la bebida
Keep Warm Programa la funcion Keep Warm
(Mantener (Mantener caliente)
caliente)
More Modes lngresa ma.s modos para coccion
(Ma.s modos) pra.ctica
Power Level Programa el nivel de potencia para el
(Nivel de poten- manejo del microondas
cia)
+30 Seconds A_ade 30 segundos al temporizador
(+30 segundos) del microondas
Kitchen Timer Programa el temporizador de cocina
(Temporizador
de cocina)
0 - 9 Use las teclas numericas para ingre-
sar valores personalizados
Vent (high/low) Enciende/Apaga la funcion de venti-
(Ventilaci6n laci6n de cocina
[alta/baja])
Light (Luz)
Clear/Off
(Borrar/Apagar)
Start/Enter
(Comenzar/Intro)
Enciende/Apaga la luz de superficie
Borra el valor ingresado/Apaga el
aparato
Confirma los valores ingresados,
comienza la operacion
Elementos del display
El display le brinda informacion sobre los valores
actuales de su aparato.Los sfmbolos del display que
titilan indican que se requiere el ingreso de un valor.
Em]
START
(Comenzar)
SENS.
F
oz Ib
m m ml II II II II II II II
88:88
Modo Keep Warm (Mantener
caliente)
Ventilador encendido
BIoqueo de panel encendido
Plato giratorio apagado
Temporizador de cocina
Descongelar
Cuando titila, se requiere confirma-
cion con la tecla Start/Enter (Comen-
zar/Intro)
Sensor activo
Temperatura en °F
El display numerico muestra el peso
en onzas/libras
Barra de estado del nivel de potencia
del microondas
Display numerico del tiempo, la tem-
peratura o el peso, segOn la unidad
que se muestre al lado
Accesorios
Para colocar la bandeja giratoria
1. Colocar el anillo de la bandeja giratoria a en la
hendidura del compartimento de coccion.
2. Enclavar la bandeja giratoria ben el accionamiento c
del centro de la base del compartimento de coccion.
Nota: Utilizar el aparato solo cuando la bandeja giratoria
este colocada. Asegurarse de que queda correctamente
enclavada y se gira libremente cuando el aparato esta.
funcionando..
36

Utilizacion del rack de metal
El rack de metal le brinda espacio adicional al cocinar
en ma.s de un recipiente al mismo tiempo.
1. Coloque el rack firmemente en los cuatro soportes de
pla.stico.
Nota: El rack no debe tocar las paredes de metal ni
la parte trasera del microondas.
2. Coloque la misma cantidad de alimentos encima y
debajo del rack.
Nota: La cantidad de alimentos debe ser
aproximadamente la misma en ambos recipientes
para equilibrar la energfa de coccion.
ATENCION
o No utilice el rack para preparar palomitas de
mafz.
o Cuando se usa el rack, este debe estar sobre los
cuatro soportes de pla.stico.
o Utilice el rack Onicamente al cocinar alimentos en
dos posiciones.
o No cocine con el rack en el piso del horno de
microondas.
o Es posible que el rack se caliente durante el
funcionamiento del horno de microondas. Deje
que el rack se enfrfe antes de manipularlo.
Guia de utensilios para microondas
Utensilios para horno adecuados
o Cristal, vitroceramica resistente al calor:
Fuentes multiuso, fuentes para pan de came, platos
para pay, platos para pastel, tazas medidoras de
Ifquido, fuentes para guisados y bols sin borde de
metal (p. ej., Pyrex®,Anchor Hocking TM, Corning
Ware ®, etc.).
o China:
Bols, tazas, platos y bandejas para servir sin borde de
metal.
o Peliculas y envolturas de plastico:
Envoltura de pla.stico (como una cubierta): apoye la
envoltura de pla.stico en forma holgada sobre la fuente
y presi6nela en los costados. Ventile la envoltura de
pla.stico doblando un borde levemente para permitir
que salga el exceso de vapor.La fuente debe ser Io
suficientemente profunda para que la envoltura de
pla.stico no toque el alimento.
o Plasticos aptos para microondas:
Utilice fuentes, tazas, recipientes semirrfgidos para
congelador y bolsas de pla.stico aptos para
microondas para tiempos de coccion cortos.Utilfcelos
con cuidado debido a que el pla.stico puede
ablandarse por el calor del alimento.
o Productos de papel:
Toallas de papel, papel encerado, papel pergamino,
servilletas de papel y platos de papel sin borde ni
diser_o de metaI.Preste atenci6n a la etiqueta del
fabricante para obtener informaci6n sobre cualquier
instruccion especial para el uso en el horno
microondas.
Utensilios no aptos horno
o Utensilios de cocina de metal:
El metal evita que la energfa de microondas Ilegue a
los alimentos y produce una coccion desigual.
Adema.s, evite el uso de brochetas de metal,
termometros o bandejas de film de aluminio. Los
utensilios de metal pueden provocar arcos electricos,
que pueden da_ar su horno microondas.
o Decoracion de metal:
Bols, tazas, platos y bandejas para servir con borde
de metal.
o Film de aluminio:
Evite el uso de laminas grandes de film de aluminio
debido a que obstaculizan la coccion y pueden
provocar arcos electricos perjudiciales. Use pequer_os
trozos de film para proteger las patas y alas de ave.
Mantenga TODO el film de aluminio, como mfnimo, a
1 pulg. (2.5 cm) de las paredes laterales de la
cavidad del horno y de la puerta del microondas.
o Madera:
Los bols y las tablas de madera se secara.n y pueden
partirse o agrietarse al utilizarse en el horno
microondas. Las canastas hechas de madera
reaccionara.n del mismo modo.
o Utensilios de cocina cubiertos en forma ajustada:
Aseg0rese de dejar aberturas para que salga el vapor
de los utensilios de cocina cubiertos. Perfore las
bolsas de pla.stico de verduras u otros alimentos antes
de cocinar. Las bolsas cerradas en forma ajustada
pueden explotar.
o Papel de estraza:
Evite utilizar bolsas de papel de estraza. Absorben el
calor y pueden quemarse.
o Utensilios de cocina con defectos o astillados:
Cualquier utensilio que este rajado, astillado o que
tenga defectos puede romperse en el horno.
o Cierres de metal:
Retire los cierres de metal de las bolsas de pla.stico o
papel. Se calientan y podrfan provocar un incendio.
37

Prueba de la vajilla
No encienda nunca el microondas sin alimentos en su
interior. Con excepcion de la prueba de la vajilla
siguiente.
Si no esta. seguro de si su recipiente es adecuado para
el microondas, efectOe la siguiente prueba:
1. Introducir el recipiente vacfo en el aparato durante 1/2
a 1 minuto a la potencia maxima.
2. Comprobar la temperatura de vez en cuando.
El recipiente deberfa estar fifo 0 templado.
Si se calienta 0 se generan chispas, no es adecuado
para el microondas.
Antes de usar el horno por primera vez
El horno debe ser correctamente instalado por un
tecnico calificado antes de comenzar a usarse.
Retire todo el material de embalaje del interior y
exterior del horno.
o Mientras esta. fifo, Ifmpielo con un paso hOmedo
limpio y sequelo.
o Es posible que sienta un ligero olor durante los
primeros usos; esto es normal y dejara, de ocurrir.
o Los resultados de coccion optimos dependen de que
se utilicen los utensilios de cocina correctos.
o Lea y comprenda todas las precauciones de
seguridad y la informacion del Manual de uso y
cuidado antes de usar el producto.
Ejecute las siguientes secciones antes de la
operacion:
El equipo tiene que estar totalmente montado y
conectado.
Limpieza de accesorios
Antes de utilizar accesorios por primera vez, Ifmpielos
minuciosamente con agua jabonosa caliente y un
repasador suave.
Operacion
Programacion del reloj
Puede programar el reloj en el modo de 12 horas.
1. Pulse Clock (Reloj) una vez.
2. Ingrese la hora utilizando las teclas numericas.
Ejemplo: para programar el reloj en 12:41, ingrese 1,
2,4,1.
3. Pulse Clock para confirmar.
Se muestra la hora del dfa.
Programacion del temporizador de cocina
Puede programar un valor del temporizador de hasta
99 minutos y 99 segundos.
1. Pulse Kitchen Timer (Temporizador de cocina).
Se enciende el sfmbolo _ y titila "_"_'"_"_
/,..a/,..a,/,..a/,..a,
2. Ingrese el tiempo deseado utilizando las teclas
numericas.
3. Pulse Kitchen Timer para confirmar.
El temporizador de cocina comienza la cuenta atra.s.
Una vez que haya transcurrido el tiempo programado,
sonara.n 4 bips. Para detener el bip, pulse Kitchen
Timer.
Para cancelar el temporizador de cocina, vuelva a pulsar
Kitchen Timer o abra la puerta del aparato.
Manejo del ventilador de ventilacion
La funci6n de ventilacion mueve el vapor y otros vapores
de coccion de la superficie de coccion de la estufa
debajo del horno de microondas.
Puede programar cuatro velocidades diferentes de
ventilaci6n.
Programe la funcion de ventilaci6n pulsando Vent (high/
low) (Ventilaci6n [alta/baja]). Se encendera, el sfmbolo
de ventilaci6n ITiiTI en el display.
Nivel de Pulse la tecla Vent Display
ventilacion (high/low) (Ventila-
cion [alta/baja])
I
4 (alta) 1 vez H ,
3 2 veces
2 3 veces
t
1 (baja) 4 veces L La
OFF 5 veces OFF (Apagado)
(Apagado)
Nota: Si la temperatura se vuelve demasiado caliente
alrededor del horno de microondas, el ventilador de la
funcion de ventilaci6n se encendera, automa.ticamente en
el valor ma.s bajo para refrigerar el horno. El ventilador
se apagara, automa.ticamente cuando las piezas internas
esten frfas. Cuando esto sucede, no se puede apagar la
ventilaci6n a mano.
38

Encendido/Apagado de la luz de
superficie
El aparato esta. equipado con una luz de superficie de
coccion para iluminar la superficie que se encuentra
debajo del aparato.
Con la tecla Light (Luz), usted puede programar dos
niveles de brillo.
Brillo Pulse la tecla de la luz
Alto 1 vez
Bajo 2 veces
Apagado 3 veces
Encendido/Apagado del plato giratorio
Para obtener los mejores resultados de coccion, deje el
plato giratorio encendido. Puede apagarse para cocinar
platos grandes.
Para apagar el plato giratorio, pulse una vez Turntable
(on/off) (Plato giratorio [encendido/apagado]. ). Se
encienden brevemente el sfmbolo _ y _el-l-. Vueiva a
pulsar la tecla para encender el plato giratorio. Se
encienden brevemente el sfmbolo _ y Un.
• , ATENCION
o A veces se calienta el plato giratorio. Tenga
cuidado al tocar el plato giratorio durante la
cocci6n y despues de esta.
o No haga funcionar el horno mientras este vacfo.
o No maneje el horno sin colocar el plato giratorio
en su lugar.
Programacion del microondas
El aparato debe estar apagado.
1. Ingrese la duracion de cocci6n deseada con las teclas
numericas. El display del temporizador se Ilenara. de
derecha a izquierda.
Ejemplo: para programar un tiempo de microondas de
20 minutos y 30 segundos, ingrese los nOmeros 2, 0,
3, 0. Titila START (Comenzar).
2. Puede comenzar la operacion del microondas con el
nivel de potencia predeterminado 10 pulsando Start/
Enter (Comenzar/lntro)
o bien
Puede ajustar el nivel de potencia. Pulse la tecla
Power Level (Nivel de potencia_). Titila el nivel de
! II II I
potencia predeterminado I-L ILI. Los segmentos en la
barra que se encuentra debajo del display numerico
tambien indican el nivel de potencia.
3. Ingrese el nivel de potencia deseado utilizando las
teclas numericas. Titilan c_1
I-L y el nivel de potencia
seleccionado, y START (Comenzar' en el display.
4. Pulse la tecla Start/Enter para iniclar el
funcionamiento del microondas.
Comenzara. la cuenta atra.s del temporizador del
microondas.
El temporizador del microondas puede modificarse
durante el funcionamiento pulsando la tecla +30
Seconds (+30 segundos).
El nivel de potencia puede modificarse durante el
funcionamiento. Para mostrar el nivel de potencia
programado, pulse la tecla Power Level.
Una vez que haya finalizado el tiempo del microondas,
sonara.n 4 bips. Se apaga el aparato y se muestra el
reloj.
Abertura de la puerta del aparato durante el
funcionamiento
La abertura de la puerta del aparato durante el
funcionamiento interrumpira, el modo actual. Debe cerrar
la puerta del aparato y, luego, pulsar Start/Enter
(Comenzar/Intro) para reanudar el funcionamiento.
Cancelacion del funcionamiento
Pulse Clear/Off (Borrar/Apagar) para cancelar el modo
activo del horno. Se apaga el aparato y se muestra el
reloj.
El ventilador de enfriamiento funciona todavfa por un
tiempo, y luego se apaga automa.ticamente.
Niveles de potencia del microondas
Los 10 niveles de potencia disponibles en este
microondas le ayudara.n a elegir la potencia que mejor
se adapte al tipo de alimento que este preparando.AI
igual que con la preparacion de cualquier alimento en el
microondas, Io ideal es seguir las instrucciones para
microondas impresas en el envase del alimento.
La siguiente tabla proporciona los niveles de potencia
sugeridos para diversos tipos de alimentos que puede
preparar en el microondas.
39

Nivel
de
poten
cia
Salida de Utilizar para
micro-
ondas
in
,u 1O0 %
AIta
90 %
8O %
"_ 70 %
I
60 %
S
50 %
9 40 %
3O %
2O %
I 10%
Hervir agua
Cocinar carne molida
Preparar dulces
Cocinar frutas y verduras frescas
Cocinar carne de pescado y ave
Precalentar recipientes para dorar
Recalentar bebidas
Cocinar rebanadas de tocino
Recalentar rebanadas de carne
ra.pidamente
Saltar cebollas, apio y pimientos
verdes
Recalentar en general
Cocinar huevos revueltos
Cocinar panes y productos con
cereales
platos con queso y ternera
muffins, brownies y mante-
Cocinar
Cocinar
cadas
Cocinar un ave entera
Cocinar pasta
Cocinar carne de res
Cocinar natilla
Cocinar costillas, costillar asado y
solomillo asado
Cocinar cortes de carne de res
menos tiernos
Recalentar alimentos envasados
congelados
Descongelar carne de res, ave y
frutos de mar
Cocinar peque_as cantidades de
alimentos
Terminar de cocinar guisos, estofa-
dos y algunas salsas
Derretir chocolate
Ablandar mantequilla y queso
crema
Ablandar helado
Hacer leudar masa con levadura
Sugerencias para obtener los mejores resultados
Para ayudarlo a obtener los mejores resultados posibles
de su horno microondas, lea las siguientes sugerencias
que figuran a continuacion:
o Temperatura de almacenamiento
Los alimentos que se sacan del congelador o del
refrigerador demoran ma.s en cocinarse que los
mismos alimentos a temperatura ambiente.
o Tamaho
Los trozos peque_os de alimentos se cocinan ma.s
ra.pido que los trozos grandes. Los trozos de tama_o y
forma similares se cocinan en forma ma.s pareja al
cocinarse juntos. Para obtener resultados ma.s
parejos, reduzca los niveles de potencia al cocinar
trozos grandes de alimentos.
o Humedad natural
Los alimentos muy hOmedos se cocinan en forma ma.s
pareja porque la energfa de microondas calienta las
moleculas de agua en forma muy eficaz.
o Revolver
Revuelva los alimentos, como guisados y verduras,
desde afuera al centro, para distribuir el calor en
forma ma.s pareja.Esto permite que el alimento se
cocine ma.s ra.pido. No es necesario revolver
constantemente.
Dar vuelta los alimentos
De vuelta los alimentos, como chuletas de cerdo,
carnes asadas o coliflor entero, a la mitad del tiempo
de coccion. Esto ayudara, a que todos los lados
queden expuestos en forma pareja a la energfa de
microondas.
o Colocacion de los alimentos
Coloque las Areas delicadas de los alimentos, como
puntas de espa.rragos, hacia el centro de la bandeja
del plato giratorio.
o Disposicion de los alimentos
Disponga alimentos de formas desparejas, como
trozos de polio o salmon, con las partes ma.s gruesas
o carnosas hacia afuera de la bandeja del plato
giratorio.
o Dejar reposar los alimentos
Despues de retirar los alimentos del microondas,
cObralos con film de aluminio o una tapa de cacerola
y dejelos reposar para que terminen de cocinarse.
Esto permitira, que los alimentos se terminen de
cocinar en el centro y evitara, el exceso de coccion en
los bordes externos. El tiempo de reposo depende de
la densidad y la superficie de los alimentos.
o Envolver en toallas de papel o papel encerado
Los sa.ndwiches y muchos otros tipos de alimentos
que contienen pan prehorneado deben envolverse
antes de colocarse en el horno microondas para
ayudar a evitar que se sequen al calentarse.
Ahadido de tiempo de coccion
(+30 Seconds [+30 segundos])
Esta funci6n que ahorra tiempo le permitira, a_adir
ra.pidamente 30 segundos a cualquier tiempo de
coccion. +30 Seconds (+30 segundos) tambien iniciara.
el microondas con 30 segundos al nivel de potencia del
100 %. Cada vez que pulse la tecla +30 Seconds (+30
segundos), se a_adira.n 30 segundos al tiempo de
coccion.
40

Auto Defrost (Descongelar
automaticamente)
Con la funci6n Auto Defrost (Descongelar
automa.ticamente) puede descongelar tres tipos de
alimentos distintos ingresando el peso. El tiempo de
descongelaci6n ideal sera. calculado por el programa.
Programacion de Auto Defrost (Descongelar
automaticamente)
1. Presione una vez Auto Defrost (Descongelar
automa.ticamente). Titilan ,a-a-oct- i y START (Comenzar)
y se enciende el sfmbolo _ en el display.
Programas Auto Defrost (Descongelar
automaticamente)
N. ° de pro- Alimento Rango de peso
grama
irr
oc,- i Carne molida 0.5 Ib a 3 Ib
irr
oct- c Trozos de carne 0.5 Ib a 3 Ib
(bistecs, chuletas)
irr
oca- __ Trozos de aves 0.5 Ib a 3 Ib
Consejos para descongelar
• , ADVERTENCIA
RIESGO PARA LA SALUD
Se producira. Ifquido al descongelar carneo aves.
Drene este Ifquido al girar carneo aves y no Io
utilice para otros fines ni permita que entre en
contacto con otros alimentos bajo ninguna
circunstancia.
2. Pulse Auto Defrost repetidamente hasta que se
muestre el nOmero de programa deseado en el
display. Verifique la etiqueta del men0 en la parte
inferior de la cavidad del horno o consulte la tabla de
programas que figura a continuacion.
3. Pulse Start/Enter (Comenzar/Intro). Titila _'__'_u.u Ib en el
display.
4. Ingrese el peso del alimento con las teclas numericas.
5. Pulse Start/Enter para iniciar el programa.
Cuando termine la funcion de descongelar
automa.ticamente, sonara.n 4 bips. Se apaga el aparato y
se muestra el reloj.
Nota: Suena un bip durante la descongelacion para
todos los programas para dar vuelta el alimento o
separar los trozos.
Abertura de la puerta del aparato durante el
funcionamiento
La abertura de la puerta del aparato durante el
funcionamiento interrumpira, el modo actual. Debe cerrar
la puerta del aparato y, luego, pulsar Start/Enter
(Comenzar/Intro) para reanudar el funcionamiento.
Cancelacion del funcionamiento
Pulse Clear/Off (Borrar/Apagar) para cancelar el modo
activo del horno. Se apaga el aparato y se muestra el
reloj.
El ventilador de enfriamiento funciona todavfa por un
tiempo, y luego se apaga automa.ticamente.
o Siempre ingrese el peso en libras cuando utilice la
funcion de descongelacion por peso (consulte la tabla
de programas).
o 0nicamente utilice el modo de descongelacion para
alimentos crudos.
o La descongelacion tiene mejores resultados cuando
los alimentos que sera.n descongelados tienen una
temperatura mfnima de 0 °F (sacados directamente
de un congelador).Si los alimentos se guardaron en
un refrigerador-congelador que no mantiene una
temperatura de 5 °F o menos, programe siempre un
peso de alimentos ma.s bajo o un tiempo de coccion
ma.s bajo para evitar que los alimentos se cocinen.
o Si los alimentos congelados se dejan fuera del
congelador durante 20 minutos, como ma.ximo,
ingrese un tiempo de coccion o peso menor.
o La forma del paquete alterara, el tiempo de
descongelacion. Los paquetes de alimentos
rectangulares poco profundos se descongelan ma.s
ra.pidamente que un bloque profundo de alimentos
congelados.
o Separe los trozos a medida que comiencen a
descongelarse.Los trozos de alimentos congelados
que se separan se descongelan mejor.
o Cubra las Areas tibias de los alimentos con peque_os
trozos de film de aluminio si comienzan a calentarse.
Use peque_os trozos de film de aluminio para cubrir
alimentos, tales como alas y puntas de las patas de
polio, y colas de pescado.
No permita que el film de aluminio entre en contacto
con la cavidad del horno al descongelar.
41

Sugerencias para descongelar carne
Para obtener los mejores resultados, lea estas
sugerencias para descongelar carne.
Came Rango de peso
Came molida 0.5 Ib a 2 Ib
(8 oz a 48 oz)
Bistecs, chuletas o
pescado
Piezas de polio
0.5 Ib a 3 Ib
(8 oz a 48 oz)
0.5 Ib a 3 Ib
(8 oz a 48 oz)
Sugerencias
Despues de cada etapa, retire cualquier trozo de alimento que este pra.ctica-
mente descongelado. Deje reposar los alimentos, cubiertos con film, entre 5
y 10 minutos.
Despues de cada etapa, reacomode los alimentos. Si hay alguna parte de
los alimentos tibia o descongelada, cObrala con trozos angostos de film de
aluminio. Retire cualquier trozo de alimento que este pra.cticamente descon-
gelado. Deje reposar los alimentos, cubiertos, aproximadamente entre 5 y
10 minutos.
Despues de cada etapa, reacomode o retire cualquier trozo de alimento que
este casi descongelado. Deje reposar los alimentos entre 10 y 20 minutos.
Sensor Reheat (Recalentar por sensor)
La funci6n Sensor Reheat (Recalentar por sensor) le
permite recalentar platos de cena o cacerolas (de 8 a
12 oz) para su comodidad al cocinar.
Programacion de recalentamiento por sensor
1. Pulse una vez Sensor Reheat (Recalentamiento por
sensor). Titilan Sr - i y START (Comenzar) en el
display.
2. Pulse Sensor Reheat repetidamente hasta que se
muestre el nOmero de programa deseado en el
display. Verifique la etiqueta del menQ en la parte
inferior de la cavidad del horno o consulte la tabla de
programas que figura a continuacion.
3. Pulse Start/Enter (Comenzar/Intro) para iniciar el
modo de recalentamiento por sensor. Se activa el
sensor del aparato, se enciende SEN& en el display.
El aparato esta. funcionando mientras la deteccion.
Cuando finaliza la funcion del sensor, suenan dos bips
cortos y comenzara, la cuenta atra.s del tiempo de
coccion calculado.
Una vez que finaliza el recalentamiento por sensor,
sonardtn 4 bips. Se apaga el aparato y se muestra el
reloj.
Nota: No abra la puerta durante el proceso en que el
sensor esta activo, o se cancelara el programa.Una vez
que se muestra el tiempo de coccion calculado, puede
abrir la puerta para revolver, dar vuelta o reacomodar los
alimentos. Pulse Start/Enter (Comenzar/Intro) para
reanudar el funcionamiento.
Notas
o Cubra con una envoltura de pldtstico o papel encerado
ventilados.
o Recaliente los alimentos en un plato de cena apto
para microondas.
Cancelacion del funcionamiento
Pulse Clear/Off (Borrar/Apagar) para cancelar el modo
activo del horno. Se apaga el aparato y se muestra el
reloj.
El ventilador de enfriamiento funciona todav[a por un
tiempo, y luego se apaga automdtticamente.
Programas de Sensor Reheat
(Recalentamiento por sensor)
N. ° de pro- Alimento Cantidad
grama
S_- - i Plato de cena 1 porcion
_¢ -2 Guisado, pasta 1 a 4 porciones
42

Sugerencias para recalentar
Alimento
Plato de
cena
Gui-
sado,
pasta
Instrucciones
Utilice Onicamente alimentos pre-
cocidos, refrigerados. Cubra el
plato con una envoltura de pla.s-
tico ventilada o un papel ence-
rado enganchados debajo del
plato. Si el alimento no queda Io
suficientemente caliente des-
pues de calentarlo con la funcion
Reheat (Recalentar), continQe
calentando con la programacion
manual de tiempo y nivel de
potencia.
Contenido:
o de 3 a 4 oz de carne de res,
ave o pescado (hasta 6 oz con
hueso);
o 1/2 taza de alimentos con
almidon (papas, pasta, arroz,
etc.);
o 1/2 taza de verduras (alrede-
dor de 3 a 4 oz).
Cubra el plato con una tapa o
con una envoltura de pla.stico
ventilada. Si el alimento no queda
Io suficientemente caliente des-
pues de calentarlo con la funcion
Reheat (Recalentar), continQe
calentando con la programacion
manual de tiempo y nivel de
potencia.
Revuelva los alimentos una vez
antes de servirlos.
Contenido:
o Guisado: alimentos refrigera-
dos (como estofado o lasa_a).
o Pasta: espaguetis y ravioles
enlatados, alimentos refrigera-
dos.
Cantidad
1 por-
cion
(1 plato)
dela4
porciones
Sensor Cook (Coccion por sensor)
La funcion Sensor Cook (Coccion por sensor) le permite
cocinar muchos de sus alimentos favoritos sin
seleccionar tiempos de coccion ni niveles de potencia.
El horno microondas determina automa.ticamente el
tiempo de coccion requerido para cada alimento.
Para obtener los mejores resultados al cocinar por
sensor, siga estas recomendaciones:
o Los alimentos cocidos con el sistema de sensor
deben estar a una temperatura de almacenamiento
normal.
o La bandeja del plato giratorio, la bandeja de vidrio y el
exterior del recipiente deben estar secos.
o Siempre debe cubrir los alimentos de manera holgada
con envoltura de pla.stico, papel encerado o tapas
aptos para horno microondas.
o No abra la puerta ni pulse la tecla Clear/Off (Borrar/
Apagar) durante el tiempo en que esta. activo el
sensor. Cuando finaliza el tiempo en que esta. activado
el sensor, el horno emitira, un bip dos vezes, y
aparecera, en el display el tiempo de coccion restante.
En este momento, puede abrir la puerta para
revolver, dar vuelta o reacomodar los alimentos.
Programacion de la coccion por sensor
1. Pulse una vez Sensor Cook (Coccion por sensor).
Titilan a-
3c- i y START (Comenzar).
2. Pulse Sensor Cook repetidamente hasta que se
muestre el nOmero de programa deseado en el
display.
3. Pulse Start/Enter (Comenzar/Intro) para iniciar el
modo de coccion por sensor. Se enciende SENS. en
el display y se activa el sensor del aparato.
Cuando finaliza la funcion del sensor, suenan dos bips
cortos y comenzara, la cuenta atra.s del tiempo de
coccion calculado.
Una vez que finaliza la coccion por sensor, sonara.n
4 bips. Se apaga el aparato y se muestra el reloj.
Nota: No abra la puerta durante el proceso en que el
sensor esta activo, o se cancelara el programa.Una vez
que se muestra el tiempo de coccion calculado, puede
abrir la puerta para revolver, dar vuelta o reacomodar los
alimentos. Pulse Start/Enter (Comenzar/Intro) para
reanudar el funcionamiento.
Cancelacion del funcionamiento
Pulse Clear/Off (Borrar/Apagar) para cancelar el modo
activo del horno. Se apaga el aparato y se muestra el
reloj.
El ventilador de enfriamiento funciona todav[a por un
tiempo, y luego se apaga automa.ticamente.
Programas de Sensor Cook (Coccion por sensor)
Alimento Cantidad Consejos para
cocinar
N.°de
pro-
grama
c- i
S "3
C-C
Papa asada 1- 4 papas
(8 - 32 oz)
Papa dulce 1- 4 papas
(8 - 32 oz)
Despues de la
coccion, dejarlas
reposar envuel-
tas en papel de
aluminio durante
5 minutos.
Despues de la
coccion, dejarlas
reposar envuel-
tas en papel de
aluminio durante
5 minutos.
43

N. ode Alimento Cantidad Consejos para
pro- cocinar
grama
S
c - 3 Verduras 8 - 24 oz No se necesita
frescas (0.5- 1.5 Ib) agua si las verdu-
ras se acaban de
lavar. Ar_adir 2
cucharadas de
agua por cada 8
onzas de verdu-
ras frescas.
S II
C - "_ Verduras 8- 24 oz A_adir 1 cucha-
congeladas (0.5 - 1.5 Ib) rada de agua por
cada 4 onzas de
verduras congela-
das.
S ,_
c - 3 Carne 8 - 24 oz Despues de la
molida (0.5- 1.5 Ib) coccion, dejarla
reposar envuelta
durante 3-4 minu-
tos.
,_
c - o Pescado/ 8 - 24 oz Enrollar los extre-
marisco (0.5 - 1.5 Ib) mos finos debajo.
Colocar en drculo
alrededor en un
plato apto para
microondas.
c - -7 Arroz 0.5 - 2 tazas Utilizar una fuente
integral (arroz en con bordes altos.
seco) No cubrir. Utilizar
1 taza de arroz
por 3 tazas de
agua.
c - o Arroz 0.5 - 2 tazas Utilizar una fuente
blanco (arroz en con bordes altos
seco) y tapa. Utilizar 1
taza de arroz por
2 tazas de agua.
,.+
c - 3 Entradas Seguir las instruc-
congelados clones del
paquete para la
ventilaci6n, el
corte del papel de
pla.stico, etc.
Bloqueo de panel
La funci6n de bloqueo de panel es muy Otil al limpiar el
control de mandos.EI bloqueo evitara, la programacion
accidental al limpiar el panel de control.
Para activar el bloqueo de panel:
Pulse y mantenga presionada Clear/Off (Borrar/Apagar)
durante ma.s de 3 segundos. Se enciende el sfmbolo
en el display, suenan dos bips.
Para desactivar el bloqueo de panel:
Pulse y mantenga presionada Clear/Off durante ma.s de
3 segundos. Desaparece el dmbolo _ del display. El
panel esta. desbloqueado.
Valores
Los siguientes valores ba.sicos de su aparato pueden
ajustarse a sus preferencias personales.
Display Funcion Pulse la tecla
de valores
,
no Encender/Apagar sonido 1 vez
de las teclas
1: encendido
2: apagado
Encender/Apagar display
del reloj en modo de
espera
1: encendido
2: apagado
r i
L _ o 2 veces
Cambio de los valores
Ejemplo: Encender/Apagar el display del reloj.
1. Pulse dos veces Settings (Valores).
r i _rr
Se alternan L _o y u¢_- o un en el display.
2. Pulse la tecla numerica 1 para encender el display del
reloj, pulse 2 para apagar el display del reloj.
3. Pulse Start/l=nter (Comenzar/Intro).
4. Pulse Clear/Off (Borrar/Apagar) para salir del men0
de valores.
Nota: Solo puede cambiar un valor por vez. Para
cambiar otro valor, primero debe salir del menQ de
valores y comenzar desde el paso 1.
Funcionamiento practico
Popcorn (Palomitas de maiz)
• , ATENCION
No deje el horno sin supervisi6n mientras prepara
palomitas de mafz. Las palomitas de mafz pueden
prenderse fuego y provocar un incendio.
Programacion del modo palomitas de maiz
La funcion Popcorn (Palomitas de mafz) le permite
preparar 3 tamar_os distintos de bolsas de palomitas de
mafz envasadas comercialmente para microondas. Use
la siguiente tabla para determinar el valor que utilizar&
Tamaho de la bolsa Pulse la tecla Popcorn
(Palomitas de maiz)
1.2 oz 1 vez
(valor predeterminado)
2.5 oz 2 veces
3.5 oz 3 veces
44

Ejemplo:Prepararautoma.ticamenteunabolsade
palomitasdemafzde3.5oz:
1.Pulse3vecesPopcorn(Palomitasdemafz).Titilan3
ySTART(Comenzar)eneldisplay.
2.PulseStart/Enter(Comenzar/Intro).
Elaparatocomienzalacuentaatra.s.Unavezque
hayatranscurridoeltiempodelmicroondas
programado,sonara.n4 bips.Seapagaelaparatoy
semuestraelreloj.
Cancelacion del funcionamiento
Pulse Clear/Off (Borrar/Apagar) para cancelar el modo
activo del homo. Se apaga el aparato y se muestra el
reloj.
El ventilador de enfriamiento funciona todavfa por un
tiempo, y luego se apaga automa.ticamente.
Beverage (Bebida)
La funcion Beverage (bebida) calienta entre 0.5 y 2 tazas
de bebida. Use la siguiente tabla para determinar el valor
que utilizara..
N. o de Cantidad Pulse
pro- la tecla Beverage
grama (Bebida)
1 0.5 tazas 1 vez
(alrededor de 8 oz)
2 1 taza 2 veces
(alrededor de 16 oz)
3 1.5 tazas 3 veces
(alrededor de 24 oz)
4 2 tazas 4 veces
(alrededor de 32 oz)
Ejemplo: Calentar 1 taza de una bebida.
1. Pulse dos veces Beverage (Bebida). Titilan 2 y START
(Comenzar) en el display.
2. Pulse Start/Enter (Comenzar/lntro).
Una vez que haya transcurrido el tiempo de coccion,
sonara.n 4 bips. Se apaga el aparato y se muestra el
reloj.
Cancelacion del funcionamiento
Pulse Clear/Off (Borrar/Apagar) para cancelar el modo
activo del horno. Se apaga el aparato y se muestra el
reloj.
El ventilador de enfriamiento funciona todavfa por un
tiempo, y luego se apaga automa.ticamente.
Mantener caliente
Puede mantener calientes alimentos cocidos en su
horno de microondas durante un ma.ximo de 60 minutos.
• , ATENCION
StGA ESTAS PAUTAS AL USAR EL MODO KEEP
WARM (MANTENER CALIENTE):
o No use el modo Keep Warm (Mantener caliente)
para calentar alimentos frfos.
o AsegOrese de mantener la temperatura adecuada
de los alimentos. El Departamento de Agricultura
de los EE. UU. (United States Department of
Agriculture, USDA) recomienda mantener los
alimentos calientes a una temperatura de 140 °F
(60 °C) o ma.s.
o NO caliente alimentos durante ma.s de una hora.
Programacion de Keep Warm (Mantener caliente)
1. Pulse Keep Warm (Mantener caliente). Se enciende el
, ,, I'_ I'_ I'_ I'_ .
slmbolo _ y tltda uu:uu en el display.
2. Ingrese el tiempo deseado utilizando las teclas
numericas.
3. Pulse Start/Enter (Comenzar/Intro).
Una vez que haya transcurrido el tiempo programado de
Keep Warm (Mantener caliente), el aparato sigue
emitiendo bips hasta que usted pulse Clear/Off.
Notas
Use el modo Keep Warm (Mantener caliente) para
mantener los alimentos cocinados calientes hasta el
momento de servidos.
o Los alimentos cocinados cubiertos deben permanecer
cubiertos durante la funcion Keep Warm (Mantener
caliente).
o Los productos de panaderia (pays, empanadas, etc.)
no deben estar cubiertos.
Las comidas completas que se deseen mantener
calientes en un plato de cena se pueden cubrir
durante la funcion Keep Warm (Mantener caliente).
Cancelacion del funcionamiento
Pulse Clear/Off (Borrar/Apagar) para cancelar el modo
activo del horno. Se apaga el aparato y se muestra el
reloj.
El ventilador de enfriamiento funciona todavia por un
tiempo, y luego se apaga automa.ticamente.
45

More Modes (Mas modos)
La funci6n More Modes (Ma.s modos) le ofrece cinco
programas ma.s pra.cticos.
Modos disponibles
N.° de Nombre Valor ingresado
modo
1 Melt butter (Derretir 1 = 2 cucharadas
mantequilla) 2 = 1/4taza
3 = 1/2taza
2 Melt Chocolate 1 = 1 taza
(Derretir chocolate) 2 = 2 tazas
3 Soften Ice Cream 1 = 4 oz
(Ablandar helado) 2 = 8 oz
3 = 16oz
4 = 32oz
5 = 48 oz
4 Soften Cream Cheese 1 = 3 oz
(Ablandar queso 2 = 6 oz
crema) 3 = 8 oz
5 Time defrost (Descon- Ingrese el tiempo de
gelar por tiempo) descongelaci6n
Programacion de More modes (Mas modos)
1. Pulse una vez More Modes (Ma.s modos). Titilan [ y
START (Comenzar) en el display.
2. Pulse More Modes repetidamente hasta que se
muestre el nOmero de programa deseado en el
display. Verifique la etiqueta del men0 en la parte
inferior de la cavidad del horno o consulte la tabla de
programas que figura arriba.
3. Pulse Start/Enter (Comenzar/lntro). Para los modos 1
a 4: titilan [ y START en el display. Para el modo 5:
f_ f_, f_f_
titila ,_,_a.,_,._aen el display.
4. Ingrese la categorfa de peso deseada (modos 1 a 4)
o ingrese el tiempo de descongelaci6n deseado
(modo 5) con las teclas numericas.
5. Pulse Start/Enter para iniciar el funcionamiento.
Una vez que haya transcurrido el tiempo de coccion,
sonara.n 4 bips. Se apaga el aparato y se muestra el
reloj.
Cancelacion del funcionamiento
Pulse Clear/Off (Borrar/Apagar) para cancelar el modo
activo del horno. Se apaga el aparato y se muestra el
reloj.
El ventilador de enfriamiento funciona todavfa por un
tiempo, y luego se apaga automa.ticamente.
Cuadros de coccion
Los cuadros pueden usarse como gufa. Siga las
instrucciones del envase o la receta.
Cocinar carne de res en su horno de
microondas
AsegOrese de colocar las carnes de res preparadas
sobre una rejilla para asar apta para horno de
microondas en un plato apto para horno de microondas.
Comience a cocinar la carne de res con el lado de la
grasa hacia abaja y, si es necesario, use tiras angostas
de papel de aluminio para cubrir las puntas de huesos o
Areas deigadas de carne. Despues de cocinar, mida la
temperatura en varios lugares antes de dejar reposar la
carne el tiempo recomendado. Recuerde que las
temperaturas indicadas en los siguientes cuadros son
las temperaturas al momento de retirar el alimento; la
temperatura aumenta durante el perfodo de reposo.
Carne
Carne de res asada
deshuesada
(hasta 4 Ib)
Nivel de potencia
AIta (10) durante los pri-
meros 5 minutos, luego
media (5)
Carne de cerdo asada AIta (10) durante los pri-
deshuesada o con meros 5 minutos, luego
hueso media (5)
(hasta 4 Ib)
Tiempo de coccion
12-17 min./Ib, en 160 ° F
(71 °C) (termino medio)
14-19 min./Ib, en 170 ° F
(76°C) (bien cocida)
15-20 min./Ib, en 170 ° F
(76°C) (bien cocida)
Instrucciones
Coloque la carne de res con el lado
de grasa hacia abajo sobre la rejilla
para asar. Cubra con papel ence-
rado. Dela vuelta a la mitad de la coc-
cion. Deje reposar * entre 10 a
15 minutos.
Coloque la carne de res con el lado
de grasa hacia abajo sobre la rejilla
para asar. Cubra con papel ence-
rado. Dela vuelta a la mitad de la coc-
cion. Deje reposar * entre 10 a
15 minutos.
Puede esperar un aumento de temperatura de hasta 10 ° F durantedurante el perfodo de reposo.
46

Tiempo de reposo
Carne Nivel de coccion Retire del horno
Carne de res Termino medio 150°F (65°C)
Bien cocida 160°F (71 °C)
Cerdo Termino medio 150°F (65°C)
Bien cocida 160°F (71 °C)
Came de ave Came oscura 150°F (65°C)
Came blanca 160°F (71 °C)
Despues de reposar (10-15 min)
150°F (65°C)
160°F (71°C)
150°F (65°C)
160°F (71°C)
150°F (65°C)
160°F (71°C)
Coccion de carne de ave en su horno de
microondas
AsegOrese de colocar la carne de ave sobre una rejilla
para asar apta para horno de microondas en un plato
apto para horno de microondas. Cubra el ave con papel
encerado para evitar salpicaduras. Use tiras angostas de
papel de aluminio para cubrir las puntas de huesos o las
Areas delgadas de came, o las Areas que comienzan a
cocinarse excesivamente. Despues de cocinar, mida la
temperatura en varios lugares antes de dejar reposar la
carne el tiempo recomendado.
Carne
Polio entero
(hasta 4 Ib)
Trozos de polio
(hasta 4 Ib)
Nivel de potencia Tiempo de coc- Instrucciones
cion
media alta (7) 180 ° F 7-10 min/Ib
(82°C) carne oscura
170 ° F (76°C) came
oscura
media alta (7) 180 ° F
(82°C) came oscura
170 ° F (76°C) came
oscura
7-10 min/Ib
Coloque el polio con el lado de la pechuga hacia
abajo sobre la rejilla para asar. Cubra con papel
encerado. Dela vuelta a la mitad de la coccion.
Cocine hasta que el jugo sea transparente y la
carne no este rosada cerca del hueso. Deje repo-
sar entre 5 y 10 minutos.
Coloque el polio con el lado del hueso hacia abajo
sobre un plato; los trozos ma.s gruesos deben
apuntar hacia adentro del plato. Cubra con papel
encerado. Delo vuelta a la mitad de la coccion.
Cocine hasta que el jugo sea transparente y la
carne no este rosada cerca del hueso. Deje repo-
sar entre 5 y 10 minutos.
Coccion de huevos en su horno
microondas
o Nunca cocine huevos con ca.scara y nunca caliente
huevos duros con cascara; pueden explotar.
o Siempre pinche la yema de los huevos enteros para
evitar que exploten.
o Cocine los huevos solo hasta que cuajen; se
endurecera.n si se cocinan en exceso.
o Es seguro cocinar huevos revueltos.
Coccion de verduras en su microondas
o Las verduras deben lavarse justo antes de cocinarse.
Por Io general, no es necesario agregar agua. Si
quiere cocinar verduras densas como papas o
zanahorias, agregue aproximadamente 1/4taza de
agua.
o Las verduras peque_as (zanahorias rebanadas,
chicharos, pallares, etc.) se cocinan ma.s ra.pido que
las verduras ma.s grandes.
o Las verduras enteras, como papas, zapallo o elote en
mazorca, deben disponerse en un drculo sobre el
plato giratorio antes de cocinarlas. Se cocinan en
forma ma.s pareja si se dan vuelta a la mitad de la
coccion.
o Siempre coloque las verduras, como espa.rragos y
br6coli, con los extremos de los tallos hacia el borde
del plato y las puntas hacia el centro.
o AI cocinar verduras cortadas, siempre cubra el plato
con una tapa o una envoltura de pla.stico ventilada
apta para horno microondas.
o Debe pinchar en varios lugares la cascara de las
verduras enteras sin pelar, como papas, camotes,
calabazas, berenjenas, etc., antes de cocinarlas para
evitar que exploten.
o Para una coccion ma.s pareja, revuelva o reacomode
las verduras enteras a la mitad del tiempo de coccion.
o La mayorfa de las veces, cuanto ma.s denso es el
alimento, mayor es el tiempo de reposo necesario.Por
ejemplo, una papa horneada debe reposar 5 minutos
antes de servirla, mientras que un plato de chicharos
puede servirse de inmediato.
47

Coccion de frutos de mar en su horno
microondas
Coloque pescado en una fuente apta para microondas.
AsegOrese de siempre cocinar el pescado hasta que se
pueda desmenuzar fa.cilmente con un tenedor. Utilice
una cubierta ma.s ajustada para cocinar pescado al
vapor; una cubierta ma.s ligera de papel encerado o una
toalla de papel generan menos vapor. AsegOrese de no
cocinar el pescado en exceso; verifique el nivel de
coccion cuando transcurra el tiempo mfnimo de coccion
antes de seguir cocina.ndolo.
Frutos de mar Nivel de potencia Tiempo de Instrucciones
coccion
Bistecsde pescado media alta (7) de 7 a 11 min/Ib
de hasta 11/2Ib
Filetes de pescado
de hasta 11/2Ib
Camarones hasta
11/2Ib
media alta (7)
media alta (7)
de 7 a 11 min/Ib
de 7 a 11 min/Ib
Disponga el pescado sobre un rack para asar con las
partes ma.s carnosas hacia afuera del rack. Cubra con
papel encerado. De vuelta y reacomode el pescado a la
mitad del tiempo de cocci6n. Codnelo hasta que el pes-
cado se pueda desmenuzar fa.cilmente con un tenedor.
Deje reposar de 3 a 5 min.
Disponga los filetes en una fuente para hornear y meta
hacia adentro las partes finas. Cubra con papel ence-
rado. Si tienen un grosor de ma.s de 1/2pulgada, delos
vuelta y reacom6delos a la mitad del tiempo de coccion.
Cocfnelos hasta que el pescado se pueda desmenuzar
fa.cilmente con un tenedor.
Deje reposar de 2 a 3 min.
Disponga los camarones en una fuente para hornear sin
superponerlos ni colocarlos en capas. Cubra con papel
encerado. Cocfnelos hasta que queden firmes y opacos,
y revuelva 2 o 3 veces.
Deje reposar 5 min.
Limpieza y mantenimiento
ADVERTENCIA
AsegOrese de que todo el aparato (incluidos los
filtros antigrasa y las la.mparas de luz, si
corresponde) se haya enfriado y de que la grasa se
haya solidificado antes de intentar limpiar cualquier
parte del aparato.
ADVERTENCIA
AsegOrese de que el electrodomestico y las luces
se hayan enfriado, y de que la alimentaci6n
electrica del electrodomestico este apagada antes
de cambiar el (los) foco(s). No hacerlo podrfa
ocasionar una descarga electrica o quemaduras. La
lente (si viene incorporada) debe estar en su lugar
al usar el electrodomestico. La lente (si viene
incorporada) sirve para proteger el foco contra
roturas. La lente (si viene incorporada) es de vidrio.
ManipOlela con cuidado para que no se rompa. El
vidrio roto podrfa causar una lesi6n.
ADVERTENCIA
El portala.mparas tiene corriente cuando la puerta
esta. abierta si la fuente de alimentaci6n electrica
principal no esta. apagada.
Limpieza
Guia de limpieza
o Para un mejor rendimiento y por motivos de
seguridad, mantenga limpios el interior y el exterior del
horno.Tenga especial cuidado para mantener el panel
interior de la puerta y el marco delantero del horno
libre de acumulacion de alimentos y grasa.
o Nunca use polvo pulidor ni esponjillas abrasivos en el
homo de microondas. Limpie el interior y el exterior
del horno de microondas con un paso suave y una
soluci6n de detergente suave y tibia (no
caliente).Luego, enjuague y seque completamente.
o Limpie de inmediato las salpicaduras con una toalla
de papel hOmeda, especialmente despues de cocinar
alimentos con grasa, como polio o tocino.
o Limpie su horno de microondas semanalmente o con
ma.s frecuencia, si es necesario.
o Nunca maneje el horno sin alimentos en la cavidad
del homo; esto puede da_ar el tubo magnetron o la
bandeja de cristal. Tal vez prefiera dejar una taza de
agua dentro del horno cuando no este en uso para
evitar da_os en caso de que se encienda
accidentalmente.
48

Componente Recomendaciones
Cavidad del horno
Rack de alambre
Bandeja para el plato
giratorio de cristal
Apoyo rodante del
plato giratorio
Puerta de cristal
Superficies pintadas
Superficies de acero
inoxidable
Mantenga limpio el interior (la cavidad) del horno. Las parficulas de alimentos y los liquidos
derramados pueden pegarse a las paredes del horno, y esto hara. que el horno funcione de
manera menos eficaz.
Limpie los derrames de inmediato. Use un patio h0medo y limpio y jabon suave. NO use
detergentes agresivos ni limpiadores abrasivos.
Para remover las parficulas de alimentos horneados o liquidos ma.s fa.cilmente, caliente 2
tazas de agua (agregue el jugo de 1 lim6n si desea mantener el horno con un aroma fresco)
en una fuente apta para microondas de 4 tazas en un nivel de potencia alta durante 5 minu-
tos o hasta que hierva. Deje reposar en la cavidad del horno durante 1 o 2 minutos.
La.velo con agua jabonosa.Enjuague bien y sequelo, o fr6telo suavemente con esponjillas
con polvo de limpieza o jabon, seg0n las indicaciones.
Retire la bandeja para el plato giratorio de cristal del horno al limpiar la cavidad del horno y
la bandeja.
AVISO: Para evitar que el plato giratorio de cristal se rompa, manip01elo con cuidado y no Io
coloque en agua inmediatamente despues de cocinar.
Lave la bandeja del plato giratorio de cristal en agua jabonosa tibia o en el lavavajillas.
Lfmpielo con agua jabonosa tibia. Enjuague bien y seque.
Superficies de pla.stico
y controles
Secciones impresas No use limpiadores abrasivos ni solventes a base de petr61eo.
(palabras y n0meros)
La.velo con jabon y agua o un limpiador para cristales. Use Fantastik® o Formula 409® en
una esponja o toalla de papel limpias y limpie. Evite usar limpiadores abrasivos, como agen-
tes de limpieza en polvo, esponjillas de lana de acero y limpiadores para hornos.
Si se acumula vapor dentro o fuera de la puerta del homo, limpie con un patio suave. El
vapor se puede acumular al operar el homo en condiciones de alta humedad; esto no signi-
fica que haya fugas de microondas.
Limpie con agua jabonosa caliente o aplique Fantastik® o Formula 409® en una esponja o
toalla de papel limpias y limpie. Evite usar limpiadores abrasivos, como agentes de limpieza
en polvo, esponjillas de lana de acero y limpiadores para hornos.
Siempre limpie o frote en la misma direccion de la veta. Limpie con una esponja jabonosa;
luego, enjuague y seque o limpie con aerosoles de Fantastik® en una toalla de papel. Pro-
teja y pula con Stainless Steel Magic® y un patio suave. Remueva las manchas de agua
con un patio humedecido con vinagre blanco. No utilice ning0nos productos de limpieza
que contangan cloro, estos pueden oxidar el acero inoxidable.
Cuando se hayan enfriado, limpie con agua jabonosa, enjuague y seque.
Limpieza de los filtros de ventilacion del horno
Los filtros de ventilacion del horno deben retirarse y
limpiarse a menudo; por Io general, por Io menos, una
vez por mes.
1. Para retirar los filtros de ventilacion, deslice el filtro
hacia la parte posterior. Luego, jale el filtro hacia abajo
y empuje hacia el otro lado. El filtro se liberara.. Repita
la operacion con el segundo filtro.
• , ATENCION
Para evitar riesgos de heridas personales o dafios
materiales, no opere la ventilacion del horno sin los
filtros correctamente colocados
49

2.Remojelosfiltrosdeventilaci6nenaguacalientecon
undetergentesuave.Enjua.guelosbienysacOdalos
paraquesesequen.Nouseamoniaconiloslaveen
unlavavajillas.Elaluminiodelfiltrosecorroey
oscurece.
3.Paravolverainstalarelfiltrodeventilaci6n,deslicelo
enlaranuralateral,luego,hagapresionhaciaarribay
endireccionalhornoparaquequedetrabado.Vuelva
ainstalarelsegundofiltroconelmismo
procedimiento.
Mantenimiento
Reemplazo de la luz de superficie
ATENCION
Para evitar riesgos de heridas personales o da_os
materiales, utilice guantes al reemplazar las
la.mparas de luz.
1. Desenchufe el horno de microondas o apague la
alimentaci6n desde el disyuntor principal.
2. Retire los tornillos de montaje de la cubierta del foco
de las dos posiciones de luz que se encuentran
debajo del microondas.
5. Vuelva a enchufar el microondas en la fuente de
alimentaci6n o vuelva a encender la energfa en el
disyuntor principal.
Reemplazo de la luz del horno
1. Para reemplazar el foco de luz, primero desconecte la
energfa del homo microondas en el panel de
disyuntores o desenchOfelo.
2. Retire los tornillos de montaje del grill de ventilaci6n.
3. Saque el grill de ventilaci6n de la unidad.
t
4. Retire el tornillo en la parte delantera de la tapa de la
luz y tire con cuidado hacia adelante.
3. Reemplace el foco con un foco de 30 vatios para
aparatos.
4. Vuelva a colocar la cubierta del foco y el tornillo de
montaje.
50

5.Retireelfocodeluzusadoyreempla.celosoloconun
focode30vatiosequivalentedisponibleatravesde
sudistribuidordepiezas.Losfocostambienesta.n
disponiblesenlamayorfadelasferreterfaso centros
deiluminacion.
........................................
Nota" NO UTILICE UN FOCO MAYOR DE 30 VATIOS.
6. Vuelva a colocar la tapa de la luz del horno de
microondas haciendo presi6n con cuidado hasta que
este en su lugar. Make sure the light cover slips
underneath the ridge at the rear of the cavity. Vuelva a
colocar el tornillo en la parte delantera de la tapa de la
luz. Reemplace el filtro de carb6n activo. Vuelva a
colocar el grill de ventilacion en su lugar haciendo
presion (enganchando la lengOeta inferior y la
superior) y vuelva a colocar los tornillos de montaje
del grill de ventilacion.
Reemplazo del filtro de carbon activo
El filtro de carbon activo, que se incluye con su horno de
microondas, se utiliza para la instalaci6n no ventilada y
recirculada (ventilacion de ambiente). Debe
reemplazarse el filtro cada 6 a 12 meses, seg0n el uso.
1. Desconecte la energfa del horno de microondas en el
panel de disyuntores o desench0felo.
2. Retire los tornillos de montaje del grill de ventilacion.
3. Saque el grill de ventilacion de la unidad.
t
4. Cambie el filtro de carbon activo.
5. Con cuidado, vuelva a colocar el grill de ventilacion en
su lugar haciendo presion y vuelva a colocar los
tornillos que se retiraron en el Paso 2.
Nota: Si no hay un filtro de carbon activo instalado,
no es posible absorber las sustancias olorosas de los
vapores de coccion.
Los filtros de carbon se pueden comprar en Bosch
eshop, www.bosch-home.com/us/store.
Nt_mero de orden 00676120
51

Resolucion de problemas
Si encuentra un problema, suele ser solo algo menor.
Antes de Ilamar al servicio a clientes, tenga en cuenta
Problema
No funcionan el display del
microondas ni el horno.
El display del horno funciona,
pero el horno no funciona.
Se corta la energia antes de que
haya transcurrido el tiempo de
coccion.
Los alimentos se cocinan muy
lentamente.
Observa
chispas o arcos
electri-
COS.
El plato giratorio hace ruidos o
se pega.
Utilizar su microondas provoca
interferencias en la TV o la
radio.
las sugerencias y las instrucciones que aparecen a
continuacion:
Sugerencia
o Inserte adecuadamente el enchufe en una toma de corriente conectada a tierra.
o Retire el enchufe de la toma de corriente, espere 10 segundos y, luego, vuelva
a enchufar el microondas.
o Restablezca el disyuntor del hogar o reemplace cualquier fusible quemado.
o Enchufe un aparato diferente en la toma de corriente. Si el otro aparato no fun-
ciona, solicite a un electricista calificado que repare la toma de corriente.
o Enchufe el microondas en una toma de corriente diferente.
o AsegOrese de que la puerta del horno este completamente cerrada en forma
segura.
o Verifique que no haya quedado atascado material del embalaje ni otros mate-
riales en el sello de la puerta.
o Verifique que no haya da_os en la puerta del horno.
o Presione la tecla Clear/Off (Borrar/Apagar) dos veces e intente volver a ingre-
sar las instrucciones de coccion.
o Si se ha producido una interrupcion en la energfa, retire el enchufe de la toma
de corriente, espere 10 segundos y, luego, vuelva a enchufar el microondas. Si
se produjo un corte de alimentaci6n, el indicador de la hora en el display mos-
trara 00:00.
o Vuelva a programar el reloj y las instrucciones de coccion.
o Restablezca el disyuntor del hogar o reemplace cualquier fusible quemado.
o Presione la tecla Clear/Off (Borrar/Apagar) dos veces e intente volver a ingre-
sar las instrucciones de coccion.
o Enchufe un aparato diferente en la toma de corriente. Si el otro aparato no fun-
ciona, solicite a un electricista calificado que repare la toma de corriente.
o Enchufe el microondas en una toma de corriente diferente.
AsegOrese de que el horno este enchufado en una Ifnea de circuitos de 20 A
separada. Hacer funcionar otro aparato en el mismo circuito puede provocar una
disminucion en el voltaje. De ser necesario, mueva el microondas a su propio cir-
cuito.
Retire cualquier utensilio metalico, utensilio de cocina o ataduras de metal que
pueda haber en la cavidad del horno. Si utiliza film de aluminio, utilice solo tiras
angostas y deje, por Io menos, una pulgada entre el film y las paredes interiores
del horno.
o Limpie el plato giratorio, el aro rodante y la parte inferior de la cavidad del
horno.
o AsegOrese de que el plato giratorio y el aro rodante esten posicionados correc-
tamente.
Esta es similar a la interferencia provocada por otros peque_os aparatos, como
los secadores de pelo.Aleje su microondas de otros aparatos, como su TV o
radio.
Nota: Si se programa el horno para cocinar durante mas de 30 minutos al nivel de potencia del 100 %, se ajustara
automaticamente al nivel de potencia del 80 % despues de 30 minutos para evitar que se cocine excesivamente.
52

Soporte de Bosch®
Antes de Ilamar al servicio
Para obtener informacion sobre resoluci6n de
problemas, consulte el Manual de uso y cuidado.
Consulte la garanfia en el Manual de uso y cuidado.
Para consultar a un representante de servicio tecnico,
remftase a la informacion de contacto que aparece en el
frente del manual. Cuando Ilame, tenga a la mano la
informacion impresa en la placa de datos de su
producto.
Placa de datos
La placa de datos muestra el modelo y el nOmero de
serie. AI solicitar servicio tecnico, consulte la placa de
datos del aparato.
La placa de datos puede encontrarse en el interior del
aparato.
Para evitar tener que buscar los datos de su aparato
cuando los precise, es aconsejable anotarlos aqui
conjuntamente con el nOmero de telefono del Servicio de
atencion al cliente:
N° de modelo
N° FD
Fecha de compra
Servicio de atencion
al cliente
Conserve su factura o los papeles de deposito para la
validaci6n de la garanfia si necesita solicitar servicio
tecnico.
Servicio tecnico
Sabemos que usted ha realizado una inversion
considerable en su cocina. Nos dedicamos a brindar
asistencia a usted y a su aparato de manera que tenga
muchos a_os de cocina creativa.
No dude en comunicarse con nuestro Departamento de
Atencion al Cliente si tiene alguna pregunta o en el caso
poco probable de que su aparato Bosch® necesite
servicio tecnico. Nuestro equipo de servicio tecnico esta.
listo para asistirlo.
EUA
800-944-2904
www.bosch-home.com/us/su pport
Canada
800-944-2904
www.bosch-home.ca/en/su pport
Piezas y accesorios
Puede comprar piezas, filtros, productos para eliminar el
sarro, limpiadores para acero inoxidable y ma.s arficulos
en la tienda electronica de Bosch ® o por telefono.
I=UA
www.bosch-home.com/us/store
Canada
Marcone 800-482-6022
o
Reliable Parts 800-941-9217
53

DECLARACION DE GARANTiA LIMITADA DEL PRODUCTO
Cobertura de esta garantia y a quienes se
aplica
La garanfia limitada otorgada por BSH Home Appliances
Corporation ("BSH") en esta Declaraci6n de Garanfia
Limitada del Producto se aplica 0nicamente al
electrodomestico Bosch ("Producto") vendido a usted, el
primer comprador usuario, siempre que el Producto
haya sido comprado:
o Para uso domestico (no comercial) normal y haya sido
utilizado en todo momento 0nicamente para fines
domesticos normales.
Nuevo en una tienda minorista (que no sea un
producto de exhibicion, ni un producto vendido "en las
condiciones en que se encuentra" ni un modelo
devuelto anteriormente) y no este destinado para
reventa ni uso comercial.
o Dentro de los Estados Unidos o Canada., y
permanezca en todo momento dentro del pals de
compra original.
Las garanfias incluidas en el presente se aplican
0nicamente al primer comprador del Producto y no son
transferibles.
BSH se reserva el derecho de exigir un comprobante de
la compra al momento de presentar una reclamaci6n de
garantfa para verificar que el Producto este cubierto por
esta garanfia de producto limitada.
Aseg0rese de devolver su tarjeta de registro; si bien no
es necesario para hacer efectiva la cobertura de la
garantfa, es la mejor manera para que BSH le notifique
en el caso poco probable de que se emita un aviso de
seguridad o se retire del mercado un producto.
Duracion de la garantia
BSH garantiza que el Producto estara, libre de defectos
en los materiales yen la mano de obra por un perfodo
de trescientos sesenta y cinqo (365) dfas a partir de la
fecha de compra. El perfodo precedente comienza a
regir a partir de la fecha de compra y no se interrumpira.,
dejara, sin efecto, extendera, ni suspendera, por ning0n
motivo.
Tambien se garantiza que este Producto no presenta
defectos esteticos en el material ni en la mano de obra
(como rayas en el acero inoxidable, imperfecciones en la
pintura/porcelana, astillas, abolladuras ni ning0n otro
da_o en el acabado del Producto) durante un perfodo de
treinta (30) dfas desde la fecha de compra o fecha de
cierre para una nueva construccion. Se excluyen de esta
garanfia por defectos esteticos las variaciones leves de
color que se deban a diferencias inherentes alas piezas
pintadas y de porcelana, asf como diferencias
provocadas por la iluminaci6n de la cocina, la ubicacion
del producto u otros factores similares. Se excluye
especfficamente de esta garantfa por defectos esteticos
cualquier electrodomestico en exposicion, de piso,
vendido "en el estado en que se encuentra" o de
segunda selecci6n.
Reparacion/reemplazo como unico
recurso
Durante el perfodo de esta garanfia, BSH o uno de sus
proveedores de servicio tecnico autorizados reparara, su
Producto sin cargo para usted (con sujecion a
determinadas limitaciones especificadas en el presente)
si se prueba que su Producto ha sido fabricado con un
defecto en los materiales o en la mano de obra. Si se ha
intentado de manera razonable reparar el Producto sin
exito, BSH reemplazara, su Producto (es posible que
usted tenga disponibles modelos mejorados, a entera
discrecion de BSH, por un cargo adicional). Todas las
piezas y los componentes extrafdos sera.n propiedad de
BSH, a su entera discrecion. Todas las piezas
reemplazadas y/o reparadas se considerara.n como la
pieza original a los fines de esta garanfia, y esta
garanfia no se extendera, con respecto a dichas piezas.
En virtud del presente, la 0nica y exclusiva
responsabilidad y obligaci6n de BSH es 0nicamente
reparar el Producto defectuoso de fa.brica, a traves de
un proveedor de servicio tecnico autorizado por BSH
durante el horario normal de oficina. Por cuestiones de
seguridad y da_os materiales, BSH recomienda
categoricamente que no intente reparar el Producto
usted mismo ni use un centro de servicio tecnico no
autorizado; BSH no tendra, responsabilidad ni obligaci6n
alguna por las reparaciones o trabajos realizados por un
centro de servicio tecnico no autorizado. Si usted
prefiere que una persona que no es un proveedor de
servicio tecnico autorizado trabaje en su Producto,
ESTA GARANTfA SE ANULARA AUTOMATICAMENTE.
Los proveedores de servicio tecnico autorizados son
aquellas personas o compa_fas que han sido
especialmente capacitadas para manejar los productos
de BSH y que tienen, seg0n el criterio de BSH, una
reputaci6n superior de servicio al cliente y capacidad
tecnica (debe tener en cuenta que son entidades
independientes y no son agentes, socios, afiliados ni
representantes de BSH). Sin perjuicio de Io que
antecede, BSH no tendra, responsabilidad ni obligaci6n
alguna por el Producto que se encuentre en un a.rea
remota (a ma.s de 100 millas de un proveedor de
servicio tecnico autorizado) o en un lugar, a.rea
circundante o entorno que no sea accesible por medios
razonables o que sea peligroso, hostil o arriesgado; en
cualquier caso, a su solicitud, BSH de todas maneras
pagara, por la mano de obra y las piezas, y enviara, las
piezas al proveedor de servicio tecnico autorizado ma.s
cercano, pero usted seguira, siendo totalmente
responsable por el tiempo de viaje y dema.s cargos
especiales de la compa_ia de servicio tecnico,
suponiendo que acepte hacer la visita de servicio
tecnico.
Producto fuera de garantia
BSH no tiene obligaci6n alguna, en virtud de la ley o por
otro motivo, de otorgarle ninguna concesion, incluidos
reparaciones, prorrateos o reemplazo del Producto, con
posterioridad al vencimiento de la garantia.
54

Exclusiones de la garantia
La cobertura de garanfia descrita en el presente excluye
todos los defectos o da_os que no fueron provocados
directamente por BSH, incluidos, entre otros, alguno de
los siguientes:
o Uso del Producto de maneras distintas del uso
normal, habitual y previsto (incluidos, entre otros,
cualquier forma de uso comercial, uso o
almacenamiento en exteriores de un producto
dise_ado para interiores, uso del Producto en
aeronaves o embarcaciones).
o Conducta indebida, negligencia, uso indebido, abuso,
accidentes, descuido, operacion inadecuada, omision
de mantener, instalaci6n inadecuada o negligente,
adulteraci6n, omisi6n de seguir las instrucciones de
operacion, manipulacion inadecuada, servicio tecnico
no autorizado (incluidos "arreglos" o exploraci6n de
los mecanismos internos del electrodomestico
realizados por uno mismo) por parte de cualquier
persona.
o Ajuste, alteraci6n o modificacion de cualquier tipo.
o Incumplimiento de los codigos, reglamentaciones o
leyes de electricidad, plomerfa y/o construccion
locales, municipales o de condado, incluida la omisi6n
de instalar el producto cumpliendo estrictamente con
los codigos y reglamentaciones locales de
construccion y proteccion contra incendios.
o Desgaste habitual, derrames de alimentos, Ifquidos,
acumulaciones de grasa u otras sustancias que se
acumulen sobre, dentro o alrededor del Producto.
o Y cualquier fuerza y factor externo, elemental y/o
ambiental, incluidos, entre otros, Iluvia, viento, arena,
inundaciones, incendios, aludes de Iodo, temperaturas
bajas extremas, humedad excesiva o exposicion
prolongada a la humedad, rayos, sobrecargas
electricas, fallas estructurales alrededor del
electrodomestico y caso fortuito.
En ningOn caso, BSH tendra, responsabilidad ni
obligaci6n alguna por los da_os ocasionados a los
bienes circundantes, incluidos los gabinetes, pisos,
techos y dema.s estructuras u objetos que se encuentren
alrededor del producto. Tambien se excluyen de esta
garantfa productos en los cuales los nOmeros de serie
hayan sido alterados, modificados o eliminados; visitas
del servicio tecnico para ense_arle a usar el Producto o
visitas en las que se determine que no hay ningOn
problema con el Producto; correcci6n de los problemas
de instalaci6n (usted es el Onico responsable de
cualquier estructura y soporte del Producto, incluidas las
instalaciones de electricidad y plomerfa o dema.s
instalaciones de conexion, de la correcta instalaci6n en
bases/pisos y de cualquier alteraci6n, incluidos, entre
otros, gabinetes, paredes, pisos, repisas, etc.); y el
restablecimiento de disyuntores o fusibles.
EN LA MEDIDA PERMtTIDA POR LA LEY, ESTA
GARANT[A ESTABLECE SUS RECURSOS EXCLUSIVOS
CON RESPECTO AL PRODUCTO,
INDEPENDtENTEMENTE DE QUE LA RECLAMACION
SEA CONTRACTUAL O EXTRACONTRACTUAL
(INCLUtDA LA RESPONSABtLIDAD OBJETIVA O LA
NEGLIGENCIA), O DE CUALQUIER OTRO MODO. ESTA
GARANTIA REEMPLAZA TODAS LAS DEMAS
GARANT[AS EXPRESAS O IMPLiCITAS. LAS
GARANT[AS IMPLiCITAS POR LEY, YA SEA DE
COMERCIABtLIDAD O APTITUD PARA UN FIN
ESPECfFICO, O DE CUALQUIER OTRO TIPO, TENDR,a,N
VIGENCIA UNICAMENTE POR EL PERfODO DE
VIGENCIA DE LA PRESENTE GARANT[A LIMtTADA
EXPRESA. EN NINGON CASO, EL FABRICANTE SERA
RESPONSABLE POR LOS DANOS CONSECUENTES,
ESPECIALES, INCIDENTALES, INDIRECTOS, POR
"Pt_RDIDAS COMERCIALES" Y/O DANOS PUNITIVOS,
PCRDIDAS O GASTOS, INCLUIDOS, ENTRE OTROS,
TIEMPO FUERA DEL TRABAJO, HOTELES Y/O
COMIDAS EN RESTAURANTES, GASTOS DE
REMODELACION QUE SUPEREN LOS DAIqOS
DIRECTOS, QUE DEFINITIVAMENTE HAYAN SIDO
CAUSADOS DE MANERA EXCLUSIVA POR BSH O DE
OTRO MODO. ALGUNOS ESTADOS NO PERMtTEN LA
EXCLUSION O LtMtTACION DE DANOS INCIDENTALES
O CONSECUENTES, Y ALGUNOS ESTADOS NO
PERMtTEN LIMITACIONES CON RESPECTO AL PLAZO
DE VIGENCIA DE UNA GARANT[A IMPLiCITA; POR LO
TANTO, ES POSIBLE QUE LAS LIMITACIONES
PRECEDENTES NO SE APLIQUEN. ESTA GARANT[A LE
OTORGA DERECHOS LEGALES ESPECfFICOS, Y
TAMBtt_N PUEDEN CORRESPONDERLE OTROS
DERECHOS QUE PUEDEN VARIAR SEGON EL ESTADO.
NingOn intento de alterar, modificar o enmendar la
presente garanfia entrara, en vigencia, a menos que fuera
autorizado por escrito por un ejecutivo de BSH.
55

IIIIIIIIIIIIIII IIIIIIIIII
9000927817
940401
BOSCH
Invented for life
1901 Main Street, Suite 600 • Irvine, CA 92614 ° 800-944-2904
www.bosch-home.com ° (c)2012 BSH Home Appliances
-
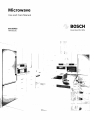 1
1
-
 2
2
-
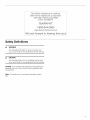 3
3
-
 4
4
-
 5
5
-
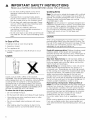 6
6
-
 7
7
-
 8
8
-
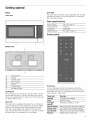 9
9
-
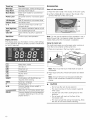 10
10
-
 11
11
-
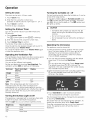 12
12
-
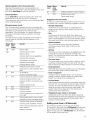 13
13
-
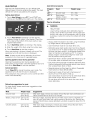 14
14
-
 15
15
-
 16
16
-
 17
17
-
 18
18
-
 19
19
-
 20
20
-
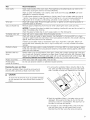 21
21
-
 22
22
-
 23
23
-
 24
24
-
 25
25
-
 26
26
-
 27
27
-
 28
28
-
 29
29
-
 30
30
-
 31
31
-
 32
32
-
 33
33
-
 34
34
-
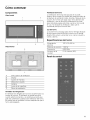 35
35
-
 36
36
-
 37
37
-
 38
38
-
 39
39
-
 40
40
-
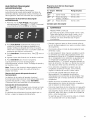 41
41
-
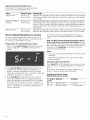 42
42
-
 43
43
-
 44
44
-
 45
45
-
 46
46
-
 47
47
-
 48
48
-
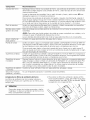 49
49
-
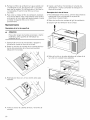 50
50
-
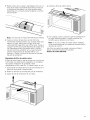 51
51
-
 52
52
-
 53
53
-
 54
54
-
 55
55
-
 56
56


Bosch HMV5052U/01 El manual del propietario
- Categoría
- Cocina
- Tipo
- El manual del propietario
- Este manual también es adecuado para
en otros idiomas
- English: Bosch HMV5052U/01 Owner's manual