Signature Kitchen Suite UPWS3044ST El manual del propietario
- Categoría
- Microondas
- Tipo
- El manual del propietario

ENGLISH ESPAÑOL
OWNER’S MANUAL
ELECTRIC CONVECTION BUILT-IN OVEN
www.signaturekitchensuite.com
UPWS3044ST
MFL51224540_03
Copyright © 2021 - 2023 Signature Kitchen Suite. All Rights Reserved.

2TABLE OF CONTENTS
TABLE OF CONTENTS
3 IMPORTANT SAFETY INSTRUCTIONS
8 PRODUCT OVERVIEW
8 Accessories
9 Oven Overview
1 0 Control Panel Overview
11 FEATURES
1 1 Clock
1 2 Timer ON/OFF
1 2 Convection Auto Conversion
1 3 Oven Temperature Adjustment
1 4 Language
1 4 Preheating Alarm Light
1 4 Beeper Volume
1 4 Fahrenheit or Celsius
1 4 Oven Light
1 5 Lockout
1 5 Start Time(Delayed Timed Cook)
1 6 Cook Time(Timed Cook)
17 USING THE OVEN
1 7 Before Using the Oven
17 Removing and Replacing the Oven Racks
18 Bake
18 Convection Bake
19 Roast
20 Convection Roast
20 Crisp Convection
21 Broil
22 Recommended Broiling Guide
23 Broiling Tips
24 Warm
24 Proof
25 Meat Probe
26 Remote Start
27 SMART FUNCTIONS
27 LG ThinQ Application
28 Smart Diagnosis™ Feature
29 FCC Notice
29 FCC RF Radiation Exposure Statement
30 MAINTENANCE
30 Self Clean
30 Setting Self Clean
31 Setting Self Clean with a Delayed Start
32 SpeedClean™
32 Cleaning Tips
33 SpeedClean™ Instruction Guide
34 Cleaning the Exterior
35 Changing the Oven Light
36 Removing and Replacing the Oven Door
37 TROUBLESHOOTING
37 FAQs
39 Before Calling for Service
42 WARRANTY

3
IMPORTANT SAFETY INSTRUCTIONS
ENGLISH
IMPORTANT SAFETY INSTRUCTIONS
Read and follow all instructions before using your oven to prevent the risk of re, electric
shock, personal injury, or damage when using the oven. This guide does not cover all
possible conditions that may occur. Always contact your service agent or manufacturer
about problems that you do not understand.
Download this owner's manual at: www.signaturekitchensuite.com
This is the safety alert symbol. This symbol alerts you to potential hazards
that can result in property damage and/or serious bodily harm or death.
All safety messages will follow the safety alert symbol and either the word
WARNING or CAUTION. These words mean:
WARNING
WARNING
Indicates a hazardous situation which, if not avoided, could result in death or serious injury.
CAUTION
CAUTION
Indicates a hazardous situation which, if not avoided, could result in minor or moderate
injury.
SAFETY PRECAUTIONS
yBe certain your appliance is properly installed and grounded by a qualied technician.
yDo not repair or replace any part of the appliance unless specically recommended in the
manual.
yAll other servicing should be referred to a qualied technician.
yAlways disconnect power to appliance before servicing by unplugging, removing the fuse or
switching o the circuit breaker.
yDO NOT TOUCH HEATING ELEMENTS OR INTERIOR SURFACES OF OVEN.
Heating elements may be hot even though they are dark in color. Interior surfaces of an oven
become hot enough to cause burns. During and after use, do not touch or let clothing or
other ammable materials contact heating elements or interior surfaces of oven until they
have had sucient time to cool. Other surfaces of the appliance may become hot enough to
cause burns. Among these surfaces are oven vent openings and surfaces near these openings,
oven doors, and windows of oven doors.
yUse care when opening door.
Let hot air or steam escape before you remove or replace food in the oven.
yDo not heat unopened food containers.
Build-up of pressure may cause containers to burst and result in injury.

4IMPORTANT SAFETY INSTRUCTIONS
SAFETY PRECAUTIONS
(CONT.)
yKeep oven vent ducts unobstructed.
The oven vent could become hot during oven use. Never block this
vent and never place plastic or heat-sensitive items on or near the
vent.
yBe certain all packing materials are removed from the appliance before operating.
Keep plastics, clothes, and paper away from parts of the appliance that may become hot.
yDO NOT force the door open. This can damage the automatic door locking system.
Use care when opening the oven door after the self-cleaning cycle. Stand to the side of
the oven when opening the door to allow hot air or steam to escape. The oven may still
be VERY HOT.
yDO NOT use a steel-wool pad. It will scratch the surface.
yDO NOT use harsh etching, abrasive cleaners or sharp metal scrapers to clean
the oven door glass since they can scratch the surface. This may result in the glass
shattering.
yBe careful when removing and lifting the door.
yDO NOT lift the door by the handle. The door is very heavy.
yDO NOT step or sit on the oven door. Be sure to follow proper installation instructions.
NOTE:
For proper operation vent trim must be installed.
Metal bottom
trim (Vent)
WARNING
WARNING
yNEVER use your appliance for warming or heating the room.
yDO NOT use water on grease res. Should an oven re occur, leave the oven door
closed and turn the oven o. If the re continues, throw baking soda on the re or use
a re extinguisher.
yUse dry pot holders only. Moist or damp pot holders on hot surfaces may result in
burns from steam. Do not let the pot holder touch hot heating elements. Do not use a
towel or other bulky cloth.
yDo not use the oven or the drawer for storage. Flammable materials should not be
stored in or on an oven.
yWear proper apparel. Loose-tting or hanging garments should never be worn
while using the appliance.
yBefore using the Wi-Fi, you should check the substance in the cavity.

5
IMPORTANT SAFETY INSTRUCTIONS
ENGLISH
ELECTRICAL SAFETY
yProtective Liners. Do not use aluminum foil or any other material to line the oven bottoms.
Improper installation of these liners may result in a risk of electric shock or re.
yDo Not allow aluminum foil or the meat probe to contact heating elements.
yDO NOT line the oven walls, racks, bottom, or any other part of the oven with
aluminum foil or any other material. Doing so will disrupt heat distribution, produce poor
baking results and cause permanent damage to the oven interior (aluminum foil will melt to
the interior surface of the oven.)
yBefore replacing your oven light bulb, switch o the electrical power to the oven at
the main fuse or circuit breaker panel. Failure to do so can result in severe personal injury,
death, or electrical shock.
SAFETY DURING USE
yOven Racks. Always place oven racks in the desired position while the oven is cool.
yAlways use pot holders or oven mitts when removing food from the oven.
Hot cookware or plates can cause burns.
yUse caution with the TIMED BAKE or DELAYED TIMED BAKE features. Use the
automatic timer when cooking cured or frozen meats and most fruits and vegetables.
Foods that can easily spoil, such as milk, eggs, sh, meat or poultry, should be chilled
in the refrigerator rst. Even when chilled, they should not stand in the oven for more
than 1 hour before cooking begins, and should be removed promptly when cooking is
completed. Eating spoiled food can result in sickness from food poisoning.
yShould an oven re occur, leave the oven door closed and turn the oven o. If the re
continues, throw baking soda on the re or use a re extinguisher.
yDO NOT put water or our on the re. Flour may be explosive and water can cause a grease
re to spread and cause personal injury.
yDO NOT use the broiler pan without the grid. DO NOT cover the grid with aluminum
foil.
No Aluminum foil
WARNING
• DO NOT place aluminum foil directly on the
oven bottom.

6IMPORTANT SAFETY INSTRUCTIONS
CHILD SAFETY
WARNING
WARNING
yChildren should be kept away from the oven.
yAccessory parts will become hot when the broiler is in use.
CAUTION
CAUTION
yChildren should not be left alone or unattended in an area where the appliance is
in use. Children should never be allowed to sit or stand on any part of the appliance.
yDO NOT leave small children unattended near the appliance. During the self-
cleaning cycle, the outside of the oven can become very hot to the touch.
SAFETY WHEN CLEANING
yDo not clean the door gasket. The door gasket is essential for a good seal. Care should be taken
not to rub, damage, or move the gasket.
yDo not use oven cleaners. No commercial oven cleaner or oven liner protective coating of any
kind should be used in or around any part of the oven.
yBefore self cleaning the oven, remove broiler pan, all oven racks, meat probe and any other
utensils from the oven cavity.
yNever keep pet birds in the kitchen. The health of birds is extremely sensitive to the fumes
released during an oven self-clean cycle. Fumes may be harmful or fatal to birds. Move birds to a
well-ventilated room.
yImportant instruction : In the event the self clean error code F is displayed, and error melody
sounds, the oven is malfunctioning in the self clean mode. Switch o the electrical power to the
main fuse or breaker and have the appliance serviced by a
qualied technician.
yMake sure oven lights are cool before cleaning. Clean
only parts listed in manual.
yDO NOT block the oven vent during operation. This can
damage the electric parts of the oven. Air must be able
to move freely. The metal bottom trim (vent) should be
properly assembled on the front bottom of the oven before
installing the oven door.
Metal bottom trim
(Vent)

7
IMPORTANT SAFETY INSTRUCTIONS
ENGLISH
COOK MEAT AND POULTRY THOROUGHLY
To protect against food-borne illnesses, cook meat and poultry thoroughly. The USDA has indicated
the following as safe minimum internal temperatures for consumption:
yGround beef: 160 °F
yPoultry: 165 °F
yBeef, veal, pork, or lamb: 145 °F
yFish/seafood: 145°F

8PRODUCT OVERVIEW
PRODUCT OVERVIEW
ACCESSORIES
Make sure that all parts are included after purchasing this product.
NOTE
yContact SIGNATURE KITCHEN SUITE Customer Service if any accessories are missing.
yFor your safety and for extended product life, only use authorized components.
yThe manufacturer is not responsible for product malfunction or accidents caused by the use of separately purchased,
unauthorized components.
yThe images in this guide may be different from the actual components and accessories, which are subject to change by the
manufacturer without prior notice for product improvement purposes.
yDo not remove gliding rack on the base packing. Gliding racks are wrapped separately to the top and bottom of the oven.
Electric convection built-in oven
Grid
Gliding rack (2 ea)
6 wood screws for mounting
(4 needed for installation
and 2 extras)
Accessories for Installation
Accessories for Cooking
Owner’s manual
Manuals
Installation manual
Heavy duty racks
(Standard Rack)
(1 ea)
Meat probe
Broiler pan
4X10 Screws (2 ea)
For bottom decorative trim
Bottom decorative trim
(1 ea)

9
PRODUCT OVERVIEW
ENGLISH
OVEN OVERVIEW
Make sure to understand the name and function of each part.
* Throughout this manual, the features and appearance may vary depending on your model.
NOTE
y The model and serial number can be verified at the rating label.
yGlide Shut™ Door: The Soft Closing feature controls the oven
door mechanism. A system that employs new generation hinges
to gently accompany the oven door, preventing it from abruptly
closing, so it closes softly and quietly.
Control panel
Rating label
model and serial
number plate
Spacer (2 ea)
- One on each side
Metal bottom trim
(vent)
Glide Shut™ Door damper (1ea)
Door switch
Door latch
Broiler pan & Grid
Standard racks (2 ea)
Oven door
Gasket

10 PRODUCT OVERVIEW
CONTROL PANEL OVERVIEW
Name Description
1
Cook Time
*Clock
- Press button and turn the Time/Temp knob to set the
desired amount of time for food to cook. The oven shuts o
when the set cooking time runs out.
- Press and hold the button for three seconds to set the time
of day.
2
Start Time
*Setting
- Press button and turn the Time/Temp knob to set the
delayed start time. The oven starts at the set time.
- Press and hold button for three seconds to select and adjust
oven settings.
3
Probe
*Lockout
-Press button to select probe function.
- Press and hold button for three seconds to activate to active
LOCKOUT.
4
Timer On/O
*Connect
- Press button to set or cancel timer on oven.
- Press and hold button for three seconds to connect it to a
Wi-Fi network.
5
Oven Light Press button to turn oven light on/o.
6
Start Press button to start all oven features.
7
Smart Diagnosis Use during the Smart Diagnosis feature.
8
Oven Mode Knob Turn knob to select oven operating mode.
9
Time/Temp Knob Turn knob to set temperature or cook time for oven.
1 2 3 4 5 6
98 7

11
FEATURES
ENGLISH
FEATURES
CLOCK
The clock must be set to the correct time of day in
order for the automatic oven timing functions to work
properly.
1. Set both Oven Mode knobs to the OFF position.
2. Press and hold COOK TIME for 3 seconds.
3. Turn the Time/Temp knob to select the desired
time. Turn the knob clockwise to increase the time
and counterclockwise to decrease the time.
4. Press START to enter the time and start the clock.
Setting the Hour Mode on the Clock
(12 or 24 hours)
The control is set to use a 12-hour clock. To change it to a
24-hour time clock, follow the steps below.
1. Set both Oven Mode knobs to the OFF position.
2. Press and hold START TIME for 3 seconds.
3. Turn the Time/Temp knob to set the desired hour
mode on the clock.
4. Press START to accept the change.
Minimum and Maximum Default Settings
All of the features listed have a minimum and a
maximum time or temperature setting that can be
entered into the control. A beep sounds each time a
control button is pressed.
Two short tones sound if the entry of the temperature
or time is below the minimum or above the maximum
setting for the feature.
Power Outage
If the time ashes on the display, there may have
been a power outage. Reset the clock. Touch any
button or turn any knob once to reset. Enter the
correct time of day by turning the Time/Temp knob.
Press START.
• The time of day cannot be changed during a
Timed Baking or Self Clean cycle.
• To check the time of day when the display is
showing other information, press CLOCK.
• The display reverts to the original setting if START
is not pressed within 25 seconds of the clock being
set.
• If the display time is blinking, there may have been
a power failure. Reset the time.
NOTE
NOTE
FEATURE MIN. TEMP. /TIME MAX. TEMP. / TIME
CLOCK TIME 12 Hr. 1:00 Hr. / Min. 12:59 Hr. / Min.
24 Hr. 0:00 Hr. / Min. 23:59 Hr. / Min.
TIMER 12 Hr. 0:01 Min. 11:59 Hr. / Min.
24 Hr. 0:01 Min. 11:59 Hr. / Min.
COOKING TIME 12 Hr. 0:01 Min. 11:59 Hr. / Min.
24 Hr. 0:01 Min. 11:59 Hr. / Min.
BAKE/ROAST 170°F / 80°C 550°F / 285°C
CONVECTION BAKE
/CONVECTION ROAST
/CRISP CONVECTION
170°F / 80°C 550°F / 285°C
BROIL Full/Center Low (350°F)High (550°F)
SELF CLEAN TIME 3Hr. 5Hr.
PROOF 0:01 Min. 11:59 Hr. / Min.
WARM Low (140°F)High (200°F)
PROBE 80 °F / 27°C 210 °F / 100°C

12 FEATURES
TIMER ON/OFF
The TIMER ON/OFF serves as an extra timer in the kitchen
that beeps when the set time has run out. It does not start
or stop cooking. The TIMER ON/OFF feature can be used
during any of the other oven control functions. The timers
can be operated independently of each other.
Setting the Timer
1. Set both Oven Mode knobs to the OFF position.
2. Press either the TIMER ON/OFF. 0:00 with HR inside
it appears and TIMER ashes in the display.
3. Turn the Time/Temp knob to set the desired time.
Turn the knob clockwise to increase the time and
counterclockwise to decrease the time.
4. Press the TIMER ON/OFF to start the timer. The
display shows the set time counting down.
5. When the set time runs out End shows in the
display. The indicator tones sound every 15 seconds
until the TIMER ON/OFF is pressed.
6. To cancel the timer, press the TIMER ON/OFF once.
The display will return to the time of day.
CONVECTION AUTO CONVERSION
When cooking using the convection mode (Conv. Bake,
Conv. Roast, and Crisp Conv.), the oven temperature is
automatically reduced by 25°F(14°C). The display will
show the changed temperature.
This feature is called auto conversion. Your oven comes
with this feature enabled.
To disable the auto conversion feature, do the following:
1. Set both Oven Mode knobs to the OFF position.
2. Press and hold START TIME for 3 seconds. Then
press START TIME once. Auto appears in the display.
3. Turn the Time/Temp knob to enable or disable the
feature.
4. Press START to accept the change.
If the TIMER ON/OFF is not pressed, the timer
returns to the time of day.
NOTE
NOTE
If the remaining time is not shown in the display,
recall the remaining time by pressing the TIMER
ON/OFF.
- Press the TIMER ON/OFF once to set the time in
hours and minutes.
- Press the TIMER ON/OFF twice to set the time in
minutes and seconds.
NOTE
NOTE

13
FEATURES
ENGLISH
• This adjustment will not aect the broiling or Self
Clean temperatures. The adjustment will be
retained in memory after a power failure. The oven
temperature can be increased (+) or decreased (-)
as much as 35°F or 19°C.
• Once the temperature is increased or decreased,
the display will show the adjusted temperature
until it readjusts.
• The thermostat adjustment for Bake will also aect
Convection Bake, Convection Roast, Roast or Crisp
Convection.
NOTE
NOTE
OVEN TEMPERATURE ADJUSTMENT
Don't use thermometers, such as those found in
grocery stores, to check the temperature setting of
the oven. Instead, begin by raising or lowering the
thermostat 15°F (8°C). Try the oven for a week with
the new setting and adjust again if needed, using
the rst adjustment as a gauge.
NOTE
NOTE
1. Set Oven Mode knobs to the OFF position.
2. Press and hold START TIME for 3 seconds. Then
press START TIME repeatedly until AdJU appears in
the display.
3. Turn the Time/Temp knob to set the amount of
temperature adjustment desired. Press START TIME
to toggle between positive and negative values.
Example : To increase the thermostat by 15 degrees,
turn the knob clockwise to select 15.
To decrease the thermostat by 15 degrees, turn the
knob clockwise to select 15, then press START TIME
to select a negative value (-15).
4. Press START to accept the change.
Adjusting the Oven Temperature
This oven may cook dierently than the one it replaced.
Use the oven for a few weeks to become more familiar
with it before changing the thermostat settings.
If the oven consistently undercooks or overcooks follow
these instructions to adjust the thermostat.

14 FEATURES
BEEPER VOLUME
The beeper volume can be adjusted to three possible
volume levels, Hi, Low and O.
1. Set Oven Mode knobs to the OFF position.
2. Press and hold START TIME for 3 seconds. Then
press START TIME repeatedly until BEEP appears in
the display.
3. Turn the Time/Temp knob to select the desired
volume.
4. Press START to accept the change.
LANGUAGE
The default language of the display is English. It can be
changed to Spanish or French.
1. Set Oven Mode knobs to the OFF position.
2. Press and hold START TIME for 3 seconds. Then
press START TIME repeatedly until Lng appears in
the display.
3. Turn the Time/Temp knob to set the desired
language.
4. Press START to accept the change.
PREHEATING ALARM LIGHT
When the oven reaches its set-temperature, the
preheating alarm light ashes until the oven door is
opened. You can activate or deactivate the preheating
alarm light.
1. Set oven mode knobs to the OFF position.
2. Press and hold START TIME for 3 seconds. Then
press START TIME repeatedly until PrE appears in
the display.
3. Turn the Time/Temp knob to enable or disable the
feature.
4. Press START to accept the change.
FAHRENHEIT OR CELSIUS
The oven control is set by default to display the Fahren-
heit temperature scale. To display the Celsius scale, follow
these instructions.
1. Set Oven Mode knobs to the OFF position.
2. Press and hold START TIME for 3 seconds. Then
press START TIME repeatedly until Unit appears in
the display.
3. Turn the Time/Temp knob to select °F (Fahrenheit) or
°C (Celsius).
4. Press START to accept the change.
OVEN LIGHT
The interior oven light automatically turns ON when the
door is opened. Touch OVEN LIGHT to manually turn the
oven light on. The lamp of the oven will turn o after 2
minutes and 30 seconds to save power.
The oven light cannot be turned on if the Self Clean
function is active.
NOTE
NOTE

15
FEATURES
ENGLISH
LOCKOUT
The Lockout feature automatically locks the oven door
and prevents most oven controls from being turned on. It
does not disable the clock, timer or the interior oven light.
1. Set Oven Mode knobs to the OFF position.
2. Press and hold PROBE for 3 seconds.
3. The lock melody sounds, OVEN LOCKOUT appears
in the display and DOOR LOCKED will icker in the
display.
4. Once the oven door is locked, the DOOR LOCKED
indicator stops ickering and remains on along with
the lock icon.
5. To deactivate the Lockout feature, press and hold
PROBE for 3 seconds. The unlock melody sounds
and UNLOCKING appears in the display until the
controls are unlocked.
START TIME (Delayed Timed COOK)
The automatic timer of the DELAYED TIMED COOK
function turns the oven ON and OFF at the time you
select. This feature can only be used with the BAKE,
ROAST, CONV. BAKE, CONV. ROAST, CRISP CONV. and SELF
CLEAN modes.
The oven continues to cook for the set amount of time
and then turns o automatically when the cooking time
has elapsed.
yEND and the time of day shows in the display.
yThe cook end indicator tone sounds every 60
seconds until the Oven Mode knob is turned to the
OFF position.
Setting the Oven to Delayed Start
The following example is to Bake at 300°F and start baking
at 4:30. Make sure the clock is set for the correct time of
day.
1. Turn the Oven Mode knob to select the BAKE mode.
350°F appears in the display.
2. Turn the Time/Temp knob to set the desired
temperature.
For this example, turn the Time/Temp knob
counterclockwise until 300°F appears in the display.
3. Press START TIME.
4. Set the start time: Turn the Time/Temp knob
clockwise until 4:30 appears in the display.
5. Press START. A short beep sounds and the oven
begins baking.
• Use the automatic timer when cooking cured or
frozen meats and most fruits and vegetables. Foods
that can easily spoil, such as milk, eggs, sh, meat
or poultry, should be chilled in the refrigerator.
Even when chilled, they should not stand in the
oven for more than 1 hour before cooking begins,
and should be removed promptly when cooking is
completed.
• Eating spoiled food can result in sickness from food
poisoning.
CAUTION
CAUTION
• To cancel the DELAYED TIMED COOK function, turn
the Oven Mode knob to the OFF position.
• To change the cooking time, repeat steps 3-4 and
press START.
• If your oven clock is set as a 12-hour clock, you can
delay the cook time for 12 hours. If your oven clock
is set as a 24-hour clock, you can delay the cook
time for 24 hours.
NOTE
NOTE

16 FEATURES
COOK TIME (TIMED COOK)
The oven turns on immediately and cooks for a selected
length of time. At the end of the cooking time, the oven
turns o automatically.
Setting the Timed Cook Function
The following example is to Bake at 300°F for 30 minutes.
1. Set the clock for the correct time of day.
2. Turn the Oven Mode knob to select BAKE. 350°F
appears in the display.
3. Set the oven temperature.
For this example, turn the Time/Temp knob coun-
terclockwise to select 300°F.
4. Press COOK TIME. TIMED ashes. BAKE, 0:00 and
300°F appears in the display.
5. Set the desired baking time.
For this example, turn the Time/Temp knob clock-
wise until 30:00 appears in the display.
6. Press START. The oven turns on, and the display
shows the cooking time countdown. The oven
continues to cook for the set amount of time, then
turns o automatically, unless the WARM function
is set. Refer to the Setting the WARM Function,
page 23.
• During the preheating mode, the convection fan
operates constantly to circulate the hot air. The
convection fan turns o automatically after the
preset temperature is attained.
• After any cooking cycle has been completed
cooling fans operate to protect the control panel.
This is normal.
NOTE
NOTE
When the cooking time has elapsed:
1. END OF CYCLE and the time of day show in the
display. The oven shuts o automatically.
2. The control continues to sound the cook end
melody every minute until the Oven Mode knob is
moved to any position.
Changing the Cook Time while Operating the
Oven
This example is to change the cook time from
30 minutes to 1 hour and 30 minutes.
1. Press COOK TIME.
2. Set the new baking time.
For this example, turn the Time/Temp knob clock-
wise until 01HR:30 appears in the display.
3. Press START to accept the change, or wait
10 seconds without pressing and the display resets
to the original cooking time.
Baking time can be set for any amount of time from
1 minute to 11 hours and 59 minutes.
NOTE
NOTE

17
USING THE OVEN
ENGLISH
Rack and Pan Placement
A
B
C
D
E
If cooking on two racks:
Place standard oven racks in positions B and D.
Place the cookware as shown below. If baking with more
than one pan, place the pans so that each one has at least
1” to 1 ½” of air space around them.
Oven Vent
yAreas near the vent may become hot during operation
and may cause burns.
yDo not block the vent opening at the bottom of the
oven.
yAvoid placing plastics near the vent as heat may distort
or melt the plastic.
yIt is normal for steam to be visible when cooking foods
with high moisture.
USING THE OVEN
BEFORE USING THE OVEN
REMOVING AND REPLACING THE
OVEN RACKS
Removing the Racks
1. While wearing oven mitts, grasp the oven rack.
2. Pull the rack straight out until it stops.
3. Lift up the front of the rack.
4. Pull out the rack.
Replacing the Racks:
1. While wearing oven mitts, place the end of the rack
on the support.
2. Tilt the front end of the rack up.
3. Push the rack in.
4. Check that the rack is properly in place.
Standard Rack
(Position D)
Standard Rack
(Position B)
Multiple rack baking
• The temperature registered by an oven
thermometer may dier from the actual set oven
temperature.
• It is normal for the convection fan to run while
preheating during a regular bake cycle.
• The convection fan motor may run periodically
during a regular bake cycle.
NOTE
NOTE
• Replace oven racks before turning the oven on to
prevent burns.
• DO NOT cover the racks with aluminum foil, or any
other material, or place anything on the bottom of
the oven. Doing so will result in poor baking and
may damage the oven bottom.
• Only arrange oven racks when the oven is cool.
CAUTION
CAUTION
Type of Food Rack Position
Angel food cake, frozen pies A
Bundt or pound cakes B
Biscuits, muns, brownies, cookies,
cupcakes, layer cakes, pies C
Casseroles C
Turkey, roasts, or ham A
Frozen pizza C
Roast chicken B
Standard Rack
(position C)
Single rack baking

18 USING THE OVEN
BAKE
Setting the BAKE mode
1. Turn the Oven Mode knob to select the BAKE mode.
2. Set the oven temperature. For example, turn the
Time/Temp knob clockwise until 375°F appears in
the display.
3. Press START.
The word PREHEATING and 100°F appears in the
display. As the oven preheats the temperature is
displayed in 5-degree increments. Once the oven
reaches the desired temperature, a tone sounds.
PREHEATING
Place the food in the oven after preheating. Preheating is
necessary for better cooking results.
4. When cooking is nished, turn the Oven Mode knob
to the OFF position.
5. Remove the food from the oven.
Changing the Temperature while Baking
Baking Tips
Follow the recipe or convection food directions for
baking temperature, time, and rack position. Baking time
and temperature will vary depending on the ingredients,
size, and shape of the baking pan used.
yFor best results, food should be placed on a single
rack with at least 1” to 1 1/2” of air space between the
pans and oven walls.
yCheck for doneness at the minimum time.
yUse metal bakeware (with or without a nonstick
nish), heatproof glass-ceramic, ceramic or other
bakeware recommended for oven use.
yDark metal pans or nonstick coatings will cook faster
with more browning. Insulated bakeware will slightly
lengthen the cooking time for most foods.
Use BAKE to prepare foods such as pastries, breads and
casseroles. The oven can be programmed to bake at
any temperature from 170°F (80°C) to 550°F (285°C). The
default temperature is 350°F (175°C).
CONVECTION BAKE
Benets of Convection Bake
ySome foods cook up to 25 to 30% faster, saving
time and energy.
yEven cooking results during multiple rack baking.
yNo special pans or bakeware needed.
Convection baking uses a fan to circulate the oven’s heat
evenly and continuously within the oven. This improved
heat distribution allows for even cooking and excellent
results using multiple racks at the same time. Foods
cooked on a single oven rack will generally cook faster
and more evenly with Convection Bake. Multiple oven
rack cooking may slightly increase cook times for some
foods, but the overall result is time saved. Breads and
pastries brown more evenly.
The oven bottom has a porcelain-enamel nish.
To make cleaning easier, protect the oven bottom
from excessive spillovers by placing a cookie sheet
on the rack below the rack you are cooking on.
This is particularly important when baking a fruit
pie or other foods with a high acid content. Hot fruit
llings or other foods that are highly acidic may
cause pitting and damage to the porcelain-enamel
surface and should be wiped up immediately.
NOTE
NOTE
It is normal for the convection fan to operate
periodically throughout a normal bake cycle. This is
to ensure even baking results.
NOTE
NOTE
1. Turn the Time/Temp knob to reset the oven
temperature.
For example, turn the knob clockwise to reset the
temperature from 375°F to 425°F.
2. Press START.
Tips for Convection Baking
yTime saved will vary depending on the amount and
type of food to be cooked. Cookies and biscuits
should be baked on pans with no sides or very low
sides to allow heated air to circulate around the food.
Food baked on pans with a dark nish will cook faster.
yWhen using Convection Bake with a single rack, place
the oven rack in position C. If cooking on multiple
racks, place the oven racks in positions B and D.
yCookies, muns, biscuits and other quickbreads give
very good results when using multiple racks.

19
USING THE OVEN
ENGLISH
ROAST
Use the ROAST mode to cook large cuts of meat.
Setting the ROAST Mode
The heating elements and a fan turn o immediately
when the door is opened. They turn on again
approximately 1 seconds after the door is closed.
Turn the Oven Mode knob to the OFF position to
cancel Convection Bake at any time.
NOTE
NOTE
It is normal for cooling fans to run after any cooking
cycle is complete, to protect the control panel.
NOTE
NOTE
• The heating elements turn o immediately
when the door is opened. They turn on again in
approximately 1 seconds after the door is closed.
• When preparing meats for roasting, use the broiler
pan and grid. The broiler pan catches grease spills
and the grid helps prevent grease splatters.
• Turn the Oven Mode knob to the OFF position to
cancel Roast at any time.
NOTE
NOTE
Changing the Temperature while Roasting
1. Turn the Time/Temp knob to reset the oven tem-
perature.
For example, turn the knob clockwise to reset the
temperature from 375°F to 425°F.
2. Press START.
1. Turn the Oven Mode knob to select the ROAST
mode. 350°F (175°C) appears in the display.
2. Set the oven temperature in the display.
For example, turn the Time/Temp knob clockwise to
set the temperature to 375°F.
3. Press START.
Setting the CONVECTION BAKE Mode
1. Turn the Oven Mode knob to select the CONV. BAKE
mode. 350°F (175°C) appears in the display.
2. Set the oven temperature.
For example, turn the Time/Temp knob clockwise to
set the temperature to 375°F.
3. Press START. The display shows CONV BAKE and
the converted temperature starting at 100°F (35°C).
As the oven preheats, the display shows increasing
temperatures in 5-degree increments. Once the oven
reaches the desired adjusted temperature, a tone
sounds. The display shows the auto converted oven
temperature (reduced by 25°F or 14°C).
4. Turn the Oven Mode knob to the OFF position to
cancel Convection Bake at any time.
Displays for the CONV. BAKE mode

20 USING THE OVEN
CONVECTION ROAST
The Convection Roast mode is designed to give
optimum cooking performance for roasting meats and
poultry. Preheating is not necessary for meats and
poultry. Heated air circulates around the food from all
sides, sealing in juices and avors. Foods are crispy
brown on the outside while staying moist on the
inside. Convection Roast is especially good for large
tender cuts of meat.
Setting the CONVECTION ROAST Mode
1. Turn the Oven Mode knob to select the CONV.
ROAST mode. 350°F (175°C) appears in the display.
2. Set the oven temperature. For example, turn the
Time/Temp knob clockwise to set the temperature
to 375° F.
3. Press START. The display shows CONV ROAST and
the temperature, starting at 100°F (35°C). As the
oven preheats, the display shows the increasing
temperature in 5-degree increments. Once the
oven reaches the adjusted set temperature, a tone
sounds. The display shows the auto-converted
oven temperature (reduced by 25°F or 14°C), CONV
ROAST, and the fan icon.
4. Turn the Oven Mode knob to the OFF position to
cancel Convection Roast at any time.
The heating elements and a fan turn o immediately
when the door is opened. They turn on again in
approximately 1 seconds after the door is closed.
When preparing meats for roasting, use the broiler
pan and grid. The broiler pan catches grease spills
and the grid helps prevent grease splatters. Adjust
the Oven Mode knob to the OFF position to cancel
the Convection Roast feature at any time.
NOTE
NOTE
It is normal for cooling fans to run after any cooking
cycle is complete, to protect the control panel.
NOTE
NOTE
CRISP CONVECTION
Benets of Crisp Convection:
The crisp convection mode is best for light colored and
delicate baked goods like cakes, tarts, cookies, pu
pastries, scones, muns, biscuits, yeast-free breads, etc.
The hot air circulated by the fan continually distributes
heat more evenly than the natural movement of air
in a standard thermal oven. This movement of hot air
cooks foods more evenly, crisping surfaces while sealing
in moisture and yielding crustier breads. The crisp
convection heating element heats up faster, reducing
cooking time by as much as 30 percent.
Tips for Crisp Convection
yTime saved will vary depending on the amount and
type of food to be cooked. Choose cookie sheets
without sides and roasting pans with very low sides
to allow heated air to circulate around the food. Food
baked on pans with a dark nish will cook faster.
yWhen using Crisp Convection with a single rack, place
the oven rack in position C. If cooking on multiple
racks, place the oven racks in positions B and D.
yIt is important to uncover foods so that surfaces of
food remain exposed to the circulating air, allowing
browning and crisping.
yKeep heat loss to a minimum by only opening the
oven door when necessary.
Displays for the CONV. ROAST mode

21
USING THE OVEN
ENGLISH
BROIL
Broiling uses an intense, radiant heat to cook food. Both the
inner and outer broil elements heat during full broiling. Only
the inner broil element heats during center broiling. The
element(s) cycle on and o at intervals to maintain the oven
temperature. The meat probe cannot be used with this mode.
Keep the oven door closed while broiling. Let the oven
preheat for approximately ve minutes before cooking food.
• DO NOT use a broiler pan without a grid. Oil can
cause a grease re.
• DO NOT cover the grid and broiler pan with
aluminum foil. Doing so will cause a re.
• Always use a broiler pan and grid for excess fat and
grease drainage. This will help to reduce splatter,
smoke, and are-ups.
CAUTION
CAUTION
• Should an oven re occur, leave the oven door
closed and turn the oven o. If the re continues,
throw baking soda on the re or use a re
extinguisher.
• DO NOT put water or our on the re.
- Flour may be explosive and water can cause a
grease re to spread and cause personal injury.
CAUTION
CAUTION
1. Place food on the broiler pan grid.
2. Turn the Oven Mode knob to select the BROIL
mode. HIGH -- PRESS START OR ENTER LEVEL / LOW -
HIGH appears in the display.
3. Turn the Time/Temp knob to select between
Full Broil (High,Med,Low) and Center Broil
(High,Med,Low). Full Broil uses all of the broil heaters
and Center Broil uses only the center broil heater to
broil.
4. Press START.
5. If using Broil, it is best to let the oven preheat for
approximately ve minutes before cooking food.
Broil on one side until food is browned ; turn and
broil on the other side.
6. When broiling is nished, turn the Oven Mode knob
to the OFF position to cancel Broil at any time.
Setting the Crisp Convection Mode
1. Turn the Oven Mode knob to select the CRISP
CONV. mode. 350°F (175°C) appears in the display.
2. Set the oven temperature. For example, turn the
Time/Temp knob clockwise to set the temperature
to 375° F.
3. Press START. The display shows CONV and the
temperature, starting at 100°F (35°C). As the
oven preheats, the display shows the increasing
temperature in 5-degree increments. Once the
oven reaches the adjusted set temperature, a tone
sounds. The display shows the auto-converted oven
temperature (reduced by 25°F or 14°C).
4. Turn the Oven Mode knob to the OFF position to
cancel Crisp Convection at any time.
The heating elements and a fan turn o immediately
when the door is opened. They turn on again in
approximately 1 seconds after the door is closed.
Turn the Oven Mode knob to the OFF position to
cancel Crisp Convection at any time.
NOTE
NOTE
It is normal for cooling fans to run after any cooking
cycle is complete, to protect the control panel.
NOTE
NOTE
Your oven is designed for CLOSED DOOR broiling.
NOTE
NOTE
Setting the BROIL Mode

22 USING THE OVEN
Smoking
Due to the intense heat associated with broiling, it is
normal to experience smoke during the cooking process.
This smoke is a natural by-product of searing and should
not cause you to worry. If you are experiencing more
smoke than you are comfortable with, use the following
tips to reduce the amount of smoke in your oven.
1. Always use a broiler pan. Do not use saute pans or
regular baking sheets for safety reasons.
2. NEVER use a broiler pan that is not thoroughly
cleaned and at room temperature at the beginning
of cooking.
3. ALWAYS run your cooktop ventilation system or vent
hood during broiling.
4. Keep the interior of your oven as clean as possible.
Leftover debris from prior meals can burn or catch
re.
5. Avoid fatty marinades and sugary glazes. Both of
these will increase the amount of smoke you
experience. If you would like to use a glaze, apply it
at the very end of cooking.
6. If you are experiencing signicant smoke with any
food item, consider:
yLowering the broiler to the LO setting.
yLowering the rack position to cook the food further
away from the broiler.
yUsing the HI broil setting to achieve the level of
searing you desire, and then either switching to the
LO broil setting, or switching to the BAKE function.
7. As a rule, fattier cuts of meat and sh will produce
more smoke than leaner items.
8. Adhere to the recommended broil settings and
cooking guidelines in the chart on the following
page whenever possible.
RECOMMENDED BROILING GUIDE
The size, weight, thickness, starting temperature, and
your preference of doneness will aect broiling times.
The following guide is based on meats at refrigerator
temperature.
Always use a broiler pan and grid when broiling.
NOTE
NOTE
The heating element(s) turn o immediately
when the door is opened. They turn on again
approximately 1 seconds after the door is closed.
Turn the Oven Mode knob to the OFF position to
cancel Broil at any time.
NOTE
NOTE

23
USING THE OVEN
ENGLISH
Broiling Chart
Food Quantity and/ or
Thickness
Rack
Position
First Side
Time
(min.)
Second
Side
Time (min.)
Comments
Ground Beef 1 lb. (4 patties)
1/2 to 3/4” thick
E4-6 3-4 Space evenly. Up to 8 patties may be
broiled at once.
Beef Steaks
Rare
Medium
Well Done
Rare
Medium
Well Done
1” thick
1 to 1-1/2 lbs.
1-1/2” thick
2 to 2-1/2 lbs.
D
D
D
D
D
D
6
7
8
10
12
14
2–3
2–3
3–4
4–6
4–8
8–10
Steaks less than 1” thick cook through
before browning. Pan frying is
recommended. Remove fat.
Chicken 1 whole cut up
2 to 2-1/2 lbs.,
split lengthwise
2 Breasts
C
C
20
20
6–8
6–10
Broil skin-side-down rst.
Lobster Tails 2–4
10 to 12 oz. each
C12-14 Do not turn
over.
Cut through back of shell. Spread open.
Brush with melted butter before broiling
and after half of broiling time.
Fish Fillets 1/4 to 1/2” thick D or E 5-6 3–4 Handle and turn very carefully. Brush with
lemon butter before and during cooking,
if desired.
Ham Slices
(precooked)
1/2” thick D 5 3–5 Increase time 5 to 10 minutes per side for
1-1/2” thick or home-cured ham.
Pork Chops
Well Done
2 (1/2” thick)
2 (1” thick) about
1 lb.
D or E
D or E
7
9-10
6–8
7–9
Remove fat.
Lamb Chops
Medium
Well Done
Medium
Well Done
2 (1” thick) about 10
to 12 oz.
2 (1-1/2” thick) about
1 lb.
D
D
D
D
6
8
11
13
4–6
7–9
9
9–11
Remove fat.
Salmon
Steaks
2 (1” thick)
4 (1” thick) about
1 lb.
D or E
D or E
8
9
3–4
4–6
Grease pan. Brush steaks with melted
butter.
Broiling Tips
Beef
ySteaks and chops should always be allowed to rest for
ve minutes before being cut into and eaten. This allows
the heat to distribute evenly through the food and
creates a more tender and juicy result.
yPieces of meat that are thicker than two inches should
be removed from the refrigerator 30 minutes prior to
cooking. This will help them cook more quickly and
evenly, and will produce less smoke when broiling.
Cooking times will likely be shorter than the times
indicated in the Broiling Chart.
yFor bone-in steaks or chops that have been Frenched (all
meat removed from around the bone), wrap the exposed
sections of bone in foil to reduce burning.
Seafood
yWhen broiling skin-on sh, always use the Medium broil
setting and always broil the skin side last.
ySeafood is best consumed immediately after cooking.
Allowing seafood to rest after cooking can cause it to dry
out.
yIt is a good idea to rub a thin coating of oil on the surface
of the broiling pan before cooking to reduce sticking,
especially with sh and seafood. You can also use a light
coating of non-stick pan spray.
Vegetables
yToss vegetables lightly in oil before cooking to improve
browning.

24 USING THE OVEN
PROOF
The Proof feature maintains a warm environment for
rising yeast-leavened products before baking.
Setting the PROOF Mode
This feature maintains a warm oven for rising yeast-
leavened products before baking.
1. Turn the Oven Mode knob to select the PROOF
mode.
2. Press START. The proof feature automatically
provides the optimum temperature for the proof
process, and therefore does not have a temperature
adjustment.
3. When proong is nished, turn the Oven Mode knob
to the OFF position.
WARM
The WARM mode maintains an oven temperature of
200°F (93°C) or less. Use the Warm mode to keep cooked
food at serving temperature for up to three hours after
the end of the cooking cycle. Do not use the Warm mode
to try to cook food or reheat cold food.
Setting the WARM Mode
1. Turn the Oven Mode knob to select the WARM
mode.
2. Turn the Time/Temp knob to select from High,
Medium, or Low temperature levels.
3. Press START.
4. Turn the Oven Mode knob to the OFF position to
cancel Warm at any time.
The warm feaure has three temperature levels :
High=200 °F, Med=170 °F, Low=140 °F
(High=93.3 °C, Med=76.7 °C, Low=60 °C)
NOTE
NOTE
For best results, cover the dough with a cloth or with
plastic wrap (the plastic may need to be anchored
underneath the container so the oven fan does not
blow it o).
NOTE
NOTE
The WARM function is intended to keep food warm.
Do not use it to cool food down.
NOTE
NOTE
• To avoid lowering the oven temperature and
lengthening proong time, do not open the oven
door unnecessarily. Check bread products early to
avoid over proong.
• Do not use the proong mode for warming
food or keeping food hot. The proong oven
temperature is not hot enough to keep foods at
safe temperatures. Use the WARM feature to keep
food warm. Proong doesn't operate when the
oven is above 125°F(52°C). OVEN IS HOT shows in
the display.
NOTE
NOTE
Display for the PROOF mode

25
USING THE OVEN
ENGLISH
MEAT PROBE
The meat probe accurately measures the internal
temperature of meat, poultry and casseroles. It should
not be used during the broiling, self cleaning, warming
or proong mode. Always unplug and remove the meat
probe from the oven before removing food. Before using,
insert the probe into the center of the thickest part of
meat or into the inner thigh or breast of poultry, away
from fat or bone. Place food in the oven and connect the
meat probe to the jack. Keep the probe as far away from
heat sources as possible. Close the oven door. The meat
probe icon ashes and a warning beep sounds until the
probe is removed if the oven starts cooking without the
probe temperature being set.
Using the Meat Probe Feature
1. Turn the Oven Mode knob to select the ROAST
mode. 350°F (175°C) appears in the display.
2. Set the oven temperature. For example, turn the
Time/Temp knob clockwise to set the temperature
to 375° F.
3. Press START or PROBE. PRESS START OR ENTER PROBE
TEMP / 80F – 210F appears in the display.
4. Set the probe temperature. For example, turn
the Time/Temp knob clockwise to set the probe
temperature to 160°F.
5. Press START.
The default probe temperature is 150˚F (65˚C), but can
be changed to any temperature between 80˚F (27˚C)
and 210˚F (100˚C). The display shows the changing
probe temperature. When the set probe temperature is
reached, the oven shuts o automatically.
Changing the Probe Temperature while Cooking
1. Press PROBE.
2. Set the probe temperature by turning the Time/Temp
knob.
3. Press START.
Calculating a total cooking time by weight is no
longer necessary using this feature. The following
chart is recommended for setting the probe
temperature.
NOTE
NOTE
Turn the Oven Mode knob to cancel Meat Probe at
any time. To avoid breaking the probe, make sure
food is completely defrosted before inserting the
probe.
NOTE
NOTE
- The meat probe can't be used with the Broil, Self
Clean, SpeedClean™, Warm, or Proof modes.
- While the meat probe mode is running, COOK TIME
does not respond.
NOTE
NOTE
Always use an oven mitt to remove the temperature
probe. Do NOT touch the broil element.
- Failure to follow this warning can result in severe
personal injury.
CAUTION
CAUTION
Recommended Probe Temperatures
Doneness Probe Temp.
Beef, Lamb and Veal
Rare
Medium Rare
Medium
Well Done
130°F (54°C)
140°F (60°C)
150°F (66°C)
160°F (71°C)
Pork
Well Done 170°F (77°C)
PouItry
Breast, Well Done
Thigh, Well Done
Stung, Well Done
170°F (77°C)
180°F (82°C)
165°F (74°C)

26 USING THE OVEN
REMOTE START
If the appliance is registered on a home Wi-Fi network,
the pre-heating function of the oven can be started
or stopped using LG ThinQ smart phone app. Set the
oven mode knob to the Remote Start position to use the
function.
Preparing the Oven for a Remote Start
1. Open the oven door to make sure the oven is empty
and ready for pre-heating. Do not place food in the
oven. Close the oven door.
2. Within 30 seconds of closing the door, turn the oven
mode knob to select Remote Start.
3. Follow the instructions in the LG ThinQ smart phone
app for using the Remote Start function.
• Remote Start is disconnected in the following
situations:
- Remote Start is never set up in the smart phone
app.
- The Remote Start status is “ready.”
- Remote Start experiences a problem during
operation.
• The Wi-Fi icon on the display shows the status of
the appliance's network connection. If the Wi-Fi
icon is not lit, use the smart phone app to select
the Wi-Fi network or register the product again.
• A faulty Wi-Fi connection could delay the Remote
Start function.
NOTE
NOTE

27
SMART FUNCTIONS
ENGLISH
SMART FUNCTIONS
LG ThinQ APPLICATION
This feature is only available on models with Wi-Fi.
The LG ThinQ application allows you to communicate with
the appliance using a smartphone.
LG ThinQ APPLICATION FEATURES
ySpeedClean™
-Allows you to set SpeedClean™ alerts, read the
instruction guide, and simulate and compare
energy consumption when using SpeedClean™
versus selfclean cycles.
ySmart Diagnosis™
-This function provides useful information for
diagnosing and solving issues with the appliance
based on the pattern of use.
ySettings
-Allows the user to change oven settings, including
the hour mode, preheat alarm light, beeper volume,
temperature units, convection auto conversion,
thermostat adjustment and language.
yRemote Start
-Remotely start the preheat mode or turn o the
oven.
After opening and closing the door, place the
mode dial back to Remote Start within 30 seconds.
yMonitoring
-This function helps you check the current status,
remaining time, cook settings and end time in one
place.
yProduct Notications
-Turn on the Push Alerts to receive appliance status
notications. The notications are triggered even if
the LG ThinQ application is not open.
yTimer
-You can set the timer from the application.
• If you change your wireless router, Internet service
provider, or password, delete the registered
appliance from the LG ThinQ application and
register it again.
• This information is current at the time of
publication. The application is subject to change
for product improvement purposes without notice
to users.
NOTE
NOTE
INSTALLING LG ThinQ
APPLICATION AND CONNECTING
AN LG APPLIANCE
Models with QR Code
Scan the QR code attached to the product using
the camera or a QR code reader application on your
smartphone.
Models without QR Code
1. Search for and install the LG ThinQ application
from the Google Play Store or Apple App Store on a
smartphone.
2. Run the LG ThinQ application and sign in with your
existing account or create an LG account to sign in.
3. Touch the add (+) button on the LG ThinQ
application to connect your LG appliance. Follow
the instructions in the application to complete the
process.
• To verify the Wi-Fi connection, check that the Wi-Fi
indicator on the control panel is lit.
• The appliance supports 2.4 GHz Wi-Fi networks
only. To check your network frequency, contact
your Internet service provider or refer to your
wireless router manual.
• LG ThinQ is not responsible for any network
connection problems or any faults, malfunctions,
or errors caused by network connection.
• The surrounding wireless environment can make
the wireless network service run slowly.
• If the distance between the appliance and the
wireless router is too far, the signal becomes weak.
It may take a long time to connect or fail to install
the application.
• If the appliance is having trouble connecting
to the Wi-Fi network, it may be too far from the
router. Purchase a Wi-Fi repeater (range extender)
to improve the Wi-Fi signal strength.
• The network connection may not work properly
depending on the Internet service provider.
NOTE
NOTE

28 SMART FUNCTIONS
• The Wi-Fi may not connect or the connection
may be interrupted because of the home network
environment.
• If the appliance cannot be connected due to
problems with the wireless signal transmission,
unplug the appliance and wait about a minute
before trying again.
• If the rewall on your wireless router is enabled,
disable the rewall or add an exception to it.
• The wireless network name (SSID) should be a
combination of English letters and numbers. (Do
not use special characters.)
• Smartphone user interface (UI) may vary
depending on the mobile operating system (OS)
and the manufacturer.
• If the security protocol of the router is set to WEP,
network setup may fail. Change the security
protocol (WPA2 is recommended), and connect
the product again.
NOTE
NOTE
SMART DIAGNOSIS™ FEATURE
Use this feature to help you diagnose and solve problems
with your appliance. NFC or Wi-Fi equipped models can
also transmit data to a smartphone using the LG ThinQ
application.
• For reasons not attributable to LGE’s negligence,
the service may not operate due to external factors
such as, but not limited to, Wi-Fi unavailability, Wi-
Fi disconnection, local app store policy, or app
unavailability.
• The feature may be subject to change without prior
notice and may have a dierent form depending on
where you are located.
NOTE
NOTE
USING LG ThinQ TO DIAGNOSE
ISSUES
If you experience a problem with your Wi-Fi equipped
appliance, it can transmit troubleshooting data to a
smartphone using the LG ThinQ application.
yLaunch the LG ThinQ application and select the Smart
Diagnosis feature in the menu. Follow the instructions
provided in the LG ThinQ application.
USING AUDIBLE DIAGNOSIS TO
DIAGNOSE ISSUES
Follow the instructions below to use the audible diagnosis
method.
yLaunch the LG ThinQ application and select the Smart
Diagnosis feature in the menu. Follow the instructions
for audible diagnosis provided in the LG ThinQ
application.
1. Open the LG ThinQ application on the smart phone.
2. Select the appliance and then the menu on upper right
side.
3. Select the Smart Diagnosis, then press Start Smart
Diagnosis button.
If the diagnosis fails several times, use the following
instructions.
NOTE
NOTE
4. Select the Audible Diagnosis.
5. Follow the instructions on the smart phone.
6. Keep the phone in place until the tone transmission has
nished. View the diagnosis on the phone.
The Smart Diagnosis™ function depends on the local
call quality.
The communication performance will improve and you
can receive better service if you use the home phone.
If the Smart Diagnosis™ data transfer is poor due to
poor call quality, you may not receive the best Smart
Diagnosis™ service.
NOTE
NOTE

29
SMART FUNCTIONS
ENGLISH
SMART DIAGNOSIS™ THROUGH
THE CALL CENTER
1. Call the SIGNATURE KITCHEN SUITE call center at:
1-855-790-6655.
2. When instructed to do so by the call center agent, hold
the mouthpiece of your phone over the Smart Diagnosis™
logo on the machine. Hold the phone no more than one
inch from (but not touching) the machine.
Do not touch any other buttons or icons on the display
screen.
NOTE
NOTE
3. Press and hold the Start button for three seconds.
4. Keep the phone in place until the tone transmission has
nished. This takes about 6 seconds and the display will
count down the time.
5. Once the countdown is over and the tones have
stopped, resume your conversation with the call center
agent, who will then be able to assist you in using the
information transmitted for analysis.
For best results, do not move the phone while the
tones are being transmitted.
If the call center agent is not able to get an accurate
recording of the data, you may be asked to try again.
NOTE
NOTE
OPEN SOURCE SOFTWARE
NOTICE INFORMATION
To obtain the source code that is contained in this product,
under GPL, LGPL, MPL, and other open source licenses that
have the obligation to disclose source code, and to access all
referred license terms, copyright notices and other relevant
documents, please visit https://opensource.lge.com.
SIGNATURE KITCHEN SUITE will also provide open
source code to you on CD-ROM for a charge covering the
cost of performing such distribution (such as the cost of
media, shipping, and handling) upon email request to
opens[email protected]. This oer is valid to anyone in receipt
of this information for a period of three years after our last
shipment of this product.
Wireless LAN Module Specifications
Frequency Range 2412 MHz – 2462 MHz
Output Power (Max) < 30 dBm
FCC NOTICE
The following notice covers the transmitter module
contained in this product.
This equipment has been tested and found to comply
with the limits for a Class B digital device, pursuant to Part
15 of the FCC Rules. These limits are designed to provide
reasonable protection against harmful interference in a
residential installation. This equipment generates, uses,
and can radiate radio frequency energy and, if not installed
and used in accordance with the instructions, may cause
harmful interference to radio communications. However,
there is no guarantee that interference will not occur in a
particular installation. If this equipment does cause harmful
interference to radio or television reception, which can be
determined by turning the equipment o and on, the user
is encouraged to try to correct the interference by one or
more of the following measures:
yReorient or relocate the receiving antenna.
yIncrease the separation between the equipment and the
receiver.
yConnect the equipment into an outlet on a circuit
dierent from that to which the receiver is connected.
yConsult the dealer or an experienced radio/TV technician
for help.
This device complies with part 15 of the FCC Rules.
Operation is subject to the following two conditions:
(1) This device may not cause harmful interference and
(2) This device must accept any interference received,
including interference that may cause undesired
operation
Any changes or modications in construction of this device
which are not expressly approved by the party responsible
for compliance could void the user’s authority to operate
the equipment.
FCC RF RADIATION
EXPOSURE STATEMENT
This equipment complies with FCC radiation exposure limits
set forth for an uncontrolled environment. This transmitter
must not be co-located or operating in conjunction with
any other antenna or transmitter.
This equipment should be installed and operated with
a minimum distance of 20 cm (7.8 inches) between the
antenna and your body. Users must follow the specic
operating instructions for satisfying RF exposure
compliance.

30 MAINTENANCE
MAINTENANCE
SELF CLEAN
The self clean cycle uses extremely hot temperatures
to clean the oven cavity. While running the Self Clean
cycle, you may notice smoking or an odor. This is normal;
especially if the oven is heavily soiled.
During Self Clean, the kitchen should be well-ventilated
to minimize the odors from cleaning.
• DO NOT leave small children unattended near the
appliance. During the Self Clean cycle, the outside
of the oven can become very hot to touch.
• If you have pet birds, move them to another well-
ventilated room. The health of some birds is
extremely sensitive to the fumes given o during
the Self Clean cycle of any oven.
• DO NOT line the oven walls, racks, bottom or
any other part of the oven with aluminum foil
or any other material. Doing so will destroy heat
distribution, produce poor baking results and cause
permanent damage to the oven interior (aluminum
foil will melt to the interior surface of the oven).
• DO NOT force the door open. This can damage the
automatic door locking system. Use care when
opening the oven door after the Self Clean cycle.
Stand to the side of the oven when opening the
door to allow hot air or steam to escape. The oven
may still be VERY HOT.
CAUTION
CAUTION
Before starting Self Clean:
• Remove the oven racks, broiler pan, broiler grid, all
cookware, aluminum foil or any other material from
the oven.
• The kitchen should be well-ventilated to minimize
the odors from cleaning.
• Wipe any heavy spillovers on the bottom of the
oven.
• Make sure that the oven light bulb cover is in place
and the oven light is o.
• The oven light cannot be turned on during a self
clean cycle. The oven light cannot be turned on
until the oven temperature has cooled below 500˚F
(260˚C) after a self clean cycle is complete.
• Remove oven racks and accessories before starting
the self clean cycle.
• If oven racks are left in the oven cavity during the
self clean cycle, they will discolor and become
dicult to slide in and out.
• Clean the frame of the oven and door with hot
soapy water. Rinse well.
• Do not clean the gasket. The berglass material of
the oven door gasket cannot withstand abrasion.
• It is essential for the gasket to remain intact. If you
notice it becoming worn or frayed, replace it.
• Wipe up any heavy spillovers on the oven bottom.
• Make sure that the oven light bulb cover is in place
and the oven light is o.
NOTE
NOTE
Setting Self Clean
The Self- Clean function has cycle times of 3, 4, or 5 hours.
Self Clean Soil Guide
Soil Level Cycle Setting
lightly soiled oven cavity 3 Hour Self Clean
moderately soiled oven cavity 4 Hour Self Clean
heavily soiled oven cavity 5 Hour Self Clean
1. Remove all racks and accessories from the oven.
2. Turn the Oven Mode knob to select the
SELF CLEAN mode. The oven defaults to
the recommended four-hour self clean for a
moderately soiled oven. Turn the Time/Temp. knob
to adjust the self clean time from 3 to 5 hours.
3. Press START.
4. Once the Self Clean is set, the oven door locks
automatically and the lock icon displays. You will
not be able to open the oven door until the oven
has cooled. The lock releases automatically when
the oven has cooled.

31
MAINTENANCE
ENGLISH
Setting Self Clean with a Delayed
Start
1. Remove all racks and accessories from the oven.
2. Turn the Oven Mode knob to select the SELF CLEAN
mode. The oven defaults to the recommended
four-hour self clean for a moderately soiled oven.
Turn the Time/Temp knob to select the self clean
time from 3 to 5 hours.
3. Press START TIME.
4. Turn the Time/Temp knob to enter the time of day
you would like the Self Clean to start.
5. Press START.
During Self Clean
yThe self clean cycle uses extremely hot temperatures
to clean the oven cavity. While running the Self Clean
cycle, you may notice smoking or an odor.
This is normal, especially if the oven is heavily soiled.
yAs the oven heats, you may hear sounds of metal parts
expanding and contracting. This is normal and will not
damage the oven.
yDo not force the oven door open when LOCKED is
displayed. The oven door will remain locked until the
oven temperature has cooled. Forcing the door open
will damage the door.
After the Self Clean Cycle
yThe oven door will remain locked until the oven
temperature has cooled.
yYou may notice some white ash in the oven. Wipe it
o with a damp cloth or a soap-lled steel wool pad
after the oven cools. If the oven is not clean after one
clean cycle, repeat the cycle.
yIf oven racks were left in the oven and do not slide
smoothly after a clean cycle, wipe racks and rack
supports with a small amount of vegetable oil to
make them glide more easily.
yFine lines may appear in the porcelain because it went
through heating and cooling. This is normal and will
not aect performance.
It may become necessary to cancel or interrupt a
self clean cycle due to excessive smoke or re in the
oven. To cancel the Self Clean function, turn the
Oven Mode knob to the OFF position.
NOTE
NOTE
DO NOT force the oven door open when the lock
icon is displayed. The oven door will remain locked
until the oven temperature has cooled. Forcing the
door open will damage the door.
CAUTION
CAUTION
• The Self Clean cycle cannot be started if the
Lockout feature is active.
• Once the Self Clean cycle is set, the oven door will
lock automatically. You will not be able to open
the oven door until the oven is cooled. The lock
will release automatically.
• Once the door has been locked, the LOCKED
indicator light will stop ashing and remain on.
Allow about 15 seconds for the oven door lock to
activate.
• If the clock is set for a 12 hour display (default) the
Delayed Self Clean can never be set to start more
than 12 hours in advance.
NOTE
NOTE
Displays for the SELF CLEAN mode

32 MAINTENANCE
SpeedClean™
SIGNATURE KITCHEN SUITE'S new oven with SpeedClean™
enamel technology provides two cleaning options for the
oven interior. The SpeedClean™ feature takes advantage of
SIGNATURE KITCHEN SUITE'S new enamel to help lift soils
without harsh chemicals, and it runs using ONLY WATER for
just 10 minutes in low temperatures to help loosen LIGHT
soils before hand-cleaning.
While SpeedClean™ is quick and effective for small and LIGHT
soils, the Self Clean feature can be used to remove HEAVY
built up soils. The intensity and high heat of the Self Clean
cycle may result in smoke which will require the opening up
of windows to provide ventilation. Compared to the more
intense Self Clean process, your SIGNATURE KITCHEN SUITE
oven gives you the option of cleaning with LESS HEAT, LESS
TIME, and virtually NO SMOKE OR FUMES.
CLEANING TIPS
• Allow the oven to cool to room temperature before using
the SpeedClean™ cycle. If your oven cavity is above 150°F
(65°C), “OVEN IS HOT- - PLEASE WAIT” will appear in the
display, and the SpeedClean™ cycle will not be activated
until the oven cavity cools down.
• A plastic spatula can be used as a scraper to scrape off any
chunks or debris before and during oven cleaning.
• Using the rough side of a non-scratch scouring pad may
help to take off burnt-on stains better than a soft sponge or
towel.
• Certain non-scratch scrubbing sponges, such as those made
of melamine foam, available at your local stores, can also
help improve cleaning.
• The oven should be level to ensure that the bottom surface
of the oven cavity is entirely covered by water at the begin-
ning of the SpeedClean™ cycle.
• For best results, use distilled or filtered water. Tap water may
leave mineral deposits on the oven bottom.
• Soil baked on through several cooking cycles will be more
difficult to remove with the SpeedClean™ cycle.
• Do not open the oven door during the SpeedClean™ cycle.
Water will not get hot enough if the door is opened during
the cycle.
• For hard to reach areas such as the back surface of the
bottom oven, it is better to use the Self Clean cycle.
* The Self Clean cycle can be used for soil that has been built up over time.
When needed, your oven still provides the Self Clean option
for longer, more thorough cleaning for heavier, built up soils.
BENEFITS OF SpeedClean™
• Helps loosen light soils before hand-cleaning
• SpeedClean™ only uses water; no chemical cleaners
• Makes for a better Self Clean experience
- Delays the need for a Self Clean cycle
- Minimizes smoke and odors
- Can allow shorter Self Clean time
Suggested
Cleaning Method Example of Oven Soiling Soil Pattern Types of Soils Common Food Items That
Can Soil Your Oven
SpeedClean™
Small drops or spots Cheese or other
ingredients Pizza
Light splatter Fat/grease
Steaks, broiled
Fish, broiled
Meat roasted at low
temperatures
Self Clean*
Medium to heavy
splatter Fat/grease Meat roasted at high
temperatures
Drops or spots
Filling or
Sugar based soils Pies
Cream or tomato
sauce Casseroles
WHEN TO USE SpeedClean™

33
MAINTENANCE
ENGLISH
SpeedClean™ INSTRUCTION GUIDE
1. Remove oven racks and accessories from the oven.
2. Scrape off and remove any burnt-on debris with a plastic
scraper.
3. Fill a spray bottle (10 oz or 300 ml) with water and use
the spray bottle to thoroughly spray the inside surfaces
of the oven.
4. Use at least
1/5
(2 oz or 60 ml) of the water in the bottle
to completely saturate the soil on both the walls and in
the corners of the oven.
5. Spray or pour the remaining water (8 oz or 240 ml) onto
the bottom center of the oven cavity. The indentation on
the oven bottom should be fully covered to submerge all
soils. Add water if necessary.
NOTE
If cleaning multiple ovens, use an entire bottle of water
to clean each oven. Do not spray water directly on the
door. Doing so will result in water dripping to the floor.
6. Close the oven door.
Turn the Oven Mode knob to select the SpeedClean™
mode.
Press START.
7. A tone will sound at the end of the 10-minute cycle.
adjust the Oven Mode knob to OFF position to clear the
display and end the tone.
8. After the cleaning cycle and during hand-cleaning,
enough water should remain on the oven bottom to
completely submerge all soils. Add water if necessary.
Place a towel on the floor in front of the oven to capture
any water that may spill out during hand-cleaning.
9. Clean the oven cavity immediately after the
SpeedClean™ cycle by scrubbing with a wet, non-scratch
scouring sponge or pad. (The scouring side will not
scratch the finish.) Some water may spill into the bottom
vents while cleaning, but it will be
captured in a pan under the oven
cavity and will not hurt the burner.
10. Once the oven cavity is cleaned, wipe any excess water
with a clean dry towel. Replace racks and any other
accessories.
11. If some light soils remain, repeat the above steps,
making sure to thoroughly soak the soiled areas. If
stubborn soils remain after multiple SpeedClean™
cycles, run the Self Clean cycle. Be sure that the oven
cavity is empty of oven racks and other accessories, and
that the oven cavity surface is dry before running the
Self Clean cycle. Consult the Self Clean section of your
owner’s manual for further details.
ySome surfaces may be hot after the SpeedClean™
cycle.Wear rubber gloves while cleaning to prevent
burns.
yDuring the SpeedClean™ cycle, the oven bottom be-
comes hot enough to cause burns. Wait until the cycle
is over before wiping the inside surface of the oven.
Failure to do so may result in burns.
yAvoid leaning or resting on the oven door glass while
cleaning the oven cavity.
CAUTION
NOTE
yIf you forget to saturate the inside of the oven with
water before starting SpeedClean™, turn the Oven
Mode knob to the OFF position to end the cycle. Wait
for the oven to cool to room temperature and then
spray or pour water into the oven and start another
SpeedClean™ cycle.
yThe cavity gasket may be wet when the SpeedClean™
cycle finishes. This is normal. Do not clean the gasket.
yIf mineral deposits remain on the oven bottom after
cleaning, use a cloth or sponge soaked in vinegar to
remove them.
yUsing commercial oven cleaners or bleachto clean the
oven is not recommended.
Instead, use a mild liquid cleanser with apH value
below 12.7 to avoid discoloring the enamel.
Suggested plastic scrapers:
• Hard plastic spatula
• Plastic pan scraper
• Plastic paint scraper
• Old credit card
yDo not use oven cleaners, harsh chemical cleaners,
bleach, vinegar, steel scouring pads, or abrasive pads
or cleansers to clean the oven, as they can permanent-
ly damage the oven surface.
yDo not clean the gasket.
CAUTION

34 MAINTENANCE
CLEANING THE EXTERIOR
Painted and Decorative Trim
For general cleaning, use a cloth with hot soapy water.
For more dicult soils and built-up grease, apply a liquid
detergent directly onto the soil. Leave it on for 30 to 60
minutes. Rinse with a damp cloth and dry. Do not use
abrasive cleaners.
Stainless Steel Surfaces
To avoid scratches, do not use steel wool pads.
1. Place a small amount of stainless steel appliance
cleaner or polish on a damp cloth or paper towel.
2. Clean a small area, rubbing with the grain of the
stainless steel if applicable.
3. Dry and bu with a clean, dry paper towel or soft
cloth.
4. Repeat as necessary.
Oven door
yUse soapy water to thoroughly clean the oven door.
Rinse well. DO NOT immerse the door in water.
yYou may use a glass cleaner on the outside glass of the
oven door. DO NOT spray water or glass cleaner on the
door vents.
yDO NOT use oven cleaners, cleaning powders, or harsh
abrasive cleaning materials on the outside of the oven
door.
yDO NOT clean the oven door gasket. The oven door
gasket is made of a woven material that is essential for
a good seal. Care should be taken not to rub, damage,
or remove this gasket.
Do not use harsh cleaners or harsh abrasive cleaning
materials on the outside of the oven door. Doing so
can cause damage.
CAUTION
CAUTION
Do not hand clean
oven door gasket
Remove any
debris from door
Broiler Pan and Grid
yDo not store a soiled broiler pan or grid anywhere in
the oven.
yDo not clean the broiler pan or grid in a self cleaning
mode.
yRemove the grid from the pan. Carefully pour out the
grease from the pan into a proper container.
yWash and rinse the broiler pan and grid in hot water
with a soap-lled or plastic scouring pad.
yIf food has burned on, sprinkle the grid with cleaner
while hot and cover with wet paper towels or a
dishcloth. Soaking the pan will remove burned-on
foods.
Do not store a soiled
broiler pan and grid
anywhere in the oven.
Oven Racks
Remove the oven racks
before operating the
selfclean cycle. Leaving
the racks in place could
cause discoloration.
If the racks are cleaned in
the self-clean cycle, their
color will turn slightly blue and nish will be dull. After
the self-clean cycle is complete and the oven has cooled,
rub the sides of the racks with wax paper or a cloth
containing a small amount of oil. This will make the racks
glide more easily into the rack tracks.
Oven Cavity
DO NOT use oven cleaners.
NEVER wipe a warm or hot porcelain surface with a damp
sponge; it may cause chipping or crazing (tiny hairlike
cracks). Food spills should be cleaned when the oven
cools. At high temperature, foods react with porcelain
and a permanent dull spot can result. When cleaning a
spot, use only non-abrasive cleaners or scrubbers.

35
MAINTENANCE
ENGLISH
CHANGING THE OVEN LIGHT
The oven light is a standard 25-watt halogen bulb for
ovens.
To replace lamps located on the side wall:
• Make sure oven and bulb are cool.
1. Unplug oven or disconnect power.
2. Remove oven racks.
3. Slide a at blade screwdriver between the housing
and the glass light cover.
4. Support the glass light cover with two ngers to
prevent the cover from falling to the bottom of the
oven.
5. Gently twist the screwdriver blade to loosen the
glass light cover and remove it.
6. Remove bulb from socket.
7. Replace bulb, replace light cover by snapping back
into place.
8. Plug in oven or reconnect power.
Glass Light Cover
Flat blade screwdriver
Housing
yBefore replacing the oven light bulb, DISCONNECT
the electrical power to the oven at the main fuse or
circuit breaker panel.
− Failure to do so can result in severe personal injury,
death, or electrical shock.
yMake sure oven and bulb are cool.
yWear gloves while changing the oven light. Glass
fragments from broken bulbs can cause risk of injury.
WARNING
WARNING

36 MAINTENANCE
Replacing the Oven Door
1. Firmly grasp both sides of the door at the top.
2. With the door at the same angle as the removal
position, seat the indentation of the hinge arm into
the bottom edge of the hinge slot. The notch in the
hinge arm must be fully seated into the bottom of
the slot.
3. Fully open the door. If the door will not fully open,
the indentation is not seated correctly in the bottom
edge of the slot.
4. Push the hinge locks down toward the bottom of
the door to the locked position. Close the oven door.
Push hinge locks up to lock
Hinge arm
Hinge lock
Hinge arm
Indentation
Bottom
edge of
slot
Hinge arm
Hinge lock
Hinge arm
Indentation
Bottom
edge of
slot
REMOVING AND REPLACING THE
OVEN DOOR
• The door is very heavy. Be careful when removing
and lifting the door.
• DO NOT lift the door by the handle.
• DO NOT hit the glass with pots, pans, or any other
object.
• Scratching, hitting, jarring or stressing the glass
may weaken its structure, causing an increased risk
of breakage at a later time.
CAUTION
CAUTION
Removing the Oven Door
1. Fully open the door. Pull the hinge locks away from
the oven interior, until they are fully unlocked. A
tool, such as a small at-blade screwdriver, may be
required.
2. Firmly grasp both sides of the door at the top. Close
the door to the removal position (approximately ve
degrees from fully closed).
3. Lift the door up and out until the hinge arm is clear
of the slot. Put the door on the oor.
Pull hinge locks down to unlock
Slot
about 5˚
Lock
Unlock
Hinge
lock
Hinge
arm
Removal Position
Slot
about 5˚
Lock
Unlock
Hinge
lock
Hinge
arm

37
TROUBLESHOOTING
ENGLISH
FAQs
My new oven doesn’t cook like my old
one. Is there something wrong with the
temperature settings?
No, Your oven has been factory tested and calibrated.
For the rst few uses, follow your recipe times and
temperatures carefully. If you still think your new oven is
too hot or too cold, you can adjust the oven temperature
yourself to meet your specic cooking needs. Refer to the
Oven Temperature Adjustment section , page 13, for easy
instructions on how to adjust your thermostat.
Is it normal to hear a clicking noise coming
from the back of my oven when I am using
it?
Your new oven is designed to maintain a tighter control
over your oven’s temperature. You may hear your oven’s
heating elements “click” on and o more frequently on
your new oven. This is a NORMAL operation.
During convection cooking the fan stops
when I open the door. Is that normal?
Yes, this is normal. When the door is opened, the
convection fan will stop until the door is closed.
Can I use aluminum foil to catch drippings
in my oven cavity?
Never use aluminum foil to line the bottom or sides of the
oven. The foil will melt and stick to the bottom surface
of the oven, and will not be removable. Use a sheet pan
placed on a lower oven rack to catch drippings instead.
(If foil has already melted onto the bottom of the oven, it
will not interfere with the oven’s performance.)
Can I use aluminum foil on the racks?
Do not cover racks with aluminum foil. Covering entire
racks with foil restricts air ow, leading to poor cooking
results. Use a sheet pan lined with foil under fruit pies or
other acidic or sugary foods to prevent spillovers from
damaging the oven nish.
Can I leave my racks in the oven when
running a Self Clean cycle?
No. Although it will not damage the racks, it will discolor
them and may make them hard to slide in and out during
use. Remove all items from the oven before starting a Self
Clean cycle.
What should I do if my racks are sticky and
have become hard to slide in and out?
Over time, the racks may become hard to slide in and out.
Apply a small amount of olive oil to the ends of the racks.
This will work as a lubricant for easier gliding.
Should I broil with the door open or closed?
Your electric oven isn't designed for open door broiling.
If you broil with the oven door open, it can damage the
oven knobs and display.
Foil may be used to wrap food in the oven, but do
not allow the foil to come into contact with the
exposed heating/broiling elements in the oven. The
foil could melt or ignite, causing smoke, re, or injury.
CAUTION
CAUTION
TROUBLESHOOTING

38 TROUBLESHOOTING
Why aren't the function buttons working?
Make sure that the oven is not in Lockout mode. The lock
symbol will show in the display if Lockout is activated.
To deactivate Lockout, press and hold the PROBE button
for three seconds. The unlock melody will sound and
UNLOCKING will appear in the display until the controls
are unlocked.
My oven is still dirty after running the
SpeedClean™ cycle. What else should I do?
The SpeedClean™ cycle only helps to loosen light soils
in your oven to assist in hand-cleaning of your oven.
It does not automatically remove all soils after the
cycle. Some scrubbing of your oven is required after
running the SpeedClean™ cycle.
I tried scrubbing my oven after running
SpeedClean™, but some soils still remain.
What can I do?
The SpeedClean™ feature works best when the soils
are fully soaked and submerged in water before
running the cycle and during hand-cleaning. If soils
are not suciently soaked in water, it can negatively
aect the cleaning performance. Repeat the SpeedClean™
process using sucient water. Sugar-based and certain
greasy soils are especially hard to clean. If some
stubborn soils remain, use the Self Clean feature to
thoroughly clean your oven.
Soils on my oven walls are not coming off.
How can I get my walls clean?
Soils on the side and rear walls of your oven may be
more dicult to fully soak with water. Try repeating the
SpeedClean™ process with more than the 1/5 cup (2 oz
or 60 ml) spray recommended.
Will SpeedClean™ get all of the soils and
stains out completely?
It depends on the soil type. Sugar-based and certain
grease stains are especially hard to clean. Also, if stains are
not suciently soaked in water, this can negatively aect
cleaning performance. If stubborn or built-up stains
remain, use the Self Clean feature. Refer to the Self
Clean section of your owner's manual.
Are there any tricks to getting some of the
stubborn soils out?
Scraping the soils with a plastic scraper before and during
hand-cleaning is recommended. Fully saturating soils
with water is also recommended.
However, certain types of soils are harder to clean than
others. For these stubborn soils, the Self Clean cycle is
recommended. Consult the Self Clean section of your
owner's manual for details.
Is it safe for my convection fan, broil
burner or heater element to get wet during
SpeedClean™?
Yes. The convection fan, broiler burner or heater element
may get a little wet during cleaning. However, direct
spray onto the broil burner and heater elements is not
necessary because these are self-cleaning during regular
use.
Do I need to use all 1 cups (10 oz or 300
ml) of water for SpeedClean™?
Yes. It is highly recommended that 4/5 cup (8 oz or
240 ml) of water be sprayed or poured on the bottom
and an additional 1/5 cup (2 oz or 60 ml) of water be
sprayed on walls and other soiled areas to fully saturate
the soils for better cleaning performance.
I see “smoke” coming out of my oven's
vents during SpeedClean™.
Is this normal?
This is normal. This is not smoke. It is actually water vapor
(steam) from the water in the oven cavity. As the oven
heats briey during SpeedClean™, the water in the cavity
evaporates and escapes through the oven vents.
How often should I use SpeedClean™?
SpeedClean™ can be performed as often as you wish.
SpeedClean™ works best when your oven is LIGHTLY
soiled from such things as LIGHT grease splatter and
small drops of cheese. Please refer to the SpeedClean™
section in your owner's manual for more information.
What is required for SpeedClean™?
A spray bottle lled with 1 cups (10 oz or 300 ml) of water,
a plastic scraper, a nonscratch scrubbing pad and a towel.
You should not use abrasive scrubbers such as heavy-
duty scouring pads or steel wool.

39
TROUBLESHOOTING
ENGLISH
BEFORE CALLING FOR SERVICE
Before you call for service, review this list. It may save you time and expense.
The list includes common occurrences that are not the result of defective workmanship or materials in this appliance.
Problem Possible Causes / Solutions
Oven control beeps
and displays any F
error code.
yElectronic control has detected a fault
condition. Touch any button and turn
any knob once to clear the display and
stop the beeping. Reprogram oven.
If fault reoccurs, record fault number.
Clear the display and stop the beeping,
then contact a qualied service
technician.
Oven will not work yPlug on oven is not completely inserted in the electrical outlet.
- Make sure electrical plug is plugged into a live, properly grounded outlet.
yA fuse in your home may be blown or the circuit breaker tripped.
- Replace the fuse or reset the circuit breaker.
yOven controls improperly set.
Instructions for setting cooking modes start on page 18.
Instructions for adjusting oven settings start on page 11 .
yOven too hot.
- Allow the oven to cool to below locking temperature.
Appliance does not
operate.
yMake sure cord is plugged correctly into outlet. Check circuit breakers.
yService wiring is not complete. Contact your appliance service person for assistance.
yPower outage. Check house lights to be sure. Call your local electric company for
service.
Oven light does not
work.
yReplace or tighten bulb. See Changing the Oven Light , page 34.
Oven smokes excessively
during broiling.
yControl not set properly. Follow instructions under Broil, page 21.
yMeat too close to the element. Reposition the rack to provide proper clearance
between the meat and the element. Preheat broil element for searing.
yMeat not properly prepared. Remove excess fat from meat. Cut remaining fatty edges
to prevent curling, but do not cut into lean.
yInsert on broiler pan wrong side up and grease not draining. Always place grid on the
broiler pan with ribs up and slots down to allow grease to drip into pan.
yGrease has built up on oven surfaces. Regular cleaning is necessary when broiling
frequently. Old grease or food spatters cause excessive smoking.
CODE CAUSE
F-3 Key held down too long or
shorted key
F-19 No heating

40
TROUBLESHOOTING
Problem Possible Causes / Solutions
Food does not bake or roast
properly
yOven controls improperly set.
- See the instructions for setting Bake, Convection Bake, Roast, and Convection Roast
modes, pages 18-21.
yRack position is incorrect or the rack is not level.
- See Rack and Pan Placement, page 17.
yIncorrect cookware or cookware of improper size being used.
- the tips on pages 17, 18, and 20.
yOven sensor needs to be adjusted.
- See Oven Temperature Adjustment, page 13.
Food does not broil
properly
yOven controls improperly set.
- See the Broil section, page 21.
yImproper rack position being used.
- See the Broiling Guide, page 21-23.
yCookware not suited for broiling.
- Use the broiling pan and grid that came with your oven.
yAluminum foil has been used on the broiling pan, grid has not been tted properly,
or slits are not on correct side.
- See the Broil section, page 21.
yIn some areas the power (voltage) may be low.
- Preheat the broil element for 10 minutes.
- See the Broil section, page 21.
Oven temperature too hot or
too cold
yOven Sensor needs to be adjusted.
- Oven Temperature Adjustment, page 13.
Oven will not self clean yThe oven temperature is too high to set a self-clean operation.
- Allow the oven to cool and reset the controls.
yOven controls improperly set.
- See the Self Clean section, page 29.
yA self-clean cycle cannot be started if oven door is open.
Crackling or popping sound yThis is the sound of the metal heating and cooling during both the cooking and
cleaning functions.
- This is normal.
Excessive smoking during a
self clean cycle
yExcessive soil.
- Set the Oven Mode knob to the OFF position. Open the windows to rid the room of
smoke. Wait until the self-clean mode is cancelled. Wipe up the excess soil and reset
the clean.
Oven door does not open
after a self clean cycle
yOven is too hot.
- Allow the oven to cool below locking temperature.

41
TROUBLESHOOTING
ENGLISH
Problem Possible Causes / Solutions
Oven not clean after a self
clean cycle
yOven controls not properly set.
- See the self-clean section, page 29-30.
yOven was heavily soiled.
- Clean up heavy spillovers before starting the clean cycle. Heavily soiled ovens may
need to self-clean again or for a longer period of time.
DOOR LOCKED icon is on
when you want to cook
yThe oven door is locked because the temperature inside the oven has not dropped
below the locking temperature.
- Adjust the Oven Mode knob to OFF position. Allow the oven to cool.
Burning or oily odor emitting
from the vent
yThis is normal in a new oven and will disappear in time.
- To speed the process, set a self-clean cycle for a minimum of 3 hours. See the self-
clean section, page 29-30.
Cooling fan continues to run
after oven is turned o
yThe fan turns o automatically when the electronic components have cooled
suciently.
- This is normal.
Warm air venting into
kitchen after oven has been
turned o.
yWarm air exhaust is needed to maintain and cool down oven temperatures. It turns
o automatically when the heat cools to a safe temperature.
- This is normal.
Wi network does not
connect properly.
yIf the appliance is having trouble connecting to the Wi-Fi network, it may be too
far from the router. Purchase a Wi-Fi repeater (range extender) to improve the Wi-Fi
signal strength.
yThe Wi-Fi connection may not connect or may be interrupted because of the home
network environment.
yThe network connection may not work properly depending on the internet service
provider.
yThe surrounding wireless environment can make the wireless network service run
slowly.

42 WARRANTY
WARRANTY (USA)
Should your SIGNATURE KITCHEN SUITE Oven ("Product") fail due to a defect in materials or workmanship under normal
and proper use, during the warranty period set forth below, SIGNATURE KITCHEN SUITE will, at its option, repair or
replace the Product. This limited warranty is valid only to the original retail purchaser of the Product and applies only
when purchased lawfully and used within the United States including U.S. Territories.
WARRANTY PERIOD HOW SERVICE IS HANDLED
Three Years
From the date of the original purchase.
Any part of the oven that fails due to a defect in materials or workmanship.
During this full three-years warranty, SIGNATURE KITCHEN SUITE will also
provide, free of charge, all labour and in-home service to replace the
defective part.
• Replacement Products and parts are warranted for the remaining portion of the original warranty period or ninety (90)
days, whichever is greater.
• Replacement Products and parts may be new, reconditioned, refurbished, or otherwise factory remanufactured.
• Replaced Product or part(s) will be the property of SIGNATURE KITCHEN SUITE.
• Proof of original retail purchase specifying the Product model and date of purchase is required to obtain warranty service
under this limited warranty.
EXCEPT TO THE EXTENT PROHIBITED BY APPLICABLE LAW, ANY IMPLIED WARRANTY OF MERCHANTABILITY OR
FITNESS FOR A PARTICULAR PURPOSE ON THE PRODUCT IS LIMITED IN DURATION TO THE DURATION OF THE
ABOVE LIMITED WARRANTY. UNDER NO CIRCUMSTANCES SHALL SIGNATURE KITCHEN SUITE OR ITS U.S.
DISTRIBUTORS/DEALERS BE LIABLE FOR ANY INDIRECT, INCIDENTAL, CONSEQUENTIAL, SPECIAL, OR PUNITIVE
DAMAGES, INCLUDING, WITHOUT LIMITATION, LOST GOODWILL, LOST REVENUES OR PROFITS, WORK STOPPAGE,
IMPAIRMENT OF OTHER GOODS, COST OF REMOVAL AND REINSTALLATION OF THE PRODUCT, LOSS OF USE, OR
ANY OTHER DAMAGES WHETHER BASED IN CONTRACT, TORT, OR OTHERWISE. SIGNATURE KITCHEN SUITE’S
TOTAL LIABILITY, IF ANY, SHALL NOT EXCEED THE PURCHASE PRICE PAID BY YOU FOR THE PRODUCT.
SOME STATES DO NOT ALLOW THE EXCLUSION OR LIMITATION OF INCIDENTAL OR CONSEQUENTIAL DAMAGES OR
LIMITATIONS ON HOW LONG AN IMPLIED WARRANTY LASTS, SO THE ABOVE EXCLUSIONS OR LIMITATIONS MAY
NOT APPLY TO YOU. THIS LIMITED WARRANTY GIVES YOU SPECIFIC LEGAL RIGHTS AND YOU MAY ALSO HAVE
OTHER RIGHTS THAT VARY FROM STATE TO STATE.
THIS LIMITED WARRANTY DOES NOT APPLY TO:
• Service trips to deliver, pick up, or install, educate how to operate, correct wiring, or correct unauthorized repairs.
• Damage or failure of the Product to perform during power failures and interrupted or inadequate electrical service.
• Damage or failure caused by leaky or broken water pipes, frozen water pipes, restricted drain lines, inadequate or
interrupted water supply or inadequate supply of air.
• Damage resulting from operating the product in a corrosive atmosphere or contrary to the product owner’s manual.
• Damage or failure to the Product caused by accidents, pests and vermin, lightning, wind, re, oods, acts of God, or any
other causes beyond the control of SIGNATURE KITCHEN SUITE.
• Damage or failure of the Product caused by unauthorized modication or alteration, or if the Product is used for other
than the intended purpose, or any water leakage where the Product was not properly installed.
• Damage or failure of the Product caused by incorrect electrical current, voltage, or plumbing codes.
• Damage or failure of the Product caused by transportation, storage, and/or handling, including scratches, dents, chips,
and/or other damage to the nish of the Product, unless such damage is reported within one (1) week of delivery.

43
WARRANTY
• Damage or failure of the Product resulting from misuse, abuse, improper installation, repair, or maintenance. Improper
repair includes the use of parts not authorized by SIGNATURE KITCHEN SUITE.
Improper installation or maintenance includes installation or maintenance contrary to the Product owner’s manual.
• Damage or failure of the Product caused by the use of parts, components, accessories, consumable cleaning products, or
any other products or services that were not authorized by SIGNATURE KITCHEN SUITE.
• Damage or missing items to any display or open box Product.
• Refurbished Product or any Product sold “As Is”, “Where Is”, “With all Faults”, or similar disclaimer.
• Products with original serial numbers that have been removed, altered, or cannot be readily determined.
• Increases in utility costs and additional utility expenses.
• Any noises associated with normal operation.
• Products used for other than normal and proper household use (e.g., commercial or industrial use) or contrary to the
Product owner’s manual.
• Costs associated with removal and reinstallation of the Product for repairs, or the removal and reinstallation of the
Product if it is installed in an inaccessible location or not installed in accordance with the Product Owner's manual.
• Accessories, removable components, or consumable parts (e.g. Shelves, door bins, drawers, water/air lters, racks, light
bulbs, batteries, etc., as applicable), except for internal/functional parts covered under this limited warranty.
This warranty is extended to the original purchaser for products purchased for home use within the U.S.A. In Alaska, the
warranty excludes the cost of shipping or service calls to your home. Some states do not allow the exclusion or limitation
of incidental or consequential damages, so this exclusion or limitation may not apply to you. This warranty gives you
specic legal rights, and you may also have other rights which vary from state to state. To know what your legal rights are,
consult your local or state consumer aairs or your state’s Attorney General.
CUSTOMER ASSISTANCE INFORMATION:
To Prove Warranty Coverage Retain your Sales Receipt to prove date of purchase.
A copy of your Sales Receipt must be submitted at the
time warranty service is provided.
To Obtain the Nearest Authorized Service Center or Sales
Dealer, or to Obtain Product, Customer, or Service Assistance
Call 1-855-790-6655 (Phone answered 24 hours - 365
days a year) and choose the appropriate prompt from
the menu; or visit our website at:
www.signaturekitchensuite.com;
or by mail: SIGNATURE KITCHEN SUITE Customer
Service P.O. Box 240007 Huntsville, AL 35813 ATTN: CIC


ESPAÑOL
P/No.: MFL51224540_03
MANUAL DEL PROPIETARIO
HORNO ELÉCTRICO DE CONVECCIÓN EMPOTRADO
www.signaturekitchensuite.com
UPWS3044ST
Copyright © 2021 - 2023 Signature Kitchen Suite. Todos los Derechos Reservados.

2ÍNDICE
ÍNDICE
3 IMPORTANTES INSTRUCCIONES DE
SEGURIDAD
8 DESCRIPCIÓN GENERAL DE LOS
PRODUCTOS
8 Accesorios
9 Descripción general de la cocina
1 0 Descripción general del panel de control
11 CARACTERÍSTICAS
1 1 Reloj
1 2 Timer on/off (Temporizador encendido/
apagado)
1 2 Conversión automática de convección
1 3 Ajustes para la temperatura del horno
1 4 Idioma
1 4 Luz de alarma de precalentamiento
1 4 Volumen de la alerta sonora
1 4 Fahrenheit o Celsius
1 4 Luz del horno
1 5 Bloqueo
1 5 Hora de inicio(cocción temporizada
retardada)
1 6 Tiempo de cocción (cocción temporizada)
17 USO DEL HORNO
17 Antes de usar el horno
17 Sacar y volver a colocar los estantes del
horno
18 Bake (Horneado)
18 Convection bake (horneadd por convección)
19 Rostizar
20 Convection roast (asado por convección)
20 Convección tostar
21 Broil (asado a la parrilla)
22 Guía recomedada de asado a la parrilla
23 Consejos para el Asado a la Parrilla
24 Calentar
24 Leudar
25 Sonda para carne
26 Remote Start(Inicio remoto)
27 FUNCIONES INTELIGENTES
27 Aplicación LG ThinQ
28 Función Smart Diagnosis™
29 Aviso de la FCC
29 Declaración sobre exposición a la radiación
de RF de la FCC
30 MANTENIMIENTO
30 Auto-limpieza
30 Configuración de la Auto-limpieza
31 Configuración de la Auto-limpieza con un
Inicio Retardado
32 SpeedClean™
32 Consejos de limpieza
33 Guía de instrucción SpeedClean™
34 Limpieza Exterior
35 Reemplazo de la luz del horno
36 Sacar y volver a colocar la puerta del horno y
el cajón
37 RESOLUCIÓN DE PROBLEMAS
37 PREGUNTAS FRECUENTES
38 ANTES DE LLAMAR AL SERVICIO
42 GARANTÍA

3
IMPORTANTES INSTRUCCIONES DE SEGURIDAD
ESPAÑOL
IMPORTANTES INSTRUCCIONES DE SEGURIDAD
Lea y siga todas las instrucciones antes de usar su horno para evitar riesgos de incendios,
descargas eléctricas, lesiones a las personas o daños al utilizar la cocina. Esta guía no
incluye todas las situaciones posibles que se podrían producir. Siempre comuníquese
con su agente de servicio técnico o con el fabricante cuando haya problemas que no
comprenda.
Usted puede descargar el manual de usuario en www.signaturekitchensuite.com
Este es el símbolo de alerta de seguridad. Este símbolo lo alerta sobre los
posibles riesgos que pueden causar daños a la propiedad y/o lesiones físicas
graves o la muerte. Todos los mensajes de seguridad estarán precedidos por el
símbolo de alerta de seguridad y la palabra «ADVERTENCIA» o «PRECAUCIÓN».
Estas palabras signican:
ADVERTENCIA
ADVERTENCIA
Indica una situación peligrosa que, de no evitarse, podría causar la muerte o lesiones
graves.
PRECAUCIÓN
PRECAUCIÓN
Indica una situación peligrosa que, de no evitarse, podría causar una lesión menor o
moderada.
PRECAUCIONES DE SEGURIDAD
yAsegúrese de que un técnico calicado realice una correcta instalación y puesta a tierra
del aparato.
yNo repare o reemplace ninguna pieza del aparato a menos que se lo señale
especícamente en este manual.
yCualquier otro servicio debe realizarlo un técnico calicado.
ySiempre desconecte la energía al artefacto antes de efectuar servicios ya sea
desenchufándolo, quitando el fusible o apagando el interruptor de circuitos.
yNO TOQUE ELEMENTOS CALENTADORES O SUPERFICIES INTERIORES DEL HORNO.
Los elementos calentadores pueden estar calientes aunque tengan un color oscuro.
Las supercies internas de un horno se calientan lo suciente como para provocar
quemaduras. Durante y después del uso, no toque o permita que vestimenta u otros
materiales inamables entren en contacto con los elementos calentadores o supercies
interiores del horno hasta que haya pasado el tiempo suciente para que se enfríen.
Otras supercies del aparato pueden calentarse lo suciente como para provocar
quemaduras. Entre esas supercies se encuentran las aberturas de ventilación del horno
y las supercies cercanas a dichas aberturas, las puertas del horno y las ventanas de las
puertas del horno.
yTenga cuidado al abrir la puerta. Deje salir el aire o vapor caliente antes de quitar o
colocar alimentos en el horno.

4IMPORTANTES INSTRUCCIONES DE SEGURIDAD
PRECAUCIONES DE SEGURIDAD (CONT.)
yNo caliente recipientes de comida sin abrir. La presión
acumulada puede hacer que el recipiente explote y provoque
lesiones.
yMantenga despejados los conductos de ventilación del
horno. La ventilación del horno puede calentarse durante el
uso del horno. Nunca obstruya esta ventilación y nunca coloque
elementos de plástico o sensibles al calor sobre o cerca de la
ventilación.
NOTA:
Para una operación adecuada, debe instalarse un reborde de ventilación.
yAsegúrese de quitar todos los materiales de empaquetado del aparato antes de
ponerlo en funcionamiento. Mantenga plásticos, ropa y papel alejados de las piezas del
aparato que puedan calentarse.
yNO fuerce la puerta del horno. Esto puede dañar el sistema automático de bloqueo de
la puerta. Tenga cuidado al abrir la puerta del horno después del ciclo de auto-limpieza.
Párese a un lado del horno cuando abra la puerta para que salga el aire o vapor caliente. El
horno puede seguir MUY CALIENTE.
yNO utilice una esponjilla de lana acero. Se RAYARÁ la supercie.
yNO utilice limpiadores abrasivos fuertes o raspadores de metal alados para limpiar
el vidrio de la puerta del horno ya que pueden rayar la supercie. Puede provocar la
rotura del vidrio.
yTenga cuidado al quitar y levantar la puerta.
yNO levante la puerta de la manija. La puerta es muy pesada.
yNO se pare o siente sobre la puerta del horno. Asegurese de seguir las instrucciones de
instalacion apropiadas.
Reborde inferior
de metal
(ventilación)
ADVERTENCIA
ADVERTENCIA
yNUNCA use su electrodoméstico para calentar la habitación.
yNO utilice agua en incendios de grasa. Si ocurre un incendio dentro del horno, deje
cerrada la puerta y apague el horno. Si el incendio continúa, arroje bicarbonato de sodio
o utilice un extintor de incendios.
ySólo utilice agarraderas secas. Las agarraderas húmedas o mojadas sobre supercies
calientes pueden provocar quemaduras de vapor. No permita que la agarradera toque
los elementos de calentamiento. No use una toalla u otra tela gruesa.
yNo almacene elementos dentro o sobre el aparato. Los materiales inamables no
deben almacenarse dentro de un horno o cerca de elementos de supercie.
yUtilice ropa adecuada. Nunca debe utilizar ropa suelta o que cuelgue mientras utiliza
este electrodoméstico.
yAntes de usar la red Wi-Fi, debe revisar la sustancia en la cavidad.

5
IMPORTANTES INSTRUCCIONES DE SEGURIDAD
ESPAÑOL
SEGURIDAD ELÉCTRICA
yRevestimientos protectores. No utilice papel de aluminio u otro material para revestir la parte
inferior del horno. Una instalación inadecuada de estos revestimientos puede provocar un
riesgo de descarga eléctrica o de incendio.
yNo permita que el papel de aluminio o la sonda para carne entren en contacto con los
elementos calentadores.
yNO recubra las paredes, bandejas, fondo o cualquier otra pieza del horno con papel de
aluminio o cualquier otro material. Hacerlo afectará la distribución de calor, producirá un
horneado pobre y provocará un daño permanente al interior del horno (el papel de aluminio se
derretirá hacia la supercie interna del horno).
yAntes de reemplazar la bombilla de luz del horno, desconecte la alimentación de energía
al horno desde el panel principal de fusibles o del interruptor de circuitos. No hacerlo
puede provocar lesiones personales graves, la muerte o una descarga eléctrica.
SEGURIDAD DURANTE SU USO
yBandejas del horno. Siempre coloque las bandejas del horno en la posición deseada
mientras el horno está frío.
ySiempre use agarraderas o guantes de cocina cuando quite alimentos del horno. Usted
puede quemarse ya que los recipientes y los platos estarán calientes.
yTenga cuidado al utilizar las características TIMED BAKE (horneado con temporizador) o
DELAYED TIMED BAKE (horneado con temporizador con retraso). Utilice el temporizador
automático cuando cocine carnes curadas o congeladas y la mayoría de las frutas y
vegetales. Los alimentos que pueden estropearse fácilmente, como leche, huevos,
pescado, carne de res o de ave, deben primero enfriarse en el refrigerador. Aún cuando
se encuentren fríos, no deben estar en el horno por más de 1 hora antes del comienzo de la
cocción y deben quitarse rápidamente cuando nalice la cocción. Consumir comida en mal
estado puede provocar intoxicación por alimentos.
ySi ocurre un incendio dentro del horno, deje cerrada la puerta y apague el horno. Si el
incendio continúa, arroje bicarbonato de sodio o utilice un extintor de incendios.
yNO eche agua o harina sobre el incendio. La harina puede ser explosiva y el agua puede
propagar un incendio de grasa y provocar lesiones personales.
yNO utilice la asadera sin la rejilla. NO cubra la rejilla con papel de aluminio.
Papel de aluminio
ADVERTENCIA
• NO coloque papel de aluminio directamente
en la parte inferior del horno

6IMPORTANTES INSTRUCCIONES DE SEGURIDAD
SEGURIDAD DE LOS NIÑOS
ADVERTENCIA
ADVERTENCIA
yLos niños siempre deben estar alejados del horno.
yLos accesorios se calientan cuando la bandeja está en uso.
PRECAUCIÓN
PRECAUCIÓN
yNo hay que dejar a los niños solos o desatendidos en el área donde se está
utilizando el aparato. Nunca debe permitirse que los niños se sienten o se paren en
cualquier parte de este electrodoméstico.
yNO deje niños pequeños desatendidos cerca del aparato. Durante el ciclo de auto-
limpieza, la parte exterior del horno puede calentarse mucho.
SEGURIDAD AL LIMPIAR
yNo limpie la junta de la puerta. La junta de la puerta es esencial para un buen sellado.
Debe tenerse cuidado de no refregar, dañar o mover la junta.
yNo utilice limpiadores de horno. No debe utilizarse ningún limpiador comercial o
revestimiento protector de ninguna clase dentro o alrededor de ninguna pieza del
horno.
yAntes de la auto-limpieza del horno. Quite la asadera, todas las bandejas del horno,
sonda para carne y cualquier otro utensilio del horno.
yNunca tenga pájaros como mascotas en la cocina. La salud de los pájaros es
extremadamente sensible al humo liberado durante el ciclo de auto-limpieza del
horno. El humo puede ser dañino o fatal para los pájaros. Procure llevar a sus aves a otra
habitación bien ventilada.
yInstrucción importante: Si apareciera un código F de error de auto-limpieza, y sonidos
de melodía de error, el horno no funciona bien en el modo de auto-limpieza. Desconecte
la energía eléctrica del fusible principal o interruptor y llame a un técnico calicado.
yAsegúrese de que las luces del horno estén frías antes de la limpieza. Limpie
únicamente las piezas enumeradas en el manual.
yNO obstruya la ventilación del horno durante
el funcionamiento. Esto puede dañar las piezas
eléctricas del horno. El aire debe poder desplazarse
libremente. El reborde inferior de metal (ventilación)
debe colocarse correctamente en la parte frontal
inferior del horno antes de instalar la puerta del horno.
Reborde inferior
de metal (Ventila)

7
IMPORTANTES INSTRUCCIONES DE SEGURIDAD
ESPAÑOL
COCINAR BIEN LA CARNE Y LAS AVES
Para evitar enfermedades transmitidas por los alimentos, cocine bien la carne y las aves.
La USDA ha indicado las siguientes temperaturas internas mínimas como seguras para el
consumo.
yCarne molida de vaca: 160° F
yAves 165° F
yCarne de vaca, ternera, cerdo o cordero: 145° F
yPescado/Frutos del Mar 145° F.

8DESCRIPCIÓN GENERAL DE LOS PRODUCTOS
DESCRIPCIÓN GENERAL DE LOS PRODUCTOS
ACCESORIOS
Asegúrese de que todas las piezas estén incluidas antes de comprar el producto.
NOTA
yComuníquese con el Centro de Atención al Cliente de SIGNATURE KITCHEN SUITE en caso de que falte algún accesorio.
yPor su seguridad y para lograr una óptima durabilidad del producto, utilice únicamente componentes autorizados.
yEl fabricante no será responsable por el mal funcionamiento del producto o por accidentes causados por el uso de componentes o
piezas no autorizadas, compradas por separado.
yLas imágenes incluidas en esta guía pueden diferir de los componentes y accesorios reales, y pueden ser sujetas a modificaciones
por parte del fabricante a los fines de mejora del producto sin necesidad de previo aviso.
yNo retire el estante deslizante del empaque de base. Los estantes deslizantes se envuelven por separado en la parte superior e
inferior del horno
HORNO ELÉCTRICO DE CONVECCIÓN EMPOTRADO
Manual del usuario
Manual
Manual de
instalación
Accesorios para cocinar
Rejilla
Estante deslizante
(2 cada uno)
Bandejas de servicio pesado
(Estante estandar)
(1 cada uno)
Sonde Thermique
Asadera
Accesorios para la instalación
6 tornillos para madera
para montaje
(4 necesarios para la
instalación y 2 extra)
Tornillos de 4X10 (2 c/u)
Para el reborde decorativo
inferior
Reborde decorativo inferior
(1 c/u)

9
DESCRIPCIÓN GENERAL DE LOS PRODUCTOS
ESPAÑOL
DESCRIPCIÓN GENERAL DE LA COCINA
Asegúrese de entender los nombres y función de cada pieza.
* A lo largo de este manual, las características y apariencia del producto pueden variar dependiendo de su modelo.
NOTA
yEl modelo y número de serie se pueden verificar en la valoración de la etiqueta.
yGlide Shut™ Door: La función de cierre suave controla el mecanismo de la puerta
del horno. Un sistema que emplea bisagras de nueva generación para acompañar
suavemente la puerta del horno, evitando que se cierre bruscamente, de modo
que se cierra suavemente y en silencio.
Panel de control
Placa de características,
el modelo y número de serie
Espaciador (2 cada uno)
- Uno en cada lado
Reborde inferior de metal
(Ventila)
Interruptor de la puerta
Traba de la puerta
Bandejas estándar (2 cada uno)
Junta
Asadera y rejilla
Puerta del horno
Glide Shut™ Door apagador (1 cada uno)

10 DESCRIPCIÓN GENERAL DE LOS PRODUCTOS
DESCRIPCIÓN GENERAL DEL PANEL DE CONTROL
Name Description
1
COOK TIME (Tiempo de cocción)
*CLOCK(Reloj)
- Presione el botón y gire la perilla Time / Temp para establecer la cantidad
de tiempo deseado para los alimentos se cocinen. El horno se apaga cuando
el tiempo de cocción se agote.
- Mantenga el presionado el botón por 3 segundos para jar la hora del día.
2
START TIME (Tiempo de inicio)
*SETTING (Ajustes)
- Presione el botón y gire la perilla TIME/TEMP (Tiempo/Temperatura)
para ajustar la hora de inicio. El horno comienza a la hora previamente
establecida.
- Mantenga presionado el botón por tres segundos para seleccionar y ajustar
las conguraciones del horno.
3
PROBE(Sonda)
*LOCKOUT(Bloqueo)
- Presione este botón para seleccionar la función PROBE.
- Mantenga presionado el botón por 3 segundos para activar la función
LOCKOUT.
4
TIMER ON/OFF (Temporizador encendido / apagado)
*Connect(Conectarlo)
- Pulse el botón para ajustar o cancelar el temporizador en el horno.
- Mantenga presionado el botón por 3 segundos para conectarlo a una red
Wi-Fi.
5
OVEN LIGHT Presione este botón para encender y apagar la luz de horno.
6
START (Inicio) Presione este botón para iniciar todas las funciones del horno.
7
SMART DIAGNOSE(Diagnóstico inteligente) Uso durante la función de Smart Diagnosis.
8
OVEN MODE KNOB (Perilla de modo del horno superior) Gire la perilla para seleccionar el modo de funcionamiento del horno.
9
Time/Temp KNOB Gire la perilla para ajustar la temperatura o el tiempo de cocción para el
horno.
1 2 3 4 5 6
98 7

11
CARACTERÍSTICAS
ESPAÑOL
CARACTERÍSTICAS
RELOJ
Debe congurarse el reloj con la hora correcta del día en
el orden correcto para que las funciones de temporización
automática del horno funcionen correctamente.
1. Colocar ambas perrillas de modo del horno en la posición
OFF.
2. Mantenga pulsado COOK TIME durante 3 segundos.
3. Gire la perilla Time/Temp superior o inferior para
seleccionar el tiempo deseado. Gire el mando hacia la
derecha para aumentar el tiempo y hacia la izquierda para
disminuir el tiempo.
4. Presione START (iniciar). Esto ingresa la hora e inicia el
reloj.
• No puede modicarse la hora del día durante el
Horneado Temporizado o un ciclo de Auto-Limpieza.
• Para ver la hora del día cuando la pantalla está
mostrando otra información, presione CLOCK.
• La pantalla vuelve a su conguración original sí START
no es presionado dentro del rango de 25 segundos
después de de haber congurado el tiempo.
• Si la hora de la pantalla está parpadeando, podría
haberse producido una interrupción eléctrica. Vuelva a
congurar la hora.
NOTA
NOTA
Configurar el modo horario en el reloj
(12 o 24 horas.)
Su control está congurado para usar un reloj de 12 horas. Si
usted preere tener un reloj de 24 horas, siga los siguientes
pasos.
1. Colocar ambas perrillas de modo del horno inferior y
superior en la posición OFF.
2. Mantenga pulsado START TIME durante 3 segundos.
3. Gire la perilla Time/Temp al modo horario deseado en el
reloj.
4. Presione START (iniciar) para aceptar el cambio.
Corte de energía
Si puede verse una hora destellando en la pantalla, se ha
experimentado un corte de energía. Recongure el reloj.
Presione cualquier botón o gire cualquier perilla para
recongurar. Ingrese la hora correcta presionando los botones
numéricos adecuados. Presione START (iniciar).
Configuraciones Predeterminadas Mínimas y
Máximas
Todas las características enumeradas tienen una conguración
de tiempo o temperatura máxima que puede ingresarse en
el control. Suena un pitido cada vez que se pulsa un botón de
control.
dos tonos cortos sonará si la entrada de la temperatura o el
tiempo están por debajo del mínimo o por encima del máximo
de las conguraciones para la función.
FEATURE MIN. TEMP. /TIME MAX. TEMP. / TIME
RELOJ DE TIEMPO 12 Hr. 1:00 Hr. / Min. 12:59 Hr. / Min.
24 Hr. 0:00 Hr. / Min. 23:59 Hr. / Min.
TIMER 12 Hr. 0:01 Min. 11:59 Hr. / Min.
24 Hr. 0:01 Min. 11:59 Hr. / Min.
PREPARACION DE
TIEMPO
12 Hr. 0:01 Min. 11:59 Hr. / Min.
24 Hr. 0:01 Min. 11:59 Hr. / Min.
HORNEAR/ROSTIZAR 170°F / 80°C 550°F / 285°C
CONVECCIÓN PARA HORNEAR
/ROSTIZADO POR CONVECCIÓN
/CONVECCIÓN TOSTAR
170°F / 80°C 550°F / 285°C
ASAR Lleno / Centro Low (350°F)High (550°F)
AUTO LIMPIEZA 3Hr. 5Hr.
PRUEBA 0:01 Min. 11:59 Hr. / Min.
TIBIO Low (140°F)High (200°F)
SONDA 80 °F / 27°C 210 °F / 100°C

12 CARACTERÍSTICAS
TIMER ON/OFF (TEMPORIZADOR
ENCENDIDO/APAGADO)
TIMER ON/OFF sirve como temporizador adicional en al cocina y
emitirá una señal acústica cuando se haya agotado el tiempo. No
se inicia o deja de cocinar. La función TIMER ON/OFF se puede
usar durante cualquiera de las funciones de control del horno.
El temporizador se puede utilizar de forma independiente para
cada uno de ellos.
Configuración del Temporizador
1. Colocar ambas perrillas de modo del horno en la posición
OFF.
2. Presione TIMER ON/OFF, y en la pantalla aparecerá 0:00
con las siglasHR también TIMER parpadeará en la pantalla.
3. Gire la perilla Time/Temp para ajustar la hora deseada.
Gire el mando hacia la derecha para aumentar el tiempo y
hacia la izquierda para disminuir el tiempo.
4. Presiona TIMER ON/OFF para iniciar el temporizador. En
la pantalla aparecerá el tiempo ajustado en decremento.
5. Cuando el tiempo congurado haya terminado, End (n)
aparecerá en la pantalla. Los tonos del indicador sonarán
cada 15 segundos hasta que se pulse TIMER ON/OFF.
6. Para cancelar el temporizador, presione TIMER ON/OFF.
En la pantalla aparecerá la hora del día.
CONVERSIÓN AUTOMÁTICA DE
CONVECCIÓN
Al cocinar con “ciclo de convección” Conv. Bake, Conv.
Roast, and Crisp Conv. la temperatura del horno se reduce
automáticamente a 25°F(14°C). La pantalla mostrará el
cambio de temperatura.A esta característica se le llama
AUTO CONVERSION (conversión automática).
Su estufa viene con esta característica activada.
Para desactivar la función de conversión automática, haga lo
siguiente.
1. Colocar ambas perrillas de modo del horno inferior y
superior en la posición OFF.
2. Mantenga presionado por tres segundos START TIME.
Después presione START TIME una vez. Auto aparecerá en
la pantalla.
3. Gire la perilla Time/Temp para activar o desactivar la
función.
4. Presione START para aceptar el cambio.
Si el botón TIMER ON/OFF no es presionado, el
temporizador volverá automáticamente a la hora del
día.
NOTA
NOTA
Si no se muestra el tiempo restante en la pantalla,
recupérelo pulsando TIMER ON/OFF.
- Presione TIMER ON/OFF una vez para establecer el
tiempo en horas y minutos.
- Presione TIMER ON/OFF dos veces para ajustar el
tiempo en minutos y segundos.
NOTA
NOTA

13
CARACTERÍSTICAS
ESPAÑOL
No utilice termometros, como los que se venden en las
tiendas, para vericar la conguracion de temperatura del
horno. En su lugar, empezar por subir o bajar el termostato
(8 ° C) 15 ° F. Pruebe el horno durante una semana con el
nuevo ajuste y ajuste de nuevo si es necesario, utilizando
el primer ajuste como un indicador.
NOTA
NOTA
AJUSTES PARA LA TEMPERATURA
DEL HORNO
Este horno puede cocinar de manera diferente al que reemplazó.
Utilice el horno durante unas semanas para familiarizarse
más con él antes de cambiar los ajustes del termostato. Si el
horno constantemente no cocina completamente o deja la
comida recocida siga las siguientes instrucciones para ajustar el
termostato.
Ajustar la Temperatura del Horno
1. Colocar ambas perrillas de modo del horno en la posición
OFF.
2. Mantenga presionado por tres segundos START TIME.
Después presione START TIME varias veces hasta que
AdJU aparezca en la pantalla.
3. Gire la perilla Time/Temp a para establecer el monto de
ajuste de la temperatura deseada. Presione START TIME
para alternar entre valores positivos y negativos.
Ejemplo: Para aumentar el termostato en 15 grados, gire
la perilla hacia la derecha para seleccionar 15.
Para bajar el termostato en 15 grados, gire la perilla hacia
la derecha para seleccionar 15, a continuación, pulse
START TIME para seleccionar un valor negativo (-15).
4. Presione START para aceptar el cambio.
• Este ajuste no afectará las temperaturas de asado o Auto-
Limpieza. El ajuste se guardará en la memoria incluso
ante la falta de suministro eléctrico. La temperatura del
horno puede aumentarse (+) o disminuirse (-) hasta 35°F
o 19°C.
• Una vez que se aumente o disminuya la temperatura, la
pantalla mostrará la temperatura ajustada hasta que se
ajuste nuevamente.
• El ajuste del termostato para Bake (horneado) también
afectará el horneado por convección, el rostizado por
convección, rostizar o convección tostar.
NOTA
NOTA

14 CARACTERÍSTICAS
LUZ DE ALARMA DE
PRECALENTAMIENTO
Cuando el horno alcanza su temperatura programada, la luz
de alarma de precalentamiento parpadeará hasta que se abra
la puerta del horno. Usted puede activar o desactivar la luz de
alarma de precalentamiento.
1. Colocar ambas perrillas de modo del horno en la posición
OFF.
2. Mantenga presionado por tres segundos START TIME.
Después presione START TIME varias veces hasta que PrE
aparezca en la pantalla.
3. Gire la perilla Time/Temp para activar o desactivar la
función.
4. Presione START (iniciar) para aceptar el cambio.
IDIOMA
El idioma predeterminado de la pantalla es el inglés. Puede
cambiarse a español o francés.
1. Colocar ambas perrillas de modo del horno en la posición
OFF.
2. Mantenga presionado por tres segundos START TIME.
Después presione START TIME varias veces hasta que Lng
aparezca en la pantalla.
3. Gire la perilla Time/Temp para ajustar el idioma deseado.
4. Presione START (iniciar) para aceptar el cambio.
VOLUMEN DE LA ALERTA SONORA
El volumen de la alarma se puede ajustar a tres posibles niveles
de volumen, Alto, Bajo y Apagado.
1. Colocar ambas perrillas de modo del horno en la posición
OFF.
2. Mantenga presionado el boton START TIME. Despues
presione START TIME varias veces hasta que BEEP
aparezca en la pantalla.
3. Gire la perilla Time/Temp para seleccionar el volumen
deseado.
4. Presione START (iniciar) para aceptar el cambio.
1. Colocar ambas perrillas de modo del horno en la posición
OFF.
2. Mantenga presionado START TIME por 3 segundos.
Después presione START TIME varias veces hasta que
Unit aparezca en la pantalla.
3. Gire la perilla Time/Temp para seleccionar °F(Fahrenheit)
o °C(Celsius).
4. Presione START (iniciar) para aceptar el cambio deseado.
FAHRENHEIT O CELSIUS
El control del horno se está congurado por defecto para
mostrar la escala de temperatura Fahrenheit. Para mostrar la
escala Celsius, siga estas instrucciones.
LUZ DEL HORNO
La luz interior del horno se enciende automáticamente
cuando se abre la puerta. Toque OVEN LIGHT para encender
manualmente la luz del horno. La lampara del horno se apagara
despues de 2minutos y 30 segundos para ahorrar energia.
No se puede encender la luz del horno si esta activada la
funcion Auto-limpieza.
NOTA
NOTA

15
CARACTERÍSTICAS
ESPAÑOL
BLOQUEO
La función de bloqueo bloquea el horno automáticamente y
evita que la mayoría de los controles del horno se activen. No
desactiva el reloj, el temporizador ni la luz interior del horno.
1. Colocar ambas perrillas de modo del horno en la posición
OFF.
2. Mantenga presionado PROBE por 3 segundos.
3. La melodía de bloqueo se escuchará, OVEN LOCKOUT
aparecerá en la pantalla y DOOR LOCKED parpadeará en la
pantalla.
4. Una vez que la puerta esté bloqueada, el indicador DOOR
LOCKED dejará de parpadear y permanecerá junto con el
ícono de bloqueo. .
5. Para desactivar la funció Horno, presione y mantenga
PROBE durante tres segundos. Sonará la melodía de
desbloqueo, y UNLOCKING aparecerá en la pantalla hasta
que se desbloqueen los controles.
Ajustando el horno a comienzo retrasado
El ejemplo siguiente es para hornear a 300 ° F y empezar a
hornear a las 4:30. Asegúrese de que el reloj está ajustado para
la hora correcta del día.
1. Gire la perilla de modo del horno superior o inferior
para seleccionar el modo BAKE. 350°F aparecerá en la
pantalla.
2. Gire la perilla Time/Temp para ajustar la temperatura
deseada.
Por ejemplo: Gire la perilla Time/Temp hacia la izquierda
hasta que 300 ° F aparezca en la pantalla.
3. Presione START TIME.
4. Fije el tiempo de inicio: Gire la perilla Time/Temp en
sentido derecho hasta que 4:30 aparezca en la pantalla.
5. Presione START. Se escuchará un tono corto y el horno
comenzará a hornear.
HORA DE INICIO (COCCIÓN
temporizada retardada)
El temporizador automático de la función COCCIÓN
TEMPORIZADA RETARDADA ENCENDERÁ y APAGARÁ el horno
en el horario que usted seleccione. Esta función puede utilizarse
únicamente con los: Modos HORNEAR, HORNEADO POR
CONVECCIÓN y ASADO POR CONVECCIÓN.
El horno continuará cocinando por la cantidad de tiempo
congurada y luego se apagará automáticamente. Cuando haya
transcurrido el tiempo de cocción:
yEND y la hora del día se mostrará en la pantalla.
yEl tono indicador de nalización de cocción sonará cada 60
segundos hasta que la perrilla del horno superior o inferior
se encuentre en la posición OFF.
• Para cancelar la función COCCIÓN TEMPORIZADA
RETARDADA, gire la perilla OVEN MODE hasta la posición
OFF.
• Para cambiar el horario de cocción, repita los pasos 3-4 y
presione START.
• Si el reloj de su horno está congurado en 12 horas,
usted podrá postergar el horario de cocción hasta
12 horas. Si el reloj de su horno está congurado en
24 horas, usted podrá postergar el horario de cocción
hasta 24 horas.
NOTA
NOTA
• Utilice el reloj temporizador automático al cocinar
carnes crudas o congeladas y la mayoría de las frutas y
vegetales. Los alimentos que pueden descomponerse
fácilmente como la leche, huevos, pescado, carne o aves
deben ser enfriados en el refrigerador. Incluso cuando
han sido enfriados, no deben permanecer en el horno
durante más de 1 hora antes de iniciar la cocción, y se los
debe retirar rápidamente luego de que la cocción haya
terminado.
• Ingerir alimentos en mal estado puede producir
intoxicaciones.
PRECAUCIÓN
PRECAUCIÓN

16 CARACTERÍSTICAS
TIEMPO DE COCCIÓN (COCCIÓN
TEMPORIZADA)
El horno se enciende inmediatamente y cocina los alimentos
durante un período de tiempo seleccionado. Al nalizar el
tiempo de cocción, el horno se apaga automáticamente.
Configuración de la función COCCIÓN
TEMPORIZADA
El ejemplo siguiente es para hornear a 300 ° F durante 30
minutos.
1. Ajuste el reloj en la hora correcta del día.
2. Gire la perilla de modo del horno para seleccionar BAKE,
aparecerá 350°F en la pantalla.
3. Fije al temperatura del horno.
Para este ejemplo, gire la perilla Time/Temp hacia la
izquierda para seleccionar 300 ° F.
4. Presione COOK TIME (tiempo de cocción). TIMED
(temporizado) destellará en la pantalla. BAKE (hornear),
0:00 y 300°F aparecerán en la pantalla.
5. Congure el tiempo de horneado deseado.
Para este ejemplo, gire la perilla Time/Temp hacia la
derecha hasta 30:00 aparece en la pantalla.
6. Presione START (iniciar). El horno se encenderá, y en la
pantalla podrá verse la cuenta regresiva de cocción. El
horno continuará cocinando por el tiempo programado,
luego se apagará de manera automática, a menos que se
congure la característica WARM (calentar). Consulte la
sección Cómo congurar la característica WARM (calentar)
en la página 23.
Cuando haya transcurrido el tiempo de cocción:
• END OF CYCLE (n de ciclo) y la hora actual aparecerán
en la pantalla. El horno se apagará automáticamente.
• El control seguirá haciendo sonar la melodía de n de
cocción una vez por minuto hasta que la perilla del
horno sea girada a cualquier posición.
Para cambiar el tiempo de cocción mientras el horno
está en funcionamiento
Este ejemplo es para cambiar el tiempo de cocción de
30 minutos a 1 hora y 30 minutos.
1. Presione COOK TIME (tiempo de cocción).
2. Establecer el nuevo tiempo de cocción.
Para este ejemplo, gire la perilla de TIME/TEMP en sentido
horario hasta la 01HR:30 aparezca en la pantalla.
3. Presione START para aceptar el cambio o espere
10 segundos sin presionar y la pantalla se reiniciará a su
tiempo original de cocción.
El tiempo de horneado puede programarse con cualquier
cantidad de tiempo entre 1 minuto hasta 11 horas y 59
minutos.
NOTA
NOTA
• Durante el modo de precalentamiento, el ventilador de
convección funciona constantemente para hacer circular
el aire caliente. El ventilador de convección se apaga
automáticamente después de alcanzar la temperatura
predeterminada.
• Después de nalizado cualquier ciclo de cocción, se
encenderán ventiladores de refrigeración para proteger
el panel de control. Esto es normal.
NOTA
NOTA

17
USO DEL HORNO
ESPAÑOL
Colocación del Estante y la Bandeja
Si usted cocina con dos estantes
Coloque los estantes estandar en las posiciones B y D.
Coloque los utensilios de cocina, como se muestra en la gura
abajo. Si está horneando con más de una bandeja, colóquelas
de forma tal que cada una tenga al menos entre 1” y 1 1/2” de
espacio de aire alrededor.
USO DEL HORNO
ANTES DE USAR DEL HORNO
SACAR Y VOLVER A COLOCAR LOS
ESTANTES DEL HORNO
• Volver a colocar los estantes del horno antes de encender
el horno para evitar quemaduras.
• NO cubra los estantes con papel de aluminio o cualquier
otro material, ni coloque nada sobre el fondo del horno.
Hacerlo podría causar un horneado deciente y podría
dañar la parte inferior del horno.
• Acomode los estantes del horno únicamente cuando el
horno este frío.
PRECAUCIÓN
PRECAUCIÓN
Retirar los estantes
1. Usando guantes de cocina, agarre el estante del horno.
2. Tire del estante hacia afuera en forma recta hasta que haga
tope.
3. Levante la parte delantera del estante.
4. Tire del estante hacia afuera.
Volver a colocar los estantes:
1. Usando guantes de cocina, coloque el extremo del estante
en el soporte.
2. Incline el extremo delantero del estante hacia arriba.
3. Empuje el estante hacia adentro.
4. Controle que el estante esté colocado correctamente.
Estante estandar
(Posicion B)
Estante estandar
(Posicion D)
Horneado con parrillas múltiples
• La temperatura registrada por un termómetro de horno
puede diferir del ajuste de la temperatura real del horno.
• Es normal que el ventilador de convección funcione
mientras se precalienta durante un ciclo de horneado
regular.
• El motor del ventilador de convección se puede ejecutar
periódicamente durante un ciclo de horneado regular.
NOTA
NOTA
A
B
C
D
E
Estante estandar
(Posicion C)
hornear solo rack
Venteo del horno
yLas zonas cercanas al venteo pueden calentarse durante el
funcionamiento y podría causar quemaduras.
yNo bloquee el oricio del venteo.
yEvite colocar plásticos cerca del venteo ya que el calor podría
deformar o derretir el plástico.
yEs normal que se observe vapor cuando se está cocinando
comidas muy húmedas.
Tipo de alimento Posicion de la
bandeja
Pastel “Angel food”, pasteles congelados A
Pasteles Bundt o de libra B
Bizcochos, muns, brownies, galletas,
magdalenas, pasteles de capas, pasteles C
Estofados C
Pavo, asado o jamon A
Pizza congelada C
Pollo rostizado B

18 USO DEL HORNO
BAKE (HORNEADO)
BAKE se usa para preparar alimentos tales como pastelería
panes, cazuelas. Puede programarse el horno para que hornee a
cualquier temperatura desde 170° F (80° C) hasta 550°F (285° C). La
temperatura predeterminada es de 350° F (175° C).
Configuración de la función BAKE
1. Gire la perrilla de modo del horno en la posición BAKE.
2. Fije la temperatura.
Por ejemplo, gire la perilla Time/Temp hacia la derecha hasta
que aparezca 375 ° F en la pantalla.
3. Presione START.
La palabra 'PREHEAT' y 100 ° F aparece en la pantalla. A medida que
el horno se precaliente, se muestra la temperatura que aumenta
de a 5-grados Una vez que el horno alcanza la temperatura
congurada, suena un tono y la luz del horno parpadea.
PRECALIENTA
Coloque los alimentos en el horno después del precalentamiento.
El precalentamiento es necesario para obtener mejores resultados
de cocción.
4. Cuando haya terminado, gire la perilla de modo del horno a la
posición OFF.
5. Quite los alimentos del horno.
CONVECTION BAKE
(HORNEADO POR CONVECCIÓN)
La parte inferior tiene un acabado de esmalte
porcelanizado. Para hacer la limpieza más fácil proteja
ésta parte de derramamientos mediante una charola
para el cocinado de galletas. Esto es particularmente
importante cuando se hornea una tarta de frutas u
otras comidas con alto grado de acidez. Los rellenos de
fruta u otras comidas con alto grado de acidez, pueden
llegar a causar pequeños agujeros y dañar la supercie
del esmalte porcelanizado y deben de ser limpiados
inmediatamente.
NOTA
NOTA
Cambiar la temperatura durante el Horneado
1. Gire la perilla Time/Temp a restablecer la temperatura del
horno. Por ejemplo, gire la perilla hacia la derecha para
restablecer la temperatura de 375 ° F a 425 ° F.
2. Presione START.
Es normal que el ventilador de convección se active
periódicamente durante un ciclo de horneado normal.
Esto es para asegurar resultados de horneado parejos.
NOTA
NOTA
Benecios del horneado por conveccion
Consejos para el Horneado por Convección
yLas reducciones de tiempo varían en base a la cantidad
y clase de alimentos que se cocinarán. Las galletas y
bizcochos deben hornearse en recipientes sin lados o con
lados muy bajos para permitir que el aire caliente circule
alrededor de los alimentos. Los alimentos horneados
en recipientes con un acabado oscuro se cocinan más
rápido.
yCuando utilice el horneado por convección con una sola
bandeja, coloque la bandeja del horno en la posición C.
Si cocina con bandejas múltiples, coloque las bandejas en
la posición B y D.
yLas galletas, muns, bizcochos y otros panes rápidos
dan muy buenos resultados cuando se utilizan bandejas
múltiples.
El horneado por convección utiliza un ventilador para hacer
circular el calor del horno en forma pareja y continua dentro
del horno. Esta distribución de calor mejorada permite
unacocción pareja y resultados excelentes utilizando
bandejas múltiples al mismo tiempo. Los alimentos cocidos
en una bandeja de horno única generalmente se cocinan
más rápido y en forma más pareja con el horneado por
convección. La cocción con bandejas múltiples puede
incrementar un poco los tiempos de cocción de algunos
alimentos, pero el resultado total es el ahorro de tiempo. Los
panes y los pastelitos se doran en forma más pareja.
yAlgunos alimentos se cocinan hasta un 25-30% más
rápido, lo que ahorra tiempo y energía.
yHorneado en bandejas múltiples.
yNo se necesitan recipientes de horneado especiales.
Consejos para el Horneado
Siga la receta o las instrucciones de cocción por convección para
temperatura de horneado, tiempo, y posición de la bandeja. El
tiempo y temperatura de horneado varían dependiendo de los
ingredientes, tamaño y forma de los recipientes de horneado.
yPara obtener los mejores resultados, hornee los alimentos.
Alimentos en una sola bandeja con un mínimo de 1 a 11/2” de
espacio entre los recipientes y las paredes del horno.
yVerique el grado de cocción cuando se haya cumplido el
tiempo mínimo.
yUtilice recipientes de cocción de metal (con o sin un acabado
antiadherente), vidrio-cerámica resistente al calor, cerámica u
otros recipientes de horneado recomendados para horno.
yLos recipientes de metal oscuro o los revestimientos
antiadherentes cocinan más rápido y doran mejor Los
recipientes con aislación prolongan ligeramente el tiempo de
cocción en la mayoría de los alimentos.

19
USO DEL HORNO
ESPAÑOL
Cambio de la temperatura duramne el Rostizado
Después de nalizado cualquier ciclo de cocción, se
encenderán ventiladores de refrigeración para proteger el
panel de control. Esto es normal.
NOTA
NOTA
• Los elementos calentadores se apagan inmediatamente
cuando se abre la puerta. Se volveran a encender
aproximadamente 1 segundos despues de que se cierre
la puerta.
• Cuando prepare carnes para rostizar, utilice la asadera y
la rejilla. La asadera retiene derrames de grasa y la rejilla
ayuda a evitar salpicaduras de grasa.
• Gire la perilla de modo del horno hasta la posicion OFF
para cancelar Roast (rostizar) en cualquier momento.
NOTA
NOTA
Los elementos calentadores y un ventilador se apagan
inmediatamente cuando se abre la puerta. Se volverán a
encender aproximadamente 1 segundos después de que
se cierre la puerta. Gire la perilla OVEN MODE del horno
hasta la posición OFF para cancelar Convection Bake
(horneado por convección) en cualquier momento.
NOTA
NOTA
Pantallas del modo de convección para hornear
1. Gire la perilla de Time/Temp (Tiempo / Temperatura) para
restablecer la temperatura del horno.
Por ejemplo, gire las manecillas hacia la derecha para
reiniciar la temperatura de 375 ° F a 425 ° F.
2. Presione START.
Configuración de la función CONVECTION BAKE
1. Gire la perilla de modo del horno para seleccionar la
función CONV. BAKE, 350°F aparecerá en la pantalla.
2. Fije la temperatura.
Por ejemplo, Gire la perilla Time/Temp en dirección de las
manecillas del reloj hasta 375°F.
3. Presione START (iniciar). En la pantalla podrá verse
CONV BAKE (Convección para hornear) y la temperatura
convertida comenzando a 100°F(35°C). A medida que se
precalienta el horno, la pantalla mostrará la temperatura
en aumentos de 5 grados. Una vez que el horno
alcance la temperatura deseada, sonará una alarma.
La pantalla mostrará la temperatura del horno auto
convertida(reducida por 25 ° F o 14 ° C).
4. Gire la perilla de modo a la posición OFF para cancelar el
horneado por convección en cualquier momento.
ROSTIZAR
El horno puede programarse para rostizar.
Para configurar la característica de rostizado
1. Gire la perilla de modo del horno para seleccionar la
función ROAST, 350°F aparecerá en la pantalla.
2. Ajuste la temperatura.
Por ejemplo, Gire la perilla Time/Temp en dirección de las
manecillas del reloj hasta 375°F.
3. Presione START.

20 USO DEL HORNO
Los elementos calentadores y un ventilador se apagan
inmediatamente cuando se abre la puerta. Se volverán a
encender aproximadamente 1 segundos después de que
se cierre la puerta.
Cuando prepare carnes para rostizar, utilice la asadera y
la rejilla. La asadera retiene derrames de grasa y la rejilla
ayuda a evitar salpicaduras de grasa. Gire la perilla OVEN
MODE del horno hasta la posición OFF para cancelar
Convection Roast (rostizado por convección) en cualquier
momento.
NOTA
NOTA
Es normal que los ventiladores de enfriamiento empiecen
a funcionar después del termino de un ciclo de cocción,
para proteger el panel de control.
NOTA
NOTA
Pantalla del modo ROSTIZADO por CONVECCIÓN
CONVECTION ROAST
(ASADO POR CONVECCIÓN)
Esta característica de rostizado por convección se encuentra
diseñada para brindar un desempeño de cocción óptimo
para rostizar carnes de res y de ave. No es necesario utilizar el
precalentamiento para carnes de res y de ave. El aire caliente
circula alrededor de los alimentos por todos los lados, sellando
los jugos y sabores. Las comidas quedan doradas y crujientes
por afuera y jugosas por dentro. El rostizado por convección es
especialmente bueno para cortes de carne grandes y tiernos.
Configuración de la función CONVECTION ROAST
1. Gire la perilla de modo del horno para seleccionar la
función CONV. ROAST, 350°F aparecerá en la pantalla.
2. Ajuste la temperatura.
Por ejemplo, Gire la perilla Time/Temp en dirección de las
manecillas del reloj hasta 375°F.
3. Presione START (iniciar). En la pantalla podrá verse CONV
ROAST (rostizado por convección) y la temperatura
convertida comenzando a 100°F(35°C). A medida que se
precalienta el horno, la pantalla mostrará la temperatura
en aumentos de 5 grados. Una vez que el horno alcance
la temperatura deseada, sonará una alarma. La pantalla
mostrará la temperatura del horno auto convertida
(reducida por 25 ° F o 14 ° C), CONV ROAST (Rostizado por
convección) el ícono del ventilador.
4. Gire la perilla de modo del horno a la posición OFF para
cancelar Convection Roast (Rostizado) en cualquier
momento.
CONVECCIÓN TOSTAR
Benecios de la convección tostar:
La característica de convección tostar es mejor para productos
horneados claros y delicados tales como pasteles, tarteletas,
galletas, hojaldres, scones, muns, bizcochos, panes sin
levadura, etc. El aire caliente que circula mediante un ventilador
distribuye el calor más uniformemente que el movimiento
natural del aire en un horno térmico estándar. Este movimiento
de aire caliente mantiene la cocción de los alimentos más
uniforme, sellando la humedad y generado panes con una
corteza más gruesa. El elemento de calentamiento por
convección tostar calienta más rápido, reduciendo el tiempo de
cocción hasta un 30 por ciento.
Consejos para una convección tostar
yLas reducciones de tiempo varían en base a la cantidad y clase
de alimentos que se cocinarán. Elija bandejas para galletas
sin lados y asaderas con lados muy bajos para permitir que el
aire caliente circule alrededor de los alimentos. Los alimentos
horneados en recipientes con un acabado oscuro se cocinan
más rápido.
yCuando utilice la convección tostar con una sola bandeja,
coloque la bandeja del horno en la posición C. Si cocina con
bandejas múltiples, coloque las bandejas del horno en la
posición B y D.
yEs importante destapar los alimentos para que las
supercies de los alimentos permanezcan expuestas
al aire que circula, por lo que los alimentos quedarán
dorados y crujientes.
yMantenga la pérdida de calor a un mínimo al abrir el horno
sólo cuando sea necesario.

21
USO DEL HORNO
ESPAÑOL
Los elementos calentadores y un ventilador se apagan
inmediatamente cuando se abre la puerta. Se volverán a
encender aproximadamente 1 segundos después de que
se cierre la puerta.
Gire la perilla de modo del horno a la posición OFF para
cancelar la función convección tostar en el momento que
desee.
NOTA
NOTA
Es normal que los ventildores de enfriamiento empiecen a
funcionar después del termino de un ciclo de cocción, para
proteger el panel de control.
NOTA
NOTA
Ajuste del modo de Convección tostar
1. Gire la perilla de modo del horno para selccionar la
función CRISP CONV. 350°F aparecerá en la pantalla.
2. Ajuste la temperatura.
Por ejemplo, Gire la perilla Time/Temp en dirección de las
manecillas del reloj hasta 375°F.
3. Presione START (iniciar). En la pantalla podrá verse
CONV. y la temperatura convertida comenzando a
100°F. A medida que se precalienta el horno, la pantalla
mostrará la temperatura en aumentos de 5 grados.
Una vez que el horno alcance la temperatura deseada,
sonará una alarma. La pantalla mostrará la temperatura
autoconvertida del horno (reducida en un 25 ° F o 14 ° C)
4. Gire la perilla de modo del horno a la posición OFF para
cancelar la función convección tostar.
Ajuste del modo ASADO A LA PARRILLA
1. Coloque los alimentos sobre la rejilla de la asadera.
2. Gire la perilla de modo del horno para seleccionar la
función BROIL, "ALTA -- PRESIONE -START- O INGRESE NIVEL
/ BAJA - ALTA" aparecerá en la pantalla.
3. Gire la perilla Time/Temp para seleccionar entre Full Broil
(Asado Completo) (High(Alto),Med(Medio),Low(Ba
jo)) y Center Broil (Asado Central) (High(Alto),Med(M
edio),Low(Bajo)) Full Broil (Asado Completo) Usa todos
los asadores y el Center Broil (Asado Central) Usa solo el
asador central.
4. Presione START.
5. Si se usa la función de Asado a la Parrilla, es mejor permitir
que el horno se precaliente durante cinco minutos antes
de cocinar los alimentos. Ase un lado del alimento hasta
que se dore, dé vuelta y cocine el otro lado del alimento.
6. Cuando el asado haya terminado, gire la perilla de modo
del horno hasta la posición OFF para cancelar esta función
en el momento que desee.
BROIL (ASADO A LA PARRILLA)
El asado utiliza un calor intenso y radiante para cocinar los
alimentos. Los elementos de asado tanto internos como externos
se calientan durante el asado completo. Sólo el elemento
de asado interno se calienta durante el asado de centro. Los
elementos se encienden y apagan a intervalos para mantener la
temperatura del horno. La sonda de carne no puede utilizarse en
este modo. Esta cocina ha sido diseñada para asar con la puerta
abierta. La puerta tiene una posición de tope para asar. Es mejor
permitir que el horno se precaliente durante cinco minutos antes
de cocinar los alimentos.
• NO utilice una asadera sin una rejilla. El aceite puede
provocar un incendio por grasa.
• NO cubra la rejilla y la asadera con papel de aluminio.
Hacerlo provocará un incendio.
• Utilice siempre una asadera y rejilla para el drenaje del
exceso de grasa. Esto ayudará a reducir las salpicaduras,
el humo, y las llamaradas.
PRECAUCIÓN
PRECAUCIÓN
• Si ocurre un incendio dentro del horno, deje cerrada la
puerta y apague el horno. Si el incendio continúa, arroje
bicarbonato de sodio o utilice un extintor de incendios.
• NO eche agua o harina sobre el incendio.
• La harina puede ser explosiva y el agua puede propagar
un incendio de grasa y provocar lesiones personales.
PRECAUCIÓN
PRECAUCIÓN
Su horno esta disenado para asado con PUERTA CERRADA.
NOTA
NOTA

22 USO DEL HORNO
Humo
Debido al calor intenso relacionado con el asado, es normal
notar humo durante el proceso de cocción. Este humo es un
resultado natural del sellado y no debería preocuparle. Si usted
nota una cantidad de humo que lo hace sentir incómodo, siga
los siguientes consejos para reducir la cantidad de humo en su
horno.
1. Utilice siempre una asadera. No utilice sartenes para saltear
o bandejas para horno convencionales por cuestiones de
seguridad.
2. NUNCA utilice una asadera que no esté completamente
limpia y a temperatura ambiente al iniciar la cocción.
3. SIEMPRE ponga en funcionamiento el sistema de
ventilación de su estufa o campana de ventilación, durante
el asado.
4. Mantenga el interior de su horno tan limpio como
sea posible. Los restos de comidas anteriores pueden
quemarse o prenderse fuego.
5. Evite las marinadas grasosas y los glaseados azucarados.
Ambos aumentarán la cantidad de humo que usted
percibirá. Si usted desea realizar un glaseado, aplíquelo al
nal de la cocción.
6. Si usted nota una cantidad importante de humo con
cualquier alimento, pruebe:
yBajar el asador a la conguración LO (baja).
yBajar la posición del estante para cocinar los alimentos
más lejos del asador.
yUse la conguración de asado HI (alta) para lograr el nivel
de sellado deseado y luego cambie a la conguración de
asado LO (baja), o cambie a la función BAKE (hornear).
7. Como regla general, los cortes más grasosos de carne y
pescado producirán más humo que los elementos más
magros.
8. Siga las conguraciones de asado a la parrilla
recomendadas y pautas de cocina en el cuadro de la
página siguiente siempre que sea posible.
GUÍA RECOMENDADA DE ASADO
A LA PARRILLA
El tamaño, peso, espesor, temperatura inicial y su preferencia en
relación al punto de cocción, afectarán los tiempos de asado. La
siguiente guía se basa en carnes a temperatura del refrigerador.
Utilice siempre una asadera y la rejilla al asar.
NOTA
NOTA
Los elementos calentadores se apagan inmediatamente
cuando se abre la puerta. Se volveran a encender
aproximadamente 1 segundos despues de que se cierre la
puerta.
Gire la perilla OVEN MODE del horno hasta la posicion OFF
para cancelar BROIL (ASADO A LA PARRILLA) en cualquier
momento.
NOTA
NOTA

23
USO DEL HORNO
ESPAÑOL
Cuadro de Asado a la Parrilla
Alimento Cantidad y/o
Grosor
Posición de
la bandeja
Primer lado
Tiempo (min.)
Segundo lado
Tiempo (min.) Comentarios
Carne picada
Bien cocida
1 lb. (4 hamburguesas)
Grosor de 1/2 a 3/4”
D o E 5–7 4–5 Espaciar uniformemente. Pueden asarse hasta 8
hamburguesas al mismo tiempo.
Filetes de
carne de res
Jugoso
Medio
Bien cocido
Jugoso
Medio
Bien cocido
Grosor de 1"
1 a 1-1/2 lbs.
Grosor de 1-1/2”
2 a 2-1/2 lbs.
D
D
D
D
D
D
6
7
8
10
12
14
2–3
2–3
3–4
4–6
6–8
8–10
Los letes de menos de 1” de grosor se cocinan
antes de dorarse. Se recomienda freír en sartén.
Retire la grasa.
Pollo 1 entero cortado
2 a 2-1/2 lbs.,
cortado a lo largo
2 pechugas
C
C
20
20
6–8
6–10
Asar sobre el lado de la piel primero.
Colas de
langosta
2–4
10 a 12 oz. cada una
C12–14 No las dé vuelta. Corte a través de la caparazón. Abra y extienda.
Pinte con mantequilla derretida antes de asar y
después de la mitad del tiempo de asado.
Filetes de
pescado
Grosor de 1/4 a 1/2” D o E 5–6 3–4 Manipule y gire con mucho cuidado. Pinte con
mantequilla y limón antes y durante la cocción si
así lo desea.
Rebanadas
de jamón
(precocido)
Grosor de 1/2” D 5 3–5 Aumente el tiempo de 5 a 10 minutos por lado
para un jamón curado en casa de 1-1/2” de
grosor.
Chuletas de
cerdo
Bien cocidas
2 (grosor de 1/2”)
2 (grosor de 1”)
alrededor de 2 lb.
D o E
D o E
7
9–10
6–8
7–9
Retire la grasa.
Chuletas
de cordero
Medio
Bien cocidas
Medio
Bien cocido
2 (grosor de 1”)
alrededor de 10 a 12
oz.
2 (grosor de 1- 1/2”)
alrededor de 1 lb.
D
D
D
D
6
8
11
13
4–6
7–9
9
9–11
Retire la grasa.
Filetes de
salmón
2 (grosor de 1”)
4 (grosor de 1”)
alrededor de 1 lb.
Do E
D o E
8
9
3–4
4–6
Aceite la sartén. Pinte los letes con mantequilla
derretida.
Consejos para el Asado a la Parrilla
Carne vacuna
ySiempre debe dejarse descansar el lomo y las costillas durante
cinco minutos antes de cortalo y comerlo. Esto permite que
el calor se distribuya en forma pareja en toda la comida y
brindando un resultado más tierno y jugoso.
yPiezas de carne que son más gruesas de dos pulgadas deben
ser retirados de la nevera 30 minutos antes de la cocción. Esto
ayudará a que se cocinen más rápidamente y en forma más
pareja y se producirá menos humo al asarlos. Los tiempos
de cocción serán probablemente más corto que los tiempos
indicados en la Tabla para asar.
yLos cortes de lomo con hueso y costillas con corte francés (en
el que se saca toda la carne de alrededor del hueso), envolver
las secciones expuestas del hueso con papel de aluminio para
reducir el quemado.
Frutos del Mar
yAl asar pescado con piel, siempre use la conguración de asado
a la parrilla Media y siempre ase el lado de la piel al nal.
yEs mejor consumir los frutos del mar inmediatamente después
de cocinarlos. Si se deja descansar los frutos del mar después de
cocinarlos la comida se secará.
yEs una buena idea frotar una delgada capa de aceite sobre la
supercie de la asadera antes de cocinar para evitar que se
peguen especialmente los pescados y mariscos. Puede utilizar
una delgada capa de rocío anti-adherente para frituras.
Vegetales
yMezcle sus vegetales levemente con aceite antes de cocinarlos
para lograr un mejor dorado.

24 USO DEL HORNO
CALENTAR
La función WARM mantendrá la temperatura del horno menor a
los 200°F (93°C). Utilice el modo de calentamiento para mantener
los alimentos cocinados a temperatura de servicio de hasta tres
horas después del nal del ciclo de cocción. No utilice el modo
de calentamiento para tratar de cocinar alimentos o calentar
alimentos fríos.
Configuración de la función CALENTAR
1. Gire la perilla de modo del horno para seleccionar la
función WARM.
2. Gire al perilla Time/Temp para seleccionar el nivel de
temperatura High (Alto), Medium (Medio) o Low (Bajo)
3. Presione START.
4. Gire la perilla a la función de calentar(WARM) de modo
horno a la posición OFF para cancelar la función calentar
en cualquier momento.
LEUDAR
La característica de leudado mantiene un medio tibio que
resulta útil para leudar productos con levadura antes de
hornear.
Configuración de la función LEUDAR
Gire la perilla OVEN MODE para seleccionar la función WARM/
PROOF (calentar/leudar).
1. Gire la perilla de modo del horno para seleccionar la
función PROOF (leudar).
2. Presione START (iniciar). La característica de leudado
brinda automáticamente la temperatura óptima para el
proceso de leudado, y por lo tanto no existe un ajuste de
temperatura.
3. Cuando haya nalizado la función de leudar (PROOF) gire la
perilla del horno a la posición OFF.
La caracteristica de calentar cuenta con tres niveles de
temperatura:
Alta=200°F, Med=170°F, Baja=140°F
(Alta=93.3°C, Med=76.7°C, Baja =60°C)
NOTA
NOTA
La función CALENTAR está pensada para mantener la
comida caliente. No la utilice para enfriar los alimentos
NOTA
NOTA
Para mejores resultados, cubra la masa con un paño o un
envoltorio plástico (el plástico puede colocarse debajo del
recipiente para que el ventilador del horno no lo desplace).
NOTA
NOTA
• Para evitar bajar la temperatura del horno y prolongar
el tiempo de leudado, no abra la puerta del horno
innecesariamente. Controle los panicados pronto para
evitar una fermentación excesiva.
• No utilice el modo de fermentación para calentar la
comida o mantener la comida caliente. La temperatura
de fermentación del horno no es lo sucientemente alta
como para mantener la comida a temperaturas seguras.
Utilice la función CALENTAR para mantener la comida
caliente. La fermentación no se realizará cuando el horno
esté por encima de los 125°F(52°C). "OVEN IS HOT" (El
horno está caliente) se mostrará en la pantalla.
NOTA
NOTA
Pantalla del modo LEUDAR

25
USO DEL HORNO
ESPAÑOL
SONDA PARA CARNE
La sonda para carne mide con precisión la temperatura
interna de la carne de res, de ave y de los estofados. No debe
utilizarse durante las características de asado, autolimpieza,
calentamiento, leudado o banco de recetas. Siempre desenchufe
y quite la sonda para carne del horno
cuando saque la comida. Antes de utilizarla, introduzca la sonda
en el centro de la parte más gruesa de la carne de res o dentro
del muslo o pechuga de la carne de ave, alejada de la grasa o
huesos. Coloque la comida en el horno y conecte la sonda para
carne en el enchufe. Mantenga la sonda lo más lejos posible de
una fuente de calor. Cierre la puerta del horno. El ícono de la
sonda para carne destellará y sonará un pitido de advertencia
hasta que se quite la sonda si el horno comienza a cocinar sin
congurar la temperatura de la sonda.
Usando la función de la sonda de carne
1. Gire la perilla de modo del horno para seleccionar la
función ROAST, 350°F (175°C) aparecerá en la pantalla.
2. Ajuste la temperatura.
Por ejemplo, Gire la perilla Time/Temp en dirección de las
manecillas del reloj hasta 375°F.
3. Presione START o PROBE. ‘PRESS START OR ENTER
PROBE TEMP / 80F – 210F’ aparecerá en la pantalla.
4. Ajuste la temperatura.
Por ejemplo, Gire la perilla Time/Temp en dirección de las
manecillas del reloj hasta 160°F.
5. Presione START.
La temperatura predeterminada de la sonda es de 150°F
(65°C), pero puede cambiarse a cualquier temperatura entre
80°F (27°C) y 210°F (100°C). La pantalla mostrará la nueva
temperatura de la sonda. Cuando se alcanza la temperatura
congurada de la sonda, el horno se apaga automáticamente y
Ciclo terminado aparecerá en la. pantalla.
Cambio de la sonda de temperatura durante la
cocción
1. Presione PROBE.
2. Ajuste la temperatura de la sonda girando el mando
Time/Temp.
3. Presione START.
Al utilizar esta característica ya no hace falta calcular
el tiempo de cocción total por peso. Se recomienda la
siguiente tabla para congurar la temperatura de la sonda
NOTA
NOTA
Gire la perilla de modo del horno para cancelar la función
de sonda para carne cuando usted lo desee.
NOTA
NOTA
- La sonda de la carne no se puede utilizar con el
Broil(asado), Self Clean(auto limpieza), SpeedClean™,
Warm(Cálido) o Proof(Leudar) modos.
- Mientras la función sonda para de carne se está
ejecutando, COOK TIME no puede ser activada.
NOTA
NOTA
Siempre use una agarradera para quitar la sonda de
temperatura. NO toque el elemento asador.
- El incumplimiento de esta advertencia puede
resultar en lesiones personales graves.
CAUTION
CAUTION
Tabla de recomendacion para la temeratura de
la sonda
Nivel de cocción Temp. de la sonda
Carne de res, cordero y ternera
Jugosa
Poco cocida
Media
Bien cocida
130°F (54°C)
140°F (60°C)
150°F (66°C)
160°F (71°C)
Cerdo
Bien cocida 170°F (77°C)
Carne de ave
Pechuga, bien cocida
Muslo, bien cocido
Relleno, bien cocido
170°F (77°C)
180°F (82°C)
165°F (74°C)

26 USO DEL HORNO
REMOTE START(INICIO REMOTO)
Si el artefacto está registrado en una red de Wi-Fi doméstica, La
función de precalentado del horno puede iniciarse o detenerse
al usar la aplicación de LG ThinQ en su teléfono inteligente.
Con gure perilla de modo del horno en la posición Remote
Inicio remoto para utilizar la función.
Preparación del horno para Remote Start.
(Inicio remoto)
1. Abra la puerta del horno para asegurarse de que esté vacío
y listo para el precalentamiento. No coloque alimentos en
el horno. Cierre la puerta del horno.
2. Dentro de los 30 segundos de haber cerrado la puerta,
gire la perilla de modo del horno para seleccionar Inicio
remoto.
3. Siga las instrucciones en la aplicación de LG ThinQ en su
teléfono inteligente para usar la función de Remote Start.
• La función de Inicio remoto se encuentra desconectada
en las siguientes situaciones:
- Inicio remoto no está nunca conectado en la
aplicación del teléfono inteligente.
- El estado de Inicio remoto es “listo”.
- Inicio remoto experimenta un problema durante el
funcionamiento.
• El icono de Wi-Fi que aparece en pantalla muestra el
estatus de la conexión a internet del electrodoméstico.
Si el icono de Wi-Fi no está encendido, use su teléfono
inteligente para seleccionar la red de conexión Wi-Fi o
registre su producto nuevamente.
• Una mala conexión de Wi-Fi puede retrasar la función de
Remote Start.
NOTA

27
FUNCIONES INTELIGENTES
ESPAÑOL
FUNCIONES
INTELIGENTES
APLICACIÓN LG ThinQ
Esta característica solo está disponible en modelos con Wi-Fi.
La aplicación LG ThinQ le permite comunicarse con el
electrodoméstico usando un teléfono inteligente.
FUNCIONES DE LA APLICACIÓN
LG ThinQ
ySpeedClean™
-Le permite establecer alertas de SpeedClean™, leer la guía
de instrucciones, y simular y comparar el consumo de
energía cuando se usan SpeedClean™ frente a ciclos de
autolimpieza.
ySmart Diagnosis™
-Esta función brinda información útil para diagnosticar y
resolver problemas con el producto conforme a su patrón
de uso.
yConguración
-Permite al usuario cambiar la conguración del horno,
incluidos el modo de la hora, la luz de la alarma de
precalentamiento, el volumen del indicador sonoro, las
unidades de la temperatura, la conversión automática a
convección, el ajuste del termostato y el idioma.
yRemote Start (Inicio remoto)
-Apague el horno o inicie el precalentamiento del horno
de forma remota. Luego de abrir y cerrar la puerta,
coloque el selector de modo nuevamente en Remote
Start (Inicio remoto) dentro de los 30 segundos.
yMonitoreo
-Esta función le ayuda a comprobar el estado actual, el
tiempo restante, la conguración de cocción y la hora de
nalización en un lugar.
yNoticaciones de productos
-Active las Alertas Push para recibir noticaciones del
estado del electrodoméstico. Las noticaciones se emiten
incluso si la aplicación LG ThinQ no está abierta.
yTemporizador
-Se puede congurar el temporizador desde la aplicación.
• Si cambia de enrutador inalámbrico, proveedor de
Internet o contraseña, borre el electrodoméstico
conectado desde la aplicación LG ThinQ y conéctelo de
nuevo.
• Esta información está actualizada en el momento de
su publicación. La aplicación está sujeta a cambios,
con nes de mejorar el producto, sin previo aviso a los
usuarios.
NOTA
INSTALACIÓN DE LA APLICACIÓN
LG ThinQ Y CONEXIÓN DE UN
ELECTRODOMÉSTICO LG
Modelos con código QR
Escanee el código QR que trae el producto con la cámara o una
aplicación lectora de códigos QR en su teléfono inteligente.
Modelos sin código QR
1. Busque la aplicación LG ThinQ en la tienda Google Play o
Apple App Store e instálela en su teléfono inteligente.
2. Ejecute la aplicación LG ThinQ e inicie sesión con su cuenta
actual, o cree una cuenta LG para iniciar sesión.
3. Pulse el botón Agregar (+) en la aplicación LG ThinQ para
conectar su electrodoméstico LG. Siga las instrucciones en
la aplicación y complete el proceso.
• Para vericar la conexión Wi-Fi, revise que el indicador
de Wi-Fi en el panel de control esté encendido.
• El electrodoméstico funciona únicamente con redes Wi-
Fi de 2.4 GHz. Contacte a su proveedor de servicios de
internet o verique el manual del enrutador inalámbrico
para revisar la frecuencia de su red.
• LG ThinQ no es responsable por ningún problema
de conexión en red, falla, mal funcionamiento o error
causado por la conexión de red.
• El entorno inalámbrico circundante puede hacer que el
servicio de red inalámbrica funcione lentamente.
• Si la distancia entre el electrodoméstico y el enrutador
inalámbrico es muy grande, la señal será débil.
Probablemente le tome más tiempo conectarse o no
pueda instalar la aplicación.
• Si el aparato tiene problemas para conectarse a la red
Wi-Fi, es posible que se encuentre demasiado lejos del
router. Adquiera un repetidor Wi-Fi (extensor de alcance)
para mejorar la intensidad de la señal Wi-Fi.
• Es posible que la conexión de red no funcione bien por
cuestiones relacionadas con su proveedor de servicios
de Internet.
• Es posible que el equipo no se conecte a la red Wi-Fi o
que se interrumpa la conexión debido alentorno de la
red doméstica.
NOTA

28 FUNCIONES INTELIGENTES
• Si el electrodoméstico no puede conectarse debido a
problemas con la transmisión de la señal inalámbrica,
desenchufe el artefacto y espere alrededor de un minuto
antes de intentarlo de nuevo.
• Si el cortafuegos de su enrutador inalámbrico está
activado, desactivelo o añada una excepción a éste.
• El nombre de la red inalámbrica (SSID) debe ser una
combinación de letras y números. (No utilice símbolos
especiales)
• La interfaz de usuario (IU) del teléfono inteligente puede
variar dependiendo del sistema operativo (OS) del móvil
y del fabricante.
• Puede que la conguración de red falle si el protocolo
de seguridad del enrutador está en WEP. Cambie el
protocolo de seguridad por otro (se recomienda el
WPA2) y conecte el producto de nuevo.
NOTA
FUNCIÓN SMART DIAGNOSIS™
Utilice esta función como ayuda para diagnosticar y resolver
problemas con su electrodoméstico. Los modelos equipados
con NFC o Wi-Fi pueden también transmitir datos a un teléfono
inteligente usando la aplicación LG ThinQ.
• Por motivos no atribuibles a la negligencia de LGE, es
posible que el servicio no pueda funcionar debido a
factores externos como por ejemplo, la indisponibilidad
de Wi-Fi, desconexión de Wi-Fi, política de la tienda de
aplicaciones local o indisponibilidad de aplicaciones,
entre otros.
• Esta función puede estar sujeta a cambios sin previo
aviso y puede tener una forma diferente según dónde se
encuentre ubicado.
NOTA
USO DE LG ThinQ PARA
DIAGNOSTICAR PROBLEMAS
Si experimenta un problema con su electrodoméstico equipado
con Wi-Fi, este puede transmitir datos sobre la resolución de
problemas a un teléfono inteligente con la aplicación LG ThinQ.
yInicie la aplicación LG ThinQ y seleccione la función Smart
Diagnosis en el menú. Siga las instrucciones provistas en la
aplicación LG ThinQ.
USO DEL DIAGNÓSTICO AUDIBLE
PARA DIAGNOSTICAR PROBLEMAS
Siga las instrucciones a continuación para utilizar el método de
diagnóstico audible.
yInicie la aplicación LG ThinQ y seleccione la función Smart
Diagnosis en el menú. Siga las instrucciones para el
diagnóstico audible provistas en la aplicación LG ThinQ.
1. Abra la aplicacion de LG ThinQ en el smartphone.
2. Seleccione el artefacto y luego el menu en la parte superior del
lado derecho.
3. Seleccione Smart Diagnosis y, a continuacion, presione el
boton Inicie Smart Diagnosis.
Si el diagnostico falla en reiteradas oportunidades, siga las
instrucciones a continuacion.
NOTA
4. Seleccione Diagnostico en audio.
5. Siga las instrucciones en el telefono inteligente.
6. Mantenga el telefono alli hasta que la transmision de tonos
haya terminado. Vea el diagnostico en el telefono.
La calidad de la funcion Smart Diagnosis™ depende de la
calidad de la llamada local.
El resultado de la comunicacion sera mejor y usted podra
recibir un mejor servicio si usa el telefono jo de su casa.
En caso de que la transferencia de datos de Smart
Diagnosis™ sea deciente debido a la mala calidad de la
llamada, es posible que usted no reciba el mejor servicio
de Smart Diagnosis™.
NOTA

29
FUNCIONES INTELIGENTES
ESPAÑOL
DIAGNÓSTICO INTELIGENTE
MEDIANTE EL CENTRO DE
SERVICIO TELÉFONICO
1. Llame al centro de servicio telefonico SIGNATURE
KITCHEN SUITE : 1-855-790-6655.
2. Cuando el agente de servicio se lo indique, sujete el
telefono frente el logotipo de diagnostico inteligente
SIGNATURE KITCHEN SUITE. Mantenga sujeto el telefono
no mas de una pulgada lejos de la maquina (sin tocarla).
No presione ningun otro boton o icono en la pantalla.
NOTA
3. Presione y mantenga presionado el boton START durante 3
segundos.
4. Mantenga el telefono en la posicion indicada hasta
que el tono de transmision haya terminado. Esto toma
aproximadamente 6 segundos y despues una cuenta
regresiva aparecera en la pantalla.
5. Una vez que la cuenta regresiva haya terminado y los tonos
hayan nalizado, reanude la conversacion con el agente de
servicio, quien estara habilitado para asistirle mediante el
analisis de la informacion transmitida.
Para mejores resultados, no retire el telefono mientras los
tonos se estan transmitiendo.
Si el agente de servicio no puede obtener los datos de
forma exacta mediante la transmision, le pedira que
intente otra vez.
NOTA
SOFTWARE DE CÓDIGO ABIERTO
Para obtener el código fuente bajo GPL, LGPL, MPL y otras
licencias de código abierto con las obligaciones para divulgar
el código abierto, que contiene este producto, y para acceder a
todos los términos de la licencia, avisos de derechos de autor y
otros documentos relevantes, visite https://opensource.lge.com.
SIGNATURE KITCHEN SUITE también le proporcionará el
código abierto en un CD-ROM por un costo que cubra los
gastos de dicha distribución (como el costo del medio, del
envío y de la manipulación) una vez realizado el pedido por
correo electrónico a la dirección opensource@lge.com. Esta
oferta es válida para todo aquel que reciba esta información
durante un período de tres años después de que se envíe el
último cargamento de este producto.
Especificaciones módulo LAN inalámbrico
Rango de frecuencia 2412 MHz – 2462 MHz
Rango de frecuencia (max.) < 30 dBm
AVISO DE LA FCC
El siguiente aviso cubre el módulo transmisor contenido en este
producto.
Este equipo fue probado y se determinó que cumple con
los límites para los dispositivos digitales de Clase B, en
conformidad con la parte 15 de las normas de la FCC.
Estos límites están diseñados para ofrecer una protección
razonable contra interferencias dañinas en una instalación
residencial. Este equipo genera, usa y puede emitir energía
de radiofrecuencia y, si no se instala y utiliza de acuerdo con
las instrucciones, podría causar interferencias dañinas a las
comunicaciones por radio. Sin embargo, no se garantiza
que dicha interferencia no pueda ocurrir en instalaciones
particulares. Si este equipo causa interferencia dañina a la
recepción de radio o televisión, que se puede determinar
encendiendo y apagando el equipo, se aconseja al usuario
intentar corregir la interferencia realizando alguna de las
siguientes acciones:
yReoriente o reubique la antena receptora.
yAumente la separación entre el equipo y el receptor.
yConecte el equipo a una toma de corriente en un circuito
diferente del utilizado por el receptor.
ySolicite ayuda a su vendedor o a un técnico especialista en
radio o TV.
Este dispositivo cumple con la parte 15 de las normas de la FCC.
La operación está sujeta a las dos siguientes condiciones:
(1) Este dispositivo no debe causar interferencia dañina, y
(2) Este dispositivo debe aceptar cualquier interferencia
recibida, incluso aquellas que pudieran causar un
funcionamiento no deseado.
Cualquier cambio o modicación en la construcción de este
dispositivo que no cuente con la aprobación expresa de la parte
responsable del cumplimiento puede anular la autorización del
usuario para operar este equipo.
DECLARACIÓN SOBRE
EXPOSICIÓN A LA RADIACIÓN
DE RF DE LA FCC
Este equipo cumple con los límites de exposición a la radiación
de la FCC establecidos para entornos no controlados. Este
transmisor no se debe ubicar ni operar junto con ninguna otra
antena ni transmisor.
El equipo se debe instalar y operar con una distancia mínima de
20 cm (7.8 pulg.) entre la antena y su cuerpo. Los usuarios deben
seguir las instrucciones de operación especícas de manera tal
de cumplir con las normas de exposición a la RF.

30 MANTENIMIENTO
MANTENIMIENTO
AUTO-LIMPIEZA
El ciclo de auto-limpieza utiliza temperaturas extremadamente
elevadas para limpiar la cavidad del horno. Al ejecutar el ciclo de
Auto-Limpieza, puede percibir humo u olores. Esto es normal;
especialmente si el horno está muy sucio.
Durante la Auto-Limpieza, la cocina debe estar bien ventilada
para minimizar los olores de la limpieza.
• NO deje a niños pequeños sin supervisión cerca del
electrodoméstico. Durante el ciclo de auto-limpieza, la
parte externa de la estufa puede estar muy caliente al
tacto.
• Si usted tiene aves domésticas, trasládelas a otro
ambiente bien ventilado. La salud de algunas aves es
extremadamente sensible a los gases liberados durante
un ciclo de auto-limpieza de cualquier estufa.
• NO cubra las paredes del horno, estantes, parte inferior o
cualquier otra parte de la estufa con papel de aluminio o
cualquier otro material. Hacerlo arruinará la distribución
del calor, producirá malos resultados en la cocción y
provocará un daño permanente en el interior del horno (el
papel de aluminio se derretirá en la supercie interior del
horno).
• NO fuerce la puerta del horno para abrirla. Esto podría
dañar el sistema de bloqueo automático de la puerta.
Abra la puerta del horno con cuidado luego del ciclo de
Auto-Limpieza. Manténgase a un costado del horno al
abrir la puerta para permitir que escape el aire caliente o
el vapor. El horno podría estar aún MUY CALIENTE.
PRECAUCIÓN
PRECAUCIÓN
Antes de iniciar la Auto-Limpieza:
• Quite los estantes del horno, la asadera, la rejilla para
asado a la parrilla, todos los recipientes de cocción, el
papel de aluminio y cualquier otro material del horno.
• La cocina debe estar bien ventilada para minimizar los
olores de la limpieza.
• Limpie los derrames grandes de la parte inferior del
horno.
• Asegúrese de que la cubierta de la bombilla del horno
esté colocada y que la luz del horno esté apagada.
• No se puede encender la luz del horno durante un ciclo
de auto-limpieza. No se puede encender la luz del horno
hasta que la temperatura del horno haya descendido por
debajo de los 500˚F (260˚C) luego de que haya nalizado
un ciclo de auto-limpieza.
• Retire los estantes del horno y los accesorios antes de
iniciar un ciclo de auto-limpieza.
• Si se dejan los estantes del horno en la cavidad del horno
durante un ciclo de auto-limpieza, se decolorarán y será
difícil deslizarlos hacia adentro y hacia afuera.
• Limpie el marco de la cocina y la puerta con agua
jabonosa caliente. Enjuague bien.
• No limpie la junta. El material de bra de vidrio de la
junta de la puerta del horno no soporta una limpieza
abrasiva.
• Es esencial que la junta permanezca intacta. Si usted
nota que se está desgastando o deshilachando,
reemplácela.
• Limpie los derrames grandes de la parte inferior del
horno.
• Asegúrese de que la cubierta de la bombilla del horno
esté colocada y que la luz del horno esté apagada.
NOTA
NOTA
Configuración de la Auto-limpieza
La función de Auto-Limpieza tiene ciclos que pueden durar 3, 4,
o 5 horas.
Guía de Suciedad para la Auto-limpieza
Nivel de Suciedad Conguración del Ciclo
Cavidad del horno levemente sucia Auto-limpieza de 3 Horas
Cavidad del horno
moderadamente sucia
Auto-limpieza de 4 Horas
Cavidad del horno muy sucia Auto-limpieza de 5 Horas
1. Extraiga todos los estantes y accesorios del horno.
2. Gire la perilla de modo del horno para seleccionar la
función SELF CLEAN. En forma predeterminada, el horno
realiza la auto-limpieza recomendada de cuatro horas
para un horno moderadamente sucio. Gire la perilla Time/
Temp para seleccionar el tiempo de autolimpieza, de 3 a
5 horas.
3. Presione START.
4. Una vez que esté congurada la auto-limpieza, la puerta
del horno se bloqueará automáticamente y aparecerá
en la pantalla el ícono de bloqueo. No podrá abrir la
puerta del horno hasta que el horno este frío. El bloqueo
se liberará automáticamente cuando el horno se haya
enfriado.

31
MANTENIMIENTO
ESPAÑOL
Configuración de la Auto-limpieza
con un Inicio Retardado
1. Extraiga todos los estantes y accesorios del horno.
2. Gire la perilla de modo del horno para seleccionar la función
SELF CLEAN. El horno mostrará el tiempo predeterminado
para la limpieza de un horno moderadamente sucio,
4 horas. Gire la perilla Time/Temp para seleccionar el
tiempo de autolimpieza, de 3 a 5 horas.
3. Presione START TIME.
4. Gire la perilla Time/Temp para seleccionar la hora del día a
la cual desee la función de auto limpieza inicie.
5. Presione START.
Durante La Auto-Limpieza
yEl ciclo de auto-limpieza utiliza temperaturas
extremadamente elevadas para limpiar la cavidad del horno.
Al ejecutar el ciclo de Auto-Limpieza, puede percibir humo
u olores. Esto es normal; especialmente si el horno está muy
sucio.
yA medida que el horno se caliente, podría oír sonidos de
partes metálicas que se expanden y contraen. Esto es normal
y no dañará el horno.
yNO fuerce la puerta del horno para abrirla cuando aparezca
en la pantalla LOCKED (BLOQUEADO). La puerta del horno
continuará bloqueada hasta que haya descendido la
temperatura del horno. Si fuerza la puerta para abrirla, se
dañará la puerta.
Luego del Ciclo de Auto-Limpieza
yLa puerta del horno continuará bloqueada hasta que haya
descendido la temperatura del horno.
yEs posible que note algo de ceniza blanca en el horno.
Límpiela con un paño húmedo o una esponja de lana de
acero enjabonada luego de que el horno se enfríe. Si el
horno no queda limpio después de un ciclo de limpieza,
repita el ciclo,
ySi se hubieran dejado estantes del horno dentro del horno
y no se deslizan suavemente luego de un ciclo de auto-
limpieza, limpie los estantes y los soportes de los estantes
con una pequeña cantidad de aceite vegetal para que se
deslicen más fácilmente.
yEs posible que aparezcan delgadas líneas en la porcelana
porque pasó del calor al frío. Esto es normal y no afectará el
funcionamiento. Cuidado y limpieza
NO fuerce la puerta del horno para abrirla cuando aparezca
en la pantalla el ícono de bloqueo. La puerta del horno
continuará bloqueada hasta que haya descendido la
temperatura del horno. Si fuerza la puerta para abrirla, se
dañará la puerta.
PRECAUCIÓN
PRECAUCIÓN
Podría ser necesario cancelar o interrumpir un ciclo de
auto-limpieza debido a la presencia de humo excesivo
o fuego en el horno. Para cancelear la función de auto
limpieza, gire la perilla de modo del horno hasta la posición
OFF.
NOTA
NOTA
• No se puede activar el ciclo de Auto-Limpieza si la
Función Bloqueo está activa.
• Una vez que esté congurada la auto-limpieza, la puerta
del horno se bloqueará automáticamente. No podrá
abrir la puerta del horno hasta que el horno esté frío. El
bloqueo se liberará automáticamente cuando el horno se
haya enfriado.
• Una vez que la puerta se ha bloqueado, La luz
indicadora de BLOQUEO (LOCKED) dejará de parpadear
y permanecerá encendida. Espere aproximadamente 15
segundos para que el bloqueo de la puerta del horno se
active.
• Si el reloj está congurado en la pantalla de 12 horas
(predeterminado) no se puede congurar la Auto-
Limpieza Retardada para que empiece más de 12 horas
adelante.
NOTA
Pantalla del modo de AUTO-LIMPIEZA

32 MANTENIMIENTO
SpeedClean™
El nuevo horno de SIGNATURE KITCHEN SUITE con tecnología
SpeedClean™ le otorga dos opciones de limpieza para el interior
de su estufa. La función SpeedClean™ toma ventaja de la nueva
tecnología de esmalte de SIGNATURE KITCHEN SUITE para ayudar
a remover suciedades sin químicos severos, y funciona tan solo
usando AGUA por tan solo 10 minutos a bajas temperaturas
para ayudar a soltar suciedades LIJERAS antes de ser limpiadas
manualmente.
Mientras que SpeedClean™ es rápido y efectivo para pequeñas
y LIJERAS suciedades, la función de auto-limpieza (Self Clean)
puede ser usada para remover suciedades PESADAS acumuladas.
La intensidad y alto calor del ciclo de auto-limpieza (Self Clean)
puede tener como resultado humo que hará que se requiera abrir
ventanas para proveer ventilación.
En comparación con el proceso
de auto-limpieza más intensa (Self Clean), su horno SIGNATURE
KITCHEN SUITE le ayudará a limpiar con un MENOR CALOR, MENOR
TIEMPO, y prácticamente SIN HUMO O GASES.
CONSEJOS DE LIMPIEZA
• Permita que el horno se enfríe a temperatura ambiente antes
de usar el ciclo SpeedClean™. Si la cavidad de su horno esta
por arriba de los 150°F (65°C). "OVEN IS HOT- - PLEASE WAIT”
aparecerá en la pantalla y el ciclo SpeedClean™ no se activará
hasta que la cavidad se enfríe totalmente.
• Una espátula de plástico se puede utilizar para desprender
trozos o desechos antes y durante la limpieza del horno.
• Usando el lado áspero de una esponja abrasiva puede ayudar a
quitar las manchas de quemado mejor que una esponja suave o
una toalla.
• Algunas esponjas, como las de espuma de melamina,
disponibles en su tienda local también puede ayudar a mejorar
la limpieza.
• La estufa debe estar nivelada para asegurar que toda la
superficie de la parte inferior del horno sea cubierta por agua al
principio del ciclo SpeedClean™.
• Para mejores resultados use agua purificada o agua filtrada. El
agua de la llave puede dejar depósitos minerales en la parte
inferior.
• La suciedad horneada durante muchos ciclos de cocinado será
más difícil de remover mediante el ciclo SpeedClean™.
• No abra la puerta del horno durante el ciclo SpeedClean™. El
agua en el horno no se calentará totalmente al abrirse la puerta.
• Es mejor usar la función SelfClean para áreas difíciles de alcanzar
como el fondo de la cavidad.
* El ciclo de auto-limpieza (Self Clean) se puede utilizar para suciedad que se ha construido con el tiempo.
Cuando sea necesario, su estufa sigue ofreciendo la opción de
auto-limpieza (Self Clean) durante más tiempo, recomendada
para la limpieza completa del horno, suciedad acumulada y
difícil de remover.
BENEFICIOS DE SpeedClean™
• Ayuda a aflojar suciedad ligera antes de su limpieza manual.
• SpeedClean™ solo necesita agua sin productos químicos de
limpieza.
• Mejora su experiencia de auto-limpieza (Self Clean)
- Minimiza la necesidad de auto-limpieza (Self Clean)
- Reduce la cantidad de humos y olores
- Se puede utilizar un tiempo más corto de auto-limpieza
(Self Clean)
Métodos de Limpieza
Sugeridos
Ejemplos de Suciedad
del Horno
Patrones de
Suciedad Tipo de Suciedad
Alimentos comunes que
pueden ensuciar su
Horno
SpeedClean™
Pequeñas Gotas
o Manchas
Queso u otros
ingredientes Pizza
Salpicadura Ligera Manteca / Grasas
Steak a la Parrilla
Pescado Asado
Asados de Carne Baja
Temperatura
Self Clean*
Salpicadura
Moderada o Excesiva Manteca / Grasas Asados de Carne Alta
Temperatura
Gotas o Manchas
Relleno o Suciedad
a base de azúcar Pasteles o Tartas
Crema o Salsa de
Tomate Cacerolas
CUANDO USAR SpeedClean™

33
MANTENIMIENTO
ESPAÑOL
GUÍA DE INSTRUCCIÓN SpeedClean™
1. Retire bandejas y accesorios del horno.
2. Talle y remueva cualquier resto quemado con la espátula de
plástico.
3. Llene el bote (10 oz o 300 ml) con agua y use el atomizador las
superficies laterales dentro de la cavidad del horno.
4. Use al menos 1/5
(2 oz o 60 ml) de agua del bote para mojar
las parte sucias de las superficies laterales y en las esquinas de
la estufa.
5. Atomice o eche 4/5 (8 oz o 240 ml) de agua abajo, en el
centro de la cavidad. La superficie abajo de la estufa debe
estar completamente cubierta para mojar todos los residuos.
Añade agua si es necesario.
NOTA
Si limpia varias estufas, use del bote entero lleno de agua
para limpiar cada estufa. No rocíe agua directamente en la
puerta. Si lo hace, el agua chorreará al piso.
6. Cierre la puerta del horno.
Gire la perilla de modo del horno para seleccionar la función
SpeedClean™.
Presione START.
7. Un tono sonará al final del ciclo de 10 minutos. Ajustar la
perilla de modo del horno en OFF posición para borrar la
pantalla y termina el tono
8. Después del ciclo de limpieza y durante la limpieza a mano,
suficiente agua debe de permanecer en la base del horno
de tal maneta que todas la suciedades queden sumergidas
completamente. Añada agua si es necesario. Ponga una toalla
en el suelo enfrente del horno para capturar cualquier liquido
que se derrame durante la limpieza a mano de su horno.
9. Limpie la cavidad del horno inmediatamente después del
ciclo SpeedClean™ frotando con una esponja mojada contra
ralladuras o una fibra. (El lado fibroso no dañará el acabado
superficial), algo de agua podría derramarse dentro de
las ventanas del la base durante la
limpieza, sin embargo el agua será
atrapada por una cacerola debajo de la
cavidad y no dañará los quemadores.
10. Una vez que la cavidad del horno se encuentre limpia,
remueva el exceso de agua con una toalla limpia y seca.
Vuelva a colocar las bandejas y accesorios del horno.
11. Si algunas manchas ligeras permanecen, repita los pasos
anteriores, asegurándose de empapar a fondo las áreas
sucias. Si quedan manchas rebeldes después de múltiples
ciclos SpeedClean™, ejecute el ciclo de auto-limpieza (Self
Clean). Asegúrese de que la cavidad del horno está vacío
de bandejas y accesorios del horno, y que la superficie de la
cavidad del horno está seca antes del ciclo de auto-limpieza
(Self Clean). Consulte la sección Self Clean del manual de
usuario para obtener más detalles.
yEs mejor usar guantes de goma durante la limpieza
del horno para prevenir accidentes inesperados como
quemaduras y lastimaduras.
yDurante el ciclo de SpeedClean™, la parte inferior del horno
se caliente lo suficiente como para causar quemaduras.
Espere hasta que el ciclo termine (20 minutos) antes de
limpiar el interior de la superficie del horno. El no seguir
ésta indicación puede llegar a causar quemaduras.
yNo empuje hacia abajo la puerta de vidrio directamente
cuando limpie el horno. El vidrio de la puerta puede
debilitarse y romperse con facilidad bajo cualquier mínimo
impacto.
PRECAUCIÓN
yNo utilice limpiadores para hornos, limpiadores químicos
abrasivos, lejía, vinagre, esponjas de acero ni paños o
limpiadores abrasivos para limpiar el horno, ya que pueden
dañar permanentemente la superficie del horno.
yNo limpie las juntas.
PRECAUCIÓN
NOTA
ySi la función SpeedClean™ comienza sin agua, Gire la
perilla de modo del horno a la posición OFF. Espere a que
al estufa se enfríe a temperatura ambiente antes de rociar
o poner agua dentro de la cavidad y comenzar otro ciclo.
yCuando termine el ciclo de SpeedClean™, el empaque de
la cavidad puede estar mojado. Esto es normal. No limpie
el empaque.
ySi depósitos minerales se quedan en la parte de abajo
del horno después de la limpieza, use un trapo o esponja
sumergida previamente en vinagre para removerles.
yNo es recomendable el uso de limpiadores comerciales o
cloro para la limpieza en el horno.
En su lugar, utilice un limpiador líquido suave con un
valor de pH inferior a 12.7 para evitar la decoloración en el
esmalte.
Espátulas de Plástico Sugeridas:
• Paleta de plástico duro
• Espátula de plástico de cocina
• Espátula de plástico para pintura
• Tarjeta de crédito antigua

34 MANTENIMIENTO
Asadera y Rejilla
No guarde una asadera con
rejillas sucias dentro del horno.
yNo guarde una asadera o rejilla sucia en ninguna parte del
horno.
yNo limpie la asadera o la rejilla en el modo auto-limpieza.
yQuite la rejilla de la asadera. Con cuidado, vuelque la grasa
de la asadera en un recipiente adecuado.
yLave y enjuague la asadera y la parrilla en agua caliente con
una esponja enjabonada o una esponja de plástico.
ySi se hubiera quemado comida, salpique la parrilla con
limpiador mientras todavía este caliente y cubra con toallas
de papel húmedas o un repasador. Sumerja la asadera para
quitar la comida quemada.
LIMPIEZA EXTERIOR
Revestimiento Pintado y Decorativo
Para la limpieza general, utilice un paño con agua caliente
jabonosa. Para suciedades más difíciles y grasa acumulada,
aplique detergente líquido directamente sobre la suciedad.
Déjelo actuar de 30 a 60 minutos. Enjuague con un paño
empapado y seque. No utilice limpiadores abrasivos.
Superficies de Acero Inoxidable
Para evitar rayones, no utilice esponjas de lana de acero.
1. Coloque una pequeña cantidad de limpiador de
electrodomésticos de acero inoxidable o lustre en un paño
húmedo o paño de papel.
2. Limpie un área pequeña, frotando en el sentido del grano
del acero inoxidable, si corresponde.
3. Seque y sacuda con un paño de papel limpio y seco o un
paño suave.
4. Repite cuantas veces sea necesario.
Puerta del horno
yUse agua jabonosa para limpiar completamente la puerta del
horno. Enjuague bien. NO sumerja la puerta en agua.
yPuede utilizar limpiavidrios en el vidrio externo de la puerta
del horno. NO rocíe agua o limpiavidrios en los venteos de la
puerta.
yNO utilice limpiadores de horno, polvos limpiadores, o
materiales ásperos de limpieza abrasiva en el lado externo de
la puerta del horno.
yNO limpie la junta de la puerta del horno. La junta de la
puerta del horno está confeccionada en un material tejido
que es esencial para un buen sellado. Debe tenerse cuidado
de no frotar, dañar, o quitar esta junta.
No utilice limpiadores ásperos o materiales ásperos de
limpieza abrasiva en el lado externo de la puerta del
horno. Hacerlo podría provocar daños.
PRECAUCIÓN
PRECAUCIÓN
No limpie a mano
el empaque de la
puerta del horno
Elimine cualquier
residuo de la puerta
Bandejas del horno
Quite las bandejas del horno
antes de operar el ciclo de
auto-limpieza. Dejar las
bandejas en su lugar puede
provocar decoloracion. Si las
bandejas se limpian en el ciclo
de auto-limpieza, el color se
volvera ligeramente azul y el acabado quedara opaco. Despues
de que haya nalizado el ciclo de auto-limpieza y que el horno
se haya enfriado, frote los lados de las bandejas con papel
encerado o un pano con una pequena cantidad de aceite. Esto
hara que las bandejas se deslicen mas facilmente por las guias.
Cavidad del horno
NO utilice limpiadores para horno. NUNCA limpie una
supercie de porcelana tibia o caliente con una esponja
humeda; esto provocara saltado o agrietamiento
(rajaduras pequenas del tamano de un cabello). Los
derrames de alimentos deben limpiarse cuando el
horno se enfria. A temperaturas elevadas, los alimentos
reaccionan con la porcelana y pueden provocarse
marchas opacas permanentes. Cuando limpie una
mancha, utilice limpiadores o estropajos no abrasivos.

35
MANTENIMIENTO
ESPAÑOL
REEMPLAZO DE LA LUZ DEL
HORNO
LLa luz del horno es una bombilla halógena estándar de 25
vatios para hornos.
Para reemplazar las lámparas ubicadas en la pared
lateral:
• Asegúrese de que el horno y la bombilla no estén
calientes.
1. Desenchufe el horno o desconecte la energía.
2. Quite las bandejas del horno.
3. Deslice un destornillador plano entre la carcasa y la tapa
de vidrio de la luz.
4. Sostenga la tapa de vidrio de la luz con dos dedos para que
no caiga a la parte inferior del horno.
5. Con suavidad gire el destornillador para aojar la tapa de
vidrio de la luz y eliminarlo.
6. Quite la bombilla del enchufe.
7. Cambie la bombilla, vuelva a colocar la tapa de la luz
ajustándola en su lugar a presión.
8. Enchufe el horno o vuelva a conectar la energía.
Tapa de vidrio de la luz
Tapa de vidrio de la luz
Destornillador plano
Destornillador plano
Carcasa
CarcasaGancho
y Antes de reemplazar la bombilla del horno,
DESCONECTE la alimentación de energía del
horno desde el panel principal de fusibles o del
interruptor de circuitos.
− No hacerlo puede provocar lesiones personales
graves, la muerte o una descarga electrica.
yAsegúrese de que el horno y la bombilla no estén
calientes.
yUsar guantes mientras se cambia el foco lampara
del horno. Pedazos de vidrio de un foco quedabrado
pueden causar lesiones.
ADVERTENCIA
ADVERTENCIA

36 MANTENIMIENTO
Volver a colocar la puerta del horno
1. Sostenga rmemente de la parte superior ambos lados de
la puerta.
2. Con la puerta en el mismo ángulo que la posición de
extracción, coloque la Muesca del brazo de la bisagra en el
borde inferior de la ranura de la bisagra. La Muesca en el
brazo de la bisagra debe estar completamente asentado
en la parte inferior de la ranura.
3. Abra completamente la puerta. Si la puerta no se
abre completamente, la Muesca no está posicionada
correctamente en el borde inferior de la ranura.
4. Empuje los seguros de la bisagra hacia arriba contra el
marco frontal de la cavidad del horno hasta la posición de
bloqueo. Cierre la puerta del horno.
SACAR Y VOLVER A COLOCAR LA
PUERTA DEL HORNO Y EL CAJÓN
• La puerta es muy pesada. Tenga cuidado al remover y
levantar la puerta.
• NO levante la puerta de la manija.
• NO golpee el vidrio con ollas, sartenes o cualquier otro
objeto.
• Los rayones, golpes, choques bruscos o el tensado del
vidrio podrían debilitar su estructura, causando mayor
riesgo de rotura en el futuro.
PRECAUCIÓN
PRECAUCIÓN
Sacar la puerta del horno
1. Abra completamente la puerta.Tire de los seguros de
la bisagra hacia el marco de la puerta, en la posición de
desbloqueo. Una herramienta, tal como un pequeño
desarmador de punta plana, puede ser necesario.
2. Sostenga rmemente de la parte superior ambos lados de
la puerta. Cierre la puerta hasta la posición de remoción
(aproximadamente cinco grados). Que está entre en la
posición de paro de horno y completamente cerrada.
3. Levante la puerta hacia arriba y hacia afuera hasta que
el brazo de la bisagra haya salido de la ranura. Ponga la
puerta en el suelo.
Tirar de los seguros de la bisagra hacia
abajo para desbloquear.
Posición para Remover
Aproximadamente 5°
Brazo de
la bisagra
Ranura
Traba de
la bisagra
Traba de la
bisagra
Brazo de
la bisagra
Muesca
Extremo
inferior de
la ranura
Bloqueo
Desbloqueo
Brazo de
la bisagra
Brazo de
la bisagra
Ranura
Traba de
la bisagra
Traba de la
bisagra
Brazo de
la bisagra
Muesca
Extremo
inferior de
la ranura
Bloqueo
Desbloqueo
Brazo de
la bisagra
Brazo de
la bisagra
Ranura
Traba de
la bisagra
Traba de la
bisagra
Brazo de
la bisagra
Muesca
Extremo
inferior de
la ranura
Bloqueo
Desbloqueo
Brazo de
la bisagra
Brazo de
la bisagra
Ranura
Traba de
la bisagra
Traba de la
bisagra
Brazo de
la bisagra
Muesca
Extremo
inferior de
la ranura
Bloqueo
Desbloqueo
Brazo de
la bisagra
Empuje los seguros de la bisagra hacia arriba
para bloquear.

37
RESOLUCIÓN DE PROBLEMAS
ESPAÑOL
Mi nuevo horno no cocina como el viejo.
¿Hay algún problema con la configuración
de la temperatura?
No, Su horno está previamente probado y calibrado de fabrica.
Para los primeros usos, siga los tiempos y temperaturas de
sus recetas cuidadosamente. Si usted todavía cree que su
nuevo horno es demasiado caliente o demasiado frío, usted
puedes ajustar la temperatura del horno para cumplir con
las necesidades de cocción que requiera. Consulte la sección
“Ajustes para la Temperatura del Horno” para obtener
instrucciones sencillas sobre cómo ajustar su termostato.
¿Es normal escuchar un ruido que proviene
de la parte trasera de mi horno cuando lo
estoy usando?
Su nueva estufa está diseñada para mantener un estricto control
de la temperatura de su horno. Usted puede escuchar un "clic“ al
encendido y apagado de los elementos de calentamiento de su
horno con frecuencia en su nueva estufa. Este funcionamiento es
normal en su nueva estufa.
Durante la cocción por convección el
ventilador se detiene cuando abro la puerta.
¿Es eso normal?
Sí, es normal. Cuando se abre la puerta, el ventilador de
convección se detendrá hasta que la puerta se cierre.
¿Puedo usar papel de aluminio para retener
los goteos en la cavidad de mi horno?
Nunca use papel aluminio para el fondo o los lados del horno. La
lámina se fundirá, se pegará en la supercie inferior del horno, y
no podrá ser removido. Utilice una bandeja sobre la rejilla inferior
del horno para atrapar la grasa en su lugar (Sí el papel aluminio
ya se ha fundido en la supercie inferior del horno, no interferirá
con el rendimiento de este)
¿Puedo usar papel de aluminio en los
estantes?
No cubra bastidores con papel de aluminio. Cubriendo bastidores
completos con papel restringe el ujo de aire, lo que lleva a
resultados de cocción pobres. Utilice una bandeja forrada con
papel de aluminio debajo de pasteles de frutas u otros alimentos
ácidos o azucarados para evitar derrames dañen el acabado del
horno.
¿Puedo dejar mis estantes en el horno
cuando se está ejecutando un ciclo de Auto-
Limpieza?
No. Si bien no dañará los estantes, los decolorará y podría
dicultar su deslizamiento hacia afuera y hacia adentro durante
su uso. Retire todos los elementos del horno antes de iniciar un
ciclo de Auto-Limpieza.
¿Qué debo hacer si mis estantes están
pegajosos y se ha vuelto difícil deslizarlos
hacia adentro y hacia afuera?
Con el tiempo es posible que sea difícil deslizar los estantes hacia
adentro y hacia afuera. Aplique una pequeña cantidad de aceite
de oliva en los extremos de los estantes. Esto funcionará como un
lubricante para un deslizamiento más fácil.
¿Debo asar a la parrilla con el horno abierto
o cerrado?
Su cocina eléctrica ha sido diseñada para asar con la puerta
abierta. Si se utiliza la función asar (Broil) con la puerta abierta,
puede dañar los mandos del horno y de la pantalla.
PREGUNTAS FRECUENTES
RESOLUCIÓN DE PROBLEMAS
El aluminio se puede utilizar para envolver los alimentos en
el horno, pero no permita que la hoja entre en contacto con
los elementos de calefacción / asar expuestas en el horno.
La lámina podría derretirse o inamarse y provocar humo,
fuego o lesiones.
PRECAUCIÓN

38 RESOLUCIÓN DE PROBLEMAS
¿Por qué no funcionan los botones de
funciones?
Asegúrese de que la estufa no esté en el modo Lockout
(Bloqueo). El símbolo de bloqueo se mostrará en la pantalla
si la función Bloqueo de Horno está activada. Para desactivar
la función Bloqueo, presione y mantenga el botón PROBE
durante tres segundos. Sonará la melodía de desbloqueo, y
UNLOCKING (DESBLOQUEO) aparecerá en la pantalla hasta que
se desbloqueen los controles.
Mi estufa sigue sucia después de ejecutar el
ciclo SpeedClean™. ¿Qué más debo hacer?
El ciclo SpeedClean™ sólo ayuda a aojar la suciedad ligera
del horno de su estufa con el n de ayudar a la limpieza manual
de su horno. Esto no elimina automáticamente todas las
manchas después del ciclo. Después de ejecutar el ciclo
SpeedClean™ se requiere tallar el horno de su estufa.
He intentado tallar mi horno después
de ejecutar SpeedClean™, pero algunas
manchas permanecen intactas. ¿Qué puedo
hacer?
La función SpeedClean™ trabaja de la mejor manera cuando
la suciedades están completamente saturadas o sumergidas
en agua antes de comenzar el ciclo de limpieza y durante la
limpieza a mano. Si las suciedades no están completamente
saturadas en agua, el desempeño de limpieza puede verse
afectado negativamente. Repita el proceso SpeedClean™ usando
suciente agua. Las suciedades cuyo principal contenido
es azúcar y grasas son especialmente difíciles de limpiar. Si
permanecen algunas suciedades difíciles de quitar, use la función
de auto-limpieza (Self Clean) para limpiar completamente su
horno.
La suciedad en la pared de mi horno no se
limpia. ¿Cómo puedo tener mis paredes
limpias?
Las suciedades en las paredes laterales y traseras de su horno
quizá sean más difíciles de sumergirse en agua. Se recomienda
que trate repitiendo el proceso SpeedClean™ rociando más
de 1/5 de taza (2 oz o 60 ml) de agua.
¿La función SpeedClean™ limpiara toda la
suciedad y las manchas por completo?
Depende del tipo de suciedad. Las suciedades cuyo principal
contenido es azúcar y grasa son especialmente difíciles de
limpiar. También, si las suciedades no están lo sucientemente
sumergidas en agua, el desempeño de la limpieza puede verse
afectado negativamente. Si suciedades difíciles de quitar o
suciedades acumuladas permanecen en el horno, use la
función de auto-limpieza (Self Clean). Reérase a la sección
auto-limpieza (Self Clean) de su manual de usuario.
¿Hay algún truco para limpiar algunas de las
manchas rebeldes?
Se recomienda raspar la suciedad con una espátula de plástico
antes y durante la limpieza manual. Se recomienda saturar la
suciedad con agua. Sin embargo, ciertos tipos de suciedad son
más difíciles de limpiar que otros.
Para estas manchas rebeldes, se recomienda la función de
autolimpieza (Self Clean). Consulte la sección Self Clean del
manual de usuario para obtener más detalles.
¿Es seguro que mi ventilador de convección,
asador o elemento de calentamiento se
moje durante SpeedClean™?
Si. El ventilador de convección, el asador o el elemento de
calentamiento pueden llegar a mojarse un poco durante la
limpieza. Sin embargo, rociar directamente en el asador o los
elementos calentadores no es necesario ya éstos se auto-limpian
durante el uso común.
¿Necesito usar todas las 1 de taza (10 oz o
300 ml) de agua para SpeedClean™?
Si. Es altamente recomendado que se rocíe o vierta 4/5 taza (8 oz
o 240 ml) de agua en la base y que se rocíen 1/5 de taza (2 oz o 60
ml) adicionales de agua en las paredes y otras áreas sucias para
saturar las suciedades para un mejor desempeño de limpieza.
Veo "humo" que sale de la chimenea de la
hornilla de mi estufa durante SpeedClean™.
Es esto normal?
Esto es normal. Esto no es "humo". En realidad, es vapor de agua
(vapor) proveniente del agua en la cavidad del horno. A medida
que el horno se calienta brevemente durante SpeedClean™,
el agua de la cavidad se evapora y se escapa a través de la
chimenea de la hornilla de su estufa.
¿Con qué frecuencia debo usar
SpeedClean™?
La función SpeedClean™ puede ejecutarse tan seguido como
usted desee. La función SpeedClean™ trabaja de la mejor
manera cuando su horno esta LIJERAMENTE sucio de cosas como
manchas de grasa LIJERA y pequeñas gotas de queso. Por favor
reérase a la sección SpeedClean™ en su manual de usuario para
más información.
¿Se puede usar SpeedClean™ en ambos
hornos?
Una botella llena con 1 de taza (10 oz o 300ml) de agua, una
espátula de plástico, una bra anti-rayas, y una toalla. No debe
de usar bras abrasivas como bras de uso rudo o de acero.

39
RESOLUCIÓN DE PROBLEMAS
ESPAÑOL
ANTES DE LLAMAR AL SERVICIO
Antes de acudir al servicio, revise esta lista. Esto le podría ahorrar tiempo y gastos. La lista incluye los incidentes más
comunes que no son el resultado de defectos de materiales o fabricación de este artefacto.
Problema Causas / Soluciones posibles
El control del horno emite
un pitido y muestra un
error de código F.
yEl control eléctrico ha detectado una condición de falla.
Gire la perilla de modo del horno superior o inferior
hasta la posición OFF.
para borrar la pantalla y detener el pitido.
Reprograme el horno. Si la falla vuelve a producirse,
registre el número de falla. Gire la perilla de modo del
horno superior o inferior hasta la posición OFF.
y comuníquese con un técnico calicado.
El aparato no funciona.
yEl enchufe del horno no está introducido del todo en el tomacorriente.
- Verique que el enchufe eléctrico esté conectado a un tomacorriente con tensión y adecuada
conexión a tierra.
yUn fusible puede haberse quemado o el interruptor de circuitos puede haber saltado.
- Cambie el fusible o recongure el interruptor de circuitos.
yLos controles del horno están mal congurados.
- Las instrucciones para congurar los modos de cocción comienzan en la página 18.
- Instrucciones para el ajuste de la conguración del horno comienzan en la página 11.
yEl horno está muy caliente.
- Deje que el horno se enfríe por debajo de la temperatura de bloqueo.
El aparato no funciona.
yAsegúrese de que el cable esté bien enchufado en un tomacorriente. Verique los interruptores de
circuitos.
yEl cableado de servicio no está completo. Para obtener asistencia, comuníquese con el reparador
del aparato.
yCorte de energía. Controle las luces de su hogar para asegurarse. Llame a la compañía de servicio
eléctrico local.
La luz del horno no
funciona.
yReemplace o ajuste la bombilla. Consulte Cambio de la Luz del horno, en la página 34.
El horno produce humo
excesivo durante el asado.
yLos controles no están congurados correctamente. Sigas la instrucciones Broil (Asado a la parrilla),
página 21.
yLa carne se encuentra muy cerca del elemento. Cambie la posición de la bandeja para brindar un
espacio adecuado entre la carne y el elemento. Precaliente el elemento de asado para sellar los
jugos.
yNo se ha preparado bien la carne. Quite el exceso de grasa de la carne. Corte los costados restantes
de grasa para evitar que se enrulen, pero no la deje sin nada de grasa.
yLa asadera está mal colocada y la grasa no escurre. Siempre coloque la rejilla sobre la asadera con
las estrías hacia arriba y las ranuras hacia abajo para que la grasa chorree dentro de la asadera.
ySe ha acumulado grasa en las supercies del horno. Es necesaria una limpieza regular cuando se asa
frecuentemente. Grasa o salpicaduras antiguas provocan humo excesivo.
CÓDIGO CAUSA
F-3 Tecla presionada por mucho
tiempo o tecla en corto
circuito
F-19 El horno no calienta

40 RESOLUCIÓN DE PROBLEMAS
Problema Causas / Soluciones posibles
Los alimentos no se hornean o
rostizan correctamente
yLos controles del horno están mal congurados.
- Ver las instrucciones para congurar Bake, horneado por convección, asado, y los modos de asado
por convección, páginas 18-21.
yLa posición de la bandeja es incorrecta o no está nivelada.
- Ver rack y Pan de Colocación, página 17.
ySe están utilizando recipientes de cocción incorrectos o de tamaño inapropiado.
- Ver bandeja y recipiente de horneado en las páginas 17, 18, 20.
yEl sensor del horno debe ajustarse.
- Ver Ajuste la temperatura del horno, página 13.
Los alimentos no se asan de
manera adecuada
yLos controles del horno están mal congurados.
- Vea la sección de asado, página 21.
ySe está usando una posición de bandeja inadecuada.
- Consulte la Guía de asado, página 21-23.
yLos recipientes no son los adecuados para asar.
- Use la asadera y rejilla que vinieron con su horno.
yEl papel metálico usado en la asadera y la rejilla no se ha colocado de manera correcta y no se
han realizado los cortes recomendados.
- Vea la sección de asado, página 21.
yEn algunas regiones la electricidad (voltaje) puede ser baja.
- Precaliente el elemento de asado durante 10 minutos.
- Ver la Guía de asado, página 21.
La temperatura del horno es
muy alta o muy baja
yEl sensor del horno debe ajustarse.
- Ajustes de temperatura del Horno, página 13.
El horno no efectúa la auto-
limpieza
yLa temperatura del horno está muy elevada para congurar la función de auto-limpieza.
- Deje que el horno se enfríe y vuelva a congurar los controles.
yLos controles del horno están mal congurados.
- Vea la sección de autolimpieza, página 29.
yNo puede iniciarse un ciclo de auto-limpieza si la puerta está abierta.
Ruido de crujidos o chasquidos
yEs el sonido del metal calentándose y enfriándose durante las funciones de cocción y limpieza.
- Esto es normal.
Humo excesivo durante un ciclo
de auto-limpieza
ySuciedad excesiva.
- Gire la perilla de modo de horno (OVEN MODE) hasta la posición OFF. Abra las ventanas para
que salga el humo. Espere hasta que se cancele el modo de auto-limpieza. Limpie el exceso de
suciedad y vuelva a congurar el ciclo de limpieza.
La puerta del horno no se
abre después de un ciclo de
autolimpieza.
yEl horno está muy caliente.
- Deje que el horno se enfríe por debajo de la temperatura de bloqueo.

41
RESOLUCIÓN DE PROBLEMAS
ESPAÑOL
Problema Causas / Soluciones posibles
El horno no queda limpio
después de un ciclo de
autolimpieza
yLos controles del horno no están congurados correctamente.
- Ver la sección auto-limpieza, página 29-30.
yEl horno estaba muy sucio.
- Limpie los derrames más rebeldes antes de iniciar el ciclo de limpieza. Los hornos muy sucios
pueden necesitar una nueva auto-limpieza o una limpieza más prolongada.
El ícono DOOR LOCKED
(puerta bloqueada) se
enciende cuando desea
cocinar.
yLa puerta del horno está bloqueada porque la temperatura dentro del horno no ha descendido
por debajo de la temperatura de bloqueo.
- Gire la perilla de modo de horno (OVEN MODE) hasta la posición OFF. Deje enfriar el horno.
Un olor a quemado o a aceite
sale de la ventilación
yEsto es normal en un horno nuevo y desaparece con el tiempo.
- Para acelerar el proceso, congure un ciclo de auto-limpieza durante un mínimo de 3 horas.
Ver la sección auto-limpieza, página 29-30.
El ventilador de refrigeración
siguen funcionando después
de que se apaga el horno
yEl ventilador se apaga automáticamente cuando los componentes electrónicos se han enfriado
lo suciente.
- Esto es normal.
Sale aire caliente de la
ventilación después de que se
apaga el horno.
ySe necesita una salida del aire caliente para mantener y reducir las temperaturas del horno. Se
apaga automáticamente cuando la temperatura baja a un nivel seguro.
- Esto es normal.
Red Wi-Fi no se conectarlo
correctamente
ySi el aparato tiene problemas para conectarse a la red Wi-Fi, es posible que se encuentre
demasiado lejos del router. Adquiera un repetidor Wi-Fi (extensor de alcance) para mejorar la
intensidad de la señal Wi-Fi.
yEs posible que la conexión Wi-Fi no se conecte o se interrumpa debido al entorno de la red
doméstica.
ySegún el proveedor de servicios de Internet, la conexión de la red puede no funcionar
correctamente.
yEl entorno inalámbrico circundante puede hacer que el servicio de red inalámbrica funcione
lentamente.

42 GARANTÍA
GARANTÍA (EE. UU.)
En caso de que su SIGNATURE KITCHEN SUITE Horno (“Producto”) presente alguna falla por defectos de materiales o de fabricación
bajo uso apropiado y normal durante el período de garantía establecido más abajo, será reparado o reemplazado por SIGNATURE
KITCHEN SUITE, a su opción. Esta garantía limitada es válida únicamente para el comprador nal original del producto, y únicamente
cuando el producto ha sido comprado y utilizado dentro de los Estados Unidos, incluidos los territorios norteamericanos.
PERÍODO DE GARANTÍA COMO SÉ MANEJA EL SERVICIO TÉCNICO
Tres años
A partir de la fecha original de compra.
Cualquier parte del horno que falle debido a materiales o confección
defectuosos. Durante esta garantía completa durante tres años, SIGNATURE
KITCHEN SUITE además brindará, sin cargo, la mano de obra y servicio técnico en
el domicilio para reemplazar la parte defectuosa.
• Los productos y las piezas de repuesto están garantizados durante el tiempo restante del período original de garantía o noventa (90)
días, lo que resulte mayor.
• Los productos y las piezas de repuesto pueden ser nuevos, reparados, reacondicionados, o reconstruidos por la fábrica.
• Los Productos o piezas reemplazados serán propiedad de SIGNATURE KITCHEN SUITE.
• Es necesario presentar prueba de la compra minorista especificando el modelo del producto y la fecha de compra para obtener el
servicio de garantía bajo esta garantía limitada.
SALVO LO PROHIBIDO POR LA LEY, TODA GARANTÍA DE COMERCIALIZACIÓN O IDONEDAD IMPLÍCITA, PARA UN PROPÓSITO
PARTICULAR EN EL PRODUCTO, ESTÁ LIMITADA A LA DURACIÓN DE LA GARANTÍA ARRIBA EXPRESADA. BAJO NINGUNA
CIRCUNSTANCIA DEBERÁ SIGNATURE KITCHEN SUITE O SUS DISTRIBUIDORES/REPRESENTANTES SER RESPOSABLE POR
CUALQUIER DAÑO INDIRECTO, INCIDENTAL, CONSECUENTE, ESPECIAL, O PUNITIVO, LO CUAL INCLUYE PERO NO SE LIMITA A,
PÉRDIDA DE FONDOS DEL COMERCIO, GANANCIAS PERDIDAS, INTERRUPCIÓN DEL TRABAJO, DETERIORO DE OTROS BIENES,
COSTO DE REMOVER Y REINSTALAR EL PRODUCTO, PÉRDIDA DE USO, O CUALQUIER OTRO DAÑO YA SEA BASADO EN
CONTRATO, PERJUICIO, U OTROS. LA RESPONSABILIDAD TOTAL DE SIGNATURE KITCHEN SUITE, EN CASO EXISTA, NO EXCEDERÁ
EL PRECIO QUE USTED PAGÓ POR ADQUIRIR EL PRODUCTO.
ALGUNOS ESTADOS NO PERMITEN LA EXCLUSIÓN O LIMITACIÓN DE DAÑOS INCIDENTALES O EMERGENTES, O LIMITACIONES A
LA DURACIÓN DE LA GARANTÍA IMPLÍCITA, POR LO QUE LA EXCLUSIÓN O LIMITACIÓN ANTERIORMENTE MENCIONADA
PODRÍAN NO CORRESPONDER EN SU CASO. ESTA GARANTÍA LIMITADA LE OTORGA DERECHOS LEGALES ESPECÍFICOS Y ES
POSIBLE QUE USTED CUENTE CON OTROS DERECHOS QUE VARÍAN SEGÚN EL ESTADO.
ESTA GARANTÍA LIMITADA NO CUBRE LO SIGUIENTE:
• Viajes del servicio técnico para entregar, buscar o instalar el producto, instruir al cliente sobre la operación del mismo, corregir el
cableado o las reparaciones/instalaciones no autorizadas.
• Daño o fallo del producto al operar durante fallas e interrupciones del suministro eléctrico, o resultado de un servicio eléctrico
inadecuado.
• Daños o fallas causadas por tuberías de agua rotas o con fugas, tuberías de agua congeladas, líneas de desagüe restringidas, suministro
de agua inadecuado o interrumpido, o suministro de aire inadecuado.
• Daños resultantes de operar el producto en una atmósfera corrosiva o contraria a las instrucciones detalladas en el manual del
propietario del producto.
• Daños o fallos del producto causados por accidentes, pestes y alimañas, rayos, viento, incendio, inundaciones, hechos de fuerza mayor,
o cualquier otra causa fuera del control de SIGNATURE KITCHEN SUITE.
• Daños o fallos del Producto causados por modicaciones o alteraciones no autorizadas, o por utilizar el Producto para nes distintos de
lo previsto, o pérdida de agua cuando el Producto no se instaló adecuadamente.
• Daños o fallos del Producto causados por corriente eléctrica o voltaje incorrectos, o códigos de cañería.
• Daños o fallos del Producto causados por el transporte, almacenamiento o manipulación, incluidos rayas, muescas, astillados u otros
daños al acabado, a menos que tales defectos se informen en el plazo de una (1) semana a partir de la entrega.

43
GARANTÍA
• Daños o fallos del Producto causados por mal uso, abuso, instalación, reparación o mantenimiento incorrectos.
Una reparación incorrecta incluye el uso de piezas no autorizadas, aprobadas o especicadas por SIGNATURE KITCHEN SUITE. La
instalación o el mantenimiento inadecuado incluye aquellos contrarios a lo especicado en el manual del usuario del Producto.
• Daños o fallos del Producto causados por el uso de piezas, componentes, accesorios, productos de limpieza consumibles, u otros
productos o servicios no autorizados por SIGNATURE KITCHEN SUITE.
• Daños o artículos faltantes con la caja abierta o que hayan estado en exhibición.
• Productos reacondicionados o cualquier producto vendido con los avisos “En el estado actual”, “En el sitio actual”, “Con todos sus
defectos” o similares.
• Productos cuyos números de serie originales hayan sido retirados, alterados o no se puedan determinar fácilmente.
• Aumentos en los costos de los servicios públicos y otros gastos adicionales de dichos servicios.
• Cualquier ruido asociado con la operación normal.
• Productos utilizados de otra forma que no sea uso doméstico usual y normal (p. ej., uso comercial o industrial) o de forma contraria al
manual del usuario del Producto.
• Costos asociados con la remoción y reinstalación del Producto para reparaciones o la remoción y reinstalación del Producto si está
instalado en una ubicación inalcanzable o no está instalado de acuerdo con el Manual del propietario del producto.
• Accesorios, componentes extraíbles o partes consumibles (por ejemplo, estantes, compartimentos de la puerta, cajones, ltros de agua
o aire, rejillas, bombillas, baterías, etc. según corresponda), excepto las partes internas/funcionales cubiertas por esta garantía limitada.
Se extiende la presente garantía al comprador original para aquellos productos comprados para uso domiciliario dentro de los EE. UU.
En Alaska, la garantía excluye los gastos de envío o las llamadas por parte del servicio técnico a su domicilio. Algunos estados no
permiten exclusiones o limitaciones de los daños incidentales o emergentes, por lo tanto, esta exclusión o limitación podría no aplicarse.
La presente garantía le otorga derechos legales especícos, es posible que usted tenga otros derechos que pueden variar entre estados.
Para conocer cuáles son sus derechos, consulte con su ocina de consumo estatal o local o con el Procurador General de su estado.
CENTRO DE ASISTENCIA AL CLIENTE:
Para Demostrar la Cobertura de la Garantía Conserve su Comprobante de Venta para demostrar la fecha de
compra.
Debe enviar una copia de su Comprobante de Venta en el momento
en que se presta servicio técnico bajo la garantía.
Para Conocer el Centro de Servicios Técnicos Autorizado o
Representante de Ventas más Cercano, o para Obtener
Asistencia por Producto, Cliente o Servicio Técnico.
Llame al 1-855-790-6655 (Atendido las 24 horas, los 365 días del
año) y elija la opción correcta del menú; o visite nuestro sitio web en:
www.signaturekitchensuite.com;
O por correo: SIGNATURE KITCHEN SUITE Customer Service P.O.
Box 240007 Huntsville, AL 35813 ATTN: CIC

MEMO

MEMO

MEMO

MEMO

Customer Information Center
For inquires or comments, call;
1-855-790-6655 USA Printed in Korea
-
 1
1
-
 2
2
-
 3
3
-
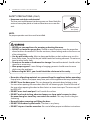 4
4
-
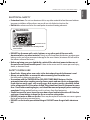 5
5
-
 6
6
-
 7
7
-
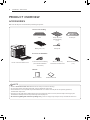 8
8
-
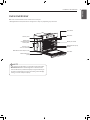 9
9
-
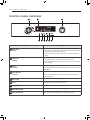 10
10
-
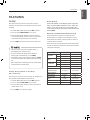 11
11
-
 12
12
-
 13
13
-
 14
14
-
 15
15
-
 16
16
-
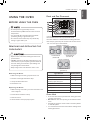 17
17
-
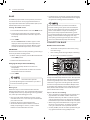 18
18
-
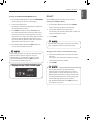 19
19
-
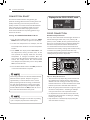 20
20
-
 21
21
-
 22
22
-
 23
23
-
 24
24
-
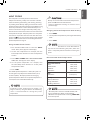 25
25
-
 26
26
-
 27
27
-
 28
28
-
 29
29
-
 30
30
-
 31
31
-
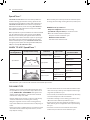 32
32
-
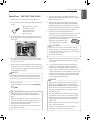 33
33
-
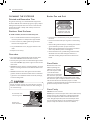 34
34
-
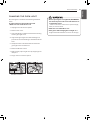 35
35
-
 36
36
-
 37
37
-
 38
38
-
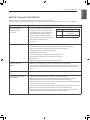 39
39
-
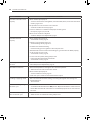 40
40
-
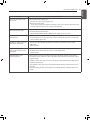 41
41
-
 42
42
-
 43
43
-
 44
44
-
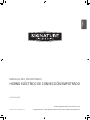 45
45
-
 46
46
-
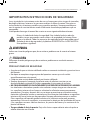 47
47
-
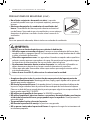 48
48
-
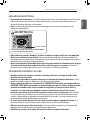 49
49
-
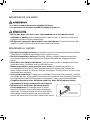 50
50
-
 51
51
-
 52
52
-
 53
53
-
 54
54
-
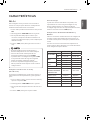 55
55
-
 56
56
-
 57
57
-
 58
58
-
 59
59
-
 60
60
-
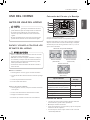 61
61
-
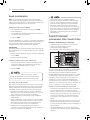 62
62
-
 63
63
-
 64
64
-
 65
65
-
 66
66
-
 67
67
-
 68
68
-
 69
69
-
 70
70
-
 71
71
-
 72
72
-
 73
73
-
 74
74
-
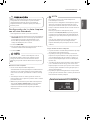 75
75
-
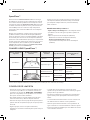 76
76
-
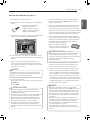 77
77
-
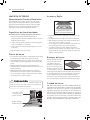 78
78
-
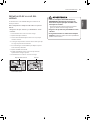 79
79
-
 80
80
-
 81
81
-
 82
82
-
 83
83
-
 84
84
-
 85
85
-
 86
86
-
 87
87
-
 88
88
-
 89
89
-
 90
90
-
 91
91
-
 92
92


Signature Kitchen Suite UPWS3044ST El manual del propietario
- Categoría
- Microondas
- Tipo
- El manual del propietario