Archos 52 Platinum El manual del propietario
- Categoría
- Smartphones
- Tipo
- El manual del propietario

EN
Table of contents
For more information, please consult the FAQs on www.archos.com.
Make sure to read them before considering any product return. As we
are often updating and improving our products, your device’s software
may have a slightly dierent appearance or modied functionality than
presented in this Quick Start Guide.
Package contents..........................................................................................................
Description of the phone...........................................................................................
Assembling......................................................................................................................
Getting started...............................................................................................................
3G & WiFi connection...................................................................................................
Google account & Contacts........................................................................................
Hints & tips with Android
TM
................................................................................
Troubleshooting.............................................................................................................
2
3
6
8
10
12
14
16
ARCHOS_52_Platinum_book.indd 1 11/12/2014 14:35:56

2
Package Contents
Check your product box for the following items:
- ARCHOS 52 Platinum
- Battery
- Headset
- USB cable
- Charger
- Quick start guide
- Warranty Legal & Safety notices
The items supplied with your device and available accessories may vary
depending on your region or service provider.
The supplied items are designed only for your device and may not be
compatible with other devices.
Unapproved accessories may cause your device to malfunction.
ARCHOS_52_Platinum_book.indd 2 11/12/2014 14:35:56

3
4
1
2
3
5
6
EN
1
Headset jack
Phone speaker
Camera
Volume buttons
ON/OFF button
Microphone
2
3
4
Description of the phone
5
6
ARCHOS_52_Platinum_book.indd 3 11/12/2014 14:35:57

4
7
8
9
10
Description of the phone
7
Camera
Flash light
Loudspeaker
Micro-USB port
10
9
8
ARCHOS_52_Platinum_book.indd 4 11/12/2014 14:35:58

5
11 12
13
EN
13
12
11
Menu: open the list of options available on the current screen.
Home/Recent apps/Google NOW: short press to return to the Home
screen; double press to open the list of recent applications; long press to
access Google Now.
Back: return to the previous screen.
Multi-task
Home/Recent apps/Google NOW
Back
ARCHOS_52_Platinum_book.indd 5 11/12/2014 14:35:58

6
Assembling
Tip:
Before using your device for the first time, charge completely its battery.
Opening
Use the notch to remove the back cover.
Do not bend or twist the back cover excessively. Doing so may damage
the cover.
Inserting a SIM card
For your SIM card, slide out the sim card tray holder and install your micro
SIM card (1) or your nano SIM card (2) into the holder.
Replace the tray holder.
Inserting a Memory card
For your Memory card, slide it facing downwards in the slot TF (3).
Closing
Replace the back cover clicking it back into position.
ARCHOS_52_Platinum_book.indd 6 11/12/2014 14:35:58

7
Picture to show how to remove the bottom casing
Picture to show how to insert the battery pack
SIM1
SIM2
Picture to show the cards position
SIM1
SIM2
TF
Picture to show the tray holder
Picture to show how to remove the bottom casing
Picture to show how to insert the battery pack
SIM1
SIM2
Picture to show the cards position
SIM1
SIM2
TF
Picture to show the tray holder
Picture to show how to remove the bottom casing
Picture to show how to insert the battery pack
SIM1
SIM2
Picture to show the cards position
SIM1
SIM2
TF
Picture to show the tray holder
Picture to show how to remove the bottom casing
Picture to show how to insert the battery pack
SIM1
SIM2
Picture to show the cards position
SIM1
SIM2
TF
Picture to show the tray holder
EN
Assembling
Lift the back cover
using the notch
ARCHOS_52_Platinum_book.indd 7 11/12/2014 14:35:58

8
Turn ON
1. Press and hold the ON/OFF button to turn on the device.
When you turn on your device, a PIN code may be requested.
2. Type the PIN code supplied with your SIM card.
Beware of typing a wrong PIN code.
3. Select ‘OK’.
Through the wizard
The rst time you start up your ARCHOS, the installation wizard will help
you set up your device:
- Language
- Date & time
- WiFi connection
- Location service options
Turn OFF
To turn o your device, press and hold the ON/OFF button, and then
select Power o > OK.
Getting started
ARCHOS_52_Platinum_book.indd 8 11/12/2014 14:35:58

9
EN
Sound & Notication proles
1. When the device is turned on, press
and hold the ON/OFF button.
2. Select an option.
Touch screen actions:
Tap: touch once to select or launch a menu, option, or application.
Tap and hold: tap an item and hold it for more than 2 seconds.
Drag: tap an item and move it to a new location.
Double-tap: tap an item twice quickly.
Flick: briskly scroll up, down, left, or right to move through lists or screens.
Pinch: place two of your ngers far apart, and then pinch them together.
Tip:
Your device goes in standby mode when you do not use it for a specified
period of time. To wake up your device, press the ON/OFF button.
To set the duration, go to Settings > Display > Sleep.
Silent Vibrate Sound
ARCHOS_52_Platinum_book.indd 9 11/12/2014 14:35:58

10
3G connection
With your SIM card, you should be connected to the Internet without
any further setup. The ARCHOS will only have signal if you are in an
area covered by your provider’s 3G network. When connected to the 3G
network, the 3G icon is displayed in the status bar.
Activating the mobile data
3G & WiFi connection
To be able to access Internet, the mobile
data icon must be activated.
1. Touch and hold the time & battery icons to
reveal the status bar.
2. Pull the white line down to display the
status dashboard.
3. Touch the status dashboard icon .
4. Touch the mobile data icon to
activate it.
Tip:
If you encounter connection problem’s, see the FAQs on www.archos.
com or contact your 3G network connection provider.
ARCHOS_52_Platinum_book.indd 10 11/12/2014 14:35:59

11
EN
WiFi connection
WARNING: Make sure that you are in a WiFi zone. You can access the WiFi
settings quickly from the status bar.
1. Touch and hold the time & battery icons to reveal
the status bar.
2. Pull the blue line down to display the status
dashboard.
3. Touch the status dashboard icon .
4. Touch the “Settings” icon to open the settings
menu.
5. In the “Wireless & networks”section, if the WiFi is
o, slide the WiFi switch to the “ON” position. Once
the WiFi is on, the ARCHOS will scan for WiFi networks
in range.
6. Touch “WiFi” to display available networks.
7. Touch the name of network you want to connect to.
Private networks are shown with a lock icon and will require you to enter
your password.
ARCHOS_52_Platinum_book.indd 11 11/12/2014 14:36:00

12
Google & Contacts
Adding a Google account
A Google account lets you take full advantage of any Google apps and
services that you may want to use.
1. Go to “Settings” > “Accounts” > “Add account”.
2. Select the account type “Google” to add.
3. Follow the onscreen instructions to enter information about the account.
Once the account is created, you can access Play Store, Gmail, Hangouts,
Maps and many other apps.
Synchronizing info
Information must be sync to be saved. Your data is backed up on Google
servers.
1. Go to “Settings” > “Accounts” > “Google”.
2. Select your account.
The list of information that can be sync are displayed.
Automatic sync should be activated. To launch the sync, press the Menu
button, then Sync now. You can get them back in case of loss of your
device or SIM card. When your Google account is added to a new device,
all your saved information is transferred.
ARCHOS_52_Platinum_book.indd 12 11/12/2014 14:36:00

13
EN
Saving your contacts
When your contacts are saved, they are always available on the web
and can be synced to any Android phone that’s set up with your Google
account.
1. Install the SIM card with your contacts in your phone.
2. From a Home or All Apps screen, select the People app .
3. Touch the Menu button > “Import/Export”.
4. In Import/export contacts, select “Import from SIM card”.
5. Select your Google account.
6. Check contacts to be imported and validate.
7. Once the contacts are imported in the Google account, go to “Settings” >
“Accounts” > “Google”.
8. Select you Google account.
9. Select the Menu button, then “Sync now”.
Your contacts are saved to via your Google account.
ARCHOS_52_Platinum_book.indd 13 11/12/2014 14:36:00

14
The extended home screen:
You have by default one home screen. You can create as many home
screens you want. Select an app icon and slide it right. A new home
screen will be created. Select another app icon and slide it right to create
a third home screen.
Moving a home screen item:
Touch and hold your nger onto it until the positioning gridlines appear,
then slide it to the desired location, and release your nger.
Removing a home screen item:
Touch and hold it, slide your nger towards the top of the screen and
drop it over the "Remove" icon.
Uninstalling an item:
From the "All apps" screens, touch and hold it, slide your nger towards
the top of the screen and drop it over "Uninstall" bin.
Hints & tips for Android
TM
ARCHOS_52_Platinum_book.indd 14 11/12/2014 14:36:00

15
EN
Creating application folders:
Drop one app icon over another on a home screen and the two icons will
be combined.
Widgets:
Touch and hold your nger on your home screen. Touch “Widgets”.
Changing your wallpaper:
Hold your nger on a home screen at an empty location, then choose
from the list.
Locking the touchscreen:
From the quick settings dashboard in the status bar, touch “Settings”. In
“Settings”, scroll down and touch “Security”. Touch “Screen lock”. Touch
the type of lock you would like to use. After you set a lock, a lock screen
is displayed whenever your screen wakes up, requesting the pattern, pin
or other specied key.
ARCHOS_52_Platinum_book.indd 15 11/12/2014 14:36:00

16
Troubleshooting
My phone is frozen or cannot switch on
Check the battery contacts, remove and reinstall your battery, then turn your
phone on. Check the battery power level, charge for at least 20 minutes.
My phone cannot connect to a network or “No service” is displayed
Try connecting in another location. Verify the network coverage with your
operator.
Unable to make outgoing calls
Make sure your phone is connected to a network, and the network is not
overloaded or unavailable.
Unable to receive incoming calls
Make sure your phone is switched on and connected to a network (check for
overloaded or unavailable network).
SIM card PIN locked
Contact your network operator to obtain the PUK code (Personal Unblocking
Key).
To configure a new 3G network:
On your device, tap Settings.
Select Wireless & networks > More... > Mobile networks.
Select Network settings. In Network operators, select your operator.
In Access Point Names, select the correct access point name and enter the
exact connection parameters provided by your 3G provider.
ARCHOS_52_Platinum_book.indd 16 11/12/2014 14:36:00

FR
18
19
22
24
26
28
30
32
Pour plus d’informations, consultez-les FAQs sur www.archos.com.
Consultez-les avant d’envisager un éventuel retour du produit. Le
problème que vous rencontrez peut être résolu facilement. Comme nous
mettons à jour et améliorons régulièrement nos produits, le logiciel
de votre appareil peut présenter une interface ou des fonctionnalités
légèrement diérentes de celles décrites dans ce guide.
Contenu de la boîte.....................................................................................................
Description du téléphone.........................................................................................
Assemblage....................................................................................................................
Mise en route.................................................................................................................
Connexion 3G & WiFi...................................................................................................
Compte Google & Contacts......................................................................................
Trucs & Astuces avec Android
TM
................................................................................
Dépannage.....................................................................................................................
Table des matières
Consultez la déclaration de conformité sur http://www.archos.com/
products/declaration_conformity.html
ARCHOS_52_Platinum_book.indd 17 11/12/2014 14:36:00

18
Contenu de la boîte
Vériez que les éléments ci-dessous sont présents dans la boîte :
- ARCHOS 52 Platinum
- Batterie
- Kit piéton
- Câble USB
- Chargeur
- Guide d’utilisation rapide
- Guide des garanties et des mentions légales
Il se peut que les éléments fournis, de même que les accessoires, varient
en fonction de votre localité ou de votre opérateur.
Les éléments fournis sont conçus uniquement pour votre appareil et ils
pourraient ne pas être compatibles avec d’autres appareils.
Des accessoires non conformes peuvent être la source d’un mauvais
fonctionnement.
ARCHOS_52_Platinum_book.indd 18 11/12/2014 14:36:00

19
4
1
2
3
5
6
FR
Description du téléphone
1
Prise kit piéton
Haut-parleur
Webcam
Boutons de volume
Bouton ON/OFF
Micro
2
3
4
5
6
ARCHOS_52_Platinum_book.indd 19 11/12/2014 14:36:01

20
7
8
9
10
7
Description du téléphone
Flash
Caméra
Haut-parleur
Port Micro-USB
8
10
9
ARCHOS_52_Platinum_book.indd 20 11/12/2014 14:36:01

21
11 12
13
FR
11
13
12
Multi-tâches
Accueil/Applications récentes/Google NOW
Retour
Menu : ache une liste d’options disponibles pour un écran donné.
Accueil/Applications récentes/Google NOW : appui court pour
retourner à l’écran d’accueil. Appuyez deux fois successivement pour
acher les applications ouvertes. Appui long pour accéder à Google
NOW.
Retour : retour à l’écran précédent.
ARCHOS_52_Platinum_book.indd 21 11/12/2014 14:36:01

22
Assemblage
Astuce :
Avant la première utilisation, chargez complètement la batterie.
Ouvrir
Utilisez l’encoche pour enlever la coque arrière.
Ne pas déformer ou plier la coque arrière excessivement au risque de
l’endommager.
Insérer la carte SIM
Pour la carte SIM, sortez le tiroir de son emplacement et installez votre
carte micro SIM (1) ou votre nano SIM (2).
Remettez en place le tiroir.
Insérer une carte mémoire
Pour la carte mémoire, glissez-la dans l’emplacement 3 en orientant la
face magnétique vers le bas.
Fermer
Remettez en place la coque arrière.
ARCHOS_52_Platinum_book.indd 22 11/12/2014 14:36:01

23
Picture to show how to remove the bottom casing
Picture to show how to insert the battery pack
SIM1
SIM2
Picture to show the cards position
SIM1
SIM2
TF
Picture to show the tray holder
Picture to show how to remove the bottom casing
Picture to show how to insert the battery pack
SIM1
SIM2
Picture to show the cards position
SIM1
SIM2
TF
Picture to show the tray holder
Picture to show how to remove the bottom casing
Picture to show how to insert the battery pack
SIM1
SIM2
Picture to show the cards position
SIM1
SIM2
TF
Picture to show the tray holder
Picture to show how to remove the bottom casing
Picture to show how to insert the battery pack
SIM1
SIM2
Picture to show the cards position
SIM1
SIM2
TF
Picture to show the tray holder
FR
Utilisez l’encoche pour
enlever la coque arrière
ARCHOS_52_Platinum_book.indd 23 11/12/2014 14:36:02

24
Allumer
1. Faites un appui long sur le bouton ON/OFF pour allumer votre
appareil.
Lorsque vous allumez votre appareil, il se peut qu’un code PIN vous soit
demandé.
2. Saisissez le code PIN de votre carte SIM.
Attention : assurez-vous de saisir le bon code PIN.
3. Sélectionnez ‘OK’.
Assistant de démarrage
La première fois que vous allumez votre téléphone, l’assistant de
démarrage vous permet de le paramétrer :
- Langue
- Date & heure
- Connexion WiFi
- Les options du service de localisation
Eteindre
Pour éteindre votre téléphone, faites un appui long sur le bouton ON/
OFF, puis sélectionnez Eteindre > OK.
Mise en route
ARCHOS_52_Platinum_book.indd 24 11/12/2014 14:36:02

25
FR
ASTUCE :
L’écran tactile s’éteint après une certaine période d’inactivité. Pour
rallumer l’écran, faites un appui court sur le bouton ON/OFF. Pour
définir la mise en veille, allez sur Paramètres>Affichage>Veille.
Prol sonore & notication
1. Lorsque le téléphone est allumé,
faites un appui long sur le bouton
ON/OFF.
2. Sélectionnez une option.
Utilisation de l’écran tactile
Appuyer: appuyez une fois pour sélectionner ou lancer un menu, une
option ou une application.
Appuyer et maintenir: sélectionnez un élément et maintenez votre
doigt appuyé plus de 2 secondes.
Déplacer: sélectionnez un élément, maintenez votre doigt appuyé et
déplacez-le.
Tapoter: tapotez un élément deux fois rapidement.
Déler: faites déler rapidemlent vers le haut, vers le bas, vers la gauche,
vers la droite pour parcourir des listes ou des écrans.
Zoomer: placez deux doigts sur l’écran et les écarter pour zoomer ou les
rapprocher dans un mouvement de pincement pour dézoomer.
Silence Vibreur Sonnerie
ARCHOS_52_Platinum_book.indd 25 11/12/2014 14:36:02

26
Connexions 3G & WiFi
Connexion 3G
Avec votre carte SIM, vous devrez pouvoir vous connecter à Internet sans
aucun paramètrage supplémentaire. Votre téléphone n’aura de signal
que si vous êtes dans une zone de réseau 3G/EDGE couverte par votre
opérateur. Lorsque vous êtes connectés au réseau 3G, l’icône 3G est
achée dans la barre de statuts.
Astuce :
Des difficultés pour vous connecter? Consultez la foire aux questions sur
www.archos.com ou contactez votre opérateur mobile.
Activer les données mobiles
Pour accéder à Internet, l’icône Données mobiles
doit être activée.
1. Sélectionnez les icônes Heure et Batterie en
maintenant votre doigt appuyé an d’acher la
barre de statuts.
2. Tirez vers le bas la barre bleue.
3. Sélectionnez l’icône du panneau des
statuts.
4. Sélectionnez l’icône Données mobiles pour
l’activer.
ARCHOS_52_Platinum_book.indd 26 11/12/2014 14:36:02

27
FR
Connexion WiFi
ATTENTION : assurez-vous d’être dans une zone WiFi. Vous pouvez
accéder rapidement aux paramètres WiFi à partir de la barre de statuts.
1. Sélectionnez les icônes Heure et Batterie en
maintenant votre doigt appuyé an d’acher la
barre de statuts.
2. Tirez vers le bas la barre bleue.
3. Sélectionnez l’icône du panneau des statuts.
4. Sélectionnez “Paramètres” pour acher la page
des paramètres WiFi.
5. Dans la section “Sans l & réseaux”, si le WiFi est
éteint, faites-glisser l’interrupteur WiFi sur la position
“OUI”. Une fois que le WiFi est activé, le téléphone
recherche des réseaux WiFi à portée.
6. Sélectionnez le nom du réseau auquel vous voulez
vous connecter.
Les réseaux privés sont achés avec un cadenas. Ils nécessitent un mot
de passe.
ARCHOS_52_Platinum_book.indd 27 11/12/2014 14:36:02

28
Ajouter un compte Google
Un compte Google vous permet de proter au maximum des
applications et des services Google que vous pourriez utiliser.
1. Sélectionnez “Paramètres” > “Comptes” > “Ajouter compte”.
2. Sélectionnez “Google” pour le type de compte à ajouter.
3. Suivez les instructions à l’écran pour saisir les informations demandées.
Une fois que le compte est créé, accédez aux applications Play Store,
Gmail, Hangouts, Maps et beaucoup d’autres.
Synchroniser des informations
Vos informations doivent être synchronisées an d’être sauvegardées.
Vos données sont enregistrées sur les serveurs Google.
1. Sélectionnez “Paramètres” > “Comptes” > “Google”.
2. Sélectionnez votre compte.
La liste des informations qu’on peut synchroniser est achée.
La synchronisation automatique est activée. Si vous voulez lancer la
synchronisation, appuyez sur le bouton de Menu, puis sur Synchroniser
maintenant. Vous pouvez les récupérer en cas de perte de votre
téléphone ou de votre carte SIM. Lorsque vous ajoutez votre compte
Google à un nouvel appareil, toutes les informations sauvegardées sont
collectées.
Compte Google & Contacts
ARCHOS_52_Platinum_book.indd 28 11/12/2014 14:36:02

29
FR
Sauvegarder vos contacts
Tous vos contacts sont disponibles sur le Web et peuvent être
synchronisés sur n’importe quel téléphone Android paramétré avec votre
compte Google.
1. Insérer votre carte SIM incluant vos contacts dans votre téléphone.
2. A partir de l’écran d’Accueil ou de l’écran Toutes les applications,
sélectionnez l’application Contacts .
3. Appuyez sur le bouton de Menu puis sélectionnez “Importer/Exporter”.
4. Dans “Importer/exporter contacts”, sélectionnez “Importer à partir de la
carte SIM”.
5. Sélectionnez votre compte Google.
6. Sélectionnez les contacts à importer puis validez.
7. Une fois les contacts importés sur votre compte Google, sélectionnez
“Paramètres” > “Comptes” > “Google”.
8. Sélectionnez votre compte Google.
9. Appuyez sur le bouton de Menu, puis sélectionnez “Synchroniser
maintenant”. Vos contacts sont sauvegardés via votre compte Google.
ARCHOS_52_Platinum_book.indd 29 11/12/2014 14:36:03

30
L’écran d’accueil étendu :
Il y a par défaut un écran d’accueil. Vous pouvez créer autant d’écrans
que vous voulez. Sélectionnez l’icône d’une application et glissez la
vers la droite pour créer un nouvel écran. Sélectionnez une autre icône
d’application et glissez la vers la droite pour créer un troisième écran.
Bouton Accueil
Appui court pour retourner à l’écran d’accueil.
Appuyez deux fois successivement pour acher les applications
ouvertes. Faites glisser une application vers la gauche ou vers la droite
pour la fermer.
Déplacer une icône de l’écran d’accueil :
Maintenez votre doigt appuyé sur l’icône jusqu’à ce que s’achent
les lignes de positionnement, puis faites-la glisser vers l’emplacement
souhaité, et relâchez.
Supprimer une icône de l’écran d’accueil :
Maintenez votre doigt appuyé sur l’icône, puis faites-la glisser vers le
haut de l’écran, et déposez-la sur l’icône Supprimer.
Désinstaller une application :
A partir de l’écran Toutes les applications, maintenez votre doigt appuyé
Trucs & Astuces pour Android
TM
ARCHOS_52_Platinum_book.indd 30 11/12/2014 14:36:03

31
FR
sur l’icône, puis faites-la glisser vers le haut de l’écran et déposez-la sur
l’icône Désinstaller.
Créer des dossiers d’applications :
A partir d’un écran d’accueil, déposez une icône sur une autre pour les
rassembler.
Widgets :
Maintenez votre doigt appuyé sur un écran d’accueil. Sélectionnez
Widgets.
Changer le fond d’écran :
Maintenez votre doigt appuyé sur un emplacement vide de l’écran, puis
choisissez parmi la liste d’options.
Verrouiller votre téléphone :
A partir du panneau des réglages rapides dans la barre de statuts,
sélectionnez paramètres. Faites déler l’écran vers le bas, puis
sélectionnez Sécurité. Sélectionnez Verrouillage de l’écran. Sélectionnez
le type de verrouillage que vous voulez utiliser. Une fois que vous avez
sélectionné une option, un écran de verrouillage s’ache chaque fois
que votre écran est réactivé. Vous êtes alors invité à saisir le schéma, le
code PIN ou tout autre code spécié.
ARCHOS_52_Platinum_book.indd 31 11/12/2014 14:36:03

32
Dépannage
Mon téléphone ne répond pas ou ne s’allume pas
Vérifiez que la batterie est bien en place. Enlevez la batterie puis remettez-la
en place et rallumez le téléphone. Vérifiez la charge de la batterie et chargez
le téléphone pendant 20 minutes minimum.
Mon téléphone ne se connecte pas au réseau ou affiche “Pas de service”
Tentez de vous connecter à partir d’un autre endroit. Vérifiez la couverture
réseau avec votre opérateur.
Impossible de passer des appels
Assurez-vous que votre téléphone est connecté au réseau et que le réseau
n’est ni saturé, ni indisponible.
Impossible de recevoir des appels
Assurez-vous que le téléphone est allumé et connecté au réseau.
Carte SIM bloquée (mauvais code PIN)
Contactez votre opérateur réseau afin d’obtenir le code PUK.
Configurer votre connexion 3G
Contactez votre opérateur 3G pour obtenir les paramètres de connexion.
Sélectionnez l’application Paramètres. Sélectionnez Sans fil et réseaux >
Plus... > Réseaux mobiles.
Dans Opérateur de réseau, sélectionnez votre opérateur.
Dans Noms des points d’accès, entrez le nom du point d’accès et saisissez les
paramètres de connexion.
ARCHOS_52_Platinum_book.indd 32 11/12/2014 14:36:03

DE
Inhaltsverzeichnis
34
35
38
40
42
44
46
48
Verpackungsinhalt........................................................................................................
Beschreibung des Geräts............................................................................................
Montage...........................................................................................................................
Erste Schritte....................................................................................................................
WLAN-Verbindung & 3G-Verbindung.....................................................................
Google-Konten & Kontakte.........................................................................................
Android
TM
kennenlernen .............................................................................................
Fehlerbehebung.............................................................................................................
Weitere Informationen nden Sie unter den FAQs auf www.archos.com.
Diese unbedingt durchlesen, bevor Sie eine Rückgabe des Produkts in
Erwägung ziehen. Es könnte ein geringfügiges Problem vorliegen. Da
unsere Produkte kontinuierlich aktualisiert und weiterentwickelt werden,
kann die Software Ihres Gerätes in Erscheinung und Funktionalität
geringfügige Abweichungen zu den Darstellungen in dieser
Schnellstartanleitung aufweisen.
Konsultieren Sie die Konformitätserklärung auf http://www.archos.com/
products/declaration_conformity.html
ARCHOS_52_Platinum_book.indd 33 11/12/2014 14:36:03

34
Verpackungsinhalt
In der Verpackung müssen folgende Elemente enthalten sein:
- ARCHOS 52 Platinum
- Batterie
- Headset
- USB-Kabel
- Ladegerät
- Benutzerhandbuch
- Garantie, Impressum und Sicherheitshinweise
Die mit Ihrem Gerät mitgelieferten Elemente und das verfügbare
Zubehör können je nach Region oder Dienstleister abweichen.
Die mitgelieferten Elemente wurden ausschließlich für Ihr Gerät
entwickelt und sind mit anderen Geräten nicht kompatibel.
Nicht genehmigtes Zubehör kann zu einer Fehlfunktion Ihres Geräts
führen.
ARCHOS_52_Platinum_book.indd 34 11/12/2014 14:36:03

35
4
1
2
3
5
6
DE
Beschreibung des Geräts
Kopfhöreranschluss
Lautsprecher
Webcam
Lautstärketasten
EIN/AUS-Taste
Mikrofon
1
2
3
4
5
6
ARCHOS_52_Platinum_book.indd 35 11/12/2014 14:36:04

36
7
8
9
10
Beschreibung des Geräts
Kamera
Bliztlicht
Lautsprecher
Micro-USB-Anschluss
7
8
10
9
ARCHOS_52_Platinum_book.indd 36 11/12/2014 14:36:04

37
11 12
13
DE
Beschreibung des Geräts
11
13
12
Menü
Home/Google NOW
Zurück
Menü: Önet die Liste verfügbarer Optionen für den aktuellen
Bildschirm.
Home/Letzte Apps/Google Now: Kurz drücken, um zum Homescreen
zu gelangen; drücken und halten, um eine Liste der letzten Apps zu
önen. Lang drücken, um die App „Google NOW“ zu önen.
Zurück: Zurück zum vorherigen Bildschirm.
ARCHOS_52_Platinum_book.indd 37 11/12/2014 14:36:04

38
Montage
Önen
Entfernen Sie die Rückseitenabdeckung.
Die Rückseitenabdeckung nicht übermäßig biegen oder verdrehen. Die
Abdeckung kann sonst beschädigt werden.
Einlegen einer SIM-Karte
Um Ihre SIM-Karte einzuführen, diese mit der Vorderseite nach unten in
den Slot 1 oder 2 schieben.
Einlegen einer Speicherkarte
Um eine Speicherkarte einzuführen, diese mit der Vorderseite nach
unten in den Slot 3 schieben.
Schließen
1. Richten Sie die 4 Kontaktpunkte des Akkus mit denen des Telefons aus
und drücken Sie den Akku leicht in seine Position.
2. Die Akkuabdeckung wieder anbringen und einrasten.
Tipp:
Vor der erstmaligen Benutzung des Geräts sollte der Akku vollständig
aufgeladen werden.
ARCHOS_52_Platinum_book.indd 38 11/12/2014 14:36:04

39
Picture to show how to remove the bottom casing
Picture to show how to insert the battery pack
SIM1
SIM2
Picture to show the cards position
SIM1
SIM2
TF
Picture to show the tray holder
Picture to show how to remove the bottom casing
Picture to show how to insert the battery pack
SIM1
SIM2
Picture to show the cards position
SIM1
SIM2
TF
Picture to show the tray holder
Picture to show how to remove the bottom casing
Picture to show how to insert the battery pack
SIM1
SIM2
Picture to show the cards position
SIM1
SIM2
TF
Picture to show the tray holder
Picture to show how to remove the bottom casing
Picture to show how to insert the battery pack
SIM1
SIM2
Picture to show the cards position
SIM1
SIM2
TF
Picture to show the tray holder
DE
Heben Sie die
Rückabdeckung mithilfe
der Einkerbung an
ARCHOS_52_Platinum_book.indd 39 11/12/2014 14:36:04

40
Einschalten
1. Drücken und halten Sie die EIN/AUS-Taste, um das Gerät einzuschalten.
Beim Einschalten des Geräts muss eine PIN-Nummer eingegeben werden.
2. Geben Sie die mit Ihrer SIM-Karte erhaltene PIN-Nummer ein.
3. Wählen Sie ‘OK’.
Installationsassistent
Wenn Sie Ihren ARCHOS das erste Mal in Betrieb nehmen, leitet Sie
der Installationsassistent durch einige Bildschirme, um Ihnen dabei zu
helfen, die grundlegenden Einstellungen vorzunehmen:
- Sprache
- Datum & Uhrzeit
- WLAN Verbindung
- Standortdienst
Ausschalten
Um das Gerät auszuschalten, drücken und halten Sie die EIN/AUS-Taste
und wählen dann Power o (Ausschalten) > OK.
Erste Schritte
ARCHOS_52_Platinum_book.indd 40 11/12/2014 14:36:04

41
DE
Ton- und Benachrichtigungsprole
1. Bei eingeschaltetem Gerät drücken und
halten Sie die EIN/AUS-Taste.
2. Wählen Sie eine Option aus.
Tipp:
Wird der Touchscreen über einen bestimmten Zeitraum hinweg nicht
benutzt, wird dieser vom Gerät abgeschaltet. Um den Bildschirm wieder
einzuschalten, drücken Sie die EIN/AUS-Taste. Für die Einstellung der
Dauer gehen Sie zu Einstellungen > Anzeige > Display-Timeout.
Still
Vibration
Ton
Touchscreen-Funktionen
Tippen: Einmal tippen für Auswahl oder starten von Menüs, Optionen
oder Anwendungen.
Tippen und halten: Auf ein Element tippen und länger als 2 Sekunden
halten.
Ziehen: Auf ein Element tippen und zu einer neuen Position
verschieben.
Doppeltippen: Ein Element zweimal hintereinander kurz antippen.
Blättern: Schnelles scrollen nach oben, unten, links oder rechts für das
Blättern durch Listen oder Bildschirme.
Drücken: Platzieren Sie zwei Finger etwas auseinander und dann
zusammendrücken.
ARCHOS_52_Platinum_book.indd 41 11/12/2014 14:36:04

42
3G- & WLAN-Verbindung
3G
Mit Ihrer SIM-Karte sollten Sie ohne weitere Einstellungen mit dem Internet
verbunden sein. Beachten Sie, dass der ARCHOS nur dann ein Signal erhält,
wenn Sie sich im Bereich des 3G- oder EDGE-Netzwerks Ihres Anbieters
benden. Ist das Gerät mit dem 3G-Netzwerk verbunden, wird in der
Statusleiste das 3G-Symbol angezeigt.
Tipp:
Bei Verbindungsproblemen lesen Sie bitte auf www.archos.com die
FAQs oder kontaktieren Ihren Anbieter der 3G-Netzwerkverbindung.
Aktivierung der Mobildaten
Um auf das Internet zugreifen zu können, muss das
Mobildatensymbol aktiviert werden.
1. Berühren und halten Sie die Symbole für Uhrzeit
und Batterie, um die Statusleiste freizulegen.
2. Ziehen Sie die blaue Linie nach unten.
3. Tippen Sie auf .
4. Tippen Sie auf das Mobildatensymbol , um
es zu aktivieren.
ARCHOS_52_Platinum_book.indd 42 11/12/2014 14:36:05

43
DE
3G- & WLAN-Verbindung
WLAN
ACHTUNG: Stellen Sie sicher, dass Sie sich innerhalb einer WiFi(WLAN)-
Zone aufhalten. Von der Statusleiste aus können Sie schnell auf die WiFi
(WLAN)-Einstellungen zugreifen.
1. Berühren und halten Sie die Symbole für Uhrzeit
und Batterie, um die Statusleiste freizulegen.
2. Ziehen Sie die blaue Linie nach unten.
3. Tippen Sie auf .
4. Berühren Sie “Einstellungen” , um das Menü
WLAN-Einstellungen zu önen.
5. Im Bereich „Drahtlos und Netzwerke“ schieben Sie
bei ausgeschaltetem WLAN den WLAN-Schalter in
die Position „ON“. Nachdem das WLAN eingeschaltet
wurde, sucht der ARCHOS nach WLAN-Netzwerken
in Reichweite.
6. Berühren “WLAN”.
7. Berühren Sie den Namen des Netzwerks, mit dem Sie verbunden werden
möchten. Gesicherte Netzwerke werden mit einem Schlossß-Symbol
angezeigt und erfordern die Eingabe eines Passworts.
ARCHOS_52_Platinum_book.indd 43 11/12/2014 14:36:05

44
Google-Konten & Kontakte
Google-Konto hinzufügen
Mit einem Google-Konto können Sie Ihre Google-Apps und Dienste in
vollem Umfang nutzen.
1. Gehen Sie zu "Settings" > "Accounts" > "Add account"
("Einstellungen" > "Konten & Synchronisierung" > "Konto hinzufügen").
2. Wählen Sie für das hinzuzufügende Konto den Typ "Google".
3. Folgen Sie den Anweisungen auf dem Bildschirm und geben Sie die
Informationen für das Konto ein.
Nachdem das Konto erstellt wurde, können Sie auf Play Store, Gmail,
Hangouts, Maps und viele andere Apps zugreifen.
Synchronisierungsinformationen
Die Informationen müssen synchron sein, um gespeichert werden zu
können. Ihre Daten werden auf Google-Servern gesichert.
1. Gehen Sie zu "Einstellungen" > "Konten" > "Google".
2. Wählen Sie Ihr Konto aus.
Die Liste der synchronisierbaren Informationen wird angezeigt.
Im Falle eines Geräte- oder SIM-Kartenverlusts können diese
wiederhergestellt werden.
Wird Ihr Google-Konto einem neuen Gerät hinzugefügt, werden Ihre
gespeicherten Informationen erfasst.
ARCHOS_52_Platinum_book.indd 44 11/12/2014 14:36:05

45
DE
Google-Konten & Kontakte
Speicherung Ihrer Kontakte
Alle Ihre Kontakte sind im Web immer verfügbar und können mit jedem
Android-Telefon synchronisiert werden, das mit dem gleichen Google-
Konto eingerichtet ist.
1. Legen Sie die SIM-Karte mit Ihren Kontakten in Ihr Telefon ein.
2. Wählen Sie vom Bildschirm „Home“ oder „All Apps (Alle
Anwendungen)“ aus die App „People (Kontakte)“ .
3. Tippen Sie auf die Menü-Taste > “Import/Export” (Importieren/
Exportieren).
4. Unter “Import/export contacts” (Kontakte importieren/exportieren)
wählen Sie Import from SIM card (Von SIM-Karte importieren).
5. Wählen Sie Ihr Google-Konto aus.
6. Markieren Sie die zu importierenden Kontakte und bestätigen Sie.
7. Nachdem die Kontakte in Ihr Google-Konto importiert wurden, gehen Sie
zu „Einstellungen > Konten > Google“.
8. Wählen Sie Ihr Google-Konto aus.
9. Drücken Sie die Menü-Taste und dann “Jetzt synchronisieren“.
Ihre Kontakte werden in Ihrem Google-Konto gespeichert.
ARCHOS_52_Platinum_book.indd 45 11/12/2014 14:36:05

46
Android
TM
kennenlernen
Der erweiterte Startbildschirm:
Sie haben standardmäßig ein Home-Bildschirm. Sie können so viele
Home-Bildschirme können Sie erstellen. Wählen Sie ein App-Symbol und
schieben Sie es richtig. Ein neues Home-Bildschirm erstellt wird. Wählen
Sie eine andere App-Icon und schieben Sie es richtig, eine dritte Home-
Bildschirm erstellen.
Home-Taste
Kurz drücken, um zum Startbildschirm zu gelangen.
Doppeltippen, um eine Liste der neuesten Anwendungen zu önen.
Ein Element vom Startbildschirm verschieben:
Zum Verschieben eines Elements vom Startbildschirm den Finger
darauf legen und so lange halten, bis die Rasterlinien zur Positionierung
erscheinen. Dann an die gewünschte Stelle schieben und loslassen.
Ein Element vom Startbildschirm entfernen:
Den Finger auf das Element legen und halten. Den Finger auf dem
Bildschirm nach oben bewegen und über dem «Entfernen»-Symbol
loslassen.
Ein Element deinstallieren:
Auf den «Alle Apps»-Bildschirmen das betreende Element berühren
und halten. Den Finger im Bildschirm nach oben bewegen und über
ARCHOS_52_Platinum_book.indd 46 11/12/2014 14:36:05

47
DE
dem «Deinstallieren»-Papierkorb loslassen.
Anwendungsordner erstellen:
Ziehen Sie auf einem Startbildschirm ein Anwendungssymbol über ein
anderes.
Die beiden Symbole werden kombiniert.
Widgets:
Berühren und halten Sie den Finger auf Ihrem Home-Bildschirm. Tippen
Sie auf “Widgets”.
Hintergrundbild ändern:
Den Finger auf eine freie Stelle des Bildschirms legen und dann aus der
Liste auswählen.
Touchscreen sperren:
Berühren Sie Einstellungen auf dem Schnelleinstellungen-Dashboard in
der Statusleiste. Scrollen Sie nach unten und berühren Sie “Sicherheit”.
Berühren Sie Bildschirmsperrung. Berühren Sie die gewünschte Art der
Sperrung. Nach erfolgter Sperrung wird ein Sperrbildschirm angezeigt,
sobald der Bildschirm aktiviert wird. Auf diesem ist ein Muster, eine PIN
oder ein anderer festgelegter Schlüssel einzugeben.
ARCHOS_52_Platinum_book.indd 47 11/12/2014 14:36:05

48
Fehlerbehebung
Mein Telefon ist abgestürzt oder es kann nicht eingeschaltet werden
Die Akkukontakte überprüfen, den Akku herausnehmen und wieder einlegen und das Telefon
einschalten. Den Ladezustand des Akkus überprüfen und mindestens 20 Minuten aufladen.
Mein Telefon kann nicht mit einem Netzwerk verbinden oder es wird „Kein Dienst“
angezeigt
Testen Sie das Gerät an einem anderen Standort. Überprüfen Sie die Netzwerkabdeckung bei
Ihrem Anbieter.
Keine ausgehenden Anrufe möglich
Überprüfen Sie die Verbindung Telefon - Netzwerk und ob das Netzwerk überlastet oder nicht
verfügbar ist.
Eingehende Anrufe können nicht empfangen werden
Überprüfen Sie, ob das Telefon eingeschaltet und mit einem Netzwerk verbunden und ob das
Netzwerk überlastet oder nicht verfügbar ist.
PIN der SIM-Karte gesperrt
Wenden Sie sich an Ihren Netzwerkbetreiber, um den PUK-Code zu erhalten.
Konguration eines neuen 3G-Netzwerks:
Verbindet sich das Gerät nicht automatisch mit dem Netzwerk Ihres 3G-Anbieters, wenden Sie
sich an Ihren 3G-Anbieter, um so die Verbindungsparameter zu erhalten.
Tippen Sie auf Ihrem Gerät auf Einstellungen.
Wählen Sie WLAN & Netzwerke > Mehr... > Mobilnetzwerke.
Wählen Sie Netzwerkeinstellungen.
Wählen Sie unter Netzwerkanbieter Ihren Anbieter aus.
Unter Access Point Names, wählen Sie den korrekten Namen des Access Points aus und geben
exakt die von Ihrem 3G-Anbieter zur Verfügung gestellten Verbindungsparameter ein.
ARCHOS_52_Platinum_book.indd 48 11/12/2014 14:36:05

49
ES
Índice
50
51
54
56
58
60
62
64
Contenido de la caja.....................................................................................................
Descripción del dispositivo........................................................................................
Ensamblado.....................................................................................................................
Utilización por primera vez........................................................................................
Conexión 3G & Conexión WiFi...................................................................................
Cuenta de Google/ Contactos...................................................................................
Para familiarizarse con Android
TM
............................................................................
Resolución de problemas...........................................................................................
Para más información, consulte la sección de preguntas y respuestas en
www.archos.com. Examínela detenidamente antes de pensar en realizar
cualquier devolución. Puede que su problema tenga una fácil solución.
Al estar actualizando y mejorando constantemente nuestros productos,
el aspecto o el software de su dispositivo pueden variar ligeramente con
respecto a lo descrito en esta guía de inicio rápido.
Consulte la declaración de conformidad en http://www.archos.com/
products/declaration_conformity.html
ARCHOS_52_Platinum_book.indd 49 11/12/2014 14:36:05

50
Contenido de la caja
Compruebe que la caja del producto incluya los elementos siguientes:
- ARCHOS 52 Platinum
- Batería
- Headset
- USB cable
- Cargador
- Guía de usuario
- Avisos de garantía, legales y de seguridad
Los elementos suministrados con su dispositivo y los accesorios disponibles
pueden variar según la zona geográfica o proveedor de servicio utilizado.
Los elementos suministrados han sido desarrollados en exclusiva para este
dispositivo y pueden no ser compatibles con otros dispositivos.
La utilización de accesorios no homologados podría ocasionar un
funcionamiento defectuoso del producto.
ARCHOS_52_Platinum_book.indd 50 11/12/2014 14:36:06

51
4
1
2
3
5
6
ES
Descripción del dispositivo
Conector de headset
Altavoz
Webcam
Botones de volumen
Botón ON/OFF
Micrófono
1
2
3
4
5
6
ARCHOS_52_Platinum_book.indd 51 11/12/2014 14:36:06

52
7
8
9
10
Descripción del dispositivo
Camera
Flash
Altavoz
Puerto micro USB
7
9
8
10
ARCHOS_52_Platinum_book.indd 52 11/12/2014 14:36:06

53
11 12
13
ES
11
13
12
Menú
Inicio/Apps recientes/Google NOW
Atrás
Menú: muestra la lista de opciones disponibles de la pantalla actual.
Inicio/Apps recientes/Google NOW: una pulsación breve para volver
a la pantalla de inicio; doble pulsación para abrir la lista de aplicaciones
recientes. Hacer una pulsación larga para abrir la aplicación Google
NOW.
Atrás: vuelve a la pantalla anterior.
ARCHOS_52_Platinum_book.indd 53 11/12/2014 14:36:07

54
Ensamblado
Apertura
Utilice la muesca para retirar la cubierta posterior.
No doble ni fuerce en exceso la cubierta posterior ya que podría resultar
dañada.
Inserción de una tarjeta SIM
1. Con respecto a la tarjeta SIM, deslice hacia fuera el soporte de sujeción
de la tarjeta sim y coloque su tarjeta micro SIM (1) o tarjeta nano SIM (2)
en el soporte.
2. Vuelva a colocar en su lugar el soporte de sujeción.
Inserción de una tarjeta de memoria
Con respecto a la tarjeta de memoria, introdúzcala boca abajo en la
ranura TF (3).
Cierre
Vuelva a colocar la cubierta en su sitio. Un clic le indicará que ha sido
cerrada correctamente.
Consejos:
Antes de utilizar su dispositivo por primera vez, cargue completamente
la batería.
ARCHOS_52_Platinum_book.indd 54 11/12/2014 14:36:07

55
Picture to show how to remove the bottom casing
Picture to show how to insert the battery pack
SIM1
SIM2
Picture to show the cards position
SIM1
SIM2
TF
Picture to show the tray holder
Picture to show how to remove the bottom casing
Picture to show how to insert the battery pack
SIM1
SIM2
Picture to show the cards position
SIM1
SIM2
TF
Picture to show the tray holder
Picture to show how to remove the bottom casing
Picture to show how to insert the battery pack
SIM1
SIM2
Picture to show the cards position
SIM1
SIM2
TF
Picture to show the tray holder
Picture to show how to remove the bottom casing
Picture to show how to insert the battery pack
SIM1
SIM2
Picture to show the cards position
SIM1
SIM2
TF
Picture to show the tray holder
ES
Levante la cubierta
posterior utilizando la muesca
ARCHOS_52_Platinum_book.indd 55 11/12/2014 14:36:07

56
Utilización por primera vez
Encendido
1. Mantenga pulsado el botón ON/OFF para encender el dispositivo.
Al encender el dispositivo, se le pedirá que introduzca un código PIN.
2. Introduzca el código PIN suministrado con su tarjeta SIM.
3. Haga clic en “OK” [Aceptar].
Asistente de inicio
La primera vez que encienda el ARCHOS, el asistente de instalación le
ayudará a congurar el dispositivo :
- Idioma
- Fecha y hora
- Conexión WiFi
- El servicio de ubicación
Apagado
Para apagar el dispositivo, mantenga pulsado el botón ON/OFF y luego
seleccione "Power o" > "OK" [Apagar] > [Aceptar].
ARCHOS_52_Platinum_book.indd 56 11/12/2014 14:36:07

57
ES
Sonido y perles de noticación
1. Con el dispositivo encendido,
mantenga pulsado el botón ON/OFF.
2. Seleccione una opción.
Acciones de la pantalla táctil
Pulsar: Con los dedos, toque una vez para seleccionar o lanzar un menú,
opción o aplicación.
Pulsar y mantener: Pulse un elemento y manténgalo pulsado durante
más de 2 segundos.
Arrastrar: Pulse un elemento y arrástrelo hasta la nueva ubicación.
Pulsar dos veces: Pulse un elemento dos veces rápidamente.
Deslizar: Deslice rápidamente un dedo arriba, abajo, a izquierda o
derecha para desplazarse a través de listas o pantallas.
Pellizcar : Coloque dos dedos separados uno del otro y luego realice un
movimiento de pellizco con los dedos hacia dentro.
Consejos:
El dispositivo desactiva la pantalla táctil tras un determinado periodo
sin utilizar. Para volver a activar la pantalla, pulse el botón ON/OFF.Para
escoger una duración, vaya a Ajustes>Pantalla>Tiempo espera pantalla.
Silencio Vibración Sonido
ARCHOS_52_Platinum_book.indd 57 11/12/2014 14:36:07

58
58
Conexión 3G & WiFi
Conexión 3G
Con su tarjeta SIM debería poder conectarse a Internet sin ninguna
otra conguración adicional. El ARCHOS solo podrá conectarse si
se encuentra en una zona en la que su proveedor de red 3G ofrezca
cobertura. Al conectarse a la red 3G, el icono 3G aparecerá en la barra
de estado.
Activación de los datos móviles
Para poder acceder a Internet, el icono de datos
móviles debe estar activado.
1. Mantenga pulsados los iconos de reloj y batería
para mostrar la barra de estado.
2. Arrastre la franja azul hacia abajo.
3. Pulse el icono .
4. Pulse el icono de datos móviles para
activarlo.
Consejo:
Si tiene algún problema de conexión, consulte la sección de preguntas
y respuestas (FAQ) de www.archos.com o póngase en contacto con su
proveedor de servicios 3G.
ARCHOS_52_Platinum_book.indd 58 11/12/2014 14:36:07

59
ES
Conexión WiFi
Asegúrese de que se encuentra en una zona WiFi. Puede acceder a los
ajustes de WiFi rápidamente desde la barra de estado.
1. Mantenga pulsados los iconos de reloj y batería
para mostrar la barra de estado.
2. Arrastre la franja azul hacia abajo.
3. Pulse el icono .
4. Toque “Ajustes” para abrir el menú de ajustes
de WiFi.
5. En la sección de Conexiones inalámbricas, si la
WiFi está apagada, deslice el interruptor Wi-Fi hasta
la posición “ON”. Una vez la WiFi activada, el ARCHOS
buscará las redes WiFi disponibles.
6. Toque “WiFi”.
7. Toque el nombre de la red a la que desee conectarse. Las redes privadas
se muestran con un icono de candado y será preciso que introduzca su
contraseña.
ARCHOS_52_Platinum_book.indd 59 11/12/2014 14:36:08

60
Cuenta de Google & Contactos
Añadir una cuenta de Google
La cuenta de Google le permite aprovechar al máximo cualquier
aplicación o servicio de Google que desee utilizar.
1.
Vaya a “Settings” [Ajustes]
> “Accounts” [Cuentas] > “Add account”
[Añadir cuenta].
2.
En tipo de cuenta, seleccione “Google”.
3.
Siga las instrucciones en pantalla para introducir los datos de la cuenta.
Una vez creada su cuenta, podrá acceder a Play Store, Gmail, Hangouts,
Maps y muchas otras aplicaciones.
Información sobre sincronización
Para poder ser guardada, la información debe estar sincronizada. Sus
datos se guardan en servidores de Google.
1.
Vaya a "Settings" [Ajustes] > "Accounts" [Cuentas] > "Google".
2.
Seleccione su cuenta.
Aparecerá la lista de información que puede sincronizarse.
La sincronización automática debe estar activada.
Para lanzar la sincronización, pulse el botón Menú, y luego Sincronizar
ahora. De esta forma, podrá recuperar sus datos en caso de pérdida del
dispositivo o de la tarjeta SIM. Al añadir su cuenta de Google a un nuevo
dispositivo, se recogerá toda la información guardada.
ARCHOS_52_Platinum_book.indd 60 11/12/2014 14:36:08

61
ES
Guardar sus contactos
Todos sus contactos están disponibles en todo momento en la web y
pueden sincronizarse con cualquier teléfono Android congurado con la
misma cuenta de Google.
1. Inserte la tarjeta SIM con sus contactos.
2. Desde la pantalla de Inicio o Todas las aplicaciones, seleccione la
aplicación Contactos .
3. Pulse el botón Menú > "Import/Export" [Importar/exportar].
4. En Importar/exportar contactos, seleccione "Import from SIM card"
[Importar de USIM].
5. Seleccione su cuenta de Google.
6. Marque los contactos que desee importar y conrme.
7. Una vez los contactos importados en la cuenta de Google, vaya a “Ajustes”
> “Cuentas” > “Google”.
8. Seleccione su cuenta de Google.
9. Seleccione el botón Menú y luego “Sync now” [Sincronizar] para guardar
sus contactos en su cuenta de Google.
Sus contactos se guardarán a través de su cuenta de Google.
ARCHOS_52_Platinum_book.indd 61 11/12/2014 14:36:08

62
La pantalla de inicio ampliada:
Tiene una pantalla de inicio por defecto. Puedes crear tantas pantallas de
inicio que desee. Seleccione un icono de aplicación y deslice bien. Una
nueva pantalla de inicio se creará. Seleccione otro icono de la aplicación
y deslice la derecha para crear una tercera pantalla de inicio.
Desplazamiento de un elemento de la pantalla de inicio:
Mantenga el dedo sobre él hasta que aparezcan líneas de cuadrícula de
posición; a continuación, deslícelo hasta la ubicación deseada y suelte
el dedo.
Eliminación de un elemento de la pantalla de inicio:
Mantenga el dedo sobre él, deslice el dedo hacia la parte superior de la
pantalla y déjelo caer sobre el icono Eliminar.
Desinstalación de un elemento:
En las pantallas Todas las aplicaciones, mantenga el dedo sobre él,
deslice el dedo hacia la parte superior de la pantalla y déjelo caer sobre
la papelera Desinstalar.
Para familiarizarse con Android
TM
ARCHOS_52_Platinum_book.indd 62 11/12/2014 14:36:08

63
ES
Creación de carpetas de aplicaciones:
Deje caer un icono de aplicación sobre otro en una pantalla de inicio y
los dos iconos se combinarán.
Widgets:
Toque y mantenga presionado el dedo sobre la pantalla de su casa.
Toque “Widgets”.
Cambio del fondo:
Mantenga el dedo en la pantalla en una ubicación vacía y, a
continuación, elija en la lista.
Bloqueo de la pantalla táctil:
En el escritorio digital de ajustes rápidos de la barra de estado, toque
ajustes. Desplácese hacia abajo y toque Seguridad > Bloqueo de la
pantalla. Toque el tipo de bloqueo que desee utilizar. Tras denir aquí
un bloqueo, aparecerá una pantalla de bloqueo cuando se active la
pantalla, solicitando el patrón, PIN u otra clave especicada.
ARCHOS_52_Platinum_book.indd 63 11/12/2014 14:36:08

64
Mi teléfono está bloqueado o no lo puedo encender
Verifique los contactos de la batería, retire y vuelva a colocar la batería y
luego encienda de nuevo el teléfono. Compruebe el nivel de carga de la
batería, recárguela durante al menos 20 minutos.
Mi teléfono no puede conectarse a la red o aparece un mensaje de "Sin
servicio"
Pruebe a conectarse desde otro lugar. Compruebe la cobertura de red de su
operador.
No consigo hacer llamadas
Asegúrese de que el teléfono esté conectado a una red y de que la red no
esté sobrecargada o indisponible.
No consigo recibir llamadas
Compruebe que su teléfono esté encendido y conectado a una red (verifique
que la red no esté sobrecargada o indisponible).
El PIN de mi tarjeta SIM está bloqueado
Póngase en contacto con su operador de telefonía para obtener el código
PUK (Clave de Desbloqueo Personal).
Para configurar una nueva red 3G:
En el dispositivo, pulse Ajustes.
Seleccione Conexiones inalámbricas > Más... > Redes móviles.
Seleccione Configuración de red móvil. En Operadores de red, seleccione
su operador. En APN, seleccione el nombre del punto de acceso correcto
e introduzca los parámetros de conexión exactos suministrados por su
proveedor.
Resolución de problemas
ARCHOS_52_Platinum_book.indd 64 11/12/2014 14:36:08

IT
Sommario
66
67
70
72
74
76
78
80
Contenuto della confezione......................................................................................
Descrizione del dispositivo........................................................................................
Assemblaggio.................................................................................................................
Introduzione...................................................................................................................
Connessione 3G & WiFi...............................................................................................
Account Google e contatti.........................................................................................
Conoscere Android
TM
...................................................................................................
Risoluzione dei problemi............................................................................................
Per ulteriori informazioni, consultare le FAQ e il manuale utente del vostro
prodotto su www.archos.com. Accertarsi di aver letto questo materiale
prima di considerare l’eventuale restituzione del prodotto. Il problema
riscontrato potrebbe non essere davvero un problema!
Consultare la dichiarazione di conformità su http://www.archos.com/
products/declaration_conformity.html
ARCHOS_52_Platinum_book.indd 65 11/12/2014 14:36:08

66
Contenuto della confezione
Assicurarsi della presenza dei seguenti articoli nella confezione:
- ARCHOS 52 Platinum
- Batteria
- Cua
- Cavo USB
- Caricatore
- Guida dell’utente
- Garanzia, note legali e sulla sicurezza
Gli articoli forniti con il dispositivo e gli accessori disponibili possono
variare in base al Paese o al gestore telefonico.
Gli articoli in dotazione sono progettati esclusivamente per il dispositivo
in questione e potrebbero non essere compatibili con altri dispositivi.
Accessori non approvati possono causare il malfunzionamento del
dispositivo.
ARCHOS_52_Platinum_book.indd 66 11/12/2014 14:36:08

67
4
1
2
3
5
6
IT
Jack per auricolare
Altoparlanti
Webcam
Pulsante per il volume
Pulsanti ON/OFF
Microfono
Descrizione del dispositivo
1
2
3
4
5
6
ARCHOS_52_Platinum_book.indd 67 11/12/2014 14:36:09

68
7
8
9
10
Descrizione del dispositivo
Fotocamera
Flash
Altoparlanti
Porta micro-USB
7
9
8
10
ARCHOS_52_Platinum_book.indd 68 11/12/2014 14:36:09

69
11 12
13
IT
11
13
12
Menu
Home/App recenti/Google Now
Indietro
Menu: Aprire la lista di opzioni disponibili sulla schermata corrente.
Home/App recenti/Google Now: Premere brevemente per tornare
alla schermata principale; premere due volte per aprire l’elenco delle
applicazioni recenti. Fare una lunga pressione per aprire l’applicazione
Google NOW.
Indietro: Ritorno alla schermata precedente.
ARCHOS_52_Platinum_book.indd 69 11/12/2014 14:36:09

70
Assemblaggio
Apertura
Utilizzare la fessura per rimuovere la copertura posteriore.
Non piegare o torcere eccessivamente la copertura posteriore.
Si potrebbe danneggiare.
Inserimento della scheda SIM
1. Per inserire una scheda SIM, far scorrere verso l’esterno l’apposito
cassettino e inserire una Micro-SIM (1) o una Nano-SIM (2).
2. Richiudere il cassettino.
Inserimento della memory card
Per inserire una memory card, farla scorrere a faccia in giù nello slot per
schede TF (3).
Chiusura
Rimettere in posizione la copertura posteriore no a sentire un clic.
Suggerimenti:
Prima di utilizzare il dispositivo per la prima volta, caricare
completamente la batteria.
ARCHOS_52_Platinum_book.indd 70 11/12/2014 14:36:10

71
Picture to show how to remove the bottom casing
Picture to show how to insert the battery pack
SIM1
SIM2
Picture to show the cards position
SIM1
SIM2
TF
Picture to show the tray holder
Picture to show how to remove the bottom casing
Picture to show how to insert the battery pack
SIM1
SIM2
Picture to show the cards position
SIM1
SIM2
TF
Picture to show the tray holder
Picture to show how to remove the bottom casing
Picture to show how to insert the battery pack
SIM1
SIM2
Picture to show the cards position
SIM1
SIM2
TF
Picture to show the tray holder
Picture to show how to remove the bottom casing
Picture to show how to insert the battery pack
SIM1
SIM2
Picture to show the cards position
SIM1
SIM2
TF
Picture to show the tray holder
IT
Sollevare la copertura
posteriore facendo leva sulla tacca
ARCHOS_52_Platinum_book.indd 71 11/12/2014 14:36:10

72
Introduzione
Accensione
1. Premere e tenere premuto il pulsante ON/OFF per accendere il dispositivo.
Quando si accende il dispositivo, può essere richiesto un codice PIN.
2. Digitare il codice PIN fornito con la scheda SIM.
3. Selezionare "OK".
Installazione guidata
La prima volta che si avvia ARCHOS, il wizard di installazione aiuterà ad
installare il dispositivo :
- Lingua
- Data e ora
- Connessione WiFi
- Il servizio di localizzazione
Spegnimento
Per spegnere il dispositivo, premere e tenere premuto il pulsante ON/
OFF, e quindi selezionare Power o > OK.
ARCHOS_52_Platinum_book.indd 72 11/12/2014 14:36:10

73
IT
Proli di notica e audio
1. Quando il dispositivo è acceso,
premere e tenere premuto il pulsante
ON/OFF.
2. Selezionare un’opzione.
Azioni sul touch screen
Tocco (Tap): Toccare una volta per selezionare o avviare un menu,
un’opzione o un’applicazione.
Tocca e premi: Toccare un elemento e tenerlo premuto per più di 2
secondi.
Trascina: Toccare un elemento e spostarlo in una nuova posizione.
Doppio tocco: Toccare un elemento due volte velocemente.
Panoramica: Scorrere velocemente verso l’alto, il basso, a sinistra o a
destra per scorrere elenchi o schermate.
Pizzica: Distanziare due dita e quindi stringerle.
Suggerimenti:
Il dispositivo disattiva il touch screen quando non lo si utilizza per un
periodo determinato. Per attivare lo schermo, premere il pulsante
ON/OFF. Per impostare la durata, andare su Settings (Impostazioni)>
Display> Sleep (Sospensione).
Silenzioso
Vibrazione Suono
ARCHOS_52_Platinum_book.indd 73 11/12/2014 14:36:10

74
Connessione 3G & WiFi
Connessione 3G
Con la scheda SIM, la connessione a Internet dovrebbe stabilirsi senza
ulteriori congurazioni. ARCHOS avrà segnale solo in un’area coperta
dalla rete 3G del fornitore. Se connesso alla rete 3G, l’icona del 3G verrà
visualizzata nella barra di stato.
Suggerimento:
Quando si verificano problemi di connessione, vedere le domande
frequenti su www.archos.com o contattare il fornitore di connessione
di rete 3G.
Attivazione dei dati mobili
Per poter accedere a Internet, l’icona dei dati mobili
deve essere attivata.
1. Tocca e tieni premute le icone dell’orario e della
batteria per visualizzare la barra di stato.
2. Trascina la linea blu verso il basso.
3. Toccare l’icona .
4. Toccare l’icona di dati mobili per attivarla.
ARCHOS_52_Platinum_book.indd 74 11/12/2014 14:36:10

75
IT
Connessione 3G & WiFi
Connessione WiFi
ATTENZIONE: Accertarsi di essere in una zona coperta da WiFi. È possibile
accedere rapidamente alle impostazioni WiFi dalla barra di stato.
1. Tocca e tieni premute le icone dell’orario e della
batteria per visualizzare la barra di stato.
2. Trascina la linea blu verso il basso.
3. Toccare l’icona .
4. Selezionare “Impostazioni” per aprire il menù
delle impostazioni WiFi.
5. Nella sezione “Wireless & networks” (Wireless e
reti), se il WiFi è spento, far scorrere l’interruttore WiFi
in posizione “ON”. Una volta che la rete WiFi è attiva,
il dispositivo ARCHOS ricerca le reti WiFi presenti nel
raggio.
6. Selezionare “WiFi”.
7. Selezionare il nome di rete a cui si desidera connettersi. Le reti private
vengono visualizzate con un lucchetto e richiedono l’inserimento di una
password.
ARCHOS_52_Platinum_book.indd 75 11/12/2014 14:36:11

76
Account Google e contatti
Aggiunta di un account Google
Un account Google consente di sfruttare al meglio tutte le applicazioni e
i servizi di Google che è possibile utilizzare.
1. Andare a "Impostazioni" > "Account"> "Aggiungi account".
2. Selezionare il tipo di account "Google" da aggiungere.
3. Seguire le istruzioni a schermo per inserire le informazioni relative
all'account.
Una volta che l'account è stato creato, è possibile accedere a Play Store,
Gmail, Hangouts, Maps e molte altre applicazioni.
Sincronizzazione di informazioni
Le informazioni devono essere sincronizzate per essere salvate. I tuoi dati
vengono salvati sui server di Google.
1. Andare a "Impostazioni"> "Account"> "Google".
2. Selezionare il proprio account.
Viene visualizzato l’elenco di informazioni che si possono sincronizzare.
La sincronizzazione automatica dev’essere attivata.
Se si desidera avviare la sincronizzazione, premere il pulsante
Menu, quindi Sincronizza ora. È possibile recuperare i dati in caso
di smarrimento del dispositivo o della scheda SIM. Quando l’utente
aggiunge il proprio account Google a un nuovo dispositivo, tutte le
informazioni salvate vengono raccolte.
ARCHOS_52_Platinum_book.indd 76 11/12/2014 14:36:11

77
IT
Salvataggio dei contatti
Tutti i propri contatti sono sempre disponibili sul web e possono essere
sincronizzati con qualsiasi telefono Android che è impostato con lo
stesso account Google.
1. Installare la scheda SIM con i contatti presenti nel telefono.
2. Da una schermata Home o Tutte le Applicazioni, selezionare l'applicazione
Persone .
3. Toccare il tasto Menu > Importa/Esporta.
4. In Importa/Esporta contatti, selezionare Importa da scheda SIM.
5. Seleziona il tuo account Google.
6. Controlla i contatti da importare e confermali.
7. Una volta che i contatti vengono importati nell’account Google, vai su
“Settings” (Impostazioni) > “Account”> “Google”.
8. Scegliere il proprio account Google.
9. Selezionare il pulsante Menu, quindi "Sincronizza ora". I contatti sono
salvati sul proprio account Google.
ARCHOS_52_Platinum_book.indd 77 11/12/2014 14:36:11

78
Schermata iniziale estesa:
Hai una schermata iniziale di default. È possibile creare quante
schermate iniziali che si desidera. Selezionare un’icona app e farlo
scorrere a destra. Verrà creata una schermata nuova casa. Selezionare
un’altra icona app e farlo scorrere a destra per creare una terza
schermata iniziale.
Pulsante Home
Premere brevemente per tornare alla schermata principale.
Doppio tocco per aprire l’elenco delle applicazioni recenti.
Spostare una voce della schermata iniziale:
Selezionare e tenere il dito su di essa no a quando si visualizzano le
linee della griglia di posizionamento, quindi scorrere nella posizione
desiderata e togliere il dito.
Rimuovere una voce della schermata iniziale:
Selezionare e tenerla, scorrere il dito verso la parte superiore dello
schermo e lasciare sull’icona Rimuovi.
Conoscere Android
TM
ARCHOS_52_Platinum_book.indd 78 11/12/2014 14:36:11

79
IT
Disinstallare una voce:
Dalle schermate Tutte le applicazioni, selezionare e tenere, scorrere
il dito verso la parte superiore dello schermo e lasciare su Cestino
disinstalla.
Creare cartelle di applicazioni:
Lasciare un’icona di applicazione su un’altra icona della schermata
iniziale e le due icone si combineranno.
Widget:
Toccare e tenere premuto il dito sullo schermo a casa. Toccare “Widget”.
Modicare lo sfondo:
Tenere il dito sulla schermata su una posizione vuota, quindi selezionare
dall’elenco.
Blocco del touchscreen:
Dal pannello delle impostazioni rapide nella barra di stato, selezionare
impostazioni. Scorrere e selezionare protezione. Bloccare il touchscreen.
Selezionare il tipo di blocco che si desidera usare. Dopo aver impostato
un blocco, un lucchetto viene visualizzato ogni volta che lo schermo si
apre, richiedendo sequenza, PIN o altra chiave specicata.
ARCHOS_52_Platinum_book.indd 79 11/12/2014 14:36:11

80
Il telefono è bloccato o non si accende
Controllare i contatti della batteria, rimuovere e reinstallare la batteria,
quindi accendere il telefono. Controllare il livello di carica della batteria,
caricare per almeno 20 minuti.
Il mio telefono non riesce a connettersi a una rete o visualizza il
messaggio "No service"
Provare a connettersi in un altro luogo. Verificare la copertura di rete con
l'operatore.
Impossibile effettuare chiamate in uscita
Assicurarsi che il telefono sia connesso a una rete, e che la rete non sia
sovraccarica o non disponibile.
Impossibile ricevere chiamate in arrivo
Assicurarsi che il telefono sia acceso e collegato ad una rete (controllare che
la rete non sia sovraccarica o non disponibile).
PIN della scheda SIM bloccato
Contattare l'operatore di rete per ottenere il codice PUK (Personal
Unblocking Key).
Per configurare una nuova rete 3G
Toccare Impostazioni sul dispositivo.
Selezionare Wireless e reti > Altro... > Reti mobili.
Selezionare Impostazioni rete. In Operatori di rete, selezionare l’operatore.
In Nomi punti d’accesso, selezionare il nome del punto d’accesso corretto e
inserire i parametri di connessione esatti comunicati dal fornitore.
Risoluzione dei problemi
ARCHOS_52_Platinum_book.indd 80 11/12/2014 14:36:11

NL
Inhoudsopgave
Inhoud van de verpakking.........................................................................................
Beschrijving van het apparaat..................................................................................
Montage...........................................................................................................................
Aan de slag......................................................................................................................
3G- & WiFi-verbinding..................................................................................................
Scherm Google account & Contacten...................................................................
Vertrouwd raken met Android
TM
..............................................................................
Probleemoplossing.......................................................................................................
82
83
86
88
90
92
94
96
Raadpleeg voor meer informatie de veelgestelde vragen (FAQ's) op
www.archos.com. Lees eerst de antwoorden op deze vragen voordat u
het product terugstuurt. Uw probleem is dan mogelijk snel opgelost.
Aangezien wij onze producten regelmatig updaten en verbeteren,
kunnen de vormgeving en/of de functies van uw apparaatsoftware
afwijken van de software in deze Verkorte handleiding.
Raadpleeg de verklaring van overeenstemming op http://www.archos.
com/products/declaration_conformity.html
ARCHOS_52_Platinum_book.indd 81 11/12/2014 14:36:11

82
Inhoud van de verpakking
Controleer of de volgende onderdelen in de verpakking zitten:
- ARCHOS 52 Platinum
- Batterij
- Headset
- USB-kabel
- Lader
- Gebruikershandleiding
- Garantie, wettelijke mededelingen en veiligheidsvoorschriftem
De onderdelen die bij het apparaat zijn meegeleverd en de accessoires
die verkrijgbaar zijn, verschillen per land en per service provider.
De meegeleverde onderdelen zijn uitsluitend bestemd voor uw
apparaat en zijn mogelijk niet compatibel met andere apparaten.
Niet goedgekeurde accessoires kunnen tot storingen van het apparaat
leiden.
ARCHOS_52_Platinum_book.indd 82 11/12/2014 14:36:11

83
4
1
2
3
5
6
NL
Beschrijving van het apparaat
Aansluiting voor headset
Luidspreker
Webcam
Volumeknoppen
AAN/UIT-knop
Microfoon
1
2
3
4
5
6
ARCHOS_52_Platinum_book.indd 83 11/12/2014 14:36:12

84
7
8
9
10
Beschrijving van het apparaat
Flash
Camera
Luidspreker
Micro-USB-poort
7
9
8
10
ARCHOS_52_Platinum_book.indd 84 11/12/2014 14:36:12

85
11 12
13
NL
11
13
12
Menu
Home/Recente apps/Google Now
Vorige
Menu: de lijst met menu-opties van het huidige scherm weergeven.
Home/Recente apps/Google Now: kort indrukken om terug te keren
naar het beginscherm. Dubbelklikken om het overzicht van recente
toepassingen weer te geven. Doe een lange druk op de app Google
NOW te openen.
Vorige: terug naar het vorige scherm.
ARCHOS_52_Platinum_book.indd 85 11/12/2014 14:36:12

86
Montage
Openen
Gebruik de inkeping om de achterklep te verwijderen.
De achterklep niet buigen of knikken. Anders kunt u de achterklep
beschadigen.
SIM-kaart plaatsen
1. De SIM-kaarthouder naar buiten schuiven en uw micro-SIM-kaart (1) of
nano-SIM-kaart (2) in de houder plaatsen.
2. Plaats de kaarthouder terug.
Geheugen-kaart plaatsen
Schuif de geheugenkaart met de voorkant naar beneden in sleuf TF (3).
Sluiten
Klik de achterklep terug op zijn plaats.
Tip:
Voordat u het apparaat gaat gebruiken, moet u eerst de batterij
helemaal opladen.
ARCHOS_52_Platinum_book.indd 86 11/12/2014 14:36:12

87
Picture to show how to remove the bottom casing
Picture to show how to insert the battery pack
SIM1
SIM2
Picture to show the cards position
SIM1
SIM2
TF
Picture to show the tray holder
Picture to show how to remove the bottom casing
Picture to show how to insert the battery pack
SIM1
SIM2
Picture to show the cards position
SIM1
SIM2
TF
Picture to show the tray holder
Picture to show how to remove the bottom casing
Picture to show how to insert the battery pack
SIM1
SIM2
Picture to show the cards position
SIM1
SIM2
TF
Picture to show the tray holder
Picture to show how to remove the bottom casing
Picture to show how to insert the battery pack
SIM1
SIM2
Picture to show the cards position
SIM1
SIM2
TF
Picture to show the tray holder
NL
breng de achterklep
voorzichtig omhoog via
de inkeping.
ARCHOS_52_Platinum_book.indd 87 11/12/2014 14:36:13

88
Aan de slag
Inschakelen
1. Houd de AAN/UIT-knop ingedrukt om het apparaat in te schakelen.
Mogelijk moet u een pincode invoeren nadat u het apparaat heeft
ingeschakeld.
2. Voer de pincode in die is meegeleverd bij uw SIM-kaart.
3. Kies ‘OK’.
Installatiewizard
De eerste keer dat u uw ARCHOS inschakelt, zal de installatiewizard u
helpen bij het instellen van uw apparaat :
- Taal
- Datum en tijd
- WiFi-verbinding
- De locatieservice
Uitschakelen
Om het apparaat uit te schakelen, houdt u de AAN/UIT-knop ingedrukt
en kiest u "Power o" [Uitschakelen] > OK.
ARCHOS_52_Platinum_book.indd 88 11/12/2014 14:36:13

89
NL
Geluid & meldingen
1. Terwijl het apparaat is ingeschakeld,
houdt u de AAN/UIT-knop ingedrukt.
2. Kies een optie.
Schermbediening
Tikken: Eenmaal tikken om een menu, optie of toepassing te kiezen of te
starten.
Tikken en vasthouden: Op een optie tikken en langer dan 2 seconden
vasthouden.
Slepen: Op een optie tikken en naar een nieuwe locatie verplaatsen.
Dubbel tikken: Twee keer snel op een optie tikken.
Vegen: Snel omhoog, omlaag, naar links of naar rechts door een lijst of
scherm bladeren.
Pinch: Twee vingers uit elkaar op het scherm plaatsen en naar elkaar toe
bewegen.
Tip:
Als u het apparaat gedurende een ingestelde tijdsduur niet gebruikt,
wordt het scherm uitgeschakeld. Om het scherm weer in te schakelen,
drukt u op de AAN/UIT-knop. Om de duur in te stellen, gaat u naar
Settings > Display > Sleep [Instellingen > Display > Stand-by].
Stil Trillen Geluid
ARCHOS_52_Platinum_book.indd 89 11/12/2014 14:36:13

90
3G- & WiFi-verbinding
3G-verbinding
Via uw SIM-kaart kunt u automatisch verbinding maken met het
internet. De ARCHOS heeft alleen signaal in een gebied met dekking
door uw 3G-netwerkaanbieder. Wanneer u bent verbonden met het
3G-netwerk wordt het 3G-pictogram weergegeven in de statusbalk.
Tip:
Bij verbindingsproblemen kunt u de FAQ's op www.archos.com
raadplegen of contact opnemen met uw 3G-netwerkbeheerder.
Mobiele data inschakelen
Om verbinding te maken met het internet moet het
pictogram voor mobiele data geactiveerd zijn.
1. Houd uw vingers op de pictogrammen voor de tijd
en de batterij om de statusbalk weer te geven.
2. Sleep de blauwe streep naar beneden.
3. Raak de pictogram .
4. Raak de pictogram voor mobiele data aan
om deze in te schakelen.
ARCHOS_52_Platinum_book.indd 90 11/12/2014 14:36:13

91
NL
WiFi-verbindung
WAARSCHUWING: Zorg ervoor dat u zich in een WiFi-zone bevindt. U
kunt snel toegang tot de WiFi-instellingen krijgen vanaf de statusbalk.
1. Houd uw vingers op de pictogrammen voor de tijd
en de batterij om de statusbalk weer te geven.
2. Sleep de blauwe streep naar beneden.
3. Raak de pictogram .
4. Tik op "Instellingen" om het menu WiFi-
instellingen te openen.
5. Als WiFi uit is bij Wireless & Networks [Draadloos en
netwerken] schuif dan de WiFi-knop naar “ON’ [Aan].
Als WiFi is ingeschakeld, scant de ARCHOS naar WiFi-
netwerken in het bereik.
6. Tik op WiFi.
7. Tik op de naam van het netwerk waarmee u verbinding wilt maken.
Privé-netwerken worden weergegeven met een slotje en vragen u om
uw wachtwoord in te voeren.
ARCHOS_52_Platinum_book.indd 91 11/12/2014 14:36:13

92
Google account & Contacten
Een Google account toevoegen
Met een Google account kunt u het meeste uit uw Google apps en
voorzieningen halen.
1. Ga naar“Settings” [Instellingen] > “Accounts” > “Add account” [Account
toevoegen].
2. Kies het accounttype "Google" om toe te voegen.
3. Volg de aanwijzingen op het scherm om de accountgegevens in te voeren.
Nadat u een account heeft aangemaakt, heeft u toegang tot Play Store,
Gmail, Hangouts, Maps en diverse andere apps.
Gegevens synchroniseren
Gegevens die u wilt opslaan, moet u eerst synchroniseren. Van uw
gegevens wordt een back-up gemaakt op Google-servers.
1. Ga naar“Settings” [Instellingen] > “Accounts” > “Google”.
2. Kies uw account.
De lijst met informatie die kan worden gesynchroniseerd, wordt
weergegeven. Automatisch synchroniseren moet ingeschakeld zijn.
Als u wilt synchroniseren, drukt u op de Menu-knop en vervolgens op
Sync now [Nu synchroniseren]. Uw gegevens blijven bewaard bij verlies
van uw apparaat of SIM-kaart. Wanneer uw Google account wordt
toegevoegd aan een nieuw apparaat, worden alle opgeslagen gegevens
verzameld.
ARCHOS_52_Platinum_book.indd 92 11/12/2014 14:36:13

93
NL
Contacten opslaan
Uw contacten zijn altijd beschikbaar op internet en kunnen worden
gesynchroniseerd met alle Android-telefoons die via hetzelfde Google-
account zijn gecongureerd.
1. Plaats de SIM-kaarten met uw contacten in uw telefoon.
2. In het beginscherm of in het scherm "Alle Apps" kiest u de app "People"
[Contactpersonen] .
3. Tik op de menuknop > "Import/Export" [Importeren/Exporteren].
4. Bij "Import/export contacts" [Contacten importeren/exporteren] kiest u
"Import from SIM card" [Importeren van SIM-kaart].
5. Kies uw Google-account.
6. Controleer de contacten die u wilt importeren en bevestig deze.
7. Na het importeren van de contacten in de Google account gaat u naar
“Settings” > “Accounts” > “Google” [Instellingen > Accounts > Google].
8. Kies uw Google-account.
9. Tik op de menuknop en dan “Sync now” [Nu synchroniseren].
10. Uw contacten worden opgeslagen op uw Google-account.
ARCHOS_52_Platinum_book.indd 93 11/12/2014 14:36:14

94
Vertrouwd raken met Android
TM
Het uitgebreide startscherm:
Je hebt een startscherm standaard. U kunt zoveel startschermen die je wilt
creëren. Selecteer een app icoon en schuif het goed. Een nieuw startscherm
wordt aangemaakt. Selecteer een andere app icoon en schuif het recht om
een derde startscherm creëren.
Home-knop:
Kort indrukken om terug te keren naar het beginscherm.
Dubbel tikken om het overzicht van recente toepassingen weer te geven.
Het verplaatsen van een item op het startscherm:
Tik en houd uw vinger op zijn plaats tot de positioneringsrasterlijnen
verschijnen, dan schuift u deze naar de gewenste locatie en laat uw vinger
vervolgens weer los.
Het verwijderen van een item op het startscherm:
Tik en houd uw vinger op het item en schuif dit vervolgens naar de
bovenkant van het scherm en zet het op het pictogram Verwijderen.
Verwijderen van een item:
Tik in de schermen Alle apps op het item en houd uw vinger daar, schuif
ARCHOS_52_Platinum_book.indd 94 11/12/2014 14:36:14

95
NL
Vertrouwd raken met Android
TM
vervolgens uw vinger in de richting van de bovenkant van het scherm
en plaats het item op de prullenbak Verwijderen.
Het aanmaken van applicatiemappen:
Plaats op een startscherm het ene app-pictogram op het andere, en de
twee pictogrammen worden gecombineerd.
Widgets:
Tik en houd uw vinger op je startscherm. Raak “Widgets”.
Uw wallpaper wijzigen:
Houd uw vinger op het scherm op een lege plek en maak vervolgens
een selectie uit de lijst.
Het vergrendelen van het aanraakscherm:
Tik vanuit het snelinstellingen-dashboard op instellingen. Scroll naar
beneden en tik op veiligheid. Tik op Scherm vergrendelen. Tik op het
type slot dat u wilt gebruiken. Nadat u hier een slot hebt ingesteld,
wordt er een vergrendelscherm weergegeven wanneer uw scherm
‘wakker’ wordt, dat om het patroon, de PIN of een andere specieke
toets vraagt.
ARCHOS_52_Platinum_book.indd 95 11/12/2014 14:36:14

96
Probleemoplossing
Mijn telefoon doet niets meer of kan niet worden ingeschakeld
Controleer de batterijcontacten, verwijder de batterij en plaats de batterij weer terug en
zet dan uw telefoon aan. Controleer uw batterijlading en laad de batterij ten minste 20
minuten lang op.
Mijn telefoon kan geen verbinding maken met een netwerk of "Geen service" wordt
weergegeven
Probeer op een andere locatie verbinding te maken. Informeer bij uw beheerder naar uw
netwerkdekking.
Ik kan geen uitgaande gesprekken voeren
Controleer of uw telefoon is verbonden met een netwerk en of het netwerk overbelast of
niet beschikbaar is.
Ik kan geen inkomende gesprekken ontvangen
Controleer of uw telefoon is ingeschakeld en is verbonden met een netwerk (controleer of
het netwerk overbelast of niet beschikbaar is).
PIN-code van SIM-kaart geblokkeerd
Neem contact op met uw netwerkbeheerder voor de PUK-code (Personal Unblocking Key).
Een nieuw 3G-netwerk configureren
Tik op Settings [Instellingen] op het apparaat.
Kies Wireless & Networks [Draadloos en netwerken] > More [Meer] > Mobile networks
[Mobiele netwerken].
Kies Network settings [Netwerkinstellingen]. Bij Network operators [Netwerkbeheerders]
kiest u uw beheerder. Bij Access Point Names [Toegangspunten] kiest u de naam van het
gewenste toegangspunt en voert u de verbindingsparameters in van uw provider.
ARCHOS_52_Platinum_book.indd 96 11/12/2014 14:36:14

PT
Índice
98
99
102
104
106
108
110
112
Conteúdo da embalagem........................................................................................
Descrição do dispositivo..........................................................................................
Montagem.....................................................................................................................
Preparação.....................................................................................................................
Ligação 3G & Wi-Fi.......................................................................................................
Ecrã da conta Google e contactos.........................................................................
Familiarizar-se com Android
TM
................................................................................
Resolução de problemas...........................................................................................
Para mais informações, consulte as perguntas frequentes (FAQs) em
www.archos.com. Certique-se de que as lê antes de devolver qualquer
produto. O seu problema ter uma resolução muito simples. Como
atualizamos e melhoramos frequentemente os nossos produtos, o
software do seu dispositivo pode ter uma aparência ou funcionalidade
ligeiramente diferente daquela que é apresentada neste Guia de
Referência Rápida.
Consulte a declaração de conformidade em http://www.archos.com/
products/declaration_conformity.html
ARCHOS_52_Platinum_book.indd 97 11/12/2014 14:36:14

98
Conteúdo da embalagem
Verique se tem os seguintes itens na embalagem do seu produto:
- ARCHOS 52 Platinum
- Bateria
- Headset
- Cabo USB
- Carregador
- Guia do usuário
- Garantia, avisos legais e de segurança
Os itens fornecidos com o seu dispositivo e os acessórios disponíveis
podem variar entre regiões e fornecedores de serviços.
Os itens fornecidos foram concebidos exclusivamente para o seu
dispositivo e podem ser incompatíveis com outros dispositivos.
O uso de acessórios não aprovados pode resultar em mau
funcionamento do seu dispositivo.
ARCHOS_52_Platinum_book.indd 98 11/12/2014 14:36:14

99
4
1
2
3
5
6
PT
Descrição do dispositivo
Entrada do auricular
Coluna
Webcam
Botões de volume
Ligar/desligar
Microfone
1
2
3
4
5
6
ARCHOS_52_Platinum_book.indd 99 11/12/2014 14:36:15

100
7
8
9
10
Descrição do dispositivo
Câmara
Flashlight
Coluna
Porta Micro-USB
7
8
10
9
ARCHOS_52_Platinum_book.indd 100 11/12/2014 14:36:15

101
11 12
13
PT
11
13
12
Menu
Início/aplicações recentes/Google NOW
Voltar
Menu: abrir a lista de opções disponíveis no presente ecrã.
Início/aplicações recentes/Google Now: prima momentaneamente
para voltar ao ecrã principal. Prima duas vezes para abrir uma lista com as
aplicações recentes. Fazer um toque longo para abrir o app Google Now.
Voltar: voltar ao ecrã anterior.
ARCHOS_52_Platinum_book.indd 101 11/12/2014 14:36:15

102
Montagem
Abrir
Use o encaixe para remover a cobertura traseira.
Não dobre ou torça a tampa traseira em demasia. Isso pode danicar a
tampa.
Inserir cartões SIM
1. Deslize para fora a gaveta do cartão SIM e instale o seu cartão micro SIM (1)
ou o seu cartão nano SIM (2) na gaveta.
2. Reposicione a gaveta.
Inserir cartões de memória
Deslize o cartão de memória virado para baixo na ranhura TF (3).
Fechar
Reposicione a cobertura traseira deslocando-a até encaixar na posição.
Dicas:
Carregue completamente a bateria antes de usar o seu dispositivo pela
primeira vez.
ARCHOS_52_Platinum_book.indd 102 11/12/2014 14:36:15

103
Picture to show how to remove the bottom casing
Picture to show how to insert the battery pack
SIM1
SIM2
Picture to show the cards position
SIM1
SIM2
TF
Picture to show the tray holder
Picture to show how to remove the bottom casing
Picture to show how to insert the battery pack
SIM1
SIM2
Picture to show the cards position
SIM1
SIM2
TF
Picture to show the tray holder
Picture to show how to remove the bottom casing
Picture to show how to insert the battery pack
SIM1
SIM2
Picture to show the cards position
SIM1
SIM2
TF
Picture to show the tray holder
Picture to show how to remove the bottom casing
Picture to show how to insert the battery pack
SIM1
SIM2
Picture to show the cards position
SIM1
SIM2
TF
Picture to show the tray holder
PT
e levante levemente capa
traseira com o encaixe.
ARCHOS_52_Platinum_book.indd 103 11/12/2014 14:36:15

104
Preparação
Ligar
1. Mantenha premido o botão ligar/desligar para ligar o dispositivo.
Pode ser solicitado o código PIN quando liga o seu dispositivo.
2. O código PIN é fornecido com o seu cartão SIM.
3. Selecione "OK".
Assistente de instalação
Quando iniciar o ARCHOS pela primeira vez, o assistente de instalação irá
ajudá-lo a congurar o seu aparelho:
- Idioma
- Data e hora
- Rede WiFi
- Minha localizaçã
Desligar
1. Mantenha premido o botão ligar/desligar para ligar o dispositivo e em
seguida selecione "Power o" (Desligar) > OK.
ARCHOS_52_Platinum_book.indd 104 11/12/2014 14:36:15

105
PT
Som e pers de noticação
1. Com o dispositivo ligado, prima
e mantenha premido o botão de ligar/
desligar.
2. Selecione uma opção.o
Ações no ecrã tátil
Tocar: Toque uma vez para selecionar ou abrir um menu, opção ou aplicação.
Tocar e manter: Toque num item e continue a pressionar por mais de 2
segundos.
Arrastar: Toque num item e mova-o para um novo local.
Toque duplo: Toque rapidamente duas vezes num item.
Percorrer: Percorra o ecrã para cima, baixo, esquerda ou direita, rapidamente
com o dedo para explorar listas ou ecrãs.
Apertar: Coloque dois dedos afastados no ecrã e depois junte-os.
Dicas:
O ecrã tátil é desligado automaticamente após um determinado
período de inatividade. Prima o botão ligar/desligar para ligar o ecrã.
Para definir a duração, vá a Definições>Ecrã>Suspender.
Silêncio Vibração Som
ARCHOS_52_Platinum_book.indd 105 11/12/2014 14:36:15

106
Ligação 3G & WiFi
Ligação 3G
Deve conseguir ligar-se à Internet com o seu cartão SIM sem necessitar
de congurações adicionais. O ARCHOS terá sinal apenas em zonas de
cobertura do seu operador de rede 3G. O ícone 3G será apresentado na
barra de estado sempre que estiver ligado a uma rede 3G.
Dica:
Se tiver problemas de ligação, consulte as FAQs em www.archos.com ou
contacte o seu fornecedor de rede 3G.
Ativar dados móveis
O ícone de dados móveis deve estar ativo para ser
possível aceder à Internet.
1. Toque e mantenha premidos os ícones do Tempo e
bateria para revelar a barra de estados.
2. Puxe a linha azul para baixo.
3. Toque no .
4. Toque no ícone dos dados móveis para
ativar.
ARCHOS_52_Platinum_book.indd 106 11/12/2014 14:36:15

107
PT
Ligação WiFi
AVISO: Certique-se de que se encontra numa zona WiFi.
Pode aceder rapidamente às denições WiFi a partir da barra do estado.
1. Toque e mantenha premidos os ícones do Tempo e
bateria para revelar a barra de estados.
2. Puxe a linha azul para baixo.
3. Toque no .
4. Toque em “Denições” para abrir o menu de
denições WiFi.
5. Na secção “Wireless & networks” (Redes e Wi-Fi), se a
opção WiFi estiver desligada, deslize-a para a posição
“ON” (LIGADO). Assim que o Wi-Fi estiver ligado, o
ARCHOS vai analisar as redes Wi-Fi que estiverem ao
seu alcance.
6. Toque WiFi.
7. Toque no nome da rede à qual pretende ligar-se. As redes privadas
aparecem com o ícone de um cadeado e irão requerer a introdução da
sua palavra-passe.
ARCHOS_52_Platinum_book.indd 107 11/12/2014 14:36:16

108
Ecrã da conta Google e contactos
Adicionar uma conta Google
Uma conta Google garante-lhe o uso de todas as aplicações e serviços
Google.
1. Vá a "Settings" (Denições) > “Accounts” (Contas) > “Add account”
(Adicionar conta).
2. Selecione “Google” como tipo de conta.
3. Realize os passos que aparecem no ecrã para introduzir os dados da sua
conta.
A conta permita-lhe aceder a serviços como a Play Store, Gmail, Hangouts,
Maps e muitas outras aplicações.
Sincronizar dados
Os dados devem ser sincronizados para serem guardados. Serão feitas
cópias de segurança dos seus dados nos servidores da Google.
1. Vá a "Settings" (Denições) > “Accounts” (Contas) > “Google”
2. Selecione a sua conta.
Será apresentada a lista de informações que pode ser sincronizada.
Deve ativar sincronização automática.
3. Se desejar sincronizar, prima o botão “Menu”, seguido de “Sync now”
(Sincronizar agora). Poderá reaver os seus dados caso perca o dispositivo
ou o cartão SIM. Os seus dados são restaurados sempre que adiciona a sua
conta Google a um novo dispositivo.
ARCHOS_52_Platinum_book.indd 108 11/12/2014 14:36:16

109
PT
Guardar os seus contactos
Os contactos cam sempre disponíveis na Web e podem ser
sincronizados com qualquer dispositivo Android congurado com a
mesma conta Google.
1. Introduza no dispositivo o cartão SIM que contém os seus contactos.
2. A partir do ecrã principal ou do ecrã de todos os aplicativos, selecione a
aplicação People (Pessoas) .
3. Toque no botão Menu > "Import/Export" (Importar/Exportar).
4. Em "Import/export contacts" (Importar/exportar contactos), selecione
"Import from SIM card" (Importar do cartão SIM).
5. Selecione a sua conta Google.
6. Marque os contactos a importar e valide.
7. Assim que os contactos forem importados, vá a “Settings” (Denições) >
“Accounts” (Contas) > “Google”.
8. Selecione a sua conta Google.
9. Selecione o botão Menu e depois “Sync now” (Sincronizar agora).
Os contactos serão guardados na sua conta Google.
ARCHOS_52_Platinum_book.indd 109 11/12/2014 14:36:16

110
Familiarizar-se com Android
TM
O ecrã inicial alargado:
Você tem uma tela inicial por padrão. Você pode criar quantas telas iniciais
que você deseja. Selecione um ícone de aplicação e deslize-o para a direita.
Uma nova tela inicial será criado. Selecione um outro ícone do aplicativo e
deslize-o para a direita para criar uma terceira tela inicial.
Botão Principal:
Prima momentaneamente para voltar ao ecrã principal.
Toque duplo para abrir uma lista com as aplicações recentes.
Mover um item do ecrã inicial:
Toque continuamente com o dedo no mesmo até aparecer a grelha de
posicionamento; em seguida, deslize-o para a posição pretendida e solte
o dedo.
Remover um item do ecrã inicial:
Toque continuamente no mesmo, deslize o seu dedo para o topo do ecrã e
largue-o sobre o ícone Remover.
Desinstalar um item:
A partir do ecrã Todas as aplicações, toque continuamente no mesmo,
ARCHOS_52_Platinum_book.indd 110 11/12/2014 14:36:16

111
PT
deslize o seu dedo para o topo do ecrã e largue-o sobre o caixote
Desinstalar.
Criar pastas de aplicações:
Largue o ícone de uma aplicação sobre outro num ecrã inicial e os dois
ícones carão combinados.
Widgets:
Toque e segure o dedo sobre a tela inicial. Toque em “Widgets”.
Alterar a imagem de fundo:
Mantenha o dedo no ecrã sobre uma localização vazia, em seguida
seleccione a partir da lista.
Bloquear o ecrã táctil:
A partir do painel de denições rápidas na barra do estado, toque nas
denições. Desloque para baixo e toque em Segurança. Toque em
Bloquear ecrã. Toque no tipo de bloqueio que pretende utilizar. Depois de
denir aqui um bloqueio, será apresentado um ecrã de bloqueio sempre
que activar o ecrã, a solicitar o padrão, o PIN ou outra chave especicada.
ARCHOS_52_Platinum_book.indd 111 11/12/2014 14:36:16

112
Resolução de problemas
O meu telemóvel está bloqueado e não liga
Verifique os contactos da bateria, remova e reinstale a bateria e ligue de novo o telemóvel.
Verifique o nível de carga da bateria e ponha-a a carregar durante, pelo menos, 20 minutos.
O meu telemóvel não consegue ligar-se a uma rede ou é exibida a mensagem "Sem
cobertura de rede"
Tente ligar em outro local. Verifique a cobertura de rede da sua operadora.
Não é possível fazer chamadas
Verifique se o seu telemóvel está ligado a uma rede e se essa rede está disponível.
Não é possível receber chamadas
Verifique se o seu telemóvel está ligado e tem uma ligação a uma rede (verifique se a rede
está disponível).
PIN do cartão SIM bloqueado
Contacte a sua operadora para obter o código PUK (Chave pessoal de desbloqueio).
Configurar uma nova rede 3G
Toque em “Settings” (Definições) no seu dispositivo.
Selecione “Wireless & networks” (Sem fios e Redes) > “More” (Mais)... > “Mobile networks”
(Redes móveis).
Selecione “Network settings” (definições de rede). Selecione o seu operador em “Network
operators” (operadores de rede). Selecione o ponto de acesso correto em “Access Point
Names” (Nomes dos Pontos de Acesso) e introduza os parâmetros de ligação fornecidos
pelo seu operador 3G.
ARCHOS_52_Platinum_book.indd 112 11/12/2014 14:36:16

RU
Содержание
114
115
118
120
122
124
126
128
Содержимое упаковки............................................................................................
Описание устройства..............................................................................................
Сборка............................................................................................................................
Начало работы............................................................................................................
Подключение 3G & Подключение WiFi............................................................
Учетная запись Google и контакты....................................................................
Знакомство с Android
TM
...........................................................................................
Устранение неполадок............................................................................................
Для получения дополнительных сведений ознакомьтесь со списком часто задаваемых вопросов
на веб-странице www.archos.com. Обязательно прочитайте их, прежде чем принимать решение
о возврате изделия. Возможно, проблема, с которой вы столкнулись, непредставляет собой
ничего сложного. Поскольку мы часто обновляем и совершенствуем свои изделия, программное
обеспечение на вашем устройстве может незначительно отличаться по внешнему виду или
функциональности от представленного в данном кратком руководстве.
Обратитесь к декларации о соответствии на http://www.archos.com/products/
declaration_conformity.html
ARCHOS_52_Platinum_book.indd 113 11/12/2014 14:36:16

114
Содержимое упаковки
Проверьте, входят ли в комплект поставки следующие компоненты:
- ARCHOS 52 Platinum
- Аккумулятор
- Гарнитуре
- Micro SIM адаптер
- Кабель USB
- Зарядное устройство
- Краткое руководство
- Гарантии и инструкции по безопасности
Компоненты, входящие в комплект поставки устройства, и
доступные аксессуары могут различаться в зависимости от
региона илипоставщика услуг. Компоненты, входящие в комплект,
предназначены для использования только с данным устройством и
могут быть несовместимыми с другими устройствами.
Использование аксессуаров, которые не были разрешены к
применению с данным устройством, может привести к его
неисправности.
ARCHOS_52_Platinum_book.indd 114 11/12/2014 14:36:16

115
4
1
2
3
5
6
RU
Описание устройства
Гнездо для гарнитуры
громкоговоритель
Веб-камера
Кнопки регулировки громкости
Кнопка включения / выключения
Микрофон
1
2
3
4
5
6
ARCHOS_52_Platinum_book.indd 115 11/12/2014 14:36:17

116
7
8
9
10
Описание устройства
Камера
фонарик
громкоговоритель
Порт micro-USB
7
8
10
9
ARCHOS_52_Platinum_book.indd 116 11/12/2014 14:36:17

117
11 12
13
RU
11
13
12
Меню: открытие списка функций, доступных на текущем экране.
Главный экран/последние приложения/Google Now: нажмите один
раз для возврата на главный экран; нажмите дважды для открытия
списка последних приложений. сделать Длительно нажмите, чтобы
открыть приложение "Google Now"
Назад: возврат к предыдущему экрану.
Меню
Главный экран/последние приложения/
Назад
Google Now
ARCHOS_52_Platinum_book.indd 117 11/12/2014 14:36:18

118
Сборка
Открытие
Для снятия крышки используйте специальную щель.
Не изгибайте и не скручивайте крышку слишком сильно. Это может
привести к ее повреждению.
Вставка SIM-карт
1. Выдвиньте лоток для SIM-карты и поместите в него карту Micro-SIM (1)
или Nano-SIM (2).
2. Верните лоток в исходное положение.
Вставка карты памяти
Для установки карты памяти протолкните ее в слот TF (3) лицевой
стороной вниз.
Закрытие
Верните на место заднюю крышку, закрепив ее путем защелкивания.
Подсказки.
Перед первым использованием устройства полностью зарядите
аккумулятор.
ARCHOS_52_Platinum_book.indd 118 11/12/2014 14:36:18

119
Picture to show how to remove the bottom casing
Picture to show how to insert the battery pack
SIM1
SIM2
Picture to show the cards position
SIM1
SIM2
TF
Picture to show the tray holder
Picture to show how to remove the bottom casing
Picture to show how to insert the battery pack
SIM1
SIM2
Picture to show the cards position
SIM1
SIM2
TF
Picture to show the tray holder
Picture to show how to remove the bottom casing
Picture to show how to insert the battery pack
SIM1
SIM2
Picture to show the cards position
SIM1
SIM2
TF
Picture to show the tray holder
Picture to show how to remove the bottom casing
Picture to show how to insert the battery pack
SIM1
SIM2
Picture to show the cards position
SIM1
SIM2
TF
Picture to show the tray holder
RU
Снимите заднюю крышку
с помощью паза
ARCHOS_52_Platinum_book.indd 119 11/12/2014 14:36:18

120
Начало работы
Включение
1. Нажмите и удерживайте кнопку включения и выключения, чтобы
включить устройство.
При включении устройства может появиться запрос на ввод PIN-кода.
2. Введите PIN-код, предоставляемый с SIM-картой.
3. Нажмите OK.
Мастер настройки
При первом запуске устройства ARCHOS мастер установки поможет
выполнить настройку :
- Язык
- Дата и время
- Соединение Wi-Fi
- Опции службы геолокации
Выключение
Чтобы выключить устройство, нажмите и удерживайте кнопку
включения и выключения, а затем выберите Power o > OK
(Выключение > OK).
Профили звуков и уведомлений
1. Когда устройство включено, нажмите и удерживайте кнопку
ARCHOS_52_Platinum_book.indd 120 11/12/2014 14:36:18

121
RU
включения/выключения.
2. Выберите один из вариантов.
Действия на сенсорном экране
Касание: Коснитесь один раз для
выбора или запуска меню, функции
или приложения.
Касание и удержание: Коснитесь элемента и удерживайте его не
менее 2 секунд.
Перетаскивание: Коснитесь элемента и переместите его в новое
место.
Двойное касание: Быстро дважды коснитесь элемента.
Проведение: Быстро проведите по экрану пальцем вверх, вниз,
влево или вправо, чтобы прокрутить список или содержимое экрана.
Сжатие: Разведите два пальца, а затем сведите их щипковым
движением.
Подсказки. Если устройство не используется в течение
определенного времени, сенсорный экран выключается. Чтобы
включить экран, нажмите кнопку включения и выключения. Чтобы
задать длительность, перейдите к меню Settings > Display > Sleep
(Настройки > Дисплей > Режим сна).
Без звука Вибрация Со звуком
ARCHOS_52_Platinum_book.indd 121 11/12/2014 14:36:18

122
Подключение 3G & Wi-Fi
Подключение к сетям 3G
После установки SIM-карты для подключения к интернету дальнейшая
настройка не требуется. Устройство ARCHOS устанавливает соединение
только при нахождении в зоне покрытия сети 3G выбранного
поставщика услуг мобильной связи. При подключении к сети 3G в
строке состояния отображается значок 3G.
Совет:
Если возникнут проблемы с соединением, см. часто задаваемые
вопросы и ответы на них на веб-сайте www.archos.com или
свяжитесь со своим поставщиком услуг сети 3G.
Активация мобильных данных
Чтобы иметь возможность доступа к Интернету,
необходимо активировать пиктограмму
мобильных данных.
1. Коснитесь и удерживайте значки времени и
аккумулятора, чтобы открыть строку состояния.
2. Потяните синюю линию вниз, чтобы
отобразить панель мониторинга состояния.
3. Выберите значок .
4. Для активации коснитесь значка мобильных
данных .
ARCHOS_52_Platinum_book.indd 122 11/12/2014 14:36:18

123
RU
Wi-Fi
Убедитесь, что Вы находитесь в зоне Wi-Fi. Быстрый доступ к
настройкам Wi-Fi осуществляется из строки состояния.
1. Коснитесь и удерживайте значки времени и
аккумулятора, чтобы открыть строку состояния.
2. Потяните синюю линию вниз, чтобы
отобразить панель мониторинга состояния.
3. Выберите значок .
4. Нажмите на значок Настройки для доступа к
настройкам.
5. Если модуль Wi-Fi выключен, в разделе Wireless
& networks («Беспроводная связь и сети»)
переместите переключатель Wi-Fi в положение ON
(«ВКЛ»). После включения Wi-Fi устройство ARCHOS
выполнит обнаружение сетей Wi-Fi в диапазоне
приема.
6. Выберите Wi-Fi.
7. Выберите ту сеть, к которой хотите подключиться. Частные сети.
отображаются в виде значка с замком, и для них потребуется ввести
пароль.
ARCHOS_52_Platinum_book.indd 123 11/12/2014 14:36:19

124
Учетная запись Google и контакты
Добавление учетной записи Google
Учетная запись Google позволяет пользоваться преимуществами любых
приложений и услуг Google, которые вы захотите использовать.
1. Перейдите к разделу Settings > Accounts > Add account (Настройки >
Учетные записи > Добавить учетную запись).
2. Выберите тип добавляемой учетной записи Google.
3. Выполняйте инструкции на экране для ввода информации об учетной
записи. Как только учетная запись будет создана, вы будете иметь доступ к
Play Store, Gmail, Hangouts, Mapsи многим другим приложениям.
Синхронизация информации
Для сохранения информации синхронизируйте ее. Резервное
копирование ваших данных выполняется на серверы Google.
1. Перейдите к разделу Settings > Accounts > Google (Настройки > Учетные
записи > Google).
2. Выберите учетную запись. Отображается список сведений, которые
можно синхронизировать. Следует включить функцию автоматической
синхронизации. Для запуска синхронизации нажмите кнопку Menu
(Меню) и затем выберите пункт Sync now (Синхронизировать сейчас). С
помощью функции синхронизации можно восстановить данные в случае
утери устройства или SIM-карты. При регистрации вашей учетной записи
Google на новом устройстве выполняется сбор всей сохраненной на нем
информации.
ARCHOS_52_Platinum_book.indd 124 11/12/2014 14:36:19

125
RU
Сохранение контактов
Все ваши контакты в любой момент доступны в сети и могут быть
синхронизированы с любым телефоном Android, настроенным на ту
же учетную запись Google.
1. Установите в телефон SIM-карту, на которой записаны контакты.
2. На главном экране или экране All Apps (Все приложения) выберите
приложение People (Контакты) .
3. Коснитесь кнопки «Меню» > Import/Export (Импорт/Экспорт).
4. В разделе импорта/экспорта контактов выберите Import from SIM card
(Импорт с SIM-карты).
5. Выберите вашу учетную запись Google.
6. Отметьте контакты, которые необходимо импортировать, и
подтвердите выбор.
7. После завершения импорта контактов в учетную запись Google
перейдите в меню Settings > Accounts > Google (Настройки > Учетные
записи > Google).
8. Выберите вашу учетную запись Google.
9. Нажмите кнопку «Меню», затем выберите Sync now
(Синхронизировать сейчас). Контакты будут сохранены в вашей учетной
записи Google.
ARCHOS_52_Platinum_book.indd 125 11/12/2014 14:36:19

126
Знакомство с Android
TM
Кнопка Home:
У вас есть по умолчанию один домашний экран. Вы можете создать
столько рабочих столов, которые вы хотите. Выберите значок
приложения и сдвиньте ее вправо. Новый домашний экран будет
создан. Выбрать другой значок приложения и сдвиньте ее вправо для
создания третьей домашний экран.
Перемещение элемента домашнего экрана:
Прикоснитесь к элементу и удерживайте палец, пока не появится сетка
позиционирования, затем переместите его в требуемое положение, и
отпустите палец.
Удаление элемента домашнего экрана:
Прикоснитесь к элементу и удерживая палец, проведите его к верхней
части экрана и отпустите над пиктограммой Remove (удалить).
Деинсталляция элемента:
Прикоснитесь к элементу на экране «Все приложения» и удерживая
палец, проведите его к верхней части экрана и отпустите над
пиктограммой Uninstall (деинсталлировать).
ARCHOS_52_Platinum_book.indd 126 11/12/2014 14:36:19

127
RU
Создание папок приложений:
Поместите пиктограмму одного приложения поверх другого на
домашнем экране, и две пиктограммы объединятся.
Виджеты:
Нажмите и удерживайте палец на домашнем экране. Нажмите
“Виджеты”.
Изменение обоев:
Удерживайте палец на свободном месте домашнего экрана, затем
выберите обои из списка.
Блокировка сенсорного экрана:
Прикоснитесь к позиции Settings на панели быстрых настроек в
строке состояния. На экране Settings выполните прокрутку вниз и
прикоснитесь к позиции Security (защита). Прикоснитесь к позиции
Screen lock (блокировка экрана). Выберите тип блокировки, который
хотите использовать. После того, как будет установлена блокировка,
при каждом пробуждении экрана будет отображаться экран
блокировки с запросом на ввод комбинации символов, PIN-кода или
иного указанного ключа.
ARCHOS_52_Platinum_book.indd 127 11/12/2014 14:36:19

128
Устранение неполадок
Телефон не реагирует на действия или не включается
Проверьте контакты аккумулятора, извлеките и повторно установите аккумулятор, затем снова
включите телефон. Проверьте уровень заряда аккумулятора, выполните зарядку в течение не
менее 20 минут.
Не удается подключить телефон не может к сети, или отображается сообщение No service
(Нет сети)
Попытайтесь установить соединение в другом месте. Проверьте у оператора наличие покрытия
сети. Проверьте у оператора, действительна ли ваша SIM-карта. Попытайтесь выбрать доступную
сеть (сети) вручную. Попытайтесь установить соединение позже, если сеть перегружена.
Не удается выполнять исходящие вызовы
Убедитесь, что телефон подключен к сети, и что сеть доступна и не перегружена.
Не удается принимать входящие вызовы
Убедитесь, что телефон включен и подключен к сети (проверьте, что сеть доступна и не
перегружена).
Заблокирован PIN-код SIM-карты
Обратитесь к оператору мобильной связи для получения PUK-кода (Personal Unblocking Key —
персональныйразблокирующий код).
Для настройки новой сети 3G
На экране устройства коснитесь пункта Settings (Настройки).
Выберите Wireless & networks (Беспроводная связь и сети) > More... (Больше...) > Mobile networks
(Мобильные сети).
Выберите пункт Network settings (Сетевые настройки). В разделе Network operators (Операторы
сети) выберите своего поставщика услуг. В разделе Access Point Names (Имена точек доступа)
правильно введите имя точки доступа и точные параметры соединения, предоставленные
поставщиком услуг сети 3G.
ARCHOS_52_Platinum_book.indd 128 11/12/2014 14:36:19

PL
Spis treści
130
131
134
136
138
140
142
144
Aby uzyskać więcej informacji, należy zapoznać się znajczęściej
zadawanymi pytaniami opublikowanymi na stronie www.archos.
com. Należy obowiązkowo zapoznać się ze wspomnianym działem
wprzypadku rozważania dokonania zwrotu dowolnego produktu.
Często aktualizujemy iwprowadzamy udoskonalenia wnaszych
produktach, dlatego też oprogramowanie może nieznacznie różnić
się wyglądem lub dostępnością funkcji od tego, co zaprezentowano
wskróconej instrukcji obsługi.
Zawartość opakowania.............................................................................................
Opis telefonu.................................................................................................................
Montaż.............................................................................................................................
Pierwsze uruchomienie.............................................................................................
Łączność 3G iWi-Fi......................................................................................................
Konto Google ikontakty...........................................................................................
Wskazówki iporady dotyczące systemu Android
TM
........................................
Rozwiązywanie problemów....................................................................................
Skonsultować deklarację zgodności na http://www.archos.com/
products/declaration_conformity.html
ARCHOS_52_Platinum_book.indd 129 11/12/2014 14:36:19

130
Zawartość opakowania
Sprawdź, czy zopakowaniu znajdują się następujące elementy:
- ARCHOS 52 Platinum
- Akumulator
- Słuchawki
- Kabel USB
- Ładowarka
- Skrócona instrukcja obsługi
- Gwarancja oraz oświadczenia prawne iinformacje dotyczące
bezpieczeństwa
Elementy dołączone do urządzenia oraz oferta akcesoriów mogą różnić
się wzależności od regionu idostawcy usług. Elementy dołączone
do urządzenia są przeznaczone dla konkretnego modelu imogą być
niekompatybilne zinnymi urządzeniami. Korzystanie zniezatwierdzonych
akcesoriów może spowodować awarię urządzenia.
ARCHOS_52_Platinum_book.indd 130 11/12/2014 14:36:19

131
4
1
2
3
5
6
RU
1
Wejście słuchawkowe
Głośnik
Kamera
Przyciski regulacji głośności
Przycisk zasilania
Mikrofon
2
3
4
Opis telefonu
5
6
ARCHOS_52_Platinum_book.indd 131 11/12/2014 14:36:20

132
7
8
9
10
Opis telefonu
7
Latarka
Kamera
Głośnik trybu głośnomówiącego
Port micro USB
10
9
8
ARCHOS_52_Platinum_book.indd 132 11/12/2014 14:36:20

133
11 12
13
PL
13
12
11
Menu: otwórz listę opcji dostępnych dla bieżącego ekranu.
Ekran główny/Ostatnio otwierane aplikacje/Google NOW: jedno
krótkie naciśnięcie powoduje powrót do ekranu głównego; podwójne
naciśnięcie otwiera listę ostatnio otwieranych aplikacji; długie
naciśnięcie otwiera Google Now.
Wstecz: powrót do poprzedniego ekranu.
Menu
Ekran główny/Ostatnio otwierane aplikacje/
Google NOW
Wstecz
ARCHOS_52_Platinum_book.indd 133 11/12/2014 14:36:21

134
Montaż
Wskazówka:
Przed pierwszym uruchomieniem urządzenia należy całkowicie
naładować akumulator.
Zdejmowanie klapki tylnej
Podważ klapkę w miejscu, w którym znajduje się specjalny rowek.
Nie należy wyginać ani wykręcać klapki, ponieważ może to spowodować
jej uszkodzenie.
Wkładanie karty SIM
1. W celu włożenia karty SIM wysuń kieszeń i włóż w nią kartę micro SIM (1)
lub kartę nano SIM (2).
2. Wsuń kieszeń na miejsce.
Wkładanie karty pamięci
Kartę pamięci należy skierować w dół i wsunąć do gniazda TF (3).
Mocowanie klapki
Z powrotem załóż klapkę, pamiętając, że przy jej mocowaniu powinien być
słyszalny odgłos kliknięcia.
ARCHOS_52_Platinum_book.indd 134 11/12/2014 14:36:21

135
Picture to show how to remove the bottom casing
Picture to show how to insert the battery pack
SIM1
SIM2
Picture to show the cards position
SIM1
SIM2
TF
Picture to show the tray holder
Picture to show how to remove the bottom casing
Picture to show how to insert the battery pack
SIM1
SIM2
Picture to show the cards position
SIM1
SIM2
TF
Picture to show the tray holder
Picture to show how to remove the bottom casing
Picture to show how to insert the battery pack
SIM1
SIM2
Picture to show the cards position
SIM1
SIM2
TF
Picture to show the tray holder
Picture to show how to remove the bottom casing
Picture to show how to insert the battery pack
SIM1
SIM2
Picture to show the cards position
SIM1
SIM2
TF
Picture to show the tray holder
PL
Montaż
Podważ klapkę
tylną, korzystając
zprzeznaczonych do tego
rowków
ARCHOS_52_Platinum_book.indd 135 11/12/2014 14:36:21

136
Włączanie urządzenia
1. Naciśnij iprzytrzymaj przycisk zasilania, aby uruchomić urządzenie.
Po uruchomieniu urządzenia konieczne może być wprowadzenie kodu PIN.
2. Wprowadź kod PIN dostarczony wraz zkartą SIM.
Uważaj, aby nie wprowadzić błędnego kodu PIN.
3. Wybierz „OK”.
Korzystanie zkreatora
Po pierwszym uruchomieniu urządzenia ARCHOS kreator instalacji
pomoże ci skongurować najważniejsze ustawienia:
- Język
- Data igodzina
- Połączenie Wi-Fi
- Opcje usług lokalizacyjnych
Wyłączanie urządzenia
Aby wyłączyć urządzenie, naciśnij iprzytrzymaj przycisk zasilania,
anastępnie wybierz opcję Power o > OK (wyłącz urządzenie > OK).
Pierwsze uruchomienie
ARCHOS_52_Platinum_book.indd 136 11/12/2014 14:36:21

137
PL
Prole dźwięków ipowiadomień
1. Naciśnij przycisk zasilania przy
włączonym urządzeniu.
2. Wybierz jedną zopcji.
Ekran dotykowy:
Dotknięcie: jednokrotne dotknięcie umożliwia dokonanie wyboru lub
uruchomienie menu, opcji bądź aplikacji.
Dotknięcie iprzytrzymanie: dotknij wybrany element iprzytrzymaj przez
czas dłuższy niż 2 sekundy.
Przeciąganie: dotknij element iprzenieś go do nowej lokalizacji.
Dwukrotne dotknięcie: szybko dwukrotnie dotknij element.
Szybkie przesunięcie palcem po ekranie: umożliwia szybkie przewijanie
wgórę, wdół, wlewo lub wprawo oraz przechodzenie pomiędzy listami
lub ekranami.
Uszczypnięcie: umieść dwa palce wpewnej odległości od siebie,
anastępnie „uszczypnij” ekran.
Wskazówka:
Jeśli nie korzystasz zurządzenia przez określony czas, przejdzie ono wtryb czuwania.
Aby uruchomić urządzenie znajdujące się wstanie hibernacji, naciśnij przycisk
zasilania. Aby ustawić czas, po którym urządzenie przejdzie wtryb czuwania,
skorzystaj znastępującej ścieżki: ustawienia > wyświetlacz > hibernacja.
Wycisz Wibracje Dźwięk
ARCHOS_52_Platinum_book.indd 137 11/12/2014 14:36:21

138
Łączność 3G
Karta SIM powinna umożliwiać połączenie zInternetem bez
konieczności przeprowadzania dodatkowej konguracji. Urządzenie
ARCHOS będzie wykrywało sygnał sieci zawsze wtedy, gdy znajdzie się
wzasięgu sieci 3G twojego operatora. W trakcie połączenia zsiecią 3G na
pasku stanu urządzenia widoczna będzie ikona 3G.
Łączność 3G iWi-Fi
Aktywacja danych mobilnych
Aby korzystać zInternetu, należy aktywować ikonę
danych mobilnych.
1. Dotknij iprzytrzymaj ikony godziny ibaterii, aby
wyświetlić pasek stanu.
2. Przeciągnij niebieską linię wdół, aby wyświetlić
panel statusu.
3. Dotknij ikonę panelu statusu .
4. Dotknij ikonę danych mobilnych , aby
aktywować opcję.
Wskazówka:
W przypadku problemów zpołączeniem zapoznaj się znajczęściej
zadawanymi pytaniami na stronie www.archos.com lub skontaktuj się
zoperatorem sieci 3.
ARCHOS_52_Platinum_book.indd 138 11/12/2014 14:36:21

139
PL
Połączenie Wi-Fi
OSTRZEŻENIE: Upewnij się, że urządzenie znajduje się wzasięgu
działania sieci Wi-Fi. Skrót do ustawień połączenia Wi-Fi znajduje się na
pasku stanu urządzenia.
1. Dotknij iprzytrzymaj ikony godziny ibaterii, aby
wyświetlić pasek stanu.
2. Przeciągnij niebieską linię wdół, aby wyświetlić
panel statusu.
3. Dotknij ikonę panelu statusu .
4. Dotknij ikonę „Settings” (ustawienia) , aby
otworzyć menu ustawień.
5. W części „Wireless & networks” (usługi
bezprzewodowe isieci), jeśli łączność Wi-Fi jest
wyłączona, przesuń włącznik Wi-Fi do pozycji „ON”
(wł.). Po uruchomieniu łączności Wi-Fi urządzenie
ARCHOS rozpocznie skanowanie wposzukiwaniu
dostępnych sieci Wi-Fi.
6. Dotknij „Wi-Fi”, aby wyświetlić dostępne sieci.
7. Dotknij nazwę sieci, zktórą chcesz się połączyć.
Sieci prywatne wyświetlane są zikoną kłódki – aby się znimi połączyć,
musisz wprowadzić hasło.
ARCHOS_52_Platinum_book.indd 139 11/12/2014 14:36:22

140
Dodawanie konta Google
Konto Google umożliwia korzystanie zpełnej gamy aplikacji iusług Google.
1. Skorzystaj znastępującej ścieżki: „Settings” > „Accounts” > „Add account”
(ustawienia > konta > dodaj konto).
2. Zaznacz, że chcesz dodać konto Google.
3. Postępuj zgodnie zpoleceniami wyświetlanymi na ekranie, aby wprowadzić
informacje na temat konta.
Po utworzeniu konta uzyskasz dostęp do Play Store, poczty Gmail, usługi
Spotkania Google, aplikacji Mapy Google iwielu innych.
Synchronizacja danych
Aby zapisać informacje, należy je uprzednio zsynchronizować. Kopia
zapasowa twoich danych zostanie zapisana na serwerach Google.
1. Skorzystaj znastępującej ścieżki „Settings” > „Accounts” > „Google”
(ustawienia > konta > Google).
2. Wybierz swoje konto.
Wyświetlona zostanie lista danych, które można zsynchronizować.
Należy aktywować opcję automatycznej synchronizacji. Aby uruchomić
synchronizację, naciśnij przycisk Menu, anastępnie „Sync now”
(synchronizuj teraz). Dzięki temu będziesz mógł/mogła odzyskać swoje
dane wprzypadku utraty urządzenia lub karty SIM. W przypadku dodania
konta Google na nowym urządzeniu, zastosowane zostaną wszystkie
zapisane informacje.
Konto Google ikontakty
ARCHOS_52_Platinum_book.indd 140 11/12/2014 14:36:22

141
PL
Zapisywanie kontaktów
Zapisane kontakty będą zawsze dostępne wprzypadku korzystania
zkonta Google za pomocą przeglądarki internetowej. Można również
zsynchronizować listę kontaktów zdowolnym telefonem zsystemem
operacyjnym Android, na którym skongurowano konto Google.
1. Włóż do telefonu kartę SIM, na której zapisane są twoje kontakty.
2. Na ekranie głównym lub na ekranie aplikacji wybierz aplikację People .
3. Dotknij przycisk Menu > „Import/Export” (import/eksport).
4. W menu importowania ieksportowania kontaktów, wybierz opcję „Import
from SIM card” (import zkarty SIM).
5. Wybierz konto Google.
6. Zaznacz kontakty, które mają zostać zaimportowane, anastępnie
potwierdź polecenie.
7. Po zaimportowaniu kontaktów do konta Google użyj następującej ścieżki:
„Settings” > „Accounts” > „Google” (ustawienia > konta > Google).
8. Wybierz konto Google.
9. Wybierz przycisk Menu, anastępnie opcję „Sync now” (synchronizuj teraz).
Twoje kontakty zkonta Google zostaną zapisane wurządzeniu.
ARCHOS_52_Platinum_book.indd 141 11/12/2014 14:36:22

142
Wskazówki iporady dotyczące systemu Android
TM
Rozszerzony ekran główny:
Domyślnie dostępny jest jeden ekran główny. Możliwe jest jednak
utworzenie dowolnej liczby ekranów głównych. Wybierz ikonę aplikacji
iprzesuń ją wprawo. Utworzony zostanie nowy ekran główny. Wybierz
ikonę innej aplikacji iprzesuń ją wprawo, aby utworzyć trzeci ekran główny.
Przycisk ekranu głównego
Krótkie naciśnięcie przycisku ekranu głównego powoduje powrót do
ekranu głównego.
Dwukrotne naciśnięcie przycisku ekranu głównego powoduje wyświetlenie
wszystkich otwartych aplikacji. Przesuń wybrane aplikacje wlewo lub
wprawo, aby je zamknąć.
Przenoszenie elementu zekranu głównego:
Dotknij iprzytrzymaj palec na wybranym elemencie aż do wyświetlenia linii
pozycjonowania, anastępnie przesuń ikonę wwybrane miejsce izwolnij ją.
Usuwanie elementu zekranu głównego:
Dotknij iprzytrzymaj wybrany element, przesuń palec wgórę ekranu
iupuść element nad ikoną usuwania.
Usuwanie elementu:
Na ekranie wszystkich aplikacji dotknij iprzytrzymaj wybrany element,
przesuń palec wgórę ekranu iupuść element nad ikoną usuwania.
ARCHOS_52_Platinum_book.indd 142 11/12/2014 14:36:22

143
PL
Wskazówki iporady dotyczące systemu Android
TM
Tworzenie folderów aplikacji:
Upuść ikonę jednej aplikacji nad kolejną na ekranie głównym, aby je
połączyć.
Widżety:
Dotknij ekran główny iprzytrzymaj na nim palec. Dotknij „Widgets”
(widżety).
Zmiana tapety:
Przytrzymaj palec wpustym miejscu ekranu głównego, anastępnie wybierz
tapetę zlisty.
Blokowanie ekranu głównego:
W panelu szybkich ustawień, dostępnym na pasku stanu urządzenia,
dotknij „Settings” (ustawienia). W menu ustawień przewiń wdół idotknij
ikonę „Security” (bezpieczeństwo). Następnie dotknij „Screen lock” (blokada
ekranu). Dotknij rodzaj blokady, jaką chcesz zastosować. Po ustawieniu
blokady zablokowany ekran będzie wyświetlany po każdym uruchomieniu
urządzenia ze stanu hibernacji, wraz zmonitem owprowadzenie
ustalonego wzoru, kodu PIN lub skongurowanego elementu
zabezpieczającego.
ARCHOS_52_Platinum_book.indd 143 11/12/2014 14:36:22

144
Rozwiązywanie problemów
Telefon zawiesił się lub nie można go uruchomić
Sprawdź styki akumulatora, wyjmij iwłóż akumulator, anastępnie ponownie uruchom
telefon. Sprawdź stan naładowania akumulatora ipodłącz urządzenie do ładowarki
przynajmniej na 20minut.
Telefon nie łączy się zsiecią lub wyświetlany jest komunikat obraku dostępnych usług
Spróbuj połączyć się zinnego miejsca. Sprawdź zasięg sieci u swojego operatora.
Nie mogę wykonywać połączeń wychodzących
Upewnij się, że telefon jest połączony zsiecią oraz że sieć nie jest przeładowana lub
niedostępna.
Nie mogę odbierać połączeń przychodzących
Upewnij się, że telefon jest włączony ipołączony zsiecią (sprawdź, czy sieć nie jest
przeładowana lub niedostępna).
Kod PIN karty SIM został zablokowany
Skontaktuj się zoperatorem sieci, aby otrzymać kod PUK, który umożliwi odblokowanie
karty SIM.
Aby skonfigurować nową sieć 3G:
Dotknij ikonę ustawień na urządzeniu.
Wybierz Wireless & networks > More... > Mobile networks (usługi bezprzewodowe isieci >
więcej... > sieci komórkowe).
Wybierz opcję Network settings (ustawienia sieci). Wczęści Network operators (operatorzy
sieci) wybierz swojego operatora. Wczęści Access Point Names (nazwy punktów dostępu)
wybierz nazwę odpowiedniego punktu dostępu iwprowadź dokładne parametry połączenia
otrzymane od operatora sieci 3G.
ARCHOS_52_Platinum_book.indd 144 11/12/2014 14:36:22

HU
Ha további információra van szüksége, keresse a FAQ [GYIK] részt a www.
archos.com weboldalon. Feltétlenül olvassa el, mielőtt visszaküldené
a terméket. Termékeink rendszeres frissítése és fejlesztése miatt
előfordulhat, hogy az Ön készülékének szoftvere némiképp eltérően
jelenik meg, vagy kismértékben eltérőek a funkciói a jelen Rövid
felhasználói útmutatóban olvasottakhoz képest.
A csomag tartalma.....................................................................................................
A telefon bemutatása................................................................................................
Összeszerelés................................................................................................................
Első lépések...................................................................................................................
3G és Wi-Fi kapcsolat.................................................................................................
Google-fiók és névjegyek........................................................................................
Ötletek és tippek az Android
TM
-hoz......................................................................
Hibaelhárítás.................................................................................................................
146
147
150
152
154
156
158
160
A megfelelőségi nyilatkozatot megtalálja a http://www.archos.com/
products/declaration_conformity.html webhelyen.
Tartalomjegyzék
145
ARCHOS_52_Platinum_book.indd 145 11/12/2014 14:36:22

146
A csomag tartalma
Ellenőrizze, hogy az alábbiak megvannak-e a termék dobozában:
- ARCHOS 50b Platinum
- Akkumulátor
- Fejhallgató
- USB-kábel
- Töltő
- Rövid felhasználói útmutató
- Garanciális jogi és biztonsági információk
A készülékhez kapott tételek és az elérhető tartozékok a régiótól és a
szolgáltatótól függően eltérőek lehetnek.
A mellékelt tételek kifejezetten az Ön készülékéhez valók,
következésképp nem feltétlenül kompatibilisek más készülékekkel.
A jóvá nem hagyott tartozékok használata a készülék hibás működését
okozhatja.
ARCHOS_52_Platinum_book.indd 146 11/12/2014 14:36:22

147
4
1
2
3
5
6
HU
1
Fejhallgató-csatlakozó
Telefon hangszórója
Kamera
Hangerő-szabályozó gombok
Főkapcsoló
Mikrofon
2
3
4
A telefon bemutatása
5
6
ARCHOS_52_Platinum_book.indd 147 11/12/2014 14:36:23

148
7
8
9
10
A telefon bemutatása
7
Kamera
Vaku
Hangszóró
Micro USB-port
10
9
8
ARCHOS_52_Platinum_book.indd 148 11/12/2014 14:36:23

149
11 12
13
HU
13
12
11
Többfeladatos: megnyitja a legutóbb használt alkalmazások listáját.
Kezdőképernyő/A legújabb alkalmazások/Google NOW: nyomja
meg röviden, hogy visszatérjen a kezdőképernyőn; nyomja meg kétszer,
hogy nyissa meg a legutóbb használt alkalmazások listájának; hosszú
megnyomásával érhető el a Google Now.
Vissza: visszatér az előző képernyőre.
Többfeladatos
Kezdőképernyő/A legújabb alkalmazások/
Google NOW
Vissza
ARCHOS_52_Platinum_book.indd 149 11/12/2014 14:36:23

150
Összeszerelés
A hátlap eltávolítása
A horonyba nyúlva távolítsa el a hátlapot.
Ne hajlítsa és ne csavarja meg túl erősen a hátlapot. Ezzel ugyanis kárt
tehet a hátlapban.
SIM-kártya behelyezése
1. SIM-kártya behelyezéséhez csúsztassa ki a SIM-kártya tartóját, és helyezze
bele a micro SIM-kártyáját (1) vagy a nano SIM-kártyáját (2).
2. Helyezze vissza a kártya tartóját a megfelelő helyre.
Memóriakártya behelyezése
Lefelé fordítva csúsztassa be a memóriakártyát a TF nyílásba (3).
Zárás
Bepattintva helyezze vissza a hátlapot.
Tipp:
A készülék első használata előtt töltse fel teljesen az akkumulátort.
ARCHOS_52_Platinum_book.indd 150 11/12/2014 14:36:23

151
Picture to show how to remove the bottom casing
Picture to show how to insert the battery pack
SIM1
SIM2
Picture to show the cards position
SIM1
SIM2
TF
Picture to show the tray holder
Picture to show how to remove the bottom casing
Picture to show how to insert the battery pack
SIM1
SIM2
Picture to show the cards position
SIM1
SIM2
TF
Picture to show the tray holder
Picture to show how to remove the bottom casing
Picture to show how to insert the battery pack
SIM1
SIM2
Picture to show the cards position
SIM1
SIM2
TF
Picture to show the tray holder
Picture to show how to remove the bottom casing
Picture to show how to insert the battery pack
SIM1
SIM2
Picture to show the cards position
SIM1
SIM2
TF
Picture to show the tray holder
HU
A horonyba benyúlva
emelje fel a hátlapot.
Összeszerelés
ARCHOS_52_Platinum_book.indd 151 11/12/2014 14:36:24

152
Bekapcsolás
1. A készülék bekapcsolásához tartsa lenyomva a főkapcsolót.
Lehet, hogy bekapcsolásakor a készülék PIN-kódot kér.
2. Írja be a SIM-kártyához kapott PIN-kódot.
Ügyeljen rá, hogy a helyes PIN-kódot adja meg.
3. Nyomja meg az „OK” gombot.
Beállítás a varázsló segítségével
Az ARCHOS első indításakor a telepítési varázsló segít a készülék
beállításában:
- Nyelv
- Dátum és idő
- Wi-Fi kapcsolat
- Helymeghatározó szolgáltatás beállításai
Kikapcsolás
A készülék kikapcsolásához tartsa lenyomva a főkapcsolót, majd válassza
a Power o > OK [Kikapcsolás > OK] lehetőséget.
Első lépések
ARCHOS_52_Platinum_book.indd 152 11/12/2014 14:36:24

153
HU
Hang- és értesítési prolok
1. A készülék bekapcsolt állapotában
2. tartsa lenyomva a főkapcsolót.
3. Válasszon a lehetőségek közül.
Az érintőképernyőn végezhető
műveletek:
Megérintés: egyszeri megérintés menük, opciók vagy alkalmazások
kiválasztásához vagy elindításához.
Megérintés és nyomva tartás: egy elem megérintése és nyomva
tartása több mint 2 másodpercig.
Húzás: egy elem megérintése és áthelyezése húzással.
Dupla megérintés: egy elem kétszeri gyors megérintése.
Pöccintés: gyors görgetés felfelé, lefelé, balra vagy jobbra listák vagy
képernyők áttekintéséhez.
Össze-/széthúzás: a képernyő megérintése két ujjal távol egymástól,
majd ujjainak összehúzása egymás felé.
Tipp:
Ha adott ideig nem használja, a készüléke készenléti üzemmódba vált. A
készülék felébresztéséhez nyomja meg a főkapcsolót.
Az időtartamot a Settings > Display > Sleep [Beállítások > Kijelző > Alvó
módba váltás] menüpontban állíthatja be.
Néma Rezgő Hangos
ARCHOS_52_Platinum_book.indd 153 11/12/2014 14:36:24

154
3G kapcsolat
A SIM-kártyájának további beállítás nélkül kapcsolódnia kell az
internethez. Az ARCHOS csak akkor fog jelet, ha a szolgáltatója 3G
hálózatának lefedettségi területén belül tartózkodik. Ha csatlakozik a 3G
hálózathoz, a 3G ikon látható az állapotjelző sávon.
A mobiladatok aktiválása
3G és Wi-Fi kapcsolat
Az internetkapcsolathoz aktiválnia kell a
mobiladatok ikont.
1. Az idő és akkumulátor ikonok nyomva tartásával
jelenítse meg az állapotjelző sávot.
2. Húzza le a fehér vonalat az állapotjelző sáv
megjelenítéséhez.
3. Érintse meg az állapotjelző sáv ikont .
4. Az aktiváláshoz érintse meg a mobiladatok
ikont .
Tipp:
Ha csatlakozási problémákat tapasztal, keresse a FAQ [GYIK] részt a
www.archos.com weboldalon, vagy forduljon 3G szolgáltatójához.
ARCHOS_52_Platinum_book.indd 154 11/12/2014 14:36:24

155
HU
Wi-Fi kapcsolat
FIGYELEM! Győződjön meg róla, hogy Wi-Fi zónában tartózkodik. Az
állapotjelző sávról gyorsan elérheti a Wi-Fi beállításokat.
1. Az idő és akkumulátor ikonok nyomva tartásával
jelenítse meg az állapotjelző sávot.
2. Húzza le a kék vonalat az állapotjelző sáv
megjelenítéséhez.
3. Érintse meg az állapotjelző sáv ikont .
4. Érintse meg a „Settings” [Beállítások] ikont a
Settings [Beállítások] menü megnyitásához.
5. A „Wireless & networks” [Vezeték nélküli és
hálózatok] részben ellenőrizze, hogy a Wi-Fi be van-e
kapcsolva. Ha nincs, húzza a Wi-Fi kapcsolót „ON” [BE]
helyzetbe. Ha be van kapcsolva, az ARCHOS keresni
kezdi az elérhető Wi-Fi hálózatokat.
6. Érintse meg a „WiFi” elemet az elérhető hálózatok megjelenítéséhez.
7. Érintse meg annak a hálózatnak a nevét, amelyikhez csatlakozni szeretne.
A magánhálózatok mellett egy lakat szimbólum látható, és jelszó megadását
kérik.
ARCHOS_52_Platinum_book.indd 155 11/12/2014 14:36:25

156
Google-ók hozzáadása
A Google-ók lehetővé teszi bármely használni kívánt Google alkalmazás
és szolgáltatás funkcióinak teljes körű kihasználását.
1. Nyissa meg a „Settings” > „Accounts” > „Add account” [Beállítások >
Fiókok > Fiók hozzáadása] menüpontot.
2. A hozzáadáshoz válassza ki a „Google” óktípust.
3. A ókkal kapcsolatos adatok megadásához kövesse a képernyőn
megjelenő utasításokat.
A ók létrehozását követően elérheti a Play áruházat, a gmailt, a Hangout
szolgáltatást, a térképeket és számos más alkalmazást.
Adatok szinkronizálása
A mentéshez szinkronizálnia kell az adatokat. Az adatokról biztonsági
mentés készül a Google szervereken.
1. Nyissa meg a „Settings” > „Accounts” > „Google” [Beállítások > Fiókok >
Google] menüpontot.
2. Válassza ki a ókját.
Megjelenik a szinkronizálható adatok listája.
Aktiválja az automatikus szinkronizálást. A szinkronizálás elindításához
nyomja meg a Menu [Menü] gombot, majd válassza a Sync now
[Szinkronizálás most] lehetőséget. Készüléke vagy SIM-kártyája
elvesztése esetén visszanyerheti adatait. Amikor Google-ókját
hozzáadja egy új készülékhez, az összes mentett adata átkerül az új
készülékre.
Google-ók és névjegyek
ARCHOS_52_Platinum_book.indd 156 11/12/2014 14:36:25

157
HU
Névjegyek mentése
Ha a névjegyei le vannak mentve, azok mindig elérhetők a weben
keresztül, és bármely Androidos telefonnal szinkronizálhatók, amelyen
be van állítva a Google-ókja.
1. Helyezze be a névjegyeit tartalmazó SIM-kártyát a telefonjába.
2. Válassza ki a People [Személyek] alkalmazást a kezdőképernyőn vagy
az Összes alkalmazás képernyőn.
3. Érintse meg a Menu [Menü] gombot, majd válassza az „Import/Export”
[Importálás/Exportálás] lehetőséget.
4. A névjegyek importálása/exportálása részben válassza az „Import from
SIM card” [Importálás SIM-kártyáról] lehetőséget.
5. Válassza ki Google-ókját.
6. Ellenőrizze az importálandó névjegyeket, és hagyja jóvá a kiválasztást.
7. Ha sikerült importálni a névjegyeket a Google-ókba, nyissa meg
a „Settings” > „Accounts” > „Google” [Beállítások > Fiókok > Google]
menüpontot.
8. Válassza ki Google-ókját.
9. Nyomja meg a Menu [Menü] gombot, majd válassza a „Sync now”
[Szinkronizálás most] lehetőséget.
Névjegyeit ezzel elmentette Google-ókján keresztül.
ARCHOS_52_Platinum_book.indd 157 11/12/2014 14:36:25

158
Bővített kezdőképernyő:
Alapértelmezés szerint egy kezdőképernyője van. Azonban tetszőleges
számú kezdőképernyőt létrehozhat. Válasszon ki egy alkalmazásikont,
és húzza el jobbra. Ezzel létrehozott egy új kezdőképernyőt. Válasszon
ki egy másik alkalmazásikont, és húzza el jobbra, ezzel létrehozott egy
harmadik kezdőképernyőt.
Elem áthelyezése a kezdőképernyőn:
Érintse meg az ujjával, és tartsa lenyomva, míg a koordinátahálózat meg
nem jelenik, utána húzza a kívánt helyre, és emelje fel az ujját.
Elem törlése a kezdőképernyőn:
Érintse meg az ujjával az adott elemet, tartsa lenyomva, majd húzza az
ujját a képernyő teteje felé, és engedje el a „Törlés” ikon felett.
Elem eltávolítása:
Az „Összes alkalmazás” képernyőn érintse meg az ujjával az adott elemet,
tartsa lenyomva, majd húzza az ujját a képernyő teteje felé, és engedje el
az „Eltávolítás” kosár felett.
Ötletek és tippek az Android
TM
-hoz
ARCHOS_52_Platinum_book.indd 158 11/12/2014 14:36:25

159
HU
Alkalmazásmappák létrehozása:
Ha egy alkalmazás ikont egy másik fölé húz egy kezdőképernyőn, majd
elengedi, azzal összekapcsolja a két ikont.
Minialkalmazások:
Érintse meg az ujjával és tartsa lenyomva a kezdőképernyőt. Érintse meg
a „Widgets” [Minialkalmazások] elemet.
Háttérkép megváltoztatása:
Tartsa az ujját egy kezdőképernyőn egy üres helyen, majd válasszon a
listából.
Az érintőképernyő lezárása:
Az állapotjelző sáv gyorsbeállítások részén érintse meg a „Settings”
[Beállítások] elemet. A „Settings” [Beállítások] menüben görgessen
lefelé, és érintse meg a „Security” [Biztonság] elemet. Érintse meg a
„Screen lock” [Képernyő lezárása] menüpontot. Érintse meg a használni
kívánt lezárástípust. Ha lezárást állít be, a képernyő felébredésekor
lezárási képernyő jelenik meg, és kéri a minta, PIN-kód vagy más kulcs
megadását.
ARCHOS_52_Platinum_book.indd 159 11/12/2014 14:36:25

160
A telefonom lefagyott vagy nem lehet bekapcsolni
Ellenőrizze az akkumulátor érintkezőit, vegye ki, majd tegye vissza az
akkumulátort, majd kapcsolja be a telefont. Ellenőrizze az akkumulátor
töltöttségi szintjét, töltse legalább 20 percig.
A telefonom nem kapcsolódik a hálózathoz, vagy a „Nincs hálózat”
üzenet jelenik meg a képernyőn
Próbáljon máshonnan csatlakozni. Ellenőrizze a hálózati lefedettséget a
szolgáltatójánál.
Nem tudok hívást kezdeményezni
Ellenőrizze, hogy a telefonja csatlakozik-e hálózathoz, és hogy a hálózat
elérhető és nem túlterhelt-e.
Nem tudok hívást fogadni
Ellenőrizze, hogy a telefonja be van-e kapcsolva és csatlakozik-e hálózathoz
(ellenőrizze, hogy a hálózat elérhető és nem túlterhelt-e).
SIM-kártya PIN-kódja blokkolva
Kérje szolgáltatójától a PUK-kódot (személyi feloldó kód).
Új 3G hálózat beállítása:
A készüléken érintse meg a Settings [Beállítások] elemet.
Válassza a Wireless & networks > More... > Mobile networks [Vezeték nélküli
és hálózatok > Továbbiak... > Mobilhálózatok] menüpontot.
Válassza ki a Network settings [Hálózati beállítások] elemet. A Network
operators [Szolgáltatók] pontban válassza ki szolgáltatóját.
Az Access Point Names [Hozzáférési pont nevek] pontban válassza ki a
megfelelő hozzáférési pont nevet, és írja be a 3G szolgáltatója által megadott
pontos csatlakozási paramétereket.
Hibaelhárítás
ARCHOS_52_Platinum_book.indd 160 11/12/2014 14:36:25

, www.archos.com
, ,
&
3G
&
Google
162
163
166
168
170
172
174
176
161
ARCHOS_52_Platinum_book.indd 161 11/12/2014 14:36:25

4
1
2
3
5
6
162
1
2
3
4
5
6
ARCHOS_52_Platinum_book.indd 162 11/12/2014 14:36:26

163
-
- ARCHOS 50b Neon
-
-
- SIM
- USB
-
-
-
,
,
ARCHOS_52_Platinum_book.indd 163 11/12/2014 14:36:26

164
11 12
13
164
13
12
11
, Google Now /
/
Google Now ,
Google Now /
/
ARCHOS_52_Platinum_book.indd 164 11/12/2014 14:36:26

165
7
8
9
10
165
8
9
10
USB
7
ARCHOS_52_Platinum_book.indd 165 11/12/2014 14:36:27

166166
Picture to show how to remove the bottom casing
Picture to show how to insert the battery pack
SIM1
SIM2
Picture to show the cards position
SIM1
SIM2
TF
Picture to show the tray holder
Picture to show how to remove the bottom casing
Picture to show how to insert the battery pack
SIM1
SIM2
Picture to show the cards position
SIM1
SIM2
TF
Picture to show the tray holder
Picture to show how to remove the bottom casing
Picture to show how to insert the battery pack
SIM1
SIM2
Picture to show the cards position
SIM1
SIM2
TF
Picture to show the tray holder
Picture to show how to remove the bottom casing
Picture to show how to insert the battery pack
SIM1
SIM2
Picture to show the cards position
SIM1
SIM2
TF
Picture to show the tray holder
ARCHOS_52_Platinum_book.indd 166 11/12/2014 14:36:27

167
167
1
micro
, 2
nano
TF(3)
ARCHOS_52_Platinum_book.indd 167 11/12/2014 14:36:28

168168
,
< <
Silent Vibrate Sound
1 ..
2 ..
,
2
ARCHOS_52_Platinum_book.indd 168 11/12/2014 14:36:28

169
169
1 ..
PIN PIN
2 .. PIN
PIN
3 ..
wizard
-
- &
-
-
«»
,
ARCHOS_52_Platinum_book.indd 169 11/12/2014 14:36:28

170170
,
:
.
1 . .
2 ..
3 ..
4 ..
5 . ,
.
6 ..
7 ..
,
ARCHOS_52_Platinum_book.indd 170 11/12/2014 14:36:28

171
171
& 3G
3G
3G , 3G
3G
, EDGE 3G
.
,
1
2
3
4
www.archos.com ,
,
ARCHOS_52_Platinum_book.indd 171 11/12/2014 14:36:29

172172
, Google
.
1 ..
2 ..
3 ..( & )
4 ..
5 .. Google
6 ..
7 .. Google < < , Google
8 .. , Google
9 .. “” ,
Google
ARCHOS_52_Platinum_book.indd 172 11/12/2014 14:36:29

173
173
&Google
Google
. Google
< < 1
” Google”
2
Gmail , , , Google 3
, , Hangouts
. Google ,
1 .. Google < <
2 ..
Google
,
ARCHOS_52_Platinum_book.indd 173 11/12/2014 14:36:29

174174
widgets
widgets
, “ ”
,
< < ,
,
,
, PIN , “ ”
ARCHOS_52_Platinum_book.indd 174 11/12/2014 14:36:29

175
175
“”
,
“ ”
ARCHOS_52_Platinum_book.indd 175 11/12/2014 14:36:29

176
, , ,
20 ,
,
,
( ) ,
PIN
PUK
3G
, < < &
,
, ,
3G
,
ARCHOS_52_Platinum_book.indd 176 11/12/2014 14:36:29

ARCHOS_52_Platinum_book.indd 177 11/12/2014 14:36:29

ARCHOS_52_Platinum_book.indd 178 11/12/2014 14:36:30

179
Open Source Software Offer
The software bundled with this product includes software les subject to certain open
source license requirements. Such open source software les are subject solely to
the terms of the relevant open source software license. Such open source software is
provided on an “AS IS” basis to the maximum extent permitted by applicable law.
For the open source les contained herein, please access “Open source license” section
located at: Settings\About phone\Legal information on the device for the relevant
copyright and licensing terms. You may obtain a copy of Apache License, Version 2.0
at http://www.apache.org/licenses/LICENSE-2.0. You may also obtain a copy of GNU
General Public License, Version 2 at the Free Software Foundation, INC, 51 Franklin
Street, Fifth Floor, Boston, MA 02110-1301, USA.
Until the date that is three years after our last shipment of this product, you may obtain
a copy of the source code corresponding to the binaries for any GPL-Licensed le by
contacting ARCHOS customer service at http://www.archos.com and ARCHOS will
send you a link to such source code or will provide instructions to get the source on a
physical medium.
This oer is valid to anyone in receipt of this information.
ARCHOS_52_Platinum_book.indd 179 11/12/2014 14:36:30

180
National restrictions
This device is intended for home and oce use in all EU countries (and other countries
following the EU directive 1999/5/EC) without any limitation except for the countries
mentioned below:
Country Restriction Reason/remark
Bulgaria None General authorization required for outdoor use
and public service
France Outdoor use
limited to 10
mW e.i.r.p.
within the
band 2454-
2483.5 MHz
Military Radiolocation use. Refarming of the
2.4 GHz band has been ongoing in recent
years to allow current relaxed regulation. Full
implementation planned 2012
Italy None If used outside of own premises, general
authorization is required.
Luxembourg None General authorization required for network and
service supply (not for spectrum)
ARCHOS_52_Platinum_book.indd 180 11/12/2014 14:36:30

181
Norway Implemented This subsection does not apply for the
geographical aera within a radius of 20 km from
the centre of Ny-Alesund
Russian
Federation
None Only for indoor applications
Note: Frequency 2454-2483.5MHZ are restricted to indoor use in France.
Consult the declaration of conformity on http://www.archos.com/products/
declaration_conformity.html
SAR
After the labortory measurement, this mobile phone SAR value is:
Head: 0.341 W/kg Body: 0.245 W/kg
Archos company declares that this device is in compliance with the essential
requirements and other relevant provisions of Directive 1999/5/EC
ARCHOS_52_Platinum_book.indd 181 11/12/2014 14:36:30
-
 1
1
-
 2
2
-
 3
3
-
 4
4
-
 5
5
-
 6
6
-
 7
7
-
 8
8
-
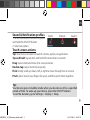 9
9
-
 10
10
-
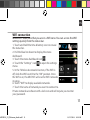 11
11
-
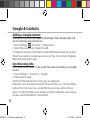 12
12
-
 13
13
-
 14
14
-
 15
15
-
 16
16
-
 17
17
-
 18
18
-
 19
19
-
 20
20
-
 21
21
-
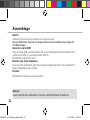 22
22
-
 23
23
-
 24
24
-
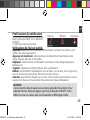 25
25
-
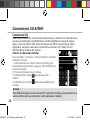 26
26
-
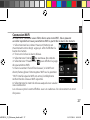 27
27
-
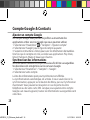 28
28
-
 29
29
-
 30
30
-
 31
31
-
 32
32
-
 33
33
-
 34
34
-
 35
35
-
 36
36
-
 37
37
-
 38
38
-
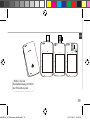 39
39
-
 40
40
-
 41
41
-
 42
42
-
 43
43
-
 44
44
-
 45
45
-
 46
46
-
 47
47
-
 48
48
-
 49
49
-
 50
50
-
 51
51
-
 52
52
-
 53
53
-
 54
54
-
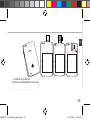 55
55
-
 56
56
-
 57
57
-
 58
58
-
 59
59
-
 60
60
-
 61
61
-
 62
62
-
 63
63
-
 64
64
-
 65
65
-
 66
66
-
 67
67
-
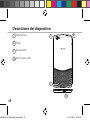 68
68
-
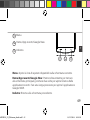 69
69
-
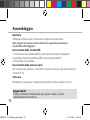 70
70
-
 71
71
-
 72
72
-
 73
73
-
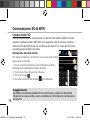 74
74
-
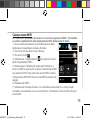 75
75
-
 76
76
-
 77
77
-
 78
78
-
 79
79
-
 80
80
-
 81
81
-
 82
82
-
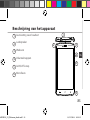 83
83
-
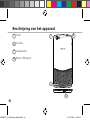 84
84
-
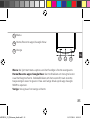 85
85
-
 86
86
-
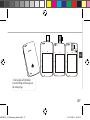 87
87
-
 88
88
-
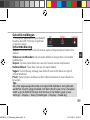 89
89
-
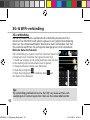 90
90
-
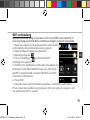 91
91
-
 92
92
-
 93
93
-
 94
94
-
 95
95
-
 96
96
-
 97
97
-
 98
98
-
 99
99
-
 100
100
-
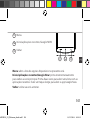 101
101
-
 102
102
-
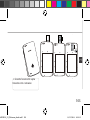 103
103
-
 104
104
-
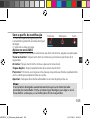 105
105
-
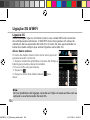 106
106
-
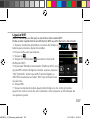 107
107
-
 108
108
-
 109
109
-
 110
110
-
 111
111
-
 112
112
-
 113
113
-
 114
114
-
 115
115
-
 116
116
-
 117
117
-
 118
118
-
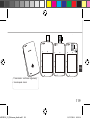 119
119
-
 120
120
-
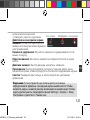 121
121
-
 122
122
-
 123
123
-
 124
124
-
 125
125
-
 126
126
-
 127
127
-
 128
128
-
 129
129
-
 130
130
-
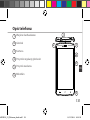 131
131
-
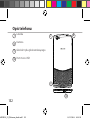 132
132
-
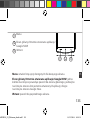 133
133
-
 134
134
-
 135
135
-
 136
136
-
 137
137
-
 138
138
-
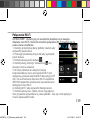 139
139
-
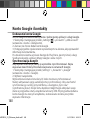 140
140
-
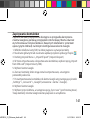 141
141
-
 142
142
-
 143
143
-
 144
144
-
 145
145
-
 146
146
-
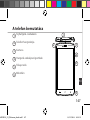 147
147
-
 148
148
-
 149
149
-
 150
150
-
 151
151
-
 152
152
-
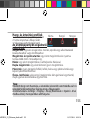 153
153
-
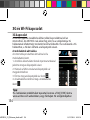 154
154
-
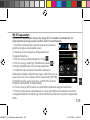 155
155
-
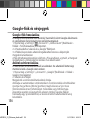 156
156
-
 157
157
-
 158
158
-
 159
159
-
 160
160
-
 161
161
-
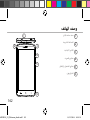 162
162
-
 163
163
-
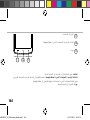 164
164
-
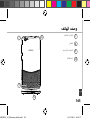 165
165
-
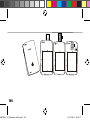 166
166
-
 167
167
-
 168
168
-
 169
169
-
 170
170
-
 171
171
-
 172
172
-
 173
173
-
 174
174
-
 175
175
-
 176
176
-
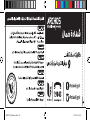 177
177
-
 178
178
-
 179
179
-
 180
180
-
 181
181


Archos 52 Platinum El manual del propietario
- Categoría
- Smartphones
- Tipo
- El manual del propietario
en otros idiomas
- français: Archos 52 Platinum Le manuel du propriétaire
- italiano: Archos 52 Platinum Manuale del proprietario
- português: Archos 52 Platinum Manual do proprietário
- polski: Archos 52 Platinum Instrukcja obsługi
Artículos relacionados
-
Archos 50b Platinum El manual del propietario
-
-
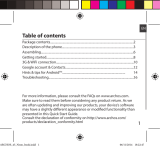 Archos Neon 45 Neon Manual de usuario
-
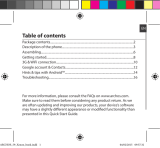 Mode d'Emploi 59 Xenon Manual de usuario
-
Archos Power 50 Power El manual del propietario
-
 Archos Xenon Series User 80b Helium Manual de usuario
-
 Archos Copper Series User 90 Copper Manual de usuario
-
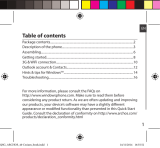 Archos Cesium 40 Cesium Manual de usuario
-
-
 Mode d'Emploi 64 Xenon El manual del propietario


