
GD910 Guía del usuario
MMBB0348724 (1.0) W
GD910 Guía del usuario
Información general
<Centro de información al cliente de LG>
902-500-234
* Asegúrese de que el número es correcto antes de
realizar una llamada.
ESPAÑOL
E N G L I S H
www.lgmobile.com
GD910_Spain_Voda_Cover_1.0_0918.1 1 2009.9.18 10:23:49 PM

Bluetooth QD ID B015581
GD910_Spain_Voda_Cover_1.0_0918.2 2 2009.9.18 10:23:49 PM

GD910 Guía del usuario
-
ESPAÑOL
Enhorabuena por la adquisición del teléfono móvil
GD910 de LG. Este modelo cuenta con un diseño
innovador y compacto compatible con la tecnología de
comunicación móvil digital más avanzada.
Algunos de los contenidos que aparecen en este
manual podrían diferir de las opciones del teléfono
dependiendo del operador.
Cómo desechar aparatos eléctricos y electrónicos
obsoletos
1 Si este símbolo de un contenedor con ruedas tachado
aparece en un producto, significa que éste está
contemplado en la directiva europea 2002/96/CE.
2 Todos los aparatos eléctricos o electrónicos se deben
desechar de forma distinta del servicio municipal de
recogida de basura, a través de puntos de recogida
designados por el gobierno o las autoridades locales.
3 La correcta recogida y tratamiento de los dispositivos
inservibles contribuye a evitar riesgos potenciales para el
medio ambiente y la salud pública.
4 Para obtener más información sobre cómo desechar
los aparatos obsoletos, póngase en contacto con su
ayuntamiento, el servicio de recogida de basura o el
establecimiento donde adquirió el producto.
GD910_Spain_Voda_1.0_0918.indd 1 2009.9.18 9:54:11 PM

2 LG GD910 | Guía del usuario
Contenidos
Directrices para un uso seguro y eficaz ...................5
Familiarizarse con el teléfono .................................15
Partes del teléfono ......................................................15
Ajuste del reloj a la muñeca .........................................17
Instale la tarjeta SIM ....................................................18
Cargar y conectar su teléfono con el soporte de conexión 20
Conectar el teléfono y el PC .........................................21
Pantalla principal ........................................................22
Comunicación con el GD910 .......................................23
Mapa de menús ....................................................... 27
Llamadas .................................................................28
Realizar una llamada o videollamada ............................28
Llamar a sus contactos ................................................29
Contestar y rechazar una llamada ................................29
Ajustar el volumen de la llamada ..................................29
Opciones de llamada entrante ......................................30
Marcación rápida ........................................................31
Ver los registros de llamadas .......................................32
Cambiar los ajustes de llamada comunes .....................32
Contactos ................................................................ 35
Búsqueda de un contacto ............................................35
Agregar un contacto nuevo ..........................................35
Crear un grupo ............................................................36
Cambiar los ajustes de contactos .................................37
Ver información ...........................................................38
Mensajes ..................................................................39
Enviar un mensaje .......................................................39
GD910_Spain_Voda_1.0_0918.indd 2 2009.9.18 9:54:11 PM

3
Contenidos
Carpetas de mensajes .................................................41
Administrar mensajes ..................................................42
Cambiar los ajustes de SMS ........................................43
Cambiar los ajustes de Buzón de voz ............................43
Comando de voz .................................................... 44
Comando de voz ........................................................44
Acceso .......................................................................45
Uso de una función del comando de voz ......................45
Ajustes del Comando de voz ........................................46
Utilidades ................................................................. 47
Carpetas .....................................................................47
Música .......................................................................47
Transferir música al teléfono ........................................48
Reproducir una canción ...............................................49
Crear una lista de reproducción ....................................50
Uso de la cámara ........................................................51
Añadir un evento al calendario .....................................51
Agregar un elemento a la lista de tareas .......................52
Añadir una nota ..........................................................52
Utilizar el buscador de fechas .......................................53
Definir una alarma .......................................................53
Grabadora de voz ........................................................54
Usar la calculadora ......................................................54
Convertir una unidad ...................................................55
Agregar una ciudad al reloj mundial .............................55
Usar el cronómetro ......................................................56
STK ............................................................................56
GD910_Spain_Voda_1.0_0918.indd 3 2009.9.18 9:54:11 PM

4 LG GD910 | Guía del usuario
Contenidos
Ajustes ..................................................................... 57
Personalizar sus perfiles ..............................................57
Cambiar los ajustes de pantalla ....................................58
Cambiar los ajustes del teléfono ...................................58
Cambiar los ajustes de conectividad .............................60
Cambiar los ajustes de Bluetooth .................................61
Vincular el teléfono con otro dispositivo Bluetooth..........62
Utilizar auriculares Bluetooth ........................................64
Enviar y recibir archivos
mediante Bluetooth ........................................64
PC Sync ................................................................... 66
Instalación de LG PC Suite en el ordenador ...................66
Conectar el teléfono y el PC .........................................67
Copias de seguridad y restauración de los datos del
teléfono ......................................................................67
Ver los archivos del teléfono en el PC ...........................68
Sincronizar los contactos .............................................68
Sincronizar los mensajes .............................................69
Utilizar el teléfono como dispositivo de almacenamiento
masivo........................................................................69
Actualización del software ...................................... 70
Programa de actualización del software de teléfonos
móviles LG ..................................................................70
Resolución de problemas ....................................... 71
Accesorios ...............................................................73
Servicios de red/Datos técnicos ............................74
GD910_Spain_Voda_1.0_0918.indd 4 2009.9.18 9:54:11 PM

5
Directrices para un uso seguro y eficaz
Lea estas sencillas instrucciones. Ignorar estas
instrucciones puede ser peligroso o ilegal.
Exposición a energía de radiofrecuencia
Información sobre exposición a ondas de radio y SAR (Specific
Absorption Rate, Tasa específica de absorción). El teléfono
móvil GD910 ha sido diseñado para cumplir la normativa de
seguridad aplicable en relación con la exposición a las ondas
de radio. Esta normativa se basa en directrices científicas que
incluyen márgenes de seguridad diseñados para garantizar la
seguridad de todo tipo de personas, independientemente de su
edad y estado de salud.
• Aunque puede haber diferencias entre los niveles de SAR
de los diferentes modelos de teléfonos LG, todos han
sido diseñados para ajustarse a las directrices relevantes
de exposición a ondas de radio.
• El límite de SAR recomendado por la ICNIRP (International
Commission on Non-Ionizing Radiation Protection,
Comisión internacional de protección contra radiaciones
no ionizantes) es de 2 W/Kg. medido sobre 10g de tejido.
• El valor más alto de SAR registrado para el uso de este
modelo de teléfono, medido por DASY4, para su uso
cerca del cuerpo es de 0.486 W/kg (10 g).
• Información de datos para los residentes en países o
regiones que han adoptado el límite SAR recomendado
por el IEEE (Institute of Electrical and Electronics Engineers,
Instituto de ingenieros eléctricos y electrónicos), que es 1,6
W/kg sobre un 1 gramo de tejido.
GD910_Spain_Voda_1.0_0918.indd 5 2009.9.18 9:54:11 PM

6 LG GD910 | Guía del usuario
Directrices para un uso seguro y eficaz
Uso del GD910
Resistencia al agua del GD910
El GD910 está protegido frente a las salpicaduras de agua
(IPX4).
• Puede lavarse la cara con el dispositivo puesto al ser
resistente al contacto fortuito con el agua durante el uso
normal. Pero no será impermeable al nadar.
• Cuando se lave las manos, tenga cuidado de no mojar la
correa de piel puesto que puede acortar su vida útil.
• Si las manos o el GD910 están mojados, no toque las
teclas. Si el teléfono ha sido expuesto al agua y existe
humedad dentro de la pantalla, visite un centro de
atención al cliente autorizado para realizar una inspección
y reparación.
• Si el líquido se ha introducido en el GD910 o si la parte
interior del cristal está empañada y se mantiene así
durante un periodo de tiempo prolongado, lleve el GD910
inmediatamente a un centro de atención al cliente para
realizar una inspección y reparación.
• La impermeabilidad no puede garantizarse si coloca
la cubierta de la tapa de la tarjeta SIM sin la junta
impermeable o con una pieza dañada.
• Si la junta impermeable está dañada por el uso frecuente
de la cubierta de la tapa de la tarjeta SIM, visite un
centro de atención al cliente autorizado.
GD910_Spain_Voda_1.0_0918.indd 6 2009.9.18 9:54:11 PM

7
Directrices para un uso seguro y eficaz
Cuando lleve puesto el GD910
• No exponga el dispositivo a altas temperaturas, humedad
o polvo. Puede producirse un fallo, deformación y
decoloración del dispositivo, así como lesiones por
quemaduras.
• No cause daños al cable. Podría provocar un incendio,
calentamiento excesivo o shock eléctrico.
• No toque los dispositivos de carga con las manos
húmedas. Podría sufrir un shock eléctrico.
• No salpique agua sobre el dispositivo cuando esté en
carga. Desconecte inmediatamente el cargador si se
vierte agua sobre el dispositivo.Esto podría provocar fallos
en el funcionamiento del dispositivo, así como shocks
eléctricos, calentamientos excesivos o incendios debido a
un cortocircuito.
• El cargador de la batería y el adaptador no son
resistentes al agua.
• Las personas con pieles sensibles o con una condición
física debilitada pueden experimentar erupciones o
irritación de la piel al llevar puesto el reloj. Si advierte
problemas en la piel por el uso del GD910, deje de
utilizarlo inmediatamente y visite a su médico.
• Cuando realice tareas o ejercicios que impliquen un gran
esfuerzo físico con el dispositivo puesto, tenga especial
cuidado de no lesionarse ni causar daños a los que están
a su alrededor.
GD910_Spain_Voda_1.0_0918.indd 7 2009.9.18 9:54:11 PM

8 LG GD910 | Guía del usuario
Cuidado y mantenimiento del producto
ADVERTENCIA: Utilice sólo baterías, cargadores y
accesorios aprobados para su utilización con este modelo de
teléfono concreto. De lo contrario, puede quedar invalidada
cualquier aprobación o garantía para el teléfono, además de
resultar peligroso.
• No desmonte esta unidad. Si es necesario repararla,
llévela a un técnico de servicio cualificado.
• Manténgala alejada de electrodomésticos tales como
televisores, radios o equipos informáticos.
• La unidad debe alejarse de fuentes de calor como
radiadores u hornos.
• No la deje caer.
• No exponga esta unidad a vibraciones mecánicas o
golpes.
• Apague el teléfono en cualquier zona en la que así lo
exijan normativas especiales. Por ejemplo, no utilice el
teléfono en hospitales, ya que podrían verse afectados
equipos médicos sensibles.
• No coja el teléfono con las manos mojadas mientras se
está cargando. Podría sufrir una descarga eléctrica y
dañar gravemente el teléfono.
• No cargue el teléfono cerca de material inflamable ya
que podría calentarse y provocar un incendio.
• Utilice un paño seco para limpiar el exterior de la unidad
(no utilice disolventes como benceno, diluyentes o
alcohol).
Directrices para un uso seguro y eficaz
GD910_Spain_Voda_1.0_0918.indd 8 2009.9.18 9:54:12 PM

9
• No cargue el teléfono sobre superficies acolchadas.
• El teléfono se debe cargar en una zona con la ventilación
adecuada.
• No exponga esta unidad a humo o polvo excesivo.
• No coloque el teléfono cerca de tarjetas de crédito o
billetes de transporte, podría afectar a la información de
las bandas magnéticas.
• No golpee la pantalla con un objeto punzante, ya que
puede estropear el teléfono.
• No exponga el teléfono a líquidos ni humedad.
• Utilice con cuidado los accesorios (p. ej. los auriculares).
No toque la antena si no es necesario.
• No utilice el teléfono o accesorios en lugares con elevada
humedad, como piscinas, invernaderos, solariums
o entornos tropicales. El teléfono puede dañarse,
anulándose la garantía.
• La piel es un material elegante y natural. Es normal que
sufra un desgaste progresivo y que se deteriore con el
paso del tiempo. Siga las instrucciones siguientes para
proteger el producto y prolongar su duración.
- No exponga las partes de piel a la humedad, agua y
fuentes directas de calor.
- No ponga la superficie de piel en contacto con alcohol,
perfumes, disolventes y sustancias grasientas.
- No ponga la superficie de piel en contacto con objetos
rugosos, afilados o abrasivos.
- No realice una exposición agresiva a partes metálicas y
límpielo con un paño seco suave.
Directrices para un uso seguro y eficaz
GD910_Spain_Voda_1.0_0918.indd 9 2009.9.18 9:54:12 PM

10 LG GD910 | Guía del usuario
- No doble el producto de forma extrema.
Si se produce algún problema
- Limpie las manchas de la superficie de la piel con un
paño limpio, suave y seco o con un agente de limpieza
profesional para la piel.
- Si el dispositivo entra en contacto con el agua, no frote
la piel con fuerza, utilice un paño limpio, suave y seco y
aplique un movimiento ligero para absorber el líquido.
• Si necesita sustituir la correa de piel, visite un centro
de atención al cliente autorizado y sustitúyala por una
piel aprobada para el uso en este modelo de teléfono
particular.(La garantía no cubre la piel.)
Funcionamiento eficaz del teléfono
Dispositivos electrónicos
Todos los teléfonos móviles pueden generar interferencias
que pueden afectar al rendimiento.
• No utilice su teléfono móvil cerca de aparatos médicos
sin solicitar permiso. Evite colocar el teléfono sobre
marcapasos, por ejemplo, en el bolsillo de la camisa.
• Algunos audífonos pueden verse afectados por teléfonos
móviles.
• También pueden generar pequeñas interferencias en
televisores, radios, ordenadores, etc.
Directrices para un uso seguro y eficaz
GD910_Spain_Voda_1.0_0918.indd 10 2009.9.18 9:54:12 PM

11
Seguridad vial
Compruebe las leyes y normativas locales de utilización de
teléfonos móviles durante la conducción.
• No utilice el teléfono móvil mientras conduzca.
• Dedique toda su atención a la conducción.
• Utilice un kit de manos libres, si lo tiene.
• Salga de la carretera y aparque antes de hacer llamadas
o responderlas, si las condiciones de la vía así lo
requieren.
• La energía de radiofrecuencia puede afectar a algunos
sistemas electrónicos de su vehículo, como la radio del
coche o el equipo de seguridad.
• Si su vehículo dispone de un airbag, no lo obstruya con
equipos inalámbricos portátiles o fijos. Puede causar
un fallo en el airbag o lesiones graves debido a un mal
funcionamiento.
• Si escucha música mientras está en la calle, asegúrese
de que el volumen tiene una intensidad razonable de
forma que pueda ser consciente de lo que sucede en su
entorno. Esto es especialmente importante cuando esté
cerca de la calzada.
Evite lesiones en los oídos
Es posible que los oídos sufran daños cuando se ven
expuestos a sonidos de alto volumen durante largos
períodos. Por lo tanto, le recomendamos que no encienda
ni apague el teléfono cerca de los oídos. Le recomendamos
igualmente que el volumen de la música y de las llamadas
se establezca en un nivel razonable.
Directrices para un uso seguro y eficaz
GD910_Spain_Voda_1.0_0918.indd 11 2009.9.18 9:54:12 PM

12 LG GD910 | Guía del usuario
Piezas de cristal
Algunas piezas de su teléfono móvil están hechas de
cristal. Este cristal puede romperse si el teléfono cae sobre
una superficie dura o recibe un impacto fuerte. Si el cristal
se rompe, no lo toque ni intente retirarlo. No utilice su
teléfono hasta que un proveedor autorizado sustituya el
cristal.
Derribos
No utilice el teléfono mientras se realizan derribos. Respete
las restricciones y siga las normativas.
Entornos potencialmente explosivos
• No utilice el teléfono en gasolineras.
• No lo utilice cerca de productos químicos o combustibles.
• No transporte ni almacene explosivos, líquidos o gases
inflamables en el compartimento de su vehículo donde
tenga el teléfono móvil y los accesorios.
En aviones
Los dispositivos inalámbricos pueden provocar
interferencias en aviones.
• Apague el teléfono móvil antes de embarcar.
• No lo utilice en tierra sin el permiso de la tripulación.
Directrices para un uso seguro y eficaz
GD910_Spain_Voda_1.0_0918.indd 12 2009.9.18 9:54:12 PM

13
Niños
Deje el teléfono en un lugar seguro fuera del alcance
de niños pequeños. Incluye piezas pequeñas que, si se
engullen, pueden causar asfixia.
Llamadas de emergencia
Puede que las llamadas de emergencia no estén
disponibles en todas las redes móviles. Por lo tanto, nunca
debe depender únicamente del teléfono para realizar
llamadas de emergencia. Consulte a su proveedor de
servicios local.
Información y mantenimiento de la batería
• No es necesario descargar por completo la batería antes
de volver a cargarla. A diferencia de otros sistemas de
baterías, no existe ningún efecto de la memoria que
pueda afectar al rendimiento de la batería.
• Utilice sólo las baterías y cargadores de LG. Los
cargadores de LG han sido diseñados para maximizar la
vida de la batería.
• No desmonte ni cortocircuite la batería.
• Mantenga limpios los contactos metálicos de la batería.
• Si necesita sustituir la batería, llévela al proveedor
o punto de servicio autorizado más cercano de LG
Electronics para obtener asistencia.
Directrices para un uso seguro y eficaz
GD910_Spain_Voda_1.0_0918.indd 13 2009.9.18 9:54:12 PM

14 LG GD910 | Guía del usuario
• Sustituya la batería cuando deje de funcionar
correctamente. La batería puede recargarse centenares
de veces antes de que deba sustituirse.
• Recargue la batería si no se ha utilizado durante mucho
tiempo para maximizar su funcionalidad.
• No exponga el cargador de la batería a la luz directa del
sol y no lo utilice en entornos muy húmedos, como en el
cuarto de baño.
• No deje la batería en lugares fríos o calientes, podría
deteriorar su rendimiento.
• Existe riesgo de explosión si la batería se sustituye por
otra de un tipo incorrecto.
• Deshágase de las baterías según las instrucciones del
fabricante. Por favor, recíclelas siempre que sea posible.
No las tire a la basura doméstica.
• Desenchufe siempre el cargador de la toma de corriente
una vez que el teléfono haya terminado de cargarse,
para evitar así un consumo de energía innecesario del
cargador.
• La duración real de la batería dependerá de la
configuración de red, los ajustes del producto, los
patrones de uso, el tipo de batería y las condiciones
ambientales.
Directrices para un uso seguro y eficaz
GD910_Spain_Voda_1.0_0918.indd 14 2009.9.18 9:54:12 PM

15
Familiarizarse con el teléfono
Partes del teléfono
Pantalla táctil
Altavoz
Lente de la cámara
Tecla de llamada
Volver/Tecla de borrado
Tecla Fin/ Encendido
Tecla de llamada
- Marca un número de teléfono y responde las
llamadas entrantes.
- Abre el menú de registro de llamadas en la
pantalla del reloj. Llama al número más reciente
al pulsar durante 2 segundos.
- Abre la lista de opciones al utilizar el menú, si
está disponible.
Volver/Tecla de borrado
- Le lleva al menú anterior.
- Le proporciona acceso rápido en la pantalla del
reloj al comando de voz si se pulsa durante 2
segundos.
Tecla Fin/ Encendido
- Cierra el menú y le lleva de vuelta a la pantalla
principal del reloj.
- Enciende y apaga el teléfono al pulsar durante
2 segundos.
NOTA:
Para apagar el dispositivo rápidamente, mantenga pulsadas
la tecla de envío y la tecla de borrado durante 3 segundos.
GD910_Spain_Voda_1.0_0918.indd 15 2009.9.18 9:54:12 PM

16 LG GD910 | Guía del usuario
Familiarizarse con el teléfono
Clavija de carga
Punto de liberación de
la tapa de la tarjeta
SIM
Cubierta de la tapa
de la tarjeta SIM
Ranura de la tarjeta SIM
Micrófono
ADVERTENCIA:
No extraiga la cubierta de la tapa de la tarjeta
SIM con el teléfono encendido, ya que podría dañarlo.
El teléfono se apaga al retirar la cubierta de la tapa de la tarjeta SIM.
ADVERTENCIA: No utilice la uña para extraer la cubierta
de la tapa de la tarjeta SIM.
GD910_Spain_Voda_1.0_0918.indd 16 2009.9.18 9:54:13 PM

17
Familiarizarse con el teléfono
Ajuste del reloj a la muñeca
La longitud de la correa puede ajustarse al tamaño de la
muñeca.
1 Quítese el reloj de la muñeca y colóquelo sobre una
superficie lisa con la hebilla abierta.
2 Sujete la correa del reloj y tire hacia fuera de la parte
“A” de la hebilla.
3 Sujete la correa del reloj y desplace la parte “A” de la
hebilla hacia los lados para ajustar la longitud de la
correa.
GD910_Spain_Voda_1.0_0918.indd 17 2009.9.18 9:54:15 PM

18 LG GD910 | Guía del usuario
Familiarizarse con el teléfono
4 “Para fijar la longitud de la correa del reloj, vuelva
a colocar la parte “ “A” de la hebilla en su posición
original.
5 Presione sobre la hebilla hasta que se escuche un clic.
Instale la tarjeta SIM
1 Retire la cubierta de la tapa de la tarjeta SIM.
- Utilice la herramienta de la tapa de la tarjeta SIM para
abrir su cubierta.
NOTA: No extraiga la cubierta de la tapa de la tarjeta SIM con
el teléfono encendido, ya que podría dañarlo. El teléfono se
apaga al retirar la cubierta de la tapa de la tarjeta SIM.
GD910_Spain_Voda_1.0_0918.indd 18 2009.9.18 9:54:17 PM

19
Familiarizarse con el teléfono
2 Instale la tarjeta SIM
Deslice la tarjeta SIM hacia el interior del soporte de la
tarjeta asegurándose de que los contactos dorados de la
tarjeta quedan hacia abajo.
A B
* Extraer la tarjeta SIM.
- Pata extraer la tarjeta SIM, presione suavemente el
borde de la tarjeta SIM y, a continuación, levántela para
separarla del soporte de la tarjeta SIM.
- Al retirar la tarjeta SIM, introduzca la herramienta SIM por
completo y retírela.
A B
C
GD910_Spain_Voda_1.0_0918.indd 19 2009.9.18 9:54:22 PM

20 LG GD910 | Guía del usuario
3 Colocar la cubierta de la tapa de la tarjeta SIM.
Coloque la cubierta de la tapa de la tarjeta SIM en el
soporte y asegúrela girando la cubierta hacia la derecha
hasta que se coloque con un clic en su lugar.
Cargar y conectar su teléfono con el
soporte de conexión
1 Enchufe el adaptador de alimentación a la fuente de
alimentación eléctrica.
2
Conecte el adaptador de alimentación al soporte de conexión.
3 Conecte el soporte de conexión al teléfono. Asegúrese
de que las clavijas de carga se alineen correctamente
con las clavijas del soporte de conexión.
A B
Familiarizarse con el teléfono
GD910_Spain_Voda_1.0_0918.indd 20 2009.9.18 9:54:25 PM

21
4 La batería comenzará a cargar al conectar el cargador.
La carga de la batería habrá finalizado cuando aparezca
en pantalla el icono Batería llena .
Icono
Descripción
Batería en
carga
NOTA: La batería debe cargarse
por completo antes del primer uso
para mejorar su vida útil.
ADVERTENCIA: Antes de cargar, asegúrese de que la cubierta de la
tapa de la tarjeta SIM esté introducida de forma segura en su teléfono.
Conectar el teléfono y el PC
Soporte de conexión
Familiarizarse con el teléfono
GD910_Spain_Voda_1.0_0918.indd 21 2009.9.18 9:54:26 PM

22 LG GD910 | Guía del usuario
Pantalla principal
El GD910 tiene una pantalla táctil.
Desde aquí, se puede acceder a las
opciones del menú, realizar una llamada
rápida y cambiar el perfil, entre otras
muchas funciones.
Sugerencias sobre la pantalla táctil
• No es necesario presionar con fuerza, ya que la pantalla
es lo suficientemente sensible como para percibir un
toque ligero, si bien firme.
• Utilice la punta del dedo para tocar la opción que desee.
Procure no tocar las teclas que haya alrededor.
• Cuando se apague la luz de la pantalla, pulse la tecla de
bloqueo/desbloqueo situada a la derecha para volver a la
pantalla principal.
• Al apagarse la luz de la pantalla, la función de protección
táctil se habilita automáticamente para evitar la activación
involuntaria de las teclas táctiles.
Esto impide que la pantalla táctil responda al tocarla
de forma involuntaria. Pulse cualquier tecla en el
lado derecho del teléfono una vez para desactivar la
protección táctil.
• Siempre que el GD910 no esté en uso, volverá a la
pantalla de bloqueo.
< Digital > < Analógico >
*
Pantalla de bloqueo
Familiarizarse con el teléfono
Pantalla táctil
GD910_Spain_Voda_1.0_0918.indd 22 2009.9.18 9:54:27 PM

23
Comunicación con el GD910
Los controles de la pantalla táctil del teléfono GD910
cambian de forma dinámica en función de las tareas que
lleve a cabo en cada momento.
Pantalla reloj: Para cambiar entre las pantallas,
desplácese simplemente por la pantalla de izquierda a
derecha o de derecha a izquierda. También puede elegir
una de las 8 pantallas del reloj desplazándose por la
pantalla de arriba a abajo o de abajo a arriba en la pantalla
principal del reloj.
Familiarizarse con el teléfono
GD910_Spain_Voda_1.0_0918.indd 23 2009.9.18 9:54:27 PM

24 LG GD910 | Guía del usuario
Desplazarse por la pantalla: Arrastre su dedo de lado
a lado para desplazarse. En algunas pantallas, también
puede desplazarse hacia arriba o abajo.
Abrir aplicaciones: Para abrir cualquier aplicación,
arrastre la pantalla hasta la aplicación deseada y, a
continuación, toque el icono o el menú de la aplicación.
Familiarizarse con el teléfono
GD910_Spain_Voda_1.0_0918.indd 24 2009.9.18 9:54:28 PM

25
Leyenda de la interacción táctil
Tocar Tocar y hacia arriba
Tocar, mantener pulsado
y hacia arriba
Mantener pulsado y
tocar hacia arriba
Tocar y arrastrar
(Arriba -> Abajo)
Tocar y arrastrar
(Abajo -> Arriba)
Tocar y arrastrar
(Izquierda -> Derecha)
Tocar y arrastrar
(Derecha -> Izquierda)
Tocar, mantener
pulsado y arrastrar
(Arriba -> Abajo)
Tocar, mantener
pulsado y arrastrar
(Abajo -> Arriba)
Tocar, mantener
pulsado y arrastrar
(Izquierda -> Derecha)
Tocar, mantener
pulsado y arrastrar
(Derecha -> Izquierda)
Leyenda de interacción de los desplazamientos
Desplazamientos
(Arriba -> Abajo)
Desplazamientos
(Abajo -> Arriba)
Desplazamientos
(Izquierda -> Derecha)
Desplazamientos
(Derecha -> Izquierda)
Familiarizarse con el teléfono
GD910_Spain_Voda_1.0_0918.indd 25 2009.9.18 9:54:29 PM

26 LG GD910 | Guía del usuario
Familiarizarse con el teléfono
Iconos en Pantalla
“La siguiente tabla
describe varios iconos”
que pueden aparecer en
la pantalla de estado. Para
ver esta pantalla, arrastre
la pantalla del reloj hacia
la derecha.
* Barra de estado
Icon Descripción Icon Descripción
Intensidad de señal de la red
(variará el número de barras)
Bluetooth activo
No hay señal de red
Conectar auriculares
Bluetooth
El Modo vuelo está
seleccionado
Vida de la batería
restante
Hay una alarma establecida Batería agotada
* Teclas rápidas
Icon Descripción Icon Descripción
Perfil General en uso Llamadas perdidas
Perfil Silencio en uso
Nuevo Mensaje
Perfil Exterior en uso
Modo vuelo activado
Sin eventos
Modo vuelo desactivado
Barra de estado
Teclas rápidas
Área de
Información
GD910_Spain_Voda_1.0_0918.indd 26 2009.9.18 9:54:30 PM

27
Mapa de menús
Cuando la luz de la pantalla está apagada, pulse dos
veces cualquier tecla en el lado derecho del teléfono para
desactivar la protección táctil y acceder a la pantalla.
La pantalla del reloj mostrará una pantalla
de flechas de cuatro direcciones. Para
abrir el menú principal, deslice su dedo de
derecha a izquierda dos veces en la pantalla
del reloj principal.
Contactos
1. Nuevo contacto
2. Buscar
3. Marcación rápida
4. Grupos
5. Ajustes
6. Información
Mensajes
1. Crear mensaje
2. Entrada
3. Borradores
4. Pendientes
5. Enviados
6. Plantillas
7. Emoticonos
8. Ajustes
Utilidades
1. Multimedia
2. Organizador
3. Alarma
4. Grabador de voz
5. Extras
Ajustes
1. Bluetooth
2. Perfiles
3. Pantalla
4. Teléfono
5. Llamada
6. Conectividad
x2
Barra de estado
Teclas rápidas
Área de
Información
GD910_Spain_Voda_1.0_0918.indd 27 2009.9.18 9:54:30 PM

28 LG GD910 | Guía del usuario
Llamadas
Realizar una llamada o videollamada
1 Para abrir un menú de llamada, arrastre su dedo de
derecha a izquierda en la pantalla del reloj.
2 Seleccione Video llamada o Llamadas de voz.
3 Introduzca el número en la pantalla del
teclado. Para eliminar un dígito, pulse la
tecla de borrado en el lado derecho
del teléfono o la tecla táctil de
borrado en la pantalla.
4 Pulse la tecla de envío en el lado
derecho del teléfono o la tecla táctil de
envío en la pantalla para realizar la llamada.
5 Para finalizar la llamada, pulse la tecla de envío en
el lado derecho del teléfono o la tecla táctil Fin en la
pantalla.
NOTA: Su teléfono tiene un comando de voz que le permite
realizar llamadas a través del nombre. SI lo tiene almacenado
previamente en los contactos del teléfono.
¡SUGERENCIA!: Para introducir “+” para las
llamadas internacionales, toque y mantenga pulsada la tecla 0
en la pantalla del teclado.
¡SUGERENCIA!: Puede introducir el asterisco * o el símbolo
#, apagar o encender el modo de Silencio, Enviar un mensaje,
Guardar un número o Buscar contactos tocando en la
pantalla del teclado. Se le habilitará un menu con estas
opciones.
GD910_Spain_Voda_1.0_0918.indd 28 2009.9.18 9:54:31 PM

29
Llamadas
Llamar a sus contactos
1 Puede buscar sus contactos pulsando o .
2 Desplácese por la lista de contactos o por la ficha hasta
el campo del Nombre, introduzca la primeras letras del
contacto al que desee llamar y pulse la tecla táctil
Intro.
3 En la lista, toque el contacto al que desee llamar y
seleccione el número si el contacto dispone de varios.
4 Toque la tecla de envío o la tecla táctil Enviar. También
puede realizar una Video llamada desde el menú de
opciones.
Contestar y rechazar una llamada
Si el teléfono suena, pulse la tecla Enviar para responder
a la llamada.
Para rechazar la llamada entrante, pulse la tecla .
¡SUGERENCIA!: Puede enviar un mensaje que explique por
qué no puede recibir una llamada entrante seleccionando
y utilizando Mensaje de excusa antes de rechazar una
llamada entrante.
Ajustar el volumen de la llamada
Si desea ajustar el volumen durante una llamada, pulse la
tecla de borrado y desplácese hacia arriba o abajo.
GD910_Spain_Voda_1.0_0918.indd 29 2009.9.18 9:54:31 PM

30 LG GD910 | Guía del usuario
Llamadas
Opciones de llamada entrante
Puede retener una llamada pulsando el número que
aparece en pantalla.
Silencio - Apaga el micrófono para que la persona con
la que esté hablando no pueda oírle. Abre la pantalla
del teclado.
Numérico - Activa el teclado numérico, además puede
buscar sus contactos pulsando o .También puede
enviar un nuevo mensaje seleccionando o guardar el
número de teléfono seleccionando .
Para abrir el menú de opciones durante una llamada, pulse
la tecla de envío . Puede elegir entre lo siguiente:
Altavoz activado/desactivado - Activa o desactiva el
teléfono con altavoz.
Teclado - Abre el teclado numérico para introducir
números (por ejemplo, al llamar a centros de atención o a
otros servicios telefónicos automatizados).
Añadir llamada - Le permite hacer una segunda llamada.
Marque el número o busque en sus contactos, a
continuación toque para realizar la llamada. Ambas
llamadas aparecerán en la pantalla de llamada. La primera
llamada se bloqueará y se pondrá en espera. Para finalizar
una o ambas llamadas, pulse la tecla Fin .
NOTA: Se le cobrará por cada una de las llamadas realizadas.
GD910_Spain_Voda_1.0_0918.indd 30 2009.9.18 9:54:31 PM

31
Grabar - Le permite grabar la conversación de la llamada.
Ir a mensajes - Le permite comprobar sus mensajes.
DTMF desactivado - Apaga DTMF durante una llamada.
DTMF le permite utilizar comandos numéricos para navegar
dentro de las llamadas automatizadas. DTMF está activado
de forma predeterminada.
Fin llamada - Finaliza la llamada.
Marcación rápida
Puede asignar un contacto frecuente a un número de
marcación rápida.
1 En la pantalla del reloj, arrastre su dedo de derecha a
izquierda hasta el menú superior. Toque Contactos, y a
continuación seleccione Marcación rápida.
2 El buzón de voz ya está establecido en la opción de
marcación rápida 1 y no puede modificarse. Toque
cualquier otro número para asignarlo a un contacto de
marcado rápido.
3 Se abrirá la lista de contactos. Seleccione el contacto
al que quiera asignar el número tocando una vez el
número de teléfono correspondiente. Para encontrar
un contacto toque el cuadro Nombre e introduzca la
primera letra de su nombre.
Para llamar a un número de marcación rápida con el
teclado numérico, mantenga pulsado el número asignado
hasta que el contacto aparezca en pantalla.
Llamadas
GD910_Spain_Voda_1.0_0918.indd 31 2009.9.18 9:54:31 PM

32 LG GD910 | Guía del usuario
Ver los registros de llamadas
En la pantalla del reloj, pulse la tecla Enviar , y
desplácese a la izquierda y derecha. Seleccione qué desea
ver:
Todas - Muestra la lista completa de todas las
llamadas realizadas, recibidas y perdidas.
Llamadas Enviadas - Muestra la lista de todos los
números a los que ha llamado.
Llamadas Recibidas - Muestra la lista de todos los
números que le han llamado.
Perdidas - Muestra la lista de todas las llamadas
perdidas.
¡SUGERENCIA!: En cualquier registro de llamadas, seleccione
la tecla Enviar para abrir el menú de opciones, y seleccione
Eliminar para eliminar los elementos. Puede seleccionar más
de un elemento a eliminar simultáneamente.
¡SUGERENCIA!: Toque cualquier entrada del registro de
llamadas para ver su fecha, hora y duración.
Cambiar los ajustes de llamada comunes
1 En la pantalla del reloj, arrastre su dedo de derecha
a izquierda hasta el menú superior. Toque Ajustes, y
seleccione Llamada.
2 Aquí podrá modificar los ajustes relativos a los
siguientes elementos:
Desvíos - Permite elegir si desea desviar las llamadas.
Llamadas
GD910_Spain_Voda_1.0_0918.indd 32 2009.9.18 9:54:32 PM

33
Llamada en espera - Si la llamada en espera está
activada, el teléfono también le puede avisar de que hay
una llamada entrante mientras está conversando en otra.
Restringir llamadas - Permite seleccionar cuándo
desea restringir las llamadas.
Marcación fija - Seleccione Número de marcación fija
para activar y reunir una lista con los números a los
que se puede llamar desde su teléfono. Necesitará el
código PIN2 que el operador le ha suministrado. Una vez
activada esta opción, desde su teléfono sólo se podrá
llamar a los números incluidos en la lista de marcación
fija.
Mensaje de excusa - Puede enviar un mensaje que
explique por qué no puede recibir una llamada entrante
tocando y utilizando Mensaje de excusa antes de
rechazar una llamada entrante.
Coste - Puede ver los cargos aplicados a los números
marcados. Este servicio depende de la red; algunos
operadores no admiten esta función.
Duración - Puede comprobar el registro de llamadas
perdidas, recibidas y enviadas.
Ajustes comúnes
• Llamada Rechazada - Toque para Activar y resaltar
la lista Rechazadas. Toque el cuadro de texto para
elegir todas las llamadas, contactos específicos
o grupos, números no registrados (números que
no están en la agenda) o sin ID de usuario. Toque
Guardar para cambiar este ajuste.
Llamadas
GD910_Spain_Voda_1.0_0918.indd 33 2009.9.18 9:54:32 PM

34 LG GD910 | Guía del usuario
• Enviar mi número - Indique si desea mostrar su
número al receptor de la llamada.
• Marcación automática - Seleccione Activado ( ) o
Desactivado (
).
• Aviso minuto - Seleccione Activado ( ) para
escuchar un tono cada minuto durante una llamada.
• Respuesta Bluetooth - Seleccione Manos libres para
contestar una llamada usando un auricular Bluetooth
o bien seleccione Teléfono para pulsar una tecla del
teléfono con el fin de contestar una llamada.
• Guardar número - Elija Sí para guardar un número.
¡SUGERENCIA!: Para desplazarse por una lista de opciones,
toque el último elemento visible y arrastre el dedo hacia arriba
en la pantalla. La lista se desplazará hacia arriba para mostrar
más elementos.
Ajustes videollamadas - Toque el ajuste Vídeollamada
para seleccionar los ajustes para sus vídeollamadas.
Elija si desea usar una imagen fija y selecciónela o
active el espejo para verse en la pantalla durante la
videollamada.
Llamadas
GD910_Spain_Voda_1.0_0918.indd 34 2009.9.18 9:54:32 PM

35
Búsqueda de un contacto
1 En la pantalla del reloj, arrastre su dedo de derecha a
izquierda hasta el menú superior. Toque Contactos, y a
continuación seleccione Buscar.
¡SUGERENCIA!: En la pantalla del teclado numérico, toque
para abrir y buscar los contactos.
2 Desplácese por la lista de contactos o por la ficha hasta
el campo del Nombre, introduzca la primeras letras del
contacto al que desee llamar y pulse la tecla táctil
Intro. Verá una lista de contactos que se corresponden
con las letras introducidas.
3 En la lista acotada, toque el contacto al que desea
llamar y seleccione el número si el contacto dispone de
varios.
4 Toque la tecla de envío o la tecla táctil Enviar. También
puede realizar una Videollamada desde el menú de
opciones.
Agregar un contacto nuevo
1 En la pantalla del reloj, arrastre su dedo de derecha a
izquierda hasta el menú superior. Toque Contactos, y a
continuación seleccione Nuevo contacto.
2 Elija entre guardar el contacto en el Teléfono o en la
SIM.
3 Introduzca el nombre y apellido del nuevo contacto. No
es obligatorio introducir ambos elementos, pero debe
especificar uno u otro.
Contactos
GD910_Spain_Voda_1.0_0918.indd 35 2009.9.18 9:54:32 PM

36 LG GD910 | Guía del usuario
Contactos
4 Si desea agregar una imagen al nuevo contacto, toque
y a continuación se mostrará el menú Editar
imagen.
5 Puede introducir hasta cinco números diferentes para
cada contacto. Cada entrada tiene asignado un tipo
preconfigurado: Móvil, Casa, Oficina, Localizador o
Fax.
6 Introduzca una dirección de correo electrónico en el
campo E-mail.
7 Asigne el contacto a un grupo. Seleccione Ningún
grupo, Familia, Amigos, Compañeros, Colegio o VIP.
¡SUGERENCIA!: Puede crear grupos personalizados para los
contactos.
8 También puede agregar un Tono llamada,
Cumpleaños, Aniversario, Pág. Inicio , Dirección
particular, Nombre empresa, Profesión, Dirección
empresa y Notas.
9 Toque Guardar para guardar el contacto.
¡SUGERENCIA!: Al visualizar un contacto, puede
acceder al menú de opciones pulsando la tecla de envío .
Crear un grupo
1 En la pantalla del reloj, arrastre su dedo de derecha
a izquierda hasta el menú superior. Toque Contactos,
seleccione Grupos, y a continuación toque en Nuevo
grupo.
GD910_Spain_Voda_1.0_0918.indd 36 2009.9.18 9:54:33 PM

37
2 Escriba un nombre para el grupo nuevo en el campo
Nombre. También puede asignar un tono de timbre al
grupo.
3 Toque Guardar.
NOTA: Aunque se elimine un grupo, los contactos asignados a
dicho grupo no se perderán. Continuarán almacenados en la
lista de contactos.
Cambiar los ajustes de contactos
Puede adaptar los ajustes de contactos para que la agenda
funcione según sus preferencias.
1 En la pantalla del reloj, arrastre su dedo de derecha a
izquierda hasta el menú superior. Toque Contactos y a
continuación Ajustes.
2 Aquí podrá modificar los siguientes ajustes:
Ubicación - Permite elegir si se ven los contactos
guardados tanto en Teléfono como en SIM, sólo en
Teléfono o sólo en SIM. También puede seleccionar que
se muestre antes el nombre o el apellido de un contacto
y si se desea mostrar una tecla de comando rápido junto
al contacto.
Copiar - Permite copiar los contactos desde el teléfono
a la tarjeta SIM o desde la tarjeta SIM al teléfono.
Puede seleccionar todos los contactos con la tecla
de envío en el lado derecho del teléfono y tocando
Seleccionar todo, o seleccionar cada contacto de uno
en uno.
Contactos
GD910_Spain_Voda_1.0_0918.indd 37 2009.9.18 9:54:33 PM

38 LG GD910 | Guía del usuario
Mover - Funciona del mismo modo que Copiar, pero el
contacto sólo se guardará en la ubicación a la que haya
sido movido. Por tanto, si mueve un contacto de la SIM
al teléfono, se eliminará de la memoria SIM.
Enviar todos los contactos por Bluetooth - Permite
enviar todos sus contactos a otro dispositivo mediante
Bluetooth. Si selecciona esta opción, Bluetooth se
activará automáticamente.
Borrar contactos -
Permite eliminar todos los contactos
del teléfono o tarjeta SIM. Si está seguro de querer borrar
todos los contactos de la lista de contactos, toque Sí.
Ver información
1 En la pantalla del reloj, arrastre su dedo de derecha a
izquierda hasta el menú superior. Toque Contactos y a
continuación Información.
2 “Aquí puede visualizar sus Nº servicios”, su Número
propio, su Info. memoria (el espacio libre de memoria
que queda) y Tarjeta visita.
¡SUGERENCIA!: Para agregar su propia tarjeta de visita,
seleccione Tarjeta visita, e introduzca la información como si
de un contacto se tratara. Toque Guardar para finalizar.
Contactos
GD910_Spain_Voda_1.0_0918.indd 38 2009.9.18 9:54:33 PM

39
Enviar un mensaje
1 Para abrir el menú principal, deslice su dedo de derecha
a izquierda dos veces en la pantalla del reloj principal.
Toque Mensajes, y a continuación seleccione Crear
mensaje.
2 Se mostrará la pantalla del teclado al tocar el campo
mensaje. Toque el campo Para para introducir el número
del destinatario, o toque el icono de búsqueda para abrir
sus contactos. Se pueden añadir varios contactos.
3 Introduzca el mensaje de texto utilizando la pantalla del
teclado.
o
4 En la pantalla del teclado, pulse la tecla de envío
para abrir el menú de opciones. Seleccione Idioma
escritura, Añadir a diccionario, Insertar, Guardar en
borrador o Tamaño fuente de escritura.
Toque
Insertar para añadir una Plantilla, Emoticono o
Nombre y número.
5 Toque Enviar cuando esté listo.
Mensajes
GD910_Spain_Voda_1.0_0918.indd 39 2009.9.18 9:54:33 PM

40 LG GD910 | Guía del usuario
Mensajes
Introducción de texto
- Toque este icono para activar el modo de entrada de
texto predictivo T9.
- Toque para cambiar entre el teclado de números,
símbolos y texto.
- Toque para mover el cursor.
- Toque para volver al campo del mensaje.
- Toque para agregar un espacio.
- Toque para eliminar un carácter o eliminar una frase.
/ - Toque para abrir o cerrar la pantalla
emergente.
* T9 predictivo
En modo T9, verá . El modo T9 consta de un
diccionario integrado que reconoce las palabras que
escribe el usuario en función de las secuencias de teclas
que toque. Pulse la tecla numérica asociada a la letra que
desea introducir y, a continuación, el diccionario predecirá
la palabra que desea utilizar.
GD910_Spain_Voda_1.0_0918.indd 40 2009.9.18 9:54:34 PM

41
Mensajes
* Abc manual
En modo Abc, verá . En este modo, debe tocar
la tecla varias veces para introducir una letra si está
desactivado el modo .
Carpetas de mensajes
Reconocerá la estructura de carpetas usada en su GD910,
la cual es muy intuitiva.
Entrada - Todos los mensajes que reciba se colocarán en
la bandeja de entrada. Aquí puede verlos, eliminarlos, etc.
Consulte Administrar mensajes para obtener información
detallada.
Borradores - Puede guardar los mensajes que no haya
terminado de redactar en esta carpeta.
Pendientes - Es una carpeta de almacenamiento temporal
mientras los mensajes se envían.
Enviados - Todos los mensajes que haya enviado se
colocan en esta carpeta.
Plantillas - Cree plantillas para los mensajes SMS
que envíe más a menudo. Ya existen algunas plantillas
disponibles y que puede modificar.
Emoticonos - Alegre sus mensajes con emoticonos.
El teléfono ya contiene algunos de los emoticonos más
populares.
Ajustes - Aquí podrá configurar las opciones de Mensaje
de texto/Buzón de voz.
GD910_Spain_Voda_1.0_0918.indd 41 2009.9.18 9:54:34 PM

42 LG GD910 | Guía del usuario
Administrar mensajes
1 Para abrir el menú principal, deslice su dedo de derecha
a izquierda dos veces en la pantalla del reloj principal.
Toque Mensajes, y a continuación seleccione Entrada.
2 Selecciona un mensaje y pulsa la tecla de envío para
abrir el menú de opciones y, a continuación, seleccione
entre lo siguiente:
Responder - Permite responder al mensaje
seleccionado.
Borrar - Permite eliminar el mensaje.
Reenviar - Permite enviar el mensaje seleccionado a
otra persona.
Guardar número - Guardar el número de teléfono en
el mensaje.
Extraer - Extraer información, como el número de
teléfono o la dirección de correo electrónico del mensaje
seleccionado.
Nuevo mensaje - Permite enviar un mensaje al
contacto.
Llamadas de voz - Permite realizar una llamada de voz
al contacto.
Videollamada - Permite realizar una videollamada de
voz al contacto.
Copiar y mover - Copiar o mover el mensaje
seleccionado a la tarjeta SIM o al teléfono.
Detalles - Comprobar el tipo, asunto, origen y fecha en
la información del mensaje.
Mensajes
GD910_Spain_Voda_1.0_0918.indd 42 2009.9.18 9:54:34 PM

43
Si aparece el mensaje Sin espacio para mensaje SIM,
será necesario eliminar algunos mensajes de la bandeja de
entrada para crear espacio.
Si aparece el mensaje No hay espacio para mensajes
será necesario eliminar algunos mensajes para liberar
espacio de memoria.
Cambiar los ajustes de SMS
Para abrir el menú principal, deslice su dedo de derecha a
izquierda dos veces en la pantalla del reloj principal. Toque
Mensaje, seleccione Ajustes, y a continuación seleccione
SMS (Mensaje de texto).
Puede modificar los siguientes elementos:
Centro SMS - Permite introducir los detalles del centro de
mensajes.
Informe entrega - Permite elegir si se permite y/o solicita
un informe de entrega.
Periodo de validez - Permite elegir el periodo de tiempo
durante el cual se almacenarán sus mensajes en el centro
de mensajes.
Cambiar los ajustes de Buzón de voz
Para abrir el menú principal, deslice su dedo de derecha a
izquierda dos veces en la pantalla del reloj principal. Toque
Mensaje, seleccione Ajustes, y a continuación seleccione
Buzón de voz. Puede ver y editar el nombre y número del
buzón de voz.
Mensajes
GD910_Spain_Voda_1.0_0918.indd 43 2009.9.18 9:54:34 PM

44 LG GD910 | Guía del usuario
Comando de voz
El GD910 admite
comandos de voz
avanzados.
Esta función, que
utiliza tecnología de
reconocimiento de voz
avanzada, le permite
utilizar comandos verbales
(por ejemplo, para realizar
llamadas, confirmar nuevos mensajes o buzón de voz,
comprobar el calendario, ver la hora y escuchar música).
NOTA:
• El uso del comando de voz puede dificultarse en un entorno
ruidoso o durante una emergencia.
• El altavoz funciona al utilizar la función del comando de voz.
Mantenga el GD910 alejado a una corta distancia al hablar.
• Compruebe que esta función esté activada antes de utilizar
un comando de voz. (Ajustes>Teléfono>Comando de voz)
• Si utiliza el teléfono en el interior del vehículo, asegúrese
de cerrar las ventanas. De lo contrario, puede sufrir
interrupciones debido al ruido del viento o del tráfico.
• El comando de voz no admite todos los idiomas; en función
del idioma es posible que no se admita su uso en algunas
funciones.
• La función del comando de voz depende del idioma.
Antes de utilizar el comando de voz, compruebe el idioma de
reconocimiento de voz.
* Idioma de reconocimiento de voz: Inglés EE. UU., Inglés
Reino Unido, Español, Francés, Portugués, Alemán, Italiano
y Ruso.
Comando de voz
Icono
Comando
de voz
Volver/
Tecla de
borrado
GD910_Spain_Voda_1.0_0918.indd 44 2009.9.18 9:54:34 PM

45
Acceso
Para utilizar la función del comando de Voz, seleccione
la pantalla en la que aparece Ajustes, posteriormente
seleccione Teléfono, y Comandos de voz y Actívar. una
vez hecho esto, mantenga pulsada la tecla de borrado
en la pantalla del reloj y siga los mensajes que se
muestren en pantalla.
Uso de una función del comando de voz
Llamada - Diga “Llamada”, a continuación inicie la
llamada pronunciando el nombre. Hable de forma clara y
exacta cuando la información del contacto aparezca en la
lista Contactos. Puede especificar el nombre del contacto
cuando haya más de un número de contacto. (por ejemplo,
“Llamar John trabajo”). El GD910 establecerá la llamada
con el número predeterminado de los contactos.
Nuevo mensaje - Cuando reciba un mensaje
nuevo, la función TTS (Conversor texto-voz) se activa
automáticamente y le permite conocer la información del
número de mensajes nuevos que haya recibido ese día.
También leerá automáticamente un mensaje nuevo que
haya recibido recientemente.
Buzón de voz - Puede acceder al centro de buzón voz
directamente pronunciando “Buzón de voz”.
Citas de hoy - El comando “Cita de hoy” le permite
acceder al, y revisar el, calendario.
Comando de voz
GD910_Spain_Voda_1.0_0918.indd 45 2009.9.18 9:54:35 PM

46 LG GD910 | Guía del usuario
Comando de voz
Hora - El comando “Hora” le indica la hora del día.
Música - El comando “Música” le permite reproducir
canciones.
Ayuda - Proporciona directrices generales para utilizar el
Comando de voz.
Ajustes del Comando de voz
1 En la pantalla del reloj, mantenga pulsada la tecla de
borrado .
2 Después de acceder a la función del comando de voz,
pulse la tecla de envío para abrir los ajustes.
3 Cambie los ajustes si es necesario.
Sensibilidad - El ajuste "Sensibilidad" controla cómo
filtra el sistema para buscar coincidencias. Al seleccionar
'Rechazar más' se incrementa la sensibilidad para
filtrar más coincidencias potenciales. Al seleccionar
'Rechazar menos' se reduce la sensibilidad y se
muestran más coincidencias potenciales. Baje el ajuste
de la sensibilidad si debe repetir la búsqueda con
frecuencia o no se encuentran coincidencias.
Palabras de entrenamiento - Si el teléfono pide repetir
con frecuencia un comando de voz, practique con el
teléfono para que reconozca sus patrones de voz.
Fuera de tiempo - Establezca 5 segundos o 10
segundos.
GD910_Spain_Voda_1.0_0918.indd 46 2009.9.18 9:54:35 PM

47
Utilidades
Carpetas
Puede almacenar cualquier archivo multimedia en la
memoria del teléfono para acceder fácilmente a todas
sus imágenes, sonidos y demás datos. Toque Utilidades,
Multimedia, y a continuación seleccione Carpetas.
Imágenes - Incluye una lista de imágenes, que incluyen
imágenes predeterminadas cargadas previamente en su
teléfono y las imágenes que haya captado con la cámara
del teléfono. También puede asignar una imagen a una
persona en particular para que se muestre la imagen
cuando la persona le llame.
Sonidos - Contiene sonidos y grabaciones de voz
predeterminados.
Otros - Esta carpeta sirve para almacenar archivos que no
sean imágenes o sonidos.
Música
El GD910 cuenta con un reproductor de música integrado
que le permite escuchar todas sus canciones favoritas.
Para acceder al reproductor de música, arrastre el dedo de
derecha a izquierda en la pantalla del reloj hasta el menú
principal. Toque Utilidades, Multimedia, y a continuación
seleccione Música.
Desde aquí puede acceder a varias carpetas:
Recientes - Permite ver todas las canciones reproducidas
recientemente.
GD910_Spain_Voda_1.0_0918.indd 47 2009.9.18 9:54:35 PM

48 LG GD910 | Guía del usuario
Utilidades
Todas las pistas - Contiene todas las canciones del
teléfono.
Artistas - Permite desplazarse en la colección de música
por artista.
Álbumes - Permite desplazarse por la colección de música
por álbum.
Géneros - Permite desplazarse por la colección de música
por género.
Listas reproducción - Contiene todas las listas de
reproducción que ha creado.
Pistas aleatorias - Permite escuchar la música en orden
aleatorio.
Transferir música al teléfono
La forma más fácil de transferir música al teléfono es vía
Bluetooth o con el cable de sincronización.
Para transferir un archivo con Bluetooth:
1 Compruebe que Bluetooth esté activo en ambos
dispositivos y que están vinculados.
2 Seleccione el archivo de música en un dispositivo y
envíelo al otro por Bluetooth.
3 Una vez enviado el archivo, deberá aceptarlo en el
teléfono tocando Sí.
4 El archivo debería aparecer en Todas las pistas.
GD910_Spain_Voda_1.0_0918.indd 48 2009.9.18 9:54:35 PM

49
Utilidades
Reproducir una canción
1 En la pantalla del reloj, arrastre su dedo de derecha
a izquierda hasta el menú superior. Toque Utilidades,
Multimedia, y a continuación seleccione Música.
2 Toque Todas las pistas.
3
Seleccione la canción que desea
reproducir.
4 Toque para detener la canción.
5 Toque para pasar a la canción
siguiente.
6 Toque para volver a la canción
anterior.
7 Toque para volver a la lista de
música.
¡SUGERENCIA!: Para ajustar el volumen al escuchar música,
pulse el icono del altavoz en la pantalla y desplácese hacia
arriba o hacia abajo.
¡SUGERENCIA!: Aunque los auriculares Bluetooth estén
conectados al teléfono, sólo podrá oír sonidos MP3 a través
del teléfono. Los sonidos MP3 no se han podido reproducir
mediante unos auriculares mono Bluetooth.
GD910_Spain_Voda_1.0_0918.indd 49 2009.9.18 9:54:35 PM

50 LG GD910 | Guía del usuario
Crear una lista de reproducción
Puede crear sus propias listas de reproducción realizando
una selección de canciones de la carpeta Todas las
pistas.
1 En la pantalla del reloj, arrastre su dedo de derecha
a izquierda hasta el menú superior. Toque Utilidades,
Multimedia, y a continuación seleccione Música.
2 Toque Listas reproducción.
3 Toque Añadir lista, introduzca el nombre de la lista de
reproducción y toque Guardar.
4 La carpeta Todas las pistas mostrará todas las
canciones del teléfono. Toque todas las canciones que
quiera incluir en la lista de reproducción. Aparecerá una
marca de verificación a la izquierda de los nombres de
las canciones.
5 Toque y, a continuación, Completado.
NOTA: La música está protegida por derechos de copia en los
tratados internacionales y las leyes de copyright nacionales.
Es posible que sea necesario obtener permiso o una licencia
para reproducir o copiar música. En algunos países, las leyes
nacionales prohíben la realización de copias de material
protegido con copyright. Revise la legislación nacional del país
correspondiente respecto del uso de tales materiales.
Utilidades
GD910_Spain_Voda_1.0_0918.indd 50 2009.9.18 9:54:36 PM

51
Uso de la cámara
1 En la pantalla del reloj, arrastre su dedo de derecha
a izquierda hasta el menú superior. Toque Utilidades,
Multimedia, y a continuación seleccione Cámara.
2 Aparecerá en la pantalla el visor de la cámara. Toque
para hacer una fotografía .
* En el visor de la cámara, puede seleccionar las
siguientes opciones antes de hacer una foto.
Toque los iconos:
Galería - toque este icono para desplazarse a la
galería.
Brillo - Deslice el indicador de brillo a lo largo de la
barra. Hacia “-”para reducir el brillo de la imagen y
hacia “+” para aumentarlo.
3 La fotografía capturada aparecerá en la pantalla. El
nombre de la imagen aparece en la parte inferior de la
pantalla.
Añadir un evento al calendario
1 En la pantalla del reloj, arrastre su dedo de derecha
a izquierda hasta el menú superior. Toque Utilidades,
seleccione Organizador, y a continuación seleccione
Calendario.
2 Seleccione la fecha a la que desea añadir un evento.
3 Toque y, a continuación, Añadir evento.
Utilidades
GD910_Spain_Voda_1.0_0918.indd 51 2009.9.18 9:54:36 PM

52 LG GD910 | Guía del usuario
¡SUGERENCIA!: Puede definir las fechas de las vacaciones
en el calendario. Toque cada día que estará de vacaciones,
de uno en uno, a continuación toque y seleccione Definir
vacaciones.
Agregar un elemento a la lista de tareas
1 Para abrir el menú principal, deslice su dedo de
derecha a izquierda dos veces en la pantalla del reloj
principal. Toque Utilidades, seleccione Organizador, y a
continuación seleccione Tareas.
2 Toque Añadir a Tareas.
3 Defina la fecha de la tarea, añada notas y seleccione un
nivel de prioridad: Alto, Medio o Bajo.
4 Para guardar la tarea, seleccione Guardar.
¡SUGERENCIA!: Puede editar un elemento seleccionándolo,
tocando la etiqueta e introduciendo los cambios. Confirme los
cambios seleccionando Guardar.
Añadir una nota
1 Para abrir el menú principal, deslice su dedo de
derecha a izquierda dos veces en la pantalla del reloj
principal. Toque Utilidades, seleccione Organizador, y a
continuación seleccione Notas.
2 Toque Nueva nota.
3 Escriba la nota y toque Guardar.
4 La nota aparecerá en la pantalla.
Utilidades
GD910_Spain_Voda_1.0_0918.indd 52 2009.9.18 9:54:36 PM

53
Utilizar el buscador de fechas
Buscador de fecha es una herramienta útil que ayuda a
calcular la fecha después de transcurrir un determinado
número de días. Le ayuda a realizar el seguimiento de los
plazos.
1 Para abrir el menú principal, deslice su dedo de
derecha a izquierda dos veces en la pantalla del reloj
principal. Toque Utilidades, seleccione Organizador, y a
continuación seleccione Buscador fechas.
2 Defina la fecha en la ficha De.
3 Defina el número de días en la etiqueta Después.
4 La Fecha límite se mostrará más abajo.
Definir una alarma
1 Para abrir el menú principal, deslice su dedo de derecha
a izquierda dos veces en la pantalla del reloj principal.
Toque Utilidades, y seleccione Alarma.
2 Toque Añadir alarma.
3 Defina la hora en la que desea que suene la alarma y
toque Guardar. La pantalla vuelve automáticamente a la
lista de alarmas.
4 Seleccione el elemento en la lista y, a continuación, elija
el tipo de repetición: entre Sin repetición, Diario, Lun
- Vie, Lun - Sáb, Sáb - Dom o Excepto festivo.
5 Seleccione Modo de alarma para elegir el tipo de
alarma que desea.
Utilidades
GD910_Spain_Voda_1.0_0918.indd 53 2009.9.18 9:54:36 PM

54 LG GD910 | Guía del usuario
6 Toque Timbre de alarma. Puede elegir un sonido de
la lista Carpetas. Para escuchar los sonidos, toque a la
derecha del sonido.
7 Agregue una nota para la alarma.
8 Finalmente, puede definir el intervalo de repetición en 5,
10, 20, 30 minutos, 1 hora. O puede desactivarlo.
9 Después de definir la alarma, toque Guardar.
NOTA: puede configurar hasta 5 alarmas.
Grabadora de voz
Utilice la grabadora de voz para grabar notas de voz u otros
archivos de sonido.
To record a sound or voice memo:
1 Para abrir el menú principal, deslice su dedo de derecha
a izquierda dos veces en la pantalla del reloj principal.
Toque Utilidades, y seleccione Grabador de voz.
2 Toque para empezar la grabación.
3 Toque para finalizar la grabación.
4 Toque para escuchar la grabación.
Usar la calculadora
1 Para abrir el menú principal, deslice su dedo de derecha
a izquierda dos veces en la pantalla del reloj principal.
Toque Utilidades, seleccione Extras, y a continuación
seleccione Calculadora.
Utilidades
GD910_Spain_Voda_1.0_0918.indd 54 2009.9.18 9:54:36 PM

55
2 Toque el cuadro para abrir las teclas numéricas.
3 Toque la pantalla e introduzca los números con las
teclas numéricas.
4 Para cálculos sencillos, toque la función que necesite
(+, –, x o ÷), seguida de =.
5 Para cálculos más complejos, toque y seleccione
entre sin, cos, tan, log, ln, exp, deg o rad, etc.
Convertir una unidad
1 Para abrir el menú principal, deslice su dedo de derecha
a izquierda dos veces en la pantalla del reloj principal.
Toque Utilidades, seleccione Extras, y a continuación
seleccione Conversor.
2 Seleccione qué dato desea convertir entre Moneda,
Superficie, Longitud, Peso, Temperatura, Volumen y
Velocidad.
3 En este punto puede seleccionar la unidad e indicar el
valor desde el que desea realizar la conversión, seguido
de la unidad a la que desea realizar la conversión.
4 El valor correspondiente aparecerá en la pantalla.
Agregar una ciudad al reloj mundial
1 Para abrir el menú principal, deslice su dedo de derecha
a izquierda dos veces en la pantalla del reloj principal.
Toque Utilidades, y seleccione Extras, y a continuación
seleccione Reloj mundial.
Utilidades
GD910_Spain_Voda_1.0_0918.indd 55 2009.9.18 9:54:37 PM

56 LG GD910 | Guía del usuario
Utilidades
2 Pulse la tecla de envío , y seleccione Nueva ciudad.
Seleccione el continente y, a continuación seleccione
la ciudad en el mapa. Si lo prefiere, toque Seleccionar
ciudad y elija la ciudad en la lista o toque Buscar, y
seleccione la primera letra de la ciudad. Se mostrará el
nombre de la ciudad en la pantalla.
3 Toque la ciudad para añadirla a su lista del reloj mundial.
Usar el cronómetro
1 Para abrir el menú principal, deslice su dedo de derecha
a izquierda dos veces en la pantalla del reloj principal.
Toque Utilidades, seleccione Extras, y a continuación
seleccione Cronómetro.
2 Toque Inicio para iniciar el temporizador.
3 Toque Vuelta si desea grabar el tiempo de una vuelta.
4 Toque Parar si desea parar el temporizador.
5 Toque Cont. para reiniciar el cronómetro en el momento
en el que lo detuvo o toque Reiniciado para empezar a
cronometrar de nuevo.
STK
Este menú puede ser diferente si la tarjeta admite servicios
STK o si no los admite (es decir, Kit de herramientas de
aplicaciones de SIM).
GD910_Spain_Voda_1.0_0918.indd 56 2009.9.18 9:54:37 PM

57
Personalizar sus perfiles
Puede cambiar su perfil con rapidez en la
pantalla del indicador. En la pantalla del
reloj, arrastre su dedo de derecha a
izquierda y toque el icono del perfil.
Icono Descripción Icono Descripción
Perfil General en uso Modo vuelo activado
Perfil Silencio en uso Modo vuelo desactivado
Perfil Exterior en uso
¡SUGERENCIA!: Para utilizar el Modo vuelo, seleccione .
El Modo vuelo le impide hacer llamadas, enviar mensajes o
utilizar Bluetooth.
Puede personalizar cada ajuste de perfil con el menú de
ajustes.
1 Para abrir el menú principal, deslice su dedo de derecha
a izquierda dos veces en la pantalla del reloj principal.
Toque Ajustes, y seleccione Perfiles.
2 Elija el perfil que desea editar.
3 Podrá cambiar todos los sonidos y opciones de alerta
disponibles en la lista, incluidos el Tono de llamada y
los ajustes de Volumen, Tono de mensaje, etc.
Ajustes
GD910_Spain_Voda_1.0_0918.indd 57 2009.9.18 9:54:38 PM

58 LG GD910 | Guía del usuario
Cambiar los ajustes de pantalla
1 Para abrir el menú principal, deslice su dedo de derecha
a izquierda dos veces en la pantalla del reloj principal.
Toque Ajustes, y seleccione Pantalla.
2 seleccione entre:
Menú principal - Permite seleccionar el estilo del menú
principal.
Fuente - Permite ajustar el tamaño de la fuente.
Luz de fondo - Permite elegir durante cuánto tiempo se
mantendrá activa la luz de fondo.
NOTA: Cuanto más tiempo esté activa la luz de fondo, más
energía se consume y es posible que deba cargar el teléfono
con mayor frecuencia.
Brillo - Permite ajustar el brillo de la pantalla.
Pantalla de bloqueo - Seleccione el tipo de reloj en la
pantalla de bloqueo (digital o analógico).
Guía de acciones - Active o desactive la guía de
acciones.
Cambiar los ajustes del teléfono
Disfrute de la libertad de adaptar el GD910 a sus
preferencias.
1 Para abrir el menú principal, deslice su dedo de derecha
a izquierda dos veces en la pantalla del reloj principal.
Toque Ajustes, y seleccione Teléfono.
Ajustes
GD910_Spain_Voda_1.0_0918.indd 58 2009.9.18 9:54:38 PM

59
2 Puede seleccionar el menú de opciones en:
Fecha y Hora - Modifique los valores de fecha y hora o
elija que la hora se actualice automáticamente cuando
viaje o cambie al horario de verano.
Ahorro de energía - Permite cambiar la configuración
de fábrica del ajuste de ahorro de energía a:
Desactivado, Sólo noche y Siempre activo.
Idiomas - Permite cambiar el idioma de la pantalla del
GD910.
Seguridad - Permite configurar sus ajustes de seguridad,
incluyendo los códigos PIN y el bloqueo del teléfono.
NOTA: Código seguridad
El código de seguridad predeterminado es “0000” y es necesario
para eliminar entradas del teléfono y para activar el menú
Reiniciar configuración.
El ajuste predeterminado del código de seguridad puede
modificarse en el menú Seguridad > Cambiar códigos.
Comando de voz - Seleccione activar o desactivar la
función de comando de voz.
Memoria - Puede usar el administrador de memoria
para determinar cómo se usa cada una y ver cuánto
espacio disponible hay.
- Memoria común del teléfono - Permite ver la
cantidad de memoria disponible en el GD910 para
imágenes, sonidos y otros elementos.
- Memoria reservada del teléfono - Permite ver
la memoria disponible en su teléfono para SMS,
Contactos, Calendario, Tareas, Notas, Alarmas y
Registro llamadas.
Ajustes
GD910_Spain_Voda_1.0_0918.indd 59 2009.9.18 9:54:38 PM

60 LG GD910 | Guía del usuario
- Memoria SIM - Permite ver la cantidad de memoria
disponible en la tarjeta SIM.
Reiniciar ajustes - Permite restablecer todos los
ajustes a los valores predeterminados.
Información - Permite ver la información técnica del
teléfono GD910.
Cambiar los ajustes de conectividad
El operador de red ya ha configurado los ajustes de
conectividad para permitirle disfrutar de su nuevo teléfono
de forma inmediata. Para cambiar estos ajustes, use este
menú:
En la pantalla del reloj, arrastre su dedo de derecha
a izquierda hasta el menú superior. Toque Ajustes, y
seleccione Conectividad. Puede seleccionar el menú de
opciones en:
1 Red
Seleccionar red - Si ha seleccionado Automático,
el GD910 busca automáticamente la red y registra el
terminal en ella. Es la opción recomendada para obtener
el mejor servicio y calidad.
NOTA: Cuando su teléfono pierda la red en modo manual,
aparecerá un mensaje emergente en la pantalla inactiva para
seleccionar la red disponible.
Modo de red - Puede establecer el tipo de red que
se debe buscar cuando se buscan redes en el menú
Seleccionar red.
Ajustes
GD910_Spain_Voda_1.0_0918.indd 60 2009.9.18 9:54:38 PM

61
Listas preferidas - Si la red se busca automáticamente,
puede agregar una red preferida a la que desee
conectarse.
2 GPRS
Si se selecciona el menú ‘Si está disponible’, el teléfono se
registrará automáticamente en una red GPRS cada vez que
se encienda. Si se selecciona “Si necesario”, se establecerá
una conexión GPRS cuando se conecte a un servicio o
aplicación WAP y se cerrará cuando finalice la conexión de
la aplicación o WAP. (Si necesario/Si está disponible)
3 USB
Puede utilizar esta opción para configurar el teléfono como
módem externo o como dispositivo de almacenamiento
masivo. (Almacenamiento masivo/PC suite)
Cambiar los ajustes de Bluetooth
1 Para abrir el menú principal, deslice su dedo de derecha
a izquierda dos veces en la pantalla del reloj principal.
Seleccione Ajustes y, a continuación, Bluetooth.
2 Seleccione Bluetooth activado ( ), pulse la tecla de
envío , y seleccione Ajustes. Realice cambios en:
Visibilidad dispositivo - Permite establecer Visibilidad
de mi terminal en Mostrar a todos de forma que otros
dispositivos puedan detectar el teléfono cuando estén
buscando un dispositivo Bluetooth. Si selecciona
[Oculto], los demás dispositivos no podrán detectar
su teléfono cuando estén buscando un dispositivo
Bluetooth.
Ajustes
GD910_Spain_Voda_1.0_0918.indd 61 2009.9.18 9:54:38 PM

62 LG GD910 | Guía del usuario
Nombre dispositivo - Permite nombrar o cambiar el
nombre de su teléfono tal y como aparecerá en otros
dispositivos. El nombre de su teléfono se mostrará en
otros dispositivos sólo cuando la opción [Visibilidad de mi
terminal] se encuentre establecida en [Mostrar a todos].
Servicios admitidos - Permite ver la lista de
dispositivos tales como auriculares o kits de manos
libres admitidos por este teléfono con Bluetooth.
Modo SIM remota - Seleccionar Activado o
Desactivado.
Mi dirección - Permite ver la dirección del dispositivo
Bluetooth.
NOTA: Cuando el usuario emplea un dispositivo Bluetooth en
el teléfono, pone en riesgo la seguridad del teléfono. Por tanto,
recomendamos que la visibilidad de Bluetooth se establezca
en Oculto después de la configuración o vinculación de
dispositivos. En el caso de archivos entrantes mediante
Bluetooth independientemente de los dispositivos vinculados,
puede elegir aceptar o rechazar la conexión después de
revisar los detalles del remitente.
Vincular el teléfono con otro dispositivo Bluetooth
Al vincular el modelo GD910 con otro dispositivo, podrá
configurar una conexión protegida por contraseña. De este
modo, crea un vínculo más seguro.
1 Compruebe que la conexión Bluetooth esté activada y
visible. Puede cambiar la visibilidad en el menú Ajustes,
seleccione Visibilidad y, a continuación, Visible.
Ajustes
GD910_Spain_Voda_1.0_0918.indd 62 2009.9.18 9:54:38 PM

63
2 Toque Buscar.
* Activar la conexión Bluetooth:
1 En el menú Bluetooth, toque Bluetooth para activarlo tal
y como se muestra en la imagen siguiente.
2 Para desactivar la conexión Bluetooth, toque Bluetooth
de nuevo.
Si la conexión Bluetooth está activada, se mostrará el
icono en pantalla.
Si la conexión Bluetooth está desactivada, se mostrará el
icono en pantalla.
3 El GD910 buscará otros dispositivos. Cuando se
complete la búsqueda, puede ver la lista de dispositivos
detectados y aparecerá la opción Actualizar en pantalla.
4 Seleccione el dispositivo con el que desea vincularse y
escriba la contraseña; a continuación, toque OK.
5 El teléfono se conectará con el otro dispositivo en el que
deberá escribir la misma contraseña.
6 La conexión Bluetooth protegida por contraseña ya
estará lista.
Ajustes
GD910_Spain_Voda_1.0_0918.indd 63 2009.9.18 9:54:39 PM

64 LG GD910 | Guía del usuario
Utilizar auriculares Bluetooth
1 Compruebe que la conexión Bluetooth esté activada
y Visible.
2 Siga las instrucciones que acompañan a los auriculares
para vincular los dos dispositivos.
3 Toque Preguntar siempre o Permitir sin preguntar,
y toque Sí para conectarse. El GD910 cambiará
automáticamente al perfil Auriculares.
Enviar y recibir archivos
mediante Bluetooth
Bluetooth es una forma excelente de enviar y recibir
archivos, ya que no necesita cables y la conexión es rápida
y sencilla. También puede conectarse a unos auriculares
Bluetooth para realizar y recibir llamadas.
La conexión puede mejorar si no hay grandes obstáculos
entre el teléfono y el otro dispositivo Bluetooth.
¡SUGERENCIA!: La conexión puede mejorar si no
hay grandes obstáculos entre el teléfono y el otro dispositivo
Bluetooth.
NOTA: Lea la guía de usuario de cada accesorio Bluetooth que
intente vincular, puesto que las instrucciones de cada uno de
ellos pueden ser diferentes.
Para enviar un archivo:
1 Abra el archivo que desee enviar, que normalmente será
un archivo de música, de vídeo o una fotografía.
Ajustes
GD910_Spain_Voda_1.0_0918.indd 64 2009.9.18 9:54:39 PM

65
2 Seleccione Enviar. Seleccione Bluetooth.
3 Si ya ha vinculado el dispositivo Bluetooth, el GD910
buscará otros dispositivos Bluetooth de manera
automática. En caso contrario, el GD910 buscará de
manera automática otros dispositivos con Bluetooth
activado que se encuentren dentro de su alcance.
4 Seleccione el dispositivo al que desea enviar el archivo
y toque Selec.
5 El archivo se enviará.
¡SUGERENCIA!: Observe la barra de progreso para
asegurarse de que se envía el archivo.
Para recibir un archivo:
1 Para recibir archivos, Bluetooth debe estar Activado y
Visible. Consulte Cambiar los ajustes de Bluetooth a la
derecha para obtener más información.
2 Un mensaje le preguntará si desea aceptar el archivo
del remitente. Toque Sí para recibir el archivo.
NOTA: La marca y el logotipo de Bluetooth
®
son propiedad de
Bluetooth SIG, Inc. y cualquier uso que haga LG Electronics de
estas marcas es bajo licencia. Las otras marcas registradas y
nombres de marcas son de sus propietarios respectivos.
Ajustes
GD910_Spain_Voda_1.0_0918.indd 65 2009.9.18 9:54:40 PM

66 LG GD910 | Guía del usuario
PC Sync
Puede sincronizar el PC con el teléfono. Con ello,
garantizará que toda la información importante y las
fechas coinciden. También le servirá de cómoda copia de
seguridad.
¡SUGERENCIA!: Para ello, instale la aplicación PC
Suite disponible en el CD-ROM o descárguela desde http://
update.lgmobile. com. (desde www.lgmobile.com, PRODUCTS
> Manual& Software > Ir a la sección de Manual y Descarga
de software)
Instalación de LG PC Suite en el ordenador
1 En la pantalla del reloj, arrastre su dedo de derecha
a izquierda hasta el menú superior. Toque Ajustes, y
seleccione Conectividad.
2 Toque USB.
3 Conecte el dispositivo al ordenador mediante el cable
USB y espere unos instantes.
4 Aparecerá el mensaje de la guía de instalación.
Precaución Si el mensaje de la guía de instalación
no aparece en su PC, compruebe los ajustes de la unidad de
CD-ROM en Windows.
5 Inserte el CD incluido o haga clic en el botón para
descargar la aplicación LG PC Suite en el PC
directamente de la Web.
6 Haga clic sobre la aplicación LG PC Suite Installer que
aparecerá en pantalla.
GD910_Spain_Voda_1.0_0918.indd 66 2009.9.18 9:54:40 PM

67
Conectar el teléfono y el PC
1 Seleccione el modo PC Suite en el menú Conectividad y,
a continuación, conecte el cable USB al teléfono y al PC.
2 LG PC Suite se activará automáticamente en el PC.
Precaución Si LG PC Suite no se activa de forma
automática en su PC, compruebe los ajustes de la
unidad de CD-ROM en su ordenador.
3 El teléfono y el PC estarán conectados.
Copias de seguridad y restauración
de los datos del teléfono
1
Conecte el teléfono al PC como se describe anteriormente.
2
Haga clic en el icono
Copia de seguridad
y seleccione
Copia de seguridad
o
Restaurar
.
3
Seleccione si desea hacer una copia de seguridad de
datos
de Contenido
o de
datos de Agenda
/
Calendario
/
Tareas
/
Notas
. Seleccione la ubicación en la que desea
realizar una copia de seguridad de la información o en la que
desea restaurarla. Haga clic en
OK
.
4
Se realizará una copia de seguridad de la información.
PC Sync
GD910_Spain_Voda_1.0_0918.indd 67 2009.9.18 9:54:40 PM

68 LG GD910 | Guía del usuario
PC Sync
Ver los archivos del teléfono en el PC
1 Conecte el teléfono al PC como se describe
anteriormente.
2 Haga clic en el icono de Contenido.
3 Las imágenes y archivos de audio que ha guardado en
el teléfono se mostrarán en pantalla en la carpeta LG
Phone.
¡SUGERENCIA!: La visualización de los contenidos
del teléfono en el PC le ayudará a organizar los archivos y
documentos y a quitar contenido que ya no necesite.
Sincronizar los contactos
1 Conexión del teléfono al PC.
2 Haga clic en el icono de Contactos.
3 Su PC importará y mostrará todos los contactos
guardados en la tarjeta SIM y en el teléfono.
4 Haga clic en Archivo y seleccione Guardar. En este
punto podrá seleccionar dónde desea guardar sus
contactos.
NOTA: Para realizar una copia de seguridad de los contactos
guardados en la tarjeta SIM, haga clic en la carpeta de
la tarjeta SIM en la parte izquierda de la pantalla del PC.
Seleccione Editar en la parte superior de la pantalla y, a
continuación, elija Seleccionar todo.
Haga clic con el botón derecho del ratón en los contactos y
seleccione Copiar a contacto. Ahora haga clic en la carpeta
Teléfono de la parte izquierda de la pantalla y se mostrarán
todos los números.
GD910_Spain_Voda_1.0_0918.indd 68 2009.9.18 9:54:40 PM

69
Sincronizar los mensajes
1 Conexión del teléfono al PC.
2 Haga clic en el icono de Mensajes.
3 Todos los mensajes del PC y del teléfono se mostrarán
en carpetas en la pantalla.
4 Use la barra de herramientas que se encuentra en la
parte superior de la pantalla para editar y reorganizar
los mensajes.
Utilizar el teléfono como dispositivo
de almacenamiento masivo
El teléfono se puede usar como dispositivo de
almacenamiento masivo.
1 Desconecte el teléfono del PC.
2 En la pantalla del reloj, arrastre su dedo de derecha a
izquierda hasta el menú superior. Seleccione Ajustes y
posteriormente, Conectividad.
3 Seleccione y, a continuación, USB.
4 Toque Almacenamiento masivo. Este modo se
guardará.
5 Conexión del teléfono al PC. El teléfono indicará:
Conectado.
6 Todos los archivos del teléfono se almacenarán
automáticamente en la unidad de disco duro del PC.
NOTA: Para iniciar Almacenamiento masivo, el teléfono debe
estar desconectado del PC.
PC Sync
GD910_Spain_Voda_1.0_0918.indd 69 2009.9.18 9:54:41 PM

70 LG GD910 | Guía del usuario
Programa de actualización del
software de teléfonos móviles LG
Para obtener más información sobre la instalación y el uso
de este programa, visite http://update.lgmobile.com.
Esta función le permite actualizar el software a la última
versión de forma rápida y práctica a través de Internet,
sin necesidad de visitar el servicio de Atención al cliente.
El programa de actualización del software del teléfono
móvil requiere la atención del usuario durante todo el
proceso de actualización. Antes de realizar alguna acción,
asegúrese de entender todas las instrucciones y notas. Si
extrae el cable USB de transferencia de datos o la batería
durante la actualización puede causar daños en el teléfono
móvil. El fabricante no se responsabiliza de la pérdida
de datos durante el proceso de actualización, por lo que
se le aconseja que realice una copia de la información
importante con antelación por su seguridad.
Actualización del software
GD910_Spain_Voda_1.0_0918.indd 70 2009.9.18 9:54:41 PM

71
En este capítulo se describen algunos problemas que
se pueden producir durante el uso del teléfono. Algunos
problemas requerirán la ayuda del proveedor de servicios,
pero la mayoría se pueden resolver personalmente.
Mensaje Causas posibles Posibles soluciones
Error de
SIM
No se ha insertado
la tarjeta SIM en
el teléfono o está
insertada de forma
incorrecta.
Asegúrese de que la
tarjeta SIM se ha insertado
correctamente.
No hay
conexión
de red
Señal débil
Se encuentra fuera
del área de la red
GSM
Acérquese a una ventana o
vaya hacia un área abierta.
Compruebe la cobertura del
proveedor de servicios.
Los
códigos no
coinciden
Para cambiar
un código de
seguridad, debe
confirmar el código
nuevo insertándolo
nuevamente. Los
dos códigos que
ha introducido no
coinciden.
Póngase en contacto con su
proveedor de servicios.
No se
puede
configurar
la función
No admitido por
el proveedor de
servicios o registro
necesario
Póngase en contacto con su
proveedor de servicios.
Llamadas
no
disponibles
Error de marcación
Nueva tarjeta SIM /
Se alcanzó el límite
de gasto
Red nueva no autorizada.
Compruebe las restricciones
nuevas. Póngase en
contacto con el proveedor
de servicios o restablezca el
límite con PIN 2.
Resolución de problemas
GD910_Spain_Voda_1.0_0918.indd 71 2009.9.18 9:54:41 PM

72 LG GD910 | Guía del usuario
Resolución de problemas
Mensaje Causas posibles Posibles soluciones
No se
puede
encender el
teléfono
Tiempo insuficiente
de pulsación de la
tecla de encendido
Batería agotada
Contactos de la
batería sucios
Pulse la tecla Activar/
Desactivar al menos
durante dos segundos.
Cargue la batería.
Compruebe el indicador de
carga en la pantalla.
Limpie los puntos de
contacto.
Error de
carga
Batería totalmente
vacía
Temperatura fuera
del intervalo
Problema de
contacto
Sin alimentación
eléctrica
Cargador defectuoso
Cargador erróneo
Batería defectuosa
Cargue la batería.
Asegúrese de que la
temperatura ambiente
es adecuada, espere un
momento y, a continuación,
vuelva a cargar.
Compruebe la fuente de
alimentación y la conexión
del teléfono. Verifique los
contactos de la batería y
límpielos si fuera necesario.
Enchúfelo en otro enchufe
o compruebe que hay
suministro eléctrico.
Si el cargador no se
calienta, sustitúyalo.
Utilice sólo accesorios de
LG originales.
Sustituya la batería.
El teléfono
pierde red
La señal es
demasiado débil
La conexión a otro
proveedor de servicios es
automática.
Número no
permitido
La función
Marcación fija está
activada.
Compruebe los ajustes.
GD910_Spain_Voda_1.0_0918.indd 72 2009.9.18 9:54:41 PM

73
Accesorios
Dispone de distintos accesorios para el teléfono móvil,
disponibles a la venta por separado. Puede seleccionar estas
opciones según sus necesidades personales de comunicación.
Consulte la disponibilidad con su proveedor local. (Los
elementos que se describen a continuación pueden ser
opcionales).
NOTA:
• Utilice siempre accesorios LG originales.
• Si no lo hace, la garantía puede quedar invalidada.
• Los accesorios podrán ser diferentes en función de
la región.
Cargador
Cable de datos/CD
Soporte de conexión
Almohadilla del
reloj
Herramienta de la tapa de
la tarjeta
SIM (2)
NOTA:
• No se incluye el auricular Bluetooth. LG recomienda
el uso de un auricular Bluetooth de alto rendimiento
para mantener la calidad óptima de la comunicación.
GD910_Spain_Voda_1.0_0918.indd 73 2009.9.18 9:54:43 PM

74 LG GD910 | Guía del usuario
Servicios de red/Datos técnicos
Servicios de red
El teléfono inalámbrico descrito en esta guía se puede
utilizar en redes E-GSM 900, DCS 1800, PCS 1900 y
WCDMA 2100.
Algunas de las funciones incluidas en esta guía reciben
el nombre de servicios de red. Se trata de servicios
especiales que puede acordar con el proveedor de
servicios inalámbricos. Antes de que pueda hacer uso de
cualquiera de estos servicios de red, deberá suscribirse a
los mismos y obtener las instrucciones para su utilización a
través de su proveedor de servicios.
Datos técnicos
General
Nombre del producto: GD910
Sistema: E-GSM 900 / DCS 1800 /
PCS 1900 / WCDMA 2100
Temperaturas ambiente
Máx.: +37°C (descargando)
+36°C (cargando)
Mín.: -10°C
GD910_Spain_Voda_1.0_0918.indd 74 2009.9.18 9:54:43 PM

GD910_Spain_Voda_1.0_0918.indd 75 2009.9.18 9:54:44 PM

Memo
80_135 memo_Gray.indd 1 2009.9.16 12:11:46 PM

GD910
User Guide
- ENGLISH
Congratulations on your purchase of the advanced
and compact GD910 phone by LG, designed to
operate with the latest digital mobile communication
technology.
Some of the contents in this manual may differ from
your phone depending on your phone’s software or
your service provider.
Disposal of your old appliance
1 When this crossed-out wheeled bin symbol is attached
to a product, the product is subject to European Directive
2002/96/EC.
2 All electrical and electronic products should be disposed of
separately from the municipal waste stream at collection
facilities designated by the government or local authorities.
3 The correct disposal of your old appliances will help prevent
potential negative impacts on the environment and human
health.
4 For more detailed information about disposal of your old
appliances, please contact your city office, waste disposal
service or the shop where you purchased the product.
GD910_Eng_1.0_0915.indd 1 2009.9.18 10:1:53 PM

2 LG GD910 | User Guide
Contents
Guidelines for safe and efficient use .............. 5
Getting to know your phone ......................... 15
Parts of the phone .............................................15
Adjusting your watch to fit your wrist ...................17
Installing the SIM card
........................................18
Charging & Connecting your phone with the cradle 20
Connecting your phone and PC ...........................21
Your main screen ...............................................22
Get in touch with your GD910 .............................
23
Menu map ..................................................... 27
Calls ............................................................... 28
Making a voice or video call ...............................28
Calling your contacts ..........................................28
Answering and rejecting a call ............................29
Adjusting call volume .........................................29
In-call options ....................................................
29
Speed dialling ....................................................
31
Viewing your call logs.........................................31
Changing call settings ........................................32
Contacts ........................................................ 34
Searching for a contact ......................................34
Adding a new contact ........................................34
Creating a group ................................................35
Changing your contacts settings .........................36
Viewing information ...........................................37
GD910_Eng_1.0_0915.indd 2 2009.9.18 10:1:53 PM

3
Contents
Messaging ..................................................... 38
Sending a message ...........................................38
Message folders ................................................40
Managing your messages ..................................41
Changing your text message settings ..................42
Changing your voicemail setting .........................42
Voice command ................................................43
Voice command ............................................ 44
Access ..............................................................44
Using a Voice command feature ..........................44
Voice command settings ....................................45
Utilities ........................................................... 46
My folders .........................................................46
Music ...............................................................46
Transferring music to your phone ........................47
Playing a song ...................................................47
Creating a playlist ..............................................48
Using the camera ..............................................49
Adding an event to your calendar ........................50
Adding an item to your To-Do list ........................50
Adding a memo .................................................51
Using date finder ...............................................51
Setting your alarm .............................................
51
Voice recorder ...................................................52
Using your calculator .........................................53
Converting a unit ...............................................53
Adding a city to your world clock ........................54
GD910_Eng_1.0_0915.indd 3 2009.9.18 10:1:53 PM

4 LG GD910 | User Guide
Contents
Using the stopwatch ..........................................54
STK ..................................................................
54
Settings .......................................................... 55
Personalising your profiles ..................................55
Changing your screen settings ............................56
Changing your phone settings ............................56
Changing your Connectivity settings ....................58
Changing your Bluetooth settings ........................59
Pairing with another Bluetooth device..................60
Using a Bluetooth headset ..................................61
Sending and receiving files using Bluetooth .........
61
PC Suite ......................................................... 63
Installing the LG PC Suite on your computer ........63
Connecting your phone and PC ...........................64
Backing up and restoring your phone’s data ........64
Viewing phone files on your PC ...........................64
Synchronising your contacts ...............................
65
Synchronising your messages ............................
65
Using your phone as a mass storage device ........66
Software Update ............................................ 67
LG Mobile Phone Software .................................67
Troubleshooting ............................................. 68
Accessories ................................................... 70
Network service / Technical data ................. 71
GD910_Eng_1.0_0915.indd 4 2009.9.18 10:1:53 PM

5
Guidelines for safe and efficient use
Please read these simple guidelines. Not following these
guidelines may be dangerous or illegal.
Exposure to radio frequency energy
This section is related to the Radio wave exposure and
Specific Absorption Rate (SAR) information: The mobile
phone model GD910 has been designed to comply with
applicable safety requirements regarding exposure to
radio waves. These requirements are based on scientific
guidelines that include safety margins designed to ensure
the safety of all persons, regardless of age and health.
• While there may be differences between the SAR levels of
various LG phone models, all LG phones are designed to
meet the relevant guidelines for exposure to radio waves.
• The SAR limit recommended by the International
Commission on Non-Ionizing Radiation Protection (ICNIRP)
is 2 W/kg, averaged over 10 g of tissue.
•
The highest SAR value for this phone model, tested by
DASY4, for use when worn on the body is 0.486 W/kg (10 g).
• SAR data for residents in countries/regions that have
adopted the SAR limit recommended by the Institute of
Electrical and Electronics Engineers (IEEE), which is 1.6
W/kg, averaged over 1 g of tissue.
GD910_Eng_1.0_0915.indd 5 2009.9.18 10:1:53 PM

6 LG GD910 | User Guide
Guidelines for safe and efficient use
How to handle your GD910
Water resistance of the GD910
The GD910 is protected against splashing water (IPX4).
• You can wash your face while wearing the device, as it
resists incidental contact with water during normal use.
But it will not be waterproof on swimming.
• When you wash your hands, be careful not to wet the
leather strap as its lifespan can be shorten.
• Do not operate the keys if the GD910 or your hands are
wet. If the phone was exposed by water and it contains
moisture inside the screen, visit an authorized service
center for inspection and repair.
• If liquid has entered the GD910, or if the inside of the
glass is fogged and remains so for an extended period,
immediately take the GD910 to a service centre for
inspection and repair.
• If you assemble missing SIM cap cover’s water proof
gasket or with damaged part, we can not garantee
waterproof.
• If your water proof gasket has been damaged by frequent
uses of SIM cap cover, please visit an authorized service
center.
GD910_Eng_1.0_0915.indd 6 2009.9.18 10:1:53 PM

7
Guidelines for safe and efficient use
When wearing the GD910
• Do not expose the device to high temperatures and large
amounts of moisture or dust. Device failure, deformation
and discolouration as well as burn injuries may result.
• Do not damage the cord. Electric shock, overheating or
fire may result.
• Do not touch the recharging devices or plugs with wet
hands. Electric shock may result.
• Do not spill water on the device while recharging. If water
spills on the device, immediately unplug the charger.
Electric shock, overheating, fire due to a short circuit or
product failure may result.
• The battery charger and the adapter are not waterproof.
• People with sensitive skin or in weakened physical
condition may experience rash or skin irritation when
wearing the watch. If you notice that your skin is affected
when the GD910, immediately stop using it and consult
a physician.
• Be careful not to injure yourself and others around you
when you are engaged in heavy physical exercise or work
with wearing the device.
GD910_Eng_1.0_0915.indd 7 2009.9.18 10:1:53 PM

8 LG GD910 | User Guide
Product care and maintenance
WARNING: Only use batteries, chargers, and accessories
approved for use with this particular phone model. The use
of any other type may invalidate any certification or warranty
applying to the phone and may pose a hazard.
• Do not disassemble this unit. Take it to a qualified service
technician when repair work is required.
• Keep this unit at a distance from electrical appliances,
such as TVs, radios and computers.
• The unit should be kept at a distance from heat sources,
such as radiators and cookers.
• Do not drop the unit.
• Do not subject this unit to mechanical vibrations or
shocks.
• Turn off the phone in any area where you are required by
special regulations. For example, do not use your phone
in hospitals, as it may affect sensitive medical equipment.
• Do not handle the phone with wet hands while it is being
charged. Doing so may cause an electric shock and can
seriously damage your phone.
• Do not to charge your handset near flammable materials,
as the handset can become hot and create a fire hazard.
• Use a dry cloth to clean the exterior of the unit (do not
use solvents such as benzene, thinner, or alcohol).
• Do not charge the phone when it is on soft furnishings.
• Charge the phone in a well ventilated area.
• Do not subject the phone to excessive smoke or dust.
Guidelines for safe and efficient use
GD910_Eng_1.0_0915.indd 8 2009.9.18 10:1:54 PM

9
• Do not keep the phone next to credit cards or transport
tickets; it can affect the information on magnetic strips.
• Do not tap the screen with sharp objects, as this may
damage the phone.
• Do not expose the phone to liquid, moisture or humidity.
• Use accessories like headsets cautiously. Do not touch
the antenna unnecessarily.
• Do not use the phone or accessories in places with
high humidity, such as pools, greenhouses, solariums or
tropical environments. This may damage the phone and
invalidate the warranty.
• Leather is an elegant and natural material, It is normal
if there is natural wear and tear after passage of time. In
order to protect the product with better durability, please
observe the following instructions.
- Do not exposing the leather parts to humidity, water, and
direct sources of heat.
- Do not contact the leather surface with alcohol, perfumes,
solvents and greasy substances.
- Do not contact the leather surface with rough, sharp, or
abrasive objects.
- Do not rough exposure to metallic parts, and clean with a
soft dry cloth.
- Do not bend the product with acutely.
In case of problems
- In case of stains occur, wipe the leather surface with
a dry clean, soft cloth, or using a professional leather
cleaning agent.
Guidelines for safe and efficient use
GD910_Eng_1.0_0915.indd 9 2009.9.18 10:1:54 PM

10 LG GD910 | User Guide
- In case of contact with water, do not rub the leather
hardly, use a dry clean soft cloth and apply a gentle
dabbing motion to absorb.
• If you need to replace the leather, visit an authorized
service center and replace it with leather approved for
use with this particular phone model.(The leather is
excluded from the warranty.)
Efficient phone operation
Electronic devices
All LG mobile phones may experience or cause
interference, which could affect performance.
• Do not use your mobile phone near medical equipment
without requesting permission. Avoid placing the phone
over pacemakers (e.g. in your breast pocket).
• Some hearing aids might be disrupted by mobile phones.
• Minor interference may affect TVs, radios, computers and
other devices.
Road safety
Check the laws and regulations on the use of mobile
phones in the area you drive in.
• Do not use a hand-held phone while driving.
• Give your full attention to driving. Use a hands-free kit, if
available.
Guidelines for safe and efficient use
GD910_Eng_1.0_0915.indd 10 2009.9.18 10:1:54 PM

11
• Pull off the vehicle to the road and park before making or
answering a call, if driving conditions so require.
• RF energy may affect some electronic systems in your
vehicle, including car stereos and safety equipment.
• If your vehicle is equipped with airbags do not obstruct
them with installed or portable wireless equipment. This
can cause airbags to fail or cause serious injury if airbags
operate improperly.
• If you are listening to music while out and about, make
sure the volume is at a moderate level so that you are
aware of your surroundings. This is particularly important
when you are near roads.
Avoid damaging your hearing
Damage to your hearing can occur if you are exposed
to loud sound for long periods of time. We therefore
recommend that you do not turn the handset on or off
while close to your ear.
We also recommend that music and call volumes are set to
moderate levels.
Glass Parts
Some parts of your mobile device are made of glass.
This glass could break if your mobile device is dropped
on a hard surface or receives a substantial impact. If the
glass breaks, do not touch or attempt to remove it. Stop
using your mobile device until the glass is replaced by an
authorised service provider.
Guidelines for safe and efficient use
GD910_Eng_1.0_0915.indd 11 2009.9.18 10:1:54 PM

12 LG GD910 | User Guide
Blasting area
Do not use the phone where blasting is in progress.
Observe restrictions, and follow any rules or regulations.
Potentially explosive atmospheres
• Do not use the phone at a refuelling point.
• Do not use the phone near fuel or chemicals.
• Do not transport or store flammable gas, liquid or
explosives in the same compartment of your vehicle as
your mobile phone and accessories.
In aircraft
Wireless devices can cause interference in aircraft.
• Turn your mobile phone off, or activate flight mode before
boarding any aircraft.
• Do not use your mobile phone on the ground without
permission from the crew.
Children
Keep the phone in a safe place, out of the reach of small
children. The phone includes small parts that, if detached,
may represent a choking hazard.
Guidelines for safe and efficient use
GD910_Eng_1.0_0915.indd 12 2009.9.18 10:1:54 PM

13
Emergency calls
Emergency calls may not be available in all mobile
networks.
Therefore, you should never depend solely on the phone for
emergency calls. Consult your local service provider.
Battery information and care
• You do not need to completely discharge the battery
before recharging. Unlike other battery systems, there is
no memory effect that could compromise the battery’s
performance.
• Use only LG batteries and chargers. LG chargers are
designed to maximise battery life.
• Do not disassemble or short-circuit the battery pack.
• Keep the metal contacts of the battery pack clean.
• If you need to replace the battery, take it to the nearest
authorised LG Electronics service point or dealer for
assistance.
• Replace the battery when it no longer provides
acceptable performance. The battery pack may be
recharged hundreds of times before it needs replacing.
• To maximise usability, recharge the battery if it has not
been used for a long time.
• Do not expose the battery charger to direct sunlight or
use it in high humidity, such as in the bathroom.
• Do not leave the battery in hot or cold places. This may
deteriorate battery performance.
Guidelines for safe and efficient use
GD910_Eng_1.0_0915.indd 13 2009.9.18 10:1:54 PM

14 LG GD910 | User Guide
• There is a risk of explosion if the battery is replaced by
an incorrect type.
• Dispose of used batteries according to the manufacturer’s
instructions. Please recycle whenever possible. Do not
dispose of in household waste.
• Always unplug the charger from the mains after the
phone is fully charged to prevent unnecessary power
consumption by the charger.
• Actual battery life will depend on network configuration,
product settings, usage patterns and battery and
environmental conditions.
Guidelines for safe and efficient use
GD910_Eng_1.0_0915.indd 14 2009.9.18 10:1:54 PM

15
Getting to know your phone
Parts of the phone
Main screen
Speaker
Camera lens
Send key
Back/Clear key
End/Power key
Send key
- Dials a phone number and answers incoming calls.
-
Opens the call history menu on your clock screen. Call
the most recent number by pressing for 2 seconds.
- Opens the option list when using the menu if
available.
Back/Clear key
- Takes you to the previous menu.
- Gives you quick access on your clock screen to
Voice command when you press for 2 seconds.
End/Power key
-
Closes menu and returns you to the main clock screen.
- Turns the phone on/off when pressed for 2 seconds.
TIP! To turn off the device quickly, press and hold the Send key &
Clear key for 3 seconds.
GD910_Eng_1.0_0915.indd 15 2009.9.18 10:1:58 PM

16 LG GD910 | User Guide
Getting to know your phone
Charging Pin
SIM cap release
SIM cap cover
SIM card socket
Microphone
WARNING: Do not remove the SIM cap cover when the
phone is on, as this may damage the phone. Removing the SIM
cap cover turns the phone off.
WARNING: Do not use your fingernail to remove the SIM
cap cover.
GD910_Eng_1.0_0915.indd 16 2009.9.18 10:1:58 PM

17
Getting to know your phone
Adjusting your watch to fit your wrist
You can adjust the strap length to your wrist size.
1 Remove watch from wrist and place on a soft surface
with its buckle open.
2 Hold the watch strap and pull the “A” part of the buckle
vertically.
3 Hold the watch strap and adjust the strap length by
moving the “A” part of the buckle from side to side.
GD910_Eng_1.0_0915.indd 17 2009.9.18 10:2:1 PM

18 LG GD910 | User Guide
Getting to know your phone
4 To fix the strap length of watch, push the “A” part of the
buckle back to the original location.
5 Press the buckle until a ‘click’ is heard.
Installing the SIM card
1 Remove the SIM cap cover.
- Use the SIM cap tool to open the SIM cap cover.
NOTE:
Insert SIM Tool fully in SIM cap release not to
disfigure the cover. Use enclosured SIM Tool not to damage SIM cap cover.
2 Install the SIM card.
Make sure the gold contact area of the SIM card is facing
downwards. Slide the SIM card into the SIM card holder.
GD910_Eng_1.0_0915.indd 18 2009.9.18 10:2:3 PM

19
Getting to know your phone
A B
* Remove the SIM card.
- To remove the SIM card, gently push the edge of the SIM
card, and then lift it away from the SIM card holder.
- When you remove SIM Card, insert SIM Tool fully and
remove it.
A B
C
GD910_Eng_1.0_0915.indd 19 2009.9.18 10:2:9 PM

20 LG GD910 | User Guide
Getting to know your phone
3 Replace the SIM cap cover.
Place the SIM cap cover into the SIM card holder, and
secure it by turning the cover to the right until it clicks
into place.
Charging & Connecting your phone with the cradle
1 Plug the power adapter into the mains.
2 Connect the power adapter to the charging cradle.
3 Connect the charging cradle to the phone. Make sure
that the charging pins are properly aligned with the pins
on the charging cradle.
GD910_Eng_1.0_0915.indd 20 2009.9.18 10:2:10 PM

21
Getting to know your phone
A B
4 Once you connect the charger, the battery will begin to
charge. If the battery full icon
appears on the lock
screen, battery charging is complete.
Icon Description
Charging the
battery
NOTE:
To improve battery
lifetime, the battery must be fully
charged before first use.
WARNING:
Before charging, make sure the SIM cap cover is
securely inserted onto your phone.
Connecting your phone and PC
Charging cradle
GD910_Eng_1.0_0915.indd 21 2009.9.18 10:2:13 PM

22 LG GD910 | User Guide
Your main screen
Your GD910 has a touchscreen.
From here, you can access menu options,
make a quick call and change your
profile, among many other functions.
Touchscreen tips
• There’s no need to press hard; the
touchscreen is sensitive enough to detect light touches.
• Use the tip of your finger to touch the option you want.
Be careful not to touch any surrounding keys.
• Don’t cover the phone with a case or cover, as the
touchscreen will not work if any material is covering it.
• When the screen light is off, the touch protection function
is automatically enabled to prevent indiscreet action of the
touch keys. This prevents the touchscreen from responding
when touched unintentionally. To disable touch protection,
press any key on the right side of the phone twice.
• Whenever
your GD910
is not in use, it will return to the
lock screen.
< Digital > < Analog >
* Lock screen
Getting to know your phone
Touchscreen
GD910_Eng_1.0_0915.indd 22 2009.9.18 10:2:14 PM

23
Get in touch with your GD910
The controls on the GD910 touchscreen change
dynamically, depending on the task you are carrying out.
Clock screen: To switch between the screens, just flick the
display from left to right or from right to left. You can also
choose one of the 8 Clock displays by flicking the screen
from top to bottom or from bottom to top on the main clock.
Getting to know your phone
GD910_Eng_1.0_0915.indd 23 2009.9.18 10:2:15 PM

24 LG GD910 | User Guide
Scrolling: Drag your finger from side to side to scroll. On
some screens, you can also scroll up and down.
Opening Applications: To open any application, drag
the screen to the desired application, and then touch the
application icon or menu.
Getting to know your phone
GD910_Eng_1.0_0915.indd 24 2009.9.18 10:2:16 PM

25
Touch interaction legend
Touch Down
Touch
Down & up
Touch
Down & Hold
Touch
Hold & Up
Touch Down & Drag
(Up o Down)
Touch Down & Drag
(Down o Up )
Touch Down & Drag
(Left
o Right)
Touch Down & Drag
(Right o Left)
Touch Down &
Hold & Drag
(Up o Down)
Touch Down &
Hold & Drag
(Down o Up )
Touch Down &
Hold & Drag
(Left
o Right)
Touch Down &
Hold & Drag
(Right o Left)
Flicking interaction legend
Flicking
(Up o Down)
Flicking
(Down o Up )
Flicking
(Left
o Right)
Flicking
(Right o Left)
Getting to know your phone
GD910_Eng_1.0_0915.indd 25 2009.9.18 10:2:17 PM

26 LG GD910 | User Guide
On-Screen Icons
The table below describes
various display indicators
or icons that appear on
the phone’s indicator
screen. To open the
indicator screen, drag
your finger across from left to right on the clock screen.
* The status bar
Icon Description Icon Description
Network signal strength
(number of bars will vary)
Bluetooth is active
No network signal
Bluetooth Mono
headset
Flight mode is selected
Remaining battery life
An alarm is set
Battery empty
* The quick keys
Icon Description Icon Description
Normal profile in use Missed calls
Silent profile in use
New message
Outdoor profile in use
Flight mode is on.
No event
Flight mode is off.
Getting to know your phone
The status bar
The quick keys
Information area
GD910_Eng_1.0_0915.indd 26 2009.9.18 10:2:18 PM

27
Menu map
When the screen light is off, press any key on the right side
of the phone twice to disable touch protection and enter
the screen.
The clock screen will display a 4-way arrow
pad. To open the top menu, slide your finger
across from right to left on the main clock
screen twice.
Contacts
1. New contact
2. Search
3. Speed dials
4. Groups
5. Settings
6. Information
x2
Messaging
1. Create message
2. Inbox
3. Drafts
4. Outbox
5. Sent items
6. Templates
7. Emoticons
8. Settings
Utilities
1. Multimedia
2. Organiser
3. Alarms
4. Voice recorder
5. Tools
Settings
1. Bluetooth
2. Profiles
3. Screen
4. Phone
5. Call
6. Connectivity
The status bar
The quick keys
Information area
GD910_Eng_1.0_0915.indd 27 2009.9.18 10:2:18 PM

28 LG GD910 | User Guide
Calls
Making a voice or video call
1 To open a Call menu, drag your finger across from right
to left on the clock screen.
2 Select Video call or Voice call.
3 Enter the number on the keypad screen.
To delete a digit, press the Clear key
on the right side of the phone or the
Clear touch key on the screen.
4 Press the Send key on the right side
of the phone or the Send touch key on
the screen to make the call.
5 To end the call, press the End key on the right side
of the phone.
NOTE: Your phone has a Voice command feature that lets you
make calls by name.
TIP! To enter “+” for international calls, touch and
hold the 0 key on the keypad screen.
TIP!
You can enter the asterisk * or # symbol, turn Silent
on/off, Send a message, Save a number
or
Search contacts by
touching on the keypad screen.
Calling your contacts
It’s easy to call anyone whose number is in your Contacts.
1 Opens the keypad screen. You can search your contacts
by choosing or .
GD910_Eng_1.0_0915.indd 28 2009.9.18 10:2:19 PM

29
Calls
2 Scroll through the contact list or tab the Name field,
enter the first letter(s) of the contact you want to call in
the Name field, and then press the Enter
touch key.
3 In the list, touch the contact you want to call, and then
select the number to use if there is more than one for
that contact.
4 Press the Send key or the Send touch key. You
can also make a Video call from the options menu.
Answering and rejecting a call
When your phone rings, press the Send key to answer.
Press the End key to reject the incoming call.
TIP! You can send a message to explain why you
cannot receive an incoming call by selecting and using
Excuse message before you reject an incoming call.
Adjusting call volume
To adjust the volume during a call, press the Clear key
and scroll up or down.
In-call options
You can hold a call by pressing the number displayed on
your screen.
Mute - Turns the microphone off so the person you are
talking to cannot hear you.
GD910_Eng_1.0_0915.indd 29 2009.9.18 10:2:19 PM

30 LG GD910 | User Guide
Calls
Keypad - Opens the keypad screen. You can search
your contacts by choosing or . You can also send
a new message by choosing or save the phone
number by choosing .
To open the options menu during a call, press the Send key
. You can choose from the following:
Speaker on/off - Turns the speakerphone on or off.
Dialpad - Opens a numerical keypad for entering numbers
(e.g., when dialling call centres or other automated
telephone services).
Add call - Allows you to make a second call. Dial the
number or search your contacts, then touch to connect
the call. Both calls will be displayed on the call screen. Your
initial call will be locked and put on hold. To end one or
both calls press the End key .
NOTE: You will be charged for each call you make.
Record - Allows you to record the call.
Go to messages - Allows you to check your messages.
DTMF off - Turns off DTMF during a call. DTMF lets you
use numerical commands to navigate within automated
calls. By default, DTMF is set to on.
End call - Terminates the call.
GD910_Eng_1.0_0915.indd 30 2009.9.18 10:2:20 PM

31
Speed dialling
You can assign a frequently-called contact to a speed dial
number.
1 On the clock screen, drag your finger across from right
to left to the top menu. Touch Contacts, and then select
Speed dials.
2 Your voicemail is already set to speed dial 1. You cannot
change this. Touch any other number to assign it to a
speed dial contact.
3 Your address book will open. Select the contact you
want to assign to that number by touching the contact’s
name once. To find a contact, tap the Name box, and
then enter the first letter(s) of the name of the contact.
To call a speed dial number, using the numerical keypad,
press and hold the assigned number until the contact
appears on the screen.
Viewing your call logs
On the clock screen, press the Send key , then scroll left
and right. Choose to view:
All calls - View a complete list of all your dialled,
received and missed calls.
Dialled calls - View a list of all the numbers you have
called.
Received calls - View a list of all the numbers that
have called you.
Missed calls - View a list of any calls you have missed.
Calls
GD910_Eng_1.0_0915.indd 31 2009.9.18 10:2:20 PM

32 LG GD910 | User Guide
TIP! In any call log, select the Send key to open the options
menu, and then select Delete to delete items. You can select
more than one item to delete at the same time.
TIP! Touch any call log entry to view the date, time and
duration of the call.
Changing call settings
1 On the clock screen, drag your finger across from right
to left to the top menu. Touch Settings, and then select
Call.
2 F
rom here, you can adjust the settings for:
Call divert - Choose whether to divert your calls.
Call waiting - If call waiting is activated, the handset will
notify you of an incoming call while you are on a call.
Call barring - Select which calls you want to barring.
Fixed dial numbers - Select Fixed dial number to
turn on and compile a list of numbers that can be called
from your phone. You’ll need your PIN2 code, which is
available from your operator. Only numbers in the fixed
dial list can be called from your phone.
Excuse message - You can send a message to explain
why you cannot receive an incoming call by touching
and using “Excuse message” before you reject an
incoming call.
Calls
GD910_Eng_1.0_0915.indd 32 2009.9.18 10:6:47 PM

33
Call costs - View the charges applied to your dialled
calls. This service is network dependent; some operators
do not support this function.
Call durations - View the duration of all calls including
All, dialed, received calls and the last call.
Common settings
• Call reject - Touch to switch On to highlight the Reject
list. You can touch the text box to choose from all calls,
specific contacts or groups, calls from unregistered
numbers (those not in your contacts), or calls with no
caller ID. Touch
Save to change this setting.
• Send my number - Choose whether to display your
number on an outgoing call.
• Auto redial - Choose on ( ) or off (
).
• Minute minder - Select on ( ) to hear a tone every
minute during a call.
• BT answer mode - Select Hands-free to answer
calls using a Bluetooth headset, or select Handset to
press a handset key to answer calls.
• Save new number - Select Yes to save a new
number.
TIP! To scroll through a list of options, touch the
last item visible, and then drag your finger up the screen. The
list will move up to display more items.
Video call setting - Touch Video call setting to select
the settings for your video calls. Decide whether to use a
static image, then select one and/or turn on the mirror to
see yourself on the screen when making a video call.
Calls
GD910_Eng_1.0_0915.indd 33 2009.9.18 10:2:20 PM

34 LG GD910 | User Guide
Searching for a contact
1 On the clock screen, drag your finger across from right
to left to the top menu. Touch Contacts, and then select
Search.
TIP! On the numerical keypad screen, touch to open and
search for contacts.
2 Scroll through the contact list or enter the first letter(s) of
the contact you want to call in the Name field and press
the Enter touch key. You will then see a list of contacts
corresponding to the letters you entered.
3 In the list, touch the contact you want to call, and then
select the number to use if there is more than one for
that contact.
4 Press the Send key or the Send touch key. You can
also make a Video call from the options menu.
Adding a new contact
1 On the clock screen, drag your finger across from right
to left to the top menu. Touch Contacts, and then select
New contact.
2 Choose whether to save the contact to your Handset
or USIM.
3 Enter the first and last name of your new contact. You do
not have to enter both, but you must enter at least one.
4 If you want to add a picture to the new contact, touch
, and then Edit image menu appears.
Contacts
GD910_Eng_1.0_0915.indd 34 2009.9.18 10:2:21 PM

35
5 You can enter up to five different numbers per contact.
Each entry is assigned a preset type: Mobile, Home,
Office, Pager or Fax.
6 Add an email address in the Email field.
7 Assign the contact to one or more groups, choosing
between No group, Family, Friends, Colleagues,
School, or VIP or one of other groups you created.
TIP! You can create customised groups for your contacts.
8 You can also add a Ringtone, Birthday, Anniversary,
Home page, Home address, Company name, Job
title, Company address or Memo.
9 Touch Save to save the contact.
TIP! When viewing a contact, you can access the options menu
by pressing the Send key
.
Creating a group
1 On the clock screen, drag your finger across from right
to left to the top menu. Touch Contacts, select Groups,
and then touch New group.
2 Enter a name for your new group in the Name field. You
can also assign a ringtone to the group.
3 Touch Save to save the new group.
NOTE: Even if you delete a group, the contacts that were
assigned to that group will not be lost. They will remain in your
contacts.
Contacts
GD910_Eng_1.0_0915.indd 35 2009.9.18 10:2:21 PM

36 LG GD910 | User Guide
Changing your contacts settings
You can adapt your contacts settings to suits your
preferences.
1 On the clock screen, drag your finger across from
right to left to the top menu. Touch Contacts and then
Settings.
2 From here, you can adjust the following settings:
Contact list settings - Choose whether to view contacts
saved to Handset & USIM, Handset only or USIM
only. You can also choose to show the first name or last
name of a contact first and whether to display a quick
command key next to the contact.
Copy - Copy your contacts from your handset to your
SIM or from your SIM to your handset.
You can choose all contacts by using the Send key on
the right side of the phone and touching Select all, or
select each contact one by one.
Move - This works in the same way as Copy, but the
contact will only be saved to the location you’ve moved
it to. So if you move a contact from the SIM to the
handset, it will be deleted from SIM memory.
Send all contacts via Bluetooth - Send all your
contacts to another device using Bluetooth. Bluetooth will
be automatically turned on if you select this option.
Clear contacts - Delete all the contacts on your handset
or SIM. Touch
Yes if you are sure you want to delete all
your contacts.
Contacts
GD910_Eng_1.0_0915.indd 36 2009.9.18 10:2:21 PM

37
Viewing information
1 On the clock screen, drag your finger across from
right to left to the top menu. Touch Contacts and then
Information.
2 From here, you can view Service dial numbers, your
Own number, Memory info (how much memory space
you have left) and My business card.
TIP! To add your own business card, select My business
card, and then enter your details as you would for any contact.
Touch Save to finish.
Contacts
GD910_Eng_1.0_0915.indd 37 2009.9.18 10:2:21 PM

38 LG GD910 | User Guide
Messaging
Sending a message
1 To open the top menu, drag your finger across from right
to left on the main clock screen twice from the main
clock screen. Touch Messaging, and then select Create
message.
2 When you touch a message field, the keypad screen
will appear. Touch the To field to enter the recipient’s
number, or touch the search icon to open your contacts.
You can add multiple contacts.
3 Enter the text message using the keypad screen.
o
4 On the keypad screen, press the Send key to open
the options menu. Choose Writing language, Add to
dictionary, Insert, Save to drafts or Writing font size.
Touch Insert to add a Template, Emoticons or Name
& Number.
5 Touch Send when ready.
GD910_Eng_1.0_0915.indd 38 2009.9.18 10:2:22 PM

39
Messaging
Entering text
- Touch to turn T9 predictive text on or off.
- Touch to change between the number, symbol and
text keypads.
- Touch to move the cursor.
- Touch to return to the message field.
- Touch to add a space.
- Touch to delete a character or remove the sentence.
/ - Touch to open or close the pop-up screen.
* T9 predictive mode
In T9 mode, you will see . T9 uses a built-in dictionary
to recognise words based on the key number sequences
you touch. Simply touch the number key associated with
the letter you want to enter, and the dictionary will predict
the word you want to use.
* Abc manual mode
In Abc mode, you will see . In this mode, you must
touch the key repeatedly to enter a letter if T9 mode is
turned off ( ).
GD910_Eng_1.0_0915.indd 39 2009.9.18 10:2:22 PM

40 LG GD910 | User Guide
Message folders
You’ll recognise the folder structure used on your GD910; it
is user-friendly and self-explanatory.
Inbox - All the messages you receive are placed into
your inbox. Here, you can view, delete and manage your
messages in a number of ways.
Drafts - If you do not finish writing a message, you can
save what you have done in this folder.
Outbox - This is a temporary storage folder while
messages are being sent.
Sent items - All the messages you sent are placed in this
folder.
Templates - A list of pre-written, useful messages, for
quick replies. The phone includes a number of templates
you can edit.
Emoticons - You can add, edit and delete emoticons.
When you write messages, insert your preferred emoticons.
There are some commonly used emoticons already on your
phone.
Settings - This is where you configure your Text message/
Voicemail options.
Messaging
GD910_Eng_1.0_0915.indd 40 2009.9.18 10:2:22 PM

41
Managing your messages
1 To open the top menu, drag your finger across from
right to left on the main clock screen twice. Touch
Messaging, and then select Inbox.
2 Select a message, and then press the Send key
to open the options menu, and then choose from the
following:
Reply - Send a reply to the selected message.
Delete - Delete the selected message.
Forward - Send the selected message on to another
person.
Save number - Save the phone number in the
message.
Extract - Extract information, such as phone number or
email address, from the selected message.
New message - Write a new message regardless of
who sent you the message.
Voice call - Make a voice call to the contact.
Video call - Make a video call to the contact.
Copy&Move - Copy or move the selected message to
your SIM card or phone.
Message info. - Check the message info for type,
subject, where it is from and date.
If you see the message
No space for USIM, you should
delete some messages from your inbox to free up space.
If you see the message
No space for messages, you can
delete either messages or saved files to free up space.
Messaging
GD910_Eng_1.0_0915.indd 41 2009.9.18 10:2:23 PM

42 LG GD910 | User Guide
Changing your text message settings
To open the top menu, drag your finger across from right
to left on the main clock screen twice. Touch Messaging,
select Settings, and then choose Text message.
You can make changes to:
Text message centre - Enter the details of your message
centre.
Delivery report - Choose to receive confirmation that your
message has been delivered.
Validity period - Choose how long your messages are
stored in the message centre.
Changing your voicemail setting
To open the top menu, drag your finger across from right
to left on the main clock screen twice. Touch Messaging,
select Settings and then choose Voicemail. You can view
and edit the voicemail name and number.
Messaging
GD910_Eng_1.0_0915.indd 42 2009.9.18 10:2:23 PM

43
Messaging
Voice command
Your GD910 supports
enhanced voice
commands. Using
advanced voice
recognition technology,
this feature allows you
to do things by verbal
command (e.g. make
calls, confirm new
messages or voicemail,
check your schedule,
get the time and listen to music).
NOTE:
• Using a Voice command may be difficult in a noisy
environment or during an emergency.
• When you use a voice command feature, the loudspeaker is
in use. Hold the GD910 a short distance away when speak.
• Before using a voice command, please check this feature is
enable. (Settings>Phone>Voice command)
• If you use the phone inside the car, make sure you closed
the car windows. Otherwise, it can be interrupted by the
wind noise and traffic noise.
• Voice command dose not support all of the languages; it
may be not supported some features according to particular
languages.
• Voice command feature is language-dependent. Before
using voice command, please check the voice recognition
language.
* Voice recognition language: US English, UK English,
Spanish, French, Portuguese, German, Italian, and Russian.
Voice command
icon
Clear key
GD910_Eng_1.0_0915.indd 43 2009.9.18 10:2:23 PM

44 LG GD910 | User Guide
Voice command
Access
To use a Voice command feature, press and hold the Clear
key on the clock screen, and then follow the prompts.
Using a Voice command feature
Call - Say “Call”, then call someone simply by saying the
name. Speak clearly and exactly as the contact details
appear in your Contacts list. When you have more than
one contact number, you can state the name of the contact
(e.g., “Call John Work”). Your GD910 will be make a call to
the default number of the contacts.
New messages - When you have a new message, TTS
(Text to Speech) function is automatically active then let you
know the information for the number of the new messages
you received for a day. It will also automatically read a new
message you recently received.
Voicemail - You can access the voice mail centre directly
by saying “Voicemail”.
Today schedule - The “Today schedule” command allows
you to access and review your schedule.
Time - The “Time” command gives you the time of day.
Music - The “Music” command allows you to play songs.
Help - Provides general guidelines for using Voice
commands.
GD910_Eng_1.0_0915.indd 44 2009.9.18 10:2:23 PM

45
Voice command
Voice command settings
1 On the clock screen, press and hold the Clear key .
2 After enter the voice command feature then press the
Send key
to open the settings.
3 Change the settings, as necessary.
Sensitivity - The “Sensitivity” setting controls how
the system filters for matches. Selecting ‘Reject more’
increases the sensitivity to filtering out more potential
matches. Selecting ‘Reject less’ decreases the sensitivity
and displays more potential matches. If you are
frequently asked to repeat or no matches are found,
lower the sensitivity setting.
Train words - If the phone often asks you to repeat a
voice command, train the phone to recognise your voice
patterns.
Timeout - Set to 5 seconds or 10 seconds.
GD910_Eng_1.0_0915.indd 45 2009.9.18 10:2:23 PM

46 LG GD910 | User Guide
Utilities
My folders
You can store any multimedia file in your phone’s memory
so you have easy access to all of your pictures, sounds,
and so on. Touch Utilities, and Multimedia, and then
select My folders.
My images - Contains a list of images, including default
images preloaded onto your phone and images taken
by your phone’s camera. You can assign an image to a
particular person in your contacts list so that the image
appears when the person calls you.
My sounds - Contains default sounds and Voice
recordings.
Others - This folder is used to store files that are not
pictures or sounds.
Music
Your GD910 has a built-in music player so you can play
all your favourite music. To access the music player, drag
your finger across from right to left on the clock screen to
the main menu. Touch Utilities, and Multimedia, and then
select Music.
From here, you can access a number of folders:
Recently played - View all the songs you have played
recently.
All tracks - Contains all the songs you have on your
phone.
Artists - Browse your music collection by artist.
GD910_Eng_1.0_0915.indd 46 2009.9.18 10:2:23 PM

47
Utilities
Albums - Browse your music collection by album.
Genres - Browse your music collection by genre.
Playlists - Contains all your playlists.
Shuffle tracks - Play your tracks in random order.
Transferring music to your phone
The easiest way to transfer music to your phone is using
Bluetooth or your sync cable.
To transfer using Bluetooth:
1 Make sure both devices have Bluetooth turned on and
can see each other.
2 Select the music file on the other device, and then select
send via Bluetooth.
3 When the file is ready to be sent, you must accept it on
your phone by touching Yes.
4 The file will appear in All tracks.
Playing a song
1 On the clock screen, drag your finger across from right
to left to the top menu. Touch Utilities, and then select
Multimedia, and then touch Music.
2 Touch All tracks.
3 Select the song you want to play.
4 Touch to pause the song.
5 Touch to go to the previous song.
GD910_Eng_1.0_0915.indd 47 2009.9.18 10:2:24 PM

48 LG GD910 | User Guide
6 Touch to go to the next song.
7 Touch to return to the Music list.
TIP! To adjust the volume when you’re
listening to music, press the Speaker icon on
the screen, and then scroll up or down.
TIP! Even though the Bluetooth headset is connected with
your handset, you may be able to hear MP3 sound through
handset only. MP3 sound could not come out via Bluetooth
mono headset.
Creating a playlist
You can create playlists by choosing a selection of songs
from the All tracks folder.
1 On the clock screen, drag your finger across from right
to left to the top menu. Touch Utilities, Multimedia, and
then select Music.
2 Touch Playlists.
3 Touch Add new playlist, enter the playlist name, and
then touch Save.
4 The All tracks folder will show all the songs on your
phone. Touch all the songs you want to include in your
playlist. A tick will appear on the left side of the track
names.
5 Press the Send key on the right side of the phone
and touch Done.
Utilities
GD910_Eng_1.0_0915.indd 48 2009.9.18 10:2:24 PM

49
NOTE: Music is copyright protected in international treaties
and national copyright laws. It may be necessary to obtain
permission or a licence to reproduce or copy music. In some
countries national law prohibits private copying of copyrighted
material. Please check the national legislation of the
applicable country concerning the use of such material.
Using the camera
1 On the clock screen, drag your finger across from right
to left to the top menu. Touch Utilities, Multimedia, and
then select Camera.
2 The viewfinder will appear on the screen. Touch to
take a photo.
* In your viewfinder, you can select the following options
before taking a photo. Touch the icons to adapt your
photo:
Gallery - Touch to move to your gallery.
Brightness - Set the brightness of the image in
the viewfinder of the camera. Slide the contrast
indicator along the bar—left for a lower exposure
and hazier image, or right for a higher exposure
and sharper image.
3 Your captured photo will appear on the screen for a few
seconds and disappear. The name of the image runs
along the bottom of the screen.
Utilities
GD910_Eng_1.0_0915.indd 49 2009.9.18 10:2:24 PM

50 LG GD910 | User Guide
Adding an event to your calendar
1 On the clock screen, drag your finger across from
right to left to the top menu. Touch Utilities, select
Organiser, and then choose Calendar.
2 Select the date to which you want to add an event.
3 Press the Send key , then Add event.
TIP! You can set holiday dates in your calendar. Touch each
day you are on holiday one at time, press the Send key
,
and then select Set holiday.
Adding an item to your To-Do list
1 On the clock screen, drag your finger across from
right to left to the top menu. Touch Utilities, select
Organiser, and then choose To do.
2 Touch Add to do.
3 Set the date for the task, add notes, and select a priority
level: High, Medium or Low.
4 Save your task by selecting Save.
TIP! You can edit an item by selecting it, touching the tab, and
then entering the changes. Confirm the changes by selecting
Save.
Utilities
GD910_Eng_1.0_0915.indd 50 2009.9.18 10:2:25 PM

51
Adding a memo
1 On the clock screen, drag your finger across from
right to left to the top menu. Touch Utilities, select
Organiser, and then choose Memo.
2 Touch New memo.
3
Type your memo, then press the Send key and select
Save to memo.
4 Your memo will appear on the screen.
Using date finder
Date finder is a handy tool that helps you calculate what
the date will be, in a given number of days. It helps you
keep track of deadlines.
1 On the clock screen, drag your finger across from
right to left to the top menu. Touch Utilities, select
Organiser, and then choose Date finder.
2 Set the current date in the From tab.
3 Set the number of days in the After tab.
4 The Target date will be shown below.
Setting your alarm
1
On the clock screen, slide your finger across from right to left
to the top menu. Touch Utilities, and then select Alarms.
2 Touch New alarm.
3 Set the time you want the alarm to sound, and then
touch Save. The screen then automatically returns to
the alarm list.
Utilities
GD910_Eng_1.0_0915.indd 51 2009.9.18 10:2:25 PM

52 LG GD910 | User Guide
4 Select the item in the list, and then choose one you want
the alarm to repeat: from Not repeated, Daily, Mon -
Fri, Mon - Sat, Sat - Sun or Except holiday.
5 Select Alarm type to select the type of alarm you want.
6 Touch Alarm bell. Choose a sound from the media
album list. To listen to sounds, touch the icon on the
right of the sound.
7 Add a memo to the alarm.
8 Finally, you can set the snooze interval to 5, 10, 20, 30
minutes, 1 hour. Or you can turn snooze off.
9 After setting the alarm, touch Save.
NOTE: You can set up to 5 alarms.
Voice recorder
Use your voice recorder to record voice memos or other
audio files.
To record a sound or voice memo:
1 On the clock screen, drag your finger across from right
to left to the top menu. Touch Utilities, and then select
Voice recorder.
2 Touch to begin recording.
3 Touch to end recording.
4 Touch to listen to the recording.
Utilities
GD910_Eng_1.0_0915.indd 52 2009.9.18 10:2:25 PM

53
Using your calculator
1 On the clock screen, drag your finger across from right
to left to the top menu. Touch Utilities, select Tools, and
then choose Calculator.
2 Touch the box to open up the number keys.
3 Touch the screen and enter numbers using number
keys.
4 For simple calculations, touch the function you need (+,
–, x or ÷), followed by =.
5 For more complex calculations, touch , and then
choose sin, cos, tan, sec, csc, cot, deg, rad, log, ln, exp
and so on.
Converting a unit
1 On the clock screen, drag your finger across from right
to left to the top menu. Touch Utilities, select Tools, and
then choose Converter.
2 Choose one you want to convert from Currency,
Surface, Length, Weight, Temperature, Volume and
Velocity.
3 Then select the unit, and enter the value you want to
convert from, followed by the unit you want to convert to.
4 The corresponding value will appear on the screen.
Utilities
GD910_Eng_1.0_0915.indd 53 2009.9.18 10:2:25 PM

54 LG GD910 | User Guide
Adding a city to your world clock
1 On the clock screen, drag your finger across from right
to left to the top menu. Touch Utilities, and select Tools,
and then choose World clock.
2 Press the Send key , and then select New city.
Choose the continent, and then select the city on the
map. Alternatively, touch Select City. and choose from
the list or touch Search, and select the first word of the
city. The city will display on the screen.
3 Touch the city to add it to your World time list.
Using the stopwatch
1 On the clock screen, drag your finger across from right
to left to the top menu. Touch Utilities, select Tools, and
then choose Stopwatch.
2 Touch Start to begin timing.
3 Touch Lap if you want to record lap time.
4 Touch Stop to end the timer.
5 Touch Resume to restart the stopwatch from the
time you stopped it, or touch Reset to start from the
beginning.
STK
This menu may be inactive if your SIM card doesn’t include
STK support services (i.e. SIM Application Toolkit).
Utilities
GD910_Eng_1.0_0915.indd 54 2009.9.18 10:2:25 PM

55
Settings
Personalising your profiles
You can quickly change your profile on
the indicator screen. On the clock screen,
drag your finger across from left to right,
and then touch the profile icon.
TIP! To use Flight mode, select . Flight mode prevents
you from making calls, sending messages or using Bluetooth.
Icon Description Icon Description
Normal profile in use Flight mode is on
Silent profile in use Flight mode is off
Outdoor profile in use
You can personalise each profile setting in the settings
menu.
1 On the clock screen, drag your finger across from right
to left to the top menu. Touch Settings, and then select
Profiles.
2 Choose the profile you want to edit.
3 You can then change all of the sounds and alert options
available in the list, including ringtone, volume, message
alerts and more.
GD910_Eng_1.0_0915.indd 55 2009.9.18 10:2:26 PM

56 LG GD910 | User Guide
Settings
Changing your screen settings
1 On the clock screen, drag your finger across from right
to left to the top menu. Touch Settings, and then select
Screen.
2 Choose from:
Top Menu - Choose the style of the top menu.
Font - Adjust the font size.
Backlight - Choose how long the backlight stays on.
NOTE:
The longer the backlight stays on, the more battery power
it uses and the more often you need to recharge your phone.
Brightness - Adjust the screen brightness.
Lock screen - Choose the clock type on the locked
screen (Digital or Analog).
Action guide - Turn the action guide on or off.
Changing your phone settings
Enjoy the freedom of adapting the GD910 to your
preferences.
1 On the clock screen, drag your finger across from right
to left to the top menu. Touch Settings, and then select
Phone.
2 Choose in the list below.
Date & Time - Adjust your date, time, and daylight
saving settings, or choose to automatically update the
time and date when travelling or for daylight saving
settings.
GD910_Eng_1.0_0915.indd 56 2009.9.18 10:2:26 PM

57
Power save - Change the factory-set power saving
settings: Off, Night only or Always on.
Languages - Change the language on your GD910
display.
Security - Adjust your security settings, including PIN
codes and handset lock.
NOTE: Security code
The default security code is set to ‘0000’ and the security
code is required to delete all phone entries and to activate the
Reset settings menu. The security code default setting can be
modified from the Security > Change codes.
Voice command - Select the voice command feature
enable or disable.
Memory manager - Use the memory manager to
determine how each memory is used and how much
space is available.
- Handset common memory - View the memory
available on your GD910 for Pictures, Sounds and
other items.
- Handset reserved memory - View the memory
available on your handset for SMS, Contacts, Calendar,
the To-do lists, Memos, Alarms and Call history.
- USIM memory - View the memory available on your
USIM Card.
Reset settings - Restores all settings to the factory
defaults.
Information - View the Handset information and the
Phone guide for your GD910.
Settings
GD910_Eng_1.0_0915.indd 57 2009.9.18 10:2:26 PM

58 LG GD910 | User Guide
Changing your Connectivity settings
Your connectivity settings have already been set up by
your network operator, so you can enjoy your new phone
immediately. To change any setting, use this menu:
On the clock screen, drag your finger across from right
to left to the top menu. Touch Settings, and then select
Connectivity. Choose from:
1 Network settings
Select network
- If you select Automatic, the GD910
automatically searches for a network and registers the
handset to the chosen network. This is recommended
for the best service and quality.
NOTE: When your handset loses a network in manual mode, a
message appears on the Idle screen instructing you to select
an available network.
Network mode - Set the type of network to search
for when searching for networks in the Select network
menu.
Preferred lists - If you are using automatic network
search, you can add a preferred network to connect to.
2 Packet data conn.
Set the packet data connection. (When needed/When
available)
3 USB connection mode
You can use your phone with a variety of PC connectivity
and data communications applications though USB.
(Mass storage/PC suite)
Settings
GD910_Eng_1.0_0915.indd 58 2009.9.18 10:2:26 PM

59
Changing your Bluetooth settings
1 On the clock screen, drag your finger across from right
to left to the top menu. Touch Settings, and then select
Bluetooth.
2 Choose Bluetooth on ( ), press the Send key , and
then select Settings. Make your changes to:
My device visibility - Set Visible or Visible for 1 min so
other devices can detect your phone when searching for
Bluetooth devices. If you select Hidden, other devices
will not be able to detect your phone when searching for
Bluetooth devices.
My device name - You can name or rename your
phone as it will appear on other devices. Your phone’s
name will be shown on other devices only when My
device visibility is set to Visible.
Supported services - You can view the list of devices,
such as headsets and handsfree devices, supported by
your Bluetooth-enabled phone.
Remote SIM Mode - Activate remote SIM mode.
My address - Check your Bluetooth address here.
NOTE: To improve security, we recommend that once you have
configured or paired with a device, set Visibility to Hidden. For
incoming connections, regardless of whether the other device
has been paired with your phone, you can choose to accept or
reject the connection.
Settings
GD910_Eng_1.0_0915.indd 59 2009.9.18 10:2:26 PM

60 LG GD910 | User Guide
Pairing with another Bluetooth device
When you pair your GD910 with another device, you can
set up a passcode-protected connection. This means your
pairing is more secure.
1 Check that your Bluetooth is on and Visible. You can
change your visibility in the Settings menu, by selecting
My device visibility and then Visible.
2 Touch Search.
* To turn Bluetooth on:
1 In the Bluetooth menu, touch Bluetooth to turn it on as
shown in the figure below.
2 To turn Bluetooth off, touch Bluetooth again.
If Bluetooth is off, you will see the icon on your
screen.
If Bluetooth is on, you will see the
icon on your
screen.
3 Your GD910 will search for devices. When the search
has completed, you can see the list of devices found and
Refresh will appear on screen.
4 Choose the device you want to pair with, then enter a
passcode, and then choose OK.
Settings
GD910_Eng_1.0_0915.indd 60 2009.9.18 10:2:27 PM

61
5 Your phone will then connect to the other device, for
which you must enter the same passcode.
6 Your passcode protected Bluetooth connection is now
ready.
Using a Bluetooth headset
1 Check that Bluetooth is turned on and Visible.
2 Follow the instructions that came with your headset to
pair the two devices.
3 Touch Ask always or Allow without asking, and then
touch Yes to connect. Your GD910 will automatically
switch to Headset profile.
Sending and receiving files using Bluetooth
Bluetooth is a great way to send and receive files, as no
wires are needed and connection is quick and easy.
You can also connect to a Bluetooth headset to make and
receive calls.
Before you can start sharing files using Bluetooth, you will
need to pair your phone with the other Bluetooth device.
For information on pairing devices, see Pairing with
another Bluetooth device.
TIP! The connection may be improved if there are no solid
objects in between your phone and the other Bluetooth device.
NOTE: Read the user guide of each Bluetooth accessory you
are trying to pair with because the instructions may vary.
Settings
GD910_Eng_1.0_0915.indd 61 2009.9.18 10:2:27 PM

62 LG GD910 | User Guide
To send a file:
1 Open the file you want to send, typically a photo.
2 Press the Send key, and then select Send.
Choose Bluetooth.
3 If you have already paired the Bluetooth device, your
GD910 will not automatically search for other Bluetooth
devices. If not, your GD910 will search for other
Bluetooth-enabled devices within range.
4 Choose the device you want to send the file to, and then
touch Select.
5 Your file will be sent.
TIP! Check the progress bar to make sure your file is sent.
To receive a file:
1 To receive files, your Bluetooth must be On and Visible.
See Changing your Bluetooth settings on the right for
more information.
2 A message will prompt you to accept the file from the
sender. Touch Yes to receive the file.
NOTE: The Bluetooth
®
word mark and logos are owned by
the Bluetooth SIG, Inc, and any use of such marks by LG
Electronics is under licence. Other trademarks and trade
names are those of their respective owners.
Settings
GD910_Eng_1.0_0915.indd 62 2009.9.18 10:2:27 PM

63
You can synchronise your PC with your phone. This will
ensure all your important details and dates match and also
act as a backup to give you peace of mind.
TIP! To do this, you must install the PC Suite
application provided on the CD-ROM or available in a
download from http://update.lgmobile. com. (From www.
lgmobile.com, PRODUCTS > Manual & Software > Go to
Manual & S/W Download Section)
Installing the LG PC Suite on your computer
1 On the clock screen, slide your finger across from right
to left to the top menu. Touch Settings, and then select
Connectivity.
2 Touch USB connection mode.
3 Connect the handset and PC using the USB cable, and
then wait a moment.
4 The installation guide message will appear.
Caution! If the installation guide message is not displayed on
your PC, check your CD-ROM settings in Windows.
5 Insert the supplied CD, or click the download button to
directly download the LG PC Suite program from the
website.
6 Click on the LG PC Suite Installer that appears on your
screen.
PC Suite
GD910_Eng_1.0_0915.indd 63 2009.9.18 10:2:27 PM

64 LG GD910 | User Guide
Connecting your phone and PC
1 Select PC Suite mode from the Connectivity > USB
connection mode menu and then connect the USB
cable to your phone and PC.
2 LG PC Suite will automatically activate on your PC.
Caution!
If LG PC Suite is not activated automatically
on your PC, please check your CD-ROM settings on the PC.
3 Your phone and PC are now connected.
Backing up and restoring your phone’s data
1 Connect your phone to your PC as outlined above.
2 Click on the Backup icon, and then select Backup or
Restore.
3 Choose whether to back up Contents Data and/or
Phonebook/Schedule/To do/Memo Data. Select the
location where you want to back up the data to, or
restore it from. Click OK.
4 Your data will be backed up.
Viewing phone files on your PC
1 Connect your phone to your PC as outlined above.
2 Click on the Manage Files icon.
3 Images and audio files you have saved on your phone
will be displayed on the screen in the LG Phone folder.
PC Suite
GD910_Eng_1.0_0915.indd 64 2009.9.18 10:2:27 PM

65
TIP! Viewing the contents of your phone on your PC helps you
manage files, organise documents and remove content you no
longer need.
Synchronising your contacts
1 Connect the phone to your PC.
2 Click on the Contacts icon.
3 Your PC will now import and display all the contacts
saved on your SIM card and handset.
4 Click on File, and then select Save. You can now select
where you want to save your contacts to.
NOTE: To back up contacts saved to your SIM card, click on
the SIM card folder on the left side of the PC screen. Right-
click on one of your contacts, choose Select all, and then
choose Copy or Move to phone memory.
Right-click on your contacts, and then select Copy to contact.
Now click on the
Handset folder on the left side of the screen,
and all your numbers will be displayed.
Synchronising your messages
1 Connect the phone to your PC.
2 Click on the Messages icon.
3 All your PC and phone messages will be displayed in
folders on the screen.
4 Use the toolbar at the top of your screen to edit and
rearrange messages.
PC Suite
GD910_Eng_1.0_0915.indd 65 2009.9.18 10:2:27 PM

66 LG GD910 | User Guide
PC Suite
Using your phone as a mass storage device
Your phone can be used as a mass storage device.
1 Disconnect your phone from your PC.
2 On the clock screen, drag your finger across from right
to left to the top menu. Touch Settings, and then select
Connectivity.
3 Touch USB connection mode.
4 Touch Mass storage. This mode will be saved.
5 Connect the phone to your PC. Your phone will display
Connected.
6 All your phone files will automatically be stored on your
PC’s hard disk.
NOTE: Your phone must be unplugged from your PC to initiate
mass storage.
GD910_Eng_1.0_0915.indd 66 2009.9.18 10:2:27 PM

67
LG Mobile Phone Software
This section discusses how to update LG mobile phone
software. For more information on installing and using this
software, please visit http://update.lgmobile.com.
The update feature allows you to update your software to
the latest version quickly and conveniently over the Internet,
eliminating the need to visit our service centre.
Since the mobile phone software update program requires
the your full attention for the duration of the update
process, please make sure to read the instructions and
notes that appear at each step before proceeding.
Note that removing the USB cable or batteries during the
update process may seriously damage your mobile phone.
LG assumes no liability for the loss of data during the
update process. It is highly recommended to back up any
important information before updating.
Software Update
GD910_Eng_1.0_0915.indd 67 2009.9.18 10:2:28 PM

68 LG GD910 | User Guide
This chapter lists a number of problems you might
encounter while using your phone. Some problems require
you to call your service provider, but most are easy to
correct yourself.
Message Possible causes Possible Corrective
measures
SIM error There is no SIM
card in the phone,
or you may
have inserted it
incorrectly.
Make sure that the SIM
card is correctly inserted.
No
connection
to the
network
Signal weak
outside network
Move to a higher location,
a window or open space.
Check the service provider
coverage map.
Codes do
not match
When you want to
change a security
code, you must
confirm the new
code, by entering it
again. The two codes
you have entered do
not match.
Contact your service
provider.
Function
cannot be
set
Not supported by
service provider
or registration
required.
Contact your service
provider.
Calls not
available
Dialling error,
New SIM card
inserted, Charge limit
reached.
New network not
authorised. Check for new
restrictions. Contact a
service provider, or reset
limit with PIN2.
Troubleshooting
GD910_Eng_1.0_0915.indd 68 2009.9.18 10:2:28 PM

69
Message Possible causes Possible Corrective
measures
Phone
cannot be
switched
on
On/Off key pressed
too briefly
Battery empty
Battery contacts
dirty
Press On/Off key for at
least 2 seconds.
Charge battery. Check
battery indicator on the
screen.
Clean the contacts.
Charging
error
Battery completely
empty
Temperature out of
operating range
Contact problem
No mains voltage
Charger defective
Wrong charger
Defective battery
Charge battery.
Make sure the
surrounding temperature
is within the operating
range, wait, and then
charge again.
Check the power supply
and connection to the
phone. Check the battery
contacts, and clean them
if necessary.
Plug in to a different
socket, or check the
voltage.
If the charger does not
warm up, replace it.
Only use original LG
accessories.
Replace the battery.
Phone
loses
network
Signal too weak Reconnection to another
service provider is
automatic.
Number
not
permitted
The fixed dial
number function
is on.
Check settings.
Troubleshooting
GD910_Eng_1.0_0915.indd 69 2009.9.18 10:2:28 PM

70 LG GD910 | User Guide
Accessories
There is a variety of accessories, some sold separately, for
your mobile phone. Choose the accessories that meet your
personal needs. Consult your local dealer for availability.
(Items described below may be optional).
NOTE:
• Always use genuine LG accessories.
• Failure to use genuine LG accessories may invalidate
your warranty.
• Accessories may vary in different regions.
Charger
Data cable and CD
Charging cradle
Watch cushion
SIM cap
tool (2)
NOTE:
• Bluetooth Headset is not included, LG recommend
to use a high performance Bluetooth headset for
enhanced communication.
GD910_Eng_1.0_0915.indd 70 2009.9.18 10:2:31 PM

71
Network service / Technical data
Network service
The wireless phone described in this guide is approved for
use on E-GSM 900, DCS 1800, PCS 1900 and WCDMA
2100 networks.
A number of features included in this guide are called
Network Services. These are special services that you
arrange through your wireless service provider. Before
you can take advantage of Network Services, you must
subscribe to them through your service provider and obtain
instructions for their use from your service provider.
Technical data
General
Product name: GD910
System: E-GSM 900 / DCS 1800 /
PCS 1900 / WCDMA 2100
Operating Temperature
Max: +37°C (discharging)
+36°C (charging)
Min: -10°C
GD910_Eng_1.0_0915.indd 71 2009.9.18 10:2:32 PM

and WCDMA
29. Jun. 2009
GD910
GD910_Eng_1.0_0915.indd 72 2009.9.18 10:2:33 PM

TARJETA DE GARANTÍA
1.- Guarde durante todo el período de garantía esta
tarjeta debidamente cumplimentada y sellada por la
tienda junto con la factura de compra.
2.- Cuando requiera cualquier servicio de reparación
deberá mostrar esta tarjeta de garantía.
3.- Para cualquier información sobre nuestros
productos, nuestra compañía, o si tiene cualquier
duda o quiere hacer alguna consulta puede hacerlo
a través de nuestras web o nuestra línea de atención
al cliente.
4.- Lea detenidamente el contenido de esta tarjeta de
garantía.
WC_Spain(80-135)_MCDF0001152.ind1 1 2009.7.4 9:24:29 PM

CERTIFICADO DE GARANTIA COMERCIAL
(Telefonía)
REQUISITOS PARA LA VALIDEZ DE LA GARANTIA
1. La presente garantía sólo ampara productos ociales importados por LG ELECTRONICS
ESPAÑA, S.A., y para beneciarse de la misma deberá:
1.1. En el periodo pre-venta (tienda), ésta deberá reejar modelo del aparato e IMEI del mismo.
1.2 En el periodo de Garantía Comercial (Usuario), será REQUISITO IMPRESCINDIBLE
adjuntar junto a la presente Garantía Comercial debidamente cumplimentada y sellada por
el establecimiento, el original del tiquet o factura de compra con IMEI mecanizado y que
identique el modelo de aparato.
2. Los benecios de la garantía sólo serán válidos si se utilizan los Servicios Técnicos Autorizados
que LG ELECTRONICS ESPAÑA, SA. tiene establecidos en su Red de Asistencia Técnica.
3. El aparato debe ser utilizado de conformidad con las instrucciones que se detallan en su manual.
COBERTURA DE LA GARANTIA
• La garantía se aplica a los modelos de Teléfonos Móviles de marca LG. El periodo de garantía es
el siguiente:
Dispositivo móvil (terminal): 24 meses
Batería y otros consumibles: 6 meses
Accesorios: 24 meses
Medios o soporte de software (CD –roms, tarjetas de memoria, etc): 90 días
• La aplicación de la garantía comienza a partir de la fecha de adquisición
(fecha de factura de compra).
EXCLUSIONES DE LA GARANTIA
• Incumplimiento de cualquiera de los requisitos del punto anterior.
• Todo componente o accesorio interior o exterior del aparato, que no esté especicado e incluido
en este certicado de garantía.
• Las puestas en marcha y demostraciones de funcionamiento al usuario, conguración de
sistemas.
• El desgaste normal por uso (incluido el de baterías, lentes de cámaras, pantallas, auriculares o
manos libres externos).
• Si la avería es producida por incendio, inundación, humedad excesiva, agentes meteorológicos,
golpeo, aplastamiento o aplicación de voltaje o energía inadecuada.
• Los daños por el mal trato, incluso los de transportes, que deberán reclamarse en presencia del
personal de la Compañía de Transportes, por lo que conviene inspeccionar los paquetes antes de
conformar los albaranes de entrega correspondientes.
• Las averías producidas por rotura física, tales como carcasas, plásticos, pinturas, esmaltes,
cristales, embellecedores y similares.
• Los productos por mal uso al no atender las instrucciones de funcionamiento y manejo que se
adjuntan con cada aparato.
• Por la utilización de accesorios no adecuados en el aparato.
• Los aparatos que no llevan identicado número de IMEI y Nº de Serie o que éstos hayan sido
alterados o borrados o no coincidan con el número expresado en el certicado de garantía o
factura de compra.
• Si el aparato es reparado o manipulado (tanto software como hardware) por personal no
autorizado por LG ELECTRONICS ESPAÑA, SA.
• Los trabajos de mantenimiento propios de cada aparato, cualquiera que sea su periodicidad.
• Cuando la avería la produzca un componente o accesorio interno o externo al aparato no incluido
o especicado en este certicado de garantía o los problemas inherentes a la unión de IMEI-
Número de Abonado para la activación en la Red.
WC_Spain(80-135)_MCDF0001152.ind2 2 2009.7.4 9:24:30 PM

NOTA IMPORTANTE
• La presente garantía comercial no afecta a los derechos de que dispone el usuario conforme a las previsiones
contenidas en el RDL 1/2007 de 16 de Noviembre de 2007 (BOE 287 de 30 de Noviembre de 2007), frente a la
garantía por falta de conformidad del vendedor, que son independientes y compatibles con la presente garantía.
• De acuerdo con lo previsto en el Título V, del RDL 1/2007, el usuario tendrá derecho a exigir al vendedor, y/o al
productor en los casos determinados en la Ley, la reparación y sustitución del producto, e incluso, en su caso, la
rebaja en el precio o la resolución del contrato si ello no fuere desproporcionado.
• El titular de la Garantía Comercial disfrutará de los derechos y coberturas que se contienen en el presente
documento, para todo el territorio nacional.
• Para reclamar los derechos y coberturas que se contienen en el presente documento el usuario dispondrá de la
vía de comunicación con nuestro número de Atención al Cliente, por escrito dirigido a las Ocinas Centrales o
Central de Servicios Técnicos y por la vía de jurisdicción ordinaria.
• Durante el tiempo que dure la reparación, no se abonarán daños y perjuicios por el tiempo que el aparato esté
fuera de servicio.
• LG ELECTRONICS ESPANA, SA. no se hace responsable de los daños que un aparato pueda causar a
elementos externos.
PROTECCIÓN DE DATOS DE CARACTER PERSONAL
• De conformidad con la Ley Orgánica 15/1999, le informamos que los datos personales
solicitados, todos ellos obligatorios para la prestación del servicio de Garantía Comercial,
serán incorporados a un chero/s debidamente inscrito/s en el RGPD cuyo responsable es
LG ELECTRONICS ESPAÑA, S.A., con la nalidad de prestarle el servicio, así como para
mantenerle informado de productos o servicios similares. Usted podrá ejercer sus derechos de
acceso, recticación, cancelación y oposición dirigiendo un escrito rmado, acompañado de
fotocopia de su DNI, a la dirección Europa Empresarial, Edif. Madrid, Ctra. N-VI, Km. 24,
Las Rozas (28230 Madrid).
DIRECTORIO DE CONTACTOS LG
902.500.234
Este es nuestro número de atención al cliente para cualquier tipo de consulta, reclamación
o para requerir asistencia técnica.
http://es.lgservice.com
A través de esta web podrá descargarse manuales, actualizaciones de SW y realizar
consultas técnicas por e-mail.
www.lge.es
Esta es nuestra página corporativa donde podrán encontrar información sobre nuestra
compañía.
OFICINAS CENTRALES LG
ELECTRONICS ESPAÑA S.A.
Complejo Europa Empresarial
Edicio Madrid
Ctra. Nacional VI, Km. 24
(28230) Las Rozas- MADRID
Tel: (+34) 91211.22.22
Fax:(+34) 91211.22.46
CENTRAL DE SERVICIOS
TÉCNICOS LG ELECTRONICS
ESPAÑA S.A.
Pol. In. El Oliveral Sector 13
Parcela 27 A
(46190) Ribarroja del Turia - VALENCIA
Tel: (+ 34) 902 500. 234
Fax: (+34) 96 305.05.01
WC_Spain(80-135)_MCDF0001152.ind3 3 2009.7.4 9:24:30 PM

RELLENAR TODOS LOS DATOS POR EL
ESTABLECIMIENTO O TIENDA EN EL
MOMENTO DE LA COMPRA
DATOS DEL USUARIO Y DEL
PRODUCTO
NOMBRE Y APELLIDOS:
DOMICILIO:
C. POSTAL: POBLACIÓN:
PROVINCIA: TELÉFONO:
FECHA DE COMPRA: MODELO:
Nº DE IMEI: SELLO DEL ESTABLECIMIENTO:
WC_Spain(80-135)_MCDF0001152.ind4 4 2009.7.4 9:24:30 PM

Memo
80_135 memo_Gray.indd 2 2009.9.16 12:11:46 PM

Memo
80_135 memo_Gray.indd 1 2009.9.16 12:11:46 PM

Memo
80_135 memo_Gray.indd 2 2009.9.16 12:11:46 PM

Memo
80_135 memo_Gray.indd 1 2009.9.16 12:11:46 PM

Memo
80_135 memo_Gray.indd 2 2009.9.16 12:11:46 PM

Memo
80_135 memo_Gray.indd 1 2009.9.16 12:11:46 PM

Memo
80_135 memo_Gray.indd 2 2009.9.16 12:11:46 PM

Memo
80_135 memo_Gray.indd 1 2009.9.16 12:11:46 PM
-
 1
1
-
 2
2
-
 3
3
-
 4
4
-
 5
5
-
 6
6
-
 7
7
-
 8
8
-
 9
9
-
 10
10
-
 11
11
-
 12
12
-
 13
13
-
 14
14
-
 15
15
-
 16
16
-
 17
17
-
 18
18
-
 19
19
-
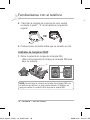 20
20
-
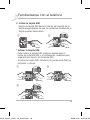 21
21
-
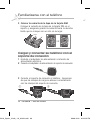 22
22
-
 23
23
-
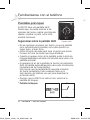 24
24
-
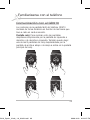 25
25
-
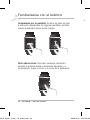 26
26
-
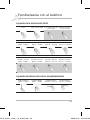 27
27
-
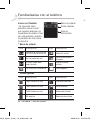 28
28
-
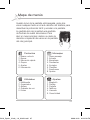 29
29
-
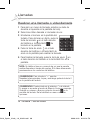 30
30
-
 31
31
-
 32
32
-
 33
33
-
 34
34
-
 35
35
-
 36
36
-
 37
37
-
 38
38
-
 39
39
-
 40
40
-
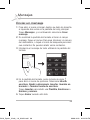 41
41
-
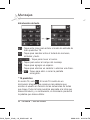 42
42
-
 43
43
-
 44
44
-
 45
45
-
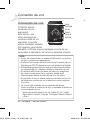 46
46
-
 47
47
-
 48
48
-
 49
49
-
 50
50
-
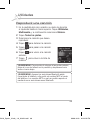 51
51
-
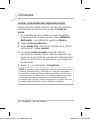 52
52
-
 53
53
-
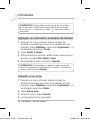 54
54
-
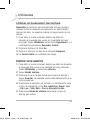 55
55
-
 56
56
-
 57
57
-
 58
58
-
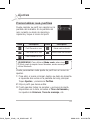 59
59
-
 60
60
-
 61
61
-
 62
62
-
 63
63
-
 64
64
-
 65
65
-
 66
66
-
 67
67
-
 68
68
-
 69
69
-
 70
70
-
 71
71
-
 72
72
-
 73
73
-
 74
74
-
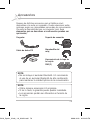 75
75
-
 76
76
-
 77
77
-
 78
78
-
 79
79
-
 80
80
-
 81
81
-
 82
82
-
 83
83
-
 84
84
-
 85
85
-
 86
86
-
 87
87
-
 88
88
-
 89
89
-
 90
90
-
 91
91
-
 92
92
-
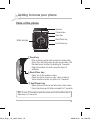 93
93
-
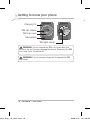 94
94
-
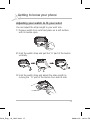 95
95
-
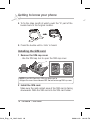 96
96
-
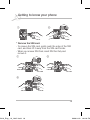 97
97
-
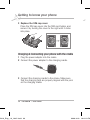 98
98
-
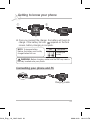 99
99
-
 100
100
-
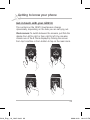 101
101
-
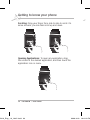 102
102
-
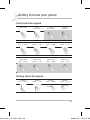 103
103
-
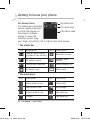 104
104
-
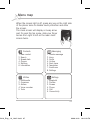 105
105
-
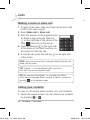 106
106
-
 107
107
-
 108
108
-
 109
109
-
 110
110
-
 111
111
-
 112
112
-
 113
113
-
 114
114
-
 115
115
-
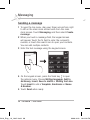 116
116
-
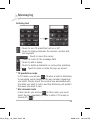 117
117
-
 118
118
-
 119
119
-
 120
120
-
 121
121
-
 122
122
-
 123
123
-
 124
124
-
 125
125
-
 126
126
-
 127
127
-
 128
128
-
 129
129
-
 130
130
-
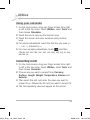 131
131
-
 132
132
-
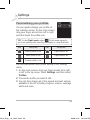 133
133
-
 134
134
-
 135
135
-
 136
136
-
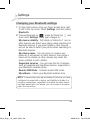 137
137
-
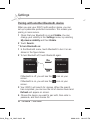 138
138
-
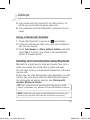 139
139
-
 140
140
-
 141
141
-
 142
142
-
 143
143
-
 144
144
-
 145
145
-
 146
146
-
 147
147
-
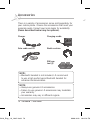 148
148
-
 149
149
-
 150
150
-
 151
151
-
 152
152
-
 153
153
-
 154
154
-
 155
155
-
 156
156
-
 157
157
-
 158
158
-
 159
159
-
 160
160
-
 161
161
-
 162
162


en otros idiomas
- English: LG GD910 User manual
Artículos relacionados
-
Sony GD910.ASEABK Manual de usuario
-
LG GT540.ARUSBK Manual de usuario
-
-
LG Série LGE720.ADEUBK Manual de usuario
-
LG GT540G.ACAPTS Manual de usuario
-
-
LG KM900G.ACAPSV Manual de usuario
-
LG Série GM310.ACISBK Manual de usuario
-
LG Optimus L5 Vodafone Guía del usuario
-
LG Série LGT320.ABUOTL Manual de usuario