LG 60PN6500 El manual del propietario

Categoría
Televisores LED
Tipo
El manual del propietario
www.lg.com
Please read this manual carefully before operating your set
and retain it for future reference.
P/NO : MFL67701704 (1308-REV05)
OWNER’S MANUAL
PLASMA TV
42PN4500
50PN4500
60PN5000 50PN5300
60PN5300
50PN6500
60PN6500
60PN6550
ENGLISH
2
IMPORTANT SAFETY INSTRUCTIONS
Do not use this apparatus near water.
Short-circuit
Breaker
Power Supply
Clean only with a dry cloth.
Short-circuit
Breaker
Power Supply
Do not block any ventilation openings. Install in
accordance with the manufacturer’s instructions.
Short-circuit
Breaker
Power Supply
Do not install near any heat sources such as
radiators, heat registers, stoves, or other apparatus
(including amplifiers) that produce heat.
Short-circuit
Breaker
Power Supply
Do not defeat the safety purpose of the polarized
or grounding-type plug. A polarized plug has two
blades with one wider than the other. A grounding
type plug has two blades and a third grounding
prong. The wide blade or the third prong are
provided for your safety. If the provided plug does
not fit into your outlet, consult an electrician for
replacement of the obsolete outlet (Can differ by
country).
Short-circuit
Breaker
Power Supply
Do not press strongly upon the panel with a hand or
a sharp object such as a nail, pencil or pen, or make
a scratch on it.
Short-circuit
Breaker
Power Supply
IMPORTANT SAFETY INSTRUCTIONS
Always comply with the following precautions to avoid dangerous situations and ensure peak performance of your
product.
Read these instructions.
Keep these instructions.
Heed all warnings.
Follow all instructions.
Short-circuit
Breaker
Power Supply
WARNING/CAUTION
RISK OF ELECTRIC SHOCK
DO NOT OPEN
TO REDUCE THE RISK OF ELECTRIC SHOCK
DO NOT REMOVE COVER (OR BACK). NO
USER SERVICEABLE PARTS INSIDE. REFER TO
QUALIFIED SERVICE PERSONNEL.
WARNING/CAUTION
RISK OF ELECTRIC SHOCK
DO NOT OPEN
The lightning flash with arrowhead symbol,
within an equilateral triangle, is intended to
alert the user to the presence of
uninsulated “dangerous voltage” within the
product’s enclosure that may be of sufficient
magnitude to constitute a risk of electric shock to
persons.
WARNING/CAUTION
RISK OF ELECTRIC SHOCK
DO NOT OPEN
The exclamation point within an equilateral
triangle is intended to alert the user to the
presence of important operating and
maintenance (servicing) instructions in the
literature accompanying the appliance.
WARNING/CAUTION
- TO REDUCE THE RISK OF FIRE AND ELECTRIC
SHOCK, DO NOT EXPOSE THIS PRODUCT TO
RAIN OR MOISTURE.
WARNING
If you ignore the warning message, you may be
seriously injured or there is a possibility of accident
or death.
CAUTION
If you ignore the caution message, you may be
slightly injured or the product may be damaged.
NOTE
The note helps you understand and use the product
safely. Please read the note carefully before using
the product.
ENGLISH
3
IMPORTANT SAFETY INSTRUCTIONS
y
Protect the power cord from being walked on
or pinched particularly at plugs, convenience
receptacles, and the point where they exit from the
apparatus.
Short-circuit
Breaker
Power Supply
y
Only use attachments/accessories specified by the
manufacturer.
Short-circuit
Breaker
Power Supply
y
Use only with a cart, stand, tripod, bracket, or table
specified by the manufacturer, or sold with the
apparatus. When a cart is used, use caution when
moving the cart/apparatus combination to avoid
injury from tip-over.
Short-circuit
Breaker
Power Supply
y
Unplug this apparatus during lightning storms or
when unused for long periods of time.
Short-circuit
Breaker
Power Supply
y
Refer all servicing to qualified service personnel.
Servicing is required when the apparatus has been
damaged in any way, such as power-supply cord or
plug is damaged, liquid has been spilled or objects
have fallen into the apparatus, the apparatus has
been exposed to rain or moisture, does not operate
normally, or has been dropped.
Short-circuit
Breaker
Power Supply
y
Do not stick metal objects or any other conductive
material into the power cord. Do not touch the end
of the power cord while it is plugged in.
y
Keep the packing anti-moisture material or vinyl
packing out of the reach of children. Anti-moisture
material is harmful if swallowed. If swallowed
by mistake, force the patient to vomit and visit
the nearest hospital. Additionally, vinyl packing
can cause suffocation. Keep it out of the reach of
children.
y
CAUTION concerning the Power Cord
(Can differ by country):
It is recommended that appliances be placed upon a
dedicated circuit; that is, a single outlet circuit which
powers only that appliance and has no additional
outlets or branch circuits. Check the specification
page of this owner’s manual to be certain. Do
not connect too many appliances to the same AC
power outlet as this could result in fire or electric
shock. Do not overload wall outlets. Overloaded
wall outlets, loose or damaged wall outlets,
extension cords, frayed power cords, or damaged or
cracked wire insulation are dangerous. Any of these
conditions could result in electric shock or fire.
Periodically examine the cord of your appliance, and
if its appearance indicates damage or deterioration,
unplug it, discontinue use of the appliance, and have
the cord replaced with an exact replacement part
by an authorized service. Protect the power cord
from physical or mechanical abuse, such as being
twisted, kinked, pinched, closed in a door, or walked
upon. Pay particular attention to plugs, wall outlets,
and the point where the cord exits the appliance. Do
not move the TV with the power cord plugged in.
Do not use a damaged or loose power cord. Be sure
do grasp the plug when unplugging the power cord.
Do not pull on the power cord to unplug the TV.
Short-circuit
Breaker
Power Supply
y
Warning
- To reduce the risk of fire or electrical
shock, do not expose this product to rain, moisture
or other liquids. Do not touch the TV with wet
hands. Do not install this product near flammable
objects such as gasoline or candles, or expose the
TV to direct air conditioning.
Short-circuit
Breaker
Power Supply
y
Do not expose to dripping or splashing and do not
place objects filled with liquids, such as vases, cups,
etc. on or over the apparatus (e.g. on shelves above
the unit).
Short-circuit
Breaker
Power Supply
ENGLISH
4
IMPORTANT SAFETY INSTRUCTIONS
y
Grounding
(Except for devices which are not grounded.)
Ensure that you connect the earth ground wire to
prevent possible electric shock (i.e. a TV with a
three-prong grounded AC plug must be connected
to a three-prong grounded AC outlet). If grounding
methods are not possible, have a qualified
electrician install a separate circuit breaker. Do not
try to ground the unit by connecting it to telephone
wires, lightening rods, or gas pipes.
Short-circuit
Breaker
Power Supply
y
As long as this unit is connected to the AC wall
outlet, it is not disconnected from the AC power
source even if the unit is turned off.
y
Do not attempt to modify this product in any way
without written authorization from LG Electronics.
Unauthorized modification could void the user’s
authority to operate this product.
y
Outdoor Antenna Grounding
(Can differ by country):
If an outdoor antenna is installed, follow the
precautions below. An outdoor antenna system
should not be located in the vicinity of overhead
power lines or other electric light or power circuits,
or where it can come in contact with such power
lines or circuits as death or serious injury can occur.
Be sure the antenna system is grounded so as to
provide some protection against voltage surges
and built-up static charges. Section 810 of the
National Electrical Code (NEC) in the U.S.A. provides
information with respect to proper grounding of the
mast and supporting structure, grounding of the
lead-in wire to an antenna discharge unit, size of
grounding conductors, location of antenna discharge
unit, connection to grounding electrodes and
requirements for the grounding electrode.
Antenna grounding according to the National
Electrical Code, ANSI/NFPA 70
Ground Clamp
Grounding Conductor
(NEC Section 810-21)
Antenna Lead in Wire
Electric Service
Equipment
Antenna Discharge Unit
(NEC Section 810-20)
Ground Clamp
Power Service Grounding
Electrode System
(NEC Art 250, Part H)
NEC: National Electrical Code
y
Cleaning
When cleaning, unplug the power cord and wipe
gently with a soft cloth to prevent scratching. Do
not spray water or other liquids directly on the TV
as electric shock may occur. Do not clean with
chemicals such as alcohol, thinners or benzine.
y
Moving
Make sure the product is turned off, unplugged
and all cables have been removed. It may take 2 or
more people to carry larger TVs. Do not press or put
stress on the front panel of the TV.
y
Ventilation
Install your TV where there is proper ventilation. Do
not install in a confined space such as a bookcase.
Do not cover the product with cloth or other
materials while plugged. Do not install in excessively
dusty places.
y
If you smell smoke or other odors coming from
the TV, unplug the power cord and contact an
authorized service center.
y
Keep the product away from direct sunlight.
y
Never touch this apparatus or antenna during a
thunder or lightning storm.
y
When mounting a TV on the wall, make sure not
to install the TV by hanging the power and signal
cables on the back of the TV.
y
Do not allow an impact shock or any objects to fall
into the product, and do not drop anything onto the
screen.
y
Disconnecting the Main Power
The power outlet used with this device must remain
easily accessible.
y
Store the accessories (battery, etc.) in a safe
location out of the reach of children.
y
This apparatus use batteries. In your community
there might be regulations that require you
to dispose of these batteries properly due to
environmental considerations. Please contact your
local authorities for disposal or recycling information.
y
Do not dispose of batteries in a fire.
y
Do not short circuit, disassemble or allow the
batteries to overheat.
ENGLISH
5
IMPORTANT SAFETY INSTRUCTIONS
For USA and Canada
FCC NOTICE
This equipment has been tested and found to
comply with the limits for a Class B digital device,
pursuant to Part 15 of the FCC Rules. These limits
are designed to provide reasonable protection against
harmful interference in a residential installation. This
equipment generates, uses and can radiate radio
frequency energy and, if not installed and used in
accordance with the instructions, may cause harmful
interference to radio communications. However, there
is no guarantee that interference will not occur in a
particular installation. If this equipment does cause
harmful interference to radio or television reception,
which can be determined by turning the equipment
off and on, the user is encouraged to try to correct
the interference by one or more of the following
measures:
- Reorient or relocate the receiving antenna.
- Increase the separation between the equipment
and the receiver.
- Connect the equipment to an outlet on a circuit
different from that to which the receiver is
connected.
- Consult the dealer or an experienced radio/TV
technician for help.
This device complies with part 15 of the FCC Rules.
Operation is subject to the following two conditions:
(1) this device may not cause harmful interference and
(2) this device must accept any interference received,
including interference that may cause undesired
operation of the device.
Any changes or modifications in construction of this
device which are not expressly approved by the party
responsible for compliance could void the user’s
authority to operate the equipment.
NOTE TO CABLE/TV INSTALLER
This reminder is provided to call the CATV system
installer’s attention to Article 820-40 of the National
Electric Code (U.S.A.). The code provides guidelines
for proper grounding and, in particular, specifies that
the cable ground shall be connected to the grounding
system of the building, as close to the point of the
cable entry as practical.
y
Dot Defect
The Plasma or LCD panel is a high technology
product with resolution of two million to six million
pixels. In a very few cases, you could see fine dots
on the screen while you’re viewing the TV. Those
dots are deactivated pixels and do not affect the
performance and reliability of the TV.
y
Generated Sound
“Cracking” noise: A cracking noise that occurs
when watching or turning off the TV is generated by
plastic thermal contraction due to temperature and
humidity. This noise is common for products where
thermal deformation is required.
Electrical circuit humming/panel buzzing: A low level
noise is generated from a high-speed switching
circuit, which supplies a large amount of current
to operate a product. It varies depending on the
product.
This generated sound does not affect the
performance and reliability of the product.
y
Take care not to touch the ventilation openings.
When watching the TV for a long period, the
ventilation openings may become hot. This does
not affect the performance of the product or cause
defects in the product.
Preventing “Image burn” or “Burn-in” on your TV
screen
y
If a fixed image displays on the TV screen for a long
period of time, it will be imprinted and become a
permanent disfigurement on the screen. This is
“image burn” or “burn-in” and not covered by the
warranty.
y
If the aspect ratio of the TV is set to 4:3 for a
long period of time, image burn may occur on the
letterboxed area of the screen.
y
Avoid displaying a fixed image on the TV screen for
a long period of time (2 or more hours for LCD, 1
or more hours for the Plasma TV) to prevent image
burn.
ENGLISH
6
LICENSES
LICENSES
Supported licenses may differ by model. For more information about licenses, visit 'www.lg.com'.
Manufactured under license from Dolby Laboratories. “Dolby” and the double-D symbol are
trademarks of Dolby Laboratories.
The terms HDMI and HDMI High-Definition Multimedia Interface, and the HDMI logo are
trademarks or registered trademarks of HDMI Licensing LLC in the United States and other
countries.
ENGLISH
7
TABLE OF CONTENTS
TABLE OF CONTENTS
2 IMPORTANT SAFETY INSTRUCTIONS
6 LICENSES
7 TABLE OF CONTENTS
8 INSTALLATION PROCEDURE
8 ASSEMBLING AND PREPARING
8 Unpacking
10 Parts and buttons
11 Additional information of the manual
11 Lifting and moving the TV
12 Setting up the TV
12 - Attaching the stand
14 - Mounting on a table
15 - Mounting on a wall
16 - Tidying cables
17 MAKING CONNECTIONS
17 Connecting to an antenna or cable
18 Connecting to a HD receiver, DVD Player or VCR
18 - HDMI Connection
19 - DVI to HDMI Connection
20 - Component Connection
21 - Composite Connection
22 Connecting to a PC
22 - HDMI Connection or DVI to HDMI Connection
24 Connecting to an Audio System
24 - Digital Optical Audio Connection
24 Connecting a USB Device
y
Image shown may differ from your TV.
y
Your TV’s OSD (On Screen Display) may differ
slightly from that shown in this manual.
y
The available menus and options may differ from
the input source or product model that you are
using.
y
New features may be added to this TV in the
future.
NOTE
25 REMOTE CONTROL
27 WATCHING TV
27 Turning the TV on for the first time
28 TROUBLESHOOTING
29 EXTERNAL CONTROL DEVICE SETUP
30 SPECIFICATIONS
ENGLISH
8
INSTALLATION PROCEDURE / ASSEMBLING AND PREPARING
ASSEMBLING AND PREPARING
Unpacking
Check your product box for the following items. If there are any missing accessories, contact the local dealer where you
purchased your product. The illustrations in this manual may differ from the actual product and item.
INSTALLATION PROCEDURE
1
Open the package and make sure all the accessories are included.
2
Attach the stand to the TV set.
3
Connect an external device to the TV set.
Remote control,
Batteries (AAA)
(See p.25)
Owner’s manual,
CD manual
Power Cord
(For 42PN4500) (For 50PN4500, 60PN5000,
50/60PN5300,50/60PN6500,
60PN6550)
(For 42PN4500)
Stand Screws
7 EA, M4 x 14
(See p.12)
Stand Screws
7 EA, M5 x 16
(See p.12)
Desk-mount Screw
(See p.14)
(For 50PN4500, 50PN5300,
50PN6500)
Protection Cover
(See p.13)
Power Cord holder
(Depending on model)
(See p.16)
Stand Body, Stand Base
(See p.12)
Ferrite core
(Depending on model)
(See p.9)
ENGLISH
9
ASSEMBLING AND PREPARING
CAUTION
y
Do not use any unapproved items to ensure the safety and product life span.
y
Any damages or injuries by using unapproved items are not covered by the warranty.
y
Some models appear to have a thin film on the screen. It is actually part of the screen, do not remove it.
NOTE
y
The items supplied with your product may vary depending on the model.
y
Product specifications or contents of this manual may be changed without prior notice due to upgrade of product
functions.
y
For an optimal connection, HDMI cables and USB devices should have bezels less than 10 mm (0.39 inches)
thick and 18 mm (0.7 inches) width. Use an extension cable that supports USB 2.0 if the USB cable or USB
memory stick does not fit into your TV's USB port.
B
A
A
B
*A 10 mm (0.39 inches)
*B 18 mm (0.7 inches)
y
How to use the ferrite core
- If there are two ferrite cores, follow as shown in Figures 1-1 & 2-1 (or 2-2).
- If there are three ferrite cores, follow as shown in Figures 1-2 & 2-1 (or 2-2).
1 Use the ferrite core to reduce the electromagnetic interference in the power cable.
Wind the power cable on the ferrite core once. Place the ferrite core close to the TV and a wall
plug.
[Figure 1-1]
[to the TV]
[to a wall plug]
[Figure 1-2]
[to the TV]
[to a wall plug]
2 Use the ferrite core to reduce the electromagnetic interference in the cable.
Place the ferrite core close to the TV.
[Figure 2-2]
[to the TV]
[to the TV]
[to an External device]
[to an External device]
[Figure 2-1]
10 mm(+ / - 5 mm)
10 mm(+ / - 5 mm)
Wind the component cable on the ferrite core once.
Wind the PC audio cable on the ferrite core once.
(Black)
[Cross Section of
Ferrite Core]
(Black)
[Cross Section of
Ferrite Core]
ENGLISH
10
ASSEMBLING AND PREPARING
Parts and buttons
Button Description
/ Scrolls through the saved channels.
/
Adjusts the volume level.
Selects the highlighted menu option or confirms an input.
Accesses the main menus, or saves your input and exits the menus.
Changes the input source.
Turns the power on or off.
Screen
Buttons
Speakers
Remote control sensor
Power indicator
ENGLISH
11
ASSEMBLING AND PREPARING
Lifting and moving the TV
When moving or lifting the TV, read the following to
prevent the TV from being scratched or damaged and for
safe transportation regardless of its type and size.
y
Avoid touching the screen at all times, as this
may result in damage to the screen.
CAUTION
y
It is recommended to move the TV in the box or
packing material that the TV originally came in.
y
Before moving or lifting the TV, disconnect the
power cord and all cables.
y
When holding the TV, the screen should face
away from you to avoid damage.
y
Hold the top and bottom of the TV frame firmly.
Make sure not to hold the transparent part,
speaker, or speaker grill area.
y
When transporting a large TV, there should be at
least 2 people.
y
When transporting the TV by hand, hold the TV as
shown in the following illustration.
y
When transporting the TV, do not expose the TV
to jolts or excessive vibration.
y
When transporting the TV, keep the TV upright,
never turn the TV on its side or tilt towards the left
or right.
Additional information of the
manual
Viewing the owner's manual
The owner’s manual in PDF file format is supplied on the
enclosed CD. Install the Adobe Acrobat Reader to view
the owner’s manual on your PC.
1
Insert the supplied CD.
The web page appears automatically.
2
Click Owner’s Manual on the web page.
3
View the owner’s manual.
y
If the web page does not appear automatically,
access My computer and then click LG and
index.
html
to view the owner’s manual.
NOTE
ENGLISH
12
ASSEMBLING AND PREPARING
Setting up the TV
You can mount your TV to a wall or attach the stand if you wish to place the TV on an entertainment center or other
furniture.
Attaching the stand
If you are not mounting the TV to a wall, use the following instructions to attach the stand.
CAUTION
y
When attaching the stand to the TV set, place the screen facing down on a cushioned table or flat surface to
protect the screen from scratches.
y
Make sure that the screws are fastened completely. (If they are not fastened securely enough, the TV may tilt
forward after being installed.)
y
Do not fasten the screws with too much force; otherwise they may be worn out and get loosened.
1
3
Front
Stand Body
Stand Base
For 42PN4500
M4 x 14
3 EA
For 50PN4500, 60PN5000,
50/60PN5300, 50/60PN6500,
60PN6550
M5 x 16
3 EA
2
For 42PN4500
M4 x 14
4 EA
For 50PN4500, 60PN5000,
50/60PN5300, 50/60PN6500,
60PN6550
M5 x 16
4 EA
ENGLISH
13
ASSEMBLING AND PREPARING
To detach the stand,
1
NOTE
y
Remove the stand before installing the TV on a
wall mount by performing the stand attachment
in reverse.
y
When installing the wall mounting bracket,
use the Protection cover. This will protect the
opening from accumulating dust and dirt.
2
For 50PN4500, 50PN5300, 50PN6500
Protection cover
1
2
M5 x 16
4 EA
M5 x 16
1 EA
ENGLISH
14
ASSEMBLING AND PREPARING
Mounting on a table
1
Lift and tilt the TV into its upright position on a table.
- Leave a 10 cm (4 inches) (minimum) space from
the wall for proper ventilation.
10 cm
10 cm
10 cm
10 cm
2
Connect the power cord to a wall outlet.
CAUTION
y
Do not place the TV near or on sources
of heat, as this may result in fire or other
damage.
Adjusting the angle of the TV to suit view
Swivel 20 degrees to the left or right and adjust the
angle of the TV to suit your view.
20˚20˚
CAUTION
y
When adjusting the angle of the TV, watch out for
your fingers.
- Personal injury may occur if hands or fingers are
pinched. If the product is tilted too much, it may
fall, causing damage or injury.
(4 inches)
Securing the TV to a table
(For 42PN4500)
Fix the TV to a table to prevent from tilting forward,
damage, and potential injury.
Mount the TV on a table, and then insert and tighten the
supplied screw on the rear of the stand.
y
To prevent TV from falling over, the TV should be
securely attached to the floor/wall per installation
instructions. Tipping, shaking, or rocking the TV
may cause injury.
WARNING
ENGLISH
15
ASSEMBLING AND PREPARING
Securing the TV to a wall (optional)
(Depending on model)
1
Insert and tighten the eye-bolts, or TV brackets and
bolts on the back of the TV.
- If there are bolts inserted at the eye-bolts position,
remove the bolts first.
2
Mount the wall brackets with the bolts to the wall.
Match the location of the wall bracket and the eye-
bolts on the rear of the TV.
3
Connect the eye-bolts and wall brackets tightly with
a sturdy rope.
Make sure to keep the rope horizontal with the flat
surface.
y
Make sure that children do not climb on or hang
on the TV.
CAUTION
y
Use a platform or cabinet that is strong and large
enough to support the TV securely.
y
Brackets, bolts and ropes are optional. You can
obtain additional accessories from your local
dealer.
NOTE
Mounting on a wall
An optional wall mount can be used with your LG
Television. Consult with your local dealer for a wall
mount that supports the VESA standard used by your
TV model. Carefully attach the wall mount bracket at the
rear of the TV. Install the wall mount bracket on a solid
wall perpendicular to the floor. If you are attaching the
TV to other building materials, please contact qualified
personnel to install the wall mount. Detailed instructions
will be included with the wall mount. We recommend
that you use an LG brand wall mount.
10 cm
10 cm
10 cm
10 cm
(4 inches)
Make sure to use screws and wall mounts that meet the
VESA standard. Standard dimensions for the wall mount
kits are described in the following table.
Model 42/50PN4500
60PN5000
50/60PN5300
50/60PN6500
60PN6550
VESA (A x B)
A
B
400 x 400
Standard screw M6
Number of screws 4
Wall mount bracket
(optional)
PSW420BX
ENGLISH
16
ASSEMBLING AND PREPARING
CAUTION
y
Disconnect the power before moving or installing
the TV. Otherwise electric shock may occur.
y
If you install the TV on a ceiling or slanted wall,
it may fall and result in severe injury. Use an
authorized LG wall mount and contact the local
dealer or qualified personnel.
y
Do not over tighten the screws as this may cause
damage to the TV and void your warranty.
y
Use only screws and wall mounts that meet
the VESA standard. Any damages or injuries by
misuse or using an improper accessory are not
covered by the warranty.
NOTE
y
Use only screws that are listed on the VESA
standard screw specifications.
y
The wall mount kit includes an installation manual
and necessary parts.
y
The wall mount bracket is optional. You can obtain
additional accessories from your local dealer.
y
The length of screws may differ depending on the
wall mount. Make sure to use the proper length.
y
For more information, refer to the manual supplied
with the wall mount.
Tidying cables
1
Install the power cord holder and power cord. It will
help prevent the power cable from being removed
by accident.
2
Gather and bind the cables with the cable holder.
(For 42PN4500)
Power Cord Holder
(Depending on model)
Cable Holder
(For 50PN4500, 60PN5000, 50/60PN5300, 50/60PN6500,
60PN6550)
Cable Holder
Power Cord Holder
(Depending on model)
CAUTION
y
Do not move the TV by holding the cable holder
and power cord holder, as the cable holders may
break, and injuries and damage to the TV may
occur.
NOTE
y
If you install the TV on a Wall, detach the cable
holder from stand body and attach it to the
protection cover or to the back cover to help keep
the cables organize.
ENGLISH
17
MAKING CONNECTIONS
MAKING CONNECTIONS
You can connect various external devices to the TV. Supported external devices are: HD receivers, DVD players, VCRs,
audio systems, USB storage devices, PC, gaming devices, and other external devices. For more information on external
device’s connection, refer to the manual provided with each device.
NOTE
y
If you record a TV program on a DVD recorder or VCR, make sure to connect the TV signal input cable to the
TV through a DVD recorder or VCR. For more information on recording, refer to the manual provided with the
connected device.
y
The external device connections shown may differ slightly from illustrations in this manual.
y
Connect external devices to the TV regardless of the order of the TV port.
y
If you connect a gaming device to the TV, use the cable supplied with the gaming device.
y
Refer to the external equipment’s manual for operating instructions.
Connecting to an antenna or cable
Connect an antenna, cable, or cable box to watch TV while referring to the following. The illustrations may differ from the
actual items and a RF cable is optional.
NOTE
y
Use a signal splitter to use more than 2 TVs.
y
Visit http://lgknowledgebase.com for more
information about the antenna and cable
connection. Search for antenna.
y
DTV Audio Supported Codec: MPEG, Dolby Digital
CAUTION
y
Make sure not to bend the copper wire of the RF
cable.
Copper wire
y
Complete all connections between devices, and
then connect the power cord to the power outlet
to prevent damage to your TV.
ANTENNA/
CABLE IN
VHF Antenna
UHF Antenna
Antenna
Terminal
Coaxial (75Ω)
(*Not Provided)
Tidying cables
1
Install the power cord holder and power cord. It will
help prevent the power cable from being removed
by accident.
2
Gather and bind the cables with the cable holder.
(For 42PN4500)
(For 50PN4500, 60PN5000, 50/60PN5300, 50/60PN6500,
60PN6550)
CAUTION
y
Do not move the TV by holding the cable holder
and power cord holder, as the cable holders may
break, and injuries and damage to the TV may
occur.
ENGLISH
18
MAKING CONNECTIONS
Connecting to a HD receiver, DVD Player or VCR
Connect a HD receiver, DVD Player or VCR to the TV and select an appropriate input mode.
HDMI Connection
HDMI is the best way to connect a device.
Transmits digital video and audio signals from an external device to the TV. Connect the external device and the TV with
the HDMI cable as shown in the following illustration.
NOTE
y
Use the latest High Speed HDMI™ Cable that supports CEC (Customer Electronics Control) function.
y
High Speed HDMI™ Cables are tested to carry an HD signal up to 1080p and higher.
y
HDMI Audio Supporeted Format: PCM (Up to 192 kHz, 32 kHz / 44.1 kHz / 48 kHz / 96 kHz / 192 kHz)
-> Not supported DTS.
IN 2
HDMI
IN 1 (PC)
(*Not Provided)
DVD / Blu-Ray / HD Cable Box / HD STB
Choose any HDMI IN input port to connect.
It does not matter which port you use.
ENGLISH
19
MAKING CONNECTIONS
DVI to HDMI Connection
Transmits the digital video signal from an external device to the TV. Connect the external device and the TV with the
DVI-HDMI cable as shown in the following illustration. To transmit an audio signal, connect an audio cable.
NOTE
y
When using the HDMI/DVI cable, Single link is only supported.
COMPONENT
IN
L
P
B
P
R
R
Y
V
IDE
O
AUDIO
R
L/MONO
AV
IN
AUDIO IN (PC)
$8',2287
'9,287
IN 1 (PC)
V
IDE
O
AUDIO
(*Not Provided)
(*Not Provided)
DVD / Blu-Ray / HD Cable Box
RED
WHITE
ENGLISH
20
MAKING CONNECTIONS
AUDIO
VIDEO
L R
COMPONENT
IN
VIDEO
AUDIO
LP
B
P
R
R
Y
VIDEO
AUDIO
R
L/MONO
AV IN
AUDIO IN (PC)
Component Connection
Transmits the analog video and audio signals from an external device to the TV. Connect the external device and the TV
with the component cable as shown in the following illustration.
NOTE
y
If cables are installed incorrectly, it could cause the image to display in black and white or with distorted color.
y
Check to ensure each cable is matched with the corresponding color connection.
(*Not Provided)
(*Not Provided)
DVD / Blu-Ray / HD Cable Box
GREEN
GREEN
BLUEBLUE
REDRED
RED
WHITE
WHITE
RED
ENGLISH
21
MAKING CONNECTIONS
Composite Connection
Transmits the analog video and audio signals from an external device to the TV. Connect the external device and the TV
with the composite cable as shown in the following illustration.
NOTE
y
If you have a mono VCR, connect the audio cable from the VCR to the AUDIO L/MONO jack of the TV.
COMPONENT
IN
V
IDEO
AU
DI
O
L
P
B
P
R
R
Y
VIDEO
AUDIO
R
L/MONO
AV IN
AUDIO IN (PC)
VIDEO
MONO
( )
AUDIOL R
VCR / DVD / Blu-Ray / HD Cable Box
YELLOW
WHITE
RED
YELLOW
WHITE
RED
(*Not Provided)
ENGLISH
22
MAKING CONNECTIONS
HDMI Connection or DVI to HDMI Connection
Choose method A or B to make connection.
Method A: HDMI Connection
IN 1 (PC)
HDMI
COMPONENT
IN
L
P
B
P
R
R
Y
V
IDE
O
AUDIO
R
L/MONO
AV I
N
AUDIO IN (PC)
$8',2287
'9,287
IN 1 (PC)
V
IDE
O
AUDIO
PC
(*Not Provided)
Connecting to a PC
NOTE
y
It is recommended to use an HDMI connection for the best image quality.
y
Depending on the graphics card, DOS mode may not work if a HDMI to DVI Cable is in use.
y
In PC mode, there may be noise associated with the resolution, vertical pattern, contrast or brightness. If noise
is present, change the PC output to another resolution, change the refresh rate to another rate or adjust the
brightness and contrast on the PICTURE menu until the picture is clear.
y
The synchronization input form for Horizontal and Vertical frequencies is separate.
y
Depending on the graphics card, some resolution settings may not allow the image to be positioned on the screen
properly.
y
When using the HDMI/DVI cable, Single link is only supported.
ENGLISH
23
MAKING CONNECTIONS
Method B: DVI to HDMI Connection
IN 1 (PC)
HDMI
COMPONENT
IN
L
P
B
P
R
R
Y
V
IDE
O
AUDIO
R
L/MONO
AV I
N
AUDIO IN (PC)
$8',2287
'9,287
IN 1 (PC)
V
IDE
O
AUDIO
PC
(*Not Provided)
(*Not Provided)
RED
WHITE
ENGLISH
24
MAKING CONNECTIONS
Connecting to an Audio System
You can use an optional external audio system instead of the built-in speaker.
NOTE
y
If you use an optional external audio device instead of the built-in speaker, set the TV speaker feature to off.
Digital Optical Audio Connection
Transmits the digital audio signal from the TV to an external device. Connect the external device and the TV with the
optical audio cable as shown in the following illustration.
OPTICAL
AUDIO IN
OPTICAL
DIGITAL
AUDIO OUT
(*Not Provided)
Digital Audio System
Connecting a USB Device
Connect a USB storage device such as a USB flash memory, external hard drive, or a USB memory card reader to the TV
and access the USB menu to use various multimedia files.
USB IN
USB
(*Not Provided)
ENGLISH
25
REMOTE CONTROL
REMOTE CONTROL
The descriptions in this manual are based on the buttons on the remote control.
Please read this manual carefully and use the TV correctly.
To install batteries, open the battery cover, replace batteries (1.5 V AAA) matching the
and
ends to the label inside the compartment, and close the battery cover. To remove the
batteries, perform the installation actions in reverse.
CAUTION
y
Do not mix old and new batteries, as this may damage the remote control.
This remote uses infrared light. When in use, it should be pointed in the direction of the TV’s remote sensor.
(POWER)
Turns the TV on or off.
TV
Returns to the last TV channel.
CAPTION
Activates or deactivate the subtitles.
AV MODE
Selects an AV mode.
RATIO
Resizes an image.
INPUT
Changes the input source. Turns the TV on if it is off.
Number button
Enters numbers.
LIST
Accesses the saved channel list.
- (Dash)
Inserts a dash between numbers such as 2-1 and 2-2.
FLASHBK
Alternates between the two last channels selected (pressing
repeatedly).
ENGLISH
26
REMOTE CONTROL
VOL
Adjusts the volume level.
FAV
Accesses your favorite channel list.
Selects a menu or option.
AUDIO
Digital signal: Changes the audio language.
Analog signal: Changes the MTS sound.
MUTE
Mutes all sounds.
^
CH
v
Scrolls through the saved channels.
^
PAGE
v
Moves to the previous or next screen.
PICTURE
Changes the image mode.
INFO
Shows information on the current program.
SOUND
Changes the sound mode.
SETTINGS
Accesses the main menu.
Q. MENU
Accesses the quick menu.
Navigation buttons
(up/down/left/right)
Scrolls through menus or options.
OK
Selects menus or options and confirms your input.
BACK
Returns to the previous level.
EXIT
Clears all on-screen displays and returns to TV viewing.
Accesses the AV devices connected to the TV;
Opens the SIMPLINK menu.
SLEEP
Sets the length of time until the TV to turns off.
Control buttons (
,
,
,
,
)
Controls the SIMPLINK compatible devices (USB,SIMPLINK).
(FREEZE)
Freezes the current frame
(Not supported when using USB Mode and Simplink).
Color buttons
These access special functions in some menus.
(
: Red, : Green, : Yellow, : Blue)
ENGLISH
27
WATCHING TV
Accesses the AV devices connected to the TV;
Opens the SIMPLINK menu.
SLEEP
Sets the length of time until the TV to turns off.
Control buttons (
,
,
,
,
)
Controls the SIMPLINK compatible devices (USB,SIMPLINK).
(FREEZE)
Freezes the current frame
(Not supported when using USB Mode and Simplink).
Color buttons
These access special functions in some menus.
( : Red, : Green, : Yellow, : Blue)
WATCHING TV
Turning the TV on for the first time
When you turn the TV on for the first time, the Initial
setting screen appears. Select a language and customize
the basic settings.
1
Connect the power cord to a power outlet.
2
In Standby mode, press the power button on the
remote control to turn the TV on.
The Initial setting screen appears when you turn the
TV on for the first time.
NOTE
y
You can also access
Initial Setting
by
accessing
OPTION
in the main menu.
3
Follow the on-screen instructions to customize your
TV settings according to your preferences.
Language
Selects a language to
display.
Mode Setting
Selects
Home Use
for
the home environment.
Time Setting
Selects the time zone
and daylight saving.
Auto Tuning
Scans and saves available
channels automatically.
NOTE
y
To display images in the best quality for your
home environment, select
Home Use
.
y
Store Demo
is suitable for the retail
environment.
y
If you select
Store Demo
, any customized
settings will switch back to the default
settings of
Store Demo
in 5 minutes.
4
When the basic settings are complete,
press
OK
.
NOTE
y
If you do not complete the Initial setting, it will
appear whenever the TV turns on.
y
Disconnect the power cord from the power
outlet when you do not use the TV for a long
period of time.
5
To turn the TV off, press the power button on the
remote control.
ENGLISH
28
TROUBLESHOOTING
TROUBLESHOOTING
General
Problem Solution
Cannot control the TV with the
remote control.
y
Check the remote control sensor on the product and try again.
y
Check if there is any obstacle between the product and the remote control.
y
Check if the batteries are still working and properly installed (
to , to ).
No image display and no sound is
produced.
y
Check if the product is turned on.
y
Check if the power cord is connected to a wall outlet.
y
Check if there is a problem in the wall outlet by connecting other products.
Image appears slowly when the TV
turns on.
y
The image is muted during the product startup process. This is normal. If the
image does not appear in a few minutes, unplug the TV for 30 seconds and try
again. If the image still does not appear, contact the authorized service center
in your local area.
Cannot connect external devices.
y
Refer to the "Connection Overview" and connect an external device.
The TV turns off suddenly.
y
Check the power control settings. The power supply may be interrupted.
y
Check if the Auto sleep feature is activated in the Time settings.
Refer to the "Sleep Timer".
y
If there is no signal while the TV is on, the TV will turn off automatically after
15 minutes of inactivity.
Audio
Problem Solution
No sound is produced while images
are displaying.
y
Press
VOL +
or
-
button.
y
Check if the sound is muted by pressing
MUTE
.
y
Scroll to other channels. There may a problem with the broadcast.
y
Check if the audio cables are connected properly.
y
Check if the TV Speaker feature is activated in the menu option.
No output from one of the speakers
y
Adjust Balance in the menu option.
Unusual sound from inside the TV is
produced.
y
A change in ambient humidity or temperature may result in an unusual noise
when the product turns on or off. There is no problem with your product.
ENGLISH
29
TROUBLESHOOTING / EXTERNAL CONTROL DEVICE SETUP
Video
Problem Solution
An image displays in black and
white or the color quality is poor.
y
Adjust the color setting in the menu option.
y
Keep a sufficient distance between this product and other electronic products.
y
Scroll to other channels. There may a problem with the broadcast.
Horizontal or vertical bars appears
or images blur
y
Check if there are local interferences such as an electrical appliance or power
tool.
Lines or streaks appear on images
y
Check the antenna or aim the antenna to the proper direction.
Afterimages (ghosts) appear when
the product turns off
y
Pixels may have been damaged from a fixed image displayed for a long time
(image burn). Use a screen saver to prevent the pixel damage on the screen.
The power is on but the screen
appears extremely dark.
y
Adjust the brightness and contrast in the menu option.
“No Signal” appears on the screen.
y
Check if the signal cable is connected between the TV and products properly.
y
Check the selected input source by pressing
INPUT
.
Black spots appear on the screen.
y
Several pixels in red, green, white, or black may appear on the screen that can
attribute to the characteristics of the panel.
y
This is normal.
The display offset is wrong.
y
Adjust the position setting in the Picture menu.
y
Check if the video card resolution and frequency are supported by the product.
If the frequency is out of range, set to the recommended resolution using the
display settings on the external device.
Thin lines appear in the background
of the screen.
y
Check the video cable connections.
The reception on some channels is
poor
y
Scroll to other channels. There may a problem with the broadcast.
y
The station signal may be weak. Aim the antenna to the proper direction.
y
Check if there is local interferences such as an electrical appliance or power
tool.
EXTERNAL CONTROL DEVICE SETUP
To obtain the external control device setup information, please visit 'www.lg.com'.
ENGLISH
30
SPECIFICATIONS
SPECIFICATIONS
Product specifications may be changed without prior notice due to upgrade of product functions.
Power requirement AC100 - 240 V ~ 50/60 Hz
Television System NTSC-M, ATSC, 64 & 256 QAM
Program Coverage VHF 2 - 13, UHF 14 - 69, CATV 1 - 135, DTV 2 - 69, CADTV 1 - 135
External Antenna Impedance 75
Ω
Environment condition Operating Temperature 0°C ~ 40 °C (32 °F ~ 104 °F)
Operating Humidity Less than 80 %
Storage Temperature -20°C ~ 60 °C (-4 °F ~ 140 °F)
Storage Humidity Less than 85 %
MODELS
42PN4500
(42PN4500-UA)
50PN4500
(50PN4500-UA)
Dimensions
(W x H x D)
With stand 983.6 x 650.3 x 250.0 (mm) 1,168.0 x755.4 x 292.7 (mm)
38.7 x 25.6 x 9.8 (inch) 45.9 x 29.7 x 11.5 (inch)
Without stand 983.6 x 595.6 x 57.0 (mm) 1,168.0 x 698.6 x 57.0 (mm)
38.7 x 23.4 x 2.2 (inch) 45.9 x 27.5 x 2.2 (inch)
Weight With stand 19.6 kg (43.2 lbs) 25.4 kg (55.9 lbs)
Without stand 18.4 kg (40.5 lbs) 24.0 kg (52.9 lbs)
Current Value / Power consumption 2.1 A / 210 W 2.75 A / 275 W
MODELS
50PN5300
(50PN5300-UF)
60PN5000
(60PN5000-UA)
60PN5300
(60PN5300-UF)
Dimensions
(W x H x D)
With stand 1,168.0 x755.4 x 292.7 (mm) 1,386.8 x 874.0 x 340.0 (mm)
45.9 x 29.7 x 11.5 (inch) 54.5 x 34.4 x 13.3 (inch)
Without stand 1,168.0 x 698.6 x 57.0 (mm) 1,386.8 x 821.7 x 57.0 (mm)
45.9 x 27.5 x 2.2 (inch) 54.5 x 32.3 x 2.2 (inch)
Weight With stand 26.1 kg (57.5 lbs) 37.7 kg (83.1 lbs)
Without stand 24.7 kg (53.7 lbs) 34.5 kg (76.0 lbs)
Current Value / Power consumption 2.9 A / 290 W 3.9 A / 390 W
MODELS
50PN6500
(50PN6500-UA)
60PN6500
(60PN6500-UA)
60PN6550
(60PN6550-UA)
Dimensions
(W x H x D)
With stand 1,168.0 x755.4 x 292.7 (mm) 1,386.8 x 874.0 x 340.0 (mm)
45.9 x 29.7 x 11.5 (inch) 54.5 x 34.4 x 13.3 (inch)
Without stand 1,168.0 x 698.6 x 57.0 (mm) 1,386.8 x 821.7 x 57.0 (mm)
45.9 x 27.5 x 2.2 (inch) 54.5 x 32.3 x 2.2 (inch)
Weight With stand 26.1 kg (57.5 lbs) 37.7 kg (83.1 lbs)
Without stand 24.7 kg (53.7 lbs) 34.5 kg (76.0 lbs)
Current Value / Power consumption 2.9 A / 290 W 3.9 A / 390 W
The model and serial number of the TV is
located on the back and/or one side of the TV.
Record it below should you ever need service.
MODEL
SERIAL
The extended owner’s manuals that contain
information on the advanced features of this LG
TV are located on the CD-ROM provided in an
electronic version.
To read these files, you will need to use the personal
computer (PC) equipped with a CD-ROM drive.
OWNER’S MANUAL
EXTERNAL CONTROL
DEVICE SETUP
Please read this manual carefully before operating the set and retain it for
future reference.
www.lg.com
2
ENG
ENGLISH
2
KEY CODES
KEY CODES
This feature is not available for all models.
Code
(Hexa)
Function Note
Code
(Hexa)
Function Note
00 CH +, PR + R/C Button 45 Q.Menu R/C Button
01 CH -, PR - R/C Button 4C List, - (ATSC Only) R/C Button
02 Volume + R/C Button 53 List R/C Button
03 Volume - R/C Button 5B Exit R/C Button
06 > (Arrow Key / Right Key) R/C Button 61 Blue R/C Button
07 < (Arrow Key / Left Key) R/C Button 63 Yellow R/C Button
08 Power R/C Button 71 Green R/C Button
09 Mute R/C Button 72 Red R/C Button
0B Input R/C Button 79 Ratio / Aspect Ratio R/C Button
0E SLEEP R/C Button 91 AD (Audio Description) R/C Button
0F TV, TV/RAD R/C Button 7A User Guide R/C Button
10 - 19 Number Key 0 - 9 R/C Button 7C Smart / Home R/C Button
1A Q.View / Flashback R/C Button 7E SIMPLINK R/C Button
1E FAV (Favorite Channel) R/C Button 8E ►► (Forward) R/C Button
20 Text (Teletext) R/C Button 8F ◄◄ (Rewind) R/C Button
21 T. Opt (Teletext Option) R/C Button AA Info R/C Button
28 Return (BACK) R/C Button AB Program Guide R/C Button
30 AV (Audio / Video) Mode R/C Button B0 ► (Play) R/C Button
39 Caption/Subtitle R/C Button B1 (Stop / Live TV) R/C Button
40 Λ
(Arrow Key / Cursor Up)
R/C Button BA
(Freeze / Slow Play /
Pause)
R/C Button
41
V (Arrow Key / Cursor
Down)
R/C Button BD (REC) R/C Button
42 My Apps R/C Button DC 3D R/C Button
43 Menu / Settings R/C Button 9F App / * R/C Button
44 OK / Enter R/C Button
* Key code 4C (0x4C) is available on ATSC/ISDB models which use major/minor channel.
(For South Korea, Japan, North America, Latin America except Colombia models)
3
ENGENGLISH
3
EXTERNAL CONTROL DEVICE SETUP
Image shown may differ from your TV.
Connect the USB to Serial converter/RS-232C input jack to an external control device (such as a computer
or an A/V control system) to control the product’s functions externally.
Note: The type of control port on the TV can be different between model series.
* Please be advised that not all models support this type of connectivity.
* Cable is not provided.
USB to Serial converter with USB Cable
USB Type
USB IN
(TV)
(PC )
(PC )
RS-232C IN
(CONTROL & SERVICE)
(TV)
(TV)
(PC )
(TV)
(PC )
SERVICE ONLY
RS-232C IN
(CONTROL & SERVICE)
RS-232C IN
(CONTROL & SERVICE)
1
3
2
1
3
2
LGTV supports PL2303 chip-based (Vendor ID : 0x0557, Product ID : 0x2008) USB to serial converter
which is not made nor provided by LG.
It can be purchased from computer stores that carry accessories for IT support professionals.
4
ENG
ENGLISH
4
EXTERNAL CONTROL DEVICE SETUP
RS-232C with RS-232C Cable (Legacy)
Phone jack Type
You need to purchase the phone-jack to RS-232 cable required for the connection between the PC and
the TV, which is specified in the manual.
* For other models, connect to the USB port.
USB IN
(TV)
(PC )
(PC )
RS-232C IN
(CONTROL & SERVICE)
(TV)
(TV)
(PC )
(TV)
(PC )
SERVICE ONLY
RS-232C IN
(CONTROL & SERVICE)
RS-232C IN
(CONTROL & SERVICE)
1
3
2
1
3
2
- This connection can only be used for the following models: 55/47/39LN5450-UA,
55/50/47/42LN5400-UA, 42/39/32LN5300-UA, and 37/32LN530B-UA.
USB IN
(TV)
(PC )
(PC )
RS-232C IN
(CONTROL & SERVICE)
(TV)
(TV)
(PC )
(TV)
(PC
)
SERVICE ONLY
RS-232C IN
(CONTROL & SERVICE)
RS-232C IN
(CONTROL & SERVICE)
1
3
2
1
3
2
- This connection can only be used for the following models: 42/50PN4500-UA, 50/60PN5300-UF,
50/60PN6500-UA, and 60PN6550-UA.
Customer Computer RS-232C configurations
3-Wire Configurations(Not standard)
1
6
5
9
PC TV
RXD 2 2 TXD
TXD 3 1 RXD
GND 5 3 GND
OR
RXD 3 2 TXD
TXD 2 1 RXD
GND 5 3 GND
D-Sub 9 Phone
RS-232C
(Serial port)
Set ID
For Set ID number, see "Real Data Mapping" on p.6
1. Press SETTINGS to access the main menus.
2. Press the Navigation buttons to scroll to OPTION and press OK.
3. Press the Navigation buttons to scroll to SET ID and press OK.
4. Scroll left or right to select a set ID number and select CLOSE. The adjustment range is 1-99.
5. When you are finished, press EXIT.
5
ENGENGLISH
5
EXTERNAL CONTROL DEVICE SETUP
Communication Parameters
Baud rate : 9600 bps (UART)
Data length : 8 bits
Parity : None
Stop bit : 1 bit
Communication code : ASCII code
Use a crossed (reverse) cable.
Command reference list
(Depending on model)
COMMAND1 COMMAND2
DATA
(Hexadecimal)
COMMAND1 COMMAND2
DATA
(Hexadecimal)
01. Power off k a 00 13. Balance k t 00 to 64
02. Aspect
Ratio
k c (p.7)
14. Color
(Colour)
Temperature
x u 00 to 64
03. Screen
Mute
k d (p.7)
15. ISM
Method (Only
Plasma TV)
j p (p.8)
04. Volume
Mute
k e 00 to 01
16. Energy
Saving
j q 00 to 05
05. Volume
Control
k f 00 to 64
17. Tune
Command
m a (p.8)
06. Contrast k g 00 to 64
18. Channel
(Programme)
Add/Del(Skip)
m b 00 to 01
07.
Brightness
k h 00 to 64 19. Key m c Key Codes
08. Color/
Colour
k i 00 to 64
20. Control
Back Light,
Control Panel
Light
m g 00 to 64
09. Tint k j 00 to 64
21. Input
select (Main)
x b (p.10)
10.
Sharpness
k k 00 to 32
22. 3D (Only
3D models)
x t (p.11)
11. OSD
Select
k l 00 to 01
23. Extended
3D (Only 3D
models)
x v (p.11)
12. Remote
Control Lock
Mode
k m 00 to 01
* Note: During USB operations such as DivX or EMF, all commands except Power(ka) and Key(mc) are
not executed and treated as NG.
6
ENG
ENGLISH
6
EXTERNAL CONTROL DEVICE SETUP
Transmission / Receiving Protocol
Transmission
[Command1][Command2][ ][Set ID][ ][Data][Cr]
[Command 1] : First command to control the TV. (j, k, m or x)
[Command 2] : Second command to control the TV.
[Set ID] : You can adjust the [Set ID] to choose desired monitor ID number in option menu.
Adjustment range in TV is 1 to 99. If [Set ID] value is selected to ‘0’, every connected set
can be controlled.
* [Set ID] is indicated as decimal (1 to 99) on menu and as Hexadecimal (0x00 to 0x63) on
transmission/receiving protocol.
[DATA] : To transmit command data (hexadecimal). Transmit ‘FF’ data to read status of command.
[Cr] : Carriage Return - ASCII code ‘0x0D’
[ ] : Space – ASCII code ‘0x20’
OK Acknowledgement
[Command2][ ][Set ID][ ][OK][Data][x]
* The set transmits ACK (acknowledgement) based on this format when receiving normal data. At this time,
if the data is data read mode, it indicates present status data. If the data is data write mode, it returns the
data of the PC computer.
Error Acknowledgement
[Command2][ ][Set ID][ ][NG][Data][x]
* The set transmits ACK (acknowledgement) based on this format when receiving abnormal data from non-
viable functions or communication errors.
Data 00: Illegal Code
Real data mapping (Hexadecimal b Decimal)
* When you enter the [data] in hexadecimal, refer to following conversion table.
* Channel Tune (ma) Command uses two-byte hexadecimal value([data]) to select channel number.
00 : Step 0 32 : Step 50 (Set ID 50) FE : Step 254
01 : Step 1 (Set ID 1) 33 : Step 51 (Set ID 51) FF : Step 255
... ... ...
0A : Step 10 (Set ID 10) 63 : Step 99 (Set ID 99) 01 00 : Step 256
... ... ...
0F : Step 15 (Set ID 15) C7 : Step 199 27 0E : Step 9998
10 : Step 16 (Set ID 16) C8 : Step 200 27 0F : Step 9999
... ... ...
7
ENGENGLISH
7
EXTERNAL CONTROL DEVICE SETUP
* Commands may work differently depending on model and signal.
01. Power (Command: k a)
To control Power Off of the set.
Transmission[k][a][ ][Set ID][ ][Data][Cr]
Data 00 : Power Off
Ack [a][ ][Set ID][ ][OK/NG][Data][x]
To Show Power On. (Works TV is On Only)
Transmission [k][a][ ][Set ID][ ][FF][Cr]
Ack [a][ ][Set ID][ ][OK][01][x]
* Similarly, if other functions transmit ‘FF’ data
based on this format, Acknowledgement feedback
presents status about each function.
02. Aspect Ratio (Command: k c)
(Main Picture Size)
To adjust the screen format. (Main picture format)
You can also adjust the screen format using the
Aspect Ratio in the Q.MENU. or PICTURE menu.
Transmission [k][c][ ][Set ID][ ][Data][Cr]
Data 01 : Normal screen
(4:3)
02 : Wide screen
(16:9)
04 : Zoom
05 : Zoom 2
(Latin America
except Colombia
Only)
06 : Set by Program/
Original
07 : 14:9
(Europe, Colombia, Mid-East,
Asia except South Korea and
Japan)
09 : * Just Scan
0B : Full Wide
(Europe, Colombia, Mid-
East, Asia except South
Korea and Japan)
10 to 1F : Cinema Zoom 1
to 16
Ack [c][ ][Set ID][ ][OK/NG][Data][x]
* Using the PC input, you select either 16:9 or 4:3
screen aspect ratio.
* In DTV/HDMI/Component mode (high-definition),
Just Scan is available.
* Full wide mode may work differently based on
model and is supported for DTV fully, and ATV,
AV partially.
03. Screen Mute (Command: k d)
To select screen mute on/off.
Transmission [k][d][ ][Set ID][ ][Data][Cr]
Data 00 : Screen mute off (Picture on)
Video mute off
01 : Screen mute on (Picture off)
10 : Video mute on
Ack [d][ ][Set ID][ ][OK/NG][Data][x]
* In case of video mute on only, TV will display On
Screen Display(OSD). But, in case of Screen mute
on, TV will not display OSD.
04. Volume Mute (Command: k e)
To control volume mute on/off.
You can also adjust mute using the MUTE button
on remote control.
Transmission [k][e][ ][Set ID][ ][Data][Cr]
Data 00 : Volume mute on (Volume off)
01 : Volume mute off (Volume on)
Ack [e][ ][Set ID][ ][OK/NG][Data][x]
05. Volume Control (Command: k f)
To adjust volume.
You can also adjust volume with the volume
buttons on remote control.
Transmission [k][f][ ][Set ID][ ][Data][Cr]
Data Min : 00 to Max : 64
Ack [f][ ][Set ID][ ][OK/NG][Data][x]
06. Contrast (Command: k g)
To adjust screen contrast.
You can also adjust contrast in the PICTURE
menu.
Transmission [k][g][ ][Set ID][ ][Data][Cr]
Data Min : 00 to Max : 64
Ack [g][ ][Set ID][ ][OK/NG][Data][x]
07. Brightness (Command: k h)
To adjust screen brightness.
You can also adjust brightness in the PICTURE
menu.
Transmission [k][h][ ][Set ID][ ][Data][Cr]
Data Min : 00 to Max : 64
Ack [h][ ][Set ID][ ][OK/NG][Data][x]
08. Color/Colour (Command: k i)
To adjust the screen Color(Colour).
You can also adjust colour in the PICTURE menu.
Transmission [k][i][ ][Set ID][ ][Data][Cr]
Data Min : 00 to Max : 64
Ack [i][ ][Set ID][ ][OK/NG][Data][x]
8
ENG
ENGLISH
8
EXTERNAL CONTROL DEVICE SETUP
09. Tint (Command: k j)
To adjust the screen tint.
You can also adjust tint in the PICTURE menu.
Transmission [k][j][ ][Set ID][ ][Data][Cr]
Data Red : 00 to Green : 64
Ack [j][ ][Set ID][ ][OK/NG][Data][x]
10. Sharpness (Command: k k)
To adjust the screen sharpness.
You can also adjust sharpness in the PICTURE
menu.
Transmission [k][k][ ][Set ID][ ][Data][Cr]
Data Min : 00 to Max : 32
Ack [k][ ][Set ID][ ][OK/NG][Data][x]
11. OSD Select (Command: k l)
To select OSD (On Screen Display) on/off when
controlling remotely.
Transmission [k][l][ ][Set ID][ ][Data][Cr]
Data 01 : OSD off 01 : OSD on
Ack [l][ ][Set ID][ ][OK/NG][Data][x]
12. Remote control lock mode (Command: k m)
To lock the front panel controls on the monitor and
remote control.
Transmission [k][m][ ][Set ID][ ][Data][Cr]
Data 01 : Lock off 01 : Lock on
Ack [m][ ][Set ID][ ][OK/NG][Data][x]
* If you are not using the remote control, use this
mode.
When main power is off & on (plug-off and plug-in,
after 20 - 30 seconds), external control lock is
released.
* In the standby mode (DC off by off timer or ‘ka’,
‘mc’ command), and if key lock is on, TV will not
turn on by power on key of IR & Local Key.
13. Balance (Command: k t)
To adjust balance.
You can also adjust balance in the AUDIO menu.
Transmission [k][t][ ][Set ID][ ][Data][Cr]
Data Min : 00 to Max : 64
Ack [t][ ][Set ID][ ][OK/NG][Data][x]
14. Color(Colour) Temperature (Command: x u)
To adjust colour temperature. You can also adjust
Color(Colour) Temperature in the PICTURE menu.
Transmission [x][u][ ][Set ID][ ][Data][Cr]
Data Min : 00 to Max : 64
Ack [u][ ][Set ID][ ][OK/NG][Data][x]
15. ISM Method (Command: j p) (Only Plasma TV)
To control the ISM method. You can also adjust
ISM Method in OPTION menu.
Transmission [j][p][ ][Set ID][ ][Data][Cr]
Data Min : 02: Orbiter
08: Normal
20: Color(Colour) Wash
Ack [p][ ][Set ID][ ][OK/NG][Data][x]
16. Energy Saving (Command: j q)
To reduce the power consumption of the TV. You
can also adjust Energy Saving in PICTURE menu.
Transmission [j][q][ ][Set ID][ ][Data][Cr]
Data
00 : Off
01 : Minimum
02 : Medium
03 : Maximum
04 : Auto
05 : Screen off
* (Depending on model)
Ack [q][ ][Set ID][ ][OK/NG][Data][x]
17. Tune Command (Command: m a)
* This command may work differently depending on
model and signal.
For Europe, Mid-East, Colombia, Asia except
South Korea and Japan, Model
Select channel to following physical number.
Transmission [m][a][ ][Set ID][ ][Data 00][ ]
[Data 01][ ][Data 02][Cr]
* Analogue Terrestrial/Cable
[Data 00][Data 01] Channel Data
Data 00 : High byte channel data
Data 01 : Low byte channel data
- 00 00 ~ 00 C7 (Decimal : 0 ~ 199)
Data 02 : Input Source (Analogue)
- 00 : Terrestrial TV (ATV)
- 80 : Cable TV (CATV)
9
ENGENGLISH
9
EXTERNAL CONTROL DEVICE SETUP
* Digital Terrestrial/Cable/Satellite
[Data 00][Data 01]: Channel Data
Data 00 : High Channel data
Data 01 : Low Channel data
- 00 00 ~ 27 0F (Decimal: 0 ~ 9999)
Data 02 : Input Source (Digital)
- 10 : Terrestrial TV (DTV)
- 20 : Terrestrial Radio (Radio)
- 40 : Satellite TV (SDTV)
- 50 : Satellite Radio (S-Radio)
- 90 : Cable TV (CADTV)
- a0 : Cable Radio (CA-Radio)
* Tune Command Examples:
1. Tune to the analogue terrestrial (PAL) Channel 10.
Set ID = All = 00
Data 00 & 01 = Channel Data is 10 = 00 0a
Data 02 = Analogue Terrestrial TV = 00
Result = ma 00 00 0a 00
2. Tune to the digital terrestrial (DVB-T) Channel 01.
Set ID = All = 00
Data 00 & 01 = Channel Data is 1 = 00 01
Data 02 = Digital Terrestrial TV = 10
Result = ma 00 00 01 10
3. Tune to the satellite (DVB-S) Channel 1000.
Set ID = All = 00
Data 00 & 01 = Channel Data is 1000 = 03 E8
Data 02 = Digital Satellite TV = 40
Result = ma 00 03 E8 40
Ack [a][ ][Set ID][ ][OK][Data 00][Data 01]
[Data 02][x][a][ ][Set ID][ ][NG][Data 00][x]
For South Korea, North/Latin America except
Colombia Model
To tune channel to following physical/major/minor
number.
Transmission [m][a][ ][0][ ][Data00][ ][Data01]
[ ][Data02][ ][Data03][ ][Data04][ ][Data05][Cr]
Digital channels have a Physical, Major, and Minor
channel number. The Physical number is the actual
digital channel number, the Major is the number that
the channel should be mapped to, and the Minor is
the sub-channel. Since the ATSC tuner automatically
maps the channel from the Major / Minor number,
the Physical number is not required when sending a
command in Digital.
* Analogue Terrestrial/Cable
Data 00 : Physical Channel Number
- Terrestrial (ATV) : 02~45 (Decimal: 2 ~ 69)
- Cable (CATV) : 01, 0E~7D (Decimal : 1, 14~125)
[Data 01 ~ 04]: Major/Minor Channel Number
Data 01 & 02: xx (Don't care)
Data 03 & 04: xx (Don't care)
Data 05: Input Source (Analogue)
- 00 : Terrestrial TV (ATV)
- 01 : Cable TV (CATV)
* Digital Terrestrial/Cable
Data 00 : xx (Don't care)
[Data 01][Data 02]: Major Channel Number
Data 01 : High byte Channel Data
Data 02 : Low byte Channel Data
- 00 01 ~ 27 0F (Decimal: 1 ~ 9999)
[Data 03][Data 04]: Minor Channel Number
Data 03 : High byte Channel Data
Data 04 : Low byte Channel Data
Data 05 : Input Source (Digital)
- 02 : Terrestrial TV (DTV) – Use Physical Channel
Number
- 06 : Cable TV (CADTV) – Use Physical Channel
Number
- 22 : Terrestrial TV (DTV) – Don’t Use Physical
Channel Number
- 26 : Cable TV (CADTV) - Don’t Use Physical
Channel Number
- 46 : Cable TV (CADTV) – Use Major Channel
Number Only (One Part Channel)
Two bytes are available for each major and minor
channel data, but usually the low byte is used alone
(high byte is 0).
* Tune Command Examples:
1. Tune to the analogue cable (NTSC) channel 35.
Set ID = All = 00
Data 00 = Channel Data is 35 = 23
Data 01 & 02 = No Major = 00 00
Data 03 & 04 = No Minor = 00 00
Data 05 = Analogue Cable TV = 01
Total = ma 00 23 00 00 00 00 01
2. Tune to the digital terrestrial (ATSC) channel 30-3.
Set ID = All = 00
Data 00 = Don’t know Physical = 00
Data 01 & 02 = Major is 30 = 00 1E
Data 03 & 04 = Minor is 3 = 00 03
Data 05 = Digital Terrestrial TV = 22
Total = ma 00 00 00 1E 00 03 22
Ack [a][ ][Set ID][ ][OK][Data 00][Data 01]
[Data 02][Data 03][Data 04][Data 05]
[x][a][ ][Set ID][ ][NG][Data 00][x]
For Japan Model
To tune channel to following physical/major/minor
number.
Transmission [m][a][ ][0][ ][Data00][ ][Data01]
[ ][Data02][ ][Data03][ ][Data04][ ][Data05][Cr]
* Digital Terrestrial/Satellite
Data 00: xx (Don't care)
10
ENG
ENGLISH
10
EXTERNAL CONTROL DEVICE SETUP
[Data 01][Data 02]: Major Channel Number
Data 01: High byte Channel Data
Data 02: Low byte Channel Data
- 00 01 ~ 27 0F (Decimal: 1 ~ 9999)
[Data 03][Data 04]: Minor/Branch Channel Number
(Don’t care in Satellite)
Data 03: High byte Channel Data
Data 04: Low byte Channel Data
Data 05 : Input Source (Digital/Satellite for Japan)
- 02 : Terrestrial TV (DTV)
- 07 : BS (Broadcasting Satellite)
- 08 : CS1 (Communication Satellite 1)
- 09 : CS2 (Communication Satellite 2)
* Tune Command Examples:
1
Tune to the digital terrestrial (ISDB-T) channel 17-1
.
Set ID = All = 00
Data 00 = Don’t know Physical = 00
Data 01 & 02 = Major is 17 = 00 11
Data 03 & 04 = Minor/Branch is 1 = 00 01
Data 05 = Digital Terrestrial TV = 02
Total = ma 00 00 00 11 00 01 02
2. Tune to the BS (ISDB-BS) channel 30.
Set ID = All = 00
Data 00 = Don’t know Physical = 00
Data 01 & 02 = Major is 30 = 00 1E
Data 03 & 04 = Don’t Care = 00 00
Data 05 = Digital BS TV = 07
Total = ma 00 00 00 1E 00 00 07
* This feature is varied based on the model.
Ack [a][ ][Set ID][ ][OK][Data 00][Data 01]
[Data 02][Data 03][Data 04][Data 05]
[x][a][ ][Set ID][ ][NG][Data 00][x]
18. Channel(Programme) Add/Del(Skip)
(Command: m b)
To skip current channel(programme) for next time.
Transmission [m][b][ ][Set ID][ ][Data][Cr]
Data 00 : Del(ATSC,ISDB)/Skip(DVB) 01 : Add
Ack [b][ ][Set ID][ ][OK/NG][Data][x]
* Set the saved channel status to del(ATSC, ISDB)/
skip(DVB) or add.
19. Key (Command: m c)
To send IR remote key code.
Transmission [m][c][ ][Set ID][ ][Data][Cr]
Data Key code - p.2.
Ack [c][ ][Set ID][ ][OK/NG][Data][x]
20. Control Back Light (Command: m g)
For LCD TV / LED TV
To control the back light.
Transmission [m][g][ ][Set ID][ ][Data][Cr]
Data Min : 00 to Max : 64
Ack [g][ ][Set ID][ ][OK/NG][Data][x]
Control Panel Light (Command: m g)
For Plasma TV
To control the panel light.
Transmission [m][g][ ][Set ID][ ][Data][Cr]
Data Min : 00 to Max : 64
Ack [g][ ][Set ID][ ][OK/NG][Data][x]
21. Input select (Command: x b)
(Main Picture Input)
To select input source for main picture.
Transmission [x][b][ ][Set ID][ ][Data][Cr]
Data
00 : DTV
02 : Satellite DTV
ISDB-BS (Japan)
03 : ISDB-CS1 (Japan)
04 : ISDB-CS2 (Japan)
11 : CATV
01 : CADTV
10 : ATV
20 : AV or AV1 21 : AV2
40 : Component1 41 : Component2
90 : HDMI1
92 : HDMI3
91 : HDMI2
93 : HDMI4
Ack [b][ ][Set ID][ ][OK/NG][Data][x]
* This function depends on model and signal.
11
ENGENGLISH
11
EXTERNAL CONTROL DEVICE SETUP
22. 3D(Command: x t) (only 3D models)
(Depending on model)
To change 3D mode for TV.
Transmission [x][t][ ][Set ID][ ][Data 00][ ][Data 01]
[ ][Data 02][ ][Data 03][Cr]
Data Structure
[Data 00] 00 : 3D On
01 : 3D Off
02 : 3D to 2D
03 : 2D to 3D
[Data 01] 00 : Top and Bottom
01 : Side by Side
02 : Check Board
03 : Frame Sequential
04 : Column interleaving
05 : Row interleaving
[Data 02] 00 : Right to Left
01 : Left to Right
[Data 03] 3D Effect(3D Depth): Min : 00 - Max : 14
(*transmit by Hexadecimal code)
* If [Data 00] is 00 (3D On), [Data 03] has no
meaning.
* If [Data 00] is 01 (3D off) or 02 (3D to 2D), [Data
01], [Data 02] and [Data 03] have no meaning.
* If [Data 00] is 03(2D to 3D), [Data 01] and [Data 02]
have no meaning.
* All 3D pattern options ([Data 01]) may not be
available according to broadcasting/video signal.
[Data 00] [Data 01] [Data 02] [Data 03]
00 O O X
01 X X X
02 X X X
03 X X O
X : don’t care
Ack [t][ ][Set ID][ ][OK][Data00][Data01][Data02]
[Data03][x]
[t][ ][Set ID][ ][NG][Data00][x]
23. Extended 3D(Command: x v) (only 3D models)
(Depending on model)
To change 3D option for TV.
Transmission [x][v][ ][Set ID][ ][Data 00][ ]
[Data 01][Cr]
[Data 00] 3D option
00 : 3D Picture Correction
01 : 3D Depth (3D Mode is Manual Only)
02 : 3D Viewpoint
06 : 3D Color Correction
07 : 3D Sound Zooming
08 : Normal Image View
09 : 3D Mode (Genre)
[Data 01] It has own range for each 3D option
determined by [Data 00].
1) When [Data 00] is 00
00 : Right to Left
01 : Left to Right
2) When [Data 00] is 01, 02
Data Min: 0 - Max: 14 (*transmit by Hexadecimal
code)
Data value range(0 - 20) converts Viewpoint range
(-10 - +10) automatically (Depending on model)
3) When [Data 00] is 06, 07, 08
00 : Off
01 : On
4) When [Data 00] is 09
00 : Standard
02 : Cinema
04 : Manual
01 : Sport
03 : Extreme
Ack [v][ ][Set ID][ ][OK][Data00][Data01][x]
[v][ ][Set ID][ ][NG][Data00][x]
MANUAL DEL USUARIO
TELEVISOR PLASMA
Lea atentamente este manual antes de poner en
marcha el equipo y consérvelo para futuras consultas.
www.lg.com
42PN4500
50PN4500
60PN5000 50PN5300
60PN5300
50PN6500
60PN6500
60PN6550
2
ENG
ESPAÑOL
INSTRUCCIONES DE SEGURIDAD IMPORTANTES
Siga siempre estas instrucciones para evitar situaciones peligrosas y garantizar el rendimiento máximo del producto.
PARA REDUCIR EL RIESGO DE DESCARGAS
ELÉCTRICAS, NO QUITE LA CUBIERTA (O LA
PARTE POSTERIOR). EL USUARIO NO PUEDE
CAMBIAR NI REPARAR LOS COMPONENTES
INTERNOS. CONSULTE ÚNICAMENTE AL
PERSONAL DE SERVICIO CALIFICADO.
El símbolo de relámpago con una punta de
flecha, dentro de un triángulo equilátero,
tiene como fin alertar al usuario sobre
la presencia en el producto de “voltaje
peligroso” sin aislar que puede tener la potencia
suficiente como para representar un riesgo de
descargas eléctricas para los usuarios.
El signo de exclamación dentro de un
triángulo equilátero tiene como fin alertar al
usuario sobre la presencia de instrucciones
importantes de funcionamiento y mantenimiento
(servicio) en el folleto que acompaña al equipo.
- PARA REDUCIR EL RIESGO DE INCENDIOS O
DESCARGAS ELÉCTRICAS, NO EXPONGA ESTE
PRODUCTO A LA LLUVIA O LA HUMEDAD.
ADVERTENCIA/PRECAUCIÓN
y
No use el aparato cerca del agua.
Short-circuit
Breaker
Power Supply
y
Limpie únicamente con un paño seco.
Short-circuit
Breaker
Power Supply
y
No tape ni bloquee las aberturas de ventilación.
Realice la instalación siguiendo las instrucciones del
fabricante.
Short-circuit
Breaker
Power Supply
y
No instale el producto cerca de fuentes de calor
como radiadores, rejillas de calefacción central,
estufas u otro tipo de aparatos que emitan calor
(incluidos los amplificadores).
Short-circuit
Breaker
Power Supply
y
No anule el propósito de seguridad del enchufe
polarizado o del enchufe a tierra. Un enchufe
polarizado tiene dos clavijas, una más ancha que
la otra. Un enchufe a tierra tiene dos clavijas y un
tercer terminal de puesta a tierra. La clavija ancha
o el terminal de puesta a tierra se proveen para
proteger al usuario. Si el enchufe del equipo no
entra en la toma, consulte a un electricista para
cambiar el tomacorriente (puede variar según el
país).
Short-circuit
Breaker
Power Supply
y
No ejerza demasiada presión sobre el panel con la
mano ni con objetos punzantes, como un clavo, una
lapicera o un lápiz, ni raye la superficie.
Short-circuit
Breaker
Power Supply
ADVERTENCIA / PRECAUCION
RIESGO DE CHOQUE ELECTRICO
NO ABRIR
Lea estas instrucciones.
Conserve estas instrucciones.
Preste atención a las advertencias.
Siga todas las instrucciones.
Short-circuit
Breaker
Power Supply
ADVERTENCIA
Si ignora el mensaje de advertencia, puede sufrir
lesiones graves, accidentes o la muerte.
PRECAUCIÓN
Si ignora el mensaje de precaución, puede sufrir
heridas leves o provocar daños en el producto.
NOTA
La nota le ayuda a comprender y a utilizar
el producto de forma segura. Lea la nota
cuidadosamente antes de utilizar el producto.
3
ENG
ESPAÑOL
INSTRUCCIONES DE SEGURIDAD IMPORTANTES
y
Asegúrese de que el cable de alimentación esté
protegido para evitar que lo pisen o aplasten,
especialmente en los enchufes, los tomacorrientes
o el punto de salida desde el aparato.
Short-circuit
Breaker
Power Supply
y
Use únicamente los accesorios recomendados por
el fabricante.
Short-circuit
Breaker
Power Supply
y
Use el producto únicamente en mesas portátiles,
pies, trípodes, soportes o mesas indicados por el
fabricante o provistos con el aparato. Al emplear
una mesa portátil, tenga cuidado al moverla con el
aparato encima, para evitar daños por caídas.
Short-circuit
Breaker
Power Supply
y
Desenchufe el aparato durante tormentas eléctricas
o si no planea usarlo durante un periodo prolongado.
Short-circuit
Breaker
Power Supply
y
Consulte todas las cuestiones de servicio de
mantenimiento al personal de servicio calificado.
El servicio es necesario cuando el aparato sufre
algún tipo de daño, por ejemplo, cuando un cable
de suministro eléctrico o un conector está dañado,
se derrama líquido o se cae un objeto dentro del
aparato, el aparato se expone a la lluvia o a la
humedad, no funciona en forma normal o sufre una
caída.
Short-circuit
Breaker
Power Supply
y
No inserte objetos de metal u otro material
conductor en el cable de alimentación. No toque el
extremo del cable de alimentación mientras esté
enchufado.
y
Mantenga el material de embalaje contra la
humedad y el embalaje de vinilo fuera del alcance
de los niños. El material contra la humedad es
dañino si se ingiere. Si se ingiere por accidente,
obligue a la persona a vomitarlo y acuda al hospital
más cercano. Además, el embalaje de vinilo puede
provocar asfixia. Manténgalo fuera del alcance de
los niños.
y
PRECAUCIÓN con respecto al cable de alimentación
(puede variar según el país):
Se recomienda colocar los aparatos en un circuito
específico, es decir, un tomacorriente único que
alimente solamente al aparato, y que no tenga otros
tomacorrientes ni circuitos derivados. Consulte
la página de especificaciones en el manual del
usuario. No conecte demasiados aparatos a la
misma toma de corriente de CA, dado que podría
provocar incendios o descargas eléctricas. No
sobrecargue los tomacorrientes de la pared.
Asegúrese de que los tomacorrientes de la pared
no estén sobrecargados, sueltos ni dañados, y
que los alargues, los cables de alimentación y el
aislamiento de los cables no estén desgastados, ya
que estas condiciones son peligrosas. Cualquiera de
estos casos podría provocar incendios o descargas
eléctricas. Examine regularmente el cable del
aparato; si le parece que está dañado o deteriorado,
desenchúfelo y no use más ese cable. Llame al
personal de servicio técnico autorizado para que lo
reemplace por uno exactamente igual. Proteja el
cable de alimentación de daños físicos o mecánicos,
es decir, que no se tuerza, doble, deforme, que
no quede atrapado al cerrar una puerta y que no
lo pisen. Preste especial atención a los enchufes,
tomacorrientes de la pared y al punto de salida
del cable en el aparato. No mueva el televisor con
el cable de alimentación enchufado. No use un
cable de alimentación que esté suelto o dañado. Al
desenchufar el cable, asegúrese de hacerlo desde
el enchufe. No tire del cable para desenchufar el
televisor.
Short-circuit
Breaker
Power Supply
y
Advertencia
- para disminuir los riesgos de incendio
o descargas eléctricas, no exponga el producto
a la lluvia, la humedad u otro tipo de líquidos. No
toque el televisor con las manos mojadas. No
instale el producto cerca de objetos inflamables
como combustible o velas, ni lo exponga al aire
acondicionado directo.
Short-circuit
Breaker
Power Supply
y
No exponga el producto a ningún tipo de goteo ni
salpicaduras, y no coloque sobre o por encima del
televisor (por ejemplo, en estantes que pudieran
encontrarse arriba de la unidad) ningún tipo de
objeto que contenga líquido, como floreros, tazas,
etc.
Short-circuit
Breaker
Power Supply
4
ENG
ESPAÑOL
INSTRUCCIONES DE SEGURIDAD IMPORTANTES
y
Puesta a tierra
(Excepto dispositivos sin conexión a tierra.)
Asegúrese de que el cable de puesta a tierra
esté conectado para evitar descargas eléctricas
(es decir, un televisor con un enchufe de CA de
tres clavijas debe conectarse a un tomacorriente
de CA con puesta a tierra de tres clavijas). Si no
puede colocarse ninguna puesta a tierra, solicite a
un electricista calificado que instale un disyuntor.
No intente improvisar una puesta a tierra con
conexiones a cables de teléfono, pararrayos o caños
de gas.
Short-circuit
Breaker
Power Supply
Alimentación
Interruptor
diferencial
y
Mientras la unidad esté conectada al tomacorriente
de CA de la pared, no se desconectará de la fuente
de alimentación de CA, aún cuando el aparato esté
apagado.
y
No intente modificar este producto de ninguna
manera sin autorización previa por escrito de LG
Electronics. Cualquier tipo de modificación sin
autorización previa podría anular la autoridad del
usuario para usar el producto.
y
Puesta a tierra con una antena exterior
(puede variar según el país):
Si instala una antena exterior, tome las siguientes
precauciones. No se debe instalar el sistema
de antena exterior cerca de las líneas aéreas de
transmisión de energía, de ningún circuito o luz
eléctrica, ni en ningún lugar donde pudiera entrar
en contacto con este tipo de cables eléctricos o
circuitos, dado que podría provocar daños graves
o incluso la muerte. Asegúrese de que el sistema
de antena tenga una puesta a tierra para proteger
contra sobretensiones y acumulaciones de cargas
estáticas. La Sección 810 del Código nacional de
electricidad (NEC) de los Estados Unidos establece
la forma de realizar una puesta a tierra correcta del
mástil, de la estructura de soporte, del cable de
bajada a una unidad de descarga de la antena, el
tamaño de los conductores de puesta a tierra, la
ubicación de la unidad de descarga de la antena,
y la conexión y los requisitos de los electrodos de
puesta a tierra
Puesta a tierra de la antena según el Código
nacional de electricidad, ANSI/NFPA 70
NEC: National Electrical Code
(Código nacional de electricidad)
Abrazadera de
puesta a tierra
Cable de entrada de la
antena
UNIDAD DE DESCARGA
DE LA ANTENA (NEC,
SECCIÓN 810-20)
Conductor de puesta a
tierra (NEC, Sección
810-21)
Sistema de electrodos
de conexión a tierra del
servicio de energía (NEC,
Artículo 250, Parte H)
Equipo de
servicio eléctrico
Abrazadera de
puesta a tierra
y
Limpieza
Al efectuar la limpieza, desenchufe el cable de
alimentación y limpie suavemente con un paño
suave para no rayar la superficie. No rocíe con agua
ni otros líquidos directamente sobre el televisor,
dado que podría provocar una descarga eléctrica.
No limpie con productos químicos como alcohol,
diluyentes o bencina.
y
Traslados
Asegúrese de que el aparato esté apagado,
desenchufado y que no quede ningún cable
conectado. Es posible que se necesiten dos
personas para trasladar los televisores de gran
tamaño. No ejerza presión ni empuje el panel frontal
del televisor.
y
Ventilación
Instale el televisor en un lugar bien ventilado. No lo
coloque en un lugar cerrado como, por ejemplo, un
estante para libros. No cubra el producto con telas
ni ningún otro material mientras esté enchufado. No
lo instale en lugares con demasiado polvo.
y
Si huele humo u otros olores que provienen de
la TV, desconecte el cable de alimentación y
comuníquese con un centro de servicio autorizado.
y
Mantenga el aparato alejado de la luz solar directa.
y
Nunca toque el aparato o la antena durante una
tormenta eléctrica o con truenos.
y
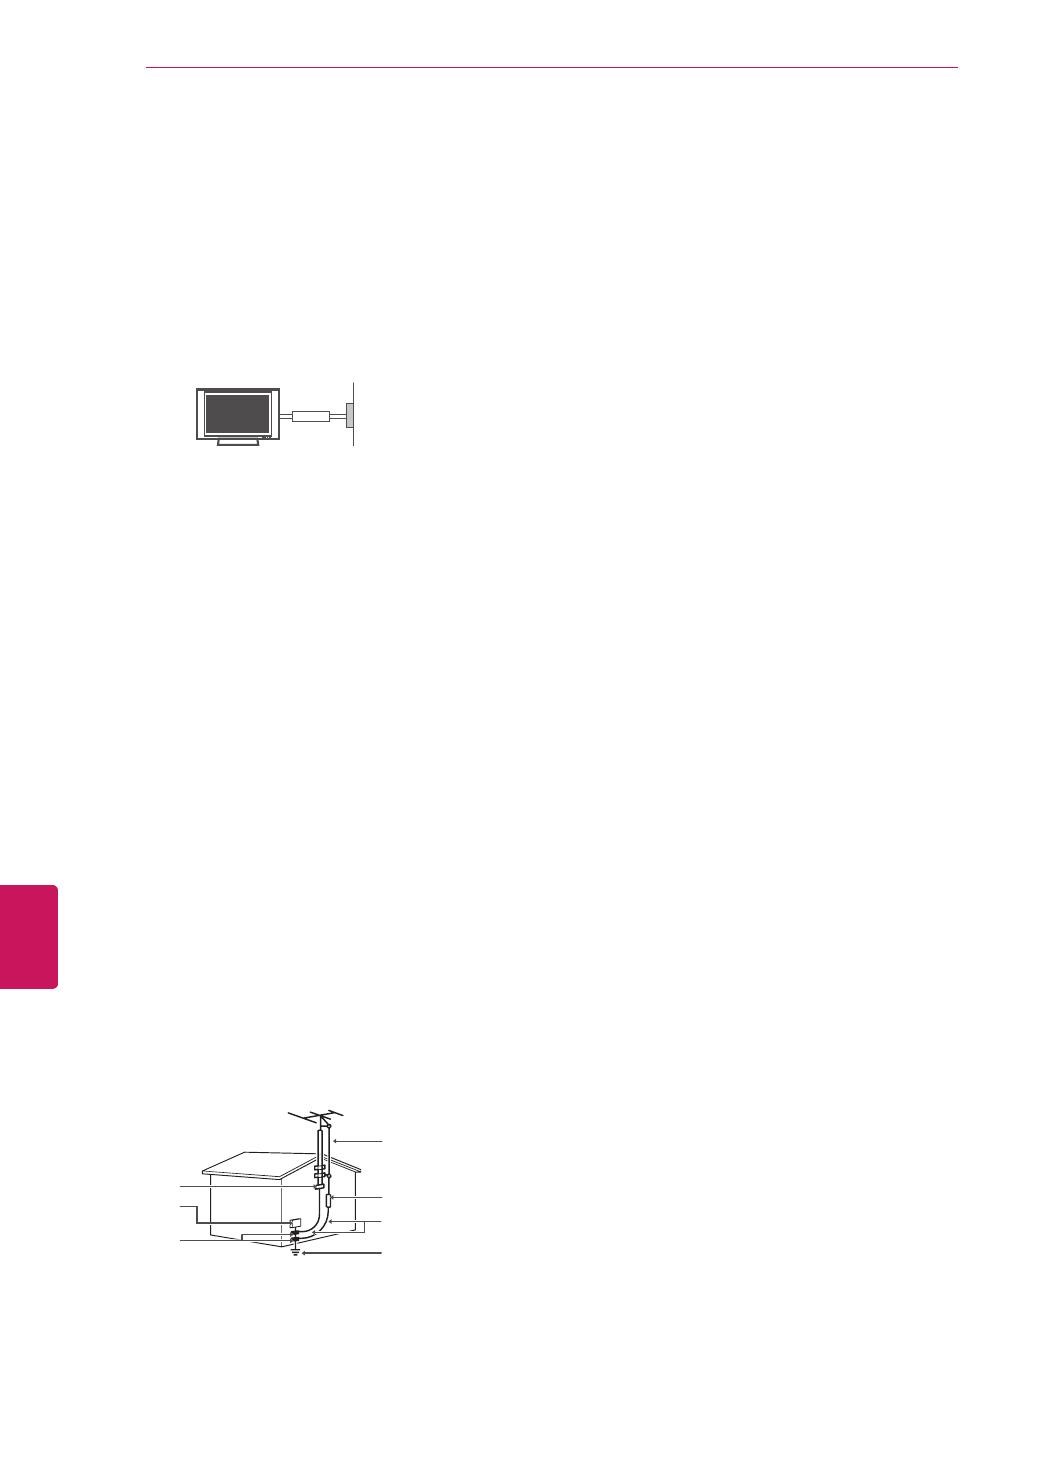
Al montar el televisor en la pared, asegúrese de que
los cables de alimentación y de señal no queden
colgando en la parte posterior.
y
No permita que se golpee el producto o que algún
objeto se caiga dentro de él, ni que se golpee la
pantalla.
y
Cómo desconectar la fuente de alimentación
principal
El tomacorriente utilizado con este dispositivo debe
ser de fácil acceso.
y
Guarde los accesorios (baterías, etc.) en un lugar
seguro lejos del alcance de los niños.
y
Este aparato usa baterías. Puede ser que en su
comunidad existan normativas que requieren que
deseche estas baterías de forma correcta debido
a las consideraciones ambientales. Póngase
en contacto con la autoridad local para obtener
información acerca del desecho o reciclaje.
y
No deseche las baterías en el fuego.
y
No provoque cortes de circuitos, desarme ni permita
que las baterías se recalienten
5
ENG
ESPAÑOL
INSTRUCCIONES DE SEGURIDAD IMPORTANTES
Para Estados Unidos y Canadá
AVISO DE LA FCC
Este equipo ha sido evaluado y cumple con los
límites para dispositivos digitales clase B, conforme
el artículo 15 de las reglas de la FCC. Estos límites
han sido diseñados para brindar una protección ra-
zonable contra la interferencia dañina en una insta-
lación residencial. Este equipo genera, utiliza y puede
irradiar energía de radiofrecuencia y, si no se instala y
no se utiliza de acuerdo con las instrucciones, podría
causar interferencia dañina a las comunicaciones
radiales. Sin embargo, no existe garantía de que la in-
terferencia no se produzca en una instalación en par-
ticular. Si este equipo ocasiona interferencia dañina
en la recepción de radio o televisión (lo cual puede
determinarse encendiendo y apagando el equipo), se
recomienda al usuario que intente corregir la interfer-
encia tomando una o más de las siguientes medidas:
- Reoriente o reubique la antena receptora.
- Aumente la distancia entre el equipo y el receptor.
- Conecte el equipo en un tomacorriente de un
circuito diferente de aquél al que esté conectado
el receptor.
- Consulte al distribuidor o a un técnico de radio/TV
experimentado para obtener ayuda.
Este dispositivo cumple con el artículo 15 de las
reglas de la FCC. El funcionamiento está sujeto a las
dos condiciones siguientes: (1) este dispositivo no
puede causar interferencia dañina y (2) este disposi-
tivo debe aceptar cualquier interferencia que reciba,
incluida la interferencia que pueda causar un funcio-
namiento no deseado.
Cualquier tipo de modificación o cambio en la con-
strucción del dispositivo sin autorización expresa del
supervisor responsable podría anular la autoridad del
usuario para utilizar el producto.
NOTA PARA EL INSTALADOR DE CATV
Se recomienda al instalador de televisión por cable
(CATV) que consulte el Artículo 820-40 del Código
nacional de electricidad de los Estados Unidos. El
código establece las disposiciones para efectuar una
puesta a tierra correcta, y en especial, indica que el
cable de puesta a tierra debe conectarse al sistema
de puesta a tierra del edificio lo más cerca posible
del punto de entrada del cable.
y
Aparición de puntos
El panel de plasma o LCD es un producto de alta
tecnología con una resolución de entre dos y seis
millones de píxeles. En raras ocasiones, es posible
que note la presencia de pequeños puntos en la
pantalla mientras mira televisión. Estos puntos son
píxeles desactivados y no afectan el rendimiento ni
la fiabilidad del televisor.
y
Reproducción de ruidos
“Crujidos”: es posible que se produzcan crujidos
cuando esté mirando televisión o al apagar el
televisor; se trata de un ruido generado por
la contracción térmica del plástico debido a la
temperatura y la humedad. Este ruido es común
en productos donde se requiere la deformación
térmica.
Zumbidos en el circuito eléctrico o el panel: se trata
de un ruido de bajo nivel, generado por un circuito
de conmutación de alta velocidad, que suministra
una gran cantidad de corriente para que un producto
pueda funcionar. Varía según cada producto.
Este ruido no afecta el rendimiento ni la fiabilidad
del producto.
y
Tenga cuidado de no tocar las aberturas de
ventilación. Al mirar televisión durante largos
periodos, las aberturas de ventilación pueden
calentarse. Esto no afecta el rendimiento ni causa
defectos en el producto.
Cómo evitar el efecto de “degradación de la
imagen por sobreexposición” o “quemadura de
pantalla” del televisor
y
Si se muestra una imagen fija en la pantalla del
televisor durante un período largo, esta quedará
impresa y se convertirá en una distorsión
permanente de la pantalla. A este desperfecto se
lo conoce como “degradación de la imagen por
sobreexposición” o “quemadura de pantalla” y no
está cubierto por la garantía.
y
Si la relación de aspecto del televisor se establece
durante mucho tiempo en 4:3, se puede producir
una degradación de imagen en las zonas de bandas
del formato buzón.
y
Evite emitir imágenes fijas en la pantalla del
televisor durante períodos prolongados (2 horas o
más para LCD, 1 hora o más para TV de plasma)
para evitar la degradación de imagen.
6
ENG
ESPAÑOL
LICENCIAS
LICENCIAS
Las licencias admitidas pueden variar según el modelo. Para obtener más información sobre las licencias,
visite ‘www.lg.com’.
Fabricado con la licencia de Dolby Laboratories. “Dolby” y el símbolo de las dos D son
marcas comerciales de Dolby Laboratories.
The terms HDMI and HDMI High-Definition Multimedia Interface, and the HDMI logo are
trademarks or registered trademarks of HDMI Licensing LLC in the United States and other
countries.
7
ENG
ESPAÑOL
CONTENIDO
2 INSTRUCCIONES DE SEGURIDAD
IMPORTANTES
6 LICENCIAS
7 CONTENIDO
8 PROCEDIMIENTO DE INSTALACIÓN
8 MONTAJE Y PREPARACIÓN
8 Desembalaje
10 Componentes y botones
11 Información
adicional
del manual
11 Levantar y trasladar el televisor
12 Configurar el televisor
12 - Colocar la base de la televisión
14 - Montar sobre una mesa
15 - Montar en la pared
16 - Sujeción de los cables
17 ESTABLECER CONEXIONES
17 Conexión de una antena o un cable
18 Conexión a un receptor de HD, reproductor de
DVD o VCR
18 - Conexión HDMI
19 - Conexión DVI a HDMI
20 - Conexión por componente
21 - Conexión compuesta
22 Conexión a un dispositivo PC
22 - Conexión HDMI o Conexión DVI a HDMI
24 Conexión a un sistema de audio
24 - Conexión de audio óptica digital
24 Conexión a un dispositivo USB
NOTA
y
Es posible que la imagen que se muestra no sea
exactamente igual a su televisor.
y
La visualización en pantalla (OSD, On Screen Dis-
play) de su televisor puede ser ligeramente dife-
rente a la que se muestra en este manual.
y
Los menús y las opciones disponibles pueden variar
según la fuente de entrada o el modelo de producto
que utilice.
y
Es posible que se agreguen nuevas funciones a
este televisor en el futuro.
CONTENIDO
25 CONTROL REMOTO
27 MIRAR TV
27 Encendido el televisor por primera vez
28 SOLUCIÓN DE PROBLEMAS
29 CONFIGURACION DE CONTROL DEL
DISPOSITIVO EXTERNO
30 ESPECIFICACIONES
8
ENG
ESPAÑOL
PROCEDIMIENTO DE INSTALACIÓN / MONTAJE Y PREPARACIÓN
MONTAJE Y PREPARACIÓN
Desembalaje
Revise que la caja del producto contenga los siguientes elementos. Si falta algún accesorio, comuníquese con el
distribuidor local mediante el cual adquirió el producto. Las ilustraciones de este manual pueden diferir del producto que
realmente adquirió.
PROCEDIMIENTO DE INSTALACIÓN
1
Abra el paquete y asegúrese de que todos los accesorios estén incluidos.
2
Instale la base del televisor.
3
Conecte un dispositivo externo al televisor.
Control remoto y baterías (AAA)
(Consulte p.25)
Manual del usuario y
Manual en CD
Cable de alimentación
(Para 42PN4500) (Para 50PN4500, 60PN5000,
50/60PN5300,50/60PN6500,
60PN6550)
(Para 42PN4500)
Tornillos de soporte
7 PZ, M4 x 14
(Consulte p.12)
Tornillos de soporte
7 PZ, M5 x 16
(Consulte p.12)
Tornillo de montaje de
escritorio
(Consulte p.14)
(Para 50PN4500, 50PN5300,
50PN6500)
Cubierta de protección
(Consulte p.13)
Soporte del cable de alimentación
(Según el modelo)
(Consulte p.16)
Cuerpo de Soporte y
Base Soporte
(Consulte p.12)
Núcleo de ferrita
(Según el modelo)
(Consulte p.9)
9
ENG
ESPAÑOL
MONTAJE Y PREPARACIÓN
PRECAUCIÓN
y
Para garantizar la seguridad y la vida útil del producto, utilice únicamente elementos originales.
y
La garantía no cubre daños o lesiones que pueden producirse al utilizar elementos no aprobados.
y
En algunos modelos, la película delgada sobre la pantalla forma parte del televisor. Por ese motivo, no debe
quitarla.
NOTA
y
Los artículos suministrados con el producto adquirido pueden variar según el modelo.
y
Es posible que cambien las especificaciones del producto o el contenido del manual sin previo aviso debido a las
actualizaciones de las funciones del producto.
y
Para que la conexión sea óptima, los cables HDMI y los dispositivos USB tienen que tener biseles que no su-
peren los 10 mm (0,39 pulgada) de espesor y 18 mm (0,7 pulgada) de ancho. Utilice un cable de extensión que
sea compatible con USB 2.0, en caso de que el cable USB o la tarjeta de memoria USB no encajen en el puerto
USB del TV.
B
A
A
B
*A 10 mm (0,39 pulgada)
*B 18 mm (0,7 pulgada)
y
Cómo usar el núcleo de ferrita
- Si cuenta con dos núcleos de ferrita, siga las indicaciones de las figuras 1-1 y 2-1 (o 2-2).
- Si cuenta con tres núcleos de ferrita, siga las indicaciones de las figuras 1-2 y 2-1 (o 2-2).
1 Use el núcleo de ferrita para reducir la interferencia electromagnética en el cable de alimentación.
Enrolle una vez el cable de alimentación en el núcleo de ferrita. Ubique el núcleo de ferrita cerca
del televisor y de un enchufe de pared.
[Figura 1-1]
[al televisor]
[a un enchufe de pared]
[Figura 1-2]
[al televisor]
[a un enchufe de pared]
2 Use el núcleo de ferrita para reducir la interferencia electromagnética en el cable.
Ubique el núcleo de ferrita cerca del televisor.
[al televisor]
[al televisor]
[a un dispositivo externo]
[a un dispositivo externo]
[Figura 2-1]
10 mm(+ / - 5 mm)
Enrolle una vez el cable componente en el núcleo de ferrita.
Enrolle una vez el cable de audio de la PC en el núcleo de ferrita.
[Figura 2-2]
10 mm(+ / - 5 mm)
(Negro)
[Sección transversal
del núcleo de ferrita]
(Negro)
[Sección transversal
del núcleo de ferrita]
10
ENG
ESPAÑOL
MONTAJE Y PREPARACIÓN
Componentes y botones
Botón Descripción
/ Permite desplazarse por los canales guardados.
/
Ajusta el nivel del volumen.
Selecciona la opción de menú resaltada o confirma una entrada.
Permite acceder a los menús principales o guardar las entradas y salir de los menús.
Cambia la fuente de entrada.
Enciende o apaga el aparato.
Pantalla
Botones
Bocinas
Sensor del control remoto
El Indicador de Poder
Información
adicional
del manual
Ver el manual del usuario
El manual del usuario se proporciona en formato PDF en
un CD. Instale Adobe Acrobat Reader para ver el manual
del usuario en su PC.
1
Inserte el CD suministrado.
La página web aparece automáticamente.
2
Haga clic en Manual del usuario en la página
web.
3
A continuación, aparecerá el manual del
usuario.
NOTA
y
Si la página web no aparece de manera automáti-
ca, acceda a Mi PC y haga clic en LG e
index.htm
para ver el manual del usuario.
11
ENG
ESPAÑOL
MONTAJE Y PREPARACIÓN
Levantar y trasladar el televisor
Si desea levantar o trasladar el televisor, lea las instruc-
ciones a continuación para no rayar o dañar el aparato, y
para transportarlo de forma segura, independientemente
del tamaño o tipo de aparato.
PRECAUCIÓN
y
No toque la pantalla. De lo contrario, podría
dañarla.
y
Se recomienda trasladar el televisor en la caja o el
material de embalaje en el que lo recibió al com-
prarlo.
y
Antes de mover o levantar el televisor, desconecte
el cable de alimentación y el resto de los cables.
y
Cuando sostenga el televisor, la pantalla debe
mirar hacia afuera para evitar daños.
y
Sostenga con firmeza la parte superior e inferior
del marco del televisor. Asegúrese de no sosten-
erlo por la parte transparente, por la bocina o por
el área de rejillas de las bocinas.
y
Si desea transportar un televisor grande, necesita
la ayuda de dos personas como mínimo.
y
Al transportar el televisor con las manos, sostén-
galo como se muestra en esta ilustración.
y
Al transportar el televisor, no lo sacuda ni lo
someta a vibraciones excesivas.
y
Al transportar el televisor manténgalo en posición
vertical, nunca lo apoye sobre uno de los costa-
dos, ni lo incline hacia la derecha o la izquierda.
Información
adicional
del manual
Ver el manual del usuario
El manual del usuario se proporciona en formato PDF en
un CD. Instale Adobe Acrobat Reader para ver el manual
del usuario en su PC.
1
Inserte el CD suministrado.
La página web aparece automáticamente.
2
Haga clic en Manual del usuario en la página
web.
3
A continuación, aparecerá el manual del
usuario.
NOTA
y
Si la página web no aparece de manera automáti-
ca, acceda a Mi PC y haga clic en LG e
index.htm
para ver el manual del usuario.
12
ENG
ESPAÑOL
MONTAJE Y PREPARACIÓN
Configurar el televisor
Puede instalar su TV en la pared o si desea colocar la TV en un centro de entretenimiento u otro mueble, colóquele la
base.
Colocar la base de la televisión
Si no instala el televisor en una pared, siga estas instrucciones para colocar la base de la televisión.
1
2
3
Parte
frontal
Cuerpo de
Soporte
Base Soporte
PRECAUCIÓN
y
Al instalar la base del televisor, ponga la pantalla hacia abajo sobre una mesa acolchada o una
superficie plana para evitar rayas.
y
Asegúrese de que los tornillos estén completamente ajustados. (Si no están lo suficientemente ajustados, el TV
puede inclinarse hacia delante después de instalarse.)
y
No ajuste los tornillos con demasiada fuerza, de lo contrario, se pueden desgastar y aflojar.
Para 42PN4500
M4 x 14
3 PZ
Para 50PN4500, 60PN5000,
50/60PN5300, 50/60PN6500,
60PN6550
M5 x 16
3 PZ
Para 42PN4500
M4 x 14
4 PZ
Para 50PN4500, 60PN5000,
50/60PN5300, 50/60PN6500,
60PN6550
M5 x 16
4 PZ
13
ENG
ESPAÑOL
MONTAJE Y PREPARACIÓN
Para desmontar la base de la televisión,
1
2
Para 50PN4500, 50PN5300, 50PN6500
Cubierta de protección
1
2
NOTA
y
Antes de montar el televisor en la pared, retire
la base, realizando la instalación de ésta en
orden inverso.
y
Al instalar el soporte de pared, use la cubierta
de protección. La cubierta evita que se acumule
polvo y suciedad en la abertura.
M5 x 16
4 PZ
M5 x 16
1 PZ
14
ENG
ESPAÑOL
MONTAJE Y PREPARACIÓN
Montar sobre una mesa
1
Levante el televisor y déjelo en posición vertical
sobre la mesa.
- Deje un espacio mínimo de 10 cm
(4 pulgadas) entre el televisor y la pared para
garantizar una ventilación adecuada.
10 cm
10 cm
10 cm
10 cm
2
Conecte el cable de alimentación al tomacorriente de
la pared.
PRECAUCIÓN
y
No coloque el televisor cerca de fuentes de
calor, dado que puede provocar incendios u
otros daños.
Ajuste el ángulo del TV para una mejor visibilidad
Rote el aparato 20 grados hacia la izquierda o la derecha
y ajuste el ángulo del televisor según su preferencia.
20˚20˚
PRECAUCIÓN
y
Al ajustar el ángulo del televisor, tenga cuidado
con sus dedos.
- Si los dedos o las manos quedan atrapados, se
pueden provocar lesiones
corporales. Si el producto se inclina
demasiado, podría caerse, lo que podría
provocar lesiones o daños.
(4 pulgadas)
Asegurar el televisor a la mesa
(Para 42PN4500)
Fije el televisor a la mesa para que no se incline hacia
adelante, evitando daños y posibles lesiones. Monte el
televisor en una mesa, y luego inserte y ajuste el tornillo
suministrado en la parte posterior del pie.
y
Para evitar que se caiga el televisor, asegúrelo
al piso o a la pared conforme a las instrucciones
de instalación. Inclinar, sacudir o balancear el
televisor puede provocar daños.
ADVERTENCIA
15
ENG
ESPAÑOL
MONTAJE Y PREPARACIÓN
Fijación del televisor a la pared (opcional)
(Según el modelo)
1
Inserte y ajuste los tornillos de ojo del televisor
en su parte posterior.
- En caso de que haya tornillos insertados, primero
retírelos.
2
Utilice los tornillos para colocar los soportes
correspondientes en la pared.
Acople el soporte de la pared con los tornillos de ojo
a la parte posterior del televisor.
3
Conecte los tornillos de ojo y los soportes con
un cordón fuerte y ajústelos con firmeza.
Asegúrese de mantener el cordón en posición
horizontal a la superficie plana.
y
Asegúrese de que los niños no se suban al
televisor ni se cuelguen de él.
PRECAUCIÓN
y
Utilice una plataforma o un armario que sea lo
suficientemente fuerte y grande para sostener el
televisor de manera segura.
y
Los soportes, los tornillos y los cordones son
opcionales. Puede solicitar otros accesorios a
través de su distribuidor local.
NOTA
Montar en la pared
Se puede usar un soporte de pared opcional con el tele-
visor LG. Consulte al distribuidor local para adquirir un
soporte de pared que cumpla con el estándar VESA que
usa su modelo de TV.
Cuidadosamente coloque el soporte de pared en la parte
posterior del TV. Instale el soporte de pared en una pared
sólida, perpendicular al piso. Si va a instalar el TV sobre
otros materiales de
construcción, póngase en contacto con personal técnico
calificado para instalar el soporte de pared. El soporte de
pared incluirá instrucciones
detalladas. Recomendamos que use un soporte de pared
de marca LG.
10 cm
10 cm
10 cm
10 cm
(4 pulgadas)
Asegúrese de utilizar tornillos y soportes de pared que
cumplan con el estándar VESA. En la tabla siguiente se
detallan las dimensiones de los conjuntos de montaje de
pared.
Modelo 42/50PN4500
60PN5000
50/60PN5300
50/60PN6500
60PN6550
VESA (A x B)
A
B
400 x 400
Tornillo estándar M6
Cantidad de tornillos
4
Soporte de pared
(opcional)
PSW420BX
16
ENG
ESPAÑOL
MONTAJE Y PREPARACIÓN
ESTABLECER CONEXIONES
Conecte varios dispositivos externos al televisor y cambie los modos de entrada para seleccionar un dispositivo externo.
Para obtener más información sobre cómo conectar dispositivos externos, consulte sus respectivos manuales.
Entre los dispositivos externos disponibles pueden mencionarse los siguientes: receptores de HD, reproductores de
DVD, VCR, sistemas de audio, dispositivos de almacenamiento USB, PC, dispositivos de juegos, etc.
NOTA
y
Si graba un programa de televisión en una grabadora de DVD o VCR, asegúrese de conectar el cable de entrada de
señal al televisor a través de uno de estos dos dispositivos. Para obtener más información acerca de la grabación,
consulte el manual proporcionado con el dispositivo conectado.
y
Las conexiones de dispositivos externos que se muestran pueden ser levemente diferentes de las ilustraciones
en este manual.
y
Conecte los dispositivos externos al televisor, independientemente del orden del puerto del televisor.
y
Si conecta un dispositivo de juegos al televisor, utilice el cable provisto con dicho dispositivo.
y
Consulte el manual del equipo externo para conocer las instrucciones de funcionamiento.
Conexión de una antena o un cable
Para mirar televisión, conecte una antena, un cable o una caja de cable y siga estas instrucciones. Las ilustraciones
pueden diferir de los elementos reales y el cable de RF es opcional.
PRECAUCIÓN
y
Antes de mover o instalar el televisor, desconecte
el cable de alimentación. De lo contrario, podría
provocar una descarga eléctrica.
y
Si instala el televisor en el cielo raso o en una
pared inclinada, podría caerse y provocar lesiones
graves. Utilice un soporte de pared autorizado por
LG y comuníquese con el distribuidor local o con
personal técnico calificado.
y
No ajuste excesivamente los tornillos, dado que
podría dañar el televisor y anular la garantía.
y
Utilice tornillos y soportes de pared que cumplan
con la norma VESA. La garantía no cubre daños
o lesiones provocados por el uso incorrecto del
aparato o de accesorios no autorizados.
NOTA
y
Utilice los tornillos enumerados en las
especificaciones del estándar VESA.
y
El conjunto de montaje de pared incluye un
manual de instalación y las piezas necesarias.
y
El soporte de pared es opcional. Para obtener
accesorios adicionales, comuníquese con su
distribuidor local.
y
La longitud de los tornillos puede variar según el
tipo de soporte de pared. Asegúrese de utilizar la
longitud adecuada.
y
Para obtener más información, consulte el manual
suministrado con el montaje de pared.
Sujeción de los cables
1
Instale el cable de alimentación y el soporte del
cable. Esto ayudará a evitar que el cable de aliment-
ación se desconecte por accidente.
2
Agrupe y ate los cables con el sujetacables.
(Para 42PN4500)
Soporte del cable
de alimentación
(Según el modelo)
Sujetacables
(Para 50PN4500, 60PN5000, 50/60PN5300,
50/60PN6500, 60PN6550)
Sujetacables
Soporte del cable
de alimentación
(Según el modelo)
PRECAUCIÓN
y
No mueva el televisor sosteniendo el cable de
alimentacion y el sujetador del cable, debido a que
el sujetador del cable se puede romper, y causar
daños en el televisor.
y
Si instala la TV en la pared, quite el soporte para
cables del soporte de la base y colóquelo en la
cubierta de protección o en la cubierta posterior
para ayudar a mantener los cables organizados.
NOTA
17
ENG
ESPAÑOL
ESTABLECER CONEXIONES
ANTENNA/
CABLE IN
ESTABLECER CONEXIONES
Conecte varios dispositivos externos al televisor y cambie los modos de entrada para seleccionar un dispositivo externo.
Para obtener más información sobre cómo conectar dispositivos externos, consulte sus respectivos manuales.
Entre los dispositivos externos disponibles pueden mencionarse los siguientes: receptores de HD, reproductores de
DVD, VCR, sistemas de audio, dispositivos de almacenamiento USB, PC, dispositivos de juegos, etc.
NOTA
y
Si graba un programa de televisión en una grabadora de DVD o VCR, asegúrese de conectar el cable de entrada de
señal al televisor a través de uno de estos dos dispositivos. Para obtener más información acerca de la grabación,
consulte el manual proporcionado con el dispositivo conectado.
y
Las conexiones de dispositivos externos que se muestran pueden ser levemente diferentes de las ilustraciones
en este manual.
y
Conecte los dispositivos externos al televisor, independientemente del orden del puerto del televisor.
y
Si conecta un dispositivo de juegos al televisor, utilice el cable provisto con dicho dispositivo.
y
Consulte el manual del equipo externo para conocer las instrucciones de funcionamiento.
Conexión de una antena o un cable
Para mirar televisión, conecte una antena, un cable o una caja de cable y siga estas instrucciones. Las ilustraciones
pueden diferir de los elementos reales y el cable de RF es opcional.
Terminal
NOTA
y
Utilice un divisor de señal para más de dos
televisores.
y
Visite http://lgknowledgebase.com para obtener
más información sobre la conexión de la antena y
del cable. Busque antena.
y
Códec de audio DTV compatible: MPEG, Dolby
Digital
PRECAUCIÓN
y
Asegúrese de no doblar el alambre de cobre del
cable de RF.
Alambre de cobre
y
Primero conecte todos los dispositivos entre sí y
luego conecte el cable de alimentación al tomacor-
riente, para que el televisor no resulte dañado.
Antena VHF
Antena UHF
Antena
Coaxial (75Ω)
(*No incluido)
18
ENG
ESPAÑOL
ESTABLECER CONEXIONES
IN 2
HDMI
IN 1 (PC)
Conexión a un receptor de HD, reproductor de DVD o VCR
Conecte un receptor de HD, reproductor de DVD o VCR al televisor y seleccione el modo de entrada apropiado.
Conexión HDMI
La conexión HDMI es la mejor manera de conectar un dispositivo.
Transmite las señales de audio y video digitales de un dispositivo externo al televisor. Conecte el dispositivo externo y el
televisor con el cable HDMI tal como se muestra en la siguiente ilustración.
NOTA
y
Utilice el cable HDMI™ de alta velocidad más reciente con la función CEC (control electrónico por parte del
cliente).
y
Los cables HDMI™ de alta velocidad están probados para transportar señales HD de hasta 1080
progresivo y superiores.
y
Formato de audio HDMI compatible: PCM (hasta 192 kHz, 32 kHz / 44,1 kHz / 48 kHz / 96 kHz / 192 kHz)
-> No compatible con DTS.
(*No incluido)
DVD / Blu-Ray /
Caja de cable HD / HD STB
Escoja cualquier puerto de entrada HDMI para conectar.
No importa qué puerto utilice.
19
ENG
ESPAÑOL
ESTABLECER CONEXIONES
Conexión DVI a HDMI
Transmite las señales de video digital de un dispositivo externo al televisor. Conecte el dispositivo externo y el televisor
con el cable DVI-HDMI tal como se muestra en la siguiente ilustración. Para transmitir una señal de audio, conecte un
cable de audio.
NOTA
y
Al utilizar un cable HDMI/DVI, sólo es compatible con un enlace único de DVI.
COMPONENT
IN
L
P
B
P
R
R
Y
V
IDE
O
AUDIO
R
L/MONO
AV
IN
AUDIO IN (PC)
$8',2287
'9,287
IN 1 (PC)
V
IDE
O
AUDIO
(*No incluido)
(*No incluido)
DVD / Blu-Ray / Caja de cable HD
BLANCO
ROJO
20
ENG
ESPAÑOL
ESTABLECER CONEXIONES
AUDIO
VIDEO
L R
COMPONENT
IN
VIDEO
AUDIO
LP
B
P
R
R
Y
VIDEO
AUDIO
R
L/MONO
AV IN
AUDIO IN (PC)
Conexión por componente
Transmite las señales de audio y video analógicas de un dispositivo externo al televisor. Conecte el dispositivo externo y
el televisor con el cable componente tal como se muestra en la siguiente ilustración.
NOTA
y
Si la instalación de los cables no es la adecuada, podría proyectarse una imagen en blanco y negro o con colores
distorsionados. Revise que los cables coincidan con las conexiones de color correspondientes.
y
Revise y compruebe que cada cable coincida con las conexiones de color correspondientes.
(*No incluido)
(*No incluido)
VERDE
VERDE
AZUL
AZUL
ROJO
ROJO
ROJO
ROJO
BLANCO
BLANCO
DVD / Blu-Ray / Caja de cable HD
21
ENG
ESPAÑOL
ESTABLECER CONEXIONES
Conexión compuesta
Transmite las señales de audio y video analógicas de un dispositivo externo al televisor. Conecte el dispositivo externo y
el televisor con el cable compuesto tal como se muestra en la siguiente ilustración.
NOTA
y
Si posee una VCR monofónica, conecte el cable de audio de la VCR a la toma AUDIO L/MONO del televisor.
COMPONENT
IN
V
IDEO
AU
DI
O
L
P
B
P
R
R
Y
VIDEO
AUDIO
R
L/MONO
AV IN
AUDIO IN (PC)
VIDEO
MONO
( )
AUDIOL R
VCR / DVD / Blu-Ray / Caja de cable HD
AMARILLO
BLANCO
ROJO
AMARILLO
BLANCO
ROJO
(*No incluido)
22
ENG
ESPAÑOL
ESTABLECER CONEXIONES
Conexión HDMI o Conexión DVI a HDMI
Escoja el método A o B para realizar la conexión.
Método A: Conexión HDMI
IN 1 (PC)
HDMI
COMPONENT
IN
L
P
B
P
R
R
Y
V
IDE
O
AUDIO
R
L/MONO
AV I
N
AUDIO IN (PC)
$8',2287
'9,287
IN 1 (PC)
V
IDE
O
AUDIO
PC
(*No incluido)
Conexión a un dispositivo PC
NOTA
y
Se recomienda utilizar el televisor con la conexión HDMI para obtener una calidad de imagen óptima.
y
Según la tarjeta gráfica, es posible que no funcione el modo DOS cuando se utiliza un cable HDMI a DVI.
y
En el modo PC, es posible que exista ruido asociado con la resolución, patrones verticales, contraste o brillo. Si se
producen ruidos, cambie la resolución de la salida de la PC, cambie la frecuencia de actualización o ajuste el brillo
y el contraste en el menú IMAGEN hasta que la imagen mejore.
y
La forma de onda de la entrada de sincronización para las frecuencias horizontales y verticales es diferente.
y
Según la tarjeta gráfica, es posible que algunos ajustes de resolución no permitan que la imagen se ubique en la
pantalla de forma correcta.
y
Al utilizar un cable HDMI/DVI, sólo es compatible con un enlace único de DVI.
23
ENG
ESPAÑOL
ESTABLECER CONEXIONES
IN 1 (PC)
HDMI
COMPONENT
IN
L
P
B
P
R
R
Y
V
IDE
O
AUDIO
R
L/MONO
AV I
N
AUDIO IN (PC)
$8',2287
'9,287
IN 1 (PC)
V
IDE
O
AUDIO
Método B: Conexión DVI a HDMI
IN 1 (PC)
HDMI
COMPONENT
IN
L
P
B
P
R
R
Y
V
IDE
O
AUDIO
R
L/MONO
AV I
N
AUDIO IN (PC)
$8',2287
'9,287
IN 1 (PC)
V
IDE
O
AUDIO
PC
(*No incluido)
(*No incluido)
BLANCO
ROJO
24
ENG
ESPAÑOL
ESTABLECER CONEXIONES
OPTICAL
AUDIO IN
OPTICAL
DIGITAL
AUDIO OUT
Conexión a un sistema de audio
Utilice un sistema de audio externo opcional en lugar de la bocina incorporada.
NOTA
y
Si utiliza un dispositivo de audio externo opcional en lugar de la bocina incorporada, apague las bocinas del
televisor.
Conexión de audio óptica digital
Transmite señales de audio digital del televisor a un dispositivo externo. Conecte el dispositivo externo y el televisor con
el cable de audio óptico tal como se muestra en la siguiente ilustración.
(*No incluido)
Sistema de audio digital
USB IN
Conexión a un dispositivo USB
Conecte un dispositivo de almacenamiento USB como una memoria USB Flash, un disco duro externo o un lector de
tarjetas de memoria USB al televisor y acceda al menú Mis medios para poder utilizar distintos archivos multimedia.
USB
(*No incluido)
25
ENG
ESPAÑOL
CONTROL REMOTO
Este control remoto utiliza luz infrarroja. Al usarlo, es necesario apuntarlo en dirección al sensor remoto del TV.
CONTROL REMOTO
Las descripciones que figuran en este manual se basan en los botones del control remoto.
Lea atentamente este manual y siga las instrucciones de uso.
Para reemplazar las baterías, abra la cubierta de la batería, coloque otras (AAA de 1,5 Vcc) y haga
coincidir la polaridad
y en el compartimiento, luego cierre la tapa. Asegúrese de apuntar con
control remoto al sensor de control remoto en el televisor.
PRECAUCIÓN
y
No coloque baterías nuevas junto con las usadas, esto puede dañar el control remoto.
(POWER)
Enciende o apaga el televisor.
TV
Regresa al último canal de televisión.
CAPTION
Activa o desactiva los subtítulos.
AV MODE
Selecciona un modo de audio y video.
RATIO
Cambia el tamaño de una imagen.
INPUT
Cambia la fuente de entrada. Enciende la TV si está apagada.
Botones numerales
Permiten introducir números.
LIST
LIST: Permite acceder a la lista de canales guardados.
- (Guión)
- (Guión): Inserta un guión entre los números, por ejemplo, 2-1 y
2-2.
FLASHBK
Permite alternar entre los dos últimos canales seleccionados
(al presionar repetidamente).
26
ENG
ESPAÑOL
CONTROL REMOTO
VOL
Ajusta el nivel del volumen.
FAV
Permite acceder a la lista de canales favoritos.
Selecciona un menú o una opción.
AUDIO
Señal digital: Cambia el idioma de audio.
Señal analógica: Cambia el sonido MTS.
MUTE
Silencia todos los sonidos.
^
CH
v
Permite desplazarse por los canales guardados.
^
PAGE
v
Permite ir a la pantalla anterior o siguiente.
PICTURE
Cambia el modo de la imagen.
INFO
Muestra información del programa actual.
SOUND
Cambia el modo de audio.
SETTINGS
Permite acceder a los menús principales
Q. MENU
Permite acceder al menú rápido.
Botones de navegación
(arriba/abajo/derecha/izquierda)
Permiten desplazarse por los menús o las opciones.
OK
Permite seleccionar menús u opciones y confirmar lo
ingresado.
BACK (VOLVER)
Permite volver al nivel anterior.
EXIT
Borra todas las visualizaciones en la pantalla y permite volver
a mirar la televisión.
Permite acceder a los dispositivos de audio y video conectados al
televisor.
O bien, abre el menú SIMPLINK.
SLEEP
Establece el tiempo durante el cual el televisor permanecerá
encendido.
Botones de control (
,
,
,
,
)
Permiten controlar los dispositivos compatibles con SIMPLINK
(USB, SIMPLINK).
(FREEZE)
Congela el fotograma actual (no admitido al utilizar el modo
USB y Simplink).
Botones de color
Permiten acceder a funciones especiales en algunos menús.
(
: Rojo, : Verde, : Amarillo, : Azul)
27
ENG
ESPAÑOL
MIRAR TV
Permite acceder a los dispositivos de audio y video conectados al
televisor.
O bien, abre el menú SIMPLINK.
SLEEP
Establece el tiempo durante el cual el televisor permanecerá
encendido.
Botones de control (
,
,
,
,
)
Permiten controlar los dispositivos compatibles con SIMPLINK
(USB, SIMPLINK).
(FREEZE)
Congela el fotograma actual (no admitido al utilizar el modo
USB y Simplink).
Botones de color
Permiten acceder a funciones especiales en algunos menús.
( : Rojo, : Verde, : Amarillo, : Azul)
MIRAR TV
Encendido el televisor por primera
vez
Al encender el televisor por primera vez, aparece la
pantalla de configuración inicial. Seleccione un idioma y
personalice la configuración básica.
1
Conecte el cable de alimentación a un tomacorriente.
2
En modo de espera, presione el botón de encendido/
apagado en el control remoto para encender el
televisor.
Si es la primera vez que enciende el televisor,
aparecerá la pantalla de configuración inicial.
NOTA
y
Para acceder a
Configuración inicial
, vaya a
OPCIÓN
en el menú principal.
3
Siga las instrucciones en pantalla para personalizar la
configuración del televisor según sus preferencias.
Lenguaje
Selecciona un idioma
para la pantalla.
Configuración de modo
Selecciona
Usar en casa
para el hogar.
Zona horaria
Selecciona la zona horaria
y el horario de verano.
Sintonización automática
Busca y guarda los
canales disponibles de
manera automática.
NOTA
y
Para ver las imágenes con la mejor calidad
dentro del hogar, seleccione
Usar en casa
.
y
Demo de tienda
es la opción adecuada para
las tiendas minoristas.
y
Si selecciona
Demo de tienda
, la configuración
personalizada vuelve a la configuración
predeterminada de
Demo de tienda
en 5
minutos.
4
Una vez finalizada la configuración básica, presione
OK
.
NOTA
y
Si no completa la configuración inicial,
aparecerá cada vez que encienda el televisor.
y
Desconecte el cable de alimentación del
tomacorriente cuando no utilice el televisor
durante periodos prolongados.
5
Para apagar el televisor, presione el botón de
encendido/apagado en el control remoto.
28
ENG
ESPAÑOL
SOLUCIÓN DE PROBLEMAS
General
Problema Solución
No se puede controlar el televisor
con el control remoto.
y
Compruebe el sensor del control remoto en el producto e inténtelo de nuevo.
y
Compruebe que no haya ningún obstáculo entre el producto y el control
remoto.
y
Compruebe si las baterías siguen funcionando y están instaladas como
corresponde (
con , con ).
No se muestra ninguna imagen ni
se emite sonido.
y
Revise si el producto está encendido.
y
Revise si el cable de alimentación está conectado a la toma de la pared.
y
Conecte otros productos para revisar si hay un problema con la toma de la
pared.
La imagen aparece con lentitud
cuando se enciende el televisor.
y
Durante el proceso de inicio del producto, se anula el sonido de la imagen.
Esto es normal. Si la imagen no aparece en algunos minutos, desenchufe el
televisor durante 30 segundos e inténtelo de nuevo. Si la imagen sigue sin
aparecer, póngase en contacto con el centro de servicio autorizado en su área
local.
No se pueden conectar dispositivos
externos.
y
Consulte “Descripción general de la conexión” y conecte un dispositivo
externo.
El televisor se apaga de repente.
y
Revise la configuración del control de energía. Es posible que el suministro
eléctrico se interrumpa.
y
Revise si la función de apagado automático no está activada en la
configuración de hora. Consulte “Temporizador”.
y
Si no hay señal mientras el televisor está encendido, este se apagará
automáticamente después de 15 minutos de inactividad.
Audio
Problema Solución
No se emite ningún sonido mientras
se proyecta la imagen.
y
Presione el botón
VOL +
o
-
.
y
Presione
MUTE
para revisar si el sonido está desactivado.
y
Desplácese a otros canales. Puede haber un problema con la transmisión.
y
Revise si los cables de audio están conectados como corresponde.
y
Revise si la función bocinas de TV está activada en la opción de menú
correspondiente.
No hay salida de audio de una de
las bocinas
y
Ajuste el balance en la opción de menú correspondiente.
Se produce un sonido inusual desde
el interior del televisor.
y
Los cambios de la humedad o la temperatura ambiente pueden producir un
ruido poco común cuando se encienda o se apague el producto. Esto no
significa que su producto tenga un problema.
29
ENG
ESPAÑOL
SOLUCIÓN DE PROBLEMAS / CONFIGURACION DE CONTROL DEL DISPOSITIVO EXTERNO
Video
Problema Solución
Se proyecta una imagen en blanco y
negro o la calidad del color es mala.
y
Ajuste la configuración de color en la opción de menú correspondiente.
y
Mantenga suficiente distancia entre el producto y otros productos electrónicos.
y
Desplácese a otros canales. Puede haber un problema con la transmisión.
Aparecen barras horizontales
o verticales o las imágenes se
muestran fuera de foco.
y
Compruebe si hay interferencias locales como las producidas por
electrodomésticos o herramientas eléctricas.
Aparecen líneas o rayas en las
imágenes.
y
Revise la antena o corrija su dirección.
Aparecen imágenes residuales
(fantasmas) al apagar el producto.
y
Es posible que se hayan dañado los píxeles por haberse proyectado
una imagen fija durante mucho tiempo (degradación de imagen por
sobreexposición). Utilice un protector de pantalla para evitar el daño de los
píxeles de la pantalla.
El televisor está encendido pero la
pantalla aparece extremadamente
oscura.
y
Ajuste el brillo y el contraste en la opción de menú correspondiente.
Aparece el mensaje “No hay señal”
en la pantalla.
y
Compruebe que el cable de señal entre el televisor y los productos esté
conectado adecuadamente.
y
Presione
INPUT
para comprobar la fuente de entrada seleccionada.
Aparecen manchas oscuras en la
pantalla.
y
Es posible que aparezcan varios píxeles en rojo, verde, blanco o negro en la
pantalla, lo cual puede ser atribuible a las características del panel.
y
Esto es normal.
La proyección de la pantalla se
encuentra desfasada.
y
Ajuste la configuración de posición en el menú Imagen.
y
Compruebe que el producto sea compatible con la resolución y la
frecuencia de la tarjeta de video. Si la frecuencia está fuera de rango, utilice
la configuración de la pantalla del dispositivo externo para establecer la
resolución recomendada.
Aparecen líneas delgadas en el
fondo de la pantalla.
y
Revise las conexiones del cable de video.
La recepción de algunos canales es
mala.
y
Desplácese a otros canales. Puede haber un problema con la transmisión.
y
Es posible que la señal de la estación sea débil. Corrija la dirección de la
antena.
y
Compruebe si existe una interferencia local como las producidas por
electrodomésticos o herramientas eléctricas.
CONFIGURACION DE CONTROL DEL DISPOSITIVO
EXTERNO
Para obtener la información de el control de dispositivo externo de configuración, por favor visite 'www.lg.com'.
30
ENG
ESPAÑOL
ESPECIFICACIONES
ESPECIFICACIONES
Potencia requerida AC100 - 240 V ~ 50/60 Hz
Sistema de televisión NTSC-M, ATSC, 64 y 256 QAM
Cobertura de programas VHF 2 - 13, UHF 14 - 69, CATV 1 - 135, DTV 2 - 69, CADTV 1 - 135
Impedancia de la antena externa
75
Ω
Condición de
ambiente
Temperatura de funcionamiento 0 a 40 °C
Humedad de funcionamiento Menos de 80 %
Temperatura de almacenamiento -20 a 60 °C
Humedad de almacenamiento Menos de 85 %
Las especificaciones del producto pueden cambiar sin previo aviso debido a las actualizaciones de las funciones del
producto.
MODELOS
42PN4500
(42PN4500-UA)
50PN4500
(50PN4500-UA)
Dimensiones (Ancho x
Altura x Profundidad)
Con base 983,6 x 650,3 x 250,0 (mm) 1 168,0 x755,4 x 292,7 (mm)
38,7 x 25,6 x 9,8 (pulgadas) 45,9 x 29,7 x 11,5 (pulgadas)
Sin base 983,6 x 595,6 x 57,0 (mm) 1 168,0 x 698,6 x 57,0 (mm)
38,7 x 23,4 x 2,2 (pulgadas) 45,9 x 27,5 x 2,2 (pulgadas)
Peso Con base 19,6 kg (43,2 libras) 25,4 kg (55,9 libras)
Sin base 18,4 kg (40,5 libras) 24,0 kg (52,9 libras)
Corriente de consumo / Consumo de la potencia
2,1 A / 210 W 2,75 A / 275 W
MODELOS
50PN5300
(50PN5300-UF)
60PN5000
(60PN5000-UA)
60PN5300
(60PN5300-UF)
Dimensiones (Ancho x
Altura x Profundidad)
Con base 1 168,0 x755,4 x 292,7 (mm) 1 386,8 x 874,0 x 340,0 (mm)
45,9 x 29,7 x 11,5 (pulgadas) 54,5 x 34,4 x 13,3 (pulgadas)
Sin base 1 168,0 x 698,6 x 57,0 (mm) 1 386,8 x 821,7 x 57,0 (mm)
45,9 x 27,5 x 2,2 (pulgadas) 54,5 x 32,3 x 2,2 (pulgadas)
Peso Con base 26,1 kg (57,5 libras) 37,7 kg (83,1 libras)
Sin base 24,7 kg (53,7 libras) 34,5 kg (76,0 libras)
Corriente de consumo / Consumo de la potencia
2,9 A / 290 W 3,9 A / 390 W
MODELOS
50PN6500
(50PN6500-UA)
60PN6500
(60PN6500-UA)
60PN6550
(60PN6550-UA)
Dimensiones (Ancho x
Altura x Profundidad)
Con base 1 168,0 x755,4 x 292,7 (mm) 1 386,8 x 874,0 x 340,0 (mm)
45,9 x 29,7 x 11,5 (pulgadas) 54,5 x 34,4 x 13,3 (pulgadas)
Sin base 1 168,0 x 698,6 x 57,0 (mm) 1 386,8 x 821,7 x 57,0 (mm)
45,9 x 27,5 x 2,2 (pulgadas) 54,5 x 32,3 x 2,2 (pulgadas)
Peso Con base 26,1 kg (57,5 libras) 37,7 kg (83,1 libras)
Sin base 24,7 kg (53,7 libras) 34,5 kg (76,0 libras)
Corriente de consumo / Consumo de la potencia
2,9 A / 290 W 3,9 A / 390 W
En el manual de usuario podras encontrar
informacion mas extensa sobre las caracteristicas
avanzadas de este televisor LG en el contenido del
CD-ROM (se provee en version electronica).
Para leer estos archivos, usted tendrá que usar
una computadora personal (PC) equipado con una
unidad de CD-ROM.
El número de modelo y serie del televisor se
encuentra en la parte posterior y/o en un lateral
del televisor respectivamente.
Anótelo a continuación para tenerlo disponible en
caso de necesitar asistencia.
MODELO
SERIE
MANUAL DEL USUARIO
CONFIGURACIÓN DE
DISPOSITIVOS
DE CONTROL EXTERNOS
Lea este manual cuidadosamente antes de utilizar el producto y consérvelo
para futuras referencias.
www.lg.com
2
ENG
ESPAÑOL
2
CÓDIGOS DE TECLA
CÓDIGOS DE TECLA
Esta función no está disponible en todos los modelos.
Código
(hexa)
Función Nota
Código
(hexa)
Función Nota
00 CH +, PR + Botón R/C 45 Q.menu (Menú rápido) Botón R/C
01 CH -, PR - Botón R/C 4C Lista, - (Solo con ATSC) Botón R/C
02 Volumen + Botón R/C 53 List Botón R/C
03 Volumen - Botón R/C 5B Salir Botón R/C
06
> (Tecla de flecha / Tecla
derecha)
Botón R/C 61 Azul Botón R/C
07
< (Tecla de flecha / Tecla
izquierda)
Botón R/C 63 Amarillo Botón R/C
08 Alimentación Botón R/C 71 Verde Botón R/C
09 Mute Botón R/C 72 Rojo Botón R/C
0B Entrada Botón R/C 79
Relación / Aspecto de
pantalla
Botón R/C
0E SLEEP Botón R/C 91 AD (Descripción audio) Botón R/C
0F TV, TV/RAD Botón R/C 7A User Guide Botón R/C
10 - 19 Teclas numéricas 0 a 9 Botón R/C 7C Smart / Home Botón R/C
1A Q.View / Flashback Botón R/C 7E SIMPLINK Botón R/C
1E FAV (canal favorito) Botón R/C 8E ►► (adelantar) Botón R/C
20 Texto (teletexto) Botón R/C 8F ◄◄ (rebobinar) Botón R/C
21 T. Opt (opción teletexto) Botón R/C AA Info Botón R/C
28 Regresar (ATRÁS) Botón R/C AB Guía de programación Botón R/C
30 Modo AV (Audio/Video) Botón R/C B0 ► (Reproducir) Botón R/C
39 Caption/Subtítulo Botón R/C B1 (detener / Live TV) Botón R/C
40
Λ (tecla de flecha/ cursor
hacia arriba)
Botón R/C BA
(congelar/reproducción
en cámara lenta/
pausa)
Botón R/C
41
V (tecla de flecha/ cursor
hacia abajo)
Botón R/C BD (GRABAR) Botón R/C
42 Mis apls. Botón R/C DC 3D Botón R/C
43 Menú / Configuración Botón R/C 9F App (aplicación)/* Botón R/C
44 OK / Enter Botón R/C
* El código de tecla 4C (0x4C) está disponible en los modelos ATSC/ISDB que utilizan canal mayor/menor.
(Para los modelos de Corea del Sur, Japón, América del Norte, América Latina excepto Colombia)
3
ENGESPAÑOL
3
CONFIGURACIÓN DE DISPOSITIVOS DE CONTROL EXTERNOS
CONFIGURACIÓN DE DISPOSITIVOS DE
CONTROL EXTERNOS
Es posible que la imagen que se muestra no sea exactamente igual a su TV.
Conecte el USB al convertidor de serie/toma de entrada RS-232C a un dispositivo de control externo
(como una computadora o un sistema de control A/V) para controlar externamente las funciones del
producto.
Nota: El tipo de puerto de control del TV puede variar según la serie de los modelos.
* Tenga en cuenta que no todos los modelos admiten este tipo de conectividad.
* No se suministra el cable.
USB a convertidor de serie con cable USB
Tipo de USB
USB IN
(TV)
(PC )
(PC )
RS-232C IN
(CONTROL & SERVICE)
(TV)
(TV)
(PC )
(TV)
(PC )
SERVICE ONLY
RS-232C IN
(CONTROL & SERVICE)
RS-232C IN
(CONTROL & SERVICE)
1
3
2
1
3
2
LG TV admite el uso de un USB a convertidor de serie basado en chip PL2303 (ID de proveedor:
0x0557, ID de producto: 0x2008) que LG no fabrica ni incluye.
Puede adquirirse en tiendas de computadoras que venden accesorios para profesionales de soporte de TI.
4
ENG
ESPAÑOL
4
CONFIGURACIÓN DE DISPOSITIVOS DE CONTROL EXTERNOS
RS-232C con cable RS-232C (existente)
Tipo de adaptador 3.5 mm Stereo
Para realizar la conexión entre la PC y el TV, que se especifica en el manual, debe comprar el cable de
conector 3.5 mm Stereo a RS-232.
* Para otros modelos, conecte al puerto USB.
USB IN
(TV)
(PC )
(PC )
RS-232C IN
(CONTROL & SERVICE)
(TV)
(TV)
(PC )
(TV)
(PC )
SERVICE ONLY
RS-232C IN
(CONTROL & SERVICE)
RS-232C IN
(CONTROL & SERVICE)
1
3
2
1
3
2
- Esta conexión solo se puede utilizar con los siguientes modelos: 55/47/39LN5450-UA,
55/50/47/42LN5400-UA, 42/39/32LN5300-UA, y 37/32LN530B-UA.
USB IN
(TV)
(PC )
(PC )
RS-232C IN
(CONTROL & SERVICE)
(TV)
(TV)
(PC )
(TV)
(PC
)
SERVICE ONLY
RS-232C IN
(CONTROL & SERVICE)
RS-232C IN
(CONTROL & SERVICE)
1
3
2
1
3
2
- Esta conexión solo se puede utilizar con los siguientes modelos: 42/50PN4500-UA, 50/60PN5300-UF,
50/60PN6500-UA y 60PN6550-UA.
Computadora del cliente Configuraciones de RS-232C
Configuraciones de 3 cables (no estándar)
1
6
5
9
PC TV
RXD 2 2 TXD
TXD 3 1 RXD
GND 5 3 GND
OR
RXD 3 2 TXD
TXD 2 1 RXD
GND 5 3 GND
D-Sub 9 3.5 mm
Stereo
RS-232C
(Puerto serie)
ID del televisor
Para seleccionar el número de ID, consulte "Asignación de datos reales" en la página 6.
1. Presione CONFIGURACIÓN para acceder a los menús principales.
2. Presione los botones de navegación para desplazarse hasta la OPCIÓN y luego presione ACEPTAR.
3. Presione los botones de navegación para desplazarse hasta SET ID y luego presione ACEPTAR.
4. Desplácese hacia la izquierda o hacia la derecha para seleccionar un número de ID del televisor y
seleccione CERRAR. El rango de ajuste es de 1 a 99.
5. Cuando haya terminado, presione SALIR.
5
ENGESPAÑOL
5
CONFIGURACIÓN DE DISPOSITIVOS DE CONTROL EXTERNOS
Parámetros de comunicación
Velocidad en baudios: 9600 bps (UART)
Longitud de datos: 8 bits
Paridad: ninguna
Bit de detención: 1 bit
Código de comunicación: código ASCII
Utilice un cable cruzado (reverso).
Lista de referencia de comandos
(según el modelo)
COMANDO1 COMANDO2
DATOS
(Hexadecimal)
COMANDO1 COMANDO2
DATOS
(Hexadecimal)
01. Apagado k a 00 13. Balance k t 00 a 64
02. Relación
de aspecto
k c
(Consulte la
pág.7)
14. Temp
color
x u 00 a 64
03. Silencio
de pantalla
k d
(Consulte la
pág.7)
15. ISM
Método (solo
televisores
plasma)
j p
(Consulte la
pág.8)
04. Silencio
de volumen
k e 00 a 01
16. Ahorro de
energía
j q 00 a 05
05. Control
de volumen
k f 00 a 64
17.
Comandos de
sintonización
m a
(Consulte la
pág.9)
06. Contraste k g 00 a 64
18. Agr/Borr
(Agregar/
Borrar) canal
(Programa)
m b 00 a 01
07. Brillo k h 00 a 64 19. Tecla m c
Código de
tecla
08. Color k i 00 a 64
20. Luz de
pantalla de
control
Luz del panel
de control
m g 00 a 64
09. Tinte k j 00 a 64
21. Selección
de entrada
(principal)
x b (Consulte la
pág.10)
10. Nitidez
k k 00 a 32
22. 3D
(Solo
modelos 3D)
x t (Consulte la
pág.11)
11. Selección
de OSD
k l 00 a 01
23.
3D
extendido
(solo modelos
3D)
x v (Consulte la
pág.11)
12. Control
remoto
Modo de
bloqueo
k m 00 a 01
* Nota: durante las operaciones de USB tales como Dvix o EMF, todos los comandos, excepto
Alimentación (ka) y Tecla (mc) no se ejecutan y se reconocen como NG.
6
ENG
ESPAÑOL
6
CONFIGURACIÓN DE DISPOSITIVOS DE CONTROL EXTERNOS
Protocolo de transmisión/recepción
Transmisión
[Comando1][Comando2][ ][ID del televisor][ ][Datos][Cr]
[Comando 1] : primer comando para controlar el televisor (j, k, m o x)
[Comando 2] : segundo comando para controlar el televisor.
[ID del televisor] : puede ajustar la ID del televisor para elegir el número de identificación de monitor que
desea en el menú de opción. El rango de ajuste es de 1 a 99. Cuando seleccione ID del
televisor "0", se controlará cada televisor conectado.
* La ID del televisor se expresa en sistema decimal (1 a 99) en el menú y en sistema
hexadecimal (0x0 a 0x63) en el protocolo de transmisión/recepción.
[DATOS] : para transmitir los datos de comando. Transmite datos "FF" para leer el estado del
comando.
[Cr] : Retorno - código ASCII “0x0D”
[ ] : Espacio – código ASCII “0x20”
Reconocimiento de aceptación
[Comando2][ ][ID del televisor][ ][Aceptar][Datos][x]
* El televisor transmite mensajes de ACK (confirmación) de acuerdo con este formato cuando recibe datos
normales. En este momento, si los datos se encuentran en modo de lectura, indica los datos de estado
actuales. Si los datos se encuentran en modo de escritura, devuelve los datos de la PC.
Reconocimiento de error
[Comando2][ ][ID del televisor][ ][NG][Datos][x]
* El televisor transmite mensajes de ACK (confirmación) de acuerdo con este formato cuando recibe datos
anormales desde funciones no viables o errores de comunicación.
Datos 00: código ilegal
Asignación de datos reales (Hexadecimal b Decimal)
* Cuando ingresa los [datos] en hexadecimal, consulte la tabla de conversión a continuación.
* El Comando de sintonización de canales (ma) utiliza un valor hexadecimal ([datos]) para seleccionar el
número de canal.
00 : Paso 0 32 : Paso 50 (ID del televisor 50) FE : Paso 254
01 : Paso 1 (ID del televisor 1) 33 : Paso 51 (ID del televisor 51) FF : Paso 255
... ... ...
0A : Paso 10 (ID del televisor 10) 63 : Paso 99 (ID del televisor 99) 01 00 : Paso 256
... ... ...
0F : Paso 15 (ID del televisor 15) C7 : Paso 199 27 0E : Paso 9998
10 : Paso 16 (ID del televisor 16) C8 : Paso 200 27 0F : Paso 9999
... ... ...
7
ENGESPAÑOL
7
CONFIGURACIÓN DE DISPOSITIVOS DE CONTROL EXTERNOS
* Según el modelo y la señal, los comandos podrán funcionar de un modo diferente.
01. Alimentación (comando: k a)
Para controlar el apagado del equipo.
Transmisión [k][a][ ][ID del televisor][ ][Dato][Cr]
Datos 00 : apagado
Confirmación [a][ ][ID del televisor][ ][OK/NG]
[Dato][x]
Para mostrar Encender. (Funciona solo si el TV
está encendido)
Transmisión [k][a][ ][ID del televisor][ ][FF][Cr]
Confirmación [a][ ][ID del televisor][ ][OK/NG]
[Dato][x]
* De igual manera, si otras funciones transmiten
datos “FF” de acuerdo con este formato, la
retroalimentación de reconocimiento presenta el
estado de cada función.
02. Relación de aspecto (comando: k c)
(tamaño de la imagen principal)
Para ajustar el formato de la pantalla. (Formato de
la imagen principal)
También puede ajustar la pantalla mediante la
opción Relación de aspecto de Q.MENU (Menú
rápido). o del menú IMAGEN.
Transmisión [k][c][ ][ID del televisor][ ][Dato][Cr]
Dato 01 : pantalla normal
(4:3)
02 : pantalla ancha
(16:9)
04 : zoom
05 : zoom 2
(América Latina
con excepción de
Colombia)
06 : Por programa/
original
07 : 14:9
(Europa, Colombia, Medio
Oriente, Asia excepto Corea
del Sur y Japón)
09 : * solo búsqueda
0B : ancho total
(Solo Europa, Taiwán,
Medio oriente asiático,
China, Hong Kong y
Colombia)
10 a 1F : zoom cine 1 a 16
Confirmación [c][ ][ID del televisor][ ][OK/NG]
[Dato][x]
* Usando la entrada de PC, seleccione la relación
de aspecto de la pantalla de 16:9 o 4:3.
* En el modo DTV/HDMI/Componente (alta
definición), está disponible la opción Solo
búsqueda.
* El modo ancho completo podría funcionar de un
modo diferente en cada modelo, y es totalmente
compatible con DTV y parcialmente compatible
con ATV.
03. Silencio de pantalla (comando: k d)
Para activar o desactivar el silencio de la pantalla.
Transmisión [k][d][ ][ID del televisor][ ][Dato][Cr]
Data 00 : silenciador de pantalla apagado (imagen
encendida) Silenciador de salida de video
apagado
01 : silenciador de pantalla encendido (imagen
apagada)
10 : silenciador de salida de video encendido
Confirmación [d][ ][ID del televisor][ ][OK/NG]
[Dato][x]
* Si solo se encuentra activado el silencio de salida
de video, el televisor mostrará la visualización en
pantalla (OSD). Pero si está activado el silencio
de la pantalla, el televisor no mostrará dicha
visualización (OSD).
04. Silenciador de volumen (comando: k e)
Para activar o desactivar el silencio del volumen.
También es posible ajustar el silenciador a través
del botón MUTE del control remoto.
Transmisión [k][e][ ][ID del televisor][ ][Dato][Cr]
Dato 00 : silenciador de volumen encendido (volumen
apagado)
01 : silenciador de volumen apagado (volumen
encendido)
Confirmación [e][ ][ID del televisor][ ][OK/NG]
[Dato][x]
05. Control de volumen (comando: k f)
Para ajustar el volumen.
También puede ajustar el volumen con los botones
de volumen del control remoto.
Transmisión [k][f][ ][ID del televisor][ ][Dato][Cr]
Dato Mín.: 00 a Máx.: 64
Confirmación [f][ ][ID del televisor][ ][OK/NG]
[Dato][x]
06. Contraste (comando: k g)
Para ajustar el contraste de la pantalla.
También puede ajustar el contraste en el menú
IMAGEN.
Transmisión [k][g][ ][ID del televisor][ ][Dato][Cr]
Dato Mín.: 00 a Máx.: 64
Confirmación [g][ ][ID del televisor][ ][OK/NG]
[Dato][x]
8
ENG
ESPAÑOL
8
CONFIGURACIÓN DE DISPOSITIVOS DE CONTROL EXTERNOS
07. Brillo (comando: k h)
Para ajustar el brillo de la pantalla.
También puede ajustar el brillo en el menú IMAGEN.
Transmisión [k][h][ ][ID del televisor][ ][Dato][Cr]
Dato Mín.: 00 a Máx.: 64
Confirmación [h][ ][ID del televisor][ ][OK/NG]
[Dato][x]
08. Color (comando: k i)
Para ajustar el color de la pantalla.
También puede ajustar el color en el menú IMAGEN.
Transmisión [k][i][ ][ID del televisor][ ][Dato][Cr]
Dato Mín.: 00 a Máx.: 64
Confirmación [i][ ][ID del televisor][ ][OK/NG]
[Dato][x]
09. Tinte (comando: k j)
Para ajustar el tinte de la pantalla.
También puede ajustar el tinte en el menú IMAGEN.
Transmisión [k][j][ ][ID del televisor][ ][Dato][Cr]
Dato Rojo: 00 a Verde: 64
Confirmación [j][ ][ID del televisor][ ][OK/NG]
[Dato][x]
10. Nitidez (comando: k k)
Para ajustar la nitidez de la pantalla.
También puede ajustar la nitidez en el menú IMAGEN.
Transmisión [k][k][ ][ID del televisor][ ][Dato][Cr]
Dato Mín.: 00 a Máx.: 32
Confirmación [k][ ][ID del televisor][ ][OK/NG]
[Dato][x]
11. Selección de OSD (comando: k l)
Para seleccionar el encendido o apagado del
modo de visualización en pantalla (OSD) durante
el control remoto.
Transmisión [k][l][ ][ID del televisor][ ][Dato][Cr]
Dato 01 : OSD apagado 01 : OSD encendido
Confirmación [l][ ][ID del televisor][ ][OK/NG]
[Dato][x]
12.
Modo de bloqueo de control remoto (comando: k m)
Para bloquear el control remoto y los controles del
panel frontal del televisor.
Transmisión [k][m][ ][ID del televisor][ ][Dato][Cr]
Dato 01 : apagado 01 : bloqueo encendido
Confirmación [m][ ][ID del televisor][ ][OK/NG]
[Dato][x]
* Si no está utilizando el control remoto, utilice este
modo.
Cuando la fuente de alimentación principal se
apaga/enciende (se desconecta y se conecta,
después de 20 - 30 segundos), se desactiva el
bloqueo de control externo.
* En modo de espera (CC apagada mediante la
hora de apagado o el comando “ka”, “mc”) si
está activado el bloqueo de teclas, el TV no se
encenderá al presionar la tecla de encendido de IR
o la tecla local.
13. Balance (comando: k t)
Para ajustar el balance.
También puede ajustar el balance en el menú
AUDIO.
Transmisión [k][t][ ][ID del televisor][ ][Dato][Cr]
Dato Mín.: 00 a Máx.: 64
Confirmación [t][ ][ID del televisor][ ][OK/NG]
[Dato][x]
14. Temperatura de color (comando: x u)
Para ajustar la temperatura de color. También
puede ajustar la temperatura de color en el menú
IMAGEN.
Transmisión [x][u][ ][ID del televisor][ ][Dato][Cr]
Dato Mín.: 00 a Máx.: 64
Confirmación [u][ ][ID del televisor][ ][OK/NG]
[Dato][x]
15. Método de ISM (comando: j p) (solo en
televisores plasma)
Para controlar el método de ISM. También puede
ajustar el Método de ISM en el menú OPCIÓN.
Transmisión [j][p][ ][ID del televisor][ ][Dato][Cr]
Datos : 02: orbiter
08: normal
20: lavado de color
Confirmación [p][ ][ID del televisor][ ][OK/NG]
[Dato][x]
16. Ahorro de energía (comando: j q)
Para reducir el consumo de energía de la
televisión. También puede ajustar el Ahorro de
energía en el menú IMAGEN.
Transmisión [j][q][ ][ID del televisor][ ][Dato][Cr]
9
ENGESPAÑOL
9
CONFIGURACIÓN DE DISPOSITIVOS DE CONTROL EXTERNOS
Datos
00 : apagado
01 : mínimo
02 : medio
03 : máximo
04 : automático
05 : pantalla apagada
* (según el modelo)
Confirmación [q][ ][ID del televisor][ ][OK/NG]
[Dato][x]
17. Comando de sintonización (comando: m a)
* Según el modelo y la señal, este comando podrá
funcionar de un modo diferente.
Para los modelos de Europa, Medio Oriente,
Colombia, Asia excepto Corea del Sur y Japón
Seleccione el canal de los siguientes números
físicos.
Transmisión [m][a][ ][ID del televisor][ ][Dato 00]
[ ][Dato 01] [ ][Dato 02][Cr]
* Terrestre análoga/por cable
[Dato 00][Dato 01] Channel Data
Dato 00 : dato de canal alto
Dato 01 : dato de canal bajo
- 00 00 ~ 00 C7 (decimal : 0 ~ 199)
Dato 02 : fuente de entrada (análoga)
- 00 : TV terrestre (ATV)
- 80 : TV por cable (CATV)
* Terrestre digital/por cable/satelital
[Dato 00][Dato 01]: datos de canales
Dato 00 : dato de canal alto
Dato 01 : dato de canal bajo
- 00 00 ~ 27 0F (decimal: 0 ~ 9999)
Dato 02 : fuente de entrada (digital)
- 10 : TV terrestre (DTV)
- 20 : Radio terrestre (Radio)
- 40 : TV satelital (SDTV)
- 50 : Radio satelital (S-Radio)
- 90 : TV por cable (CADTV)
- a0 : Radio por cable (CA-Radio)
* Ejemplos de comandos de sintonización:
1. Sintonice el canal terrestre análogo (PAL) 10.
ID del televisor = todo = 00
Dato 00 y 01 = datos de canales 10 = 00 10
Dato 02 = TV terrestre análoga = 00
Resultado = ma 00 00 0a 00
2. Sintonice el canal terrestre digital (DVB-T) 01.
ID del televisor = todo = 00
Dato 00 y 01 = datos de canales 1 = 00 01
Dato 02 = TV terrestre digital = 10
Resultado = ma 00 00 01 10
3. Sintonice el canal satelital (DVB-S) 1000.
ID del televisor = todo = 00
Dato 00 y 01 = datos de canales 1000 = 03 E8
Dato 02 = TV digital satelital = 40
Resultado = ma 00 03 E8 40
Confirmación [a][ ][ID del televisor][ ][OK][Dato 00]
[Dato 01][Dato 02][x][a][ ][ID del televisor][ ][NG]
[Data 00][x]
Para los modelos de Corea del Sur, América del
Norte, América Latina excepto Colombia.
Para sintonizar los canales en el siguiente número
físico/mayor/menor.
Transmisión [m][a][ ][0][ ][Dato00][ ][Dato01]
[ ][Dato02][ ][Dato03][ ][Dato04][ ][Dato05][Cr]
Los canales digitales poseen un número de canal
físico, mayor y menor. El número físico es el número
de canal digital real, el mayor es el número al cual
el canal se debe asignar y el menor es el subcanal.
Como el sintonizador ATSC asigna automáticamente
el canal al número mayor/menor, cuando se envía
un comando en modo Digital, no es necesario
especificar el número físico.
* Terrestre análoga/por cable
Dato 00 : número de canal físico
- terrestre (ATV) : 02~45 (decimal: 2 ~ 69)
- por cable (CATV) : 01, 0E~7D (decimal : 1,
14~125)
Dato 01 y 04: número de canal mayor/menor
Dato 01 y 02: xx (no importa)
Dato 03 y 04: xx (no importa)
Dato 05: fuente de entrada (análoga)
- 00: TV terrestre (ATV)
- 01: TV por cable (CATV)
* Terrestre digital/por cable
Dato 00: xx (no importa)
[Dato 01][Dato 02]: número de canal mayor
Dato 01: dato de canal de bytes altos
Dato 02: dato de canal de byte bajos
- 00 01 ~ 27 0F (decimal: 1 ~ 9999)
[Dato 03][Dato 04]: número de canal menor
Dato 03: dato de canal de bytes altos
Dato 04: dato de canal de byte bajos
Dato 05: fuente de entrada (digital)
- 02: Terrestrial TV (TV terrestre) (DTV): Use un
número de canal físico
- 06: Cable TV (TV por cable) (CADTV): Use un
número de canal físico
- 22: Terrestrial TV (TV terrestre) (DTV): No use un
número de canal físico
- 26: Cable TV (TV por cable) (CADTV): No use un
número de canal físico
- 46 : TV cable (CADTV): usa solo número de
canal mayor (canal de una parte)
Hay dos bytes disponibles para cada dato de canal
mayor y menor, pero generalmente, solo se usa el
byte más bajo (segundo) (los bytes altos son de 0).
10
ENG
ESPAÑOL
10
CONFIGURACIÓN DE DISPOSITIVOS DE CONTROL EXTERNOS
* Ejemplos de comandos de sintonización:
1. Sintonice el canal de cable análogo (NTSC) 35.
ID del televisor = todo = 00
Dato 00 = datos de canales 35 = 23
Dato 01 y 02 = sin mayor = 00 00
Dato 03 y 04 = sin mayor = 00 00
Dato 05 = TV terrestre por cable análoga = 01
Total = ma 00 23 00 00 00 00 01
2. Sintonice el canal terrestre digital (ATSC) 30-3.
ID del televisor = todo = 00
Dato 00 = físico desconocido = 00
Dato 01 y 02 = mayor es 30 = 00 1E
Dato 03 y 04 = menor es 3 = 00 03
Dato 05 = TV terrestre digital = 22
Total = ma 00 00 00 1E 00 03 22
Confirmación [a][ ][ID del televisor][ ][OK][Dato 00]
[Dato 01][Dato 02][Dato 03][Dato 04]
[Dato 05][x][a][ ][ID del televisor][ ][NG][Dato 00][x]
Para el modelo de Japón
Para sintonizar los canales en el siguiente número
físico/mayor/menor.
Transmisión [m][a][ ][0][ ][Dato00][ ][Dato01]
[ ][Dato02][ ][Dato03][ ][Dato04][ ][Dato05][Cr]
* Terrestre digital/por cable/satelital
Dato 00: xx (no importa)
[Dato 01][Dato 02]: número de canal mayor
Dato 01: dato de canal de bytes altos
Dato 02: dato de canal de byte bajos
- 00 01 ~ 27 0F (decimal: 1 ~ 9999)
[Dato 03][Dato 04]: número de canal menor/derivado
(no importa en TV satelital)
Dato 03: dato de canal de bytes altos
Dato 04: dato de canal de byte bajos
Dato 05 :
fuente de entrada (digital/satelital para Japón)
- 02: TV terrestre (DTV)
- 07: BS (satélite de transmisión)
- 08: CS1 (satélite de comunicación 1)
- 09: CS2 (satélite de comunicación 2)
* Ejemplos de comandos de sintonización:
1
Sintonice el canal terrestre digital (ISDB-T) 17-1.
ID del televisor = todo = 00
Dato 00 = físico desconocido = 00
Dato 01 y 02 = mayor es 17 = 00 11
Dato 03 y 04 = menor/derivado es 1 = 00 01
Dato 05 = TV terrestre = 02
Total = ma 00 00 00 11 00 01 02
2.
Sintonice el canal de satélite de transmisión (BS) 30.
ID del televisor = todo = 00
Dato 00 = físico desconocido = 00
Dato 01 y 02 = mayor es 30 = 00 1E
Dato 03 y 04 = no importa = 00 00
Data 05 = TV satelital de BS = 07
Total = ma 00 00 00 1E 00 00 07
* Esta función varía según el modelo.
Confirmación [a][ ][ID del televisor][ ][OK][Dato 00]
[Dato 01][Dato 02][Dato 03][Dato 04] [Dato 05]
[x][a][ ][ID del televisor][ ][NG][Dato 00][x]
18. Agr/Borr (Agregar/Borrar) canal (Programa)
Para saltar el canal actual (programa) para otra
ocasión.
Transmisión [m][b][ ][ID del televisor][ ][Dato][Cr]
Dato 00 : Borrar (ATSC, ISDB)/Saltar
(DVB)
01 : Agregar
Confirmación [b][ ][ID del televisor][ ][OK/NG]
[Dato][x]
* Establecer el estado del canal guardado como
borrar (ATSC, ISDB)/saltar (DVB) o agregar.
19. Tecla (comando: m c)
Para enviar el código de la tecla remota IR.
Transmisión [m][c][ ][ID del televisor][ ][Dato][Cr]
Dato código de tecla - Consulte la pág.2.
Confirmación [c][ ][ID del televisor][ ][OK/NG]
[Dato][x]
20. Control de luz de pantalla (comando: m g)
Para TV LCD/TV LED
Para controlar luz de pantalla.
Transmisión [m][g][ ][ID del televisor][ ][Dato][Cr]
Dato Mín. : 00 a Máx. : 64
Confirmación [g][ ][ID del televisor][ ][OK/NG]
[Dato][x]
Luz del panel de control (comando: m g)
Para Plasma TV
Para controlar la luz del panel
Transmisión [m][g][ ][ID del televisor][ ][Dato][Cr]
Dato Mín : 00 a Máx.: 64
Confirmación [g][ ][ID del televisor][ ][OK/NG]
[Dato][x]
21. Selección de entrada (comando: x b)
(Entrada de imagen principal)
Para seleccionar la fuente de entrada para la
imagen principal.
Transmisión [x][b][ ][ID del televisor][ ][Dato][Cr]
11
ENGESPAÑOL
11
CONFIGURACIÓN DE DISPOSITIVOS DE CONTROL EXTERNOS
Datos
00 : DTV
02 : DTV satelital
ISDB-BS (Japón)
03 : ISDB-CS1 (Japón)
04 : ISDB-CS2 (Japón)
11 : CATV
01 : CADTV
10 : ATV
20 : AV o AV1 21 : AV2
40 : Component1 41 : Component2
90 : HDMI1
92 : HDMI3
91 : HDMI2
93 : HDMI4
Confirmación [b][ ][ID del televisor][ ][OK/NG]
[Dato][x]
* Esta función varía según el modelo y la señal.
22. 3D (comando: x t) (solo en modelos 3D)
(según el modelo)
Para cambiar el modo 3D del TV.
Transmisión [x][t][ ][ID del televisor][ ][Dato 00][ ]
[Dato 01][ ][Dato 02][ ][Dato 03][Cr]
Dato estructura
[Dato 00] 00 : 3D activado
01 : 3D apagado
02 : 3D a 2D
03 : 2D a 3D
[Dato 01] 00 : parte superior e inferior
01 : lado a lado
02 : tablero de damas
03 : secuencial de marco
04 : intercalación de columnas
05 : intercalación de filas
[Dato 02] 00 : derecha a izquierda
01 : izquierda a derecha
[Dato 03]
efecto 3D (profundidad 3D): Mín.: 00 - Máx.: 14
(*transmitir por código hexadecimal)
* Si [Dato 00] es 00 (3D activado), [Dato 03] no es
relevante.
* Si [Dato 00] es 01 (3D apagado) o 02 (3D a 2D),
[Dato 01], [Dato 02] y [Dato 03] no son relevantes.
* Si [Dato 00] es 03(2D a 3D), [Dato 01] y [Dato 02]
no son relevantes.
* Es posible que todas las opciones del patrón de
3D ([Datos 01]) no estén disponibles según la
transmisión/señal de video.
[Dato 00] [Dato 01] [Dato 02] [Dato 03]
00 O O X
01 X X X
02 X X X
03 X X O
X : sin importancia
Confirmación [t][ ][ID del televisor][ ][OK][Dato00]
[Dato01][Dato02][Dato03][x]
[t][ ][ID del televisor][ ][NG][Dato00][x]
23. 3D extendida++(comando: x v) (solo en
modelos con 3D) (según el modelo)
Para cambiar la opción 3D del televisor.
Transmisión [x][v][ ][ID del televisor][ ][Dato 00][ ]
[Dato 01][Cr]
[Dato 00] opción 3D
00 : corrección de imagen en 3D
01 : profundidad 3D (solo modo 3D
manual)
02 : Visualización 3D
06 : corrección de color en 3D
07 : zoom de sonido 3D
08 : vista de imagen normal
09 : MODO DE SINTONIZACIÓN EN 3D
[Dato 01] cuenta con su propio rango para cada
opción en 3D según [Dato 00].
1) Cuando [Data 00] es 00
00 : derecha a izquierda
01 : izquierda a derecha
2) Cuando [Data 00] es 01, 02
Dato Mín.: 0 - Máx.: 14 (*transmitir por código
hexadecimal)
El rango de valores de datos (0 - 20) convierte el
rango de visión (-10 - +10) de forma automática
(según el modelo)
3) Cuando [Data 00] es 06, 07, 08
00 : apagado
01 : encendido
4) Cuando [Data 00] es 09
00 : estándar
02 : cine
04 : manual
01 : deporte
03 : extremo
Confirmación [v][ ][ID del televisor][ ][OK]
[Dato00][Dato01][x][v][ ][ID del televisor][ ][NG]
[Dato00][x]
  • Page 1 1
  • Page 2 2
  • Page 3 3
  • Page 4 4
  • Page 5 5
  • Page 6 6
  • Page 7 7
  • Page 8 8
  • Page 9 9
  • Page 10 10
  • Page 11 11
  • Page 12 12
  • Page 13 13
  • Page 14 14
  • Page 15 15
  • Page 16 16
  • Page 17 17
  • Page 18 18
  • Page 19 19
  • Page 20 20
  • Page 21 21
  • Page 22 22
  • Page 23 23
  • Page 24 24
  • Page 25 25
  • Page 26 26
  • Page 27 27
  • Page 28 28
  • Page 29 29
  • Page 30 30
  • Page 31 31
  • Page 32 32
  • Page 33 33
  • Page 34 34
  • Page 35 35
  • Page 36 36
  • Page 37 37
  • Page 38 38
  • Page 39 39
  • Page 40 40
  • Page 41 41
  • Page 42 42
  • Page 43 43
  • Page 44 44
  • Page 45 45
  • Page 46 46
  • Page 47 47
  • Page 48 48
  • Page 49 49
  • Page 50 50
  • Page 51 51
  • Page 52 52
  • Page 53 53
  • Page 54 54
  • Page 55 55
  • Page 56 56
  • Page 57 57
  • Page 58 58
  • Page 59 59
  • Page 60 60
  • Page 61 61
  • Page 62 62
  • Page 63 63
  • Page 64 64
  • Page 65 65
  • Page 66 66
  • Page 67 67
  • Page 68 68
  • Page 69 69
  • Page 70 70
  • Page 71 71
  • Page 72 72
  • Page 73 73
  • Page 74 74
  • Page 75 75
  • Page 76 76
  • Page 77 77
  • Page 78 78
  • Page 79 79
  • Page 80 80
  • Page 81 81
  • Page 82 82
  • Page 83 83
  • Page 84 84
  • Page 85 85
  • Page 86 86
  • Page 87 87
  • Page 88 88

LG 60PN6500 El manual del propietario

Categoría
Televisores LED
Tipo
El manual del propietario

En otros idiomas