ROBLIN BACCARAT El manual del propietario
- Tipo
- El manual del propietario

Notice
BACCARAT
HOTTE MURALE
CONCEPTION
FABRICATION
FRANÇAISE

FR
EN
DE
IT
ES
NL
CH
Mode d’emploi et d’installation
Instructions for installation and use
Gebrauchs- und Installationsanleitung
Istruzioni per l’installazione e l’uso
Manual de empleo e instalación
Gebruiksaanwijzing en installatie
Suisse, cordon d’alimentation
Composants, Components, Komponenten, Componenti, Componentes, Onderdelen P. 41
P. 42
P. 31
P. 34
P. 39
P. 42
P. 43
P. 45
P. 51
Shéma électrique, Electrical diagram, Stromlaufplan, Schema elettrico, Esquema eléctrico, Elektrisch schema
Dessin technique, Technical drawing, Technische Zeichnung, Disegno tecnico, Dibujo técnico, Technische tekening
Montage, Assembly, Montage, Montaggio, Montaje, Montage
Entretien, Maintenance, Instandhaltung, Manutenzione, Mantenimiento, Onderhoud
Commande déportée, Remote controls, Hilfe bei der Diagnose, Comando deportato, Mando separado, Afstandsbediening
Commande, Controls, Bedienung, Comando, Mandos, Bediening,
Aide au diagnostic, Diagnostic aid, Zeichenerklärungen, Aiuto alla diagnostica, Ayuda a la diagnosis, Diagnosetabel
Légendes, Legends, Zeichenerklärungen, Legende, Leyendas, Legenda’s
P. 4
P. 10
P. 16
P. 22
P. 28
P. 34
P. 40

Version recyclage systeme «Clean-air»
«Clean-air» system recirculation version
Umluftausführung «Clean-air»-System
Versione riciclo sistema «Clean-air»
Versión sistema de recirculación «Clean-air»
Versie “clean-air” recirculatie systeem
Version recyclage
Recirculation version
Umluftausführung
Versione riciclo
Versión recirculación
Versie recirculatie
Version évacuation extérieure verticale
Vertical exterior extraction version
Vertikale Außenabluftausführung
Versione evacuazione esterna e verticale
Versión evacuación exterior vertical
Versie verticale evacuatie naar buiten
Version évacuation extérieure horizontale
Horizontal exterior extraction version
Horizontale Außenabluftausführung
Versione evacuazione esterna e orizzontale
Versión evacuación exterior horizontal
Versie horizontale evacuatie naar buiten
CLEAN-
R

4
FR
La présente notice vaut pour plusieurs versions d’appareils.
Elle peut contenir des descriptions d’accessoires ne figurant pas dans votre appareil.
CET ÉQUIPEMENT EST CONFORME AUX NORMES SUIVANTES :
EN 60 335-1:2012+A11:2014, EN 60 335-2-31:2014, EN 62233:2008 + C1:2008, EN 61 000-3-2:2006 + A1/A2: 2009, EN
61 000-3-3:2008, EN 55 014-1:2006 + A1:2009 + A2:2011, EN 55 014-2:1997 + A1:2001 + A2:2008, EN 61591:1997/
A2:2011, EN 50564:2011, EN 50581:2012, 2014/35/CE relative à la sécurité électrique, 2014/30/CE relative à la compatibilité
électromagnétique, 2009/125/CE relative à l’écoconception, 2011/65/CE relative à la limitation de l’utilisation de certaines
substances dangereuses dans les équipements électriques et électroniques, et aux principales exigences des directives
européennes 66/2014.
Lorsque le symbole d’une poubelle à roue barrée est attaché à un produit, cela signifie que le produit est couvert par la directive
Européenne 2002/96/EC.
Votre produit est conçu et fabriqué avec des matériaux et des composants de haute qualité qui peuvent être recyclés et utilisés
de nouveau :
• Veuillez vous informer du système local de séparation des déchets électriques et électroniques,
• Veuillez agir selon les règles locales et ne pas jeter vos produits usagés avec les déchets domestiques usuels,
• Jetez correctement votre produit usagé aidera à prévenir les conséquenses négatives potentielles contre
l’environnement et la santé humaine.
PRÉCONISATION DE MONTAGE
(1)
Le non-respect de cette condition entraîne la suppression de la garantie du constructeur et tout recours en cas d’accident.
Le montage et le raccordement doivent être réalisés par un installateur
(1)
qualifié.
Employez les chevilles adaptées au support, se renseigner auprès des fabricants, effectuez un scellement si nécessaire.
La société décline toute responsabilité en cas d’accrochage défectueux dû au perçage et chevillage.
La hotte est équipée d’un cordon d’alimentation de type HO5VVF 3 x 0,75 mm² comportant une fiche normalisée 10/16A avec
système de mise à la terre.
Mode de protection : classe 1
Tension d’alimentation : 220-240V mono - 50/60Hz.
Vérifiez que la tension du secteur soit identique aux valeurs indiquées sur la plaque signalétique à l’intérieur de la hotte.
Si la hotte est raccordée directement sur le réseau (sans sa fiche), un interrupteur omnipolaire avec une ouverture de contact de
3 mm doit être installé avant la hotte. Le fil de terre (fil jaune et vert) ne doit pas être interrompu par cet interrupteur.
Cet appareil ne doit pas être utilisé par des personnes (y compris les enfants) ayant des capacités psychiques, sensorielles
ou mentales réduites, ni par des personnes n’ayant pas l’expérience et la connaissance de ce type d’appareils, à moins
d’être sous le contrôle et la formation de personnes responsables de leur sécurité. Les enfants doivent être surveillés
pour s’assurer qu’ils ne jouent pas avec l’appareil.
• Respectez le diamètre de sortie de l’appareil : la hotte ne doit en aucun cas être raccordée à un conduit de ventilation méca-
nique contrôlée (V.M.C).
• Lorsqu’on évacue l’air vicié dans un conduit d’évacuation, il faut veiller à ce que celui-ci ne soit pas déjà exploité à véhiculer
des gaz ou fumées provenant d’appareils alimentés par une énergie autre qu’électrique.
• Positionnez le plan de cuisson au plus près de l’évacuation et évitez la formation de coudes sur la gaine, afin de réduire au
maximum les pertes de charges.
• Dans tous les cas d’installation, veillez au bon renouvellement d’air de la cuisine. Pensez à effectuer une ou des entrées d’air
dont la section est supérieure ou égale au diamètre du tuyau d’évacuation afin de ne pas mettre la cuisine en dépression.
• Prévoyez une aération suffisante lorsqu’un appareil de cuisson ou autre utilise simultanément l’air ambiant de la pièce où est
installée la hotte.
• La dépression maximum créée dans la pièce doit être inférieure à 0,04 mbar, ce qui évite un retour de gaz de combustion.
• L’appareil doit être positionné de telle façon que la fiche d’alimentation soit accessible.

5
FR
CONSEILS D’ÉCONOMIE D’ÉNERGIE
1. Utilisez une vitesse d’aspiration réduite, de préférence ; N’utilisez la vitesse intensive que si nécessaire.
2. Une cuisine bien ventilée rend le fonctionnement de la hotte plus efficace.
3. Nettoyez les filtres anti-graisses régulièrement afin de maintenir leur efficacité.
4. Un filtre saturé n’est pas performant et ne pourra pas être utilisé longtemps.
CONSEILS D’UTILISATION
Pour obtenir une efficacité maximum d’absorption des fumées ou des vapeurs, faîtes fonctionner la hotte 5 minutes
environ avant et après la cuisson des aliments :
• les petites vitesses sont conseillées pour les cuissons à feu doux et pour les sauces, mijotages, etc...
• les vitesses intermédiaires sont conseillées pour les cuissons soutenues, grillades et fritures.
• les grandes vitesses sont conseillées pour les cuissons à forte émanation de graisses et vapeurs.
• la vitesse intensive est conseillée en cas de vapeurs et d’émanations de graisses ponctuelles trop importantes.
NE JAMAIS FLAMBER DE METS EN DESSOUS DE L’APPAREIL
Ne laissez jamais de flammes libres sous la hotte en fonctionnement.
Les fritures nécessitent une surveillance permanente, l’huile surchauffée pouvant s’enflammer.
Les parties accessibles de la hotte peuvent devenir chaudes lorsque celle-ci est utilisée avec des appareils de cuisson.

6
FR
ENTRETIEN
Évitez le risque d’incendie en nettoyant la hotte selon les préconisations d’entretien :
Mettez la hotte hors tension avant toute opération d’entretien ou intervention électrique. Équipez vous de gants.
• Nettoyez régulièrement la carrosserie en utilisant des produits détergents, non abrasifs et une éponge légèrement humide.
• Pour rénover (par intervalle d’un an minimum) les parties extérieures en inox, préférez l’utilisation du produit réf.112.0172.941
• N’utilisez jamais d’éponges ou de chiffons trempés.
• N’introduisez aucun objet, ni les mains dans l’ouverture servant à l’évacuation de l’air.
• Nettoyez l’intérieur du corps aspirant 1 fois par an.
• Vérifiez tous les 6 mois le bon écoulement de l’air vicié.
• Observez les prescriptions réglementaires locales concernant l’évacuation de l’air vicié.
• Il est indispensable de procéder à un nettoyage périodique des filtres anti-graisses au lave vaisselle à une température maxi-
male de 50°C, 1 fois par mois ou selon les indications de la commande (voir la page de commande). Laissez sécher les filtres
à l’air libre. Ces filtres ont une durée de vie de 10 ans.
• Si votre hotte est équipée de filtres anti-odeurs lavables
(3)
, ceux-ci doivent être nettoyés au lave vaisselle à température élevée
(sans autres ustensiles de cuisine) tous les 2 mois et doivent être séchés par le lave vaisselle ou à l’air libre durant 30 minutes
environ .
• Une fois lavés et séchés, réactivez les filtres anti-odeurs lavables en les plaçant au four pendant 10 minutes à 100°C maxi-
mum. Le nettoyage des filtres anti-odeurs lavables s’accompagne systématiquement du nettoyage des filtres anti-graisses.
• Les filtres anti-odeurs à charbon actif
(3)
nécessitent un remplacement tous les 3 mois au minimum ou plus si la hotte est utili-
sée plus de 3 heures par jour, ou selon les indications de commande (voir la page de commande). Le remplacement des filtres
anti-odeurs à charbon actif s’accompagne systématiquement du nettoyage des filtres anti-graisses
• Le remplacement des LED défectueuses doit être exclusivement fait par un professionnel spécialiste agréé.
• Les lampes à ultraviolet ont une durée de vie d’environ 6000 heures. Le cycle de vie des filtres clean-air (catalyseurs) suit celui
des lampes à ultraviolet.
• Le remplacement d’une lampe à ultraviolet (tous les 3 ans) s’accompagne systématiquement du remplacement du filtre clean-
air associé.
DISPONIBILITÉ DES PIÈCES DÉTACHÉES
En application de l’article R 111-3 du Code de la consommation, pour les produits mis sur le marché à compter du 1er mars 2015,
ROBLIN garantit la disponibilité des pièces détachées indispensables à l’utilisation de ses Produits pendant une durée de 10 ans
à compter de l’achat du produit par le consommateur, la facture faisant foi, sous réserve que celle-ci se situe dans les 12 mois
suivants la date de vente par ROBLIN au Client. En cas d’anomalie de fonctionnement, prévenez votre installateur qui devra vérifier
l’appareil et son raccordement.
(3)
les filtres anti-odeurs : (filtre à charbon actif (aspect noir) et filtre à charbon lavable (aspect similaire au filtre anti-graisse mais plus épais et de plus petite périphérie)
sont toujours placés après le filtre anti-graisse, ce dernier est le premier visible.
CLEAN- R

7
FR
X x X W
X
x X W
XXX-XXX V ~ XX-XX
TOT. X W
XXXXXXXXXXXX
FUN Nr: XXX.XXXX.XXX
XXXXXXX
XXXX X X XX XXXX
MOD
Made in France
AVANT MONTAGE
INFORMATIONS À TRANSMETTRE AU SERVICE
APRÈS VENTE LE CAS ÉCHÉANT.
Visualiser l’étiquette signalétique collée sur le corps de la hotte, à l’intérieur, derrière les filtres. Les informations indi-
quées sur cette étiquette sont nécessaires au pôle assistance S.A.V pour une prise en charge d’assistance technique.
Pôle assistance S.A.V : 04.88.78.59.93
Reporter et conserver ci-dessous les références repérées
COLLER LE DUPLICATA DE L’ÉTIQUETTE SIGNALÉTIQUE ICI
CODE PRODUIT :
CODE FUN :
N° DE SÉRIE :
OU
1
1
2
2
3
3

8
FR
GARANTIE ET SERVICE APRÈS-VENTE
DANS LE CAS OU UN COMPOSANT ÉLECTRIQUE VIENDRAIT À ÊTRE ENDOMMAGÉ, CELUI-CI NE PEUT ÊTRE REMPLACÉ QUE
PAR UN ATELIER DE RÉPARATION RECONNU PAR LE FABRICANT, CAR DES OUTILS SPÉCIAUX SONT NÉCESSAIRES.
• Débranchez complètement l’appareil.
• Exigez toujours l’utilisation de pièces de rechange d’origine (La non observation de cette prescription peut compromettre la
sécurité de l’appareil).
• Lors de la commande des pièces détachées, rappelez le numéro de série de l’appareil ( voir sur la page ci-contre) inscrit sur la
plaque signalétique située à l’intérieur de la hotte.
• Seule la facture d’achat de l’appareil fera foi pour l’application de la garantie contractuelle (cette garantie ne couvre pas les
consommables comme : les ampoules, les filtres, les LED...).
En application de l’article R 111-3 du Code de la consommation, pour les produits mis sur le marché à compter du 1er mars 2015,
ROBLIN garantit la disponibilité des pièces détachées indispensables à l’utilisation de ses Produits pendant une durée de 10 ans
à compter de l’achat du produit par le consommateur, la facture faisant foi, sous réserve que celle-ci se situe dans les 12 mois
suivants la date de vente par ROBLIN au Client. En cas d’anomalie de fonctionnement, prévenez votre installateur qui devra vérifier
l’appareil et son raccordement.
La garantie commerciale fournie par la société FRANKE France SAS pour les produits de marque ROBLIN est limitée aux profession-
nels de la distribution. Elle est applicable à la France continentale, la Corse, et aux DOM TOM.
La garantie commerciale est une garantie de de 2 ans pièces (hors frais de main d’œuvre et déplacement). Elle s’applique à comp-
ter de la date de facturation de l’appareil au consommateur sous réserve que celle-ci se situe dans les 12 mois suivants la date de
vente par ROBLIN au Client.
Afin de satisfaire le consommateur lors de toute intervention de service après-vente, le Client s’engage à l’orienter vers le service
mis en place par ROBLIN afin d’organiser la prise en charge dans les meilleurs délais. Le service après-vente est joignable au nu-
méro suivant : 04 88 78 59 93.
Les éléments à communiquer au service après-vente ROBLIN sont :
• Un descriptif de la panne constatée
• la référence commerciale du produit ainsi que son numéro de série
• la copie de facture d’achat du consommateur ainsi que ses coordonnées
Cette garantie s’applique à tous problèmes techniques ou fonctionnels. Sont exclues de la garantie commerciale :
• Les pannes concernant les accessoires ou les pièces consommables (filtres, ampoules …),
• Les dommages, pannes et défauts imputables à des causes d’origine extérieure,
• Les dommages dus à la corrosion, à un mauvais branchement ou alimentation,
• Les dommages dus au non-respect des instructions fournies par ROBLIN (installation, montage,…),
• Les pannes résultant de la modification de la construction et des caractéristiques de l’appareil de marque ROBLIN,
• Les pannes et dommages survenant suite à l’utilisation de pièces détachées non conformes à celles fournies d’origine par
ROBLIN ou à un défaut d’entretien,
• Les pannes résultant d’un usage professionnel ou commercial des appareils.

10
EN
This manual applies to several appliance versions.
It may contain descriptions of accessories not included in your appliance.
THIS EQUIPMENT IS COMPLIANT WITH THE FOLLOWING STANDARDS:
EN 60 335-1:2012+A11:2014, EN 60 335-2-31:2014, EN 62233:2008 + C1:2008, EN 61 000-3-2:2006 + A1/A2: 2009, EN
61 000-3-3:2008, EN 55 014-1:2006 + A1:2009 + A2:2011, EN 55 014-2:1997 + A1:2001 + A2:2008, EN 61591:1997/
A2:2011, EN 50564:2011, EN 50581:2012, 2014/35/CE relating to electrical safety, 2014/30/EC relating to electromagnetic
compatibility, 2009/125/EC relating to ecodesign, 2011/65/EC relating to the limitation of the use of certain hazardous
substances in electrical and electronic equipment and to the main requirements of European Directives 66/2014.
When the symbol of a crossed out wheelie bin is attached to a product it means that the product is covered by the European Di-
rective 2002/96/EC.
Your product is designed and manufactured with materials and components of high quality that can be recycled and used again:
• You should find out about the local system of separation of electrical and electronic waste,
• You should act according to the local rules and not dispose of your used product with normal domestic waste,
• Correct disposal of your old product will help prevent the potential negative consequences on the environment and
human health.
ASSEMBLY RECOMMENDATIONS
(1)
Failure to comply with this condition results in the cancellation of the manufacturer’s warranty and rejection of any recourse in the event of an accident.
Assembly and connection must be done by a qualified installer
(1)
.
Use suitable anchors for the support medium. Obtain information from the manufacturers; seal if necessary. The company dis-
claims any responsibility in case of faulty anchoring due to the hole or the anchor system.
The hood is equipped with a HO5VVF 3 x 0.75 mm² power cable with a standard 10/16A plug with earth.
Mode of protection: class 1
Supply voltage: 220-240V single phase - 50/60Hz.
Check that the mains voltage is the same as the values indicated on the manufacturer’s plate on the inside of the hood.
If the hood is connected directly to the mains (without a plug), an all-pole circuit breaker switch with a contact opening of 3 mm
must be installed before the hood. The earth wire (yellow and green) must not be broken by this switch.
This appliance must not be used by persons (including children) with diminished psychical, sensory or mental capacities,
nor by persons not having the experience and knowledge of this type of appliance, unless they are under the control
and the training of persons responsible for their safety. Children should be supervised to ensure that they do not play
with the appliance.
• Respect the diameter of the appliance output: the hood must not in any circumstances be connected to a controlled mecha-
nical ventilation duct.
• If it releases the stale air into an outlet duct, it is essential to ensure that the latter is not already used to carry gas or smoke
from appliances powered by energy other than electricity.
• Position the cooking surface as close as possible to the outlet and avoid the formation of elbows in the duct, to reduce pres-
sure loss to the minimum.
• When installing situations, make sure that the air renewal in the kitchen is satisfactory. Be sure to create one or more air inlets
with a section greater than or equal to the diameter of the outlet pipe in order not to create a vacuum in the kitchen.
• Make sure there is sufficient ventilation if a cooking or other appliance uses the ambient air of the room where the hood is
installed at the same time.
• The maximum vacuum created in the room should be less than 0.04 mbar; this prevents return of the combustion gases.
• The appliance must be positioned in such a way that the power plug is accessible.

11
EN
POWER SAVING TIPS
1. Preferably use a low suction speed; only use the high speed if it is really necessary.
2. A well ventilated kitchen makes hood operation more efficient.
3. Clean the anti-grease filters regularly to maintain their efficiency.
4. A saturated filter is not efficient and cannot be used for long.
RECOMENDATIONS FOR USE
To obtain maximum efficiency in the absorption of smoke or fumes, run the hood for approximately 5 minutes before and after
cooking food:
• low speeds are recommended when cooking on a low heat and for sauces, simmering, etc.
• intermediate speeds are recommended for fast cooking, and fried or grilled foods.
• high speeds are recommended for cooking that creates a lot of fat or vapour.
• the extra fast speed is recommended in cases of sudden excessive release of vapours and fumes.
NEVER FLAME DISHES UNDER THE APPLIANCE
Never leave open flames under the hood while it is operating.
Fried foods require a permanent monitoring, overheated oil may catch fire.
The accessible parts of the hood may become hot when it is used with cooking appliances.

12
EN
MAINTENANCE
Avoid fire risk by cleaning the hood according to the maintenance instructions :
Turn the hood off before any maintenance operation or electrical work. Wear gloves.
• Clean the bodywork regularly using non-abrasive detergent products and a slightly damp sponge.
• To renovate external stainless steel parts (at intervals of one year minimum), it is preferable to use the product ref.112.0172.941
• Never use soaked sponges or rags..
• Do not insert any object, or your hands, into the opening serving for the extraction of the air.
• Clean the inside of the extraction body once per year.
• Check the flow of stale air every 6 months.
• Observe local regulatory requirements covering the extraction of stale air.
• It is essential to clean anti-grease filters in a dishwasher at a maximum temperature of 50°C, once per month or according
to the indications on the order (see order page). Allow the filters to dry in the open air. These filters have a service life of 10
years.
• If your hood is equipped with washable anti-odour filters
(3)
, they must be cleaned in a dishwasher at high temperature (without
other kitchen utensils) every 2 months and dried by the dishwasher or in the open air for approximately 30 minutes.
• Once washed and dried, reactivate the washable anti-odour filters by placing them in an oven for 10 minutes at 100°C maxi-
mum. Cleaning of the washable anti-odour filters should systematically be accompanied by cleaning of the anti-fat filters.
• Active charcoal
(3)
anti-odour filters need replacement at least every 3 months, or more often if the hood is used more than 3
hours per day. Or according to the indications of the order (see the order page). Replacement of the active charcoal anti-odour
filters should systematically be accompanied by cleaning of the anti-fat filters.
• The replacement of faulty LEDs should only be done by a certified professional specialist.
• The ultraviolet bulbs have a life expectancy of approximately 6000 hours. The life cycle of the clean-air filters (catalysts) fol-
lows that of the ultraviolet lamps.
• The replacement of an ultraviolet bulb (every 3 years) should systematically be accompanied by the replacement of the asso-
ciated clean air filter.
AVAILABILITY OF SPARE PARTS
Pursuant to Article R 111-3 of the Consumer Code, for products placed on the market as of March 1, 2015, ROBLIN guarantees
the availability of spare parts essential for the use of its products for a period of 10 years. years from the purchase of the product
by the consumer, the invoice being authentic, provided that it is within 12 months of the date of sale by ROBLIN to the Customer.
In the event of a malfunction, inform your installer who will have to check the device and its connection.
(3)
anti-odour filters: (active charcoal filter (black appearance) and washable charcoal filter (similar appearance to the anti-grease filter but thicker and with a smaller circu-
mference)) are always placed after the anti-grease filter; this is the first one visible.
CLEAN- R

EN
13
FUSE ON
FUSE ON
FUSE ON
BLUE (NEUTRAL)
BROWN (LIVE)
GREEN & YELLOW
(EARTH)
N Supply
DP
L supply
N
L
UK ELECTRICAL CONNECTION - ELECTRICAL REQUIREMENTS
Any permanent electrical installation must comply with the lastet I.E.E Regulations and local Electricity Board regulations. For your
own safety this should be undertaken by a qualified electrician e.g. your local Electricity Board, or a contactor who is on the roll of
the National Inspection Council for Electrical Installation Contracting (NICEIC).
Before connecting to the mains supply ensure that the mains voltage corresponds to the voltage on the rating inside the cooker
hood.
This appliance is fitted with a 2 core mains cable and must be permanently connected to the electricity supply
via a double-pole switch having 3mm minimum contact gap on each pole. A switched Fuse Connection Unit to BS.1363 Part 4,
fitted with a 3 Amp fuse, is a recommended mains supply connection accessory to ensure compliance with the Safety Requirements
applicable to fixed wiring instructions.
The wires in this mains lead are coloured in accordance with the following code :
Green & yellow : Earth
Blue : Neutral
Brown : Live
As the colours of the wires in the mains lead of this appliance may not correspond with the coloured markings identifying the ter-
minals in your connection unit, proceed as follows :
The wire which is coloured blue must be connected to the terminal which is marked with the letter ‘N’ or coloured black.
The wire which is coloured brown must be connected to the terminal which is marked with the letter ‘L’ or coloured red.
BEFORE FITTING
X x X W
X
x X W
XXX-XXX V ~ XX-XX
TOT. X W
XXXXXXXXXXXX
FUN Nr: XXX.XXXX.XXX
XXXXXXX
XXXX X X XX XXXX
MOD
Made in France
INFORMATION TO BE GIVEN TO THE SERVICE DEPT IN CASE OF NEED.
Check the label affixed to the body of the hood, inside, behind
the filters. The information on this label is necessary for the
After Sales Service assistance contact to provide technical as-
sistance.
A s s i s t a n c e c o n t a c t . Service
Department: 0 4 . 8 8 . 7 8 . 5 9 . 9 3 .
Copy and keep the references below
GLUE A COPY OF THE LABEL HERE
PRODUC CODE :
FUN CODE :
SERIAL No :
1
1
2
2
3
3

14
EN
WARRANTY AND AFTER-SALES SERVICE
IF AN ELECTRIC COMPONENT IS DAMAGED IT CAN ONLY BE REPLACED BY A REPAIR SHOP APPROVED BY THE MANUFAC-
TURER BECAUSE SPECIAL TOOLS ARE REQUIRED.
• In the event of faulty operation notify your installer who will check the appliance and its connection.
• Disconnect the appliance completely.
• Always require the use of genuine spare parts (non-compliance with this requirement can compromise the safety of the ap-
pliance).
• When ordering spare parts, quote the serial number of the appliance (see on the page opposite) on the plate located inside
the hood.
• Only the purchase invoice of the appliance can serve as proof for the implementation of the contractual warranty (this warranty
does not cover consumables such as: lighting, filters, LEDs, etc.).
Pursuant to Article R 111-3 of the Consumer Code, for products placed on the market as of March 1, 2015, ROBLIN guarantees the
availability of spare parts essential for the use of its products for a period of 10 years. years from the purchase of the product by
the consumer, the invoice being authentic, provided that it is within 12 months of the date of sale by ROBLIN to the Customer. In
the event of a malfunction, inform your installer who will have to check the device and its connection.
The commercial guarantee provided by FRANKE France SAS for ROBLIN brand products is limited to retailers. It is applicable to
continental France, Corsica, and DOM TOM.
The commercial guarantee is a guarantee of 2 years parts (excluding labor costs and displacement). It applies from the date of
invoicing of the device to the consumer provided that it is within 12 months of the date of sale by ROBLIN to the Customer.
In order to satisfy the consumer during any after-sales service, the Customer undertakes to direct him to the service set up by
ROBLIN to organize the care as soon as possible. The after-sales service can be reached at the following number: 04 88 78 59 93.
The elements to communicate to the ROBLIN after-sales service are:
• A description of the failure observed
• the commercial reference of the product as well as its serial number
• the copy of the consumer’s invoice and his contact information
This warranty applies to all technical or functional problems. Are excluded from the commercial guarantee:
• Faults concerning accessories or consumable parts (filters, bulbs ...),
• Damages, failures and defects due to causes of external origin,
• Damage due to corrosion, poor connection or power supply,
• Damages due to non-compliance with the instructions provided by ROBLIN (installation, assembly, ...),
• Failures resulting from the modification of the construction and features of the ROBLIN branded device,
• Breakdowns and damage resulting from the use of spare parts not in conformity with those provided by origin by ROBLIN or a
lack of maintenance,
• Breakdowns resulting from professional or commercial use of the devices.

16
DE
Diese Anleitung gilt für mehrere Geräteausführungen.
Sie kann Beschreibungen zu Zubehörkomponenten enthalten, die nicht in Ihrem Gerät
vorhanden sind.
DIESES GERÄT ERFÜLLT DIE FOLGENDEN NORMEN:
EN 60 335-1:2012+A11:2014, EN 60 335-2-31:2014, EN 62233:2008 + C1:2008, EN 61 000-3-2:2006 + A1/A2: 2009, EN 61
000-3-3:2008, EN 55 014-1:2006 + A1:2009 + A2:2011, EN 55 014-2:1997 + A1:2001 + A2:2008, EN 61591:1997/A2:2011,
EN 50564:2011, EN 50581:2012, 2014/35/EG über die elektrische Sicherheit, 2014/30/EG über die elektromagnetische
Verträglichkeit, die Ökodesign-Richtlinie 2009/125/EG, 2011/65/EG zur Beschränkung der Verwendung bestimmter gefährlicher
Stoffe in Elektro- und Elektronikgeräten, und die wesentlichen Anforderungen der europäischen Richtlinien 66/2014.
Wenn ein Produkt mit dem Symbol einer durchgestrichenen Mülltonne versehen ist, bedeutet dies, dass das Produkt unter die
europäische Richtlinie 2002/96/EG fällt.
Ihr Produkt wurde unter Verwendung qualitativ hochwertiger Materialien und Komponenten konstruiert und hergestellt, die recy-
celt und wiederverwendet werden können:
• Bitte informieren Sie sich über das örtliche Abfalltrennungssystem für Elektro- und Elektronikabfälle,
• Halten Sie sich bitte an die örtlichen Bestimmungen und entsorgen Sie Ihre Altgeräte nicht mit dem normalen Hausmüll,
• Die ordnungsgemäße Entsorgung Ihres Altgeräts trägt zur Vermeidung möglicher negativer Auswirkungen für die Umwelt
und die menschliche Gesundheit bei.
HINWEISE ZUR MONTAGE
(1)
Die Nichteinhaltung dieser Bedingung führt zum Erlöschen der Herstellergarantie und jeglicher Ansprüche im Falle eines Unfalls.
Die Montage und der Anschluss sind von einem qualifizierten Installateur
(1)
vorzunehmen.
Verwenden Sie für den Untergrund geeignete Dübel – erkundigen sich hierfür bei den Herstellern – und zementieren Sie diese ggf.
ein. Das Unternehmen lehnt jede Haftung für eine fehlerhafte Verankerung infolge des Bohrens und der Befestigung mit Dübeln ab.
Die Abzugshaube ist mit einem Netzkabel vom Typ HO5VVF 3 x 0,75 mm² versehen, welches einen genormten 10/16A Stecker
mit Erdungskontakt besitzt.
Schutzklasse: 1
Versorgungsspannung: 220-240V einphasig - 50/60Hz.
Überprüfen Sie, dass die Netzspannung mit den auf dem Typenschild angegebenen Werten innen an der Abzugshaube übereins-
timmt.
Wenn die Abzugshaube direkt an das Netz (ohne ihren Stecker) angeschlossen wird, muss dem Gerät ein allpoliger Trennschalter
mit 3 mm Kontaktöffnung vorgeschaltet werden. Der Schutzleiter (gelber und grüner Draht) darf durch diesen Trennschalter nicht
unterbrochen werden.
Dieses Gerät darf nicht von Personen (einschließlich Kindern) mit eingeschränkten physischen, sensorischen oder
geistigen Fähigkeiten oder von Personen verwendet werden, die keine Erfahrung und Kenntnis im Umgang mit dieser
Art von Geräten haben, es sei denn, der Gebrauch erfolgt unter Beaufsichtigung und Anleitung durch eine Person, die
für deren Sicherheit verantwortlich ist. Kinder müssen beaufsichtigt werden, um sicherzustellen, dass sie nicht mit dem
Gerät spielen.
• Beachten Sie den Ausgangsdurchmesser des Geräts: Die Abzugshaube darf auf keinen Fall an eine Leitung der mechanischen
Belüftung angeschlossen werden.
• Wenn die Abluft über eine Abzugsleitung abgeführt wird, ist darauf zu achten, dass diese nicht bereits zur Abführung von
Gasen und Rauch von Geräten genutzt wird, die mit einer anderen Energieform als elektrischem Strom betrieben werden.
• Positionieren Sie die Kochfläche möglichst nahe am Abzug und vermeiden Sie übermäßige Biegungen im Kabelmantel, um
Spannungsverluste zu weit wie möglich zu reduzieren.
• Sorgen Sie bei allen Installationsarbeiten für einen ausreichenden Luftaustausch in der Küche. Denken Sie daran, einen oder
mehrere Lufteinlässe vorzusehen, deren Querschnitt mindestens zu groß wie der Durchmesser des Abzugsrohrs ist, damit in
der Küche kein Unterdruck entsteht.
• Sehen Sie eine ausreichende Belüftung vor, wenn ein Kochgerät oder ein anderes Gerät gleichzeitig die Umgebungsluft aus
dem Raum nutzt, in dem die Abzugshaube installiert ist.
• Der im Raum erzeugte maximale Unterdruck muss unter 0,04 mbar liegen – damit wird ein Rückstrom von Verbrennungsgasen
verhindert.
• Das Gerät muss so platziert werden, dass der Netzstecker zugänglich ist.

17
DE
ENERGIESPARTIPPS
1. Verwenden Sie möglichst eine geringere Absaugleistung; nutzen Sie die höchste Stufe nur, wenn es nötig ist.
2. Eine gut gelüftete Küche erhöht die Effektivität der Abzugshaube.
3. Reinigen Sie die Fettfilter regelmäßig, damit ihre Wirksamkeit erhalten bleibt.
4. Ein gesättigter Filter ist nicht leistungsfähig und darf nicht längere Zeit verwendet werden.
GEBRAUCHSHINWEISE
Um eine maximale Aufnahmeeffizienz für Rauchgase oder Dampf zu erzielen, lassen Sie die Abzugshaube vor und nach dem
Kochen bzw. Braten der Speisen etwa 5 Minuten lang eingeschaltet:
• die niedrigen Leistungsstufen werden für das Garen bei geringer Hitze und für Soßen, leichtes Köcheln, usw. empfohlen.
• die mittleren Leistungsstufen werden für längeres Garen, zum Grillen und Frittieren empfohlen.
• die hohen Leistungsstufen werden für Garmethoden mit starker Fett- und Rauchentwicklung empfohlen.
• die höchste Leistungsstufe wird im Falle kurzzeitiger enormer Rauch- und Fettentwicklungen empfohlen.
NIEMALS SPEISEN UNTER DEM GERÄT FLAMBIEREN
Niemals mit offener Flamme unter der eingeschalteten Abzugshaube hantieren.
Bratfette erfordern eine ständige Beaufsichtigung, da sich überhitztes Öl entzünden kann.
Die zugänglichen Teile der Abzugshaube können heiß werden, wenn sie mit Kochgeräten benutzt wird.

18
DE
INSTANDHALTUNG
Vermeiden Sie die Gefahr von Bränden, indem Sie die Abzugshaube gemäß den Instandhaltungshinweisen reinigen:
Schalten Sie vor jeglichen Wartungs- oder Elektroarbeiten die Abzugshaube spannungsfrei. Ziehen Sie Handschuhe an
• Reinigen Sie regelmäßig das Gehäuse unter Verwendung eines nicht scheuernden Reinigungsmittels und eines leicht ange-
feuchteten Schwamms.
• Zur Erneuerung (mindestens im Jahresintervall) der äußeren Edelstahlteile verwenden Sie vorzugsweise das Produkt Art.-Nr.
112.0172.941
• Benutzen Sie nie nasse Schwämme oder Putzlappen.
• Führen Sie keinen Gegenstand oder die Hände in die Öffnung für die Luftabführung ein.
• Reinigen Sie das Innere des Gebläsekörpers einmal jährlich.
• Überprüfen Sie alle 6 Monate den ordnungsgemäßen Abstrom der Abluft.
• Halten Sie die örtlichen gesetzlichen Vorschriften bezüglich der Abführung der Abluft ein.
• IEs ist unerlässlich, die Fettfilter regelmäßig in der Geschirrspülmaschine bei einer Temperatur von maximal 50°C einmal im
Monat oder entsprechend den Bestellangaben zu reinigen (siehe Seite Bestellung). Lassen Sie die Filter an der frischen Luft
trocknen. Diese Filter haben eine Lebensdauer von 10 Jahren.
• Wenn Ihre Abzugshaube mit waschbaren Geruchsfiltern
(3)
ausgestattet ist, müssen diese alle 2 Monate bei hoher Temperatur
in der Spülmaschine (ohne andere Küchenutensilien) gereinigt und in der Spülmaschine oder für etwa 30 Minuten an der
frischen Luft getrocknet werden.
• Reaktivieren Sie die waschbaren Geruchsfilter nach dem Reinigen und Trocknen, indem Sie sie für 10 Minuten bei maximal
100°C in den Ofen legen. Im Zuge der Reinigung der waschbaren Geruchsfilter sind grundsätzlich auch die Fettfilter zu reini-
gen.
• Die Aktivkohle-Geruchsfilter
(3)
müssen mindestens alle 3 Monate oder häufiger, wenn die Abzugshaube länger als 3 Stunden
am Tag benutzt wird, ausgewechselt werden; oder entsprechend den Bestellangaben zu reinigen (siehe Seite Bestellung). Mit
dem Austausch der Aktivkohle-Geruchsfilter geht standardmäßig eine Reinigung der Fettfilter einher
• Der Austausch defekter LEDs darf nur von einer zugelassenen Fachperson vorgenommen werden.
• Die UV-Lampen haben eine Lebensdauer von ca. 6000 Stunden. Die Lebensdauer der Clean-Air-Filter (Katalysatoren) ents-
pricht der der UV-Lampen.
• Im Zuge des Austauschs einer UV-Lampe (alle 3 Jahre) erfolgt grundsätzlich ein Wechsel des entsprechenden Clean-Air-Filters.
VERFÜGBARKEIT VON ERSATZTEILEN
Gemäß Artikel R 111-3 des Verbraucherschutzgesetzes garantiert ROBLIN für Produkte, die ab dem 1. März 2015 in Verkehr
gebracht werden, die Verfügbarkeit von Ersatzteilen, die für die Verwendung seiner Produkte für einen Zeitraum von 10 Jahren
erforderlich sind. Jahre ab dem Kauf des Produkts durch den Verbraucher, wobei die Rechnung gültig ist, sofern sie innerhalb von
12 Monaten nach dem Verkaufsdatum von ROBLIN an den Kunden erfolgt. Im Falle einer Fehlfunktion informieren Sie Ihren Instal-
lateur, der das Gerät und seine Verbindung überprüfen muss.
(3)
die Geruchsfilter: Aktivkohlefilter (schwarzes Aussehen) und waschbarer Kohlefilter (sieht ähnlich wie der Fettfilter aus, ist jedoch dicker und von kleinerem Umfang)
werden stets hinter dem Fettfilter eingesetzt, dieser ist der zuerst sichtbare
CLEAN- R

19
DE
X x X W
X
x X W
XXX-XXX V ~ XX-XX
TOT. X W
XXXXXXXXXXXX
FUN Nr: XXX.XXXX.XXX
XXXXXXX
XXXX X X XX XXXX
MOD
Made in France
VOR DER MONTAGE
GEGEBENENFALLS DEM KUNDENDIENST MITZUTEILENDE
INFORMATIONEN.
Machen Sie das auf dem Gehäuse der Abzugshaube an der Innenseite hinter den Filtern aufgeklebte Typenschild
ausfindig. Die Kundendienstabteilung benötigt die auf diesem Etikett angegebenen Informationen, um technische Un-
terstützung leisten zu können.
Kundendienstabteilung: (+33) (0)4.88.78.59.93
Die abgelesenen Nummern unten eintragen und aufbewahren
DAS TYPENSCHILD-DUPLIKAT HIER AUFKLEBEN
PRODUKTCODE :
FUNCODE :
SERIEN-NR :
ODER
1
1
2
2
3
3

20
DE
GARANTIE UND KUNDENDIENST
FALLS EINE ELEKTRISCHE KOMPONENTE BESCHÄDIGT WERDEN SOLLTE, DARF DIESE NUR DURCH EINE VOM HERSTELLER
ANERKANNTE REPARATURWERKSTATT AUSGETAUSCHT WERDEN, DA HIERFÜR SPEZIALWERKZEUGE ERFORDERLICH SIND.
• Bei einer Funktionsstörung benachrichtigen Sie Ihren Installateur, welcher anschließend das Gerät und dessen Anschluss
überprüfen muss.
• Trennen Sie das Gerät vollständig vom Netz.
• Verlangen Sie stets die Verwendung von Original-Ersatzteilen (Die Nichteinhaltung dieser Bedingung kann die Sicherheit des
Geräts gefährden).
• Geben Sie bei der Bestellung von Ersatzteilen die Seriennummer des Gerätes an (siehe nebenstehende Seite), welche auf dem
Typenschild innen an der Abzugshaube aufgeführt ist.
Einzig die Kaufrechnung des Geräts ist für die Inanspruchnahme der vertraglichen Garantie maßgebend (diese Garantie erstreckt
sich nicht auf Verbrauchsmaterial wie: die Beleuchtung, Filter, LEDs...).
Gemäß Artikel R 111-3 des Verbraucherschutzgesetzes garantiert ROBLIN für Produkte, die ab dem 1. März 2015 in Verkehr
gebracht werden, die Verfügbarkeit von Ersatzteilen, die für die Verwendung seiner Produkte für einen Zeitraum von 10 Jahren
erforderlich sind. Jahre ab dem Kauf des Produkts durch den Verbraucher, wobei die Rechnung gültig ist, sofern sie innerhalb von
12 Monaten nach dem Verkaufsdatum von ROBLIN an den Kunden erfolgt. Im Falle einer Fehlfunktion informieren Sie Ihren Instal-
lateur, der das Gerät und seine Verbindung überprüfen muss.
Die kommerzielle Garantie von FRANKE France SAS für ROBLIN Markenprodukte beschränkt sich auf Einzelhändler. Es gilt für Kon-
tinentalfrankreich, Korsika und DOM TOM.
Die kommerzielle Garantie ist eine Garantie von 2 Jahren (ohne Lohnkosten und Verlagerung). Sie gilt ab dem Rechnungsdatum des
Gerätes beim Verbraucher, sofern dieser innerhalb von 12 Monaten nach dem Verkaufsdatum von ROBLIN an den Kunden erfolgt.
Um den Kunden während eines Kundendienstes zufriedenzustellen, verpflichtet sich der Kunde, ihn an den von ROBLIN eingerich-
teten Service zu wenden, um die Pflege so schnell wie möglich zu organisieren. Der Kundendienst ist unter folgender Nummer
erreichbar: +33 (0) 4 88 78 59 93.
Die Elemente für die Kommunikation mit dem ROBLIN-Kundendienst sind:
• Eine Beschreibung des beobachteten Fehlers
• die kommerzielle Referenz des Produkts sowie seine Seriennummer
• die Kopie der Rechnung des Verbrauchers und seine Kontaktinformationen
Diese Garantie gilt für alle technischen oder funktionalen Probleme. Sind von der kommerziellen Garantie ausgeschlossen:
• Fehler in Bezug auf Zubehör oder Verschleißteile (Filter, Glühbirnen ...),
• Schäden, Fehler und Mängel aufgrund von Ursachen externer Herkunft,
• Schäden durch Korrosion, schlechte Verbindung oder Stromversorgung,
• Schäden aufgrund der Nichtbeachtung der Anweisungen von ROBLIN (Installation, Montage, ...),
• Ausfälle, die sich aus der Änderung der Konstruktion und der Merkmale des ROBLIN-Markengeräts ergeben,
• Betriebsstörungen und Schäden, die sich aus der Verwendung von Ersatzteilen ergeben, die nicht denen entsprechen, die von
ROBLIN durch Herkunft oder mangelnde Wartung bereitgestellt werden,
• Pannen durch professionelle oder kommerzielle Nutzung der Geräte

22
IT
Il presente foglio di istruzioni vale per più versioni di apparecchi.
Può contenere descrizioni di accessori che non figurano nel vostro apparecchio.
QUESTO APPARECCHIO È CONFORME ALLE NORME SEGUENTI:
EN 60 335-1:2012+A11:2014, EN 60 335-2-31:2014, EN 62233:2008 + C1:2008, EN 61 000-3-2:2006 + A1/A2: 2009, EN
61 000-3-3:2008, EN 55 014-1:2006 + A1:2009 + A2:2011, EN 55 014-2:1997 + A1:2001 + A2:2008, EN 61591:1997/
A2:2011, EN 50564:2011, EN 50581:2012, 2014/35/CE relativa alla sicurezza elettrica, 2014/30/CE relativa alla compatibilità
elettromagnetica, 2009/125/CE relativa all’eco-progettazione, 2011/65/CE relativa alla limitazione dell’uso di certe sostanze
pericolose nelle apparecchiature elettriche ed elettroniche, e alle principali esigenze delle direttive europee 66/2014.
Quando il simbolo di un bidone dei rifiuti con ruote barrato da una croce è annesso a un prodotto, ciò significa che il prodotto è
coperto dalla direttiva europea 2002/96/EC.
Il vostro prodotto è concepito è fabbricato con materiali e componenti di alta qualità che possono essere riciclati e riutilizzati :
• Si prega di informarsi del sistema locale di separazione dei rifiuti elettrici ed elettronici,
• Si prega di agire secondo le regole locali e di non gettare i prodotti usati con i rifiuti domestici indifferenziati,
• Smaltire correttamente il prodotto usato aiuterà a prevenire le conseguenze negative potenziali per l’ambiente e la
salute umana.
RACCOMANDAZIONE DI MONTAGGIO
(1)
Il mancato rispetto di questa condizione comporta la soppressione della garanzia del costruttore e l’invalidità di qualsiasi ricorso in caso di incidente.
Il montaggio e il collegamento devono essere realizzati da un installatore
(1)
qualificato.
Impiegare i tasselli adatti a supporto, informarsi presso il fabbricante, effettuare una sigillatura se necessario. La società declina
qualsiasi responsabilità in caso di agganciamento difettoso dovuto a un cattivo uso dei tasselli.
La cappa è dotata di un cavo di alimentazione di tipo HO5VVF 3 × 0,75 mm² comprendente una spina standard 10/16A con un
sistema di messa a terra.
Modalità di protezione: classe 1
Tensione di alimentazione: 220-240V mono - 50/60Hz.
Controllare che la tensione di rete sia identica ai valori indicati sulla targhetta segnaletica all’interno della cappa.
Se la cappa è collegata direttamente sulla rete (senza la sua spina), un interruttore onnipolare con un’apertura di contratto di 3 mm
deve essere installato davanti alla cappa. Il filo di terra (giallo e verde) non deve essere interrotto da questo interruttore.
Questo apparecchio non deve essere utilizzato da persone (compresi i bambini) aventi capacità psichiche, sensoriali
o mentali ridotte, né da persone che non siano in possesso di esperienza e conoscenza di questo tipo di apparecchi,
a meno che non operino sotto la supervisione di persone responsabili della loro sicurezza. I bambini devono essere
sorvegliati per assicurarsi che non giochino con l’apparecchio.
• Rispettare il diametro di uscita dell’apparecchio: la cappa non deve in alcun caso essere collegata a un condotto di ventila-
zione meccanico controllato (V.M.C).
• Quando si evacua l’aria viziata tramite un condotto di evacuazione, occorre controllare che questo non sia già usato per vei-
colare gas o fumi provenienti da apparecchi alimentati da energia diversa da quella elettrica.
• Posizionare il piano di cottura il più vicino possibile all’evacuazione ed evitare la formazione di gomiti sulla guaina, in modo da
ridurre al massimo le perdite di carico.
• In qualsiasi tipo di installazione, vigilare al buon ricambio d’aria della cucina. Pensare a effettuare una o più entrate d’aria la cui
sezione sia superiore o uguale al diametro del tubo di evacuazione in modo da non mettere la cucina in depressione.
• Prevedere un’aerazione sufficiente quando un apparecchio di cottura o di altro tipo utilizza simultaneamente l’aria ambiente
del locale in cui è installata la cappa.
• La depressione massima creata nel locale deve essere inferiore a 0,04 mbar, onde evitare un ritorno di gas di combustione.
• L’apparecchio deve essere posizionato in modo tale da rendere accessibile la spina di alimentazione

23
IT
CONSIGLI DI RISPARMIO ENERGETICO
1. Utilizzare di preferenza una velocità di aspirazione ridotta; utilizzare la velocità intensiva solo quando è necessario.
2. Una cucina ben ventilata rende il funzionamento della cappa più efficiente.
3. Pulire regolarmente i filtri anti-grassi in modo da mantenerne l’efficacia.
4. Un filtro saturato non è più efficace e non potrà essere utilizzato a lungo.
CONSIGLI DI UTILIZZAZIONE
Per ottenere un’efficacia massima di assorbimento dei fumi e vapori, fare funzionare la cappa per 5 minuti circa prima e dopo la
cottura degli alimenti :
• le piccole velocità sono consigliate per le cotture a fuoco lento e per le salse, ecc.
• le velocità intermedie sono consigliate per le cotture sostenute, per le grigliate e per le fritture.
• le grandi velocità sono consigliate per le colture a forte emanazione di grassi e vapori.
• la velocità intensiva è consigliata in caso di vapori e di emanazioni di grassi troppo cospicue.
NON FARE MAI FIAMMEGGIARE PIATTI AL DI SOTTO DELL’APPARECCHIO
Non lasciare mai fiamme libere sotto la cappa in funzionamento.
Le fritture necessitano di una sorveglianza permanente: l’olio surriscaldato può prendere fuoco.
Le parti accessibili della cappa possono diventare calde quando questa viene utilizzata con apparecchi di cottura..

24
IT
MANUTENZIONE
Evitate il rischio di incendio pulendo la cappa secondo le raccomandazioni di :
Mettere la cappa fuori tensione prima di qualsiasi operazione di manutenzione o intervento elettrico. Dotarsi di guanti.
• Pulite regolarmente la carrozzeria utilizzando prodotti detergenti, non abrasivi e una spugna leggermente umida.
• Per rinnovare (a intervalli di un anno come minimo) le parti esterne in inox, preferite l’utilizzazione del prodotto rif.112.0172.941
• Non utilizzare mai spugne o panni bagnati.
• Non introdurre alcun oggetto, né le mani, nell’apertura che serve all’evacuazione dell’aria.
• Pulire l’interno del corpo aspirante una volta all’anno.
• Controllare ogni 6 mesi la corretta evacuazione dell’aria viziata.
• Osservare le prescrizioni regolamentari locali riguardanti l’evacuazione dell’aria viziata.
• È indispensabile procedere a una pulitura periodica dei filtri anti-grassi in lavastoviglie a una temperatura massima di 50 °C,
una volta al mese o secondo le indicazioni dell’ordine (si veda la pagina di ordine). Lasciare asciugare i filtri all’aria aperta.
Questi filtri hanno una durata di vita di 10 anni.
• Se la vostra cappa è dotata di filtri anti-odori lavabili
(3)
, questi devono essere puliti in lavastoviglie a temperatura elevata (senza
altri utensili da cucina) ogni 2 mesi e devono essere asciugati in lavastoviglie o all’aria libera per circa 30 minuti circa .
• Una volta lavati e asciugati, riattivare i filtri anti-odori lavabili mettendoli in forno per 10 minuti a 100 °C al massimo. La puli-
tura dei filtri anti-odori lavabili si accompagna sistematicamente alla pulitura dei filtri anti-grassi.
• I filtri anti-odori a carbone attivo
(3)
devono essere sostituiti come minimo ogni 3 mesi o più spesso se la cappa viene utilizzata
per più di 3 ore al giorno. O secondo le indicazioni di ordine (si veda la pagina di ordine). La sostituzione dei filtri anti-odori a
carbone attivo si accompagna sistematicamente alla pulitura dei filtri anti-grassi.
• La sostituzione dei LED difettosi deve essere effettuata esclusivamente da un professionista specialista autorizzato.
• Le lampade a ultravioletti hanno una durata di vita di circa 6000 ore. Il ciclo di vita dei filtri clean-air (catalizzatori) segue quello
delle lampade ultraviolette.
• La sostituzione di una lampada a ultravioletti (ogni 3 anni) si accompagna sistematicamente alla sostituzione del filtro clean-air
associato.
DISPONIBILITÀ DI PEZZI DI RICAMBIO
(3)
) i filtri anti-odori: filtro a carbone attivo (di aspetto nero) e filtro a carbone lavabile (aspetto simile al filtro anti-grasso ma più spesso e di minore circonferenza)
sono sempre collocati dopo il filtro anti-grasso; quest’ultimo è il primo a essere visibile.
Ai sensi dell’articolo R 111-3 del Codice del consumo, per i prodotti immessi sul mercato a partire dal 1 ° marzo 2015, ROBLIN
garantisce la disponibilità di pezzi di ricambio essenziali per l’utilizzo dei suoi prodotti per un periodo di 10 anni. anni dall’acquisto
del prodotto da parte del consumatore, la fattura è autentica, a condizione che sia entro 12 mesi dalla data di vendita da parte di
ROBLIN al Cliente. In caso di malfunzionamento, informare l’installatore che dovrà controllare il dispositivo e la sua connessione.
CLEAN- R

25
IT
X x X W
X
x X W
XXX-XXX V ~ XX-XX
TOT. X W
XXXXXXXXXXXX
FUN Nr: XXX.XXXX.XXX
XXXXXXX
XXXX X X XX XXXX
MOD
Made in France
PRIMA DEL MONTAGGIO
INFORMAZIONI DA TRASMETTERE
AL
SERVIZIO DI ASSISTENZA.
Visualizzare l’etichetta segnaletica incollata sul corpo della cappa, all’interno, dietro ai filtri. Le informazioni indicate su
questa etichetta sono necessarie al Polo di assistenza S.A.V. per la presa in carico di assistenza tecnica.
Polo di assistenza S. A. V: 04.88.78.59.93
Vedere e mantenere i riferimenti indicati di seguito
INCOLLARE QUI IL DUPLICATO DELL’ETICHETTA SEGNALETICA
CODICE PRODOTTO :
CODICE FUN :
N° DI SÉRIE :
O
1
1
2
2
3
3

26
IT
GARANZIA E SERVIZIO DI ASSISTENZA
NEL CASO IN CUI UN COMPONENTE ELETTRICO SUBISSE DANNI, NON POTRÀ ESSERE SOSTITUITO SE NON DA UN LABO-
RATORIO DI RIPARAZIONE RICONOSCIUTO DAL FABBRICANTE, IN QUANTO SONO NECESSARI UTENSILI SPECIALI.
• In caso di anomalia di funzionamento, avvertite il vostro installatore che dovrà controllare l’apparecchio e il suo collegamento.
• Scollegate completamente l’apparecchio.
• Esigete sempre l’utilizzazione di pezzi di ricambio originali (la mancata osservanza di questa prescrizione può compromettere
la sicurezza dell’apparecchio).
• All’ordinazione dei pezzi staccati, indicate il numero di serie dell’apparecchio (si veda sulla pagina a fianco) scritto sulla targhet-
ta segnaletica situata all’interno della cappa.
• Solo la fattura di acquisto dell’apparecchio farà fede per l’applicazione della garanzia contrattuale (questa garanzia non copre
le parti consumabili come l’illuminazione, i filtri, i LED...).
Ai sensi dell’articolo R 111-3 del codice del consumo, per i prodotti immessi sul mercato a partire dal 1 Marzo, 2015, Roblin garan-
tisce la disponibilità dei pezzi di ricambio necessari per l’uso dei suoi prodotti per un periodo di 10 anni dall’acquisto del prodotto da
parte del consumatore, la fattura è autentica, a condizione che sia entro 12 mesi dalla data di vendita da parte di ROBLIN al Cliente.
In caso di malfunzionamento, informare l’installatore che dovrà controllare il dispositivo e la sua connessione.
La garanzia commerciale fornita da FRANKE France SAS per i prodotti a marchio ROBLIN è limitata ai rivenditori. È applicabile alla
Francia continentale, alla Corsica e al DOM TOM.
La garanzia commerciale è una garanzia di 2 anni di pezzi (esclusi costi di manodopera e dislocamento). Si applica dalla data di
fatturazione del dispositivo al consumatore a condizione che sia entro 12 mesi dalla data di vendita da parte di ROBLIN al Cliente.
Al fine di soddisfare il consumatore durante qualsiasi servizio post-vendita, il Cliente si impegna a indirizzarlo al servizio istituito
da ROBLIN per organizzare le cure il prima possibile. Il servizio post-vendita è raggiungibile al seguente numero: 04 88 78 59 93.
Gli elementi per comunicare con il servizio post-vendita ROBLIN sono:
• Una descrizione del fallimento osservato
• il riferimento commerciale del prodotto e il suo numero di serie
• la copia della fattura del consumatore e le sue informazioni di contatto
Questa garanzia si applica a tutti i problemi tecnici o funzionali. Sono esclusi dalla garanzia commerciale:
• Difetti relativi ad accessori o parti di consumo (filtri, lampadine ...),
• Danni, guasti e difetti dovuti a cause di origine esterna,
• Danni dovuti a corrosione, scarsa connessione o alimentazione elettrica,
• Danni dovuti al mancato rispetto delle istruzioni fornite da ROBLIN (installazione, montaggio, ...),
• Guasti derivanti dalla modifica della struttura e delle caratteristiche del dispositivo con marchio ROBLIN,
• Guasti e danni derivanti dall’uso di pezzi di ricambio non conformi a quelli forniti da ROBLIN all’origine o alla mancanza di
manutenzione,
• Guasti derivanti dall’uso professionale o commerciale dei dispositivi

28
ES
Este manual es válido para diversas versiones de aparatos.
Puede incluir descripciones de accesorios que no estén disponibles en su aparato.
ESTE EQUIPO ES CONFORME A LAS NORMAS SIGUIENTES:
EN 60 335-1:2012+A11:2014, EN 60 335-2-31:2014, EN 62233:2008 + C1:2008, EN 61 000-3-2:2006 + A1/A2: 2009, EN 61
000-3-3:2008, EN 55 014-1:2006 + A1:2009 + A2:2011, EN 55 014-2:1997 + A1:2001 + A2:2008, EN 61591:1997/A2:2011,
EN 50564:2011, EN 50581:2012, 2014/35/CE relativa a la seguridad eléctrica, 2014/30/CE relativa a la compatibilidad
electromagnética, 2009/125/CE relativa al diseño ecológico 2011/65/CE relativa a la limitación de utilización de ciertas
substancias peligrosas en los equipos eléctricos y electrónicos, y las principales exigencias de las directivas europeas 66/201.
Cuando el símbolo de un contenedor de basura aparece en un producto, significa que el producto está cubierto por la directiva
europea 2002/96/EC.
Su producto ha sido diseñado y fabricado con materiales y componentes de alta calidad que pueden ser reciclados y utilizados de
nuevo :
• Le rogamos se informen del sistema local de separación de desechos eléctricos y electrónicos,
• Le rogamos que cumpla con la normativa local y no tire sus productos usados con los residuos domésticos habituales,
• Desechar correctamente ayudará a prevenir consecuencias negativas para el medio ambiente y la salud de la personas.
INSTRUCCIONES DE MONTAJE
(1)
No respetar de esta condición conlleva la supresión de la garantía del constructor y cualquier recurso en caso de accidente.
El montaje y conexión deben ser realizados por un instalador
(1)
cualificado.
Utilice tacos adaptados al soporte, respete la información de los fabricantes y realice un sellado si fuese necesario.
La empresa declina toda responsabilidad en caso de fijación defectuosa debido a la perforación y a la instalación de tacos.
La campana está equipada con un cable de alimentación de tipo HO5VVF 3 x 0,75 mm² que incluye una toma normalizada 10/16A
con sistema de toma a tierra:
Modo de protección: clase 1
Tensión de alimentación: 220-240V mono - 50/60Hz.
Compruebe que la tensión de alimentación de su hogar es la misma que figura en la placa de características en el interior de la
campana.
Si la campana se conecta directamente a la red (sin toma normalizada), debe instalarse antes de la campana un interruptor omni-
polar con separación de contactos de 3 mm. El cable de tierra (amarillo-verde) no debe verse interrumpido por dicho interruptor.
Este aparato no debe ser utilizado por personas (incluyendo niños) que presentan minusvalía en sus capacidades
psíquicas, sensoriales o mentales ni por personas que no tengan experiencia y el conocimiento de este tipo de aparatos,
a menos que se encuentren bajo el control y la formación de personas responsables de su seguridad. Los niños deberán
ser vigilados para garantizar que no juegan con el aparato.
• Respete el diámetro de salida del aparato: la campana no debe ser nunca conectada a un conducto de ventilación mecánica
controlada (V.M.C).
• Cuando se evacua el aire viciado en un conducto de evacuación, se habrá de comprobar que el mismo no sea utilizado para
vehicular gases o humos que provengan de aparatos alimentados por una energía que no sea eléctrica.
• Coloque el plano de cocción lo más cerca posible de la evacuación y evite la formación de codos en el tubo, con el fin de
reducir al máximo las pérdidas por carga.
• En cualquier instalación debe observarse una correcta renovación del aire de la cocina. Realice una o dos entradas de aire
cuya sección sea mayor o igual que el diámetro del tubo de evacuación para no crear una depresión.
• Prevea una aireación suficiente si un aparato de cocción u otro utilice de forma simultánea el aire ambiente de la habitación
donde se encuentra instalada la campana.
• La depresión máxima que se cree en la habitación debe ser inferior a 0,04 mbar, lo que garantizará cualquier retorno de gases
de combustión.
• El aparato debe ser colocado de forma que la toma de conexión sea accesible.

29
ES
CONSEJOS DE AHORRO ENERGÉTICO
1. Utilice preferiblemente una velocidad de aspiración reducida; utilice la velocidad máxima sólo cuando sea necesario.
2. Una cocina ventilada correctamente mejora la eficacia del funcionamiento de la campana.
3. Limpie los filtros antigrasa regularmente con el fin de mantener su eficacia.
4. Un filtro saturado no rinde correctamente y no podrá ser utilizado durante mucho tiempo.
CONSEJOS DE UTILIZACIÓN
Para obtener una eficacia máxima de absorción de los humos o vapores, haga funcionar la campana durante 5 minutos antes y
después de la cocción de alimentos:
• Se recomiendan las pequeñas velocidades para las cocciones a fuego lento, salsas, y sofritos….
• Las velocidades intermedias se aconsejan para las cocciones mantenidas, parrillas y frituras.
• Se recomiendan las velocidades altas para las cocciones con fuerte emanación de grasas y vapores.
• La velocidad máxima se aconseja en caso de vapores y emanaciones de grasas puntuales demasiado importantes.
NO FLAMBEE NUNCA PLATOS DEBAJO DEL APARATO.
No deje nunca que haya llamas libres bajo la campana en funcionamiento.
Las frituras necesitan vigilancia permanente, ya que el aceite demasiado caliente puede inflamarse.
Las partes accesibles de la campana pueden calentarse cuando se utiliza con aparatos de cocción.

30
ES
MANTENIMIENTO
Evite el riesgo e incendio limpiando la campana con arreglo a las instrucciones de mantenimiento: :
Desconecte la campana de la corriente antes de toda operación de mantenimiento o de intervención eléctrica. Provéase de guantes.
• Limpie regularmente la carcasa utilizando detergentes no abrasivos y una esponja ligeramente húmeda.
• Para renovar (a intervalo mínimo de un año) las partes exteriores de inoxidable, se prefiere la utilización del producto con
referencia 112.0172.941
• No utilice nunca esponjas o trapos empapados.
• No introduzca ningún objeto, ni las manos, en la abertura que sirve para evacuar el aire.
• Limpie el interior del cuerpo aspirando una vez al año.
• Verifique cada 6 meses el vaciado correcto del aire viciado
• Respete las prescripciones reglamentarias locales concernientes a la evacuación del aire viciado.
• Es indispensable proceder a una limpieza periódica de los filtros antigrasa en el lavavajillas y a una temperatura máxima de 50
°C, una vez al mes o con arreglo a las indicaciones de las instrucciones (ver la página de instrucciones). Dejar secar los filtros
al aire libre. Estos filtros tienen una vida útil de 10 años.
• Si la campana está provista de filtros antiolores lavables
(3)
éstos se deben lavar en el lavavajillas a temperatura elevada (sin
otros utensilios de cocina) cada 2 meses y se deben secar en el lavavajillas o al aire libre durante 30 minutos aproximada-
mente.
• Una vez lavados y secos reactive los filtros antiolores lavables colocándolos en el horno durante 10 minutos a un máximo de
100 °C. La limpieza de los filtros antiolores lavables se acompaña, sistemáticamente, de la limpieza de los filtros antigrasa.
• Los filtros antiolores de carbón activo
(3)
necesitan cambiarse cada 3 meses como mínimo, o más, si la campana se utiliza más
de 3 horas al día. O con arreglo a las indicaciones del pedido (ver la página de pedido). El cambio de los filtros antiolores de
carbón activo se acompaña sistemáticamente de la limpieza de los filtros antigrasa.
• La sustitución de los LED defectuosos debe ser realizada exclusivamente por un profesional especializado autorizado.
• Las lámparas de ultravioleta tienen una vida útil de 6000 horas. El ciclo de vida de los filtros clean-air (catalizadores) es el
mismo que el de las lámparas ultravioleta.
• La sustitución de una lámpara de ultravioleta (cada 3 años) se acompaña sistemáticamente del cambio del filtro clean-air
asociado.
DISPONIBILIDAD DE REPUESTOS
(3)
Los filtros antiolores (filtro de carbón activo de color negro) y el filtro de carbón lavable (aspecto similar al filtro antigrasa pero más grueso y de perímetro más pe-
queño) siempre se colocan después del filtro antigrasa, este último es el primero visible
De conformidad con el artículo R 111-3 del Código del Consumidor, para los productos comercializados desde el 1 de marzo de
2015, ROBLIN garantiza la disponibilidad de piezas de repuesto esenciales para el uso de sus productos durante un período de 10
años. años desde la compra del producto por parte del consumidor, siendo la factura auténtica, siempre que sea dentro de los 12
meses a partir de la fecha de venta de ROBLIN al Cliente. En caso de un mal funcionamiento, informe a su instalador quién deberá
verificar el dispositivo y su conexión.
CLEAN- R

31
ES
X x X W
X
x X W
XXX-XXX V ~ XX-XX
TOT. X W
XXXXXXXXXXXX
FUN Nr: XXX.XXXX.XXX
XXXXXXX
XXXX X X XX XXXX
MOD
Made in France
ANTES DEL MONTAJE
INFORMACIONES A TRANSMITIR AL SERVICIO POSVENTA EN SU
CASO.
Mire la placa de características colocada en el cuerpo de la campana, en el interior, detrás de los filtros. Las informa-
ciones indicadas en esta etiqueta son necesarias en el centro de asistencia del S.P.V. para aceptar la asistencia técnica.
Pôle assistance S.A.V : 04.88.78.59.93
Comunicar y conservar abajo las referencias indicadas
PEGAR AQUίUNA COPIA DE LA PLACA DE CARACTERίSTICAS
CÓDIGO DEL PRODUCTO :
CÓDIGO FUN :
N° DE SERIE :
O
1
1
2
2
3
3

32
ES
GARANTÍA Y SERVICIO POSVENTA
EN CASO DE QUE SE DETERIORE UN COMPONENTE ELÉCTRICO, NO SE PUEDE SUSTITUIR MÁS QUE POR UN TALLER DE
REPARACIÓN RECONOCIDO POR EL FABRICANTE YA QUE SON NECESARIAS HERRAMIENTAS ESPECIALES.
• En caso de funcionamiento anómalo, avise al instalador, que deberá verificar el aparato y su conexión.
• Desconecte totalmente el aparato.
• Exija siempre la utilización de piezas de repuesto originales (no respetar esta prescripción puede comprometer la seguridad
de aparato).
• Durante el pedido de las piezas retiradas, recuerde el número de serie del aparato (ver la página siguiente) grabado en la placa
de características colocada en el interior de la campana.
• Solamente la factura del aparato dará fe para la aplicación de la garantía contractual (esta garantía no cubre los consumibles
como: iluminación, filtros, LED...)
De conformidad con el artículo R 111-3 del Código del Consumidor, para los productos comercializados desde el 1 de marzo de
2015, ROBLIN garantiza la disponibilidad de piezas de repuesto esenciales para el uso de sus productos por un período de 10
años. años desde la compra del producto por parte del consumidor, siendo la factura auténtica, siempre que sea dentro de los 12
meses a partir de la fecha de venta de ROBLIN al Cliente. En caso de un mal funcionamiento, informe a su instalador quién deberá
verificar el dispositivo y su conexión.
La garantía comercial provista por FRANKE France SAS para los productos de la marca ROBLIN está limitada a los minoristas. Es
aplicable a Francia continental, Córcega y DOM TOM.
La garantía comercial es una garantía de 2 años partes (excluyendo costos de mano de obra y desplazamiento). Se aplica desde
la fecha de facturación del dispositivo al consumidor, siempre que sea dentro de los 12 meses posteriores a la fecha de venta de
ROBLIN al Cliente.
Con el fin de satisfacer al consumidor durante cualquier servicio postventa, el Cliente se compromete a dirigirlo al servicio estable-
cido por ROBLIN para organizar la atención lo antes posible. El servicio posventa se puede contactar al siguiente número: 04 88
78 59 93.
Los elementos para comunicarse con el servicio postventa ROBLIN son:
• Una descripción de la falla observada
• la referencia comercial del producto, así como su número de serie
• la copia de la factura del consumidor y su información de contacto
Esta garantía se aplica a todos los problemas técnicos o funcionales. Están excluidos de la garantía comercial:
• Fallas en accesorios o partes consumibles (filtros, bombillas ...),
• Daños, fallas y defectos debidos a causas de origen externo
• Daños por corrosión, mala conexión o suministro de energía
• Daños por incumplimiento de las instrucciones proporcionadas por ROBLIN (instalación, montaje, ...),
• Fallas resultantes de la modificación de la construcción y características del dispositivo de marca ROBLIN,
• Averías y daños derivados del uso de piezas de repuesto no conformes con las proporcionadas por origen por ROBLIN o por
falta de mantenimiento,
• Fallas resultantes del uso profesional o comercial de los dispositivos.

34
NL
De onderhavige handleiding geldt voor de verschillende versies apparaten.
Hij kan beschrijvingen bevatten van accessoires die niet op uw apparaat van toepassing zijn.
DIT APPARAAT VOLDOET AAN DE VOLGENDE NORMEN: EN 60 335-1:2012+A11:2014, EN 60 335-2-31:2014, EN 62233:2008 +
C1:2008, EN 61 000-3-2:2006 + A1/A2: 2009, EN 61 000-3-3:2008, EN 55 014-1:2006 + A1:2009 + A2:2011, EN 55 014-2:1997
+ A1:2001 + A2:2008, EN 61591:1997/ A2:2011, EN 50564:2011, EN 50581:2012, 2014/35/CE met betrekking tot elektrische
veiligheid, 2014/30/CE met betrekking tot elektromagnetische compatibiliteit, 2009/125/CE met betrekking tot ecoconceptie,
2011/65/CE met betrekking tot de beperking van het gebruik van bepaalde gevaarlijke substanties in elektrische en elektronische
apparatuur, en met betrekking tot de belangrijkste Europese richtlijnen 66/2014.
Wanneer het symbool van een doorgestreepte vuilnisbak op wielen op het product is bevestigd, betekent dit dat het product
conform de Europese richtlijn 2002/96/EC is.
Uw apparaat werd ontworpen en vervaardigd met materialen en bestanddelen van superieure kwaliteit die gerecycled en opnieuw
gebruikt kunnen worden:
• Gelieve u te informeren naar de plaatselijke reglementering voor de scheiding van elektrisch en elektronisch afval,
• Gelieve u te houden aan de plaatselijke reglementeringen en uw afgedankte apparaten niet bij uw gewone huisvuil te
gooien,
• Door afgedankte apparaten op een correcte manier weg te werpen helpt u mogelijke negatieve gevolgen voor het milieu
en de gezondheid te voorkomen l’environnement et la santé humaine.
AANWIJZINGEN VOOR DE MONTAGE
(1)
Het niet respecteren van deze voorwaarde houdt in dat de garantie van de fabrikant en alle hulp in geval van een ongeval vervallen.
De montage en de aansluiting moeten worden uitgevoerd door een gekwalificeerd installateur
(1)
.
Gebruik pluggen die geschikt zijn voor het type wand, vraag advies aan de fabrikant, kies indien nodig voor vastmetselen.
Het bedrijf is niet aansprakelijk in geval van een defectueuze bevestiging veroorzaakt door de gemaakte boorgaten en de gebruikte
pluggen.
De afzuigkap is voorzien van een voedingskabel van het type HO5VVF 3 x 0,75 mm2 met een genormaliseerde geaarde stekker
10 / 16A.
Beschermingsmodus: klasse 1.
Netspanning: 220-240V mono – 50 / 60Hz
Controleer of de spanning van de sector identiek is aan de waarden die staan vermeld op het identificatieplaatje aan de binnenkant
van de afzuigkap.
Indien de afzuigkap rechtstreeks wordt aangesloten op het net (zonder de fiche), moet een omnipolaire schakelaar met een
verbindingsopening van 3 mm voor de afzuigkap worden geïnstalleerd. De aardsnoer (gele en groene snoer) mag niet worden
onderbroken door deze schakelaar
Dit apparaat mag niet worden gebruikt door personen (inclusief kinderen) met beperkte psychische, zintuiglijke of
mentale capaciteiten, noch door personen die geen ervaring hebben met of kennis hebben van dit type apparaat, tenzij
ze onder toezicht staan van personen die verantwoordelijk zijn voor hun veiligheid. Kinderen moeten onder toezicht
worden gehouden om er zeker van te zijn dat ze niet met het apparaat spelen.
• Respecteer de afvoerdiameter van het apparaat: de afzuigkap mag in geen enkel geval worden aangesloten op een mechanisch
gecontroleerd ventilatiesysteem.
• Zorg ervoor dat bij het evacueren van vervuilde lucht door een afvoerbuis deze niet al wordt gebruikt voor de afvoer van rook
of gassen afkomstig van apparaten die op een andere energie werken dan elektriciteit.
• Plaats de kookplaat zo dicht mogelijk bij de evacuatie en vermijd de vorming van bochten in de afvoer om drukverlies zoveel
mogelijk te beperken.
• Zorg ervoor dat bij alle installaties de lucht in de keuken regelmatig vernieuwd wordt. Bedenk daarbij dat er 1 of meerdere
luchtingangen aanwezig moeten zijn met een grotere of dezelfde diameter als de afvoerbuis, om negatieve druk in de keuken
te voorkomen.
• Voldoende ventilatie is noodzakelijk als een kookapparaat of een ander apparaat tegelijkertijd lucht uit de ruimte halen waar
ook de afzuigkap hangt.
• De maximale negatieve druk in de ruimte moet lager zijn dan 0,04 mbar, om een retour van het verbrandingsgas te voorkomen.
• Het apparaat dient zo geïnstalleerd te zijn dat het stopcontact toegankelijk is.

35
NL
AANWIJZINGEN VOOR ENERGIEBESPARING
1. Gebruik bij voorkeur een beperkte afzuigsnelheid ; Gebruik de intensieve snelheid alleen indien nodig.
2. Een goed geventileerde keuken zorgt voor een efficiëntere werking van de afzuigkap.
3. Maak voor een efficiënte werking de anti-vetfilters regelmatig schoon.
4. Een vuile filter functioneert niet goed en gaat niet lang mee.
GEBRUIKSAANWIJZINGEN
Om een optimale afzuiging van de rook of dampen te realiseren, dient u de afzuigkap ongeveer 5 minuten voor het koken in te
schakelen en enige tijd aan te laten na het koken:
• lage snelheden worden aanbevolen voor koken op een laag vuur, sauzen, suddergerechten, enz…
• middelmatige snelheden worden aanbevolen voor koken op hoog vuur, grillen en frituren.
• hoge snelheden worden aanbevolen voor koken met grote vetuitwasemingen en dampen.
• de intensieve snelheid wordt aanbevolen bij te hoge dampen en vetuitwasemingen.
FLAMBEER NOOIT EEN GERECHT ONDER DE AFZUIGKAP
Laat geen vrije vlammen onder een in werking zijnde afzuigkap.
Frituurpannen dienen altijd onder toezicht gehouden te worden, aangezien oververhit vet kan leiden tot brand.
De toegankelijke onderdelen van de afzuigkap kunnen warm worden tijdens het gebruik van kookapparatuur

36
NL
ONDERHOUD
Voorkom brandgevaar door de afzuigkap volgens de onderhoudsaanwijzingen te reinigen :
Schakel de stroomtoevoer altijd uit voor onderhouds- of elektrische werkzaamheden . Draag handschoenen.
• Reinig de behuizing regelmatig met niet schurende, zachte reinigingsmiddelen en een licht vochtige spons.
• Gebruik voor het renoveren (met een tussenpoos van minstens een jaar) van de roestvrij stalen buitenste delen bij voorkeur
het product ref. 112.0172.941
• Gebruik nooit sponzen of doornatte doeken.
• Introduceer geen enkel voorwerp, noch de handen in de opening voor de luchtevacuatie.
• Reinig de binnenkant van de afzuiger 1 keer per jaar.
• Controleer elke 6 maanden de goede afvoer van de vervuilde lucht.
• Raadpleeg de plaatselijke reglementering betreffende de evacuatie van vervuilde lucht.
• De anti-vetfilters moeten regelmatig worden gereinigd in de afwasmachine op een maximale temperatuur van 50°C, 1 keer per
maand of volgens de aanwijzingen van de bediening (zie pagina over de bediening). De filters aan de open lucht laten drogen.
Deze filters hebben een levensduur van 10 jaar
• Wanneer uw afzuigkap is uitgerust met afwasbare anti-geurfilters
(3)
dan moet u deze filters om de 2 maanden reinigen in de
afwasmachine op een hoge temperatuur (zonder ander keukengerei) en vervolgens door de afwasmachine of aan de open
lucht laten drogen gedurende ongeveer 30 minuten.
• Heractiveer de schone en droge anti-geurfilters door ze gedurende 10 minuten in een oven op maximaal 100°C te leggen. De
reiniging van de anti-geurfilters gebeurt systematisch op hetzelfde moment als de reiniging van de anti-vetfilters.
• De anti-geurfilters met actieve steenkool
(3)
moeten minstens om de 3 maanden worden vervangen of zelfs vaker indien de af-
zuigkap langer dan 3 uur per dag wordt gebruikt. Of volgens de aanwijzingen van de bediening (zie pagina over de bediening).
De vervanging van de anti-geurfilters met actieve steenkool gebeurt systematisch op hetzelfde moment als de reiniging van
de anti-vetfilters
• De vervanging van de defecte LED mag alleen worden uitgevoerd door een erkende ervaren specialist.
• Ultraviolet lampen hebben een levensduur van ongeveer 6000 uur. De levenscyclus van de clean-air filters (katalysatoren) volgt
die van de ultraviolet lampen.
• De vervanging van een ultraviolet lamp (om de 3 jaar) gebeurt systematisch op hetzelfde moment als de vervanging van de
bijbehorende clean-air filter.
BESCHIKBAARHEID VAN RESERVEONDERDELEN
(3)
de anti-geurfilters: (filter met actieve steenkool (zwart aspect) en filter met afwasbare steenkool (zelfde aspect als de anti-vetfilter maar dikker en met een kleinere
periferie) worden altijd na de anti-vetfilter geplaatst. Deze laatste is als eerste zichtbaar.
Op grond van artikel R 111-3 van de consumentenwetgeving garandeert ROBLIN voor producten die met ingang van 1 maart 2015
op de markt worden gebracht de beschikbaarheid van reserveonderdelen die essentieel zijn voor het gebruik van haar producten
gedurende een periode van 10 jaar. jaar vanaf de aankoop van het product door de consument, waarbij de factuur authentiek is,
mits deze binnen 12 maanden na de datum van verkoop door ROBLIN aan de klant is. Informeer uw installateur in geval van een
storing, die het apparaat en de verbinding moet controleren.
CLEAN- R

37
NL
X x X W
X
x X W
XXX-XXX V ~ XX-XX
TOT. X W
XXXXXXXXXXXX
FUN Nr: XXX.XXXX.XXX
XXXXXXX
XXXX X X XX XXXX
MOD
Made in France
VOOR DE MONTAGE
GEGEVENS DIE INDIEN NDIG MOETTEN WORDEN DOORGEGEVEN
AAN DE KLANTENSERVICE.
Visualiseer het identificatieplaatje dat op de behuizing van de afzuigkap is geplakt, aan de binnenkant, achter de filters.
De gegevens op dit plaatje zijn noodzakelijk voor de onderhoudsdienst van de klantenservice voor technische assistentie.
Onderhoudsdienst Klantenservice: + 33 4.88.78.59.93
Vermeld hier en bewaar de volgende gegevens
PLAK HIER HET DUPLICAAT VAN HET IDENTIFICATIEPLAATJE
PRODUCTCODE :
FUN NUMMER :
SERIENUMMER :
OF
1
1
2
2
3
3

38
NL
GARANTIE EN KLANTENSERVICE
WANNEER EEN ELEKTRISCH ONDERDEEL BESCHADIGD RAAKT, MAG DIT ALLEEN WORDEN VERVANGEN DOOR EEN DOOR
DE FABRIKANT ERKEND REPARATIEATELIER, AANGEZIEN SPECIAAL GEREEDSCHAP IS VEREIST
• In geval van functiestoornissen dient u uw installateur te raadplegen. Hij moet het apparaat en de aansluitingen controleren.
• Schakel de stroomtoevoer volledig uit.
• Eis altijd het gebruik van originele vervangonderdelen (het niet respecteren van deze aanwijzing kan schade berokkenen aan
de veiligheid van het apparaat).
• Bij de bestelling van onderdelen dient u het serienummer van het apparaat te vermelden (zie volgende pagina). Dit nummer
bevindt zich op het identificatieplaatje aan de binnenkant van de afzuigkap.
• Alleen de aankoopfactuur van het apparaat geeft recht op de toepassing van de contractuele garantie (onder deze garantie
vallen in geen geval producten zoals: verlichting, filters, LED…).
Op grond van artikel R 111-3 van de consumentenwetgeving garandeert ROBLIN voor producten die met ingang van 1 maart 2015
op de markt worden gebracht de beschikbaarheid van reserveonderdelen die essentieel zijn voor het gebruik van haar producten
gedurende een periode van 10 jaar. jaar vanaf de aankoop van het product door de consument, waarbij de factuur authentiek is,
mits deze binnen 12 maanden na de datum van verkoop door ROBLIN aan de klant is. Informeer uw installateur in geval van een
storing, die het apparaat en de verbinding moet controleren.
De handelsgarantie die door FRANKE France SAS wordt verleend voor producten van het merk ROBLIN is beperkt tot detailhande-
laren. Het is van toepassing op continentaal Frankrijk, Corsica en DOM TOM.
De handelsgarantie is een garantie van 2 jaar onderdelen (exclusief arbeidskosten en verplaatsing). Het is van toepassing vanaf de
datum van facturering van het apparaat aan de consument, op voorwaarde dat het binnen 12 maanden na de datum van verkoop
door ROBLIN aan de klant is.
Om de klant tevreden te stellen tijdens een dienst na verkoop, verbindt de klant zich ertoe hem te verwijzen naar de dienst die
ROBLIN heeft opgezet om de zorg zo snel mogelijk te organiseren. De klantenservice is bereikbaar op het volgende nummer: 04
88 78 59 93.
De elementen om met de ROBLIN-klantenservice te communiceren zijn:
• Een beschrijving van de waargenomen storing
• de commerciële referentie van het product, evenals het serienummer
• de kopie van de factuur van de consument en zijn contactgegevens
Deze garantie is van toepassing op alle technische of functionele problemen. Zijn uitgesloten van de commerciële garantie:
• Storingen met betrekking tot accessoires of verbruiksartikelen (filters, gloeilampen ...),
• Schade, storingen en defecten door oorzaken van externe oorsprong,
• Schade door corrosie, slechte aansluiting of voeding,
• Schade als gevolg van niet-naleving van de instructies van ROBLIN (installatie, montage, ...),
• Fouten als gevolg van de wijziging van de constructie en kenmerken van het ROBLIN-merkapparaat,
• Storingen en schade die het gevolg zijn van het gebruik van reserveonderdelen die niet conform zijn met die welke door ROBLIN
bij de bron zijn geleverd of een gebrek aan onderhoud,
• Storingen als gevolg van professioneel of commercieel gebruik van de apparaten.

40
CH
35.5
19
19
8.5 min6 min
E
N
L
15.8
4
23
E
N
24.5
7
7
L
25.5
Fiche de sécurité class 1, 250V~ 10A - 2 poles + terre
Spira di sicurezza classe 1, 250V~ 10A - 2 poli + terra
Sicheheit-Stecker - Schutzklasse 1, 250V~ 10A
Zweipolig mit Schutzkontakt (Erde)
SEV 1011, SN416534-2, CH-Typ 12


41
N ot i c e
VENUS VERRE
H OT T E MURAL E
CON C EPT I O N
FAB RIC ATION
FRAN Ç AISE
IT EN FR DE NL ES PT S NO FI DK RU ET LV
PF
Informazioni sulla
scheda del prodotto
secondo 65/2014
Product fiche
Fiche d'informations
65/2014
produit selon la
norme 65/2014
information, according to
Informationen über das
65/2014
Produkt-Datenblatt gemäß
Informatie over het
65/2014
productblad volgens
Manuale d’uso - Efficienza Energetica / User Manual - Energy Eciency / Manuel de l’utilisateur - L’ecacité énergétique / Handbuch - Energieeffizienz / Handboek - Energie-efficiëntie
Manual - Eficiencia Energética / Manual - Eficiência Energética / Manuell - Energieffekti
vitet / Manuell - Energieffektivitet / Manuaalinen - Energy Efficiency / Manual – Energieffektivitet
Руководство - Энергоэффективность / Käsiraamat - Energiatõhususe / Rokasgrāmata - Energoefektivitātes
Información sobre la
ficha del producto
conforme a 65/2014
Informações na ficha do
produto de acordo com a
norma 65/2014
Uppgifter i
produktinformationsblad
et enligt 65/2014
Opplysninger på
65/2014
produktkortet iht.
Tietoja tuotetiedoista
asetuksen (EU) 65/
2014
mukaisesti
Oplysninger i databladet
vedrørende produktet i
henhold til 65/2014
Информация в карточке
65/2014
изделия в соответствии с
Toote etiketi teave
vastavalt 65/2014
Informācija marķējumā
saskaņā ar 65/2014
S
Nome del fornitore Supplier's name Nom du fournisseur Name des Zulieferers Naam van de leverancier Nombre del proveedor Nome do fornecedor Leverantörens namn Navnet til leverandøren Tavarant oimittajan nimi Leverandørens navn Имя поставщика Tarnija nimi Piegādātāja
nosaukums
M
modello
Identificativo del Model identification Identification du modèle Ident-Daten des Modells
het model
Identificatienummer van Identificación del m odelo Identificação do model o Modellbeteckning Modellbetegnelse Tavarant oimittajan
mallitunniste
Modelidentifikation Идентификация модели Mudeli identifitseerimine
Modeļa identikācija
AEC
annuale
Consumo energetico Annual Efficiency
Consumption annuelle
Consommation d’énergie Jährlicher
Energieverbrauch
Jaarlijks energieverbruik
anual
Consumo de energía
energia
Consumo anual de Årlig energiförbrukning Årlig energ iforbruk Vuotuinen
energiankulutus
Årligt energiforbrug Годовое потребление
электроэнергии
Aastane energiatarve
Gada efektīvais
patēriņš
EEC
energetica
Classe di efficienza Energy Efficiency Class Classe d’ecacité
énergétique
Energieeffizienzklasse Energie-efficiëntieklasse Clase de eficiencia
energética energética
Classe de eficiência Energieffektivitetsklass Energieffektivitetsklasse Energiatehokkuusluokka Energieffektivitetsklasse Класс энергетической
эффективности
Energiatõhususe klass
klase
Energoefektivitātes
FDE
Efficienza
fluidodinamica
Efficacité Fluid Dynamic Efficiency
fluidodynamique
Strömungseffizienz Hydrodynamische
efficiëntie
Eficiencia fluidodinámica
fluidos
Eficiência dinâmica dos Flödesdynamisk
effektivitet
Fluiddynamisk effektivitet nenimaanydsuatriV
hyötysuhde
Hydraulisk effektivitet Гидродинамическая
эффективность tõhusus
Vedelikudünaamika Šķidruma dinamiskā
efektivitāte
FDEC
Classe di efficienza
fluidodinamica Class
Fluid Dynamic Efficiency Classe d’ecacité
fluidodynamique
Strömungseffizienzklasse Hydrodynamische
efficiëntieklasse
Clase de eficiencia
fluidodinámica
Classe de eficiência
dinâmica dos fluidos
Flödesdynamisk
effektivitetsklass
Klasse for fluiddynamisk
effektivitet
Virtausdynaamisen
hyötysuhteen luokka
Hydraulisk
effektivitetsklasse
Класс гидродинамической
эффективности
Vedelikudünaami
ka
tõhususe klass
Šķidruma dinamiskās
efektivitātes klase
LE
Efficienza luminosa Lighting Efficiency Efficacité lumineuse Lichtausbeute Verlichtingsefficiëntie Eficiencia luminosa Eficiência de iluminação Belysningseffektivitet Belysningseffektivitet Valotehokkuus Belysningseffektivitet Световая эффективность Valgustustõhusus Apgaismojuma
efektivitāte
LEC
luminosa
Classe di efficienza Lighting Efficiency Class
lumineuse
Classe d’ecacité Klasse der Lichtausbeute
se
Verlichtingsefficiëntieklas
luminosa
Clase de eficiencia
iluminação
Classe de eficiência de
ss
Belysningseffektivitetskla
sse
BelysningseffektivitetsklaValotehokkuusluokka
sse
BelysningseffektivitetsklaКласс световой
эффективности
Valgustustõhususe klass Apgaismojuma
efektivitātes klase
GFE
antigrasso
Efficienza di filtrazione Grease Filtering
Efficiency
graisse
Efficacité de la filtration Effizienz der Fettfilter Vetfilteringsefficiëntie
de grasa
Eficiencia de la filtración
gorduras
Eficiência de filtragem de Fettfiltreringseffektivitet F ettfiltreringseffektivitet Rasvansuodatuksen
erotusaste
Fedtfiltreringseffektivitet Эффект ивность
фильтрации жира tõhusus
Rasva filtreerimise Tauku ltrēšanas
efektivitāte
GFEC
Classe di efficienza di
filtrazione antigrasso
Grease Filtering
Efficiency Class filtration
raisse
Classe d’ecacité de la Effizienzklasse der
Fettfilter sse
Vetfilteringsefficiëntiekla Clase de eficiencia de
filtración de grasa
Classe de eficiência de
filtragem de gorduras klass
Klasse for Fettfiltreringseffektivitets
fettfiltreringseffektivitet
Rasvansuodatuksen
erotusasteen luokka klasse
Fedtfiltreringseffektivitets Класс эффективности
фильтрации жира
Rasva filtreerimise
tõhususe klass
Tauku ltrēšanas
efektivitātes klase
Qmin
minima
Flusso d'aria a velocità
speed
Air flow at minimum
d’air à la vitesse
minimale
Luftstrom bei geringster
Gebläsestufe snelheid
Luchtstroom op minimale
mínima
Flujo de aire a velocidad Fluxo de ar na regulaç ão
de velocidade mínima
Luftflöde vid
minimihastighet
Luftgjennomstrømming Ilmavirta
ved laveste hastighet miniminopeudella
Luftstrømsværdi ved
minimumshastighed
Минимальная скорость Õhuvool
воздушного потока miinimu mkiirusel
Minimālais gaisa
plūsmas ātrums
Qmax
massima
Flusso d'aria a velocità
speed
Air flow at maximum
d’air à la vitesse
maximale
Luftstrom bei höchster
Gebläsestufe
Luchtstroom op
maximale snelheid máxima
Flujo de aire a velocidad Fluxo de ar na regulaç ão
de velocidade máxima
Luftflöde vid
maximihastighet
Luftgjennomstrømming Ilmavirta
ved høyeste hastighet maksiminopeudella
Luftstrømsværdi ved
maksimumshastighed
Максимальная скорость Õhuvool
воздушного потока maksi mumkiirusel
Maksimālais gaisa
plūsmas ātrums
Qboost
intensiva
Flusso d'aria a velocità
d’air à la vitesse Air flow at boost speed
intensive
Luftstrom bei
Intensivgeschwindigkeit snelheid
Luchtstroom op hoogste
intensiva
Flujo de aire a velocidad Fluxo de ar de
velocidade intensa hastighet
Luftflöde vid intensiv Luftgjennomstrømming
ved intensiv hastighet nopeudella
Ilmavirta kiihdytetyllä Luftstrømsværdi ved
intensiv hastighed
Интенсивная скорость
воздушного потока kiirus el
Õhuvool intensiivsel Palielināts gaisa
plūsmas ātrums
SPEmin
Emissione di potenza
sonora A ponderata in
aria a velocità minima
Airborne acoustical A-
weighted sound Power
Émission
speed
Emission at minimum
pondérée
Emission der A-
gewichteten Schallleistung
Gebläsestufe
in der Luft bei geringster
A-gewogen
geluidsemissie in de
snelheid
lucht bij minimale
Emisión de potencia
acústica A ponderada en
mínima
el aire a velocidad
Potência sonora
ponderada A emitida no
ar na regulação de
velocidade mínima
för A-viktade
Luftburet akustiskt buller
ljudeffektutsläpp vid
minimihastighet
Akustisk A-veid
lydeffektutslipp via luft
ved laveste hastighet
ilmassa
A-pai
notettu ääniteho
miniminopeudella
Luftbåren, akustisk, A-
vægtet lydeffektemission
ved minimumshastighed
Звукоизлучение А при
минимальной скорости
воздушного потока
Õhukaudne akustiline A-
emissioon
kaalutud helivõimsuse
miinimumkiirusel
Gaisa akustiskās A -
svērtās skaņas jaudas
ātrumā
emisija minimālajā
SPEmax
Emissione di potenza
sonora A ponderata in
aria a velocità massima
Airborne acoustical A-
weighted sound Power
speed
Emission at maximum
Emission der A-
gewichteten Schallleistung
in der Luft bei höchster
Gebläsestufe snelheid
A-gewogen
geluidsemissie in de
lucht bij maximale
Emisión de potencia
acústica A ponderada en
máxima
el aire a velocidad
Potência sonora
ponderada A emitida no
ar na regulação de
velocidade máxima
för A-viktade
Luft
buret akustiskt buller
ljudeffektutsläpp vid
maximihastighet
Akustisk A-veid
lydeffektutslipp via luft
ved høyeste hastighet
A-painotettu ääniteho
ilmassa
maksiminopeudella
Luftbåren, akustisk, A-
ved
vægtet lydeffektemission
maksimumshastighed
Звукоизлучение А при
максимальной скорости
воздушного потока
Õhukaudne akustiline A-
emissioon
kaalutud helivõimsuse
maksimumkiirusel
Gaisa akustiskās A -
svērtās skaņas jaudas
ātrumā
emisija maksimālajā
SPEboost
Emissione di potenza
sonora A ponderata in
aria a velocità intensiva
Airborne acoustical A-
weighted sound Power
Émission
Emission at boost speed
Emission der A-
gewichteten Schallleistung
in der Luft bei
A-gewogen
Intensivgeschwindigkeit
geluidsemissie in de
snelheid
lucht bij hoogste
Emisión de potencia
acústica A ponderada en
intensiva
el aire a velocidad
Potência sonora
ponderada A emitida no
intensa
ar com velocidade
för A-viktade
Luftburet akustiskt buller
ljudeffektutsläpp vid
intensiv hastighet
Akustisk A-veid
lydeffektutslipp via luft
ved intensiv hastighet
A-painotettu ääniteho
ilmassa kiihdytetyllä
nopeudella
Luftbåren, akustisk, A-
vægtet lydeffektemission
ved intensiv hastighed
Звукоизлучение А при
интенсивной скорости
воздушного потока
Õhukaudne akustiline A-
kaalutud helivõimsuse
kiirusel
emissioon intensiivsel
Gaisa akustiskās A -
svērtās skaņas jaudas
ātrumā
emisija paaugstinātajā
P0
Consumo di corrente in
modalità off
Consommation d
off mode
Power Consumption in
courant en mode
Stromverbrauch in Off
stand
Stroomverbruik in de uit-
modo off
Consumo de energía en Consumo de energia no
modo de desativação frånläge
Effektförbrukning i
tilstand
Effektforbruk i avslått Energiankulutus tavassa
pois päältä tilstand
Energiforbrug i slukket
выкл (o)
Потребление тока в режиме
režiimis
Toitetarve väljalülitatud Enerģijas patēriņš
izslēgtā režīmā
Ps
Consumo di corrente in
modalità standby
Power Consumption in Consommation d
standby mode courant en mode Standby
Stromverbrauch in Stroomverbruik in de
stand-bystand
Consumo de energía en
modo standby
Consumo de energia no
modo de espera
Effektförbrukning i
standby-läge
Effektforbruk i
hviletilstand
Energiankulutus tavassa
valmiustila
Energiforbrug i
standbytilstand
Потребление тока в режиме
ожидания (standby)
Toitetarve ooterežiimis Enerģijas patēriņš
gaidīšanas režīmā
PI Informazioni
aggiuntive
secondo 66/2014
Additional
information
according to
66/2014
Informations
supplémentaires
selon 66/2014
Zusätzliche
66/2014
Informationen gemäß
Extra informatie
volgens 66/2014
Información
adicional conforme
a 66/2014
Informações
adicionais de acordo
com a norma
66/2014
Tilläggsuppgifter
enligt 66/2014
Ekstraopplysninger
iht. 66/2014
Lisätietoja
asetuksen (EU)
66/2014 mukaisesti
Yderligere
oplysninger i
henhold til 66/2014
Дополнительная
и
нформаци
я
в
соо
т
ветствии с 66/2014
66/2014
Lisateave vastavalt Papildus
informācija
saskaņā ar 66/2014
F
Coefficiente di
incremento del tempo
Time increase factor Coefficient
temps
d’augmentation dans le
Koeffizient des
Zeitinkrements
Tijdstoenamecoëfficiënt Coeficiente de
incremento del tiempo tempo
Fator de aumento de Tidsökningsfaktor Tidsøkefaktor Ajan korotuskerroin Tidsforøgelsesfaktor
времени
Коэффициент повышения Aja suurendustegur
faktors
Laika palielināšanās
EEI
energetica
Indice di efficienza Energy Efficiency Index Indic e d’ecacité
énergétique
Energieeffizienzindex Energie-efficiëntie-index
energética
Índice de eficiencia
energética
Índice de eficiência Energieffektivitetsindex Energieffektivitetsindeks En ergiatehokkuusindeksi Energieffektivitetsindeks Показатель энергетич еской
эффективности
Energiatõhususe indeks
indekss
Enerģijas efektivitātes
Qbep
Portata d'aria misurata
migliore
nel punto di efficienza
Measured Air flow rate at
best efficiency point
Débit d’air mesuré à son
meilleur point d’ecacité
Luftdurchsatz, am Punkt
gemessen
der besten Effizienz
Gemeten luchtdebiet op
het beste-efficiëntiepunt
Caudal de aire medido
mejor
en el punto de eficiencia
Débito de ar medido no
ponto de maior eficiência vid bästa
Uppmätt luftflödesvärde
effektivitetspunkt
Målt luft
mengde ved
p
unktet for beste
virkningsgrad
Mitattu ilmavirta parhaan
hyötysuhteen pisteessä
Målt luftstrøm i det
optimale driftspunkt
Расход воздуха,
измеренный в точке
наибольшей
эффективности
Mõõdetud õhu vooluhulk
parima tõhususe punktis
Izmērītais gaisa
plūsmas ātrums
visefektīvākajā punktā
Pbep
Pressione dell'aria
misurata nel punto di
efficienza migliore
Measured air pressure at
best efficiency point
Pression de l’air
mesurée à son meilleur
point d’ecacité
Luftdruck, am Punkt der
besten Effizienz
gemessen
Gemeten luchtdruk op
het beste-efficiëntiepunt
Presión de aire medido
mejor
en el punto de eficiencia
Pressão de ar medida no
ponto de maior eficiência
Uppmätt lufttryck vid
bästa effektivitetspunkt
Målt lufttrykk ved punktet
fo
r beste virkningsgrad
Mitattu ilmanpaine
pisteessä
parhaan hyötysuhteen
Målt lufttryk i det
optimale driftspunkt
Давление воздуха,
измеренное в точке
наибольшей
эффективности
Mõõdetud õhurõhk
parima tõhususe punktis
Izmērītais gaisa
spiediens
visefektīvākajā punktā
Qmax
flusso d'aria massimo
d’air maximalmaximum air flow max. Luftstrom Maximale luchtstroom flujo de aire máximo Débito de ar máximo Maximalt luftflöde Høyeste
luftgjennomstrømming
Suurin ilmavirta Maksimal luftstrøm
поток
максимальный воздушный Maksimaalne õhuvool maksimālā gaisa
plūsma
Wbep
Alimentazione elettrica
misurata nel punto di
efficienza migliore
Measured electric power
point
électrique
input at best efficiency mesurée à son meilleur
point d’ecacité
Luftdurchsatz, am Punkt
gemessen
der höchsten Effizienz
Gemeten elektrisch
opgenomen vermogen
op het beste-
efficiëntiepunt
Alimentación eléctrica
medida en el punto de
eficiencia mejor
Potência elétrica medida
no ponto de maior
eficiência
Uppmätt elektrisk
ineffekt vid bästa
effektivitetspunkt
Målt elektrisk
inngangseffekt ved
punktet for beste
virkningsgrad
Mitattu sähkön ottoteho
parhaan hyötysuhteen
pisteessä
Målt elektrisk effektoptag
i det optimale driftspunkt
Подача электроэнергии,
измеренная в точке
наибольшей
эффективности
Mõõdetud elektri
võimsussisend parima
tõhususe punktis
Izmērītā elektriskā
jaudas ieeja
visefektīvākajā punktā
Wl
Potenza nominale del
sistema di
illuminazione
Nominal power of the
lighting system
Puissance nominale du
système d’éclairage
Nennleistung der
Beleuchtung
Nominaal vermogen van
het verlichtingssysteem
Potencia nominal del
sistema de iluminación
Potência nominal do
sistema de iluminação
Märkeffekt för
belysningssystemet
Nominell effekt til
belysningssystemet
Valaistusjärjestelmän
nimellisteho
Belysningssystemets
nominelle effekt
Номинальная мощн
ость
осветительной системы
Valgustussüsteemi
nimivõimsus
Apgaismojuma
jauda
sistēmas nominālā
Emiddle
Illuminazione media del
sistema di
cottura
illuminazione sul piano
Average illumination of
the lighting system on
the cooking surface
Éclairage moyen du
cuisson
système sur la plaque de
Durchschnittliche
Ausleuchtung des
Kochfelds
van het
Gemiddelde verlichting
verlichtingssysteem op
het kookoppervlak
Iluminación media del
sistema de iluminación
en el plano de cocción
Iluminação média
produzida pelo sistema
de iluminação na
superfíc
ie de cozedura
över kokytan
Genomsnittlig belysning Gjennomsnittlig lysstyrke
til belysningssystemet
over komfyrtoppen
Valaistusjärjestelmän
keskimääräinen
valaistusvoimakkuus
keittopinnalla
Belysningssystemets
gennemsnitlige lysstyrke
på kogefladen
Средняя освещенность
осветительной системы на
варочной панели
Valgustussüsteemi
keskmine valgustugevus
pliidiplaadil
sistēmas
Vidējais apgaismojuma
apgaismojums uz
gatavošanas virsmas
Lwa
Livello di potenza
massima
sonora all'impostazione
Sound power level at the
highest setting
Niveau de puissance
sonore à son
paramétrage maximum
Schallleistungsstufe bei
max. Einstellung
Geluidsvermogensnivea
u in de hoogste stand
Nivel de potencia
máximo
acústica con el ajuste
Nível de potência sonora
na regulação de
velocidade máxima
Ljudeffektnivå vid
maximiinställning
Lydeffektnivå ved
høyeste innstilling
Äänitehotaso
suurimmal
la asetuksella
Lydeffektniveau ved
maksimumsindstilling
Уровень звукоизлучения
при максимальной
настройке
Helivõimsuse tase
kõrgeimal seadistusel
Skaņas jaudas līmenis
pie visaugstākā
uzstādījuma
CONSIGLI PER IL
RISPARMIO
ENERGETICO
ENERGY SAVING TIPS CONSEILS POUR
L’ÉCONOMIE
1) Quando si inizia a
cucinare, azionare la
cappa a velocità
minima per controllare
l'umidità ed eliminare
gli odori di cucina
2) Usare la velocità
intensiva solo quando
strettamente
necessario
3) Aumentare la
velocità della cappa
solo quando richiesto
dalla quantità di vapore
4) Mantenere pulito il
filtro o puliti i filtri della
cappa per ottim
izzare
l'effici
enza antigrasso e
antiodori.
D’ÉNERGIE
(s) clean to optimize
grease and odor
efficiency .
1) When you start
cooking, switch on the
range hood at minimum
speed, to control
moisture and remove
cooking odor
2) Use boost speed only
when is strictly
necessary
3) Increase the range
hood speed only when
the amount of vapor
makes it necessary
4) Keep range hood filter
4)
h
Veillez à ce que le ou
p
les filtres de la otte
soient toujours ropr
es,
an d’optim
iser
anti-odeurs.
l’ecacité anti-graisse et
RATSCHLÄGE ZUR
ENERGIEEINSPARUNG
1) Lorsque vous
commencez à cuisiner,
activez la hotte à la
vitesse minimum pour
contrôler l’humidité et
éliminer les odeurs de
cuisine.
2) N’utilisez la vitesse
intensive lorsque cela
est strictement
nécessaire.
3) Augmentez la vitesse
de la hotte seulement
lorsque la quantité de
vapeur le requiert.
4)
erhöhen
r
Den oder die Filter de
r
Haube s
aube halten,
damit die Fett- und
wird.
Geruchsfilterung optimiert
TIPS VOOR
ENERGIEBESPARING
1) Zu Beginn des
Kochvorgangs die Haube
bei niedrigster
Gebläsestufe aktivieren,
damit die Feuchtigkeit
abgesaugt und
Kochgerüche beseitigt
werden
2) Die
Intensivgeschwindigkeit
nur dann benutzen, wenn
sich viel Dampf entwickelt.
3) Die Geschwindigkeit
der Haube nur bei
vermehrter
Dampfentwicklung
mschoon o de
n
vetfilterings- en
geurf
ilteri gsefficiëntie te
op
timaliseren.
CONSEJOS PARA EL
AHORRO DE ENERGÍA
1) Schakel de afzuigkap
op de laagste snelheid in
wanneer u met koken
begint om de
vochtigheidsgraad te
regelen en kookluchtjes
te verwijderen
2) Gebruik de hoogste
snelheid alleen wanneer
dit beslist noodzakelijk is
3) Verhoog de snelheid
van de afzuigkap alleen
wanneer de hoeveelheid
damp dit vereist
4) Houd het filter/de
filters van de afzuigkap
CONSELHOS P
ARA
POUP
AR ENERGIA
p
1) Cuando se comienza
a cocinar, accionar la
campana a la velocidad
mínima para controlar la
humedad y eliminar los
olores de cocina
2) Utilizar la velocidad
intensiva sólo cuando
sea estrictamente
necesario
3) Aumentar la velocidad
de la campana sólo
cuando lo requiera la
cantidad de vapor
4)Mantener limpio el
filtro o los filtros de la
campana para optimizar
la eficiencia antigrasa y
antiolores
ci
lim
pos, ara otimiz ar a
a
s
eficiên a de retenção de
RÅD FÖR
gordur e de cheiros.
ENERGIBESPARING
1)Ao começar a
cozinhar, ligue o
exaustor na velocidade
mínima, para controlar a
humidade e eliminar os
cheiros da cozinha
2)Utilize a velocidade
intensa apenas quando
estritamente necessário
3)Aumente a velocidade
do exaustor apenas
quando a quantidade de
vapor produzido o
justificar
4)Conserve o(s) filtro(s)
do exaustor sempre
RÅD FO
R
ENERG
ISPARING
1) Starta köksfläkten
med min. hastigheten
när du börjar tillagningen
för att kontrollera
fuktigheten och avlägsna
matos.
2) Använd den intensiva
hastigheten endast när
det är absolut
nödvändigt.
3) Öka köksfläktens
hastighet endast när
större mängder ånga
kräver detta.
4) Se till att köksfläktens
filter är rent/rena för att
optimera fett- och
luktfiltrens effektivitet.
UVOJA
ENERGIANSÄÄSTÖNE
1) Start kjøkkenviften på
l
aveste hastighet når du
starter matlagingen for å
kontrollere fuktigheten
og fjerne matosen.
2) Bruk kun intensiv
hastighet når det er helt
nødvendig
3) Øk kun kjøkkenviftens
hastighet ved stor
dampmengde.
4) Hold kjøkkenviftens
filter rent/rene for en
effektiv fjerning av fett og
matos.
TIPS TIL
poiston optimoimiseksi
ENERGIBESPARELSE
1) Käynnistä liesituuletin
miniminopeudella
ruoanlaittoa aloittaessasi
kosteuden valvomiseksi
ja h
ajun poistamiseksi
keittiöstä
2) Kä
ytä suurta nopeutta
vain kun se on
välttämätöntä
3) Lisää liesituulettimen
nopeutta vain kun höyryn
määrä sitä vaatii
4) Pidä liesituulettimen
suodatin tai suodattimet
puhtaina rasvan
suodatustehon ja hajun
n.optimere deres funktio
РЕКОМЕНДАЦИИ ПО
ЭКОНОМИИ
ЭНЕРГОПОТРЕБЛЕНИЯ1) Tænd emhætten ved
minimumshastighed, når
du begynder
tilberedningen. Således
kan du kontrollere
fugthalten og fjerne
ma
dos.
2) An
vend kun intensiv
hastighed, når det er
højst nødvendigt.
3) Forøg kun emhættens
hastighed, når
dampmængden kræver
det.
4) Hold emhættens fedt-
og lugtfiltre rene for at
4) Поддерживайте фильтр /
чфильтры вытяжки в истом
состоянии для
оптимального удаления
жира и запахов от готовки.
ANDED
ENERGIASÄÄSTUNÕU
1) В начале готовки
включите вытяжку на
минимальной скорости для
контроля уровня влажности
и удаления
из кухни
зап
ахов
2) Включайте интенсивную
скорость работы вытяжки,
только когда это
совершенно необходимо
3) Повышайте скорость
работы вытяжки, только
когда этого требует
наличие большого
количества пара
PADOMI ENERĢIJAS
TAUPĪŠANAI
4) Uzturēt tīru( -us)
tvaiku nosūcēja
1) Toidu valmistamise
alustamisel lülitage
pliidikumm õhuniiskuse
kontrolli all hoidmiseks ja
toidulõhnade
eemaldamiseks
miinimumkiirusel sisse
2) Kasutage intensiivset
k
iirust ainult siis, kui see
on rangelt vajalik
3) Suurendage
pliidikummi kiirust ainult
siis, kui auru hulk
muudab selle vajalikuks
4) Hoidke pliidikummi
filter/filtrid rasva ja lõhna
eemaldamise tõhususe
optimeerimiseks
puhastena.
mfiltru(-us), lai opti izētu
tauku un aromātu
neitralizēšanas
efektivitāti.
Norme di riferimento:
EN/IEC 61591
EN/IEC 60704-2-13
EN 50564
Normative references:
EN/IEC 61591
1) Kad Jūs sākat
ēdiena gatavošanu,
ieslēgt minimālo tvaiku
nosūcēja ātrumu, lai
kontrolētu mitrumu un
aizvāktu ēdiena
gatavošanas aromātu.
2) Izmantot
paaugstinātu ātrumu
tikai tad, ja tas ir
noteikti nepieciešams.
3) Palielināt tvaiku
nosūcēja ātrumu tikai
tad, ja tas ir
nepieciešams tvaiku
daudzuma dēļ.
EN/IEC 60704-2-13
EN 50564
Nor
mes de référence :
EN/IEC
61591
EN/IEC 60704-2-13
EN 50564
Referenznormen:
EN/IEC 61591
EN/IEC 60704-2-13
EN 50564
Referentienormen
EN/IEC 61591
EN/IEC 60704-2-13
EN 50564
Normas de referencia:
EN/IEC 61591
EN/IEC 60704-2-13
EN 50564
Normas de referência:
CEI EN 61591
CEI EN 60704-2-13
EN 50564
Referensstandarder:
EN/IEC 61591
EN/IEC 60704-2-13
EN 50564
Referansestandarder:
EN/IEC 61591
EN/IEC 60704-2-13
EN 50564
Viitenormit:
EN/IEC 615
91
EN/IEC
60704-2-13
EN 50564
Referencestandarder:
EN/IEC 61591
EN/IEC 60704-2-13
EN 50564
Нормативные документы:
EN/IEC 61591
EN/IEC 60704-2-13
EN 50564
Normatiivviited:
EN/IEC 61591
EN/IEC 60704-2-13
EN 50564
Normatīvās atsauces:
EN/IEC 61591
EN/IEC 60704-2-13
EN 50564
Émission
pondérée
aximale
991.0356.516
A
++
A
+
A
+++
A
++
A
+
65/2014
ABCDEFG
XYZ
kWh/annum
ABCDEFG
ABC
DEFG XYdB
110.XXXX.XXX
112.0538.947
112.0181.109
composants - components - Komponenten - Componenti - componentes - Onderdelen
x1
x1
x1
x1 x1
x3
x2
x1
x1
x1
x1 x1
x2

42
J11
J1
J10
J2
J3
J5
CN1
light
PWM
Brown (J1)
Light Blue (J3)
Light Blue
M
170 W
Blue
LIMANDE COMMANDE
FLAT CABLE
MULTI-FLACH KABEL
Yellow
Green-Yellow
Blue
wolleY
Purple (J5)
ECLAIRAGE
LIGHTING
BELEUCHTUNG
LEDS (2 x 3 W)
PWM
SEC
+ -
+ -
ELEKTRONISCHE STEUERUNG
BOITIER COMMANDE
PUSCH BUTTON PANEL
7
4
5
6
3
2
1
8
9
7
4
5
6
3
2
1
8
9
Brown
Green-Yellow
Light Blue
Green-Yellow
Brown
Light Blue
G-Y
Brown
J4
motor
PWM
Green-Yellow (J2)
Pink (J11)
Purple (J4)
Grey (J10)
Black
(PWM light)
Red
(PWM light)
schéma électrique - electrical diagram - Stromlaufplan - Schema elettrico - esquema eléctrico - Elektrisch schema
A : azur, azur, azur blau / BK : black, noir,schwarz / B : blue, bleu, blau / Br : brown, brun, braun / G-Y : green-yellow, vert-jaune,
grün-gelb / Gr : grey, gris, grau / LB : light blue, bleu clair, hell blau / P : pink, rose, rosa / V : purple, mauve, malver farbig
/ R : red, rouge, rot / W : white, blanc, weiss / W-P : white-pink, blanc-rose, weiss-rosa / Y : yellow, jaune, gelb

43
898
990 - 1290
55°
501
301
583
103
468
263
100
100
243
426
409
dessin technique - technical drawing - Technische Zeichnung - Disegno tecnico - plano técnico - Technische tekening
40
cm
mini

44
898
55°
501
583
103
468
100
100
243
426
409
271
29
370
dessin technique - technical drawing - Technische Zeichnung - Disegno tecnico - plano técnico - Technische tekening
40
cm
mini

45
898
55°
501
583
103
468
100
100
243
426
409
271
29
370
150
401
dessin technique - technical drawing - Technische Zeichnung - Disegno tecnico - plano técnico - Technische tekening
40
cm
mini

46
montage - fitting - Montage - montaggio - montaje - Montage
180°

47
100
426409
320
Ø155
Ø8
513
100
240
810
810
810
montage - fitting - Montage - montaggio - montaje - Montage
outdoor indoor

48
100
426409
320
513
100
240
35
35
1
210
16
210
210
Ø8
Ø8
100
426409
320
513
100
240
Ø8
montage - fitting - Montage - montaggio - montaje - Montage

49
montage - fitting - Montage - montaggio - montaje - Montage
click

50
100
426409
320
513
100
240
35
35
1
210
16
210
210
Ø8
Ø8
100
426409
320
513
100
240
Ø8
montage - fitting - Montage - montaggio - montaje - Montage

51
montage - fitting - Montage - montaggio - montaje - Montage

52
100
426409
320
513
100
240
Ø8
montage - fitting - Montage - montaggio - montaje - Montage

53
montage - fitting - Montage - montaggio - montaje - Montage
entretien - maintenance - Instandhaltung - manutenzione - mantenimiento - Onderhoud

54
entretien - maintenance - Instandhaltung - manutenzione - mantenimiento - Onderhoud
112.0538.947
2
1
1
22
1
1

55
entretien - maintenance - Instandhaltung - manutenzione - mantenimiento - Onderhoud
Type de lampe Module led
Puissance de fonctionnement en Watt 3.1
Puissance maximale en Watt 6,2
Tension de fonctionnement en Volts 4.3
Type de connexion connecteur automatique
Dimensions hors tout en mm Lxlxe : 280x20x6
click

56
FR DE
ES
Commande - Bedienung - mandos
FONCTION/ FUNKTION/ FUNCIÓN AFFICHAGE/ DISPLAY/ DISPLAY
Allume et éteint le moteur d’aspiration à la dernière vitesse utilisée.
Schaltet den Motor der Absauganlage bei der zuletzt verwendeten Geschwindigkeit ein und aus.
Enciende y apaga el motor de aspiración a la última velocidad utilizada.
Affiche la vitesse réglée.
Zeigt die eingestellte Geschwindigkeit an.
Visualiza la velocidad implementada.
Diminue la vitesse de service.
Vermindert die Betriebsgeschwindigkeit.
Decrementa la velocidad de ejercicio.
Les segments allumés diminuent.
Die leuchtenden Segmente nehmen ab.
Disminuyen los segmentos encendidos.
Augmente la vitesse de service.
Erhöht die Betriebsgeschwindigkeit. .
Incrementa la velocidad de ejercicio.
Les segments allumés augmentent.
Die leuchtenden Segmente nehmen zu.
Aumentan los segmentos encendidos.
Met en marche la vitesse intensive de n’importe quelle vitesse, même à moteur éteint. Cette
vitesse est temporisée à 6 minutes ensuite le système retourne à la vitesse réglée au préalable.
Idéale pour faire face à des émissions maximales de fumées de cuisson.
Aktiviert von jeder Geschwindigkeit aus, auch bei abgestelltem Motor, die Intensivgeschwin-dig-
keit, die auf 6 Minuten zeitgeregelt ist. Nach Ablauf dieser Zeit kehrt das System zu der zuvor
eingestellten Geschwindigkeit die Beseitigung von sehr intensiven
Activa la velocidad intensiva desde cualquier velocidad incluso desde motor apagado, dicha
velocidad está temporizada en 6 minutos, al final del tiempo el sistema regresa a la velocidad
implementada precedentemente. Adecuada a enfrentar las máximas emisiones de humos de
cocción.
I clignote et les segments sur l’afficheur sont tous allumés.
Appuyer sur la touche pour désactiver.
I blinkt und alle Segmente auf dem Display leuchten.
Wird durch Drücken der Taste ausgeschaltet.
Parpadea I y los segmentos en el Display se encienden todos.
Se desactiva presionando la Tecla.
1. Met en marche le moteur à une vitesse permettant une aspiration de 100 m3/h pendant
10 minutes toutes les heures. Au bout de 24h, le moteur s’arrête.
2. Active la fonction alarme de saturation des filtres charbon (recyclage)
• AkKochtivierdünstent den Mo geeigtor benet. i einer Geschwindigkeit, die eine Ab-
saugleistung von 100 m3/h für die Dauer von 10 Minuten jede Stunde ermöglicht, nach
dessen Ablauf hält der Motor an.
• Aktiviert die Sättigungsalarmfunktion von Kohlefiltern (Recycling)
1. Activa el motor a una velocidad que permite una aspiración de 100 m3/h por 10 minutos
cada hora, una vez terminados el motor se de-tiene.
2. Activar la función de alarma de saturación de los filtros de carbón (reciclaje)
1. 24 s’affiche et les segments qui sont tous allumés sur l’afficheur s’étei-
gnent un à un de façon cyclique.
Appuyer sur la touche pour désactiver.
2. Hotte alimentée et hors fonction:
-appui long (5s) : 1 son + l’horloge clignotante indiquent que la configuration
est possible, et dans les 3s qui suivent :
si la fonction est active est apparent
-appui court sur la touche ,active ou désactive la fonction alarme de satura-
tion des filtres charbon
• Zeigt 24 an und alle auf dem Display angezeig-ten Segmente erlöschen
allmählich nacheinan-der.
Wird durch Drücken der Taste ausgeschaltet.
• Kapuze ein- und ausgeschaltet:
- lange drücken (5s): 1 Sound + die blinkende Uhr zeigt an, dass die Konfigura-
tion möglich ist, und innerhalb von 3s:
ob die Funktion aktiv ist, ist offensichtlich
- kurzes Drücken der Taste aktiviert oder deaktiviert die Sättigungsalarm-
funktion der Kohlefilter
1. Visualiza 24 y los segmentos en el Display desde todos encendidos se
apagan uno por vez cíclicamente.
Se desactiva presionando la Tecla.
2. Hood encendido y apagado:
- pulsación larga (5s): 1 sonido + el reloj parpadeante indica que la configura-
ción es posible, y dentro de 3s:
si la función está activa es evidente
- presione brevemente la tecla activa o desactiva la función de alarma de
saturación de los filtros de carbón
Active l’arrêt automatique après un délai de 30’. Idéal pour éliminer complètement les odeurs
résiduelles. Peut être activée depuis n’importe quelle position, appuyer sur la touche ou
éteindre le moteur pour désactiver la fonction.
Aktiviert das automatische Ausschalten mit einer Verzögerung von 30’. Ermöglicht die Besei-
tigung von Restgerüchen. Kann von jeder Position aus eingeschaltet werden und wird durch
Drücken der Taste oder abstellen des Motors ausgeschaltet.
Activa el apagado automático retrasado en 30’. Adecuado para completar la eliminación de
olores residuos. Activable desde cualquier posición, se desactiva presionando la tecla o
apagando el motor.
Le symbole d’une Horloge qui clignote s’affiche.
Appuyer sur la touche pour désactiver.
Zeigt das Symbol einer blinkenden Uhr an. Wird durch Drücken der Taste
ausgeschaltet.
Visualiza el símbolo de un Reloj que parpadea. Se desactiva presionando la
Tecla.
Appuyer sur la touche pendant environ 2 secondes pour remettre à l’état initial l’alarme signa-
lant la saturation des filtres.
Führt durch ca. 2 Sekunden langes Drücken der Taste ein Reset des Filtersättigungsalarms aus.
Efectúa el Reset de la alarma saturación Filtros presionando la Tecla por aproximadamente 2
Segundos.
Après 100 heures de fonctionnement, le symbole Goutte s’affiche pour signaler
la saturation des filtres métalliques.
Après 200 heures de fonctionnement, C s’affiche pour signaler la saturation
des filtres au charbon actif.
Nach 100 Betriebsstunden zeigt das Symbol Tropfen die Sättigung der Metallfil-
ter an. Nach 200 Betriebsstunden zeigt C die Sätti-gung der Aktivkohlefilter an.
Después de 100 horas de Funcionamiento Visualiza el símbolo Gota para
señalar la saturación de los Filtros Metálicos.
Después de 200 horas de Funcionamiento Visualiza C para señalar la satura-
ción de los Filtros al Carbono Activo.
appui court : Allume et éteint l’éclairage à la dernière intensité utilisée / appui long : augmente
ou diminue l’intensité lumineuse
Kurz drücken: Zum Ein- und Ausschalten der Beleuchtung auf die zuletzt verwendete Intensität
/ lang drücken: erhöht oder verringert die Lichtintensität
pulsación corta: Enciende y apaga la iluminación de la última intensidad utilizada prensa /
larga: aumenta o disminuye la intensidad de la luz
Commande de blocage du clavier : il est possible de bloquer le clavier, par exemple, pour effectuer le nettoyage du verre, quand le moteur et l’éclairage de la hotte
sont éteints.
Appuyer sur la touche
pendant environ 5 secondes pour activer ou désactiver le blocage du clavier, qui est toujours confirmé par un bip sonore et une animation sur la barre du moteur de l’afficheur.
Steuerbefehl Tastatursperre : Die Tastatur lässt sich, z.B. zur Reinigung der Scheiben, sperren, wenn Motor und Beleuchtung der Haube ausgeschaltet sind.
Zum Aktivieren oder Deaktivieren der Tastatursperre die Taste
ca. 5 Sekunden lang drücken. Der Vorgang wird immer durch einen Piepton und die Motorbalkenanzeige auf dem Display bestätigt.
Mando Bloqueo Teclado : es posible bloquear el teclado, por ejemplo para efectuar la limpieza del Vidrio, cuando la Campana tiene el Motor y las Luces apagadas.
Presionando por aproximadamente 5 segundos
se puede habilitar o deshabilitar el Bloqueo Teclado lo cual es siempre confirmado con un Beep y una animación en la barra motor del display.
24
h
F

EN IT
NL
controls - ordine - mandos
24
h
F
FONCTION/ FUNZIONE/ FUNCTIE DISPLAY
Turns the suction motor on and off at the last speed used.
Accende e spegne il motore di aspirazione all’ultima velocità utilizzata.
Schakelt de zuigmotor in of uit op de laatst gebruikte snelheid.
Displays the speed set.
Visualizza la velocità impostata.
Toont de ingestelde snelheid.
Decreases the working speed.
Decrementa la velocità di esercizio.
Verlaagt de bedrijfssnelheid.
Decreases the lighted segments.
Diminuiscono i segmenti accesi.
De brandende segmenten nemen af.
Increases the working speed.
Incrementa la velocità di esercizio.
Verhoogt de bedrijfssnelheid.
Increases the lighted segments.
Aumentano i segmenti accesi.
De brandende segmenten nemen toe.
Activates intensive speed from any other speed, including motor off. This speed is timed to
run for 6 minutes, after which the system will return to the speed that was previously set.
Suitable for dealing with severe cooking fumes.
Attiva la velocità intensiva da qualsiasi velo-cità anche da motore spento, tale velocità è
temporizzata a 6 minuti, al termine del tempo il sistema ritorna alla velocità precedentemente
impostata. Adatta a fronteggiare le massime emissioni di fumi di.
Activeert de hoogste snelheid vanuit elke snel-heidsstand, ook vanuit de uitgeschakelde stand
van de motor. Deze snelheid wordt minuten aangehouden en daarna keert het systeem terug
naar de eerder ingestelde snelheid. Geschikt voor het opvangen van de maximale uitstoot van
kookdampen.
I flashes and the segments on the Display are all lit. It is disabled by pressing the
Button.
Lampeggia I e i segmenti sul Display sono tutti accesi.
Si disattiva premendo il Tasto. display branden.
Wordt uitgeschakeld bij een druk op de toets.
1. Starts the motor at a speed that allows a suction of 100 m3/h for 10 minutes every
hour, after which the motor stops.
2. Activates the saturation alarm function of carbon filters (recycling)
• Attiva il motore ad una velocità che consente un’aspirazione di 100 m3/h per 10 minuti
ogni ora, terminati il motore si ferma.
• Attiva la funzione di allarme di saturazione dei filtri a carbone (riciclaggio)
1. Activeert de motor op een snelheid die elk uur gedurende 10 minuten een afzuiging van
100 m3/h mogelijk maakt, waarna de motor stopt.
2. Activeert de verzadigingsalarmfunctie van koolstoffilters (recycling)
1. Displays 24 and the segments on the Display, initially all lit, turn off one at
a time in cycle. It is disabled by pressing the Button.
2. Hood powered and off:
- long press (5s): 1 sound + flashing clock indicate that the configuration is
possible, and within 3s:
if the function is active is apparent
- short press on the key, activates or deactivates the saturation alarm func-
tion of the carbon filters
• Visualizza 24 e i segmenti sul Display da tutti accesi si spengono uno alla
volta ciclicamente. Si disattiva premendo il Tasto.
• Cappuccio alimentato e spento:
- pressione lunga (5 secondi): 1 suono + l’orologio lampeggiante indica che la
configurazione è possibile e entro 3 secondi:
se la funzione è attiva è evidente
- premere brevemente il tasto , attiva o disattiva la funzione di allarme di
saturazione dei filtri a carbone
1. Toont 24 en alle brandende segmenten op het display gaan cyclisch één
voor één uit.
Wordt uitgeschakeld bij een druk op de toets.
2. Kap aangedreven en uit:
- lang indrukken (5s): 1 geluid + knipperende klok geven aan dat de configuratie
mogelijk is, en binnen 3 s:
als de functie actief is, is duidelijk
- druk kort op de toets , activeert of deactiveert de verzadigingsalarmfunctie
van de koolstoffilters
Activates automatic switch-off with a 30’ delay. Suitable to complete elimination of residual
odours. Can be activated from any position, it is deactivated by pressing the button of turning
the motor off
Attiva lo spegnimento automatico ritardato di 30’. Adatto per completare l’eliminazione di
odori residui. Attivabile da qualsiasi posizione, si disattiva premendo il tasto o spegnendo il
motore.
Activeert de automatische uitschakeling met een vertraging van 30’. Geschikt om rest-
geur-tjes te verwijderen. Kan vanuit elke stand wor-den geactiveerd, wordt uitgeschakeld door
op de toets te drukken of door de motor uit te schakelen.
Displays a flashing Clock symbol. It is disabled by pressing the Button.
Visualizza il simbolo di un Orologio che lam-peggia.
Si disattiva premendo il Tasto.
Toont het knipperende symbool van een Klok. Wordt uitgeschakeld bij een druk
op de toets.
Performs a Reset of the Filter saturation alarm when the button is pressed for ap-proximately
2 seconds. .
Effettua il Reset dell’allarme saturazione Filtri premendo il Tasto per circa 2 Secondi.
Reset het alarm van de verzadiging van de filters door ongeveer 2 seconden op de toets te
drukken.
After 100 hours operation the Drop symbol is displayed to indicate saturation of
the Metal Grease Filters.
After 200 hours operation the letter C is dis-played to indicate saturation of the
Activated Charcoal Filters.
Dopo 100 ore di Funzionamento Visualizza il simbolo Goccia per segnalare la
saturazione dei Filtri Metallici.
Dopo 200 ore dai Funzionamento Visualizza C per segnalare la saturazione dei
Filtri al Carbone Attivo.
Na 100 bedrijfsuren wordt het symbool drup-pel getoond om de verzadiging van
de metalen filters te signaleren.
Na 200 bedrijfsuren wordt C getoond om de verzadiging van de actieve koolstof-
filters te signaleren.
Short press: Turns the light on and off at the last intensity used / Long press: increases or
decreases the light intensity
Pressione breve: Accende e spegne l’illuminazione alla stampa lo scorso intensità usato /
lunga: aumenta o diminuisce l’intensità della luce
Kort indrukken: Hiermee schakelt de verlichting om de laatst gebruikte intensiteit / lang
indrukken: verhoogt of verlaagt de lichtintensiteit
Keyboard Lock Command : it is possible to lock the keyboard, for example, when cleaning the Glass, when the Hood Motor and Lights are turned off.
Press
for approximately 5 seconds to enable or disable Keyboard Locking, which is always confirmed by a Beep and an animated signal on the display motor bar.
Comando Blocco Tastiera : è possibile bloccare la tastiera, ad esempio per effettuare la pulizia del Vetro, quando la Cappa ha il Motore e le Luci spente.
Premendo per circa 5 Secondi il tasto
si può abilitare o disabilitare il Blocco Tastiera che è sempre confermato con un Beep e un’animazione sulla barra motore del display.
Toetsenblokkering : het toetsenbord kan worden geblokkeerd, bijvoorbeeld om het glas schoon te maken als de motor en de lampen van de kap uit zijn.
Door gedurende 5 seconden op de toets
te drukken kan de toetsenblokkering worden in- of uitgeschakeld. Dit wordt altijd bevestigd door een pieptoon en een animatie op de mo-torbalk van het display.

58
FR DE
ES
EN IT
NL
commande à distance - Fernbedienung - mando a distancia - remote control - telecomando -
Afstandbediening
Cette page vous explique comment appairer vos appareil télécommande/hotte.
This page explains you how to activate and use the remote control.
Diese Seite erklärt, wie Sie Ihre Fernbedienung / Haube zu koppeln.
Questa pagina spiega come accoppiare il telecomando unità di controllo / cappa.
Esta página explica cómo sincronizar tu unidad de control / campana remota.
Deze pagina wordt uitgelegd hoe u uw afstandsbediening / afzuigkap koppelen.
• Eclairage et moteur éteints :
• Appuyez sur
24
h
pendant environ 5 secondes, jusqu’à l’allumage d’icônes,
• Au relâchement de la touche
24
h
, l’icône clignote à l’afficheur, dans les 3 secondes qui suivent : appuyez de nouveau sur
24
h
• si l’afficheur affiche
alors la télécommande est activé.
• si l’afficheur affiche
alors la télécommande est désactivé.
• Lighting and engine off:
• Press
24
h
for about 5 seconds, until the icons are lit,
• When the button is released,
24
h
, the icon flashes in the display within 3 seconds: press again
24
h
• If the display shows
the remote control is activated.
• If the display shows
the remote control is not activated.
• Verlichting en de motor uit:
• Druk
24
h
ongeveer 5 seconden ingedrukt totdat de verlichting van de iconen,
• In de knop los
24
h
, het pictogram knippert, binnen 3 seconden: druk opnieuw
24
h
• Als het display toont
de afstandsbediening wordt geactiveerd.
• Als het display toont
de afstandsbediening is uitgeschakeld.
• Beleuchtung und Motor aus :
• Drücken Sie
24
h
für ca. 5 Sekunden, bis die Beleuchtung von Symbolen,
• In dem Loslassen der Taste blinkt
24
h
, das Symbol innerhalb von 3 Sekunden: Drücken Sie erneut
24
h
• wenn die Anzeige
der Fernbedienung angezeigt wird aktiviert.
• wenn die Anzeige
der Fernbedienung angezeigt wird ausgeschaltet.
• Illuminazione e motore spento:
• Premere
24
h
per circa 5 secondi fino a quando l’illuminazione di icone,
• AIn rilasciando il pulsante
24
h
, l’icona lampeggia, entro 3 secondi: premere di nuovo
24
h
• se il display visualizza
il telecomando si attiva.
• se il display visualizza
il telecomando è spento.
• La iluminación y el motor apagado:
• Presione
24
h
durante unos 5 segundos hasta que la iluminación de los iconos,
• En soltar el botón
24
h
, el icono parpadea el plazo de 3 segundos: pulse de nuevo
24
h
• si la pantalla
mostrará se activa el mando a distancia.
• si la pantalla
mostrará el mando a distancia está apagado.

59
légendes - Legends - Zeichenerklärungen - legenda - leyendas - Legenda’s
Configurations de montage préconisées, Mounting configurations
recommended, Montagekonfigurationen empfohlen, Configurazioni
di montaggio raccomandati, Configuraciones de montaje recomen-
dados, Bevestigingsconfiguraties aanbevolen.
Mettre l’appareil hors tension, Turn the power off, Schalten Sie das
Gerät aus, Spegnere l’alimentazione, Desconecte la alimentación,
Schakel de stroom uit
Clapet anti-retour, check valve, Rückschlagventil, valvola di ritegno,
válvula de retención, terugslagklep
Télécommande, Remote control, Fernbedienung, il controllo remo-
to, mando a distancia, afstandsbediening
Sachet de visserie, bag of screws, Beutel mit Schrauben, sacchetto
di viti, la bolsa de tornillos, zakje schroeven,
Utilisez un tournevis cruciforme, Using a Phillips screwdriver, Mit
einem Kreuzschraubenzieher, Utilizzando un cacciavite Phillips,
Con un destornillador Phillips, Met behulp van een Phillips schroe-
vendraaier
Tracez les centres, Draw centers, Draw-Zentren, Centri Draw,
Centros de dibujar, Draw centers.
Alignez les appareils plan de cuisson/hotte de cuisine, Align
the hob devices / range hood, Richten Sie die Kochgeräte /
Dunstabzugshaube, Allineare il cofano dispositivi piano cottura /
intervallo, Alinear el capó dispositivos encimera / campana, Lijn
de kookplaat apparaten / afzuigkap,
Utilisez un outil de découpe, Use a cutting tool, Verwenden Sie ein
Schneidwerkzeug, Utilizzare uno strumento di taglio, Utilice una
herramienta de corte, Gebruik een snijgereedschap,
Utilisez une outil de perçage/vissage, Use a drilling / screwing
tool, Verwenden Sie ein Bohr- / Schraubwerkzeug, Utilizzare un /
strumento di avvitamento di perforazione, Utilice una herramienta
de perforación / atornillado, Gebruik een boor- / schroefmachine
gereedschap
Utilisez une régle, Use a rule, Verwenden Sie eine Regel, Utilizzare
una regola, Utilice una regla, Gebruik een regel
Filtre anti-graisse, grease filter, Fettfilter , filtro grassi, filtro de
grasa, vetfilter
Utilisez un crayon, Use a pencil, Verwenden Sie einen Bleistift,
Utilizzare una matita, Use un lápiz, Gebruik een potlood,
Filtre anti-odeur, Anti-odor filter, Anti-Geruchsfilter , Filtro an-
ti-odore, filtro anti-olor, Anti-geur filter,
Déconnectez, disconnect, trennen, disconnect, desconectar,
losmaken
Opération a suivre chronologiquement, operation follow chro-
nologically, Operation folgen chronologisch, operazione seguire
cronologicamente, la operación sigue cronológicamente, operatie
volgt chronologisch
Opération qui nécessite 2 personnes, Operation that requires 2
people, Ein Betrieb, 2 Personen erfordert, Operazione che richiede
2 persone, Operación que requiere 2 personas, Operatie die 2
personen vereist.
Ne pas intervenir seul, Do not work alone, Nicht allein arbeiten,
Non lavorare da soli, No trabaje solo, Niet alleen werken
Utilisez une clé, Use a wrench, Verwenden Sie einen
Schraubenschlüssel, Utilizzare una chiave, Utilice una llave,
Gebruik een sleutel
Utilisez un mètre, use a tape measure, Verwenden Sie ein
Maßband, usare un metro a nastro, utilice una cinta métrica,
Gebruik een meetlint
Utilisez un tournevis a tête plate, Use a screwdriver Flathead, Mit
einem Schraubendreher Flathead, Utilizzare un cacciavite a taglio,
Utilice un destornillador de cabeza plana, Gebruik een schroeven-
draaier Flathead
utilisez un tourne vis 6 pans, Use a screwdriver 6 sides, Mit einem
Schraubendreher 6 Seiten, Usare un cacciavite 6 lati, Utilice un
destornillador de 6 lados, Gebruik een schroevendraaier 6 kanten
Équipez vous de gants de protection, Equip your protective gloves,
Rüsten Sie Ihre Schutzhandschuhe, Dotare i guanti protettivi, Equi-
par sus guantes protectores, Rust uw beschermende handschoe-
nen
Appuyez, press, Presse, stampa, prensa, pers
Utilisez du ruban adhésif, Use duct tape, Verwenden Sie Klebe-
band, Utilizzare nastro adesivo, Use cinta adhesiva, Gebruik duct
tape.
Utilisez un niveau, Use a level, Verwenden Sie eine Ebene, Usare
un livello, Utilice un nivel, Gebruik een waterpas
Connectez, Connect, verbinden, collegarsi, conectar, aansluiten Interdit, forbidden, verboten, proibito, prohibido, verboden.
Possibilité de consolider le montage (avec tiges filetées ø 8mm),
Ability to consolidate the assembly (with threaded rods ø 8 mm),
Die Fähigkeit, die Montage zu konsolidieren (mit Gewindestangen
Ø 8 mm), Capacità di consolidare il gruppo (con barre filettate ø 8
mm), Capacidad de consolidar el conjunto (con varillas roscadas
Ø 8 mm) De mogelijkheid om de vergadering te consolideren (met
draadeinden ø 8 mm)
Hauteur minimum de pose en fonction de l’energie utilisé par
l’appareil de cuisson, Minimum installation height depending on
the energy used by the cooking appliance, Minimale Einbauhöhe
abhängig von der Energie des Gargeräts, Altezza minima dell’ins-
tallazione a seconda dell’energia utilizzata dall’apparecchio di
cottura, Altura mínima de instalación según la energía utilizada por
el artefacto de cocina, Minimale installatiehoogte afhankelijk van
de energie die door het kooktoestel wordt gebruikt.
40cm mini
FA
F0
click
click

33

991.0537.636 - 180401
code produit
330.0537.330
330.0537.332
330.0537.333
330.0537.334
330.0537.335
330.0537.336
330.0537.337
product code
FRANKE FRANCE SAS
B.P. 13 - Avenue Aristide Briand
60230 - CHAMBLY (France)
www.roblin.fr
Service consommateur :
04.88.78.59.93
-
 1
1
-
 2
2
-
 3
3
-
 4
4
-
 5
5
-
 6
6
-
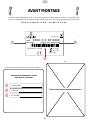 7
7
-
 8
8
-
 9
9
-
 10
10
-
 11
11
-
 12
12
-
 13
13
-
 14
14
-
 15
15
-
 16
16
-
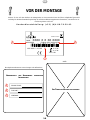 17
17
-
 18
18
-
 19
19
-
 20
20
-
 21
21
-
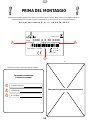 22
22
-
 23
23
-
 24
24
-
 25
25
-
 26
26
-
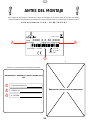 27
27
-
 28
28
-
 29
29
-
 30
30
-
 31
31
-
 32
32
-
 33
33
-
 34
34
-
 35
35
-
 36
36
-
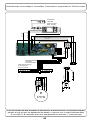 37
37
-
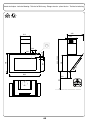 38
38
-
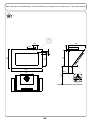 39
39
-
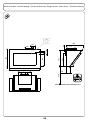 40
40
-
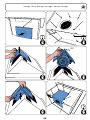 41
41
-
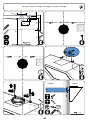 42
42
-
 43
43
-
 44
44
-
 45
45
-
 46
46
-
 47
47
-
 48
48
-
 49
49
-
 50
50
-
 51
51
-
 52
52
-
 53
53
-
 54
54
-
 55
55
-
 56
56


ROBLIN BACCARAT El manual del propietario
- Tipo
- El manual del propietario
en otros idiomas
- français: ROBLIN BACCARAT Le manuel du propriétaire
- italiano: ROBLIN BACCARAT Manuale del proprietario
- Deutsch: ROBLIN BACCARAT Bedienungsanleitung
- Nederlands: ROBLIN BACCARAT de handleiding
- português: ROBLIN BACCARAT Manual do proprietário
- eesti: ROBLIN BACCARAT Omaniku manuaal