GYS POWERDUCTION 37LG El manual del propietario
- Tipo
- El manual del propietario

73502_V5_22/12/2020
www.gys.fr
POWERDUCTION
37LG / 39LG / 50LG
ES
6-14 / 45-56 / 92-100
RU
6-14 / 57-68 / 92-100
NL
6-14 / 69-80 / 92-100
IT
6-14 / 81-91 / 92-100
FR
2-22 / 92-100
EN
6-14 / 23-33 / 92-100
DE
6-14 / 34-44 / 92-100

2
POWERDUCTION 37LG / 39LG / 50LG
FR
Notice originale
INSTRUCTIONS DE SÉCURITÉ
Ce manuel d’utilisation comprend des indications sur le fonctionnement
de cet appareil et les précautions à suivre pour votre sécurité. Merci
de le lire attentivement avant la première utilisation et de le conserver
soigneusement pour toute relecture future. Ces instructions doivent être
lues et bien comprises avant toute opération. Toute modification ou
maintenance non indiquée dans le manuel ne doit pas être entreprise.
Tout dommage corporel ou matériel dû à une utilisation non-conforme
aux instructions de ce manuel ne pourra être retenu à la charge du
fabricant. En cas de problème ou d’incertitude, veuillez consulter une
personne qualifiée pour manier correctement l’appareil. Cet appareil
doit être utilisé uniquement pour chauffer des matériaux ferreux dans
les limites indiquées sur l’appareil et le manuel. Il faut respecter les
instructions relatives à la sécurité. En cas d’utilisation inadéquate ou
dangereuse, le fabricant ne pourra être tenu responsable. Toute autre
utilisation non mentionnée dans cette notice est strictement interdite, et
potentiellement dangereuse. Le produit est semi-automatique et requiert
la présence d’un opérateur.
Cet appareil peut être utilisé par des enfants âgés d’au moins 8 ans
et par des personnes ayant des capacités physiques, sensorielles ou
mentales réduites ou dénuées d’expérience ou de connaissance, s’ils
(si elles) sont correctement surveillé(e)s ou si des instructions relatives
à l’utilisation de l’appareil en toute sécurité leur ont été données et
si les risques encourus ont été appréhendés. Les enfants ne doivent
pas jouer avec l’appareil. Le nettoyage et l’entretien par l’usager ne
doivent pas être effectués par des enfants sans surveillance.
Ne pas utiliser l’appareil, si le cordon d’alimentation ou la fiche de
secteur sont endommagés.
Ne pas couvrir l’appareil.
Risque d’explosion et d’incendie!
• Ne pas utiliser l’appareil en atmosphère explosive.
• Maintenir les bombes aérosol et autres récipients pressurisés
éloignés de l’équipement de chauffage par induction.
Attention risque de chaleur et de amme
• Ne pas surchauffer les pièces et les adhésifs.
• Être vigilant au feu, maintenir un extincteur à proximité.
• Ne pas disposer l’appareil sur, ou à proximité de surfaces inflammables.
• Ne pas installer l’appareil près de substances inflammables.
Attention ! Surface très chaude. Risque de brûlures.
• Les pièces et l’équipement chauds peuvent causer des brûlures.
• Ne pas toucher les pièces chaudes à main nue.
• Attendre le refroidissement des pièces et de l’équipement avant
de les manipuler.
• Veiller à ce que des bijoux (alliance en particulier) ou pièces mé-
talliques ne viennent pas à proximité du système d’induction et de
l’inducteur lors du fonctionnement.

3
POWERDUCTION 37LG / 39LG / 50LG
FR
Notice originale
• Enlever tous les bijoux et autres objets en métal de votre corps
avant d’utiliser cet équipement
• Les personnes avec des implants en métal dans le corps ne doivent
pas utiliser cet équipement.
• En cas de brûlure, rincer abondamment à l’eau et consulter un
médecin sans tarder.
Dangerosité des vapeurs et gaz
• Maintenir la tête hors des fumées, ne pas respirer les vapeurs.
• En travail intérieur, aérer le secteur et/ou utiliser un extracteur
d’air pour évacuer les vapeurs et des gaz.
• Le chauffage par induction de certains matériaux, adhésifs, et flux
peut produire des vapeurs et des gaz. La respiration de ces va-
peurs et gaz peut être dangereuse pour votre santé. Par exemple
le chauffage de l’uréthane libère un gaz : le cyanure d’hydro-
gène, qui peut être mortel aux humains.
• Si la ventilation est insuffisante, utiliser un respirateur agréé.
• Lire les fiches techniques d’hygiène et sécurité des produits (MSDS)
et les instructions du fabricant pour les adhésifs, les flux, les mé-
taux, les consommables, les enduits, les nettoyants, et les déca-
pants.
• Travailler dans un espace confiné seulement s’il est bien aéré, ou
en utilisant un respirateur agréé. Veiller à garder une personne
qualifiée pour surveiller. Les vapeurs et les gaz résultants du chauf-
fage peuvent remplacer l’oxygène de l’air et provoquer un acci-
dent ou la mort. S’assurer de la qualité de l’air respiré.
• Ne pas utiliser le chauffage sur des parties en cours de dégrais-
sage, ou de pulvérisation. La chaleur peut réagir avec les vapeurs
et former des gaz fortement toxiques et irritants.
• Ne pas surchauffer les métaux, tel que l’acier galvanisé, revêtus
de plomb ou de cadmium, à moins que le revêtement soit enlevé
de la surface à chauffer, que l’aire de travail soit bien ventilée, et
au besoin, en portant un respirateur agréé. Les pièces de fonderie
et tous les métaux contenant ces éléments peuvent dégager les
vapeurs toxiques si surchauffés.
• Se référer au MSDS concernant les informations relatives aux tem-
pératures.
Attention danger électrique
Attention ! Champ magnétique important. Les personnes
porteuses d’implants actifs ou passifs doivent être informées.
Aucune mesure de protection supplémentaire n’est nécessaire
lorsque la machine est utilisée seule. Des restrictions et/ou des me-
sures de protection supplémentaires peuvent être nécessaires dans
les autres cas.
Lors d’une maintenance, les niveaux de champ doivent être vérifiés
avant la remise en service du matériel.
En fonctionnement, ne jamais approcher l’inducteur au niveau de
la tête ou des organes vitaux.

4
POWERDUCTION 37LG / 39LG / 50LG
FR
Notice originale
Risque d’émission optique lorsque les éléments métalliques
chauffés approchent et atteignent la fusion
Les porteurs de stimulateur cardiaque ne doivent pas s’approcher
à moins d’un mètre de l’ensemble de l’appareil lorsque celui-ci est
en fonctionnement. Il ne faut pas, non plus, approcher ou toucher
les éléments induits en cours de chauffe. (courants de contacts).
Consulter un médecin et évaluer les risques avant d’aller près d’un
système de chauffage par induction.
Risques de projection de métal ou d’adhésif
• Porter les verres de sécurité approuvés avec des protections laté-
rales ou utiliser un écran sur le visage.
• Porter un vêtement de travail
• Porter des gants.
Ne pas obstruer les ouvertures de ventilation. Se référer à la partie
installation avant d’utiliser l’appareil.
Raccordement :
• Cet appareil doit être raccordé à un socle de prise de courant
relié à la terre.
• Cet appareil est muni d’une protection par fusible (39 & 50LG).
• Ce matériel destiné aux environnements industriels (classe A)
n’est pas prévu pour être utilisé dans un site résidentiel où le cou-
rant électrique est fourni par le réseau public d’alimentation basse
tension. Il peut y avoir des difficultés potentielles pour assurer la
compatibilité électromagnétique dans ces sites, à cause des per-
turbations conduites, aussi bien que rayonnées à fréquence ra-
dioélectrique.
Ce matériel est conforme à la CEI 61000-3-12.
Ce matériel est conforme à la CEI 61000-3-11.
Entretien :
• Si le câble d'alimentation est endommagé, il doit être remplacé
par le fabricant, son service après-vente ou des personnes de
qualification similaire afin d'éviter un danger.
• L’entretien ne doit être effectué que par une personne qualifiée.
• Avertissement ! Débrancher toujours la fiche de la prise secteur
avant d’effectuer des travaux sur l’appareil.
A l’intérieur du produit, les tensions et intensités sont élevées et
dangereuses.
• Si le fusible interne est fondu, il doit être remplacé par le fabri-
cant, son service après-vente ou des personnes de qualification
similaire afin d’éviter un danger.
• Régulièrement, enlever le capot et dépoussiérer à la soufflette. En
profiter pour faire vérifier la tenue des connexions électriques
avec un outil isolé par un personnel qualifié.
• N’utiliser en aucun cas des solvants ou autres produits nettoyants
agressifs
• Nettoyer les surfaces de l’appareil à l’aide d’un chiffon sec.

5
POWERDUCTION 37LG / 39LG / 50LG
FR
Notice originale
Réglementation :
• Appareil conforme aux directives européennes
• La déclaration de conformité est disponible sur notre site internet.
• Marque de conformité EAC (Communauté économique Eura-
sienne)
• Matériel conforme aux exigences britanniques. La déclaration
de conformité britannique est disponible sur notre site (voir à la
page de couverture).
• Appareil conforme aux normes Marocaines.
• La déclaration Cم (CMIM) de conformité est disponible sur notre site
internet.
Mise au rebut :
Ce matériel fait l’objet d’une collecte sélective. Ne pas jeter dans
une poubelle domestique.
Symbole Ecoemballage :
« Produit dont le fabricant participe à la valorisation des embal-
lages en cotisant à un système global de tri, collecte sélective et re-
cyclage des déchets d’emballages ménagers ».
Symbole TRIMAN :
« Produit recyclable qui relève d’une consigne de tri selon le décret
n°2014-1577. »

6
POWERDUCTION 37LG / 39LG / 50LG
ASSEMBLAGE / ASSEMBLY / MONTAGE / ENSAMBLAJE / СБОРКА / MONTAGE / ASSEMBLAGGIO
50LG
8 vis M8x12 - 41281
6 vis M5x16 - 41072
41214
41214
42032
42032
1 vis tôle - 41086
6 vis M6x20 - 41026

POWERDUCTION 37LG / 39LG / 50LG
7
2 vis M5x16 - 41072

8
POWERDUCTION 37LG / 39LG / 50LG
39LG
2 vis M8x40 - 42066
2 vis M5x10 - 41025
6 vis M6x16 - 41032

POWERDUCTION 37LG / 39LG / 50LG
9
37LG
(si option chariot / if trolley option)

10
POWERDUCTION 37LG / 39LG / 50LG
MISE EN EAU DU RÉSERVOIR / IMPOUNDMENT OF THE RESERVOIR / BEWÄSSERUNG DES SPEICHERS /
RIEGO DEL EMBALSE / ПОЛИВ ВОДОХРАНИЛИЩА / BEWATERING VAN HET RESERVOIR / IRRIGA-
ZIONE DEL SERBATOIO
37LG
POWERDUCTION 37LG
26/09/19
1
Press
2
MAX
MIN
3
Press x 2
4
5
6
7
6
return to
go to
A
8
or
press
BIP BIP
5 sec
wait
or
5x max if NOK
7
B
8 9
Press x 2
BIP BIP
5 sec
10
MAX
MIN
Adjust if necessary
11

POWERDUCTION 37LG / 39LG / 50LG
11
39LG
POWERDUCTION 39LG
26 septembre 2019
1 2
MAX
MIN
3
Press x 2
4
5
6
7
6
return to
go to
A
8
or
press
BIP BIP
5 sec
wait
or
5x max if NOK
7
B
8
7 Nm max
27
9
Press x 2
BIP BIP
5 sec
10
MAX
MIN
Adjust if necessary
11
Press

12
POWERDUCTION 37LG / 39LG / 50LG
50LG
POWERDUCTION 50LG
Réf. 055599 - 07/10/19
1 2
MAX
MIN
3
Press x 2
4
5
6
7
6
return to
go to
A
8
or
press
BIP BIP
5 sec
wait
or
5x max if NOK
7
B
8
7 Nm max
27
9
Press x 2
BIP BIP
5 sec
10
MAX
MIN
Adjust if necessary
11
12

POWERDUCTION 37LG / 39LG / 50LG
13
I
50LG
39LG
37LG
3
4
5
6
7
8
9
10
11
12
13
14
17
11
12
16
15
212
1
2
1

14
POWERDUCTION 37LG / 39LG / 50LG
II
Réaction des témoins lumineux / Reaction of the indicator lights / Reaktion der Kontrollleuchten /
Reacción de las luces indicadoras / Реакция индикаторных ламп / Reactie van de indicatielampjes /
Reazione delle spie luminose
État du voyant / Indicator status / Indikatorstatus / Estado del
indicador / Состояние индикатора / Indicatorstatus / Stato
dell’indicatore
Allumé / Light on / Licht an / Luz encendida / Oсвещать
/ Oplichten / Luce accesa
Clignote lentement / Flashing slowly / Blinkt langsam /
Parpadea lentamente / Мигания медленно / Knippert
langzaam / Lampeggia lentamente
Clignote rapidement / Flashing quickly / Blinkt schnell /
Parpadea rápidamente / Мгновенно вспыхивает / knip-
pert snel / Lampeggia rapidamente
Éteint / Off / Aus / Apagado / Выключен / Uit / Spento
%
Puissance (W) / Power (W) / Leistung (W) /
Potencia (W) / Мощность (W) / Vermogen (W)
/ Potenza (W)
37LG 39LG 50LG
10 800 W 1 kW
20 1 kW 1,5 kW
30 1,25 kW 2 kW
40 1,5 kW 2,5 kW
50 1,75 kW 3 kW
60 2 kW 3,5 kW
70 2,5 kW 4 kW
80 3 kW 4,5 kW
90 3,5 kW 5 kW
100 3,7 kW 5,2 kW
Hi -- 3.7 kW 5,2 kW
- lors de la sélection de la puissance - when selecting the power. - bei der Auswahl der Leistung.
- al seleccionar la potencia. - при выборе мощности. - bij het selecteren van de stroomvoorziening.
- quando si seleziona la potenza.
- lorsque la chauffe est active. - when the heating is active. - wenn die Heizung aktiv ist. - cuando la
calefacción está activada. - когда отопление- wanneer de verwarming actief is.включено. - quando
il riscaldamento è attivo.

15
POWERDUCTION 37LG / 39LG / 50LG
FR
Notice originale
IDENTIFICATION DU PRODUIT
A l’arrière du produit apparaît une plaque d’identication, sur laquelle le marquage CE est apposé :
• Nom et adresse du fabricant
• Date de fabrication
• Modèle
• Type du produit
• Tension d’utilisation
Ces données doivent être mentionnées à chaque intervention de techniciens ou si des pièces détachées sont demandées.
SPÉCIFICATIONS DU PRODUIT
37LG 39LG 50LG
Puissance 3.7 kW 3.7 kW 5.2 kW
Tension d’utilisation 185 V - 265 V
Fréquence tension secteur 50 Hz - 60Hz
Fréquence du réchauffeur
15-30 kHz, contrôlé par
microprocesseur.
30-50 kHz, contrôlé par microprocesseur.
Nombre de conducteurs 2 + Terre
Contenance du réservoir
1,5 litres
7 litres
Liquide de refroidissement
Liquide de refroidissement
spécial soudage 5 l
(ref. 062511)
Liquide de refroidissement spécial soudage 10 l
(ref. 052246)
Longueur câble secteur 2 m 2 m 8 m
Longueur câble inducteur 2 m 3 m 3 m
Indice de protection IP 21
Dimensions mini
groupe électrogène
4,5 kVA 6,5 kVA
POIDS ET DIMENSIONS DU PRODUIT
37LG 39LG 50LG
Poids (kg) 15 50 70
Dimensions (cm) 28,5 x 45 x 25 70 x 53 x 37 85 x 58 x 50
DESCRIPTION DU POSTE (FIG I)
1 Interrupteur général
2 Bouton lumineux d’autorisation de chauffe
3 Indicateurs de puissance de chauffe (50 LG : 1 kW – 5 kW, 39LG - 37 LG : 800 W - 3,7 kW)
4 Boutons réglage de puissance de chauffe ou choix d’unité de température
5 Température du liquide de refroidissement et consigne
6 Voyant défaut générateur ou inducteur
7 Voyant d’alarme circuit de refroidissement
8 Voyant de protection thermique du générateur ou du circuit de refroidissement
9 Voyant du mode changement d’inducteur
10 Bouton d’activation du mode changement d’inducteur
11 Bouton de lance : déclenche la chauffe
12 LED d’éclairage du point de chauffe
13 Attache de lance. Empreinte pour clé de 32 mm
14 Empreinte pour clé de 27 mm
15 Adaptateur
16 Inducteur
17 Inducteur complet

16
POWERDUCTION 37LG / 39LG / 50LG
FR
Notice originale
PREMIÈRE MISE EN FONCTIONNEMENT
Le POWERDUCTION 50LG est fourni avec un cordon secteur de 8 m équipé d’une prise électrique 5 pôles 32 A
50/60Hz. Pour assurer un fonctionnement optimum du produit, celui-ci doit être branché sur une installation électrique
avec une protection de 32 A, et protégée selon les normes en vigueur. Le produit est fourni avec un adaptateur 32 A
vers 16 A. Il permet d’utiliser le générateur sur une prise 16 A avec une protection selon les normes pour des travaux
de courtes durées, principalement le dégrippage d’écrous. Pour travailler sans déclencher la protection du réseau,
régler la puissance sur 3.5 kW 70% (voir les instructions de branchement).
Les POWERDUCTION 37LG et 39LG sont fournis avec un cordon secteur de 2 m équipé d’une prise électrique 2 pôles
+ terre 16 A 50/60 Hz.
1. Une fois le produit monté, poser la lance sur son support (50LG) ou de manière à ce qu’elle pointe vers le haut (39
& 37LG). Enlever le bouchon de la lance et celui du réservoir.
2. Remplir au maximum le réservoir avec le liquide de refroidissement spécial soudage.
3. Prendre la lance et la placer au-dessus d’un seau ou du bidon de remplissage.
4. Relier le produit au réseau.
Actionner l’interrupteur général (1) en position ON.
5. Le produit démarre et part systématiquement en Erreur 7 («E-7»).
6. Appuyer 2 fois sur le bouton changement accessoire (10). Le cycle de purge dure 5 secondes et il est signalé par
un chenillard sur l’afcheur. Un double signal sonore indique la n du cycle.
7.
Dès que le liquide sort de la lance, arrêter l’écoulement en appuyant sur le bouton de lance (11) ou attendre l’afchage
« E-6 ». Si l’afcheur indique «E-7», recommencer l’opération à partir de l’étape 6 (5 fois maximum, sinon se référer
à la partie «Correction défaut E-7»).
8. Visser l’inducteur avec un couple de serrage de 7 Nm maximum.
9. Appuyer 2 fois sur le bouton «changement inducteur» (10). Le cycle de purge dure 5 secondes et il est signalé par
un chenillard sur l’afcheur. Un double signal sonore indique la n du cycle.
10. L’afcheur indique par alternance la température du liquide de refroidissement et la consigne de puissance.
11. Refaire l’appoint de liquide de refroidissement si nécessaire.
12. Mettre le bouchon du réservoir fourni dans la boîte accessoire. Le produit est prêt à fonctionner.
Correction défaut E-7
Après 5 essais de cycle de purge infructueux, il est nécessaire de suivre la procédure suivante :
- Tendre la lance au-dessus du produit, pour que les poches d’eau s’écoulent et permettent à la pompe de s’amorcer.
- Pencher le produit à 30° environ du côté de la lance.
- Il est possible de soufer dans le bout de lance. Utiliser une soufette avec un chiffon pour l’étanchéité et éviter les pro-
jections.
- Relancer un ou deux cycles après chaque action.
Si le problème persiste, alors vérier que la pompe fonctionne correctement ou que le tuyau n’est pas pincé ou bouché.
INSTRUCTIONS D’UTILISATION
1. Actionner l’interrupteur général (1) en position ON.
La machine effectue sa phase d’initialisation pendant 2 secondes.
2. Appuyer sur le bouton d’autorisation de chauffe (2). Le voyant sur le bouton (2) et la LED d’éclairage de l’inducteur
(12) s’allument, indiquant que le produit est prêt à chauffer.
3. Positionner l’inducteur (16 ou 17) à plat sur la pièce ou la partie à réchauffer (placer la partie ouverte de la ferrite contre
la pièce).
4. Appuyer sur le bouton (11) de la lance pour démarrer la chauffe ; si nécessaire déplacer l’inducteur pour réchauffer
une surface plus grande. Deux témoins permettent d’indiquer que la chauffe est active :
- La luminosité de la LED d’éclairage de l’inducteur (12) diminue
*
.
- Le voyant de la puissance minimum sur l’indicateur de puissance de chauffe (3) clignote rapidement (en mode HI
ce sont les deux voyants min & max qui clignotent).
Il est possible de modier la consigne de puissance pendant la chauffe.
POWERDUCTION
39LG & 50LG
La consigne de chauffe peut être réglée sur la valeur Hi. La puissance est identique au mode 100%
mais le Powerduction adopte un comportement différent :
- À 100% : il porte la pièce au rouge et maintient à la puissance adéquate pendant quelques secondes
avant d’atteindre doucement sa puissance maximale.
- En mode Hi : il monte à sa puissance maximale en faisant abstraction de l’état de la pièce à chauffer.
Rester très vigilant, la chauffe est forte et rapide et risque d’endommager la pièce.
* Valable que pour les Powerduction dôtés des versions de programme V4. Les version antérieures n'étant pas équipées de cette fonction.

17
POWERDUCTION 37LG / 39LG / 50LG
FR
Notice originale
L’afcheur indique en continu la température du liquide de refroidissement (max 60°C/140°F).
- Dans la phase d’initialisation, la pompe et le ventilateur du circuit de refroidissement fonctionnent pendant quelques
secondes, ceci pour vérier son bon état de marche.
- Après l’arrêt de la chauffe, laisser le circuit de refroidissement refroidir l’inducteur avant d’éteindre le produit.
- Pour modier l’unité d’afchage de la température du liquide de refroidissement, maintenir appuyés les deux boutons
de réglage (4) jusqu’à ce que l’unité désirée s’afche (“ -F-” = Fahrenheit / “ -C- ” = Celsius). Relâcher les boutons, le
changement est mémorisé et effectif.
La machine a été conçue en réduisant au maximum les risques dus aux champs électromagnétiques.
Des risques subsistent et il est recommandé de respecter une distance de sécurité minimale de 30 cm
entre l’inducteur et la tête ou le tronc de l’opérateur.
Mise en veille de la chauffe
Pour des raisons de sécurité, le produit désactive l’autorisation de chauffe au bout de 5 minutes d’inactivité du générateur.
Le témoin lumineux vert du bouton d’autorisation de chauffe (2) et la LED du support de lance (12) s’éteignent.
Pour remettre en fonction le générateur, faire un appui long sur le bouton de lance (11) pendant 1 seconde.
Après 20 minutes d’inactivité, seul un appui sur le bouton d’autorisation de chauffe (2) permet de réactiver le générateur.
PRÉSERVATION DE L’INDUCTEUR
Le métal chauffé rayonne de la chaleur vers l’inducteur au carré de la température à laquelle il est porté. L’inducteur
est donc fortement exposé. Lorsque le métal est rouge sombre, la température est inférieure à 850°C. S’il devient
rouge vif/orange, la température dépasse 1000°C. S’il vire au blanc, la température dépasse 1200°C
(nuancier ci-dessous
disponible en couleur sur la notice du site internet).
600 °C 900 °C 1300 °C
Pour préserver l’inducteur et allonger sa durée de vie, il faut rester le plus possible sur des températures avoisinant
les 850°C et éviter les utilisations prolongées.
La ferrite incluse dans l’inducteur a un coefcient de dilatation supérieur à son support mécanique. La chauffe exces-
sive de l’inducteur engendre une altération de la ferrite. Il dépend de l’utilisateur d’éviter cette chauffe excessive.
Par conséquent, les inducteurs sont des consommables sur lesquels la garantie ne s’applique pas.
TÉMOINS D’ALARME
- Le voyant 6 signale un défaut d’inducteur ou du générateur.
- Le voyant 7 signale un défaut de débit du circuit de refroidissement liquide.
- Le voyant 8 signale la mise en protection thermique du bloc de puissance ou le dépassement de la limite haute de
la température de liquide de refroidissement.
Attendre l’extinction du voyant, le produit est de nouveau prêt à fonctionner.
L’afcheur 5 renvoie le code du défaut :
Code défaut
Raison
E - 1 Bouton autorisation de chauffe (2) resté appuyé. En court-circuit ou bloqué mécaniquement.
E - 2 Bouton de lance resté appuyé (11). En court-circuit ou bloqué mécaniquement.
E - 3 Boutons du clavier resté appuyé (4) ou (10). En court-circuit ou bloqué mécaniquement.
E - 4* Intensité inducteur trop élevée ou non compatible. Lance défectueuse ou inducteur en court-circuit.
E - 5* Intensité inducteur trop faible Inducteur mal vissé ou lance défectueuse.
E - 6 Débit trop élevé >6 l/min Tuyau percé ou absence d’inducteur.
E - 7 Débit trop faible <4 l/min
Tuyau pincé ou bouché, la pompe ne fonctionne pas.
E - 8* Défaut interne Nappe commande débranchée.
E - 9
Défaut tension réseau La tension réseau est trop faible sous 165 V.
- - - Défaut surtension Tension secteur supérieure à 300 V.
*Dans le cas des défauts E-4, E-5 et E-8, redémarrer l’appareil pour réinitialiser le défaut
NB : En cas d’alarme l’appareil ne chauffe pas.
L’appareil est équipé de plusieurs systèmes de protection électroniques pour les surcharges électriques et le refroidissement.
La protection thermique de l’inducteur intervient surtout lors de la chauffe de pièces en inox, cuivres ou aluminium.
Pour remettre en fonction, il suft d’attendre la n du refroidissement. Pour toutes les autres protections, éteindre
l’appareil avec l’interrupteur général et le rallumer.

18
POWERDUCTION 37LG / 39LG / 50LG
FR
Notice originale
Pour les alarmes des défauts E-6 et E-7, vérier :
- la présence d’une éventuelle fuite,
- que le tuyau n’est pas bouché ou pincé,
- que la pompe n’est pas bloquée ou désamorcée,
- qu’il y a sufsamment de liquide de refroidissement.
Si le défaut semble corrigé, appuyer deux fois sur le bouton «changement d’inducteur» (10). Le produit effectue un
cycle de purge. Il est prêt à fonctionner.
MODE «TEMPORISATION»
*
La fonction “Temporisation” permet de maîtriser le temps de chauffe du Powerduction.
Le temps est réglable de 1 à 30 s.
Pour rentrer dans ce mode :
1. Appuyer sur le bouton d’autorisation de chauffe (2). Son voyant lumineux s’allume.
2. Puis appuyer simultanément sur les deux boutons de réglages de puissance (4). L’afchage indique “SEC” puis “T 00”
ou “SEC” puis “ON” si un temps a déjà été paramétré.
3. Les boutons de réglages de puissance (4) deviennent des boutons de réglages de temps. Modier la consigne de
temps à souhait.
Si au délà de 3 secondes, la valeur de temps n’a pas été modiée et indique toujours “T 00”, le Powerduction repasse
en mode normal.
Utilisation en mode “Temporisation” :
Une fois la consigne de temps sélectionnée, le produit est prêt à fonctionner. La LED d’éclairage (12) est allumée.
1. Appuyer sur le bouton de lance (11). L’intensité de la LED (12) diminue pour indiquer que la chauffe est active.
2. La chauffe s’arrête à la n du temps imparti. Tant que le bouton de lance (11) est préssé, la LED (12) et le bouton
d’autorisation de chauffe (2) clignotent pour avertir que la puissance est coupée. Ajuster la consigne de temps si
besoin.
3. Appuyer sur le bouton de lance (11) pour un nouveau cycle de chauffe.
Sortir du mode “Temporisation”
Le mode reste actif constamment, y compris lorsque l’on éteint puis rallume le Powerduction.
1. Pour sortir du mode, régler la consigne de temps sur ∞ ou appuyer simultanément sur les deux boutons de réglage
de puissance (4). Le Powerduction repasse en mode d’utilisation normal. L’afche indique “SEC” puis “OFF”.
Particularité du réglage de puissance dans ce mode
Comme expliqué, en mode d’utilisation normal les boutons de réglages permettent de modier la puissance alors que
dans ce mode, ils modient la consigne de temps. Pour modier la puissance sans sortir du mode :
1. Appuyer sur le bouton d’autorisation de chauffe (2). Son voyant lumineux vert s’éteint.
2. Les boutons de réglages (4) permettent de modier la puissance. Régler la puissance.
3. Appuyer à nouveau sur le bouton (2). Son voyant lumineux se rallume. Les boutons de réglages (4) redeviennent le
paramètrage de temps.
MODE «CHANGEMENT ACCESSOIRE»
STOP
OK
A
B
1 3 4 5
sérigraphie produit
Couple de serrage max = 7 Nm
Ce mode est accessible uniquement si la chauffe n’est pas activée (bouton vert éteint).
* Valable que pour les Powerduction 39LG / 50LG dôtés des versions de programme V4. Les version antérieures n'étant pas équipées de cette fonction.

19
POWERDUCTION 37LG / 39LG / 50LG
FR
Notice originale
1. Appuyer sur le bouton (10), la pompe s’arrête et la LED (9) s’allume.
2. Placer la lance sur son support (50LG & 39LG) ou de manière à ce qu’elle pointe vers le haut
(37LG), mettre le câble au sol pour éviter la perte de liquide.
3. Si le Powerduction est équipé d’un inducteur complet, le dévisser avec la clé de 27 (fournie
avec le produit). S’il est équipé d’un inducteur simple, le dévisser manuellement puis dévisser
l’adaptateur si nécessaire.
Le Powerduction 37LG est équipé d’un connexion xe S, elle ne peut être dévissée.
4. Selon le choix du nouvel inducteur : revisser un inducteur complet à l’aide de la clé fournie
ou revisser l’adaptateur adéquat (7 N.m max) puis le nouvel inducteur manuellement.
5. Appuyer de nouveau sur le bouton (10).
La pompe se met en fonctionnement pendant 5 secondes. Un chenillard s’afche.
Si le débit est correct, un double signal sonore retentit et le produit est prêt à fonctionner.
Sinon un défaut s’afche (se référer au tableau code défaut).
Inducteurs et Adaptateurs
Le Powerduction 37LG est équipé d’une connexion xe S et livré d’origine avec l’inducteur S90.
Les Powerduction 39LG et 50LG sont livrés d’origine avec l’inducteur complet C20/B1.
Les autres accessoires sont optionnels, ils permettent d’élargir les possibilités de chauffe à de multiples applications.
Inducteurs complet Adaptateurs
C20/B1
Réf. 056862
28S
Réf. 064485
28L
Réf. 064492
C180/B1
Réf. 056879
Inducteurs
S90
Réf. 058927
S70
Réf. 061569
L90
Réf. 059788
C180/B2
Réf. 056886
S180
Réf. 059269
S20/B1
Réf. 064874
L70
Réf. 059771
S180/B1
Réf. 064881
S180/B2
Réf. 064928
L180
Réf. 059795
S180/B3 W
Ref. 067899
L180 SPIRAL
Réf. 065000
L20/B4
Ref. 067882
MODE «VIDANGE» (50LG)
Ce mode est accessible uniquement si la chauffe n’est pas activée (bouton vert éteint).
1. Appuyer sur le bouton (10), la pompe s’arrête et la LED (9) s’allume.
2. Placer la lance sur son support. Mettre le câble au sol pour éviter la perte de liquide.
3. Dévisser l’inducteur avec la clé de 27 (fournie avec le produit).
4. Maintenir appuyé 3 secondes sur le bouton d’autorisation de chauffe (2) jusqu’à ce qu’il s’allume.
5. Placer la lance au-dessus d’un récipient d’au moins 10 l de contenance.
6. Appuyer sur le bouton de lance (11). La pompe se met en route jusqu’à ce que le débit devienne inférieur à 1 l/min
ou pendant 2 minutes. L’afcheur afche le débit en décilitre par minute. Pour arrêter la pompe en cours de cycle,
appuyer sur n’importe quel bouton.
2

20
POWERDUCTION 37LG / 39LG / 50LG
FR
Notice originale
7. Pour vider complètement le circuit de liquide de refroidissement, soufer (30PSI ≈ 2 bar) dans le bout de lance,
jusqu’à entendre l’air ou voir des projections de liquide de refroidissement sortir du réservoir.
8. Pour évacuer le liquide restant dans le fond du réservoir, utiliser une pompe à dépression ou pencher le produit sur
la face avant.
9. Pour refaire le plein de liquide de refroidissement, voir la notice de première mise en route.
Il est conseillé de renouveler le liquide de refroidissement tous les ans sous peine de détériorer la lance du POWERDUCTION.
Privilégier l’utilisation du liquide de refroidissement spécial soudage proposé avec le Powerduction (cf. § Maintenance).
MODE «VIDANGE» (39LG & 37LG)
Ce mode est accessible uniquement si la chauffe n’est pas activée (bouton vert éteint).
1. Placer la lance de manière à ce qu’elle pointe vers le haut. Mettre le câble au sol pour éviter la perte de liquide.
2. Dévisser l’inducteur avec la clé de 27 fournie avec le produit (39LG) ou manuellement (37LG).
3. Incliner la lance au dessus d’un récipient de 10 l.
4. Pour évacuer le liquide se trouvant dans le réservoir, placer le produit au dessus du récipient de 10 l et :
- 39LG : dévisser le bouchon de vidange.
- 37LG : pencher le produit sur l’arrière.
39 LG 37 LG
SYSTÈME DE REFROIDISSEMENT ET MODE «REFROIDISSEMENT FORCÉ» (39LG & 50LG)
Lorsque la température du liquide de refroidissement atteint 35°C (95°F), le ventilateur se met en route. Dès qu’elle
repasse en dessous de 35°C, il se coupe.
Lors de longues périodes de chauffe, le POWERDUCTION a un mode de refroidissement forcé. Pour l’enclencher :
1. Actionner l’interrupteur général (1) en position ON.
La machine effectue sa phase d’initialisation pendant 2 secondes.
2. Appuyer sur le bouton d’activation (2) décrit en page 11. Le voyant sur le bouton (2) et la LED sur le support de lance
(12) s’allument, indiquant que le produit est prêt à chauffer.
3. Faire un appui long (>3 secondes) sur le bouton (10). Le mode «Refroidissement forcé» est activé.
Le ventilateur se met alors en route automatiquement. Le message «Fan ON» apparaît sur l’afcheur.
Pour arrêter le mode «Refroidissement forcé», recommencer l’étape 3. Le message «Fan OFF» apparaît alors sur l’afcheur.
MAINTENANCE
Recommandations générales
• Il est conseillé de renouveler le liquide de refroidissement tous les ans sous peine de détériorer la lance du
POWERDUCTION. Avant d’ajouter le liquide, dépoussièrer le produit et vérier l’absence de fuite.
•
Privilégier l’utilisation du liquide de refroidissement spécial soudage proposé avec le Powerduction.
Ne pas utiliser de
liquide automobile, uniquement des liquides de refroidissement à faible conductivité électrique.

21
POWERDUCTION 37LG / 39LG / 50LG
FR
Notice originale
• Vérier régulièrement le serrage des vis de puissance ainsi que l’aspect des connexions électriques de puissance.
Couple de serrage préconisés pour vis de puissance
Dimensions vis M5 M6 M8 M10
collier de
serrage
Gaz
1/4
3/8
Gaz
M28 M32
Inducteur
16/22
Matière acier acier laiton laiton cuivre cuivre cuivre
Couple 4 Nm 6 Nm 7 Nm 7 Nm 2,5 Nm 4 Nm 7 Nm max 7 Nm max
à la main,
4 Nm max
• Il est essentiel que la maintenance du produit soit réalisée par du personnel autorisé, qualié et informé des recom-
mandations décrites dans ce manuel.
• Ne jamais nettoyer, lubrier ou effectuer une maintenance sur le produit en fonctionnement.
• Avant toute opération de maintenance, placer le bouton Marche / Arrêt (1) sur la position « 0 » pour éteindre le pro-
duit, puis le débrancher de l’installation électrique pour éviter tout choc électrique ou autre risque résultant d’une
mauvaise manipulation.
• Ne pas porter de bagues, montres, bijoux, vêtements pendants comme des cravates, vêtements déchirés, écharpes,
vestes déboutonnées ou fermeture éclair ouverte qui pourrait être accrochés pendant le travail.
• Porter plutôt des vêtements spéciques pour la prévention des accidents, comme par exemple : des chaussures anti-
dérapantes, des casques antibruits, des lunettes de protection, des gants de sécurité, etc…
• Ne jamais utiliser d’essence ou de solvants inammables pour nettoyer le produit. Utiliser plutôt de l’eau et, si néces-
saire, des solvants commerciaux non toxiques.
• Après les interventions, toujours remonter les carters métalliques du produit avant de remettre la machine en marche.
• Si elle est endommagée, la ferrite sur un inducteur peut être remplacée.
Pour la remplacer, il faut :
- retirer la protection,
- retirer la ferrite sur le cuivre avec un décapeur thermique pour faciliter l’élimination de la résine,
- bien nettoyer le cuivre,
- encoller la ferrite avec la résine spécique,
- repositionner la ferrite avec sa protection,
- attendre la prise complète de la colle avant d’utiliser l’inducteur.
ACCESSOIRES (FOURNIS)
39LG - 50LG 37LG
Potence - Câble support Inducteur
052284
2 équerres de xation
(si choix option chariot)
OPTIONS
39LG - 50LG 37LG
Ferrite Protection UNIVERSAL 800 + potence
053823
056909
051331 + 052284
053458
056916
Colle-Stick bi-composant Power Epoxy 150°C
054851
Liquide de refroidissement spécial soudage
10 l 5 l
052246
062511

22
POWERDUCTION 37LG / 39LG / 50LG
FR
Notice originale
Maintenance préventive
Des inspections méticuleuses effectuées à des intervalles réguliers sont nécessaires pour détecter et éliminer rapide-
ment les défauts, an qu’ils ne causent des dommages à l’appareil.
Chaque fois que vous devez utiliser le produit POWERDUCTION, vérier au préalable les organes de
sécurité de l’appareil, et toutes anomalies pouvant nuire au fonctionnement correct de l’appareil.
Vérier quotidiennement pour identier les signes avant-coureurs d’usure.
La sécurité opérationnelle du produit ne peut être garantie que si les réparations sont effectuées en
utilisant des pièces de rechange d’origine et si les instructions de maintenance sont respectées.
Après chaque utilisation, le produit étant éteint, il doit être nettoyé aussitôt pour retirer toutes pous-
sières ou salissures pouvant réduire l’efcacité de la ventilation et altérer le bon fonctionnement du
produit et sa durée de vie.
Avant chaque utilisation, vérier le bon fonctionnement des organes de contrôle, des organes de
sécurité, et l’intégralité des câbles électriques de connexion.
Effectuer des contrôles visuels périodiques an de vérier la présence éventuelle de fuites de liquide,
et vérier que les bouches de ventilation ne sont pas obstruées.
BRANCHEMENTS ÉLECTRIQUES
Le produit est conçu pour fonctionner avec une tension secteur monophasée de 185 V à 265 V,
CONDITIONS DE GARANTIE
La garantie couvre tous défauts ou vices de fabrication pendant 2 ans, à compter de la date d’achat (pièces et main
d’oeuvre).
La garantie ne couvre pas :
• Toutes autres avaries dues au transport.
• L’usure normale des pièces (Ex. : câbles, pinces, concentrateurs, ferrite.. etc ).
• Les incidents dus à un mauvais usage (erreur d’alimentation, chute, démontage).
• Les pannes liées à l’environnement (pollution, rouille, poussière).
• Les inducteurs et ferrites démontables qui sont des consommables.
• L’utilisation d’un liquide de refroidissement non spécié.
En cas de panne, retourner l’appareil à votre distributeur, en y joignant :
- un justicatif d’achat daté (ticket de sortie de caisse, facture….)
- une note explicative de la panne.

23
POWERDUCTION 37LG / 39LG / 50LG
EN
Translation of the original instructions
SAFETY INSTRUCTIONS
This manual contains safety and operating instructions, to be followed
for your safety. Please read it carefully before using the device for the
first time and keep it in a safe place for future reference. Read and un-
derstand the following safety recommendations before using or servi-
cing the unit. Any change or servicing that is not specified in the instruc-
tion manual must not be undertaken. The manufacturer is not liable for
any injury or damage caused due to non-compliance with the instruc-
tions featured in this manual . If there is any issue or uncertainty, please
consult a qualified individual to operate the equipment correctly. This
machine may only be used to heat ferrous materials within the limits in-
dicated on the equipment and manual. The operator must observe the
safety precautions. In case of inedaquate or unsafe use, the manufactu-
rer cannot be held liable for damage or injury. Any other uses not spe-
cified in this manual is forbidden, and possibly dangerous.The product
is semi automatic and requires the presence of an operator.
This unit can be used by children aged 8 or over and by people with
reduced physical, sensory or mental capabilities or lack of experience
or knowledge, if they are properly monitored or if instructions for
using the equipment safely have been read and risks made aware of.
Children must not play with the product. Cleaning and maintenance
should not be performed by an unsupervised child.
Do not use the charger if the mains cable or plug is damaged.
Do not cover the device.
Fire and explosion risks!
• Do not use the device in an explosive atmosphere.
• Keep gas cannisters or other pressurised gas containers away
from the induction heating machine.
Warning, heat and ame risk.
• Do not overheat parts and adhesives.
• Be wary of fire, keep a fire extinguisher is in the vicinity..
• Do not position the machine on, or near flammable surfaces.
• Do not position the machine near flammable materials.
Warning ! Very hot surface. Risk of burns.
• The parts and pieces that have just been heated are hot and may
cause burns when manipulated.
• Do not touch any hot parts with your hands.
• Wait for the parts and pieces to cool down before handling them.
• Check that jewellery (such as wedding rings) or other metal pieces
do not get close to the induction heating machine or the inductor
when switched on.
• Remove any jewellery or any metal object from yourself before
using this machine
• People with metal implants should not use this machine.
• In case of burns, rinse with water abundantly and see a medical
doctor as soon as possible.
Dangerosity of the gas fumes

24
POWERDUCTION 37LG / 39LG / 50LG
EN
Translation of the original instructions
• Keep the head away from the fumes, do not inhale.
• If working inside, ventilate the area or use a fume extractor to eva-
cuate the gases and fumes.
• Induction heating of certain materials such as adhesives and flux
can generate fumes and gases. Breathing these fumes and gases
can be dangerous for your health. For example, heating urethane
generates a gas : hydrogen cyanide, potentially mortal for humans.
• If the ventilation is insufficent, use an approved respiratory unit.
• Read the safety data sheets (MSDS) and the manufacturer’s instruc-
tions for adhesvies, flux, metals, consumables, coatings, cleaning
agents, corrosives, and paint strippers.
• Do not use the heater on parts being degreased or sprayed. The
heat might react with fumes and generate highly toxic gases.
• Work in a confined area only if it’s well ventilated, or use an appro-
ved repiratory/filtration unit. Make sure that a qualified person is
around to watch over you. The fumes and gases released while
heating can replace oxygen or air, causing accidents or death.
Check the quality of the air you’re breathing
• Do not overheat metals, such as galvanised steel, covered with lead
or cadmium, unless the coating is removed from the surface before
it’s heated, that the area is well ventilated, and if needed, use an
approved filtration/respiratory unit.. Foundry pieces and all metals
containing such elements may generates toxic fumes if overheated.
• Check the MSDS for temperature related details.
Warning, electrical danger
Warning ! Major magnetic eld. People wearing active or
passive implants must be informed.
No further protectective steps are required when the machine is used
on its own. Further restrictions and/or protective measures may be
necessary in other cases.
After maintenance, the magnetic field levels must be checked before
the machine is used again.
When switched on, never put the inductor near the head or vital or-
gans.
Caution: Danger of optical radiation when the heated metal ele-
ments reach fusion.
People wearing pacemakers are advised to not come close to the
machine. Risk of disruption of pacemaker operations when close to
the machine.
Consult a doctor before getting close to induction heaters.
Risk of metal or adhesive projections
• Wear approved protective goggles with lateral protections, or
protect the whole face with a screen.
• Wear protective clothes.
• Wear gloves.
Do not obstruct the machine’s air intake, which facilitates air circu-
lation. Check the installation chapter before using the device.

25
POWERDUCTION 37LG / 39LG / 50LG
EN
Translation of the original instructions
Connection:
• This machine must be connected to an earthed socket.
• This machine is fuse-protected (39LG & 50LG).
• These Class A devices are not intended to be used on a residential
site where the electric current is supplied by the public network,
with a low voltage power supply. There may be potential difficul-
ties in ensuring electromagnetic compatibility on these sites, be-
cause of the interferences, as well as radio frequencies.
This hardware is compliant with the IEC 61000-3-12.
This equipment complies with the IEC 61000-3-11.
Maintenance:
• If the power cable is damaged, it must be replaced by the manu-
facturer, its after sales service or an equally qualified person to
prevent danger.
• Service should be performed by a qualified person.
• Warning! Always disconnect from the mains before performing
maintenance on the device.
• High Voltage and Currents inside the machine.
• If the internal fuse is melted, it must be replaced by the manufac-
turer (GYS’ dedicated sales service) or by an equally qualified
person to prevent any accidents.
• Remove the casing on a regular basis, to remove any excess dust.
Take this opportunity to have the electrical connections checked
by a qualified person, with an insulated tool.
• Do not use solvents or any agressive cleaning products.
• Clean the device’s surfaces with a dry cloth.
Regulations:
• Device complies with europeans directives.
• The certificate of compliance is available on our website.
• EAC Conformity marking (Eurasian Economic Community).
• Equipment in compliance with British requirements. The British De-
claration of Conformity is available on our website (see home
page).
• Equipment in conformity with Moroccan standards.
• The declaration Cم (CMIM) of conformity is available on our we-
bsite (see cover page).
Waste management:
This product should be disposed of at an appropriate recycling faci-
lity. Do not throw away in a domestic bin.
Ecopackaging symbol
«The product’s manufacturer contributes to the recycling of its pac-
kaging by contributing to a global recycling system».
TRIMAN symbol
«This product should be recycled appropriately».

26
POWERDUCTION 37LG / 39LG / 50LG
EN
Translation of the original instructions
PRODUCT IDENTIFICATION
At the back of the product, there is an identication plate on which the CE marking is afxed:
• Name and address of the manufacturer
• Date of manufacture
• Model
• Product Type
• Operating Voltage
This data must be specied for each maintenance intervention, or if spare parts are requested.
PRODUCT SPECIFICATIONS
37LG 39LG 50LG
Power 3.7 kW 3.7 kW 5.2 kW
Operating voltage 185 V - 265 V
Power supply frequency 50 Hz - 60Hz
Heater Frequency
15-30 kHz, microprocessor
controlled.
30-50 kHz, microprocessor controlled.
Number of conductors 2 + Ground
Container capacity
1,5 l
7 l
Cooling liquid
Special welding liquid coolant (Coragard)
5 l (ref. 062511)
10 l
(ref. 052246)
Power supply cable length 2 m 2 m 8 m
Inductor cable length 2 m 3 m 3 m
IP Code IP 21
Minimum dimensions
generator set
4,5 kVA 6,5 kVA
PRODUCT WEIGHT AND DIMENSIONS
37LG 39LG 50LG
Weight (kg) 15 50 70
Dimensions (cm) 28,5 x 45 x 25 70 x 53 x 37 85 x 58 x 50
DESCRIPTION OF THE MACHINE (FIG I, II & III)
1 Heat authorisation illuminated button
2 Main switch
3 Heating power indicator (1 kW – 5 kW).
4 Heating power settings or temperature unit button
5 Cooling liquid temperature
6 Inductor or machine fault indicator
7 Cooling circuit warning alarm indicator
8 Machine or cooling circuit thermal protection indicator
9 Inductor change indicator
10 Inductor change mode activation button
11 Lance button : start the heat
12 LED worklight (illuminates the heating point)
13 Lance attachment. For a 27 mm spanner
14 Lance attachment. For a 32 mm spanner
15 Adaptor
16 Inductor
17 Complete inductor

27
POWERDUCTION 37LG / 39LG / 50LG
EN
Translation of the original instructions
FIRST USE
The POWERDUCTION 50LG is supplied with an 8 m power cable tted with a 5 poles 32 A 50Hz/60Hz plug. For optimal
performance, the machine must be connected to a power supply network with a 32 A protection, and protected ac-
cording to the applicable standards. The product is supplied with a 32A to 16A adapter. It allows the machine to ope-
rate on a 16 A plug with proper protection for short periods e.g. to remove seized bolts (see connection instructions).
The POWERDUCTION 37LG and 39LG are supplied with an 2 m power cable tted with a 2 poles + earth 16 A
50Hz/60Hz plug.
1. Once the product is assembled, place the lance on its support (50LG) or so that it points upwards (39 & 37LG).
Remove the cap of the lance and the cap of the tank. Remove the torch cap and the tank cap.
2. Fill up the tank to the maximum using cooling liquid.
3. Place the torch above a bucket.
4. Connect the machine to the mains.
Switch on the machine (1).
5. The machine starts and will systematically display Error 7.
6. Press the accessory change button (10) twice. The purge cycle takes 5 seconds (a loading icon should be displayed
during it) and a double «beep» sound indicates completion.
7. As soon as the liquid is coming out of the torch, stop the torch by pressing the torch button, the accessory change
button or the heat authorisation button. Or wait for «E-6» to be displayed.
If Error 7 is displayed, start again from step 6 (ve times max, see default E-7 explanation).
8. Screw the inductor on using a maximum coupling of 7Nm.
9. Press the accessory change button (10) twice. The purge cycle takes 5 seconds (a loading icon should be dis-
played during it) and a double «beep» sound indicates completion.
10. The temperature of the cooling liquid and the power instruction are displayed.
11. Top up the tank with cooling liquid if required.
12. Close the tank using the cap supplied with the accessories. The machine is now ready to be used.
Solving fault E-7
If the issue remains, check that the pump is working correctly or that the pipe is not blocked.
After ve unsuccessful purge cycles, it is possible to:
- Stretch the torch above the machine to clear any pocket of water and for the pump to kick in.
- Put the machine at a 30° angle towards the torch.
- It is possible to blow the torch. Use an air blower and a cloth to keep it water proof and avoid projections.
- Re-attempt one or two cycles after each action.
If the issue remains, check that the pump is working correctly or that the pipe is not blocked.
INSTRUCTIONS
1. Set the main switch (1) to ON.
The machine initialises in 2 seconds.
2. Press the heat authorisation button (2) as described on page 11. The indicator on button (2) and the lance support LED
(12) both switch on, indicating that the machine is ready to operate.
3. Position the inductor (13) at on the workpiece (place the open part of the ferrite towards the workpiece).
4. Press the button (11) on the lance to start the heating; if necessary move the inductor to heat a larger area. Two
indicators indicate that the heating is active:
- The brightness of the LED illuminating the inductor (12) decreases*.
- The minimum power indicator light on the heating power indicator (3) ashes quickly (in HI mode both min &
max lights ash).
It is possible to change the rated power during the heating.
The heating set point can be set to Hi. The power is identical to the 100% mode but the Powerduction
behaves differently:
- At 100%: he wears the part red and maintains the right power for a few seconds before slowly rea-
ching its maximum power.
- In Hi mode: it rises to its maximum power regardless of the condition of the room to be heated.
Remain very vigilant, the heating is strong and fast and may damage the part without a control of
this mode.
* Valid only for Powerduction versions of V4 program versions. Previous versions are not equipped with this function.

28
POWERDUCTION 37LG / 39LG / 50LG
EN
Translation of the original instructions
The display provides a continuous update of the cooling liquid temperature (max 60°C/140°F).
- During the powering up phase, the pump and the cooling fan activate for a few seconds, to check that they are wor-
king properly.
- After the heating stops, let the cooling circuit operate to cool down the inductor, before switching off the machine.
- To modify the cooling liquid temperature unit, press and hold both settings buttons (4) until the desired unit is dis-
played (“ -F-” = Farenheit / “ -C- ” = Celsius). Release the buttons, the change is saved and in effect.
The machine has been designed to minimise the risks due to electromagnetic elds. Some residual
risks persist and it is recommended to observe a security distance between the inductor and the
operator’s head/torso.
Heat on standby
For security reasons, the product deactivates the heat authorisation after 5 minutes of inactivity. The heat authorisation
button indicator and the lance support LED both switch off.
To reactivate the machine, press the heat authorisation button (2) or press and hold the lance button (11) for 1 second.
This feature is disabled after 20 minutes of inactivity.
It allows the user to stay in a working position without the need to reach for the machine.
INDUCTOR PRESERVATION
The heated metal radiates heat on to the inductor at the square of the temperature to which it is heated. The inductor
is therefore highly exposed. When the metal is dark red, the temperature is below 850°C. If it turns bright red/
orange, the temperature exceeds 1000°C. If it turns white, the temperature exceeds 1200°C
(the chart below is available in
colour on the website manual).
600 °C 900 °C 1300 °C
To preserve the inductor and extend its life, it is necessary to keep the temperature around 850°C as much as pos-
sible and avoid prolonged use.
The ferrite included in the inductor has a higher coefcient of expansion than its mechanical support. Excessive hea-
ting of the inductor causes distortion to the ferrite. It is up to the user to avoid this excessive heating.
Therefore, inductors are consumables to which the warranty does not apply.
WARNING LIGHTS
- The indicator 6 signals a machine/inductor fault.
- The indicator 7 signals a cooling circuit liquid ow fault.
- The indicator 8 signals a thermal protection of the power block or the excessive temperature of the cooling liquid.
Wait for the indicator to switch off and the machine is ready to operate.
The display 5 displays the fault code :
Fault code
Cause
E - 1 Heat authorisation button (2) is stuck. In short-circuit or mechanically blocked.
E - 2 Lance button (11) is stuck. In short-circuit or mechanically blocked.
E - 3 Keypad buttons are stuck (9) and (11). In short-circuit or mechanically blocked.
E - 4* Inductor intensity is too high or not compatible. Faulty lance or inductor in short circuit.
E - 5* Inductor intensity is too low. Inductor is not screwed properly or faulty lance.
E - 6 Flow is too high >6 l/min. Pierced hose or missing inductor.
E - 7 Flow too low <4 l/min.
Hose is pinched or obstructed, the pump does not operate.
E - 8* Internal fault. Disconnected at command cable.
E - 9
Voltage network fault. The network voltage is too low under 165 V.
- - - Overvoltage fault. Voltage above 300 V. sector.
*For E-4, E-5 and E-8 faults, restart the unit to correct the fault.
* Valid only for Powerduction 39LG / 50LG with V4 program versions. Previous versions are not equipped with this function.

29
POWERDUCTION 37LG / 39LG / 50LG
EN
Translation of the original instructions
NB : In the event of a warning alarm, the machine does not work.
The machine is tted with several protection systems against electrical overcharge and cooling faults. The thermal
protection of the inductor is mainly used when heating stainless steel, copper or aluminium parts. To reactivate the
machine, simply wait for the cooling phase to end. For other protections, switch off the machine using the main switch
and switch it back on.
For fault alarms E-6 and E-7, check that there is no leak or an obstructed/broken hose, that the pump is not blocked or deacti-
vated and that there is enough cooling liquid in the tank.
If the problem appears to have been rectied, press the «inductor change» button twice (10) . The cooling circuit is performing
a purge cycle. It is ready to operate.
TIME DELAY MODE
*
* Valid only for Powerduction versions of V4 program versions. Previous versions are not equipped with this function.
The “Timing” function allows you to control the heating time of the Powerduction.
The time is adjustable from 1 to 30 s.
To enter this mode:
1. Press the heating authorization button (2). Its indicator light comes on.
2. Then press both power adjustment buttons (4) simultaneously. The display shows “SEC” then “T 00”
or “SEC” then “ON” if a time has already been set.
3. The power setting buttons (4) become time setting buttons. Change the setpoint from time to time as desired.
If the time value has not been changed beyond 3 seconds and still shows “T 00”, the Powerduction returns to normal
mode.
Use in “Timer” mode:
Once the time setpoint has been selected, the product is ready for operation. The lighting LED (12) is lit.
1. Press the lance button (11). The intensity of the LED (12) decreases to indicate that the heating is active.
2. The heating stops at the end of the time limit. As long as the lance button (11) is pressed, the LED (12) and the
heating enable button (2) ash to warn that the power is off. Adjust the time setpoint if necessary.
3. Press the lance button (11) for a new heating cycle.
Exit the “Timer” mode
The mode remains active at all times, even when the Powerduction is switched off and then on again.
1. To exit the mode, set the time setpoint on ∞ or press both power control buttons (4) simultaneously. The Powerduc-
tion returns to normal operating mode. The display shows “SEC” then “OFF”.
Special feature of the power setting in this mode
As explained, in normal use mode the setting buttons allow you to change the power while in this mode they change
the time setpoint. To change the power without leaving the mode:
1. Press the heating authorization button (2). Its green light goes out.
2. The setting buttons (4) allow you to change the power. Adjust the power.
3. Press button (2) again. Its indicator light comes on again. The setting buttons (4) become the time setting again.
«ACCESSORY CHANGE» MODE
STOP
OK
A
B
1 3 4 5
product serigraphy
Tightening torque max = 7N
This mode is accessible only if the heating isn’t activated (green button switched off).

30
POWERDUCTION 37LG / 39LG / 50LG
EN
Translation of the original instructions
1. Press the button (10), the pump stops and the LED (9) switches on.
2. Place the lance on its supports and put the cable on the ground (to prevent loss of cooling liquid).
3. If the Powerduction is equipped with a complete inductor, unscrew it with the key of 27 (sup-
plied with the product). If it is equipped with a simple inductor, unscrew it manually and then
unscrew the adapter if necessary.
The Powerduction 37LG is equipped with a xed connection S, it cannot be unscrewed.
4. Depending on the choice of the new inductor: screw on a complete inductor using the wrench
supplied or screw on the appropriate adapter (7 N.m max) and then screw on the new inductor
manually.
5. Press the button again (10).
The pump activates. For 5 seconds, the LEDs display a wait pattern.
If the ow is correct, the machine emits a double «BEEP» and the product is ready to operate.
Otherwise a fault is displayed (refer to the fault code table).
Inductors and Adapters
The Powerduction 37LG is equipped with a xed connection S and is supplied as standard with the S90 inductor.
The Powerduction 39LG and 50LG are delivered with the complete C20/B1 inductor.
The other accessories are optional, they extend the heating possibilities to a wide range of applications.
Complete inductors Adapters
C20/B1
Ref. 056862
28S
Ref. 064485
28L
Ref. 064492
C180/B1
Ref. 056879
Inductors
S90
Ref. 058927
S70
Ref. 061569
L90
Ref. 059788
C180/B2
Ref. 056886
S180
Ref. 059269
S20/B1
Ref. 064874
L70
Ref. 059771
S180/B1
Ref. 064881
S180/B2
Ref. 064928
L180
Ref. 059795
S180/B3 W
Ref. 067899
L180 SPIRAL
Ref. 065000
L20/B4
Ref. 067882
«PURGE» MODE (50LG)
This mode is only available if the heat is not activated (green switch is off).
1. Push the button (10), the pump stops and the LED (9) lights up.
2. Position the torch on its support and place the cable on the oor (to avoid liquid spillage).
3. Unscrew the accessory using key 27 (supplied with the machine).
4. Push and hold the heat authorisation button (2) for 3 seconds until it lights up.
5. Place the torch button above a bucket with a capacity of 10l minimum.
6. Push the torch button (11). The pump activates until the debit falls under 1l / minute or for 2 minutes. The ma-
chine displays the debit in decilitre per minute.
2

31
POWERDUCTION 37LG / 39LG / 50LG
EN
Translation of the original instructions
7. To interrupt the pump during the cycle, push any button.
8. To empty the cooling circuit, use a blower to blow air (30PSI) at the end of the torch until you can hear the air
owing or projections of liquid coming out of the tank.
9. To empty the tank, use a pump or push the machine forward in order to have it at an angle.
10. To top up the cooling liquid, refer to the installation instructions.
It is recommended to change the cooling liquid every year, otherwise you may damage the POWERDUCTION’s lance.
Prefer the use of the special welding coolant offered with Powerduction (see § Maintenance).
«PURGE» MODE (39LG & 37LG)
This mode is only available if the heat is not activated (green switch is off).
1. Place the inductor, making sure it points upwards. Place the cable on the oor to avoid liquid spillage.
2. Unscrew the accessory using key 27 supplied with the machine (39LG) ou l’inducteur (37LG).
3. Place the torch button above a bucket with a capacity of 10l minimum.
4. To empty the tank, place the product button above a bucket with a capacity of 10l minimum :
- 39LG : unscrew the «purge» button.
- 37LG : lean the product on the back.
39 LG 37 LG
It is recommended to change the cooling liquid every two years, otherwise you may damage the Powerduction’s lance.
COOLING CIRCUIT AND «FORCED COOLING» MODE
To prevent the cooling liquid’s temperature from rising, the cooling fan starts, in any event, when the liquid’s tempera-
ture reaches 35°C (95°F). As soon as the temperature goes below that, the cooling fan switches off.
During long periods of use, the POWERDUCTION has a forced cooling mode. To activate it :
1. Set the main switch (1) to ON.
The machine initialises in 2 seconds.
2. Press the activation button (2) as described on page 5. The indicator on button (2) and the lance support LED (12) both
switch on, indicating that the machine is ready to operate.
3. Hold (>3 seconds) the button (10). The « Forced cooling» mode is activated.
The cooling fan then starts automatically. The cooling fan will be audible and the «Fan ON» message will appear on the
display.
To stop the «Forced cooling», press the activation button to stop the heating or hold the button (10) again. The message
«Fan OFF» is displayed.
MAINTENANCE
General recommendations
• It is recommended to change the cooling liquid every two years, otherwise you may damage the Powerduction’s lance.
• Prefer the use of the special welding coolant offered with Powerduction. Do not use automotive uids, only coolants
with low electrical conductivity.

32
POWERDUCTION 37LG / 39LG / 50LG
EN
Translation of the original instructions
• Prefer the use of the special welding coolant offered with Powerduction. Do not use automotive uids, only coolants
with low electrical conductivity.
Recommended tightening torque for power screws
Screw dimensions M5 M6 M8 M10 hose clamp
Gaz
1/4
3/8
Gaz
M28 M32
Inductor
16/22
Material steel steel brass brass copper copper copper
Couple 4 Nm 6 Nm 7 Nm 7 Nm 2,5 Nm 4 Nm 7 Nm max 7 Nm max
by hand,
4 Nm max
• It is essential that the maintenance of the product is performed by qualied, authorised staff, that is fully aware of the
recommendations outlined in this manual.
• Never clean, lubricate or perform maintenance on the product when it’s being used.
• Before any maintenance work, set the On / Off switch to « 0 » to switch off the machine, .then disconnect it it from
the mains power supply to prevent any electrical shock or other risks resulting from improper handling.
• Do not wear rings, watches, jewellery, hanging clothes (e.g. ties), torn clothes, scarves, unbuttoned or unzipped
jackets, or anyhting that could get caught during the operation of the machine
• Rather wear clothing specically designed for the prevention of accidents, such as: non-slip shoes, anti-noise helmets,
protective goggles, safety shoes, etc ...
• Never use petrol or ammable solvents to clean the product. Prefer the use of water and, if necessary, non toxic com-
mercial solvents.
• After maintenance, always put and secure the metal covers back on, before switching the machine on.
• The ferrite on inducer can be replaced if damaged.
To replace it, you must :
- Remove the protection,
- Remove the ferrite on copper with a heat gun to facilitate the removal of the resin,
- Clean copper,
- Glue the ferrite with the specic resin,
- Reposition the ferrite with its protection,
- Waiting for the complete setting of the adhesive before using the inductor.
ACCESSORIES
39LG - 50LG 37LG
Gallows - Cable carrier Inductor
052284
2 xing brackets
(if choice trolley option)
OPTIONS
39LG - 50LG 37LG
Ferrite Protection UNIVERSAL 800 + Gallows
053823
056909
051331 + 052284
053458
056916
Glue Stick-Power Bi-component Epoxy 150 ° C
054851
Special welding liquid coolant
10 l 5 l
052246
062511

33
POWERDUCTION 37LG / 39LG / 50LG
EN
Translation of the original instructions
Preventive maintenance
Meticulous inspections should be carried out at regular intervals to quickly detect and eliminate faults, so they will not
cause damage to the device.
Prior to each use of the POWERDUCTION, check the unit’s security systems and any anomalies that may
hinder the proper operation of the device. Perform daily checks to identify signs of wear.
The operational safety of the product can only be guaranteed if the repairs are carried out using original
spare parts, and if the maintenance instructions are followed.
After each use and once the product is switched off, it should be cleaned immediately to remove any dust or
dirt that may impair cooling efciency, affect the proper functioning of the product and reduce its lifespan.
Before each use, check the good operation of the main systems, security systems, and all the electrical
cables connection.
Perform periodic visual inspections to verify that there are no cooling liquid leaks, and check that the vents
are not obstructed.
ELECTRICAL CONNECTIONS
The product is designed to operate on a single phase power supply from 185 V to 265 V,
WARRANTY
The warranty covers faulty workmanship for 2 years from the date of purchase (parts and labour).
The warranty does not cover:
• Transit damage.
• Normal wear of parts (eg. : cables, clamps, etc..).
• Damages due to misuse (power supply error, dropping of equipment, disassembling).
• Environment related failures (pollution, rust, dust).
• Inductors and removable ferrites that are consumables.
• Use of unspecied coolant.
In case of failure, return the unit to your distributor together with:
- The proof of purchase (receipt etc ...)
- A description of the fault reported

34
POWERDUCTION 37LG / 39LG / 50LG
DE
Übersetzung der Originalbetriebsanleitung
SICHERHEITSHINWEISE
Diese Betriebsanleitung enthält Sicherheits- und Betriebshinweise. Bitte
lesen Sie diese Anleitung aufmerksam durch, bevor Sie das Gerät zum
ersten Mal benutzen und bewahren Sie diese sorgfältig auf. Lesen Sie vor
Inbetriebnahme des Gerätes die Anleitung sorgfältig durch. Nehmen Sie
keine Wartungsarbeiten oder Veränderungen am Gerät vor, wenn diese
nicht explizit in der Anleitung genannt werden. Der Hersteller haftet nicht
für Verletzungen oder Schäden, die durch unsachgemäße Handhabung
dieses Gerätes enstanden sind. Bei Problemen oder Fragen zum korrekten
Gebrauch dieses Gerätes, wenden Sie sich bitte an entsprechend qualifi-
ziertes und geschultes Fachpersonal. Dieses Gerät darf nur zum Erwär-
men von Eisenwerkstoffen innerhalb der in der Betriebsanleitung angege-
benen Grenzen verwendet werden. Die Sicherheitsanweisungen müssen
in jedem Fall beachtet werden. Der Hersteller ist für Schäden bei fehle-
rhaften oder gefährlichen Verwendung nicht verantwortlich. Jede andere
Nutzung, die nicht in dieser Bedienungsanleitung erwähnt wurde, ist un-
tersagt und potentiell gefährlich. Das Produkt ist halbautomatisch und die
Präsenz eines Betreibers ist erforderlich.
Dieses Gerät kann von Personen ab 8 Jahren, und von Personen mit
eingeschränkten physischen, sensorischen oder geistigen Fähigkeiten
sowie von Personen ohne Erfahrungen oder Kenntnissen benutzt
werden, wenn sie durch eine für ihre Sicherheit verantwortliche Person
beaufsichtigt oder bezüglich des Gebrauchs des Gerätes angeleitet
werden. Kinder müssen beaufsichtigt werden, um sicherzustellen, dass
sie mit dem Gerät nicht spielen. Die Reinigung und Wartung darf nicht
von unbewachten Kindern durchgeführt werden.
Das Gerät nicht nutzen, wenn das Netzkabel oder den Stecker
beschädigt sind.
Das Gerät nicht abdecken.
Brand- und Explosionsgefahr!
• Verwenden Sie nicht das Produkt in explosionsgefährdeten Be-
reichen.
• Das Induktionsheizgerät nicht in der Nähe von Spraydosen und
anderen Druckbehälter betreiben.
Schützen Sie sich vor Hitze und vor Feuer.
• Werkstücke und Klebestoffe nicht überhitzen.
• Achten Sie darauf, dass kein Brand entsteht, und halten Sie stets
einen Feuerlöscher bereit.
• Setzen Sie das Gerät nicht an oder in der Nähe von brennbaren
Oberflächen und Stoffen ein.
Achtung! Sehr heiße Oberäche. Verbrennungsgefahr.
•
ACHTUNG! Die Werkstücke und Geräte sind nach Anwendung sehr
heiß! Seien Sie daher im Umgang mit den Werkstücken und Geräten
vorsichtig, um Verbrennungen zu vermeiden.
• Berühren Sie die heißen Werkstücke nicht mit bloßen Händen und
lassen Sie diese vorher abkühlen.
• Achten Sie darauf, dass Schmuckstücke (z.B. Eheringe) oder andere
Metallteile nicht in der Nähe des betriebenen Induktionsheizgerätes
oder des Induktors sind.

35
POWERDUCTION 37LG / 39LG / 50LG
DE
Übersetzung der Originalbetriebsanleitung
• Legen Sie alle Schmuckstücke und Metallteile ab, bevor Sie dieses
Gerät benutzen möchten.
• Achtung! Personen die Implantate aus Metall tragen, dürfen dieses
Gerät nicht benutzen.
• Im Falle einer Verbrennung, sofort gründlich mit Wasser kühlen und
Arzt konsultieren.
Gefährdung durch Dämpfe und Gase
• Den Kopf nicht über den Rauch halten, bzw. Dämpfe nicht einatmen.
• Bei Arbeiten in geschlossenen Räumen müssen diese entsprechend
den geltenden Bestimmungen gut belüftet sein um Dämpfe und
Gase vom Bediener fern zu halten.
• Die Induktionserwärmung von manchen Werkstoffen, Klebstoffen kann
giftige Dämpfe und Gase entwickeln. Das Einatmen dieser Dämpfe
und Gase kann gesundheitsschädlich sein. Zum Beispiel setzt das
Erhitzen von Urethan u.U. tödlich wirkenden Cyanwasserstoff frei.
• Bei unzureichender Belüftung in jedem Fall Atemschutzgerät anlegen.
• Lesen Sie die SDB (Sicherheitsdatenblätter) und Anweisungen des
Herstellers für Klebstoffe, Metalle, Verschleißteile, Beschichtungs-
u. Reinigungsmittel sowie Beizen etc.
• Erwärmen Sie keine Werkstücke im laufenden Entfettungs- oder
Zerstäubungsprozess. Die Hitze kann mit den Dämpfen reagie-
ren, und sehr giftige und reizende Gase bilden.
•
Damit Sie in beengten Raumverhältnissen arbeiten können, muss der
Raum gut belüftet sein, oder Sie müssen ein zugelassenes Beatmu
-
ngsgerät nutzen. Achten Sie darauf, dass eine zur Überwachung
qualifizierte Person anwesend ist. Die durch das Erhitzen entstehen
-
den Dämpfe und Gase können den Sauerstoff in der Luft ersetzen,
und zu unter Umständen tödlichen Unfällen führen. Achten Sie auf
eine gute Belüftung und auf die Qualität der Atemluft.
• Mit Zink-, Blei- oder Cadmium haltigen Beschichtungen versehene
Metalle nicht überhitzen sofern die Beschichtung nicht vorher ent-
fernt wurde und/oder der Raum entsprechend gut belüftet wird.
Bei Bedarf tragen Sie ein zugelassenes Beatmungsgerät. Gußteile
und Werkstoffe mit den genannten chemischen Elementen können
bei Überhitzung giftige Dämpfe entwickeln
• Siehe SDB für Informationen über Grenztemperaturen.
Achtung! Elektrische Gefährdung!
Achtung! Starkes Magnetfeld. Personen die aktive oder pas-
sive Implantate tragen müssen informiert werden.
Weitere Schutzmaßnahmen sind nicht erforderlich wenn das
Gerät
allein benutzt wird. Beschränkungen und/oder zusätzliche Schutz
-
maßnahme können in allen anderen Fälleb notwendig werden.
Nach einer Wartung oder Reparatur müssen vor der Wiederinbe-
triebnahme die Feldstärken geprüft werden.
Während des Betriebs niemals den Induktor an die Nähe des
Kopfes oder andere lebenswichtige Organe halten.

36
POWERDUCTION 37LG / 39LG / 50LG
DE
Übersetzung der Originalbetriebsanleitung
Achtung ! Gefahr von optischen Strahlungen, wenn erhitzte Me-
tallteile ihren Schmelzpunkt erreichen.
Träger von Herzschrittmachern oder anderen medizinischen Geräten
müssen sich vom Gerät fernhalten. Achtung! Betriebsstörung von
Herzschrittmachern oder ähnlichen medizinischen Geräten in der
Nähe möglich.
Konsultieren Sie im Zweifel einen Arzt, bevor Sie sich einem Induk-
tionsheizgerät nähern.
ACHTUNG! Gefahr von Metall- und Klebstoffspritzern!
• Tragen Sie zugelassene Sicherheitsschutzbrillen mit Seitenschutz
oder nutzen Sie einen Voll-Gesichtsschutz.
• Tragen Sie geignete Arbeitsschutzkleidung.
• Tragen Sie Schutzhandschuhe.
Achten Sie darauf, dass die Entlüftungsöffnungen der Maschine
nicht abgedeckt werden. Vor der Anwendung des Gerätes die
Montage-Anleitung lesen.
Anschluss
• Dieses Gerät muss an eine mit Schutzleiter und ausreichender
Absicherung versehene Steckdose angeschlossen werden.
• Dieses Gerät ist mit einer Schutzsicherung ausgestattet (39 & 50LG).
• ACHTUNG! Dieses Gerät wird als Klasse A Gerät eingestuft.
Es ist nicht für den Einsatz in Wohngebieten bestimmt, in denen
die lokale Stromversorgung über das öffentliche Niederspan-
nungsnetz geregelt wird. In diesem Umfeld ist es auf Grund von
Hochfrequenz-Störungen und Strahlungen schwierig die elektro-
magnetische Verträglichkeit zu gewährleisten.
Das Gerät entspricht der Norm ICE 61000-3-12.
Das Gerät entspricht der Norm ICE 61000-3-11.
Wartung:
• Falls das Anschlusskabel beschädigt ist, muss es durch den Hers-
teller, seinen Reparaturservice oder eine qualifizierte Person aus-
getauscht werden, um Gefahren zu vermeiden.
• Die Wartung und Reparatur darf nur von entsprechend geschultem
und qualifiziertem Fachpersonal durchgeführt werden.
• Anweisung! Vor Wartungsarbeiten das Gerät immer vom Net-
zanschluss trennen. Hohe Spannungen und Ströme im Gerät ber-
gen die Gefahr von u.U. tödlichen elektrischen Schlägen.
• Wenn die interne Sicherung durchgebrannt ist, muss sie durch den
Hersteller, seinen Reparaturservice oder eine qualifizierte Person
ausgetauscht werden, um Gefahren zu vermeiden.
• Nehmen Sie regelmäßig (mindenstens 2 bis 3 x pro Jahr) das
Gehäuse ab und reinigen Sie das Innere des Gerätes mit Druc-
kluft. Lassen Sie regelmäßig Prüfungen des GYS-Gerätes auf seine
elektrische Betriebssicherheit von qualifiziertem Technikern
durchführen.

37
POWERDUCTION 37LG / 39LG / 50LG
DE
Übersetzung der Originalbetriebsanleitung
• In keinem Fall dürfen Sie Lösungsmittel oder andere aggresive
Mittel zur Reinigung verwenden.
• Reinigen Sie die Oberflächen des Gerätes mit einem trockenen Tuch.
Regelung:
• Gerät entspricht europäischen Richtlinien.
• EAC-Konformitätszeichen (Eurasische Wirtschaftsgemeinschaft)
• Das Gerät entspricht den britischen Richtlinien und Normen. Die
Konformitätserklärung für Grossbritannien ist auf unserer Inter-
netseite verfügbar (siehe Titelseite).
• Das Gerät entspricht die marokkanischen Standards.
• Die Konformitätserklärung Cم (CMIM) ist auf unserer Webseite
verfügbar (siehe Titelseite).
Entsorgung:
Produkt für getrennte Sammlung (Sondermüll). Nicht mit dem Haus-
müll entsorgen.
Recycling-Symbol:
Produkt für getrenne Entsorgung (Elektroschrott). Werfen Sie es
daher nicht in den Hausmüll!
TRIMAN-Symbol:
Recyclebares Produkt, das spezifisch entsorgt wird (nach dem Dekret
N°2014-1577).
TECHNISCHE DATEN
Auf der Rückseite der Maschine bendet sich ein Typenschild, auf dem neben der CE-Kennzeichnung folgende Anga-
ben zu nden sind:
• Herstelleranschrift
• Baujahr
• Modell
• Produktbezeichnung
• Betriebsspannung
Diese Daten sind bei Reparaturen oder bei Anfragen von Ersatzteilen dringend erforderlich.
PRODUKTDATEN
37LG 39LG 50LG
Leistung 3.7 kW 3.7 kW 5.2 kW
Betriebsspannung 185 V - 265 V
Netzfrequenz 50 Hz - 60Hz
Frequenz des
Induktionsheizgerätes
15-30 kHz, Mikroprozessor
gesteuert.
30-50 kHz, Mikroprozessor gesteuert.
Stromleiteranzahl 2 + Schutzleiter
Tankkapazität
1,5 Liter
7 Liter
Kühlmittel
Kühlmittel - für Schweißgeräte
5 l (ref. 062511)
10 l
(ref. 052246)
Netzleitung 2 m 2 m 8 m
Induktorkabellänge 2 m 3 m 3 m
Schutzart IP 21
Mindestabmessungen
Generatoraggregat
4,5 kVA 6,5 kVA

38
POWERDUCTION 37LG / 39LG / 50LG
DE
Übersetzung der Originalbetriebsanleitung
GRÖSSE UND GEWICHT
37LG 39LG 50LG
Gewicht (kg) 15 50 70
Grösse (cm) 28,5 x 45 x 25 70 x 53 x 37 85 x 58 x 50
BESCHREIBUNG DES GERÄTES (FIG I, II & III)
1 Netzschalter
2 Beleuchtete Heiztaste
3 Anzeiger der Heizleistung (1 kW – 5 kW).
4 Einstellungsknöpfe der Heizleistung oder Auswahl der Temperatureinheit
5 Temperatur des Kühlmittels und Anweisungen
6 Fehler-Warnleuchte für das Gerät oder Induktor
7 Signalleuchte des Kühlkreislaufes
8 Wärmeschutz-Leuchte des Gerätes oder des Kühlkreislaufes
9 Kontrollleuchte des Modus zur Änderung des Induktors
10 Aktivierungstaste des Modus zur Änderung des Induktors.
11 Induktor-Taste: Aktivierung des Aufheizens
12 LED-Leuchte des Erhitzungspunktes
13 Schlüsselgröße 27mm
14 Induktor-Halterung. Schlüssegröße 32mm
15 Adapter
16 Induktor
17 Induktor komplett
ERSTE INBETRIEBNAHME
Das POWERDUCTION 50LG wird mit einer 8m langen 5-adrigen Netzleitung geliefert. Die erforderliche Sicherungs-
größe beträgt 32A 50Hz/60Hz.. Das Gerät darf ausschließlich an einem mit 32A-Sicherung gesicherten, normgerechten
Anschluss betrieben werden.
Das POWERDUCTION 37 LG und 39 LG werden mit einer zwei Meter langen, dreiadrigen (L, N, PE) Netzleitung aus-
geliefert.
1. Wenn das Produkt montiert ist, legen Sie die Induktolanze auf die Halterung.
Entfernen Sie die Kappe der Lanze und die Kappe des Tanks.
2. Den Tank mit Kühlmittel - für Schweißgeräte bis Maximum befüllen.
3. Den Induktor über einem ausreichend großen Auffangbehälter positionieren.
4. Das Gerät an der Netzspannungsversorgung anschließen.
MAschine am Schalter (1) einschalten.
5. Das Gerät startet und wird in aller Regel Fehler 7 anzeigen («E-7»).
6. Drücken Sie zweimal auf der Taste «Wechsel Zubehör» (10). Der Entlüftungszyklus dauert 5 Sekunden und wird
von einem Lauicht auf der Bedieneinheit signalisiert. Ein doppelter Hinweiston signalisiert das Ende des Zyklus.
7.
Sobald Kühlmittel aus dem Induktor-Handstück austritt, stoppen Sie den Zyklus durch drücken der Taste «Heizen» oder
«Zubehörwechsel» oder warten Sie auf die Anzeige «E-6». Wenn Fehler 7 wieder erscheint wiederholen Sie ab der
Schritt 6 (max. 5 x - siehe Behebung des Fehlers E-7).
8. Den Induktor mit einem max. Anzugsmoment von 7 Nm anschrauben.
9. Drücken Sie zweimal die Taste «Wechsel Zubehör». Der Entlüftungszyklus dauert 5 Sekunden und wird von einem
Lauicht auf der Bedieneinheit signalisiert. Ein doppelter Hinweiston signalisiert das Ende des Zyklus.
10. Die Temperatur des Kühlmittels wird angezeigt und die Einschaltkontrolllampe leuchtet.
11. Bei Bedarf den Tank mit Kühlmittel auffüllen.
12. Verschliessen Sie den TAnk mit dem im Lieferumfang enthaltenen Deckel. Das Produkt ist betriebsbereit.
Behebung des Fehlers E-7
Falls das Problem weiterhin besteht,stellen Sie sicher dass die Kühlmittelpumpe korrekt arbeitet und keine Schlauch und
Rohrverbindungen des Kühlkreislaufes blockiert oder abgeknickt sind.
- Das Schlauchpaket mit Induktor über die MAschine heben um Wasser- bzw. Lufttaschen abießen zu lassen und der
Pumpe zu ermöglichen in Gang zu kommen.
- Kippen Sie das Gerät ca. 30° auf die Seite des Induktors.
- Es ist auch möglich, an der Spitze der Induktorlanze Druckluft ein zu blasen. Benutzen Sie eine Druckluftpistole und ei-
nem Putzlappen, um ab zu dichten, und Spritzer zu vermeiden.
- nach jedem Versuch ein oder zwei Entlüftungszyklen durchführen.

39
POWERDUCTION 37LG / 39LG / 50LG
DE
Übersetzung der Originalbetriebsanleitung
Falls das Problem weiterhin besteht bitte erneut kontrollieren ob die Pumpe richtig funktioniert, und keine Schlauch- und
Rohrverbindungen abgeknickt oder verstopft sind.
BETRIEBSHINWEISE
1. Stellen Sie den Hauptschalter (1) auf EIN.
Der Startvorgang dauert 2 Sekunden.
2. Nun die Heiztaste drücken (2), siehe Seite X. Sobald die Signalleuchten auf der Taste (2), sowie die LED-Leuchte auf
dem Induktor (12) leuchten, ist das Gerät betriebsbereit.
3. Den Induktor ach, mit dem Ferritkern nach unten auf das zu erhitzende Werkstück platzieren(13).
4. Drücken Sie die Taste (11) an der Lanze, um die Heizung zu starten; falls erforderlich. Bewegen Sie den Induktor,
um eine größere Fläche zu erwärmen. Zwei Anzeigen zeigen an, dass die Heizung aktiv ist:
- Die Helligkeit der LED, die den Induktor (12) beleuchtet, nimmt ab*.
- Die Anzeigeleuchte für die minimale Leistung an der Heizleistungsanzeige (3) blinkt schnell (im HI-Modus blinken
beide Min- und Max-Leuchten).
Die Heizleistung ist regulierbar.
POWERDUCTION
39LG & 50LG
Der Heizungssollwert kann auf Hi eingestellt werden. Die Leistung ist identisch mit dem 100%-Mo-
dus, aber die Leistungsaufnahme verhält sich anders:
- Bei 100%: Er trägt den Teil rot und hält die richtige Leistung für einige Sekunden, bevor er langsam
seine maximale Leistung erreicht.
- Im Hi-Modus: Er steigt auf seine maximale Leistung, unabhängig von den Bedingungen des zu be-
heizenden Raumes. Bleiben Sie sehr wachsam, die Erwärmung ist stark und schnell und kann das
Teil ohne Steuerung dieses Modus beschädigen.
Die Anzeige zeigt kontinuierlich die Temperatur des Kühlmittels an (max 60°C/140°F).
- Während des Startvorgangs funktionieren die Pumpe und der Lüfter für einige Sekunden nicht. Der Betriebszustand
des Gerätes wird überprüft.
- Nach Beendigung des Heizvorganges sollte das Gerät zur besseren Abkühlung nicht sofort ausgeschaltet werden.
- Zur Änderung der Temperatureinheit drücken Sie die beiden Einstellungsknöpfe (4) bis die gewünschte Einheit (“-F-” =
Farenheit / “-C-” = Celsius) angezeigt wird. Die Änderung wird automatisch gespeichert..
Das Gerät wurde so entwickelt, dass nur geringe elektromagnetische Felder entstehen. Restrisiken
bestehen und es solte Abstand von mindestens 30cm zwischen dem Induktor und dem Kopf/dem
Rumpf des Bedieners eingehalten werden.
Stand-By-Modus
Aus Sicherheitsgründen deaktiviert sich das Gerät nach 5 Minuten automatisch. Zusätzlich schalten sich die grüne Kontroll-
leuchte und die LED-Leuchte des Induktors ab.
Drücken Sie auf die Heiztaste (2) oder 1 Sekunde auf die Taste am Induktor (11), um das Gerät neu zu starten.
Nach 20 Minuten wird diese Funktion inaktiv.
BEWAHRUNG DES INDUKTORS
Der Induktor selbst wird durch die im Metall bendliche Wärme erhitzt und wird stark beansprucht. Ist das Metall dun-
kelrot, liegt die Temperatur unter 850°C, hellrot/orange werden die 1.000°C überschritten - wird das Werkstück weiß,
so liegt die Temperatur bereits über 1.200°C
(Farbscala in der Bedienungsanleitung auf der Website verfügbar).
600 °C 900 °C 1300 °C
Je niedriger die Temperatur des Induktors, desto höher die Lebensdauer. Bleibt also der Induktor fast nur unter einer Tem-
peratur von 850°C, so wird dieser nicht schnell ersetzt werden müssen.
Der im Induktor enthaltene Ferrit hat einen höheren Ausdehnungskoefzienten als die im Induktor bendliche, mecha-
nische Aufnahme. Eine übermäßige Erwärmung des Induktors bewirkt eine Veränderung des Ferrits - dies sollte vermieden
werden.
Induktoren sind daher Verbrauchsmaterialien, für die die Garantie nicht gilt.
WARNSYMBOLE (SIEHE S.2)
- Die Signalleuchte 6 zeigt einen Induktor- oder Generator-Fehler an.
- Die Signalleuchte 7 zeigt einen Fehler im Kühlkreislauf an.
- Die Signalleuchte 8 zeigt eine Überhitzung der Elektronik oder des Kühlmittels an.
* Gültig nur für Powerduction-Versionen von V4-Programmversionen. Frühere Versionen sind nicht mit dieser Funktion ausgestattet.

40
POWERDUCTION 37LG / 39LG / 50LG
DE
Übersetzung der Originalbetriebsanleitung
Warten Sie auf das Erlöschen der Signalleuchte. Danach ist das Produkt wieder betriebsbereit.
In der Anzeige 5 wird der Fehler-Code angezeigt:
Standard-Code
Grund
E - 1 Heiztaste noch gedrückt (2). Kurzschluss oder mechanisch gesperrt.
E - 2 Induktor-Taste noch aktiv (11). Kurzschluss oder mechanisch gesperrt.
E - 3 Taste (9) und (11) gedrückt. Kurzschluss oder mechanisch gesperrt.
E - 4*
Intensität des Induktors zu hoch
oder nicht kompatibel
Defekter Induktor oder kurzgeschlossener Induktor.
E - 5* Intensität des Induktors zu gering Falsch verschraubter Induktor oder defekter Induktor.
E - 6 Durchuss zu hoch >6 l/min Beschädigter Schlauch oder Induktor noch nicht verschraubt.
E - 7 Durchuss zu gering <4 l/min
Abgeknickter oder verstopfter Schlauch. Die Pumpe funktioniert nicht.
E - 8* Interner Fehler Bedienfeld deaktiviert.
E - 9 Fehler Netzspannung Die Netzspannung ist niedriger als 165V.
- - - Überspannung Die Netzspannung ist höher als 300V.
*Für die Fehlermeldung E-4, E-5 und E-8, starten Sie das Gerät neu, um den Fehler zu korrigieren.
NB: Das Gerät heizt nicht auf.
Im Fall von elektrischen Überlastungen und Kühlstörungen verhindern verschiedene Schutzsysteme eine weiter Beschädigung
am Gerät. Der Wärmeschutz des Induktors wird hauptsächlich beim Erwärmen von Edelstahl-, Kupfer- oder Aluminiumteilen
eingesetzt. Warten Sie bis sich das Gerät abgekühlt hat, bevor SIe es weiter verwenden. Bei anderen Warnungen sollten SIe das
Gerät aus- und wieder einschalten.
Erscheint die Fehlermeldung E-6 oder E-7, prüfen Sie bitte zunächst den Schlauch auf eventuelle Verstopfungen oder Lecks und
die Pumpe auf eventuelle Fehler. Es sollte immer ausreichend Kühlmittel im Tank vorhanden sein.
Wenn der Defekt behoben wurde, starten Sie das Gerät mit zweimaliger Betätigung der Induktorwechseltaste (10) neu. Das
Gerät führt einen Entleerungszyklus durch. Es ist betriebsbereit.
ZEITVERZÖGERUNGSMODUS
*
* Gültig nur für Powerduction-Versionen von V4-Programmversionen. Frühere Versionen sind nicht mit dieser Funktion ausgestattet.
Mit der Funktion “Timing” können Sie die Aufheizzeit der Leistungsaufnahme steuern.
Die Zeit ist von 1 bis 30 s einstellbar.
Um in diesen Modus zu gelangen:
1. Drücken Sie die Taste Heizberechtigung (2). Die Kontrollleuchte leuchtet auf.
2. Drücken Sie dann beide Power-Einstelltasten (4) gleichzeitig. Auf der Anzeige erscheint “SEC” und dann “T 00”
oder “SEC” dann “ON”, wenn bereits eine Zeit eingestellt wurde.
3. Die Leistungseinstelltasten (4) werden zu Zeiteinstelltasten. Ändern Sie den Sollwert von Zeit zu Zeit wie gewünscht.
Wenn der Zeitwert nicht länger als 3 Sekunden geändert wurde und trotzdem “T 00” angezeigt wird, kehrt die
Stromzufuhr in den Normalbetrieb zurück.
Verwenden Sie diese Option im Modus “Timer”:
Nach Auswahl des Zeitsollwerts ist das Produkt betriebsbereit. Die leuchtende LED (12) leuchtet.
1. Drücken Sie den Lanzenknopf (11). Die Intensität der LED (12) nimmt ab, um anzuzeigen, dass die Heizung aktiv ist.
2. Die Heizung stoppt am Ende der Zeitbegrenzung. Solange der Lanzenknopf (11) gedrückt wird, blinken die LED (12)
und der Heizfreigabetaster (2), um zu warnen, dass die Stromversorgung unterbrochen ist. Stellen Sie bei Bedarf
den Zeitsollwert ein.
3. Drücken Sie die Lanzen-Taste (11) für einen neuen Heizzyklus.
Verlassen des “Timer”-Modus
Der Modus bleibt jederzeit aktiv, auch wenn die Leistungsaufnahme aus- und wieder eingeschaltet wird.
1. Um den Modus zu verlassen, stellen Sie den Zeitsollwert auf ∞ ein. Die Stromzufuhr kehrt in den normalen Betrieb-
smodus zurück oder drücken Sie beide Power Control Tasten (4) gleichzeitig. Auf der Anzeige erscheint “SEC” und
dann “OFF”.
Besonderheit der Leistungseinstellung in diesem Modus
Wie erläutert, können Sie im Normalbetrieb mit den Einstelltasten die Leistung ändern, während Sie in diesem Modus
den Zeitsollwert ändern. Um die Stromversorgung zu ändern, ohne den Modus zu verlassen:
1. Drücken Sie die Taste Heizberechtigung (2). Das grüne Licht erlischt.
2. Mit den Einstelltasten (4) können Sie die Leistung ändern. Stellen Sie die Leistung ein.
3. Drücken Sie die Taste (2) erneut. Die Kontrollleuchte leuchtet wieder auf. Die Einstelltasten (4) werden wieder zur
Zeiteinstellung.

41
POWERDUCTION 37LG / 39LG / 50LG
DE
Übersetzung der Originalbetriebsanleitung
«ZUBEHÖR-WECHSEL» MODUS
STOP
OK
A
B
1 3 4 5
Typenschild
Max. Drehmoment = 7 Nm
Dieser Modus ist nur verfügbar, wenn der Induktor nicht aktiviert ist (grüne LED ist AUS).
1. Nach Betätigung der Taste (10) schaltet die Pumpe ab und die LED (9) leuchtet.
2. Die Induktorlanze in der Halterung ablegen und das Schlauchpaket auf den Boden legen, um ein
Auslaufen der Kühlüssigkeit zu vermeiden.
3. Wenn die Powerduction mit einem kompletten Induktor ausgestattet ist, schrauben Sie ihn mit
dem Schlüssel 27 (im Lieferumfang enthalten) ab. Wenn er mit einem einfachen Induktor ausges-
tattet ist, schrauben Sie ihn manuell ab und schrauben Sie dann gegebenenfalls den Adapter ab.
Das Powerduction 37LG ist mit einem Festanschluss S ausgestattet, er kann nicht
abgeschraubt werden.
4. Je nach Wahl des neuen Induktors: Kompletten Induktor mit dem mitgelieferten Schrauben-
schlüssel aufschrauben oder den entsprechenden Adapter aufschrauben (max. 7 N.m) und dann
den neuen Induktor von Hand aufschrauben.
5. Drücken Sie wieder auf die Taste (10).
Die Pumpe läuft wieder an. Für 5 Sekunden erscheint ein Lauicht.
Arbeitet der Kühlkreislauf fehlerfrei, ertönt ein doppelter Signalton und das Gerät ist betriebsbereit.
Wenn nicht, erscheint eine Fehlermeldung im Display (siehe die Fehler-Tabelle auf der vorhergehenden Seite).
Zubehör & Verbrauchsmaterialen
Das Powerduction 37LG ist mit einem Festanschluss S ausgestattet und wird standardmäßig mit der S90-Induktivität
geliefert.
Die Powerduction 39LG und 50LG werden standardmäßig mit dem kompletten C20/B1-Induktor geliefert.
Die anderen Zubehörteile sind optional, sie ermöglichen es, die Heizmöglichkeiten auf ein breites Spektrum von An-
wendungen zu erweitern.
Induktor komplet Adapter
C20/B1
Art-Nr. 056862
28S
Art-Nr. 064485
28L
Art-Nr. 064492
C180/B1
Art-Nr. 056879
Induktor
S90
Art-Nr. 058927
S70
Art-Nr. 061569
L90
Art-Nr. 059788
C180/B2
Art-Nr. 056886
S180
Art-Nr. 059269
S20/B1
Art-Nr. 064874
L70
Art-Nr. 059771
S180/B1
Art-Nr. 064881
S180/B2
Art-Nr. 064928
L180
Art-Nr. 059795
S180/B3 W
Art-Nr. 067899
L180 SPIRAL
Art-Nr. 065000
L20/B4
Art-Nr. 067882
2

42
POWERDUCTION 37LG / 39LG / 50LG
DE
Übersetzung der Originalbetriebsanleitung
ENTLEERUNGSMODUS (50LG)
Dieser Modus ist nur verfügbar, wenn der Induktor nicht aktiviert ist (grüne LED ist AUS).
1. Nach Betätigung der Taste (10) schaltet die Pumpe ab und die LED (9) leuchtet.
2. Die Induktorlanze in der Halterung ablegen und das Schlauchpaket auf den Boden legen, um ein Auslaufen der
Kühlüssigkeit zu vermeiden.
3. Das Induktorrohr mit dem Schraubenschlüssel 27 mm abschrauben (im Lieferumfang enthalten).
4. Taste für Heizfunktion ca. 3 Sekunden drücken bis die LED leuchtet.
5. Postionieren sie das Induktor-Handstück über einem Behälter mit min. 10 L Fassungsvermögen.
6. Drücken Sie die Induktor-Taste (11). Die Pumpe startet und läuft bis der Durchuss für 2 Min. unter weniger als 1 l/
min fällt. Das Display zeigt den Durchuss in Deziliter pro Minute an. Um die Pumpe im laufenden Zyklus auszu-
chalten, drücken Sie auf ein beliebige Taste.
7. Um den Kühlüssigkeitskreislauf komplett zu entleeren blasen Sie mit Druckluft in den offenen Induktor-Handgriff
(30PSI) bis Sie Luft strömen hören bzw. Kühlmittelnebel austritt.
8. Nutzen Sie eine Saugpumpe oder neigen Sie das Gerät auf die Vorderseite, um im Tank verbliebene Kühlmittelreste
zu entleeren.
9. Um das Kühlmittel wieder aufzufüllen schauen Sie in die Betriebseinleitung unter Erstinbetriebnahme.
Das Kühlmittel sollte spätens alle 2 Jahre getauscht werden, um eine Beschädigung des POWERDUCTION zu vermeiden.
Bevorzugen Sie die Verwendung des speziellen Schweißkühlmittels, das mit Powerduction angeboten wird (siehe §
Wartung).
ENTLEERUNGSMODUS (39LG & 37LG)
Dieser Modus ist nur verfügbar, wenn der Induktor nicht aktiviert ist (grüne LED ist AUS).
1. Placer la lance de manière à ce qu’elle pointe vers le haut. Mettre le câble au sol pour éviter la perte de liquide.
2. Das Induktorrohr mit dem Schraubenschlüssel 27 mm abschrauben (im Lieferumfang enthalten).
3. Postionieren sie das Induktor-Handstück über einem Behälter mit min. 10 L Fassungsvermögen.
- 39LG : dévisser le bouchon de vidange.
- 37LG : pencher le produit sur l’arrière.
39 LG 37 LG
KÜHLSYSTEM UND «ZWANGSKÜHLUNGS»-MODUS (39LG & 50LG)
Das Kühlmittel wird über einen Lüfter gekühlt. Sinkt die Temperatur unter 35°C, schaltet sich der Lüfter automatisch ab.
Für längere Betriebszeit bietet das POWERDUCTION einen Zwangskühlungs-Modus. So aktivieren Sie die Funktion:
1. Das Gerät mit dem Hauptschalter einschalten (1).
Der Startvorgang dauert 2 Sekunden.
2. Aktivieren Sie den auf Seite X beschriebenen Vorgang (2). Sobald die Signalleuchten auf der Taste (2), sowie die LED-
Leuchte auf dem Induktor (12) leuchten, ist das Gerät betriebsbereit.
3. Drücken Sie die Taste (10) mindestens 3 Sekunden. Der «Zwangskühlungs»-Modus ist aktiviert.
Der Lüfter startet automatisch. Das Gerät kann eingesetzt werden, sobald der Lüfter in Betrieb ist und die Meldung «Fan
ON» angezeigt wird.
Stoppen die «Zwangskühlung» mit der Aktivierungstaste. Zum Beenden des Heizvorgangs Taste (10) lange gedrückt
halten. Die Nachricht «Fan OFF» erscheint dann in der Anzeige.

43
POWERDUCTION 37LG / 39LG / 50LG
DE
Übersetzung der Originalbetriebsanleitung
WARTUNG
Generelle Empfehlungen
•
Das Kühlmittel sollte spätens alle 2 Jahre getauscht werden, um eine Beschädigung des POWERDUCTION zu vermeiden.
Bevor Sie die Flüssigkeit hinzufügen, stauben Sie das Produkt ab und prüfen Sie es auf Undichtigkeiten.
• Bevorzugen Sie die Verwendung des speziellen Schweißkühlmittels, das mit Powerduction angeboten wird. Verwenden
Sie keine Automobilüssigkeiten, sondern nur Kühlmittel mit geringer elektrischer Leitfähigkeit.
• Überprüfen Sie regelmäßig das Anziehen der Leistungsschrauben und das Aussehen der elektrischen Leistung-
sanschlüsse.
Empfohlenes Anzugsdrehmoment für Antriebsschrauben
Abmessungen
Schrauben
M5 M6 M8 M10 Klemme
Gas
1/4
3/8
Gas
M28 M32 Induktor 16/22
Material Stahl Stahl Messing Messing Kupfer Kupfer Kupfer
Drehmoment 4 Nm 6 Nm 7 Nm 7 Nm 2,5 Nm 4 Nm 7 Nm max 7 Nm max
max. von Hand,
4 Nm max
• Die Wartung des Gerätes muss durch ein entsprechend autorisiertes und qualiziertes Fachpersonal durchgeführt
werden.
• Führen Sie niemals eine Reinigung oder Wartung aus, während das Gerät in Betrieb ist.
• Schalten Sie den EIN/AUS Schalter auf AUS und trennen Sie das Gerät vom Netz bevor Sie Wartungsarbeiten be-
ginnen, um Stromschläge oder andere Gefahren durch unsachgemäße Handhabung zu verhindern.
• Tragen Sie keine Ringe, Uhren, Schmuck oder offene, baumelnde Kleidung wie Krawatten, Schals, offene Jacken oder
sonstiges, womit Sie am Gerät oder beim Arbeiten mit dem Gerät hängen bleiben könnten.
• Tragen Sie geeignete Schutzausrüstung wie rutschfeste Schuhe, Lärmschutz, Schutzbrille, geeignete Handschuhe,
etc…
• Verwenden Sie niemals Benzin oder brennbare Lösungsmittel zum Reinigen des Gerätes. Nutzen Sie Wasser und bei
Bedarf giftfreie Lösungsmittel.
• Eventuell entfernte Abdeckungen oder Gehäuseteile müssen vor Wiederinbetriebnahme wieder montiert werden.
• Austausch eines beschädigten Ferritkern.
Bitte gehen Sie folgendermaßen vor:
- Die Schutzkappe entfernen,
- Den Ferritkern mit Hilfe einer Heißluftpistole von dem Kupferrohr lösen und die Klebstoffreste entfernen,
- Den Induktor sorgfältig reinigen,
- Den neuen Ferritkern mit dem empfohlenen Kleber aufkleben,
- Die Schutzkappe wieder befestigen,
- Warten Sie bis der Kleber vollständig abgetrocknet ist, bevor Sie den Induktor wieder verwenden.
ZUBEHÖR (inkl.)
39LG - 50LG 37LG
Ausleger - Kabelhalterung Induktor
052284
2 Befestigungswinkel
(optional beim Fahrwagen)
OPTIONEN
39LG - 50LG 37LG
Ferrit Schutzkappe UNIVERSAL 800 + Ausleger
053823
056909
051331 + 052284
053458
056916
Power Epoxy 150°C 2-Komponenten Klebe-Stick
054851

44
POWERDUCTION 37LG / 39LG / 50LG
DE
Übersetzung der Originalbetriebsanleitung
Kühlmittel - für Schweißgeräte
10 l 5 l
052246
062511
Vorbeugende Wartungen
Bei regelmäßigen, sorgfältigen Kontrollen können Störungen erkannt werden, bevor sie einen Schaden verursachen.
Prüfen Sie vor jedem Einsatzt des POWERDUCTION 50 LG die Sicherheitseinrichtungen und alle möglichen
Fehler, die die Funktionallität des Gerätes beinussen könnten. Überprüfen Sie vor jedem Gebrauch die
Funktionalität der Signalleuchten, Sicherheitseinrichtungen und den Zustand der elektrischen Leitungen.
Die Betriebssicherheit ist nur gewährleistet, wenn Reparaturen unter Verwendung von Originalteilen und
Beachtung der Wartungsanweisungen durchgeführt werden.
Entfernen SIe nach jedem Gebrauch Staub und Schmutz, um ein Beschädging der Lüftung zu vermeiden.
Überprüfen Sie vor jedem Gebrauch die Funktionalität der Kontrollleuchten, Sicherheitseinrichtungen und
den Zustand der elektrischen Leitungen.
Führen Sie regelmäßig Sichtkontrollen am Induktor durch, um zu verhindern, dass Lecks entstehen
oder die Lüftungsschlitze blockiert sind.
STROMANSCHLÜSSE
Das Gerät arbeitet an einem einphasigen Netzanschluss von 185V bis 265 V.
GARANTIE
Die Garantieleistung des Herstellers erfolgt ausschließlich bei Fabrikations- oder Materialfehlern, die binnen 24 Monate
nach Kauf angezeigt werden (Nachweis Kaufbeleg).
Die Garantieleistung erfolgt nicht bei:
• Durch Transport verursachten Beschädigungen.
• Normalem Verschleiß der Teile (z.B. : Kabel, Klemmen, usw.) sowie Gebrauchsspuren.
• Von unsachgemäßem Gebrauch verursachten Defekten (Sturz, harte Stöße, Demontage).
• Durch Umwelteinüsse entstandene Defekte (Verschmutzung, Rost, Staub).
• Abnehmbare Induktoren und Ferrite, die Verbrauchsmaterialien sind.
• Verwendung von nicht speziziertem Kühlmittel.
Die Reparatur erfolgt erst nach Erhalt einer schriftlichen Akzeptanz (Unterschrift) des zuvor vorgelegten Kostenvo-
ranschlages durch den Besteller. Im Fall einer Garantieleistung trägt GYS ausschließlich die Kosten für den Rückver-
sand an den Fachhändler.

45
POWERDUCTION 37LG / 39LG / 50LG
ES
Traducción de las instrucciones originales
INSTRUCCIONES DE SEGURIDAD
Este manual de instrucciones contiene indicaciones sobre el funciona-
miento de su aparato y las precauciones a seguir para su seguridad.
Léalo atentamente antes del primer uso y consérvelo con cuidado para
cualquier relectura en el futuro. Estas instrucciones se deben leer y com-
prender antes de toda operación. Toda modificación o mantenimiento
no indicado en el manual no se debe llevar a cabo. Todo daño físico o
material debido a un uso no conforme con las instrucciones de este
manual no podrá atribuírsele al fabricante. En caso de problema o de
incertidumbre, consulte con una persona cualificada para manejar cor-
rectamente el aparato. Este equipo sólo puede ser utilizado para calen-
tar materiales ferrosos dentro de los límites indicados en el equipo y en
el manual. Se deben respetar las instrucciones relativas a la seguridad.
En caso de uso inadecuado o peligroso, el fabricante no podrá consi-
derarse responsable. Todo otro uso no mencionado en este manual
está estrictamente prohibido y puede ser potencialmente peligroso. El
producto es semiautomático y requiere la presencia de un operador.
Este aparato se puede utilizar por niños de al menos 8 años y
por personas con capacidades físicas, sensoriales o mentales
reducidas o sin experiencia o conocimiento, siempre y cuando estén
correctamente vigilados y que se entreguen instrucciones relativas
al uso del aparato con toda seguridad y si se han señalado los
posibles riesgos. Los niños no deben jugar con el aparato. La
limpieza y mantenimiento por el usuario no se debe efectuar por
niños sin vigilancia.
No utilice el aparato si el cable de corriente o la toma de corriente
están dañados.
No cubra el aparato.
Riesgo de explosión y de incendio.
Una batería en carga puede emitir gases explosivos.
• No utilice el aparato bajo una atmósfera explosiva.
• Mantenga los aerosoles y otros recipientes presurizados lejos del
equipo de calentamiento por inducción.
Atención, riesgo de calor y de llama
• No sobrecaliente las piezas y los adhesivos.
• Preste atención al riesgo de fuego, mantenga un extintor a proximidad.
• No coloque el aparato sobre o cerca de superficies inflamables.
• No instale el aparato cerca de sustancias inflamables.
¡Atención! Supercie muy caliente. Riesgo de quemaduras.
• Las piezas y el equipamiento calientes pueden causar quemaduras.
• No toque las piezas calientes con la mano desnuda.
• Espere a que se enfríen las piezas y el equipo antes de manipularlos.
• Compruebe que las joyas (alianzas en particular) o piezas metáli-
cas no estén cerca del inductor o del aparato durante su funcio-
namiento.
• Retire sus joyas u otros objetos metálicos de su cuerpo antes de
utilizar este equipamiento.

46
POWERDUCTION 37LG / 39LG / 50LG
ES
Traducción de las instrucciones originales
• Las personas con implantes de metal en el cuerpo no deben utili-
zar este equipamiento.
• En caso de quemadura, aplique agua abundante y consulte con
un médico sin demora.
Peligrosidad de los vapores y gases
• Mantenga la cabeza lejos de humos, no respire los vapores.
• En trabajo interior, airee el lugar o utilice un extractor de aire
para evacuar vapores y gases.
• El calentamiento por inducción de algunos materiales, adhesivos
y flux pueden producir vapores y gases. La respiración de estos
vapores y gas puede ser peligrosa para su salud. Por ejemplo, el
calentamiento del uretano libera un gas: el cianuro de hidrógeno,
que puede ser mortal para los humanos.
• Si la ventilación es insuficiente, utilice un respirador conforme.
• Lea las fichas técnicas de higiene y seguridad de los productos
(MSDS) y las instrucciones del fabricante para los adhesivos, flux,
metales, consumibles, revestimientos, limpiadores y los deca-
pantes.
• No utilice el calentamiento sobre partes en proceso de desengra-
sado o de pulverizado. El calor puede reaccionar con los va-
pores y formar gases tóxicos e irritantes.
• Trabaje en un espacio confinado sólo si este está bien aireado, o
utilizando un respirador conforme. Compruebe que cerca haya
una persona cualificada para vigilancia. Los vapores y los gases
resultantes del calentamiento pueden reemplazar el oxígeno del
aire y provocar un accidente o la muerte. Asegúrese de la cali-
dad del aire que se respira.
• No sobrecaliente metales como el acero galvanizado, revesti-
mientos de plomo o de cadmio, a menos que el revestimiento se
haya quitado de la superficie a calentar, que el aire de trabajo
esté bien ventilado y, si fuera necesario, que se lleve un respira-
dor conforme. Las piezas de fundición y todos los metales que
contienen estos elementos pueden liberar vapores tóxicos si se
sobrecalientan.
• Compruebe la Ficha de Datos de Seguridad (o MSDS como se
conoce por la siglas en inglés) sobre la información relativas a
las temperaturas.
Atención, peligro eléctrico
¡Atención! Campo magnético importante. Las personas que
lleven implantes activos o pasivos deben ser informadas.
No se requiere ninguna medida adicional de protección cuando la
máquina se utiliza sola. Restricciones y/o medidas de protección
complementarias pueden ser necesarias en otros casos.
Durante un mantenimiento, el nivel de los campos electromagnéti-
cos se debe comprobar antes de la puesta en marcha del material.
Durante su funcionamiento, no acerque nunca la cabeza u órganos
vitales al inductor.

47
POWERDUCTION 37LG / 39LG / 50LG
ES
Traducción de las instrucciones originales
Peligro de radiación óptica cuando los elementos metálicos calen-
tados alcanzan la fusión.
Las persones que lleven un estimulador cardíaco no deben acer-
carse al aparato. Riesgo de perturbación de funcionamiento de los
estimuladores cardíacos cerca del aparato.
Consulte un médico antes de acercarse a sistemas de calentamien-
tos por inducción.
Riesgos de proyección de metal o de adhesivo.
• Lleve gafas de seguridad conformes con protecciones laterales
o utilice una máscara de protección sobre la cabeza.
• Lleve vestimenta de trabajo.
• Lleve guantes.
No obstruya las aperturas de ventilación. Lea la sección de insta-
lación antes de utilizar el aparato.
Conexión:
• Este aparato se debe conectar a una toma de corriente conecta-
da a tierra.
• Este aparato de Clase A está destinado a entornos industriales y
no está previsto para ser utilizado en lugares residenciales donde
la corriente eléctrica está suministrada por la red eléctrica públi-
ca de baja tensión. En estos lugares puede encontrar dificultades
a nivel de potencia para asegurar una compatibilidad electroma-
gnética, debido a las interferencias propagadas por conducción
y por radiación con frecuencia radioeléctrica.
• Este aparato posee una protección por fusible (39LG & 50LG).
Este material es conforme con la CEI 61000-3-12.
Este material es conforme con la CEI 61000-3-11.
Mantenimiento:
• Si el cable de alimentación está dañado, debe ser sustituido por
el fabricante, su servicio post-venta o una persona con cualifica-
ción similar, para evitar cualquier peligro.
• El mantenimiento solo debe realizarlo una persona cualificada.
• Aviso! Desconecte siempre la toma de corriente de la red eléctri-
ca antes de realizar trabajos sobre el aparato.
En su interior, la tensión y la intensidad son elevadas y peligrosas.
• Si el fusible interno se funde, se debe reemplazar por el fabri-
cante, su departamento técnico o por personas de cualificación
similar para evitar cualquier peligro.
• De forma regular, quite el capó y desempolve con un soplador
de aire. Aproveche la ocasión para pedir a un personal cualifica-
do que compruebe que las conexiones eléctricas estén bien en
sitio con una herramienta aislada.
• No utilice en ningún caso solventes u otros productos de limpieza
agresivos
• Limpie las superficies del aparato mediante un trapo seco.

48
POWERDUCTION 37LG / 39LG / 50LG
ES
Traducción de las instrucciones originales
Normativa:
• Aparato conforme a las directivas europeas.
• La declaración de conformidad está disponible en nuestra página.
• Marca de conformidad EAC (Comunidad económica euroasiática).
• Equipo conforme a los requisitos británicos. La Declaración de
Conformidad Británica está disponible en nuestra página web
(véase la portada).
• Equipamiento conforme a las normas marroquíes.
• La declaración de conformidad Cم (CMIM) está disponible en nues-
tra página web (ver página de portada).
Desecho:
Producto objeto de recogida colectiva. Ne lo tire a la basura do-
méstica.
Símbolo de Ecoembalaje:
«Producto sobre el cual el fabricante participa mediante una valori-
zación de los embalajes cotizando a un sistema global de separa-
ción, recogida selectiva y reciclado de los deshechos de embalajes
domésticos.»
Símbolo TRIMAN:
«Producto reciclable que requiere una separación determinada se-
gún el decreto nº 2014-1577.»
IDENTIFICACIÓN DEL PRODUCTO
En la parte trasera del producto aparece una placa de identicación, sobre la cual está marcado el sello CE:
• Nombre y dirección del fabricante
• Fecha de fabricación
• Modelo
• Tipo de producto
• Tensión de uso
Estos datos se deben mencionar en cada intervención de los técnicos o si se deben reemplazar piezas.
ESPECIFICACIONES DEL PRODUCTO
37LG 39LG 50LG
Potencia 3.7 kW 3.7 kW 5.2 kW
Tensión de uso 185 V - 265 V
Frecuencia de tensión de red 50 Hz - 60Hz
Frecuencia del calentadores
15-30 kHz, controlado por
microprocesador
30-50 kHz, controlado por microprocesador
Número de conductores 2 + tierra
Capacidad del depósito
1,5 l
7 l
Líquido de refrigeración
Líquido de refrigeración especial soldadura
5 l (ref. 062511)
10 l
(ref. 052246)
Longitud de cable eléctrico 2 m 2 m 8 m
Longitud de cable del inductor
2 m 3 m 3 m
Grado de protección IP IP 21
Dimensiones mínimas
grupo generador
4,5 kVA 6,5 kVA

49
POWERDUCTION 37LG / 39LG / 50LG
ES
Traducción de las instrucciones originales
PESO Y DIMENSIONES DEL PRODUCTO
37LG 39LG 50LG
Peso (kg) 15 50 70
Dimensiones (cm) 28,5 x 45 x 25 70 x 53 x 37 85 x 58 x 50
DESCRIPCIÓN DEL EQUIPO (FIG I, II & III)
1 Botón luminoso de autorización de calentamiento.
2 Interruptor general.
3 Indicador de potencia de calentamiento (1 kW - 5 kW).
4 Botones de ajuste de potencia de calentamiento o selección de unidad de temperatura.
5 Temperatura del líquido de refrigeración y de consigna.
6 Indicador de fallo de generador o inductor.
7 Indicador de alarma de circuito de refrigeración.
8 Indicador de protección térmica del generador o del circuito de refrigeración.
9 Indicador del modo de cambio de inductor.
10 Botón de activación del modo de cambio de inductor.
11 Botón de lanza: activa el calentamiento.
12 LED de iluminación del punto de calentamiento.
13 Ranura para llave de 27 mm.
14 Unión de lanza. Ranura para llave de 32 mm.
15 Adaptator
16 Inductor
17 Inductor completo
PRIMERA PUESTA EN FUNCIONAMIENTO
El POWERDUCTION 50LG incluye un cable de corriente de 8m que posee una toma eléctrica de 5 polos de 32A
50Hz/60Hz. Para asegurar un funcionamiento óptimo del producto, este se debe conectar sobre una instalación eléc-
trica que cuente con una protección de 32A, protegida según las normas en vigor. El producto incluye un adaptador
de 32A a 16A. Permite utilizar el generador sobre una toma de 16A con una protección según las normas para trabajos
de corta duración, principalmente desbloqueo de tuercas (ver instrucciones de conexión).
Los POWERDUCTION 37LG & 39LG incluyen un cable de corriente de 2m que posee una toma eléctrica de 2 polos +
tierra de 16A 50Hz/60Hz.
4. Una vez que el producto se ha instalado, coloque la lanza sobre su soporte (50LG) o de manera a que señale hacia
arriba (39 y 37 LG). Retire el tapón de la lanza y el del depósito. Retire el tapón de la lanza y del depósito.
5. Llene la reserva con líquido de refrigeración hasta el máximo.
6. Coloque la lanza sobre un cubo.
7. Conecte el producto a la red eléctrica.
Accione el interruptor (1) sobre la posición encendido.
8. El producto inicia y se enciende sistemáticamente en Error 7.
9. Hay que presionar 2 veces sobre el botón de cambio de accesorio (10). El ciclo de vaciado dura 5 segundos y se
indica mediante una luz secuencial sobre el indicador. Un doble BIP indica el n del ciclo.
10. En cuanto el líquido sale de la lanza, detenga la lanza presionando sobre el botón de esta, de autorización de ca-
lentamiento o de cambio de accesorio. O espere a que se indique « E-6 ».
Si se indica Error 7, recomience a partir de la etapa 6 (Max 5 veces ver Corrección fallo E-7).
11. Atornille el inductor con un par de apriete de 7Nm max.
12. Hay que presionar 2 veces sobre el botón de cambio de accesorio. El ciclo de vaciado dura 5 segundos y se indica
mediante una luz secuencial sobre el indicador. Un doble BIP indica el n del ciclo.
13. La temperatura del líquido de refrigeración y de instrucción de potencia se indican.
14. Revise el nivel de líquido de refrigeración si fuera necesario.
15. Coloque el tapón del deposito incluido en la caja de accesorios. El producto está listo para funcionar.

50
POWERDUCTION 37LG / 39LG / 50LG
ES
Traducción de las instrucciones originales
Corrección fallo E-7
Si el problema persiste, compruebe que la bomba funcione correctamente o que el conducto no esté perforado u obstruido.
Tras 5 intentos de ciclo de vaciado sin éxito, se puede:
- Tender la lanza sobre el producto para que la reserva de agua uyan y permitan a la bomba arrancar.
- Inclinar el producto a 30º aproximadamente del lado de la lanza.
- Es posible soplar en el extremo de la lanza. Utilice una pistola de aire comprimido con una bayeta para la hermeticidad y
evite las proyecciones.
- Reinicio uno o dos ciclos antes de cada acción.
Si el problema persiste, compruebe que la bomba funcione correctamente o que el conducto no esté perforado u obstruido.
INSTRUCCIONES DE USO
1. Gire el interruptor general (1) en posición ON.
2. La máquina efectúa su fase de inicio durante 2 segundos.
3. Presione sobre el botón de autorización de calentamiento (2) descrito en la página 11. El indicador luminoso del
botón (2) y el LED sobre el soporte de la lanza (12) se encienden, indicando que el producto está listo para calentar.
4. Pulsar el botón (11) de la lanza para poner en marcha la calefacción; si es necesario mover el inductor para calen-
tar un área más grande. Dos indicadores indican que la calefacción está activa:
- El brillo del LED que ilumina el inductor (12) disminuye
*
.
- La luz indicadora de potencia mínima del indicador de potencia de calefacción (3) parpadea rápidamente (en
modo HI parpadean las luces de mín. y máx.).
Se puede modicar la consigna de potencia durante el calentamiento.
POWERDUCTION
39LG & 50LG
El punto de ajuste de la calefacción se puede ajustar en Hi. La potencia es idéntica a la del modo
100%, pero la Powerduction se comporta de forma diferente:
- Al 100%: lleva la parte roja y mantiene la potencia correcta durante unos segundos antes de alcan-
zar lentamente su potencia máxima.
- En modo Hi: aumenta su potencia máxima independientemente del estado de la estancia a calentar.
Permanezca muy atento, el calentamiento es fuerte y rápido y puede dañar la pieza sin un control
de este modo.
El indicador señala en continuo la temperatura del líquido de refrigeración (max 60°C/140°F).
- En la fase de inicio, la bomba y el ventilador del circuito de refrigeración funcionan durante algunos segundos, para
comprobar el buen estado de funcionamiento.
- Tras la interrupción del calentamiento, deje que el circuito de refrigeración enfríe el inductor antes de apagar el pro-
ducto.
- Para modicar la unidad de medida de temperatura del líquido de refrigeración, hay que mantener presionado los dos
botones de ajuste (4) hasta que la unidad deseada se señale (“ -F-” = Farenheit / “ -C- ” = Celsius). Al soltar los bo-
tones, el cambio quedará memorizado.
La máquina se sido diseñada para reducir al máximo los riesgos debidos a los campos electroma-
gnéticos. Subsisten riesgos residuales y por lo tanto se recomienda respetar una distancia de se-
guridad mínima de 30 cm entre el inductor y la cabeza o el tronco del operador.
Suspensión del calentamiento
Por razones de seguridad, el producto desactiva la autorización de calentamiento tras 5 minutos de inactividad del gene-
rador. El testigo luminoso verde del botón de autorización de calentamiento y el LED de soporte de lanza se apagan.
Para volver a hacer funcionar el generador, se debe presionar sobre el botón de autorización de calentamiento (2) o pre-
sionar durante un segundo sobre el botón de la lanza (11).
Esta función no está activa tras 20 minutos de inactividad del generador.
Permite dejar la máquina en posición de trabajo sin necesidad de apagar el generador.
* Válido sólo para las versiones Powerduction de las versiones del programa V4. Las versiones anteriores no están equipadas con esta función.

51
POWERDUCTION 37LG / 39LG / 50LG
ES
Traducción de las instrucciones originales
PRESERVACIÓN DEL INDUCTOR
El metal calentado irradia el calor hacia el inductor al cuadrado de la temperatura a la cual funciona. El inductor está
entonces altamente expuesto. Cuando el metal se convierte rojo oscuro, la temperatura está inferior a 850°C. Si apare-
ce rojo vivo/naranja, la temperatura supera 1000°C. Si va hacia el blanco, la temperatura supera 1200°C
(carta de colores
debajo disponible en el manual de la web).
600 °C 900 °C 1300 °C
Para preservar el inductor y alargar su esperanza de vida, hace falta quedar lo más posible en temperaturas alrededor
de 850°C y evitar las utilizaciones prolongadas.
La ferrita incluida en el inductor tiene un coeciente de dilatación superior a su soporte mecánico. El calentamiento
excesivo del inductor genera una alteración de la ferrita. El usuario tiene la responsabilidad de evitar este calentamien-
to excesivo.
Por lo tanto, los inductores son consumibles a los que no se aplica la garantía.
TESTIGOS DE ALARMA
- El indicador 6 señala un fallo de inductor o de generador.
- El indicador 7 señala un fallo de caudal del circuito de refrigeración líquida.
- El indicador 8 señala la activación de la protección térmica del bloque de potencia o el rebasamiento del límite de la
temperatura del líquido de refrigeración.
- Espere a que se apague el indicador, el producto estará de nuevo listo para su funcionamiento.
- La pantalla 5 envía el código de fallo siguiente:
Código de fallo
Raison
E - 1
El botón de autorización de calentamiento (2) ha que-
dado presionado.
En cortocircuito o bloqueado mecánicamente.
E - 2 El botón de la lanza ha quedado presionado (11). En cortocircuito o bloqueado mecánicamente.
E - 3
Los botones del teclado han quedado presionados (9) y
(11).
En cortocircuito o bloqueado mecánicamente.
E - 4*
Intensidad de inductor demasiado elevada o no es
compatible
Fallo en la lanza o inductor en cortocircuito.
E - 5* Intensidad del inductor demasiado débil. Inductor mal atornillado o fallo en la lanza.
E - 6 Caudal demasiado elevado >6 l/min Conducto perforado o ausencia de inductor.
E - 7 Caudal demasiado débil <4 l/min Conducto obstruido o plegado, la bomba no funciona.
E - 8* Fallo interno Cable de control desconectado.
E - 9 Falla en la red de tensión La tensión de red es demasiado bajo como 165 V.
- - - Fallo de sobretensión Tensión superior a 300 V sector.
*En caso de fallos E-4, E-5 y E-8, reinicie el aparato para corregir el fallo.
Nota: En caso de alarma el aparato no calienta.
El aparato está equipado de varios sistemas de protecciones electrónicas contra las sobrecargas eléctricas y la refrigeración. La
protección térmica del inductor se utiliza principalmente para calentar piezas de acero inoxidable, cobre o aluminio. Para volver-
lo a usar, solo se debe esperar al nal de la refrigeración. Para todas las otras protecciones, apague el aparato con el interruptor
general y vuelva a encenderlo.
Para las alarmas de fallos E-6 y E-7, compruebe que no haya una fuga en el conducto o un conducto perforado u obstruido, que
la bomba no está bloqueada o desactivada y que haya suciente líquido de refrigeración.
Si el fallo parece corregido, presione dos veces el botón «cambio de inductor» (10). El producto efectúa un ciclo de purga. Está
listo para funcionar.

52
POWERDUCTION 37LG / 39LG / 50LG
ES
Traducción de las instrucciones originales
MODO “TEMPORIZADOR”
*
La función “Temporizador” le permite controlar el tiempo de calentamiento de la Powerduction.
El tiempo es ajustable de 1 a 30 s.
Para entrar en este modo:
1. Pulse el botón de autorización de calefacción (2). Su luz indicadora se enciende.
2. A continuación, pulse simultáneamente los dos botones de ajuste de potencia (4). En el display aparece “SEC” y luego
“T 00” o “SEC” y luego “ON” si ya se ha ajustado la hora.
3. Los botones de ajuste de la alimentación (4) se convierten en botones de ajuste de la hora. Cambie el punto de ajuste
de vez en cuando según lo desee.
Si el valor de tiempo no se ha modicado más allá de 3 segundos y sigue mostrando “T 00”, la Powerduction vuelve
al modo normal.
Utilícelo en modo “Temporizador”:
Una vez que se ha seleccionado el punto de ajuste de tiempo, el producto está listo para funcionar. El LED de iluminación
(12) se enciende.
1. Presione el botón de lanza (11). La intensidad del LED (12) disminuye para indicar que la calefacción está activa.
2. La calefacción se detiene al nal del tiempo límite. Mientras se pulsa el botón de lanza (11), el LED (12) y el botón
de habilitación de calefacción (2) parpadean para avisar de que la alimentación está desconectada. Ajuste el punto
de ajuste de la hora si es necesario.
3. Presione el botón de lanza (11) para un nuevo ciclo de calentamiento.
Salir del modo “Temporizador”
El modo permanece activo en todo momento, incluso cuando el Powerduction se apaga y se vuelve a encender.
1. Para salir del modo, ajuste el punto de ajuste de la hora en ∞ La Powerduction vuelve al modo de funcionamiento
normal o pulse ambos botones de control de potencia (4) simultáneamente. En el display aparece “SEC” y luego
“OFF”.
Característica especial del ajuste de potencia en este modo
Como se explica, en el modo de uso normal, los botones de ajuste permiten cambiar la potencia mientras que en este
modo cambian el punto de ajuste de la hora. Para cambiar la potencia sin salir del modo:
1. Pulse el botón de autorización de calefacción (2). Su luz verde se apaga.
2. Los botones de ajuste (4) le permiten cambiar la alimentación. Ajuste la potencia.
3. Pulse de nuevo el botón (2). Su luz indicadora se enciende de nuevo. Los botones de ajuste (4) vuelven a ser el
ajuste de la hora.
MODO «CAMBIO DE ACCESORIO»
STOP
OK
A
B
1 3 4 5
serigrafía del producto
max = par 7N
Este modo es accesible únicamente si el calentamiento no está activado (botón verde apagado).
1. Presiones sobre el botón (10), la bomba se detiene y el LED (9) se enciende.
2. Coloque la lanza sobre su soporte y coloque el cable en el suelo (para evitar la pérdida de líquido).
3. Si la Powerducción está equipada con un inductor completo, desenrósquela con la llave de 27
(suministrada con el producto). Si está equipado con un simple inductor, desenrósquelo manual-
mente y luego desenrosque el adaptador si es necesario.
El Powerduction 37LG está equipado con una conexión ja S, no se puede desatornillar.
4. Según la elección del nuevo inductor: atornillar un inductor completo con la llave suministrada
o atornillar el adaptador apropiado (máx. 7 N.m) y luego atornillar el nuevo inductor manualmente.
5. Presione de nuevo sobre el botón (10).
La bomba se pone en funcionamiento. Durante 5 segundos, los LED parpadean.
Si el caudal es correcto, un doble «BIP» resuena y el producto está listo para funcionar.
Sino se indica un fallo (ver la tabla de códigos de fallos).
2
* Válido sólo para Powerduction 39LG / 50LG con versiones de programa V4. Las versiones anteriores no están equipadas con esta función.

53
POWERDUCTION 37LG / 39LG / 50LG
ES
Traducción de las instrucciones originales
Inductores y adaptadores
El Powerduction 37LG está equipado con una conexión ja S y se suministra con el inductor S90 como estándar.
Los Powerduction 39LG y 50LG se entregan con el inductor completo C20/B1.
Los demás accesorios son opcionales, amplían las posibilidades de calentamiento a una amplia gama de aplicaciones.
Inductores completos Adaptadores
C20/B1
Ref. 056862
28S
Ref. 064485
28L
Ref. 064492
C180/B1
Ref. 056879
Inductores
S90
Ref. 058927
S70
Ref. 061569
L90
Ref. 059788
C180/B2
Ref. 056886
S180
Ref. 059269
S20/B1
Ref. 064874
L70
Ref. 059771
S180/B1
Ref. 064881
S180/B2
Ref. 064928
L180
Ref. 059795
S180/B3 W
Ref. 067899
L180 SPIRAL
Ref. 065000
L20/B4
Ref. 067882
MODO «VACIADO»
Este modo es accesible únicamente si el calentamiento no está activado (botón verde apagado).
1. Presiones sobre el botón (10), la bomba se detiene y el LED (9) se enciende.
2. Coloque la lanza sobre su soporte y coloque el cable en el suelo (para evitar la pérdida de líquido).
3. Desatornille el accesorio con la llave de 27 (incluida con el producto).
4. Mantenga presionado durante 3 segundos el botón de autorización de calentamiento (2) hasta que se encienda.
5. Coloque botón de lanza por encima de un recipiente de al menos 10L de contenido.
6. Presione sobre el botón de la lanza (11). La bomba se pone en marcha hasta que el caudal es inferior a 1 L/minuto
o durante dos minutos. La pantalla indica el caudal en decilitro por minuto. Para detener la bomba durante el ciclo,
presione sobre cualquier botón.
7. Para vaciar completamente el circuito de líquido de refrigeración, se debe soplar (30PSI) en el extremo de la lanza
hasta escuchas el aire o ver proyecciones de líquido de refrigeración a la salida del depósito.
8. Para evacuar el líquido restante, utilice una bomba de depresión o incline el producto sobre la parte frontal.
9. Para llenar de nuevo el líquido de refrigeración, lea en el manual la parte sobre el primer accionamiento de la máquina.
Se aconseja renovar el líquido de refrigeración cada año, de lo contrario se puede deteriorar la lanza del POWERDUCTION.
Preera el uso del refrigerante de soldadura especial que se ofrece con Powerduction (ver § Mantenimiento).
MODO «VACIADO» (39LG & 37LG)
Este modo es accesible únicamente si el calentamiento no está activado (botón verde apagado).
1. Coloque la lanza de modo a que esta señale hacia arriba. Coloque el cable en el suelo para evitar la pérdida de
líquido.
2. Desatornille el accesorio con la llave de 27 incluida con el producto (39LG) ou l’inducteur (37LG).

54
POWERDUCTION 37LG / 39LG / 50LG
ES
Traducción de las instrucciones originales
3. Coloque lanza por encima de un recipiente de al menos 10L de contenido.
4. Para evacuar el líquido restante, coloque producto por encima de un recipiente de al menos 10L de contenido :
- 39LG : desatornille el boton de vaciado.
- 37LG : incline el producto hacia atrás.
39 LG 37 LG
SISTEMA DE REFRIGERACIÓN Y MODO «REFRIGERACIÓN FORZADA»
Para vigilar que el líquido de refrigeración no aumente de temperatura, el ventilador se pone en marcha cada vez que
la temperatura del líquido de refrigeración llega a los 35ºC (95ºF). El ventilador se detiene cuando la temperatura des-
ciende de este umbral.
Durante largos periodos de calentamiento, el Powerduction tiene un modo de refrigeración forzada. Para activarlo:
1. Gire el interruptor general (1) en posición ON.
La máquina efectúa su fase de inicio durante 2 segundos.
2. Presione sobre el botón de activación (2) descrito en la página 5. El indicador luminoso del botón (2) y el LED sobre el
soporte de la lanza (12) se encienden, indicando que el producto está listo para calentar.
3. Presione durante un tiempo (>3 segundos) sobre el botón (10). El modo «Refrigeración forzada» está activado.
El ventilador se pone en marcha automáticamente. El sonido del ventilador en funcionamiento y el mensaje «Fan ON»
que aparece en pantalla permiten conrmar que se ha realizado correctamente la activación.
Para detener el modo «Refrigeración forzada», presione sobre el botón de activación para interrumpir el calentamien-
to o haga de nuevo una presión larga sobre el botón (10). El mensaje «Fan OFF» aparece en pantalla.
MANTENIMIENTO
Recomendaciones generales
• Se aconseja renovar el líquido de refrigeración cada dos años, de lo contrario se puede deteriorar la lanza del
Powerduction. Antes de añadir el líquido, espolvoree el producto y compruebe si hay fugas.
• Preera el uso del refrigerante de soldadura especial que se ofrece con Powerduction. No utilice uidos de automoción,
sólo refrigerantes con baja conductividad eléctrica.
• Compruebe regularmente el apriete de los tornillos de potencia y el aspecto de las conexiones eléctricas.
Par de apriete recomendado para los tornillos de potencia
Dimensiones tornillos M5 M6 M8 M10 abrazadera
Gas
1/4
3/8
Gas
M28 M32
Inductor
16/22
Material acero acero latón latón cobre cobre cobre
Par de giro 4 Nm 6 Nm 7 Nm 7 Nm 2,5 Nm 4 Nm 7 Nm max 7 Nm max
max a mano,
4 Nm max
• Es esencial que el mantenimiento del producto lo haga personal autorizado, calicado e informado de las recomenda-
ciones descritas en este manual.
• No limpiar nunca, lubricar o efectuar un mantenimiento sobre el producto si este se encuentra en funcionamiento.
• Antes de toda operación de mantenimiento, coloque el botón Encendido / Apagado en posición «0» para apagar el
producto, luego desconecte el cable de la instalación eléctrica para evitar cualquier choque eléctrico u otro riesgo re-
sultante de una mala manipulación.
• No lleve pulseras, relojes, joyas, prendas colgantes como corbatas, prendas desgarradas, bufandas, chaquetas desa-
botonadas o con cremallera abierta que se pudieran enganchar durante el trabajo.
• Lleve prendas especícas para la prevención de accidentes, como por ejemplo: calzado antideslizante, casco contra el
ruido, gafas de protección, guantes de seguridad, etc…
• No utilice gasolina o solventes inamables para limpiar el producto. Utilice agua y, si fuera necesario, solventes comer-
ciales no tóxicos.
• Tras las intervenciones, vuelva a colocar las carcasas metálicas del producto antes de volverlo a poner en marcha.
• La ferrita de inductor puede ser reemplazado si está dañado.

55
POWERDUCTION 37LG / 39LG / 50LG
ES
Traducción de las instrucciones originales
Para reemplazarlo, es necesario:
quitar la protección,
• eliminar la ferrita en el cobre con una pistola de calor para facilitar la eliminación de la resina,
• cobre limpia,
• pegar la ferrita con la resina especíca,
• cambiar la posición de la ferrita con su protección,
• esperar para el ajuste completo del adhesivo antes de utilizar el inductor.
ACCESORIOS
39LG - 50LG 37LG
Potencia - Soporte de cable Inductor
052284
2 soportes de montaje
(si se elige la opción del carro)
OPCIONES
39LG - 50LG 37LG
Ferrito Protección UNIVERSAL 800 + Potencia
053823
056909
051331 + 052284
053458
056916
Barra de pegamento-Power de dos componentes epoxi de 150 °C
054851
Líquido de refrigeración especial soldadura
10 l 5 l
052246
062511
Mantenimiento preventivo
Se necesita realizar inspecciones meticulosas con intervalos regulares para detectar y eliminar rápidamente los fallos,
para que no causen daños al aparato.
Cada vez que usted debe utilizar el producto POWERDUCTION, compruebe antes las zonas de seguridad
del aparato y si hubiera alguna anomalía que pueda afectar al correcto funcionamiento del aparato. Com-
pruebe regularmente para identicar signos previos de desgaste.
La seguridad operacional del producto solo se pueden garantizar si las reparaciones se llevan a cabo utili-
zando piezas de recambio originales y si las instrucciones de mantenimiento se respetan. Tras cada uso,
con el producto apagado, se debe limpiar el producto cada cierto tiempo para retirar polvo o suciedad que
pudiera reducir la ventilación y alterar el buen funcionamiento del producto y su duración de vida.
Tras cada uso, compruebe el buen funcionamiento de los órganos de control, los órganos de seguridad y
la integridad de los cables eléctricos de conexión.
Realice controles visuales periódicos para comprobar que no haya fugas de líquido, y compruebe que los
agujeros de ventilación no están obstruidos.

56
POWERDUCTION 37LG / 39LG / 50LG
ES
Traducción de las instrucciones originales
CONEXIONES ELÉCTRICAS
El producto ha sido diseñado para funcionar en una tensión monofásica de entre 185 y 265V.
GARANTÍA
La garantía cubre todos los defectos o vicios de fabricación durante 2 años, a partir de la fecha de compra (piezas y
mano de obra)
La garantía no cubre:
• Todas las otras averías resultando del transporte
• El desgaste normal de las piezas (cables, pinzas…)
• Los incidentes resultando de un mal uso (error de alimentación, caída, desmontaje)
• Los fallos relacionados con el entorno (polución, oxidación, polvo…)
• Los inductores y las ferritas desmontables cuales son consumibles
• Uso de refrigerante no especicado.
En caso de fallo, regresen la maquina a su distribuidor, adjuntando:
• Un justicativo de compra con fecha (recibo, factura…)
• Una nota explicativa del fallo

POWERDUCTION 37LG / 39LG / 50LG
Перевод оригинальных инструкций
57
RU
ПРАВИЛА БЕЗОПАСНОСТИ
Данная инструкция описывает функционирование вашего
устройства и меры предосторожности в целях обеспечения вашей
безопасности. Пожалуйста, прочтите ее перед первым
использованием и сохраните, чтобы при надобности перечитать.
Эти указания должны быть прочтены и поняты до начала сварочных
работ. Изменения и ремонт, не указанные в этой инструкции, не
должны быть предприняты. Производитель не несет ответственности
за травмы и материальные повреждения связанные с
несоответствующим данной инструкции использованием аппарата.
В случае проблемы или сомнений, обратитесь к квалифицированному
профессионалу для правильного подключения.Данное
оборудование разрешается использовать для нагрева черных
материалов только в пределах, указанных на оборудовании и
руководстве. Соблюдайте правила безопасности. В случае
неадекватного или опасного использования производитель не
несет ответственности. Любое другое использование этого
аппарата, не указанное в данном руководстве, категорически
воспрещено и потенциально опасно. Аппарат полуавтоматический
и требует присутствия оператора.
Этот аппарат может быть использован детьми старше 8 лет,
а также лицами с ограниченными физическими, умственными
возможностями или ограниченным сенсорным восприятием, а
также не обладающими опытом и знаниями, при условии, что
за ними надлежащим образом следят или если с ними провели
инструктаж по безопасному использованию аппарата и если
все возможные риски были предусмотрены. Дети не должны
играть с устройством. Чистка и уход не должны производится
детьми без надлежащего присмотра.
Не используйте аппарат если сетевой шнур или вилка
повреждены.
Не накрывайте аппарат.
Риск пожара и взрыва!
При заряде батарея может выпустить взрывоопасный газ.
• Не используйте аппарат во взрывоопасной среде.
• Держите аэрозольные баллоны и прочие емкости под давлением
вдали от оборудования для индукционного нагрева.
Опасность высокой температуры и пламени.
• Не перегревайте детали и молдинги.
• Будьте бдителaны, всегда держите поблизости огнетушитель.
• Не ставьте аппарат на или вблизи воспламеняющихся
поверхностей.
• Не устанавливайте аппарат вблизи воспламеняющихся
веществ.
Внимание! Горячая поверхность. Опасность ожогов.
• Горячие детали и горячее оборудование могут вызвать ожоги.
• Не дотрагивайтесь голыми руками до нагретых деталей.
• Дождитесь, что детали и оборудование остынут прежде чем
до них дотрагиваться.

POWERDUCTION 37LG / 39LG / 50LG
Перевод оригинальных инструкций
58
RU
• Следите за тем, чтобы ювелирные украшения (в частности,
обручальные кольца) или металлические детали не находились
вблизи
• индукционной системы и индуктора во время работы.
• Снимите с себя все ювелирные украшения и другие
металлические предметы перед тем, как использовать это
оборудование.
• Лица, имеющие металлические имплантаты, не должны
использовать это оборудование.
• В случае ожога, обильно промойте водой и проконсультируйте
врача без промедления.
Опасные испарения и газ
• Держите голову вдали от дыма, не вдыхайте испарения.
• При работе в помещении проветривайте рабочую зону и/или
используйте эксгаустер для вытяжки испарений и газов.
• Индукционный нагрев некоторых материалов, клеящих
веществ и флюсов может вызвать испарения и образование
газов. Вдыхать эти испарения и газы может быть опасным
для вашего здоровья. Например, нагрев уретана вызывает
образование газа цианистого водорода, который может быть
смертельным.
• Если вентиляции недостаточно, то пользуйтесь респиратором,
отвечающим принятым стандартам.
• Читайте листы безопасности веществ (MSDS) и руководства
производителя по клеящим веществам, флюсам, металлам,
расходным материалам, покрытиям, чистящим средствам и
растворителям.
• Не нагревайте детали, которые очищают от жира или на
которые что-либо распыляют. Тепло может вступить в
реакцию с испарениями и привести к образованию сильно
токсичного и раздражающего газа.
• Работайте в замкнутом пространстве только в том случае, если
оно хорошо проветривается или используя респиратор,
отвечающим принятым стандартам. Работайте в присутствии
компетентного специалиста, который мог бы прийти на помощь.
Испарения и газы, образующиеся в результате нагрева могут
вытеснить кислород и привести к несчастному случаю или вызвать
смерть. Убедитесь в качестве воздуха, которым вы дышите.
• Не перегревайте такие металлы, как оцинкованная сталь,
сталь со свинцовым или кадмиевым покрытием за исключением
случаев, когда покрытие удалено с нагреваемой поверхности,
рабочая зона хорошо проветривается или при надобности
используя респиратор, отвечающий принятым стандартам.
Литые заготовки и все металлы, содержащие эти элементы,
способны выделять ядовитые испарения, если они перегреты.
• Смотрите информацию о температурах в листе безопасности
вещества (MSDS).
Опасность поражения электрическим током.

POWERDUCTION 37LG / 39LG / 50LG
Перевод оригинальных инструкций
59
RU
Внимание! Сильное магнитное поле. Лица, имеющие
активные или пассивные имплантаты должны быть
информированы.
Когда аппарат используется один, то не требуется никакой
другой дополнительной защитной меры. В других случаях
могут потребоваться дополнительные ограничения и/или
защитные меры.
Во время техобслуживания уровень излучения магнитного
поля должен быть проверен до следующего использования
оборудования.
В рабочем режиме никогда не приближайте индуктор к голове
или к жизненно важным органам.
Внимание: опасность излучения света когда нагретые
металлические элементы достигают плавления.
Носители электрокардиостимуляторов не должны приближаться
к аппарату. Риск сбоя работы электрокардиостимуляторов
вблизи аппарата.
Проконсультируйтесь у врача перед тем, как приближаться к
индукционному нагревателю.
Риск брызг металла или клеящего вещества
• Защитите себя очками безопасности с боковыми защитами,
отвечающими принятым стандартам, или используйте экран
перед лицом.
• Носите рабочую одежду
• Носите перчатки.
Не перекрывайте вентиляционные отверстия. Перед
использованием ознакомьтесь с разделом «установка»
инструкции.
Подключение:
• Это устройство должно быть подключено к розетке с
заземлением.
• Этот аппарат защищен с помощью предохранителя (39LG &
50LG).
• Этот аппарат класса A, предназначенный для промышленных
помещений, не подходит для использования в жилых
кварталах, где электрический ток подается общественной
системой питания низкого напряжения. В таких кварталах
могут возникнуть трудности обеспечения электромагнитную
совместимость из-за кондуктивных и индуктивных помех на
радиочастоте.
Этот аппарат соответствует норме CEI 61000-3-12.
Этот аппарат соответствует норме CEI 61000-3-11.
Обслуживание:
• Если шнур питания поврежден, он должен быть заменен
производителем, его сервисной службой или
квалифицированным специалистом во избежание опасности.

POWERDUCTION 37LG / 39LG / 50LG
Перевод оригинальных инструкций
60
RU
• Техническое обслуживание должно производиться только
квалифицированным специалистом.
• Внимание! Отключите аппарат от розетки до начала
ремонтных работ.
Внутри аппарата высокие и опасные напряжение и ток.
• Если встроенный предохранитель расплавился, он должен
быть заменен производителем, его сервисной службой или
квалифицированным специалистом во избежание опасности.
• Регулярно открывайте аппарат и продувайте его, чтобы
очистить от пыли. Необходимо также проверять все
электрические соединения с помощью изолированного
инструмента. Проверка должна осуществляться
квалифицированным специалистом.
• Ни в коем случае не использовать растворители или другие
коррозийные моющие средства.
• Очистите поверхность аппарата с помощью сухой тряпки.
Нормы и правила:
Аппарат соответствует директивам Евросоюза.
Декларация соответствия есть на нашем сайте.
Знак соответствия EAC (Евразийское экономическое
сообщество).
• Устройство соответствует директивам Евросоюза. Заявление
о соответствии для Великобритании доступно на нашем
веб-сайте (см. главную страницу).
• Товар соответствует нормам Марокко.
• Декларация Cم (CMIM) доступна для скачивания на нашем
сайте (см на титульной странице).
Утилизация:
Это оборудование подлежит переработке. Не выбрасывать в
общий мусоросборник.
Знак Экологической упаковки :
« Аппарат, производитель которого участвует в глобальной
программе переработки упаковки, выборочной утилизации и
переработке бытовых отходов ».
Знак TRIMAN :
« Этот аппарат подлежит утилизации согласно постановлению
n°2014-1577. »
ИДЕНТИФИКАЦИЯ АППАРАТА
На задней панели аппарата находится идентификационная табличка с маркировкой ЕС и следующей информацией:
• Имя и адрес производителя
• Дата производства
• Модель
• Тип продукта
• Напряжение использования
Эти данные должны быть указаны при каждом техобслуживании или когда требуются запчасти.

POWERDUCTION 37LG / 39LG / 50LG
Перевод оригинальных инструкций
61
RU
СПЕЦИФИКАЦИЯ АППАРАТА
37LG 39LG 50LG
Мощность 3.7 kW 3.7 kW 5.2 kW
Рабочее напряжение 185 V - 265 V
Частота напряжение в сети 50 Hz - 60Hz
Частота нагревателя
15-30 kHz,
управляемый
микропроцессором.
30-50 kHz, управляемый микропроцессором.
Количество проводников 2 + Земля
Емкость резервуара
1,5 l
7 l
Охлаждающая жидкость
охлаждающая жидкость
5 l (
Арт.
062511)
10 l
(
Арт.
052246)
Длина сетевого шнура 2 m 2 m 8 m
Длина кабеля индуктора 2 m 3 m 3 m
IP (степень защиты оболочки) IP 21
Минимальные размеры
генераторная установка
4,5 kVA 6,5 kVA
ВЕС И РАЗМЕРЫ АППАРАТА
37LG 39LG 50LG
Вес (kg) 15 50 70
Размеры (cm) 28,5 x 45 x 25 70 x 53 x 37 85 x 58 x 50
ОПИСАНИЕ АППАРАТА (FIG I, II & III)
1 Светящаяся кнопка разрешения нагрева
2 Главный прерыватель
3 Индикатор мощности нагрева (1 кВт - 5 кВт).
4 Кнопка регулировки мощности нагрева или выбора температурной единицы
5 Температура охлаждающей жидкости и заданная величина
6 Световой индикатор ошибки источника или индуктора
7 Аварийный сигнальный индикатор цепи охлаждения
8 Индикатор тепловой защиты источника или цепи охлаждения
9 Индикатор режима смены индуктора
10 Кнопка включения режима смены индуктора
11 Кнопка рукоятки индуктора: включает нагрев
12 Светодиод подсветки точки нагрева
13 Отпечаток для ключа на 27 мм
14 Крепление для рукоятки индуктора. Отпечаток для ключа на 32 мм
15 Адаптер
16 Индуктор
17 Индуктор
ПЕРВОЕ ВКЛЮЧЕНИЕ
POWERDUCTION 50LG поставляется с 8-метровым сетевым шнуром с вилкой 5 полюсов 32 A 50Гц/60Гц. Для
оптимальной работы этого аппарата его следует подключить к сети с защитой 32 A, защищенной в соответствии
с действующими нормами. Аппарат поставляется с переходником с 32 A на 16 A, который позволяет ему
работать от сети 16 A с защитой в соответствии с нормами для непродолжительных работ, в основном для
устранения заедания гаек (cм. инструкцию по подключению).
POWERDUCTION 37LG & 39LG поставляется с 2-метровым сетевым шнуром с вилкой 5 полюсов 16 A 50Гц/60Гц.
1. Как только аппарат смонтирован, поместите рукав с индуктором на его подставку (50LG) или таким образом,
чтобы он был направлен вверх (39 & 37LG). Снимите колпачок с индуктора и пробку бака для жидкости.
Снимите колпачок с индуктора и пробку бака для жидкости.
2. Наполните бак охлаждающей жидкостью охлаждающая жидкость до максимального уровня.
3. Возьмите рукав с индуктором и поместите его над ведром.
4. Включите аппарат в сеть.
Поставьте прерыватель (1) в положение ВКЛ.
5. Аппарат включается и систематически показывает Ошибку 7.

POWERDUCTION 37LG / 39LG / 50LG
Перевод оригинальных инструкций
62
RU
6. Нужно 2 раза нажать на кнопку замены аксессуара (10). Цикл очистки длиться 5 секунд и обозначается
ползущей гусеницей на дисплее. Двойной звуковой сигнал предупреждает об окончании цикла.
7. Как только жидкость начинает вытекать из рукава, выключите индуктор, нажав на кнопку на держателе
индуктора, на кнопку разрешения нагрева или на кнопку замены аксессуара. Либо дождитесь появления
сообщения « E-6 ».
Если вы снова видите Ошибку 7, тогда снова начните с этапа 6 (Max 5x, см. исправление ошибки E-7).
8. Привинтите индуктор, Момент затяжки должен быть 7Nm максимум.
9. Нужно 2 раза нажать на кнопку замены аксессуара. Цикл очистки длиться 5 секунд и обозначается
ползущей гусеницей на дисплее. Двойной звуковой сигнал предупреждает об окончании цикла.
10. На дисплее появляются температура охлаждающей жидкости и заданная величина мощности.
11. При надобности, подлейте охлаждающей жидкости.
12. Завинтите пробку бака для жидкости, которая находится в коробке с аксессуарами. Аппарат готов к
работе.
Исправление ошибки E-7
Если проблема не устраняется, проверьте, что насос правильно работает или что шланг не защемился или не
засорился.
После 5 безрезультатных попыток цикла очистки можно предпринять следующие действия:
- Вытянуть рукав с индуктором над аппаратом, чтобы скопившаяся вода смогла вытечь и насос снова
заработал.
- Наклонить аппарат примерно на 30° в сторону, где находится рукав с индуктором.
- Можно продуть рукав с индуктором. Воспользуйтесь обдувателем с лоскутом для герметичности и против
брызг.
- Заново проделайте один-два цикла после каждого действия.
Если проблема не устраняется, проверьте, что насос правильно работает или что шланг не защемился или не
засорился.
РУКОВОДСТВО ПО ИСПОЛЬЗОВАНИЮ
1. Поставьте основной прерыватель (1) в положение ON.
2. Аппарат производит установку в первоначальное положение в течение 2 секунд.
3. Нажмите на кнопку разрешения нагрева (2), описанную на стр. 11. Включаются индикатор на кнопке (2) и
светодиод на держателе рукоятки индуктора (12), показывая, что аппарат готов к нагреву.
4. Нажмите кнопку (11) на копье для запуска нагрева; при необходимости переместите индуктор для нагрева
большей площади. Два индикатора указывают на то, что отопление включено:
- Яркость светодиода, освещающего индуктор (12), уменьшается
*
.
- Индикатор минимальной мощности на индикаторе нагревательной мощности (3) мигает быстро (в режиме
HI мигают как минимальная, так и максимальная мощность).
Во время нагрева возможно изменить заданную мощность.
POWERDUCTION
39LG & 50LG
Заданное значение нагрева можно установить на Hi. Мощность идентична 100% режиму, но
режим Powerduction работает по-разному:
- На 100%: он носит красную часть и поддерживает правильную мощность в течение нескольких
секунд, прежде чем медленно достигает максимальной мощности.
- В режиме Hi: он поднимается до максимальной мощности независимо от состояния
отапливаемого помещения. Будьте очень бдительны, нагрев сильный и быстрый и может
повредить деталь без контроля этого режима.
Индикатор в постоянном режиме показывает температуру охлаждающей жидкости (max 60°C/140°F).
- Во время инициализации насос и вентилятор цепи охлаждения работают в течение нескольких секунд для того,
чтобы проверить исправность его состояния.
- После остановки нагрева дайте цепи охлаждения охладить индуктор перед тем, как выключить аппарат.
- Чтобы поменять единицу измерения температуры охлаждающей жидкости на экране, нужно одновременно
нажать и удерживать две регулировочные кнопки (4) пока не появится требуемая единица измерения (“ -F-” =
градус Фаренгейта / “ -C- ” = градус Цельсия). Отпустите кнопки. Изменение сохранено и действует.
Аппарат был разработан таким образом, чтобы свести к минимуму риски, вызванные
электромагнитными полями. Остаточные риски всегда есть, поэтому рекомендуется
соблюдать минимальное расстояние безопасности 30 см между индуктором и головой или
туловищем оператора.
* Действительно только для версий программ V4 Powerduction. Предыдущие версии не оснащены этой функцией.

POWERDUCTION 37LG / 39LG / 50LG
Перевод оригинальных инструкций
63
RU
Переключение нагрева в режим ожидания
По причине безопасности аппарат отключает разрешение нагрева по истечении 5 минут бездеятельности источника.
Зеленый световой индикатор кнопки разрешения нагрева и светодиод держателя рукоятки индуктора гаснут.
Чтобы снова включить рабочий режим, нужно нажать на кнопку разрешения нагрева (2) или совершить
продолжительное нажатие на кнопку рукоятки индуктора (11) в течение 1 секунды.
Эта функция становится неактивной по истечению 20 минут бездействия источника.
Она позволяет оставаться в рабочем положении, не отключая источник.
ДОЛГОВЕЧНОСТЬ ИНДУКТОРА
Раскаленный метал излучает тепло в направлении индуктора с мощностью температуры нагрева в квадрате. Как
следствие, индуктор значительно подвержен воздействию. Если металл темно-красного цвета, его температура
ниже 850°C. Когда он становится ярко-красным/оранжевым, температура превышает 1000°C. Если он меняет
цвет на белый, это значит, что температура уже выше 1200°C
(вы найдете оттенки в цветной версии инструкции на нашем).
600 °C 900 °C 1300 °C
Для предотвращения повреждения индуктора и продления его срока действия, желательно использовать его
при температурах близким к 850°C и избегать непрерывное применение.
Феррит в индукторе имеет коэффициент расширения превышающий коэффициент его оправы. Чрезмерный
нагрев индуктора приведет к износу феррита. Предотвращение чрезмерного нагрева является
ответственностью пользователя.
В связи с чем, индуктор аппарата, или отдельно феррит (в случае когда он может быть заменен
самостоятельно как на аппаратах, являются расходными материалами и не покрываются гарантией.
СИГНАЛЬНЫЕ ИНДИКАТОРЫ
- Индикатор 6 указывает на ошибку индуктора или источника.
- Индикатор 7 указывает на ошибку расхода цепи жидкостного охлаждения.
- Индикатор 8 указывает на включение тепловой защиты блока мощности или на превышение верхней границы
температуры охлаждающей жидкости.
После того, как индикатор погаснет, аппарат снова готов к работе.
Индикатор 5 показывает код ошибки:
Код ошибки Причина
E - 1 Кнопка разрешения нагрева (2) осталась в нажатом состоянии. Закорочена или заблокирована механически.
E - 2
Кнопка рукоятки индуктора (11) осталась в нажатом
состоянии.
Закорочена или заблокирована механически.
E - 3
Кнопка панели управления (9) и (11) осталась в нажатом
состоянии.
Закорочена или заблокирована механически.
E - 4* Слишком высокий ток индуктора или несовместимый Повреждена рукоятка индуктора или закорочен индуктор.
E - 5* Слишком низкий ток индуктора
Индуктор плохо привинчен или повреждена рукоятка
индуктора.
E - 6 Слишком высокий расход >6 л/мин Шланг продырявлен или отсутствует индуктор
E - 7 Слишком низкий расход <4 л/мин Шланг защемлен или забит, насос не работает.
E - 8* Внутренняя ошибка Шлейф платы управления отключен.
E - 9 Напряжение сети по умолчанию Напряжение сети слишком низкое, как 165 в.
- - - Неисправность повышенного напряжения Напряжение, превышающее 300В сектор.
*В случае ошибок E-4, E-5 и E-8 перезапустите аппарат, чтобы исправить ошибку.
NB: В случае аварийного сигнала аппарат не нагревает.
Аппарат оснащен несколькими электронными системами защиты от перенапряжения и охлаждения Термическая защита
индуктора в основном используется при нагреве деталей из нержавеющей стали, меди или алюминия. Чтобы снова
включить рабочий режим, достаточно подождать охлаждения. Что касается остальных защит, выключите аппарат с
помощью основного прерывателя и снова включите его.
При сигналах, предупреждающих об ошибках E-6 и E-7, проверьте, нет ли утечки, засорения или защемления шланга,
блокировки насоса или не выпущена ли из него жидкость и что охлаждающая жидкость присутствует в достаточном
количестве.
Если вы решите, что ошибка исправлена, то нажмите два раза на кнопку «смены индуктора» (10). Аппарат совершает
цикл очистки. Он готов к работе.

POWERDUCTION 37LG / 39LG / 50LG
Перевод оригинальных инструкций
64
RU
РЕЖИМ ВРЕМЕННОЙ ЗАДЕРЖКИ
*
* Действительно только для версий программ V4 Powerduction. Предыдущие версии не оснащены этой функцией.
Функция “Тайминг” позволяет управлять временем нагрева в системе Powerduction.
Время регулируется в диапазоне от 1 до 30 секунд.
Для входа в этот режим:
1. Нажмите кнопку разрешения отопления (2). Загорается индикаторная лампочка.
2. Затем одновременно нажмите обе кнопки регулировки мощности (4). На дисплее появится надпись “SEC”,
затем “T 00” или “SEC”, а затем “ON”, если время уже установлено.
3. Кнопки настройки питания (4) становятся кнопками настройки времени. Время от времени меняйте заданное
значение по желанию.
Если значение времени не было изменено по истечении 3 секунд и по-прежнему отображается “T 00”,
устройство Powerduction возвращается в нормальный режим.
Используется в режиме “Таймер”:
После выбора заданного значения времени устройство будет готово к работе. Загорается светодиодный
индикатор (12).
1. Нажмите кнопку со стрелкой (11). Интенсивность светодиода (12) уменьшается, указывая на то, что нагрев
активен.
2. Отопление останавливается по истечении заданного времени. Пока нажата кнопка включения копья (11),
мигают светодиод (12) и кнопка включения нагрева (2), предупреждая о том, что питание выключено. При
необходимости отрегулируйте заданное значение времени.
3. Нажмите кнопку со стрелкой (11) для запуска нового цикла нагрева.
Выход из режима “Таймер”.
Режим остается активным в любое время, даже при выключении и повторном включении устройства Powerduction.
1. Чтобы выйти из режима, установите заданное значение времени на сайте ∞ или нажмите обе кнопки
управления питанием (4) одновременно. Электропроводка возвращается в нормальный режим работы. На
дисплее появится надпись “SEC”, затем “OFF”.
Особенность настройки мощности в этом режиме работы
Как поясняется, в нормальном режиме работы кнопки настройки позволяют изменять мощность, в то время как
в этом режиме они изменяют заданное значение времени. Для переключения питания, не выходя из режима:
1. Нажмите кнопку разрешения отопления (2). Его зеленый свет погаснет.
2. Кнопки настройки (4) позволяют изменять мощность. Отрегулируйте мощность.
3. Нажмите кнопку (2) еще раз. Его индикатор загорается снова. Кнопки настройки (4) снова становятся
настройками времени.
РЕЖИМ «СМЕНЫ АКСЕССУАРА»
STOP
OK
A
B
1 3 4 5
шильдик на аппарате
максимальный крутящий
момент = 7N
Этот режим доступен только, если функция нагрева не включена (выключена зеленая кнопка).
1. Нажмите на кнопку (10), насос остановится и включится светодиод (9).
2. Поместите рукоятку с индуктором на подставку так, чтобы кабель лежал на полу (во
избежание утечки жидкости).
3. Если Powerduction оснащен полным индуктором, отвинтите его с помощью ключа 27
(поставляется вместе с изделием). Если он оснащен простым индуктором, открутите его
вручную, а затем, при необходимости, открутите адаптер.
Модель Powerduction 37LG оснащена фиксированным соединением S,
которое невозможно отвинтить.
4. В зависимости от выбора нового индуктора: прикрутить полный индуктор гаечным
ключом из комплекта поставки или прикрутить соответствующий переходник (макс. 7 Н.м),
а затем прикрутить новый индуктор вручную.
5. Снова нажмите на кнопку (10).
2

POWERDUCTION 37LG / 39LG / 50LG
Перевод оригинальных инструкций
65
RU
Насос начинает работать. В течение 5 секунд на экране видна «гусеница».
Если расход правильный, то раздастся двойной «BIP» и аппарат готов к работе.
В противном случае появляется сообщение об ошибке (см. таблицу кодов ошибок).
Индукторы и адаптеры
Powerduction 37LG оснащен фиксированным соединением S и поставляется с S90 в стандартной комплектации.
Powerduction 39LG и 50LG поставляются в стандартной комплектации с индуктором в сборе C20/B1.
Остальные аксессуары являются дополнительными, они расширяют возможности нагрева до широкого спектра
применений.
Индукторы заполнены Адаптеры
C20/B1
Ref. 056862
28S
Ref. 064485
28L
Ref. 064492
C180/B1
Ref. 056879
Индукторы
S90
Ref. 058927
S70
Ref. 061569
L90
Ref. 059788
C180/B2
Ref. 056886
S180
Ref. 059269
S20/B1
Ref. 064874
L70
Ref. 059771
S180/B1
Ref. 064881
S180/B2
Ref. 064928
L180
Ref. 059795
S180/B3 W
Ref. 067899
L180 SPIRAL
Ref. 065000
L20/B4
Ref. 067882
РЕЖИМ «ОЧИСТКИ БАКА» (50LG)
Этот режим доступен только, если функция нагрева не включена (выключена зеленая кнопка).
1. Нажмите на кнопку (10), насос остановится и включится светодиод (9).
2. Поместите рукоятку с индуктором на подставку так, чтобы кабель лежал на полу (во избежание утечки
жидкости).
3. Отвинтите аксессуар с помощью ключа на 27 (поставляется в наборе).
4. В течение 3 секунд удерживайте кнопку разрешения нагрева (2) пока он не включится.
5. Поместите кнопку рукоятки индуктора над резервуаром объемом как минимум 10 л.
6. Нажмите на кнопку рукоятки индуктора (11). Насос будет заводиться, пока расход не станет меньше, чем 1
л/минуту или в течение 2 минут. Экран показывает расход в децилитрах в минуту. Для остановки насоса во
время цикла нажмите на любую кнопку.
7. Чтобы полностью опорожнить цепь охлаждения, нужно дуть (30PSI) в конец рукава пока вы не услышите
звук воздуха или не увидите выбрызгивания охлаждающей жидкости из бака.
8. Для удаления остатков жидкости на дне резервуара воспользуйтесь вакуумным насосом или наклоните
аппарат спереди.
9. Чтобы снова наполнить бак охлаждающей жидкостью, см. главу с инструкциями по первому запуску
аппарата.
Рекомендуется обновлять охлаждающую жидкость раз в года вов избежание повредить рукоятку индуктора
аппарата POWERDUCTION.
Предпочтителено использовать специальную сварочную охлаждающую жидкость, предлагаемую в комплекте с
системой Powerduction (см. § Техническое обслуживание).

POWERDUCTION 37LG / 39LG / 50LG
Перевод оригинальных инструкций
66
RU
РЕЖИМ «ОЧИСТКИ БАКА» (39LG & 37LG)
Этот режим доступен только, если функция нагрева не включена (выключена зеленая кнопка).
1. Поместите держатель с индуктором таким образом, чтобы он был направлен вверх,чтобы кабель лежал на
полу (во избежание утечки жидкости).
2. Отвинтите аксессуар с помощью ключа на 27 поставляется в наборе (39LG) ou l’inducteur (37LG).
3. Поместите индуктора над резервуаром объемом как минимум 10 л.
4. Для удаления остатков жидкости на дне резервуара, Поместите продукт на емкость объемом не менее 10
литров и :
- 39LG : Отвинтите сливная пробка.
- 37LG : опустите продукт на спину.
39 LG 37 LG
СИСТЕМА ОХЛАЖДЕНИЯ И РЕЖИМ «ПРИНУДИТЕЛЬНОГО ОХЛАЖДЕНИЯ»
Для того, чтобы охлаждающая жидкость не нагревалась включается вентилятор, когда температура охлаждающая
жидкости достигает 35°C (95°F). Как только температура опускается ниже этого предела, он отключается.
Для длительных периодов нагрева у аппарат POWERDUCTION есть режим принудительного охлаждения.
Чтобы его включить :
1. Поверните главный прерыватель (1) на положение ON.
Аппарат производит установку в первоначальное положение в течение 2 секунд.
2. Нажмите на кнопку включения режима (2), описанную на стр. 5. Включаются индикатор на кнопке (2) и
светодиод на держателе рукоятки индуктора (12), показывая, что аппарат готов к нагреву.
3. Совершите продолжительное нажатие (>3 секунд) на кнопку (10). Режим «Принудительного охлаждения»
активирован.
Вентилятор автоматически включается. В этом позволяет убедиться звук работающего вентилятора и
появляющееся на экране сообщение «Fan ON».
Для остановки режима «Принудительного охлаждения» нажмите на кнопку включения режима, чтобы прекратить
нагрев, или снова совершите продолжительное нажатие на кнопку (10). На экране появляется сообщение «Fan OFF».
ТЕХОБСЛУЖИВАНИЕ
Общие рекомендации
• Рекомендуется обновлять охлаждающую жидкость раз в 2 года во избежание повредить рукоятку индуктора
аппарата Powerduction. Перед добавлением жидкости нанесите на изделие пыль и проверьте на герметичность.
• Предпочтителено использовать специальную сварочную охлаждающую жидкость, предлагаемую в комплекте
с системой Powerduction. Не используйте автомобильные жидкости, только охлаждающие жидкости с низкой
электропроводностью.
• Регулярно проверяйте затяжку винтов питания и внешний вид электрических соединений.
Рекомендуемый момент затяжки силовых винтов
Винты с размерами M5 M6 M8 M10 зажим
Газ
1/4
3/8
Газ
M28 M32 Индуктор 16/22
Материал сталь сталь латунь латунь медь медь медь
Момент затяжки 4 Nm 6 Nm 7 Nm 7 Nm 2,5 Nm 4 Nm 7 Nm max 7 Nm max
макс. вручную,
4 Nm max
• Совершенно необходимо, чтобы техобслуживание аппарата совершалось уполномоченным квалифицированным
специалистом, который знаком с рекомендациями, описанными в данном руководстве.
• Никогда не чистите, не смазывайте и не осуществляйте техобслуживание, если аппарат находиться в рабочем
режиме.
7 Nm

POWERDUCTION 37LG / 39LG / 50LG
Перевод оригинальных инструкций
67
RU
РЕЖИМ «ОЧИСТКИ БАКА» (39LG & 37LG)
Этот режим доступен только, если функция нагрева не включена (выключена зеленая кнопка).
1. Поместите держатель с индуктором таким образом, чтобы он был направлен вверх,чтобы кабель лежал на
полу (во избежание утечки жидкости).
2. Отвинтите аксессуар с помощью ключа на 27 поставляется в наборе (39LG) ou l’inducteur (37LG).
3. Поместите индуктора над резервуаром объемом как минимум 10 л.
4. Для удаления остатков жидкости на дне резервуара, Поместите продукт на емкость объемом не менее 10
литров и :
- 39LG : Отвинтите сливная пробка.
- 37LG : опустите продукт на спину.
39 LG 37 LG
СИСТЕМА ОХЛАЖДЕНИЯ И РЕЖИМ «ПРИНУДИТЕЛЬНОГО ОХЛАЖДЕНИЯ»
Для того, чтобы охлаждающая жидкость не нагревалась включается вентилятор, когда температура охлаждающая
жидкости достигает 35°C (95°F). Как только температура опускается ниже этого предела, он отключается.
Для длительных периодов нагрева у аппарат POWERDUCTION есть режим принудительного охлаждения.
Чтобы его включить :
1. Поверните главный прерыватель (1) на положение ON.
Аппарат производит установку в первоначальное положение в течение 2 секунд.
2. Нажмите на кнопку включения режима (2), описанную на стр. 5. Включаются индикатор на кнопке (2) и
светодиод на держателе рукоятки индуктора (12), показывая, что аппарат готов к нагреву.
3. Совершите продолжительное нажатие (>3 секунд) на кнопку (10). Режим «Принудительного охлаждения»
активирован.
Вентилятор автоматически включается. В этом позволяет убедиться звук работающего вентилятора и
появляющееся на экране сообщение «Fan ON».
Для остановки режима «Принудительного охлаждения» нажмите на кнопку включения режима, чтобы прекратить
нагрев, или снова совершите продолжительное нажатие на кнопку (10). На экране появляется сообщение «Fan OFF».
ТЕХОБСЛУЖИВАНИЕ
Общие рекомендации
• Рекомендуется обновлять охлаждающую жидкость раз в 2 года во избежание повредить рукоятку индуктора
аппарата Powerduction. Перед добавлением жидкости нанесите на изделие пыль и проверьте на герметичность.
• Предпочтителено использовать специальную сварочную охлаждающую жидкость, предлагаемую в комплекте
с системой Powerduction. Не используйте автомобильные жидкости, только охлаждающие жидкости с низкой
электропроводностью.
• Регулярно проверяйте затяжку винтов питания и внешний вид электрических соединений.
Рекомендуемый момент затяжки силовых винтов
Винты с размерами M5 M6 M8 M10 зажим
Газ
1/4
3/8
Газ
M28 M32 Индуктор 16/22
Материал сталь сталь латунь латунь медь медь медь
Момент затяжки 4 Nm 6 Nm 7 Nm 7 Nm 2,5 Nm 4 Nm 7 Nm max 7 Nm max
макс. вручную,
4 Nm max
• Совершенно необходимо, чтобы техобслуживание аппарата совершалось уполномоченным квалифицированным
специалистом, который знаком с рекомендациями, описанными в данном руководстве.
• Никогда не чистите, не смазывайте и не осуществляйте техобслуживание, если аппарат находиться в рабочем
режиме.
7 Nm
• Перед любой операцией по техобслуживанию поставьте кнопку ВКЛ/ВЫКЛ в положение « 0 », чтобы выключить
аппарат. Затем отключите его от электросети во избежание удара электрическим током или любого другого
риска, который может возникнуть по причине неправильного обращения.
• Не носите колец, часов, украшений, таких висячих аксессуаров, как галстуки, порванной одежды, шарфов,
курток с расстегнутыми пуговицами или молниями, которые могли бы зацепиться по время работы.
• Носите специальную одежду для предотвращение несчастных случаев, например: обувь с противоскользящими
подошвами, противошумные наушники, защитные очки и перчатки и т.д.
• Никогда не используйте воспламеняющиеся масла или растворяющие
вещества для очистки аппарата. Используйте воду и при надобности
нетоксичные растворители.
• После совершения любых действий с аппаратом необходимо всегда
собирайте все металлические части корпуса аппарата перед тем, как
включать его.
• Феррит на индуктор может быть заменен, если он поврежден.
Для того, чтобы заменить его, необходимо выполнить следующее :
- удалить феррита на меди с использованием фена, чтобы облегчить удаление смолы,
- чистой меди,
- клей феррита с определенной смолой,
- изменить положение феррита с его охраной,
- дождаться полного схватывания клея перед использованием индуктора.
АКСЕССУАРЫ
39LG - 50LG 37LG
Виселица - Шлейфовые Индуктор
052284
2 монтажных кронштейна
(при выборе варианта тележки)
ВАРИАНТЫ
39LG - 50LG 37LG
Феррит Защита UNIVERSAL 800 + potence
053823
056909
051331 + 052284
053458
056916
Клей Стик-Power 150 °C Bi-эпоксидная
054851
Специальная охлаждающая жидкость для сварки CS 330
10 l 5 l
052246
062511
профилактическое техническое обслуживание
Регулярный тщательный осмотр необходим для быстрого выявления и устранения дефектов, чтобы они не
нанесли ущерба аппарату.
Каждый раз, когда вы должны использовать POWERDUCTION, предварительно проверяйте все
органы безопасности аппарата, чтобы выявить любой сбой, который может помешать правильной
работе аппарата. Осуществляйте каждодневные проверки для выявления следов износа.

POWERDUCTION 37LG / 39LG / 50LG
Перевод оригинальных инструкций
68
RU
Рабочая безопасность аппарата может быть гарантирована только в случае, если ремонтные
работы осуществлены с использованием оригинальных запчастей и если соблюдены все
инструкции по техобслуживанию.
После каждого использования аппарат нужно выключить и тут же его очистить от пыли и грязи,
которая может снизить эффективность вентиляции, ухудшить его правильное функционирование
и уменьшить срок его службы.
Перед каждым использованием проверьте, что блоки управления, блоки безопасности и все
соединительные электропровода работают нормально.
Периодически проводите визуальный контроль, чтобы проверить отсутствие утечек жидкости и
что вентиляционные отверстия ничем не забиты.
ПОДКЛЮЧЕНИЕ К СЕТИ
Аппарат предназначен для работы от однофазной сети с напряжением от 185 В до 265 В,
ГАРАНТИЯ
Гарантия распространяется на любой заводской дефект или брак в течение 2х лет с даты покупки изделия
(запчасти и рабочая сила).
Гарантия не распространяется на:
• Любые поломки, вызванные транспортировкой.
• Нормальный износ деталей (Например : кабели, зажимы и т.д.).
• Случаи неправильного использования (ошибка питания, падение, разборка).
• Случаи выхода из строя из-за окружающей среды (загрязнение воздуха, коррозия, пыль).
• Съемные индукторы и ферриты, являющиеся расходными материалами.
• Использование неподходящей охлаждающей жидкости.
При выходе из строя, обратитесь в пункт покупки аппарата с предъявлением следующих документов:
- документ, подтверждающий покупку (с датой): кассовый чек, инвойс....
- описание поломки.

69
POWERDUCTION 37LG / 39LG / 50LG
NL
Vertaling van de oorspronkelijke gebruiksaanwijzing
VEILIGHEIDSINSTRUCITES
Deze gebruikershandleiding bevat aanwijzingen voor het gebruik van
uw apparaat en de veiligheidsmaatregelen die in acht genomen moe-
ten worden. Leest u deze handleiding alstublieft aandachtig door al-
vorens het apparaat in gebruik te nemen, en bewaar de handleiding
als naslagwerk. Voor het in gebruik nemen van het product moeten
deze instructies gelezen en goed begrepen worden. Voer geen wijzi-
gingen of onderhoud uit die niet in de handleiding vermeld staan.
Geen enkel lichamelijk letsel of schade, veroorzaakt door het niet nale-
ven van de instructies in deze handleiding, kan verhaald worden op
de fabrikant van het apparaat. Raadpleeg, in geval van problemen of
onzekerheid over het gebruik, een gekwalificeerd persoon, die u kan
helpen het apparaat correct te gebruiken. Deze apparatuur mag
alleen worden gebruikt voor het verwarmen van ijzerhoudende mate-
rialen binnen de grenzen die op de apparatuur en de handleiding zijn
aangegeven. De veiligheidsvoorschriften moeten gerespecteerd wor-
den. In geval van onjuist of gevaarlijk gebruik kan de fabrikant niet
aansprakelijk worden gesteld. Elk ander gebruik, niet vermeld in deze
handleiding, is strikt verboden, en mogelijk gevaarlijk. Het apparaat is
semi-automatisch en vereist de aanwezigheid van een gebruiker.
Dit apparaat kan gebruikt worden door kinderen ouder dan 8 jaar en
door personen met lichamelijke, zintuiglijke of mentale beperkingen,
of personen met gebrek aan ervaring of kennis, alleen als ze onder
voldoende toezicht staan of als ze de instructies voor het veilig
gebruik van het apparaat hebben ontvangen, en als de bestaande
risico’s goed begrepen zijn. Kinderen mogen niet met het apparaat
spelen. Reinigen en onderhoud van het apparaat door de gebruiker
mogen niet uitgevoerd worden door kinderen zonder toezicht.
Gebruik het apparaat niet wanneer de voedingskabel of de stekker
beschadigd zijn.
Bedek het apparaat niet.
Brand- en ontplofngsgevaar!
• Een accu die opgeladen wordt kan explosieve gassen uitstoten.
• Gebruik het apparaat niet in een explosie-gevaarlijke omgeving.
• Houd spuitbussen en andere houders die onder druk staan op
voldoende afstand van de inductie-verwarming apparatuur.
Waarschuwing : risico hitte en vlammen
• De onderdelen en de hechtmiddelen niet oververhitten.
• wees waakzaam voor brand, zorgt u ervoor dat er een brandblus-
ser in de buurt is.
• Plaats het apparaat niet op, of nabij brandbare oppervlaktes.
• Plaats het apparaat niet dichtbij ontvlambare stoffen.
Let op! Zeer heet oppervlak. Kan brandwonden veroorzaken.
• De onderdelen en de apparatuur die heet worden kunnen brand-
wonden veroorzaken.
• Raak de opgewarmde onderdelen niet met blote handen aan.
• Wacht tot de onderdelen en de apparatuur afgekoeld zijn al-
vorens deze aan te raken.

70
POWERDUCTION 37LG / 39LG / 50LG
NL
Vertaling van de oorspronkelijke gebruiksaanwijzing
• Let u erop dat sieraden (in het bijzonder ringen) of metalen
voorwerpen niet dichtbij het inductie-systeem en de inductor ko-
men tijdens het opwarmen.
• Verwijder alle sieraden en andere metalen voorwerpen van uw
lichaam, voor u dit apparaat gebruikt.
• Personen met metalen implantaten in het lichaam mogen dit ap-
paraat niet gebruiken.
• Bij brandwonden, grondig en met veel water afspoelen en on-
middellijk een arts raadplegen.
Gevaarlijke dampen en gassen
• Houd uw hoofd verwijderd van rook, adem de dampen niet in.
• Wanneer er binnen gewerkt wordt, de werkruimte goed ventileren
en/of een luchtafzuigsysteem gebruiken om dampen en gassen te
evacueren.
• Verwarming door inductie van sommige materialen, hechtmidde-
len en vloeistoffen kan dampen en gassen produceren. Het inade-
men van deze dampen en gassen kan gevaarlijk zijn voor uw ge-
zondheid. Bijvoorbeeld : het opwarmen van urethaan doet het
gas waterstofcyanide vrijkomen, dat dodelijk kan zijn voor mensen.
• Gebruik, wanneer er onvoldoende ventilatie is, een goedgekeurde
adembescherming.
• Lees de hygiënevoorschriften en de veiligheidsinstructies van de
producten (MSD) en de instructies van de fabrikant wanneer u
werkt met hechtmiddelen, vloeistoffen, metalen, verbruiksartikelen,
coatings, reinigingsmiddelen en afbijtmiddelen.
• Gebruik het verwarmingssysteem niet op onderdelen die ontvet
worden, of onderdelen die worden gespoten. Het opwarmen kan
een reactie met de dampen veroorzaken en zeer giftige en irrite-
rende gassen doen ontstaan.
• Er mag alleen in beperkte ruimtes gewerkt worden als deze voldoende
geventileerd worden, of wanneer er een goedgekeurde adembescher
-
ming gebruikt wordt. Er moet toezicht gehouden worden door een
gekwalificeerd persoon. De dampen en de gassen die vrijkomen ti
-
jdens het opwarmen kunnen de zuurstof in de lucht vervangen en een
ongeluk of de dood veroorzaken. Verzekert u zich ervan dat de in
-
geademde lucht van goede kwaliteit is.
• Metalen zoals gegalvaniseerd staal, bekleed met lood of cad-
mium, kunnen alleen verwarmd worden wanneer de bekleding
verwijderd is van het te verwarmen oppervlak, wanneer de werk-
plek voldoende geventileerd wordt en als er, indien nodig, met
een goedgekeurde adembescherming wordt gewerkt. Gietstukken
en alle metalen die deze elementen bevatten kunnen giftige gassen
vrijgeven als ze worden oververhit.
• Raadpleeg de MSD voor informatie over de temperaturen.
Waarschuwing : elektrisch gevaar
Let op! Sterk magnetisch veld. Dragers van actieve of pas-
sieve implantaten moeten worden geïnformeerd.

71
POWERDUCTION 37LG / 39LG / 50LG
NL
Vertaling van de oorspronkelijke gebruiksaanwijzing
Geen enkele aanvullende beschermingsmaatregel is vereist wanneer
het apparaat alleen gebruikt wordt. In andere gevallen kunnen be-
perkingen en/of beveiligingsmaatregelen kunnen nodig.
Tijdens een onderhoudsbeurt moeten de veldsterktes gecontroleerd
worden, voordat het materiaal weer in werking wordt gesteld.
Breng, wanneer het apparaat in werking is, nooit de inductor dicht-
bij het hoofd of de vitale organen.
Waarschuwing : optisch stralingsgevaar wanneer de opgewarmde
metalen elementen een smeltpunt bereiken.
Dragers van een pacemaker mogen niet in de buurt van het appa-
raat komen. Risico op storing van het functioneren van pacemakers
in de buurt van het apparaat. Raadpleeg een arts, voordat u zich in
de buurt van een inductie verwarmingssysyteem begeeft.
Risico op wegspattende deeltjes metaal of lijm.
• Draag een goedgekeurde veiligheidsbril met zijbescherming of
een veiligheidsscherm voor het gelaat.
• Draag werkkleding.
• Houd de openingen van de ventilator vrij. Raadpleeg het ge-
deelte «installatie» alvorens het apparaat in gebruik te nemen.
Aansluiting :
• Dit apparaat moet aangesloten worden op een geaard stopcontact.
• Dit apparaat is, ter bescherming, uitgerust met een zekering
(39LG & 50LG).
• Deze klasse A apparaten zijn bestemd voor industrieel gebruik,
en zijn niet geschikt voor gebruik in woonwijken, waar de stroom
wordt geleverd door een openbaar laagspanningsnet. Het is mo-
gelijk dat er problemen ontstaan met de elektromagnetische com-
patibiliteit in deze omgevingen, vanwege storingen of radiofre-
quente straling.
Deze apparatuur is conform aan CEI 61000-3-12
Deze apparatuur is conform aan CEI 61000-3-11 norm.
Onderhoud :
• Als de voedingskabel beschadigd is moet deze vervangen wor-
den door de fabrikant, zijn reparatie dienst of een gekwalificeerd
persoon, om zo ieder risico te vermijden.
• Het onderhoud dient uitsluitend door een gekwalificeerde onde-
rhoudsmonteur te gedaan te worden.
• Waarschuwing ! Haal altijd eerst de stekker uit het stopcontact
voor u werkzaamheden op het apparaat verricht.
De spanning en de stroom binnenin het apparaat zijn hoog en
gevaarlijk.
• Als de interne zekering is gesmolten, moet deze vervangen wor-
den door de fabrikant, zijn reparatie dienst of een overeenkomstig
gekwalificeerd persoon, om zo ieder risico te vermijden.
• De kap regelmatig afnemen en met een blazer stofvrij maken.
Maak van deze gelegenheid gebruik om met behulp van geï-
soleerd gereedschap ook de elektrische verbindingen te laten
controleren door gekwalificeerd personeel.

72
POWERDUCTION 37LG / 39LG / 50LG
NL
Vertaling van de oorspronkelijke gebruiksaanwijzing
• Gebruik nooit oplosmiddelen of andere agressieve reinigingsmid-
delen.
• Reinig de oppervlaktes van het apparaat met een droge doek.
Regelgevinga :
• Het toestel is in overeenstemming met de Europese richtlijnen.
• De conformiteitsverklaring is te vinden op onze internetsite.
• EAC (Euraziatische Economische Gemeenschap) merkteken van
overeenstemming.
• Materiaal conform aan de Britse eisen. De Britse verklaring van ove-
reenkomt is beschikbaar op onze website (zie omslagpagina).
• Dit materiaal voldoet aan de Marokkaanse normen.
• De verklaring Cم (CMIM) van overeenstemming is beschikbaar op
onze internet site (vermeld op de omslag).
Afvalverwerking :
Afzonderlijke inzameling vereist. Apparaat niet weggooien met het
huishoudelijk afval.
Symbool Eco-Verpakking :
«De fabrikant van dit product neemt deel aan het hergebruik en re-
cyclen van de verpakkingen, door middel van een contributie aan
een globaal sorteer en recyclage systeem van huishoudelijk verpak-
kingsafval».
Symbool TRIMAN :
« Product recyclebaar, niet bij het huishoudelijk afval gooien. »
PRODUCT IDENTIFICATIE
Aan de achterzijde van het product bevindt zich een type plaatje, waarop de CE markering staat vermeld :
• Naam en adres van de fabrikant
• Productie datum
• Model
• Type product
• Voedingsspanning
Deze gegevens moeten vermeld worden bij iedere technische interventie, en bij het bestellen van onderdelen.
PRODUCT GEGEVENS
37LG 39LG 50LG
Vermogen 3.7 kW 3.7 kW 5.2 kW
Voedingsspanning 185 V - 265 V
Frequentie spanning 50 Hz - 60Hz
Frequentie verwarmingselement
15-30 kHz, microproces-
sorgestuurd.
30-50 kHz, microprocessorgestuurd.
Aantal geleiders 2 + Aarde
Tank capaciteit
1,5 l
7 l
Koelvloeistof
Speciaal laskoelmiddel
5 l (ref. 062511)
10 l
(ref. 052246)
Lengte voedingskabel 2 m 2 m 8 m
Lengte inductie-kabel 2 m 3 m 3 m
IP-code IP 21
Minimumafmetingen
generatorset
4,5 kVA 6,5 kVA

73
POWERDUCTION 37LG / 39LG / 50LG
NL
Vertaling van de oorspronkelijke gebruiksaanwijzing
GEWICHT EN AFMETINGEN VAN HET PRODUCT
37LG 39LG 50LG
Gewicht (kg) 15 50 70
Afmeting (cm) 28,5 x 45 x 25 70 x 53 x 37 85 x 58 x 50
BESCHRIJVING VAN HET APPARAAT (FIG I, II & III)
1 Knop «toestemming opwarmen»
2 Hoofdschakelaar
3 Indicatielampje opwarmingsvermogen (1 kW - 5 kW).
4 Knoppen voor het instellen van het verwarmingsvermogen of keuze van de temperatuur-eenheid
5 Temperatuur koelvloeistof en advies
6 Lampje storing generator of inductor
7 Alarm-lampje koelcircuit
8 Lampje thermische beveiliging van de generator of van het koelcircuit
9 Lampje modus vervangen inductor
10 Aan/uit knop modus vervangen inductor
11 Lansknop : activeert het opwarmen
12 LED lampje verwarmingspunt
13 Inkeping voor sleutel 27 mm.
14 Verbinding lans. Inkeping voor sleutel 32 mm.
15 Adapter
16 Inductor
17 Inductor compleet
EERSTE INGEBRUIKNAME
Het POWERDUCTION 50LG wordt geleverd met een 8 m lange voedingskabel, voorzien van een 32A 5-polige 50Hz/60Hz
stekker. Voor een optimaal gebruik van het apparaat moet het aangesloten worden aan een elektrische installatie met
een beveiliging van 32A, en beveiligd volgens de geldende normen. Het apparaat wordt geleverd met een 32A naar
16A adapter, die het mogelijk maakt de generator te gebruiken met een 16A aansluiting met een beveiliging die vol-
doet aan de geldende normen, voor kortere taken zoals bijvoorbeeld het loskoppelen van moeren (Zie de instructies
voor het aansluiten).
De POWERDUCTION 37LG en 39LG wordt geleverd met een 2 m lange voedingskabel, voorzien van een 16A 5-polige
50Hz/60Hz stekker.
1. Plaats, wanneer het apparaat klaar is om te gebruiken, de lans op de houder.
Verwijder de dop van de lans en de dop van het reservoir.
2. Vul het reservoir met Koelvloeistof tot aan het maximum niveau.
3. Neem de lans en plaats deze boven een emmer.
4. Sluit het apparaat aan op de netspanning.
Zet de schakelaar (1) op aan.
5. Het apparaat start en schakelt automatisch over op Error 7.
6. Druk 2 keer op de knop «vervangen van onderdelen» (10). De zuiveringscyclus duurt 5 seconden en wordt aange-
geven door een looplichtje op de display. Een dubbel piepsignaal geeft het eind van de cyclus aan.
7. Zodra de vloeistof uit de lans komt, de lans stoppen door een druk op de lansknop, de knop «toestemming opwar-
men» of de knop «vervangen van onderdelen». Of : wacht totdat « E-6 » getoond wordt.
Als Error 7 wordt getoond : opnieuw beginnen vanaf stap 6 (Max 5 keer, zie correctie storing E-7).
8. Schroef de inductor vast met een krachtmoment van maximaal 7 Nm.
9. Druk twee keer op de knop «vervangen van onderdelen». De zuiveringscyclus duurt 5 seconden en wordt aangege-
ven door een looplichtje op de display. Een dubbel piepsignaal geeft het eind van de cyclus aan.
10. De temperatuur van de koelvloeistof en het gewenste vermogen worden aangegeven.
11. Vul indien nodig de koelvloeistof bij.
12. Leg de meegeleverde dop van het reservoir in de onderdelen-doos. Het apparaat is klaar om gebruikt te worden.
Correctie storing E-7
Controleer, wanneer het probleem aanhoudt, of de pomp correct werkt, en of de kabel niet afgeknepen wordt of verstopt is.
Na het uitvoeren van 5 zuiveringscycli zonder resultaat kunt u :
- De lans boven het apparaat houden, zodat de waterbellen kunnen wegspoelen en de pomp beter op kan starten.
- Het apparaat ongeveer 30° naar de kant van de lans over laten hellen.
- Het is mogelijk om in het uiteinde van de lans te blazen. Gebruik een blazer met een doek om af te schermen, en vermijd
wegspatten.

74
POWERDUCTION 37LG / 39LG / 50LG
NL
Vertaling van de oorspronkelijke gebruiksaanwijzing
- Herstart één of twee cycli na ieder gebruik.
Controleer, wanneer het probleem aanhoudt, of de pomp correct werkt en of de kabel niet afgeknepen wordt of verstopt is.
GEBRUIKSINSTRUCTIES
1. Draai de hoofdschakelaar (1) op de ON stand.
Het apparaat begint de opstartfase (duur 2 seconden).
2. Druk op de knop «toestemming opwarmen» (2) beschreven op pagina 11. Het lampje op knop (2) en het LED lampje
op de lanshouder (12) gaan branden, en geven aan dat het apparaat klaar is om op te warmen.
3. Leg de inductor (13) plat op het op te warmen (deel van het) werkstuk (plaats het open deel van de ferriet tegen het
op te warmen werkstuk).
4. Druk op de knop (11) op de lans om de verwarming te starten; beweeg indien nodig de spoel om een groter op-
pervlak te verwarmen. Twee indicatoren geven aan dat de verwarming actief is:
- De helderheid van de LED die de spoel (12) verlicht, neemt af
*
.
- Het indicatorlampje voor het minimumvermogen op de indicator voor het verwarmingsvermogen (3) knippert snel
(in de HI-modus knipperen zowel de min- als max-lampjes).
- Het is mogelijk om de vermogensinstellingen te wijzigen tijdens het opwarmen.
POWERDUCTION
39LG & 50LG
De verwarmingssetwaarde kan op Hi worden ingesteld. Het vermogen is identiek aan de 100% modus
maar de Powerduction gedraagt zich anders:
- Bij 100%: hij draagt het deel rood en behoudt het juiste vermogen voor een paar seconden voordat
hij langzaam zijn maximale vermogen bereikt.
- In de Hi-modus: het maximale vermogen wordt bereikt, ongeacht de toestand van de te verwarmen
ruimte. Blijf zeer waakzaam, de verwarming is sterk en snel en kan het onderdeel beschadigen zon-
der controle over deze modus.
- De display geeft voortdurend de temperatuur van de koelvloeistof aan (max 60°C/140°F).
- Tijdens de opstartfase functioneren de pomp en de ventilator van het koelcircuit enkele seconden, om de correcte
werking te testen.
- Laat na aoop van het opwarmen het koelcircuit de inductor afkoelen, alvorens het apparaat uit te schakelen.
- De eenheid voor temperatuur van de koelvloeistof kan gewijzigd worden door het ingedrukt houden van de twee afs-
telknoppen (4), tot de gewenste eenheid verschijnt (“ -F-” = Fahrenheit / “ -C- ” = Celsius). Bij het loslaten van de
knoppen is de wijziging direct van kracht en wordt deze opgeslagen.
Het apparaat is dusdanig ontworpen dat de risico's, veroorzaakt door elektromagnetische velden,
tot het minimum beperkt worden. Overige risico's blijven bestaan en het wordt aanbevolen om een
minimale veiligheidsafstand van 30 cm te bewaren tussen de inductor en het hoofd en de romp van
de gebruiker.
Standby-stand
Vanwege veiligheidsredenen schakelt het apparaat zelf, na 5 minuten non-actief te zijn geweest, de functie «toestemming
opwarmen» uit. Het groene lampje «toestemming opwarmen» en het LED lampje van de lanshouder gaan uit.
Druk, om de generator weer op te starten, op de knop «toestemming opwarmen» (2), of houd de knop van de lans (11)
1 seconde lang ingedrukt.
Deze functie wordt gedeactiveerd nadat de generator 20 minuten non-actief is geweest.
Het is zo mogelijk in werkpositie te blijven, zonder dat men zich naar de generator hoeft te begeven.
CORRECT GEBRUIK VOOR EEN LANGERE LEVENSDUUR VAN DE INDUCTOR
Het verhitte metaal straalt een zeer intense warmte uit naar de inductor. De inductor wordt dus blootgesteld aan bi-
jzonder hoge temperaturen. Wanneer het metaal donkerrood is, is de temperatuur lager dan 850°C. Wanneer het me-
taal helder rood / oranje wordt, is de temperatuur hoger dan 1000°C. Wanneer het metaal wit van kleur wordt, is de
temperatuur hoger dan 1200°C
(het kleurenbalkje hieronder is terug te vinden in kleur in de handleiding op onze internet site).
600 °C 900 °C 1300 °C
Om de levensduur van de inductor te verlengen is het belangrijk dat de temperatuur ervan rond de 850°C wordt gehou-
den. Tevens moet worden voorkomen dat de inductor langdurig opgewarmd wordt.
De ferrietkern in de inductor heeft een uitzettingscoëfciënt die hoger is dan die van het mechanische omhulsel. Het
excessief opwarmen van de inductor zal een wijziging in de ferrietkern teweegbrengen. De gebruiker moet te allen
tijde voorkomen dat de temperatuur van de inductor te hoog oploopt.
Daarom zijn smoorspoelen verbruiksgoederen waarop de garantie niet van toepassing is.
* Alleen geldig voor Powerduction versies van V4 programmaversies. Eerdere versies zijn niet uitgerust met deze functie.

75
POWERDUCTION 37LG / 39LG / 50LG
NL
Vertaling van de oorspronkelijke gebruiksaanwijzing
ALARMLAMPJES
- Lampje (6) geeft een storing van de inductor of de generator aan.
- Lampje (7) geeft een storing in de aanvoer van het koelcircuit aan.
Lampje 8 geeft aan dat het voedingsblok in thermische beveiliging is gesteld, of dat de hoogste limiet van de tempe-
ratuur van de koelvloeistof bereikt is.
Wacht tot het lampje uit is, het apparaat kan weer opgestart worden.
Display 5 geeft error code :
Code défaut
Raison
E - 1 Knop «toestemming opwarmen» (2) blijft ingedrukt. Kortsluiting of mechanisch geblokkeerd.
E - 2 Lanceringsknop blijft ingedrukt (11). Kortsluiting of mechanisch geblokkeerd.
E - 3 Knoppen van toetsenbord blijven ingedrukt (9) en (11). Kortsluiting of mechanisch geblokkeerd.
E - 4* Intensiteit inductor te hoog of niet verenigbaar. Defecte lans of kortsluiting inductor.
E - 5* Intensiteit inductor te zwak Inductor slecht aangedraaid of defecte lans.
E - 6 Te hoge toevoer >6l/min Slang geperforeerd of afwezigheid inductor.
E - 7 Te zwakke toevoer <4l/min
Slang afgeknepen of verstopt, de pomp functioneert niet.
E - 8*
Interne storing. Besturingskabels losgekoppeld.
E - 9 Default netwerk voltage. De netspanning te laag is als 165 V.
- - -
Overspanningsfout. Spanning boven 300 V sector.
*Dans le cas des défauts E-4, E-5 et E-8, redémarrer l’appareil pour corriger le défaut.
NB : Bij alarm warmt het apparaat niet op.
Het apparaat is uitgerust met meerdere elektronische beveiligingssystemen, ter voorkoming van elektrische overbelasting en ter
bescherming van het koelsysteem. De thermische bescherming van de spoel wordt voornamelijk gebruikt bij het verwarmen van
roestvrijstalen, koperen of aluminium onderdelen. Om het apparaat weer in werking te stellen, wachten tot het voldoende afge-
koeld is. Voor alle andere beveiligingen, het apparaat uitschakelen met de hoofdschakelaar en opnieuw opstarten.
Bij alarm vanwege de storingen E-6 et E-7, controleer of er geen lekkage in de toevoer is, of dat er geen toevoer verstopt
of afgeknepen is, of de pomp niet geblokkeerd of buiten werking is, en dat er voldoende koelvloeistof aanwezig is.
Druk, wanneer de storing opgelost lijkt, twee keer op de knop «vervangen van de inductor» (10). Het apparaat start
een zuiveringscyclus op. Apparaat klaar om te functioneren.
TIJDVERTRAGINGSMODUS
*
Met de “Timing” functie kunt u de verwarmingstijd van de Powerduction regelen.
De tijd is instelbaar van 1 tot 30 seconden.
Om naar deze modus te gaan:
1. Druk op de verwarmingsautorisatietoets (2). Het indicatielampje gaat branden.
2. Druk vervolgens tegelijkertijd op beide aan/uit-knopjes (4). Op het display verschijnt “SEC” en vervolgens “T 00”
of “SEC” en dan “AAN” als er al een tijd is ingesteld.
3. De aan/uit-toetsen (4) worden tijdinsteltoetsen. Wijzig het setpoint van tijd tot tijd naar wens.
Als de tijdwaarde niet meer dan 3 seconden is gewijzigd en nog steeds “T 00” wordt weergegeven, keert de Power-
duction terug naar de normale modus.
Gebruik in de “Timer”-modus:
Nadat het tijdinstelpunt is geselecteerd, is het product klaar voor gebruik. De verlichtings-LED (12) brandt.
1. Druk op de lansknop (11). De intensiteit van de LED (12) neemt af om aan te geven dat de verwarming actief is.
2. De verwarming stopt aan het einde van de tijdslimiet. Zolang de lansknop (11) wordt ingedrukt, knipperen de LED
(12) en de vrijgaveknop voor verwarming (2) om te waarschuwen dat de stroom is uitgeschakeld. Pas het tijdinstel-
punt zo nodig aan.
3. Druk op de lansknop (11) voor een nieuwe verwarmingscyclus.
De “Timer”-modus verlaten
De modus blijft te allen tijde actief, ook wanneer de Powerduction uit- en weer ingeschakeld is.
1. Om de modus te verlaten, stelt u het tijdinstelpunt in op ∞ of druk tegelijkertijd op beide aan/uit-knopjes (4). De
Powerduction keert terug naar de normale bedrijfsmodus. Op het scherm verschijnt “SEC” en vervolgens “OFF”.
* Alleen geldig voor Powerduction 39LG / 50LG met V4 programmaversies. Eerdere versies zijn niet uitgerust met deze functie.

76
POWERDUCTION 37LG / 39LG / 50LG
NL
Vertaling van de oorspronkelijke gebruiksaanwijzing
Speciaal kenmerk van de vermogensinstelling in deze modus
Zoals uitgelegd, kunt u in de normale gebruiksmodus met de instellingsknoppen de stroom wijzigen terwijl ze in deze mo-
dus het tijdinstelpunt veranderen. Om het vermogen te veranderen zonder de modus te verlaten:
1. Druk op de verwarmingsautorisatietoets (2). Het groene licht gaat uit.
2. Met de insteltoetsen (4) kunt u de stroomvoorziening wijzigen. Pas de stroom aan.
3. Druk nogmaals op knop (2). Het indicatielampje gaat weer branden. De insteltoetsen (4) worden weer de tijdinstelling.
MODUS «ONDERDELEN VERVANGEN»
STOP
OK
A
B
1 3 4 5
serigrae van het product
maximumkoppel = 7N
Deze modus is uitsluitend toegankelijk wanneer het opwarmen niet geactiveerd is (groene lampje brandt niet).
1. Druk op de knop (10), de pomp stopt en het LED lampje (9) gaat branden.
2. Plaats de lans op de houder en plaats de kabel op de grond (om verlies van vloeistof te voorkomen).
3. Als de Powerduction is uitgerust met een complete inductor, draai deze dan los met de sleutel
van 27 (meegeleverd met het product). Als het apparaat is uitgerust met een eenvoudige induc-
tor, draai deze dan met de hand los en schroef de adapter indien nodig los.
De 37LG is uitgerust met een vaste aansluiting S, deze kan niet worden losgeschroefd.
4. Afhankelijk van de keuze van de nieuwe inductor: schroef een volledige inductor vast met de
bijgeleverde sleutel of schroef de juiste adapter aan (max. 7 N.m) en schroef de nieuwe induc-
tor vervolgens handmatig vast.
5. Druk opnieuw op de knop (10).
De pomp zal 5 seconden draaien. Er wordt een achtervolging weergegeven.
Als het debiet correct is, klinkt er een dubbele pieptoon en is het product klaar voor gebruik.
Anders wordt er een fout weergegeven (zie de foutcode-tabel).
Inductoren en Adapters
De Powerduction 37LG is uitgerust met een vaste aansluiting S en wordt standaard geleverd met de S90 inductor.
De Powerduction 39LG en 50LG worden standaard geleverd met de complete C20/B1 inductor.
De andere accessoires zijn optioneel, ze breiden de verwarmingsmogelijkheden uit tot een breed scala aan toepassingen.
Complete inductoren Adapters
C20/B1
Ref. 056862
28S
Ref. 064485
28L
Ref. 064492
C180/B1
Ref. 056879
Inductoren
S90
Ref. 058927
S70
Ref. 061569
L90
Ref. 059788
C180/B2
Ref. 056886
S180
Ref. 059269
S20/B1
Ref. 064874
L70
Ref. 059771
S180/B1
Ref. 064881
S180/B2
Ref. 064928
L180
Ref. 059795
S180/B3 W
Ref. 067899
L180 SPIRAL
Ref. 065000
L20/B4
Ref. 067882

77
POWERDUCTION 37LG / 39LG / 50LG
NL
Vertaling van de oorspronkelijke gebruiksaanwijzing
MODUS «ONDERDELEN VERVANGEN» (SERIGRAFIE VAN HET PRODUCT)
STOP
OK
A
B
1 3 4 5
maximumkoppel
= 7N
Deze modus is uitsluitend toegankelijk wanneer het opwarmen niet geactiveerd is (groene lampje brandt niet).
1. Druk op de knop (10), de pomp stopt en het LED lampje (9) gaat branden.
2. Plaats de lans op de houder en plaats de kabel op de grond (om verlies van vloeistof te
voorkomen).
3. Schroef het accessoire los met behulp van de sleutel 27 (meegeleverd met het apparaat).
4. Vervang en bevestig de nieuwe inductor.
5. Druk opnieuw op de knop (10).
De pomp stelt zichzelf in werking. Een looplichtje brandt gedurende 5 seconden.
Wanneer de aanvoer correct is, klinkt een dubbele «BIP»en is het apparaat klaar om te func-
tioneren.
Wanneer de aanvoer niet correct is, wordt er een storing aangegeven (kijk op de storings-
tabel).
MODUS «AFVOEREN» (50LG)
Deze module is alleen toegankelijk wanneer het opwarmen niet geactiveerd is (groene knop uit).
1. Druk op knop (10), de pomp stopt en het LEDlampje (9) gaat branden.
2. Plaats de lans op de houder en leg de kabel op de grond (om verlies van vloeistof te voorkomen).
3. Schroef het onderdeel los met sleutel 27 (meegeleverd met het apparaat).
4. Houd de knop «toestemming opwarmen» (2) 3 seconden lang ingedrukt, totdat deze gaat branden.
5. Plaats de lans-knop boven een reservoir met een inhoud van ten minste 10 liter.
6. Druk op de lans-knop (11). De pomp stelt zich in werking totdat het gepompte volume kleiner wordt dan één liter
per minuut, gedurende twee minuten. De display toont het gepompte volume in deciliter per minuut. Om de pomp
in het midden van een cyclus te laten stoppen, kunt u op iedere willekeurige knop drukken.
7. Om het koelvloeistofcircuit geheel leeg te laten lopen, moet u in het uiteinde van de lans blazen (30PSI) totdat u
de luchtstroom hoort, of totdat u koelvloeistof uit het reservoir ziet komen.
8. Gebruik een vacuümpomp om de resterende vloeistof van de bodem van het reservoir op te pompen, of kantel het
apparaat naar de voren.
9. Raadpleeg, voor het bijvullen van de koelvloeistof, de instructies voor het opstarten van het apparaat.
Het wordt aanbevolen om de koelvloeistof iedere jaar te vervangen, zodat de lans van de Powerduction optimaal blijft
werken.
Gebruik bij voorkeur de speciale laskoelvloeistof die met Powerduction wordt aangeboden (zie § Onderhoud).
MODUS «AFVOEREN» (39LG & 37LG)
Deze module is alleen toegankelijk wanneer het opwarmen niet geactiveerd is (groene knop uit).
1. Plaats de lans op zo’n manier dat deze naar boven gericht is. Leg de kabel op de grond (om verlies van vloeistof te
voorkomen)
2. Schroef het onderdeel los met sleutel 27 meegeleverd met het apparaat (39LG) ou l’inducteur (37LG).
3. Plaats de lans-knop boven een reservoir met een inhoud van ten minste 10 liter.
4. Voor het pompen van de overblijvende vloeistof uit de tankbodem, Plaats het product over een tank met een capa-
citeit van ten minste 10 liter en :
2

78
POWERDUCTION 37LG / 39LG / 50LG
NL
Vertaling van de oorspronkelijke gebruiksaanwijzing
- 39LG : Schroef de afvoerplug gedeelte af.
- 37LG : Leun het product op de rug.
39 LG 37 LG
KOELSYSTEEM EN MODUS «GEFORCEERDE KOELING»
Om ervoor te zorgen dat de temperatuur van de koelvloeistof niet stijgt, stelt de ventilator zich in werking, in alle
gevallen wanneer de temperatuur van de koelvloeistof hoger wordt dan 35°C (95°F). Zodra de temperatuur lager
wordt stopt de ventilator.
Tijdens langere opwarmingsperiodes heeft de POWERDUCTION een modus «geforceerde koeling». Om deze modus in
werking te stellen :
1. Draai de hoofdschakelaar (1) op positie ON.
Het apparaat begint de opstartfase (duur 2 seconden).
2. Druk op knop (2) beschreven op pagina 5. Het lampje op knop (2) en het LED lampje op de lanshouder (12) gaan
branden, en geven aan dat het apparaat klaar is om op te warmen.
3. Druk langere tijd (>3 seconden) op knop (10). De modus «Geforceerde koeling» is geactiveerd.
De ventilator stelt zich automatisch in werking. Het geluid van een werkende ventilator en de melding «Fan ON» die op
de display verschijnt getuigen van de werking van de ventilator.
Om de modus «Geforceerde koeling» te stoppen, druk op de aan/uit knop om het opwarmen te stoppen, of druk opnieuw
langere tijd op knop (10). De melding «Fan OFF» verschijnt op de display.
ONDERHOUD
Algemene aanbevelingen
• Het wordt aanbevolen om de koelvloeistof iedere 2 jaar te vervangen, zodat de lans van de Powerduction optimaal
blijft werken. Alvorens de vloeistof toe te voegen, bestrooit u het product en controleert u het op lekkage.
• Gebruik bij voorkeur de speciale laskoelvloeistof die met Powerduction wordt aangeboden. Gebruik geen vloeistoffen
voor auto’s, alleen koelvloeistoffen met een laag elektrisch geleidingsvermogen.
• Controleer regelmatig of de vermogensschroeven goed vastzitten en of de elektrische aansluitingen er goed uitzien.
Aanbevolen aanhaalmoment voor vermogensschroeven
Afmetingen
schroeven
M5 M6 M8 M10 klem
Gas
1/4
3/8
Gas
M28 M32
Inductor
16/22
Materiaal staal staal messing messing koperen koperen koperen
Paar 4 Nm 6 Nm 7 Nm 7 Nm 2,5 Nm 4 Nm 7 Nm max 7 Nm max
persoonlijk,
4 Nm max
• Het is noodzakelijk dat het onderhoud van het apparaat wordt gedaan door gekwaliceerd en geautoriseerd personeel,
dat op de hoogte is van de aanbevelingen zoals beschreven in deze handleiding.
• Nooit het apparaat reinigen, smeren, of onderhoud uitvoeren op het apparaat wanneer het in werking is.
• Draai, alvorens met onderhoudswerkzaamheden te beginnen, de ON/OFF knop op positie « 0 » om het apparaat uit
te schakelen, Haal vervolgens de stekker uit het stopcontact om zo een mogelijke elektrische schok en ieder risico op
een verkeerde handeling te voorkomen.
• Draag geen ringen, horloges, sieraden, wijde of hangende kleding zoals stropdassen, gescheurde kleding, sjaals, open-
hangende jasjes of vesten of open ritssluitingen die gevaar kunnen opleveren tijdens het werken met het apparaat.
• Het is aan te raden om speciale kleding ter voorkoming van ongelukken te dragen, zoals bijvoorbeeld : veiligheidsschoe-
nen met anti-slip zool, geluidswerende helmen, een veiligheidsbril en -handschoenen enz...
• Gebruik nooit benzine of ontvlambare oplosmiddelen om het apparaat te reinigen. Het is beter om water te gebruiken
en, indien nodig, niet-giftige commerciële oplosmiddelen.
• Monteer, na verrichte werkzaamheden, altijd weer de metalen carters van het apparaat alvorens het apparaat opnieuw
op te starten.

79
POWERDUCTION 37LG / 39LG / 50LG
NL
Vertaling van de oorspronkelijke gebruiksaanwijzing
• De ferriet op inducerende kan worden vervangen als ze beschadigd zijn.
Om het te vervangen, moet u:
- verwijderen van de bescherming,
- verwijder het ferriet op koper met een warmtepistool om het verwijderen van het hars te vergemakkelijken,
- schoon koper,
- plak de ferriet met de specieke hars,
- de positie van de ferriet met zijn bescherming,
- wacht volledige installatie van het hechtmiddel alvorens de spoel.
ACCESSOIRES
39LG - 50LG 37LG
Galgen - Kabelgoot Inductor
052284
2 montagebeugels
(indien de keuze van de trolleyoptie)
OPTIES
39LG - 50LG 37LG
Ferriet Bescherming UNIVERSAL 800 + galg
053823
056909
051331 + 052284
053458
056916
Lijm StickPower Bi-component Epoxy 150°C
054851
Koelvloeistof
10 l 5 l
052246
062511
Preventief onderhoud
Het is noodzakelijk om regelmatig nauwgezette inspecties uit te voeren, om zo snel eventuele storingen op te kunnen
sporen en deze te kunnen repareren, zodat deze geen schade kunnen veroorzaken aan het apparaat.
Controleer, elke keer dat u het apparaat POWERDUCTION moet gebruiken, eerst de veiligheidsonder-
delen van het apparaat, en iedere storing die het correct functioneren van het apparaat zou kunnen
hinderen. Controleer het apparaat dagelijks, om voorbodes van slijtage op te sporen.
De operationele veiligheid van het apparaat kan alleen worden gegarandeerd wanneer de reparaties
worden uitgevoerd met originele onderdelen en als de onderhoudsinstructies correct worden nage-
leefd.
Het apparaat moet na ieder gebruik uitgeschakeld en direct gereinigd worden om al het stof en vui-
ligheid te verwijderen, daar dit de ventilatie zou kunnen hinderen en het goed functioneren van het
apparaat kan verminderen en de levensduur kan verkorten.
Controleer, voor ieder gebruik, het correct functioneren van de controle-elementen, de beveiliging-
sonderdelen, en alle elektrische verbindingskabels.
Voer periodiek visuele controles uit om te kijken of er geen vloeistof lekt, en om te veriëren of de
ventilatie-openingen niet verstopt zijn.

80
POWERDUCTION 37LG / 39LG / 50LG
NL
Vertaling van de oorspronkelijke gebruiksaanwijzing
ELEKTRISCHE AANSLUITINGEN
Het apparaat is ontworpen om op een 185V tot 265V enkelfase spanningsnet aangesloten te worden.
GARANTIE
De garantie dekt alle gebreken en fabricagefouten gedurende twee jaar vanaf de aankoopdatum (onderdelen en
arbeidsloon).
De garantie dekt niet :
• Alle overige schade als gevolg van vervoer.
• De gebruikelijke slijtage van onderdelen (Bijvoorbeeld : kabels, klemmen, enz.).
• Incidenten als gevolg van verkeerd gebruik (verkeerde elektrische voeding, vallen, ontmanteling).
• Gebreken ten gevolge van de gebruiksomgeving (vervuiling, roest, stof).
• Afneembare inductoren en ferrieten die verbruiksgoederen zijn.
• Gebruik van niet-gespeciceerd koelmiddel.
In geval van storing moet het apparaat teruggestuurd worden naar uw distributeur, samen met:
- Een gedateerd aankoopbewijs (betaalbewijs, factuur ...).
- Een beschrijving van de storing.

81
POWERDUCTION 37LG / 39LG / 50LG
IT
Traduzione delle istruzioni originali
ISTRUZIONI DI SICUREZZA
Questo manuale descrive il funzionamento di questo apparecchio e le
precauzioni da seguire per vostra sicurezza. Leggerlo attentamente pri-
ma dell’uso e conservarlo con cura per poterlo consultare successiva-
mente. Queste istruzioni devono essere lette e comprese prima dell’uso.
Ogni modifica o manutenzione non indicata nel manuale non deve
essere effettuata. Ogni danno fisico o materiale dovuto ad un uso non
conforme alle istruzioni presenti in questo manuale non potrà essere
considerato a carico del fabbricante. In caso di problema o d’incertez-
za, si prega di consultare una persona qualificata per manipolare cor-
rettamente il dispositivo. Questo apparecchio può essere utilizzato solo
per riscaldare materiali ferrosi entro i limiti indicati sull’apparecchio e
sul manuale. Bisogna rispettare le istruzioni relative alla sicurezza. In
caso di uso inadeguato o pericoloso, il fabbricante non potrà essere
ritenuto responsabile. Qualsiasi altro utilizzo non menzionato in questo
manuale è strettamente vietato e potenzialmente pericoloso. Il prodotto
è semi-automatico e richiede la presenza di un operatore.
Questo dispositivo può essere usato da bambini di età superiore
a 8 anni, da persone con capacità fisiche, sensoriali o mentali
ridotte e da persone senza esperienza o conoscenze, purchè esse
siano correttamente sorvegliate o se le istruzioni relative all’uso del
dispositivo in sicurezza siano state loro trasmesse e qualora i rischi
intrapresi siano stati presi in considerazione. I bambini non devono
giocare con il dispositivo. La pulizia e la manutenzione non devono
essere effettuate da bambini non sorvegliati.
Non usare il dispositivo se il cavo di alimentazione o la presa sono
danneggiati.
Non coprire il dispositivo.
Rischio di esplosione e d’incendio!
Una batteria in carica può emettere dei gas esplosivi.
• Non utilizzare l’apparecchio in atmosfera esplosiva.
• Tenere le bombole aerosol e altri recipienti pressurizzati lontano
dall’impianto di riscaldamento per induzione.
Attenzione rischio di calore e di amma
• Non surriscaldare i pezzi e gli adesivi.
• essere vigili al fuoco, tenere un estintore in prossimità.
• Non posizionare l’apparecchio sopra o in prossimità di superfici
infiammabili.
• Non installare l’apparecchio vicino a sostanze infiammabili.
Attenzione! Supercie molto calda. Rischio di ustioni.
• I pezzi e le attrezzature calde possono causare delle ustioni.
• Non toccare i pezzi caldi a mani nude.
• Attendere il raffreddamento dei pezzi e delle attrezzature prima
di manipolarli.
• Controllare che gioielli (anelli in particolare) o pezzi metallici non
siano in prossimità del sistema d’induzione e dell’induttore quan-
do quest’ultimo è in funzione.

82
POWERDUCTION 37LG / 39LG / 50LG
IT
Traduzione delle istruzioni originali
• Togliere qualsiasi gioiello o oggetto metallico dal vostro corpo
prima di utilizzare quest’apparecchio.
• Le persone con impianti in metallo nel corpo non devono utiliz-
zare quest’apparecchio.
• In caso di ustione risciacquare con abbondante acqua e consul-
tare immediatamente un medico.
Pericolosità di gas e vapori.
• Tenere la testa lontano dai fumi e non respirare i vapori.
• Lavorando all’interno, aerare l’ambiente e/o utilizzare un estart-
tore d’aria per evacuare i vapori e i gas.
• Il riscaldamento ad induzione di alcuni materiali, adesivi e fluidi
può produrre vapori e gas. La respirazione di questi gas e vapori
può essere pericolosa per la vostra salute. Per esempio il riscalda-
mento dell’uretano libera un gas : il cianuro d’idrogeno, che può
essere mortale agli essere umani.
• Se la ventilazione è insufficiente, utilizzare un respiratore certificato.
• Leggere le schede tecniche d’igien e sicurezza dei prodotti
(MSDS) e le istruzioni del fabricante per gli adesivi, i flussi, i me-
talli, i ricambi, i rivestimenti, i detergenti e i decapanti.
• Non utilizzare il riscaldamento sulla parti in sgrassaggio o polve-
rizzazione. Il calore può reagire con i vapori e formare gas forte-
mente tossici ed irritanti.
• Lavorare in uno spazio limitato solo se è ben aerato o utilizzando
un respiratore certificato. Assicurarsi di avere una persona qualifi-
cata per la sorveglianza. I vapori e i gas risultanti dal riscaldamen-
to possono sostituirsi all’ossigeno dell’aria e provocare un malore
o la morte. Assicurarsi della qualità dell’aria che respirate.
• Non surriscaldare i metalli, quali l’acciaio galvanizzato, rivestito
di piombo o di cadmio, a meno che il rivestimento non sia rimos-
so dalla superficie da riscaldare, che l’aria sia ben ventilata e, se
necessario, indossare un respiratore certificato. Le fusioni e tutti i
metalli contenenti questi elementi possono liberare vapori tossici
se surriscaldati.
• Far riferimento al MSDS per le informazioni relative alle temperature.
Attenzione pericolo elettrico.
Attenzione! Campo magnetico importante. Le persone che
hanno impianti attivi o passivi devono essere informate.
Nessuna misura di protezione supplementare è necessaria
quando la macchina è usata da sola. Restrizioni e/o misure di pro-
tezione supplementari possono essere necessarie negli altri casi.
In caso di manutenzione i livelli di campo devono essere verificati
prima del riavvio dell’apparecchio.
Durante il funzionamento non avvicinare l’induttore al livello della
testa o degli organi vitali.
Attenzione pericolo di radiazioni ottiche quando gli elementi
metallici riscaldati raggiungono la fusione.

83
POWERDUCTION 37LG / 39LG / 50LG
IT
Traduzione delle istruzioni originali
I protatori di stimolatori cardiaci non devono avvicinarsi all’appa-
recchio. Rischio di disturbi/interferenze del funzionamento degli sti-
molatori cardiaci in prossimità dell’apparecchio. Consultare un me-
dico proma avvicinarsi al sistema di riscaldamento ad induzione.
Rischi di proiezioni di metallo o collanti.
• Indossare occhiali di sicurezza con protezioni laterali o usare
uno schermo sul viso.
• Indossare un abito da lavoro
• Indossare guanti.
Non ostruire le aperture della ventilazione. Riferirsi alla parte ins-
tallazione prima di usare il dispositivo.
Collegamento :
• Questo dispositivo deve essere collegato ad una presa di cor-
rente con messa a terra.
• Questo dispositivo è dotato con una protezione con fusibile
(39LG & 50LG).
• Questo materiale destinato agli ambienti industriali (classe A) non
è progettato per essere utilizzato in un sito residenziale in cui la
corrente elettrica è fornita dalla rete pubblica a bassa tensione.
Potrebbero esserci difficoltà potenziali per assicurare la compa-
tibilità elettromagnetica in questi siti, a causa delle perturbazioni
condotte o irradiate.
Questo materiale è in conformità con la CEI 61000-3-12
Questo materiale è conforme alla CEI 61000-3-11.
Manutenzione :
• Se il cavo di alimentazione è danneggiato, deve essere sostituito
dal fabbricante, dal suo servizio post-vendita o da persone di qua-
lifiche simili per evitare pericoli.
• La manutenzione deve essere effettuata da una persona qualificata
• Avvertenze ! Scollegare sempre la schede dalla presa elettrica
prima di effettuare qualsiasi manipolazione sul dispositivo.
All’interno, le tensioni e l’intensità sono elevate e pericolose.
• Se il fusibile interno è fuso, esso deve essere sostituito dal fabbri-
cante, dal suo servizio post-vendita o da persone di qualifica si-
mile per evitare pericoli.
• Regolarmente, togliere la custodia metallica e spolverare con una
pistola ad aria. Cogliere l’occasione per far verificare le connes-
sioni elettriche con un utensile isolato da persone qualificate.
• Non usare in nessun caso solventi o altri prodotti di pulizia aggres-
sivi.
• Pulire le superfici del dispositivo con uno straccio asciutto.
Regolamentazione:
• Dispositivo in conformità con le direttive europee
• La dichiarazione di conformità è disponibile sul nostro sito internet.
• Marchio di conformità EAC (Comunità Economica Eurasiatica)

84
POWERDUCTION 37LG / 39LG / 50LG
IT
Traduzione delle istruzioni originali
• Materiale conforme alla esigenze britanniche. La dichiarazione
di conformità britannica è disponibile sul nostro sito (vedere pagi-
na di copertina).
•Materiale conforme alle normative marocchine.
• La dichiarazione Cم (CMIM) di conformità è disponibile sul nostro sito
(vedi scheda del prodotto)
Smaltimento :
Questo materiale è soggetto alla raccolta differenziata. Non deve
essere smaltito con i rifiuti domestici.
Simbolo Ecoimballaggio :
Il fabbricante di questo prodotto partecipa alla valorizzazione degli
imballi contribuendo ad un sistema globale di smistamento, raccolta
differenziata e riciclaggio dei rifiuti degli imballaggi domestici.
Simbolo TRIMAN :
Prodotto riciclabile che riporta un ordinamento di smistamento se-
condo il decreto n°2014-1577.
IDENTIFICAZIONE DEL PRODOTTO
Nella parte posteriore el prodotto si trova una placca identicativa sulla quale è apposto il marchio CE :
• Nome e indirizzo del fabbricante
• Data di fabbricazione
• Modello
• Tipo di prodotto
• Tensione d’utilizzo
Questi dati devono essere menzionati ad ogni intervento dei tecnici o se si richiedono pezzi di ricambio.
SPECIFICHE DEL PRODOTTO
37LG 39LG 50LG
Potenza 3.7 kW 3.7 kW 5.2 kW
Tensione d’utilizzo 185 V - 265 V
Frequenza tensione rete elettrica
50 Hz - 60Hz
Frequenza del riscaldatore
15-30 kHz, governato da
microprocessore.
30-50 kHz, governato da
microprocessore.
Numero conduttori 2 + Terra
Capacità del serbatoio
1,5 l
7 l
Liquido di raffreddamento
Liquido di raffreddamento speciale saldatura
5 l (ref. 062511)
10 l
(ref. 052246)
Lunghezza cavo collegamento
elettrico
2 m 2 m 8 m
Lunghezza cavo induttore 2 m 3 m 3 m
International Protection IP 21
Dimensioni minime
gruppo elettrogeno
4,5 kVA 6,5 kVA
PESO E DIMENSIONI DEL PRODOTTO
37LG 39LG 50LG
Peso (kg) 15 50 70
Dimensioni (cm) 28,5 x 45 x 25 70 x 53 x 37 85 x 58 x 50

85
POWERDUCTION 37LG / 39LG / 50LG
IT
Traduzione delle istruzioni originali
DESCRIZIONE DEL DISPOSITIVO (FIG I, II & III)
1 Interruttore generale
2 Pulsante luminoso di autorizzazione al riscaldamento
3 Indicatore di potenza del riscaldamento (1 kW – 5 kW)
4 Pulsante di regolazione di potenza del riscaldamento o scelta dell’unità di temperatura
5 Temperatura del liquido di raffreddamento e istruzioni
6 Spia errore generatore o induttore
7 Spia allarme circuito di raffreddamento
8 Spia di protezione termica del generatore o del circuito di raffreddamento
9 Spia della modalità cambio induttore
10 Pulsante di attivazione modalità cambio induttore
11 Pulsante lancia : innesco del riscaldamento
12 LED di segnale del punto di riscaldamento
13 Impronta per chiave da 27 mm
14 Attacco della lancia Impronta per chiave da 32 mm
15 Adattatore
16 Induttore
17 Induttore completo
PRIMA MESSA IN FUNZIONE
Il POWERDUCTION 50LG è fornito con cavo di collegamento alla rete elettrica di 8 metri e con spina elettrica da 5 poli
32 A 50Hz/60Hz. Per assicurare un funzionamento ottimale del prodotto, questo dev’essere collegato ad un’installa-
zione elettrica con protezione da 32 A, e protetto secondo le norme vigenti. Il prodotto è fornito con un adattatore da
32 A a 16 A. Permette di utilizzare il generatore su una presa da 16 A con una protezione secondo le norme per lavo-
ri di breve durata, principalmente lo sbloccaggio dei dadi (vedere le istruzioni di collegamento).
Il POWERDUCTION 37LG en 39LG sono fornito con cavo di collegamento alla rete elettrica di 2 metri e con spina elet-
trica da 5 poli 16 A 50Hz/60Hz.
4. Appena montato il prodotto, posare la lancia sul suo supporto (50LG) in modo che abbia la punta verso l’alto (39 &
37LG). Togliere il tappo della lancia e quello del serbatoio. Togliere il tappo della lancia e quello del serbatoio.
5. Fare il pieno del serbatoio con
liquido di raffreddamento
no al livello massimo.
6. Prendere la lancia e posizionarla sopra un secchio.
7. Collegare il dispositivo alla rete.
Azionare l’interruttore (1) su avvio.
8. Il dispositivo si avvia e parte sistematicamente in Errore 7.
9. Bisogna premere 2 volte sul pulsante cambio accessorio (10). Il ciclo di espurgo dura 5 secondi ed è segnalato da
uno scorrimento sullo schermo. Un doppio BIP segnala la ne del ciclo.
10. Dal momento in cui esce il liquido dalla lancia, fermare la lancia premendo sul pulsante della lancia, di avvio ris-
caldamento o di cambio accessorio. O aspettare la visualizzazione « E-6 ».
Se appare Errore 7 allora ricominciare dal punto 6 (max 5 volte vedi correzione difetto E-7).
11. Avvitare l’induttore con una coppia di serraggio da 7Nm massimo.
12. Bisogna premere 2 volte sul pulsante cambio accessorio (10). Il ciclo di espurgo dura 5 secondi ed è segnalato da
uno scorrimento sullo schermo. Un doppio BIP segnala la ne del ciclo.
13. Vengono visualizzate la temperature del liquido di raffreddamento e il valore nominale della potenza.
14. Aggiungere, se necessario, liquido di raffreddamento.
15. Posizionare il tappo del serbatoio fornito nella scatola accessori. Il dispositivo è pronto per funzionare.
Correzione difetto E-7
Se il problema persiste, vericare che la pompa funzioni correttamente o che il tubo non sia piegato od ostruito.
Dopo 5 cicli di espurgo infruttuosi, è possibile:
- Stendere la lancia al di sopra del dispositivo, afnché le sacche d’acqua si svuotino e permettano alla pompa di innescarsi.
- Inclinare il disposistivo a 30° circa dal lato della lancia.
- E’ possibile sofare nella punta della lancia. Utilizzare un sofatore con uno straccio per impermeabillizare ed evitare le
proiezioni.
- Rilanciare uno o due cicli dopo ogni azione.
Se il problema persiste, vericare che la pompa funzioni correttamente o che il tubo non sia piegato od ostruito.

86
POWERDUCTION 37LG / 39LG / 50LG
IT
Traduzione delle istruzioni originali
ISTRUZIONI D’USO
1. Girare l’interruttore generale (1) in posizione ON.
La macchina effettua la sua fase di preparazione in 2 secondi.
2. Premere sul pulsante di avvio riscaldamento (2) descritto a pag. 11. La spia del tasto (2) e il LED sul supporto di
lancia (12) si accendono, indicando che il prodotto è pronto per riscaldare.
3. Posizionare l’induttore (13) a piatto sul pezzo o sulla parte da riscaldare (posizionare la parte aperta di ferrite contro
il pezzo).
4. Premere il pulsante (11) sulla lancia per avviare il riscaldamento; se necessario spostare l’induttore per riscaldare
un’area più ampia. Due indicatori indicano che il riscaldamento è attivo:
- La luminosità del LED che illumina l’induttore (12) diminuisce
*
.
- La spia di minima potenza sull’indicatore di potenza di riscaldamento (3) lampeggia rapidamente (in modalità HI
lampeggiano entrambe le spie min e max).
E’ possibile modicare l’impostazione della potenza durante il riscaldamento.
POWERDUCTION
39LG & 50LG
Il set point di riscaldamento può essere impostato su Hi. La potenza è identica alla modalità 100%,
ma la Powerduction si comporta in modo diverso:
- Al 100%: indossa la parte rossa e mantiene la giusta potenza per alcuni secondi prima di raggiun-
gere lentamente la sua massima potenza.
- In modalità Hi: sale alla massima potenza indipendentemente dalle condizioni dell’ambiente da
riscaldare. Rimanete molto vigili, il riscaldamento è forte e veloce e può danneggiare il pezzo senza
un controllo di questa modalità.
Il display indica continuamente la temperatura del liquido di raffreddamento (max 60°C/140°F).
- Nella fase di preparazione, la pompa e il ventilatore del circuito di raffreddamento funzionano per qualche secondo, ciò
per vericare le condizioni di funzionamento.
- Dopo l’arresto del riscaldamento, lasciar raffreddare il circuito di raffreddamento prima di spegnere il prodotto.
- Per modicare l’unità di misura della temperatura del liquido di raffreddamento che appare sul display, si devono tenere
premuti i due pulsanti di regolazione (4) nchè appare l’unità desiderata (“ -F-” = Farenheit / “ -C- ” = Celsius). Rilas-
ciare i pulsanti, il cambio è memorizzato ed effettivo.
La macchina è stata concepita riducendo al massimo i rischi dovuti ai campi elettromagnetici. Ul-
teriori rischi sussistono ed è raccomandato di rispettare una distanza di sicurezza minimo di 30 cm
tra l’induttore e la testa o il busto dell’operatore.
Messa in standby del riscaldamento
Per ragioni di sicurezza, il prodotto disattiva l’autorizzazione al riscaldamento dopo 5 minuti d’inattività del generatore. La
spia luminosa del pulsante d’autorizzazione al riscaldamento e il LED di supporto della lancia si spengono.
Per rimettere in funzione il generatore, bisogna premere sul pulsante d’autorizzazione al riscaldamento (2) o premere a
lungo il pulsante della lancia (11) per 1 secondo.
Questa funzione non è più attiva dopo 20 minuti d’inattività del generatore.
Questa funzione permette di restare nella posizione di lavoro senza dover raggiungere il generatore.
CONSERVAZIONE DELL’INDUTTORE
Il metallo riscaldato irradia calore all’induttore al quadrato della temperatura a cui è portato. L’induttore è quindi alta-
mente esposto. Quando il metallo è rosso scuro, la temperatura è inferiore a 850 ° C. Se diventa rosso / arancione
brillante, la temperatura supera i 1000 ° C. Se diventa bianco, la temperatura supera i 1200 ° C
(la tabella dei colori di seguito è
disponibile a colori nel manuale d’utilizzo del sito Web).
600 °C 900 °C 1300 °C
Per preservare l’induttore e prolungarne la durata di vità, è necessario rimanere il più possibile a temperature intorno
agli 850 ° C ed evitare un uso prolungato.
La ferrite inclusa nell’induttore ha un coefciente di espansione maggiore del suo supporto meccanico. L’eccessivo riscal-
damento dell’induttore provoca un’alterazione della ferrite. Dipende dall’utente evitare questo riscaldamento eccessivo.
Pertanto, gli induttori sono materiali di consumo a cui non si applica la garanzia.
* Valido solo per le versioni a riduzione di potenza delle versioni di programma V4. Le versioni precedenti non sono dotate di questa funzione.

87
POWERDUCTION 37LG / 39LG / 50LG
IT
Traduzione delle istruzioni originali
SPIE D’ALLARME
- La spia 6 segnala un difetto d’induttore o di generatore.
- La spia 7 segnala un difetto di usso del ciruito di raffreddamento liquido.
- La spia 8 segnala la messa in protezione termica del blocco di potenza o il superamento del limite alto della tempera-
tura del liquido di raffreddamento.
Aspettare lo spegnimento della spia, il prodotto è di nuovo pronto per funzionare.
Il display 5 reinvia il codice di errore :
Code défaut Raison
E - 1
Il pulsante d’autorizzazione al riscaldamento (2)
resta premuto.
In corto-circuito o meccanicamente bloccato.
E - 2 Il pulsante della lancia resta premuto (11). In corto-circuito o meccanicamente bloccato.
E - 3 I pulsanti della tasiera restano premuti (9) e (11). In corto-circuito o meccanicamente bloccato.
E - 4* Intensità induttore troppo elevata o non compatibile. Lancia difettosa o induttore in corto-circuito.
E - 5* Intensità induttore troppo debole. Induttore male avvitato o lancia difettosa.
E - 6 Flusso troppo elevato >6 l/min. Tubo perforato o assenza d’induttore.
E - 7 Flusso troppo debole <4 l/min.
Tubo schiacciato o tappato, la pompa non funziona.
E - 8* Difetto interno. Contatti comandi scollegati.
E - 9 Difetto rete di tensione. La tensione di rete è troppo bassa sotto 165 V.
- - - Difetto sovratensione. Tensione sopra settore 300 V.
*In caso di errore E-4, E-5 e E-8, riavviare l’apparecchio per corregge l’errore.
NB : In caso d’allarme l’apparecchio non riscalda.
L’apparecchio è dotato di diversi sistemi di protezione elettronica per le sovraccariche elettriche e il raffreddamento. La protezione
termica dell’induttore viene utilizzata principalmente per il riscaldamento di parti in acciaio inossidabile, rame o alluminio. Per ri-
mettere in funzione, è sufciente aspettare la ne del raffreddamento. Per qualsiasi altra protezione, spegnere l’apparecchio con
l’interruttore generale e riaccenderlo.
Per gli allarmi dei difetti E-6 e E-7, vericare che non si tratti di un tubo che perde, di un tubo ostruito o schiacciato, che la pom-
pa non sia bloccata o disinnescata e che ci sia sufciente liquido di raffreddamento.
Se il difetto sembra corretto, premere due volte il pulsante «cambio induttore» (10). Il prodotto effettua un ciclo di espurgo. E’
pronto a funzionare.
“MODALITÀ “TIMER”
*
La funzione “Timing” permette di controllare il tempo di riscaldamento della Powerduction.
Il tempo è regolabile da 1 a 30 secondi.
Per entrare in questa modalità:
1. Premere il pulsante di autorizzazione al riscaldamento (2). La spia si accende.
2. Quindi premere contemporaneamente entrambi i pulsanti di regolazione dell’alimentazione (4). Il display visualizza
“SEC” e poi “T 00” o “SEC” e poi “ON” se è già stata impostata un’ora.
3. I pulsanti di impostazione dell’alimentazione (4) diventano pulsanti di impostazione dell’ora. Modicare il setpoint di
volta in volta come desiderato.
Se il valore del tempo non è stato modicato oltre 3 secondi e mostra ancora “T 00”, la Powerduction ritorna al modo
normale.
Utilizzare in modalità “Timer”:
Una volta selezionato il setpoint dell’ora, il prodotto è pronto per l’uso. Il LED di illuminazione (12) è acceso.
1. Premere il pulsante della lancia (11). L’intensità del LED (12) diminuisce per indicare che il riscaldamento è attivo.
2. Il riscaldamento si arresta alla ne del tempo limite. Finché si preme il pulsante della lancia (11), il LED (12) e il
pulsante di abilitazione del riscaldamento (2) lampeggiano per avvertire che l’alimentazione è spenta. Se necessario,
regolare il setpoint dell’ora.
3. Premere il pulsante della lancia (11) per un nuovo ciclo di riscaldamento.
Uscire dalla modalità “Timer
La modalità rimane attiva in ogni momento, anche quando la Powerduction viene disattivata e poi riaccesa.
1. Per uscire dalla modalità, impostare il setpoint dell’ora su ∞ oppure premere contemporaneamente entrambi i pul-
santi di controllo dell’alimentazione (4). La Powerduction ritorna alla modalità di funzionamento normale. Il display
visualizza “SEC” e poi “OFF”.
* Valido solo per le versioni di programma V4 a riduzione di potenza 39LG / 50LG. Le versioni precedenti non sono dotate di questa funzione.

88
POWERDUCTION 37LG / 39LG / 50LG
IT
Traduzione delle istruzioni originali
Particolarità dell’impostazione della potenza in questa modalità
Come spiegato, in modalità d’uso normale i pulsanti di impostazione consentono di cambiare l’alimentazione mentre in
questa modalità cambiano il setpoint dell’ora. Per cambiare la potenza senza uscire dalla modalità:
1. Premere il pulsante di autorizzazione al riscaldamento (2). La luce verde si spegne.
2. I pulsanti di impostazione (4) consentono di modicare l’alimentazione. Regolare la potenza.
Premere nuovamente il pulsante (2). La spia si riaccende. I pulsanti di impostazione (4) diventano di nuovo l’impostazi
one dell’ora.
MODO «CAMBIO ACCESSORI»
STOP
OK
A
B
1 3 4 5
stampa serigraca
coppia massima = 7N
Questa modalità è accessibile solo se il riscaldamento non è attivo (pulsante verde spento).
1. Premere il pulsante (10), la pompa si ferma e il LED (9) s’accende.
2. Posizionare la lancia sul suo supporto e mettere a terra il cavo (per evitare la perdita di liquido).
3. Se la Powerduction è dotata di un induttore completo, svitarlo con la chiave da 27 (fornita con
il prodotto). Se è dotato di un semplice induttore, svitarlo manualmente e, se necessario,
svitare l’adattatore.
Il Powerduction 37LG è dotato di un collegamento sso S, non può essere svitato.
4. A seconda della scelta del nuovo induttore: avvitare un induttore completo con la chiave in dotazi-
one o avvitare l’apposito adattatore (max. 7 N.m) e poi avvitare manualmente il nuovo induttore.
5. Premere di nuovo il pulsante (10).
La pompa si mette in funzione. Per 5 secondi, il display scorre.
Se il usso è corretto, si sente un doppio «BIP» e il prodotto è pronto per funzionare.
Se no, appare un errore (fare riferimento alla tabella dei codici di errore).
Induttori e adattatori
Il Powerduction 37LG è dotato di un collegamento sso S ed è fornito di serie con l’induttore S90.
I Powerduction 39LG e 50LG sono forniti di serie con l’induttore completo C20/B1.
Gli altri accessori sono opzionali, estendono le possibilità di riscaldamento ad una vasta gamma di applicazioni.
Induttori completi Adattatori
C20/B1
Rif. 056862
28S
Rif. 064485
28L
Rif. 064492
C180/B1
Rif. 056879
Induttori
S90
Rif. 058927
S70
Rif. 061569
L90
Rif. 059788
C180/B2
Rif. 056886
S180
Rif. 059269
S20/B1
Rif. 064874
L70
Rif. 059771
S180/B1
Rif. 064881
S180/B2
Rif. 064928
L180
Rif. 059795
S180/B3 W
Rif. 067899
L180 SPIRAL
Rif. 065000
L20/B4
Rif. 067882

89
POWERDUCTION 37LG / 39LG / 50LG
IT
Traduzione delle istruzioni originali
MODALITÀ «SCARICO»
Questa modalità è accessibile solo se il riscaldamento non è attivo (pulsante verde spento).
1. Premere il pulsante (10), la pompa si ferma e il LED (9) s’accende.
2. Posizionare la lancia sul suo supporto e mettere a terra il cavo (per evitare la perdita di liquido).
3. Svitare l’accessorio con la chiave da 27 (fornita con il prodotto).
4. Tenere premuto per 3 secondi il pulsante d’avvio del riscaldamento (2) nché si accende.
5. Posizionare il pulsante della lancia sopra un recipiente da almeno 10 l di capienza.
6. Premere sul pulsante della lancia (11). La pompa si mette in marcia nchè il usso diventa inferiore a 1l/minuto o
per 2 minuti. Il display indica il usso in decilitri al minuto. Per fermare la pompa durante il ciclo, premere su un
pulsante qualsiasi.
7. Per svuotare completamente il circuito del liquido di raffreddamento, bisogna sofare (30PSI) in punta alla lancia,
no a sentire l’aria o a vedere proiezioni di liquido di raffreddamento uscire dal serbatoio.
8. Per evacuare il liquido rimanente nel fondo del serbatoio, utilizzare una pompa a depressione o inclinare il disposi-
tivo sulla parte anteriore.
9. Per evacuare il liquido rimanente nel fondo del serbatoio, utilizzare una pompa a depressione o inclinare il disposi-
tivo sulla parte anteriore.
Si consiglia di rinnovare il liquido di raffreddamento ogni anni per non deteriorare la lancia del POWERDUCTION.
Preferire l’uso dello speciale refrigerante di saldatura offerto con Powerduction (vedi § Manutenzione).
MODE «VIDANGE» (39LG & 37LG)
Questa modalità è accessibile solo se il riscaldamento non è attivo (pulsante verde spento).
1. Collocare la lancia afnché punti verso l’alto. Mettere a terra il cavo per evitare la perdita di liquido.
2. Svitare l’accessorio con la chiave da 27 fornita con il prodotto (39LG) ou l’inducteur (37LG).
3. Posizionare il producto sopra un recipiente da almeno 10 l di capienza.
4. Per evacuare il liquido rimanente nel fondo del serbatoio, placer le produit au dessus du récipient de 10l et :
- 39LG : svitare la spina di scarico.
- 37LG : appoggiare il prodotto sul retro.
39 LG 37 LG
SISTEMA DI RAFFREDDAMENTO E MODALITÀ «RAFFREDDAMENTO FORZATO»
Per controllare che il liquido di raffreddamento non salga di temperatura, il ventilatore si mette in marcia sempre quando
la temperatura del liquido di raffreddamento raggiunge i 35°C (95°F). Quando ritorna al di sotto di questa temperatura
si spegne.
Durante lunghi periodi di riscaldamento, il POWERDUCTION ha una modalità di raffreddamento forzato. Per avviarlo :
1. Girare l’interruttore generale (1) in posizione ON.
La macchina effettua la sua fase di preparazione in 2 secondi.
2. Premere il tasto di attivazione (2) descritto a pag. 5. La spia del tasto (2) e il LED sul supporto di lancia (12) si accen-
dono, indicando che il prodotto è pronto per riscaldare.
3. Premere a lungo (>3 secondi) il tasto (10). La modalità «Raffreddamento forzato» è attivata.
Il ventilatore si mette automaticamente in marcia. Il suono di un ventilatore in funzione e il messaggio «Fan ON» che
appare sul display permettono di esserne sicuri.
Per fermare la modalità «Raffreddamento forzato», premere il tasto d’attivazione per interrompere il riascaldamento o
premere di nuovo a lungo il tasto (10). Il messaggio «Fan OFF» appare sul display.

90
POWERDUCTION 37LG / 39LG / 50LG
IT
Traduzione delle istruzioni originali
MANUTENZIONE
Raccomandazioni generali
• Si consiglia di rinnovare il liquido di raffreddamento ogni 2 anni per non deteriorare la lancia del Powerduction. Prima di
aggiungere il liquido, spolverare il prodotto e controllare le perdite.
• Preferire l’uso dello speciale refrigerante di saldatura offerto con Powerduction. Non utilizzare uidi per autoveicoli,
ma solo refrigeranti a bassa conducibilità elettrica.
• Controllare regolarmente il serraggio delle viti di alimentazione e l’aspetto dei collegamenti elettrici.
Coppia di serraggio consigliata per le viti di potenza
Dimensioni viti M5 M6 M8 M10 morsetto
Gas
1/4
3/8
Gas
M28 M32
Induttore
16/22
Materiale acciaio acciaio ottone ottone rame rame rame
Coppia 4 Nm 6 Nm 7 Nm 7 Nm 2,5 Nm 4 Nm 7 Nm max 7 Nm max
max a mano,
4 Nm max
• E’ essenziale che la manutenzione del prodotto sia realizzata da personale autorizzato, qualicato e informato sulle
raccomandazioni descritte in questo manuale.
• Mai pulire, lubricare o effettuare una manutenzione sul prodotto in funzione.
• Prima di qualsiasi operazione di manutenzione, posizionare il pulsante Marche / Arrêt (avvio / stop) in posizione « 0 »
per spegnere il prodotto, poi scollegarlo dall’installazione elettrica per evitare qualsiasi scossa elettrica o altro rischio
risultante da una cattiva manipolazione.
• Non indossare anelli, orologi, gioielli, abiti pendenti come cravatte, abiti strappati, sciarpe, abiti sbottonati o cerniere
lampo aperte, che potrebbero essere agganciate durante il lavoro.
• Indossare piuttosto abiti specici per la prevenzione degli incidenti, come per esempio: scarpe antiscivolo, caschi anti
rumore, occhiali di protezione, guanti di sicurezza, ecc...
• Mai utilizzare essenze o solventi inammabili per pulire il prodotto. Utilizzare piuttosto acqua e, se necessario, dei
solventi commerciali non tossici.
• Dopo gli interventi, rimontare sempre i coperchi metallici del prodotto prima di rimettere in funzione la macchina.
Per sostituirlo, è necessario :
- rimuovere la protezione,
- rimuovere la ferrite sul rame con una pistola di calore per facilitare la rimozione della resina,
- di rame pulito,
- incollare la ferrite con la resina specica,
- riposizionare la ferrite con la sua protezione,
- attendere la completa impostazione del collante prima di utilizzare l’induttore.
ACCESSORI
39LG - 50LG 37LG
Braccio - Cable support Induttore
052284
2 staffe di montaggio
(se scelta dell’opzione carrello)
OPZIONI
39LG - 50LG 37LG
Ferrite Protezione UNIVERSAL 800 + Braccio
053823
056909
051331 + 052284
053458
056916
Power Epoxy 150°C 2-componenti epossidico Glue-Stick
054851

91
POWERDUCTION 37LG / 39LG / 50LG
IT
Traduzione delle istruzioni originali
Liquido di raffreddamento speciale saldatura
10 l 5 l
052246
062511
Manutenzione preventiva
Ispezioni meticolose effettuate ad intervalli regolari sono necessarie per individuare ed eliminare rapidamente i difetti,
per non causare danni all’apparecchio.
Ogni volta che dovete utilizzare il POWERDUCTION, vericare preventivamente gli organi di sicurezza
dell’apparecchio, e qualsiasi anomalia che possa danneggiare il funzionamento corretto dell’appa-
recchio. Vericare quotidianamente per identicare i segnali avvisatori d’usura.
La sicurezza operativa del prodotto può essere garantita solo se le riparazioni sono effettuate utiliz-
zando pezzi di ricambio originali e se vengono rispettate le istruzioni di manutenzione.
Dopo ogni utilizzo, il prodotto spento, deve essere pulito per togliere polvere e sporcizia che possano
ridurre la ventilazione e alterare il buon funzionamento del prodotto e la sua durata.
Prima di ogni utilizzo, vericare il buon funzionamento degli organi di controllo, degli organi di sicu-
rezza e l’integrità dei cavi elettrici di connessione.
Effettuare periodicamente controlli visivi per vericare che non ci siano perdite di liquido, che le
bocche di ventilazione non siano ostruite.
COLLEGAMENTI ELETTRICI
Il prodotto è concepito per funzionare con una tensione di rete monofase da 185 V a 265 V,

92
POWERDUCTION 37LG / 39LG / 50LG
IT
Traduzione delle istruzioni originali
GARANZIA
La garanzia copre qualsiasi difetto di fabbricazione per 2 anni, a partire dalla data d’acquisto (pezzi e mano d’opera).
La garanzia non copre:
• Danni dovuti al trasporto.
• La normale usura dei pezzi (Es. : cavi, morsetti, ecc.).
• Gli incidenti causati da uso improprio (errore di alimentazione, cadute, smontaggio).
• I guasti legati all’ambiente (inquinamento, ruggine, polvere).
• Induttori e ferriti rimovibili che sono materiali di consumo.
• Uso di refrigerante non specicato.
In caso di guasto, rinviare il dispositivo al distributore, allegando:
- la prova d’acquisto con data (scontrino, fattura...)
- una nota esplicativa del guasto.

POWERDUCTION 37LG / 39LG / 50LG
93
SCHÉMAS ÉLECTRIQUES / ELECTRICAL DIAGRAM / ESQUEMAS ELÉCTRICOS / ЭЛЕКТРИЧЕСКИЕ
СХЕМЫ / ELEKTRISCHE SCHEMA’S / SCHEMI ELETTRICI
50LG
97367C
21556
5100471746
52100
81100
23
97788C
97447C
51021
20
63691
96131
94196
52250
51967
91969 51403
44
20
FAN
BP_LANCE
BP_ACT_LANCE
DEBIT CTN_GF
2
51075
53106
51363
97782
20
39LG
97367C
21468
5101471746
52100
81100
23
97788C
97447C
20
63691
96131
95618
97426
91307 51403
44
20
FAN
BP_LANCE
BP_ACT_LANCE
DEBIT CTN_GF
53106
51363
52460
51967
97782
20

94
POWERDUCTION 37LG / 39LG / 50LG
37LG
21468
51021 71776
52100
81100
5
3
97418C
95398
97473C
51967
91142 51403
44
20
LANCE
ACT_LANCE
GF
52460
2
97419C
96133
DIAGRAMME DU CIRCUIT DE REFROIDISSEMENT / COOLING CIRCUIT DIAGRAM / DIAGRAMA DEL
CIRCUITO DE REFRIGERACIÓN / ДИАГРАММА ЦЕ ПИ ОХЛАЖДЕНИЯ / SCHEMA KOELCIRCUIT /
DIAGRAMMA DEL CIRCUITO DI RAFFREDDAMENTO
F
E
C
A
G
D
B

POWERDUCTION 37LG / 39LG / 50LG
95
50LG 39LG 37LG
A 51004 51014 51021
B 71777 71779 71751
C 52100
D 94196 95618 95398
E 81100
F 71746 71776
G 91254 71794 71760
DISTANCES EMS / DISTANCES EMS / DISTANCES EMS / DISTANCIAS EMS / РАССТОЯНИЯ EMS /
AFSTANDEN EMS / DISTANZE EMS
POWERDUCTION 50 LG
10cm
7cm
5cm
VA haute/basse
VA pour une exposition des menbres
10cm
Mesures effectuées sur un POWERDUCTION 50LG selon la directive EMF 2013/35/EU
plan globale du produit
ajouter un zoom de la lance
niveau de référence ICNIRP 1998
30cm
10cm
5cm
5cm

96
POWERDUCTION 37LG / 39LG / 50LG
POWERDUCTION 39 LG
7 cm
7 cm
4 cm
VA haute/basse
VA pour une exposition des membres
7 cm
Mesures effectuées sur un POWERDUCTION 39LG selon la directive EMF 2013/35/EU
7 cm
4 cm
4 cm
POWERDUCTION 37 LG
65 mm
65 mm
100 mm
105 mm
130 mm
75 mm
95 mm
55 mm
45 mm
80 mm
VA haute/basse
VA pour une exposition des membres
Mesures effectuées sur un POWERDUCTION 37LG selon la directive EMF 2013/35/EU

POWERDUCTION 37LG / 39LG / 50LG
97
PIÈCES DE RECHANGE / SPARE PARTS / ERSATZTEILE / PIEZAS DE RECAMBIO / ЗАПЧАСТИ /
RESERVE ONDERDELEN / PEZZI DI RICAMBIO
POWERDUCTION 37LG
13
11
10
9
4
2
14
6
20
19
8
3
5
1
7
12
15
18 1617
N° Désignation Réf
1
Condenseur à eau / Water-cooled condenser / Wassergekühlter Kondensator / Condensador enfriado por agua / Водяной конденсатор /
Watergekoelde condensator / Condensatore raffreddato ad acqua
71751
2
Ventilateur / Ventilator / Beatmungsgerät / Ventilador / Вентилятор / Ventilator / Ventilatore
51021
3
Pompe / Pump / Pumpe / Bomba / Насос / Pomp / Pompa
71776
4
Réservoir / Tank / Tank / Tanque / Цистерна / Tank / Serbatoio
91138
5
Transformateur / Transformer / Transformator / Transformador / Трансформатор / Transformator / Trasformatore
96133
6
Carte de commande / Control card / Kontrollkarte / Tarjeta de control / Карта управления / Besturingskaart / Scheda di controllo
97418C
7
Circuit condensateur / Capacitor circuit / Kondensator-Schaltkreis / Circuito de condensadores / Конденсаторная схема / Condensatorcircuit
/ Circuito del condensatore
97473C
8
Circuit de puissance / Power circuit / Stromkreislauf / Circuito de energía / Цепь питания / Vermogenscircuit / Circuito di alimentazione
97419C
9
Patin - Angle / Shoe - Angle / Schuh - Winkel / Zapato - Ángulo / Обувь - Угол / Schoen - Hoek / Scarpa - Angolo
56120
10
Clavier / Keyboard / Tastatur / Teclado / Клавиатура / Toetsenbord / Tastiera
51967IND1
11
Bouton lumineux vert / Green illuminated button / Grün beleuchtete Taste / Botón verde iluminado / Зеленая кнопка с подсветкой / Groen
verlichte knop / Pulsante verde illuminato
51403
12
Cordon secteur / Power cord / Netzkabel / Cable de alimentación / шнур питания / Stroomkabel / Cavo di alimentazione
21468
13
Poignée plastique / Plastic handle / Kunststoffgriff / Mango de plástico / Пластиковая ручка / Kunststof handvat / Maniglia in plastica
56048
14
Interrupteur Marche/Arrêt / On/Off switch / Ein/Aus-Schalter / Interruptor de encendido y apagado / Переключатель Вкл/Выкл / Aan/
uit-schakelaar / Interruttore On/Off
52460
15
Cache bouton / Button cover / Knopfabdeckung / Tapa de botones / Крышка кнопки / Knopdeksel / Copertura a bottone
52463
16
Lance / Launch / Starten Sie / Lanzamiento / Запуск / Lancering / Lanciare
95398
17
Capteur de débit / Flow sensor / Durchusssensor / Sensor de ujo / Датчик расхода / Stromingssensor / Sensore di usso
81100
18
Circuit CEM Powerduction / Powerduction EMC circuit / Leistungsuss-EMV-Schaltung / Circuito de conducción de energía EMC /
Электромагнитная цепь электромагнитной совместимости / Elektriciteitsnet EMC-circuit / Circuito EMC a conduzione di potenza
97472C
19
Nappe / Ribbon cable / Flachbandkabel / Cable plano / ленточный кабель / Lint kabel / Cavo a nastro 63781
20
Circuit adaptation interface clavier / Keyboard interface adaptation circuit / Schaltung zur Anpassung der Tastaturschnittstelle / Circuito de
adaptación de la interfaz del teclado / Схема адаптации интерфейса клавиатуры / Toetsenbordinterface aanpassingscircuit / Circuito di adatta-
mento dell’interfaccia della tastiera
97782C
*
* selon version / depending on version

98
POWERDUCTION 37LG / 39LG / 50LG
POWERDUCTION 39LG
16
8
15
6
4 10
9
11
112 25
143 7
23
10
27
26
18
25
24
22
21
13
28
19
20
17
N° Désignation Réf
1 Réservoir / Tank / Tank / Tanque / Цистерна / Tank / Serbatoio 71794
2 Pompe / Pump / Pumpe / Bomba / Насос / Pomp / Pompa 71746
3 Ventilateur / Ventilator / Beatmungsgerät / Ventilador / Вентилятор / Ventilator / Ventilatore 51014
4
Radiateur à eau 3 rangés / Water radiator 3 rows / Wasserkühler 3 Reihen / Radiador de agua 3 las / Водяной радиатор 3 ряда / Waterra-
diator 3 rijen / Radiatore dell’acqua 3 le
71779
5
Roue pivotante avec frein / Swivel wheel with brake / Schwenkrad mit Bremse / Rueda giratoria con freno / Шарнирное колесо с тормозом
/ Zwenkwiel met rem / Ruota girevole con freno
71360
6 Transformateur / Transformer / Transformator / Transformador / Трансформатор / Transformator / Trasformatore 96131
7 Self torique / Toroidal choke / Ringkerndrossel / Estrangulamiento toroidal / тороидальный дроссель / Ringkern / Strozzatore toroidale 63691
8 Clavier / Keyboard / Tastatur / Teclado / Клавиатура / Toetsenbord / Tastiera 51967IND1
9
Interrupteur Marche/Arrêt / On/Off switch / Ein/Aus-Schalter / Interruptor de encendido y apagado / Переключатель Вкл/Выкл / Aan/
uit-schakelaar / Interruttore On/Off
52460
10 Poignée plastique / Plastic handle / Kunststoffgriff / Mango de plástico / Пластиковая ручка / Kunststof handvat / Maniglia in plastica 56048
11 Cache bouton / Button cover / Knopfabdeckung / Tapa de botones / Крышка кнопки / Knopdeksel / Copertura a bottone 52463
12 Roues xe / Fixed wheels / Feste Räder / Ruedas jas / Фиксированные колеса / Vaste wiele / Ruote sse 71368
13 Carte de commande / Control card / Kontrollkarte / Tarjeta de control / Карта управления / Besturingskaart / Scheda di controllo 97788C
14
Circuit condensateur / Capacitor circuit / Kondensator-Schaltkreis / Circuito de condensadores / Конденсаторная схема / Condensatorcircuit
/ Circuito del condensatore
97426C
15
Circuit alimentation & CEM / Power supply & EMC circuit / Stromversorgung & EMV-Schaltung / Fuente de alimentación y circuito EMC /
Источник питания и электромагнитная цепь / Stroomvoorziening & EMC-circuit / Alimentazione e circuito EMC
97367C
16
Bouton lumineux vert / Green illuminated button / Grün beleuchtete Taste / Botón verde iluminado / Зеленая кнопка с подсветкой / Groen
verlichte knop / Pulsante verde illuminato /
51403
17 Lance / Launch / Starten Sie / Lanzamiento / Запуск / Lancering / Lanciare 95618
18 Circuit primaire / Primary circuit / Primärer Kreislauf / Circuito primario / Первичный контур / Primair circuit / Circuito primario 97447C
19 Cordon secteur / Power cord / Netzkabel / Cable de alimentación / шнур питания / Stroomkabel / Cavo di alimentazione 21468
20
Circuit adaptation interface clavier / Keyboard interface adaptation circuit / Schaltung zur Anpassung der Tastaturschnittstelle / Circuito de
adaptación de la interfaz del teclado / Схема адаптации интерфейса клавиатуры / Toetsenbordinterface aanpassingscircuit / Circuito di
adattamento dell’interfaccia della tastiera
97782C
*
21
Pied de maintiein potence / Handle foot for gallows / Handgriff-Fuß für Galgen / Pie de mango para la horca / Ручка-ножка для виселицы /
Handgreepvoet voor galg / Piedino per forca
56023
22
Maintien haut potence / High gallows support / Hohe Galgenunterstützung / Soporte de la horca alta / Высокая виселица поддержка / Hoge
galgsteun / Supporto per forca alta
56024
23
Potence support cable / High gallows support / Kabelhalterung / Soporte del cable / Кронштейн опоры кабеля / Kabelsteunbeugel / Staffa di
supporto del cavo
fab050ST
24 Mat potence / Mat gallows / Matten-Galgen / La horca de esteras / ковровая виселица / Matgalg / Forca di stuoia 91025ST
25
Support câble pour potence / Cable support for a gallows / Kabelhalterung für einen Galgen / Soporte de cable para una horca / Кабельная
опора для виселицы / Кабельная опора для виселицы / Kabelsteun voor een galg / Supporto per cavo per forca
56019
26 Capteur de débit / Flow sensor / Durchusssensor / Sensor de ujo / Датчик расхода / Stromingssensor / Sensore di usso 81100
27
Circuit CEM / EMC circuit / Leistungsuss-EMV-Schaltung / Circuito de conducción de energía EMC / Электромагнитная цепь
электромагнитной совместимости / Elektriciteitsnet EMC-circuit / Circuito EMC a conduzione di potenza
97472C
28 Nappe / Ribbon cable / Flachbandkabel / Cable plano / ленточный кабель / Lint kabel / Cavo a nastro 63781
* selon version / depending on version

POWERDUCTION 37LG / 39LG / 50LG
99
POWERDUCTION 50LG
5
1516
8 17
21
31
7
12
11
14
13
4
6
19
9
10
18
28
2
2029
22
27
25
26
24
23
N° Désignation Réf
1 Axe de roue / Wheel axle / Radachse / Eje de la rueda / Ось колеса / Wielas / Asse delle ruote 91100ST
2 Poignée plastique / Plastic handle / Kunststoffgriff / Mango de plástico / Пластиковая ручка / Kunststof handvat / Maniglia in plastica 56014
3 Roue / Wheel / Rad / Rueda / Колесо / Wiel / Ruota 71375
4 Ventilateur / Ventilator / Beatmungsgerät / Ventilador / Вентилятор / Ventilator / Ventilatore 51021
5 Presse étoupe / Cable gland / Kabelverschraubung / Glándula de cable / кабельный ввод / Klier / Pressacavo 71164
6
Enrouleur de Cables - Pinces / Cable Reel - Pliers / Kabeltrommel - Zange / Carrete de cable - Alicates / Кабельный барабан - Клещи / Kabel-
haspel - Tang / Avvolgicavo - Pinze
56131
7 Pompe / Pump / Pumpe / Bomba / Насос / Pomp / Pompa 71746
8 Clavier / Keyboard / Tastatur / Teclado / Клавиатура / Toetsenbord / Tastiera 51967IND1
9 Réservoir / Tank / Tank / Tanque / Цистерна / Tank / Serbatoio 91254
10
Interrupteur Marche/Arrêt / On/Off switch / Ein/Aus-Schalter / Interruptor de encendido y apagado / Переключатель Вкл/Выкл / Aan/
uit-schakelaar / Interruttore On/Off
51075
11 Capteur de débit / Flow sensor / Durchusssensor / Sensor de ujo / Датчик расхода / Stromingssensor / Sensore di usso 81100
12
Roue pivotante avec frein / Swivel wheel with brake / Schwenkrad mit Bremse / Rueda giratoria con freno / Шарнирное колесо с тормозом
/ Zwenkwiel met rem / Ruota girevole con freno
71360
13 Self / Self / Spule / Self / Inductie spoel / Self 63691
14 Transformateur / Transformer / Transformator / Transformador / Трансформатор / Transformator / Trasformatore 96131
15
Circuit alimentation & CEM / Power supply & EMC circuit / Stromversorgung & EMV-Schaltung / Fuente de alimentación y circuito EMC /
Источник питания и электромагнитная цепь / Stroomvoorziening & EMC-circuit / Alimentazione e circuito EMC
97367C
16 Carte de commande / Control card / Kontrollkarte / Tarjeta de control / Карта управления / Besturingskaart / Scheda di controllo 97788C
17
Bouton lumineux vert / Green illuminated button / Grün beleuchtete Taste / Botón verde iluminado / Зеленая кнопка с подсветкой / Groen
verlichte knop / Pulsante verde illuminato /
51403
18
Circuit CEM / EMC circuit / Leistungsuss-EMV-Schaltung / Circuito de conducción de energía EMC / Электромагнитная цепь
электромагнитной совместимости / Elektriciteitsnet EMC-circuit / Circuito EMC a conduzione di potenza
97472C
19 Circuit primaire / Primary circuit / Primärer Kreislauf / Circuito primario / Первичный контур / Primair circuit / Circuito primario 97447C
20
Circuit adaptation interface clavier / Keyboard interface adaptation circuit / Schaltung zur Anpassung der Tastaturschnittstelle / Circuito de
adaptación de la interfaz del teclado / Схема адаптации интерфейса клавиатуры / Toetsenbordinterface aanpassingscircuit / Circuito di adatta-
mento dell’interfaccia della tastiera
97782C
*
21 Lance / Launch / Starten Sie / Lanzamiento / Запуск / Lancering / Lanciare 94196
22 Cordon secteur / Power cord / Netzkabel / Cable de alimentación / шнур питания / Stroomkabel / Cavo di alimentazione 21556
23
Pied de maintiein potence / Handle foot for gallows / Handgriff-Fuß für Galgen / Pie de mango para la horca / Ручка-ножка для виселицы /
Handgreepvoet voor galg / Piedino per forca
56023
24
Maintien haut potence / High gallows support / Hohe Galgenunterstützung / Soporte de la horca alta / Высокая виселица поддержка / Hoge
galgsteun / Supporto per forca alta
56024
25
Potence support cable / High gallows support / Kabelhalterung / Soporte del cable / Кронштейн опоры кабеля / Kabelsteunbeugel / Staffa di
supporto del cavo
fab050ST
26 Mat potence / Mat gallows / Matten-Galgen / La horca de esteras / ковровая виселица / Matgalg / Forca di stuoia 91025ST
27
Support câble pour potence / Cable support for a gallows / Kabelhalterung für einen Galgen / Soporte de cable para una horca / Кабельная
опора для виселицы / Кабельная опора для виселицы / Kabelsteun voor een galg / Supporto per cavo per forca
56019
28
Condensateur de résonnance / Resonance capacitor / Resonanzkondensator / Condensador de resonancia / Pезонансный конденсатор /
Resonantiecondensator / Condensatore di risonanza
52250
29 Nappe / Ribbon cable / Flachbandkabel / Cable plano / ленточный кабель / Lint kabel / Cavo a nastro 63781
* selon version / depending on version

SAS GYS
1, rue de la Croix des Landes
CS 54159
53941 SAINT-BERTHEVIN Cedex
-
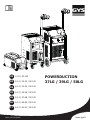 1
1
-
 2
2
-
 3
3
-
 4
4
-
 5
5
-
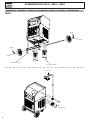 6
6
-
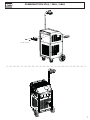 7
7
-
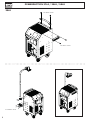 8
8
-
 9
9
-
 10
10
-
 11
11
-
 12
12
-
 13
13
-
 14
14
-
 15
15
-
 16
16
-
 17
17
-
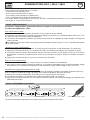 18
18
-
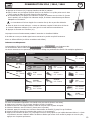 19
19
-
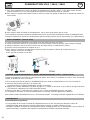 20
20
-
 21
21
-
 22
22
-
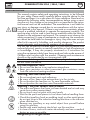 23
23
-
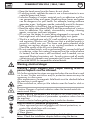 24
24
-
 25
25
-
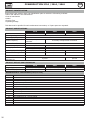 26
26
-
 27
27
-
 28
28
-
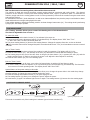 29
29
-
 30
30
-
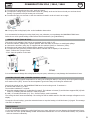 31
31
-
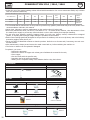 32
32
-
 33
33
-
 34
34
-
 35
35
-
 36
36
-
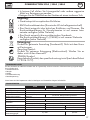 37
37
-
 38
38
-
 39
39
-
 40
40
-
 41
41
-
 42
42
-
 43
43
-
 44
44
-
 45
45
-
 46
46
-
 47
47
-
 48
48
-
 49
49
-
 50
50
-
 51
51
-
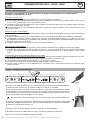 52
52
-
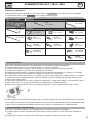 53
53
-
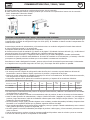 54
54
-
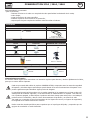 55
55
-
 56
56
-
 57
57
-
 58
58
-
 59
59
-
 60
60
-
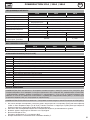 61
61
-
 62
62
-
 63
63
-
 64
64
-
 65
65
-
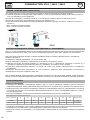 66
66
-
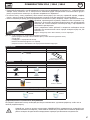 67
67
-
 68
68
-
 69
69
-
 70
70
-
 71
71
-
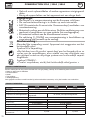 72
72
-
 73
73
-
 74
74
-
 75
75
-
 76
76
-
 77
77
-
 78
78
-
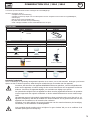 79
79
-
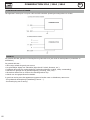 80
80
-
 81
81
-
 82
82
-
 83
83
-
 84
84
-
 85
85
-
 86
86
-
 87
87
-
 88
88
-
 89
89
-
 90
90
-
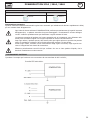 91
91
-
 92
92
-
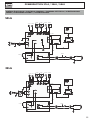 93
93
-
 94
94
-
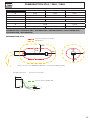 95
95
-
 96
96
-
 97
97
-
 98
98
-
 99
99
-
 100
100


GYS POWERDUCTION 37LG El manual del propietario
- Tipo
- El manual del propietario
En otros idiomas
- français: GYS POWERDUCTION 37LG Le manuel du propriétaire
- italiano: GYS POWERDUCTION 37LG Manuale del proprietario
- Deutsch: GYS POWERDUCTION 37LG Bedienungsanleitung
- Nederlands: GYS POWERDUCTION 37LG de handleiding
Documentos relacionados
-
GYS POWERDUCTION 39LG (S90) El manual del propietario
-
GYS 37LG Manual de usuario
-
GYS POWERDUCTION 37LG El manual del propietario
-
-
GYS POWERDUCTION 220LG Ficha de datos
-
GYS POWERDUCTION C20/B1 COMPLETE INDUCTOR Ficha de datos
-
GYS POWERDUCTION 39LG Ficha de datos
-
-
GYS POWERDUCTION 10R Ficha de datos
-