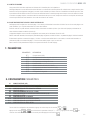
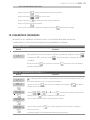
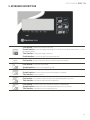
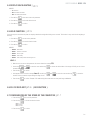
Baxtran TMH Manual de usuario
- Categoría
- Escalas personales
- Tipo
- Manual de usuario

BR95
V.2.2
ES-FR-EN
INDICADOR
INDICATEUR
INDICATOR
BR95
marca propiedad de | est une marque de | trade mark propiety of:
Pol. Empordà Internacional - Calle Molló, 3
17469 VILAMALLA - (Girona) SPAIN
T. (34) 972 527 212
El fabricante se reserva el derecho de modificar sin previo aviso las características de sus productos para introducir mejoras técnicas o cumplir con nuevas regulaciones oficiales./Le
constructeur se réserve le droit de modifier les caractéristiques de ses produits en vue d’y apporter des améliorations techniques ou de respecter de nouvelles réglamentations./The
manufacturer reserves the right to modify the specifications of its products in order to make technical improvements or comply with new regulations.
22/06/2021


3
BR95
ES
1. ALIMENTACIÓN 6
2. ANTES DE LA UTILIZACIÓN 6
3. CONSUMO 6
4. CONEXIÓN DE LA CÉLULA DE CARGA AL INDICADOR 6
5. DESCRIPCIÓN DEL TECLADO 7
6. APLICACIONES BR95 8
6.1 MODO DE PESAJE NORMAL 8
6.1.1 CONFIGURACIÓN DEL EQUIPO 8
6.1.2 PRIMERA CALIBRACIÓN 8
6.1.3 UTILIZACIÓN 8
6.2 MODO CUENTA PIEZAS 8
6.2.1 CONFIGURACIÓN DEL EQUIPO 8
6.2.2 PRIMERA CALIBRACIÓN 8
6.2.3 UTILIZACIÓN 8
6.3 LÍMITES Y ALARMA 9
6.4 RANGO UNITARIO / MULTI-RANGO / MULTI-INTERVALO 9
7. PARÁMETROS 9
8. CONFIGURACIÓN PARÁMETROS 9
8.1 CUENTAS INTERNAS (A/D) 10
8.2 CONFIGURACIÓN DE LOS LÍMITES DE PESO (SUPERIOR E INFERIOR) 10
8.3 AUTODESCONEXIÓN AUTOMÁTICA 10
8.4 RETROILUMINACIÓN DEL DISPLAY 11
8.5 FUNCIÓN HOLD 11
8.6 SALIDA DE DATOS RS-232 (SIN FUNCIÓN) 11
8.7 CONFIGURACIÓN DE LA VELOCIDAD DEL CONVERSOR AD 11
8.8 CIEGA 12
8.9 CONFIGURACIÓN DE LA GRAVEDAD 12
9. CONFIGURACIÓN DE REAJUSTES DE CALIBRACIÓN 12
10. PARÁMETROS TÉCNICOS 13
11. MENSAJES DE ERROR 18
12. GARANTÍA 19
ÍNDICE

4
BR95
FR
1. ALIMENTATION 20
2. AVANT DE L’UTILISATION DU ÉQUIPEMENT 20
3. CONSOMMATION 20
4. CONNEXION DE LA CELLUL E DE CHARGE À L’INDICAT EUR 20
5. DESCRIPTION DU CLA VIER 21
6. APLICATIONS BR95 22
6.1 MODE DE PESAGE 22
6.1.1 CONFIGURATION DE L’ÉQUIPEMENT 22
6.1.2 PREMIER CALIBRAGE 22
6.1.3 UTILISATION 22
6.2 MODE COMPTEUSES 22
6.2.1 CONFIGURATION DE L’ÉQUIPEMENT 22
6.2.2 PREMIER CALIBRAGE 22
6.2.3 UTILISATION 22
6.3 LIMITES ET UNE ALARME 23
6.4 PLAGE UNITAIRE / MULTI-PLAGES / MULTI-INTERVALLES 23
7. PARAMÈTRES 23
8. CONFIGURATION PARAMÈTRES 23
8.1 COMPTE INTERNE A/D) 24
8.2 CONFIGURATION DU LIMITES DE POIDS (SUPÉRIEUR ET INFÉRIEUR) 24
8.3 AUTODÉCONNEXION AUTOMATIQUE 24
8.4 CONFIGURATION DU RÉTRO-ECLAIRAGE DE L’ÉCRAN 24
8.5 FONCTION HOLD 25
8.6 SORTIE DE DONNÉES RS-232 (SANS FUNCTION) 25
8.7 CONFIGURATION DE LA VITESSE DU CONVERTISSEUR 25
8.8 MOYENNE DU ZÉRO 26
8.9 CONFIGURATION DE LA GRAVITÉ 26
9. CONFIGURATION DE REAJUSTES DE CALIBRATION 26
10. PARAMÈTRES TECHNIQUES 27
11. MESSAGES D’ERREUR 32
11. GARANTIE 33
INDEX

5
BR95
EN
1. EXCITATION 34
2. BEFORE ITS USE 34
3. CONSUMPTION 34
4. LOAD CELL CONNECTION TO THE INDICATOR 34
5. KEYBOARD DESCRIPTION 35
6. BR95 APPLICATIONS 36
6.1 NORMAL WEIGHING MODE 36
6.1.1 EQUIPMENT CONFIGURATION 36
6.1.2 FIRST CALIBRATION 36
6.1.3 USE 36
6.2 MODE COMPTEUSE 36
6.2.1 EQUIPMENT CONFIGURATION 36
6.2.2 FIRST CALIBRATION 36
6.2.3 USE 36
6.3 LIMITS AND ALARM 37
6.4 UNIT RANGE/ MULTI RANGE/ MULTI INTERVAL 37
7. PARAMETERS 37
8. PARAMETERS CONFIGURATION 37
8.1 INTERNAL COUNTING (A/D) 38
8.2 CONFIGURATION OF THE WEIGHT LIMITS (SUPERIOR AND INFERIOR) 38
8.3 AUTO SWITCH OFF 38
8.4 CONFIGURATION OF THE ILLUMINATION OF THE DISPLAY 39
8.5 HOLD FUNCTION 39
8.6 RS-232 DATA EXIT (NO FUNCTION) 39
8.7 CONFIGURATION OF THE SPEED OF THE AD CONVERTER 39
8.8 BLIND 40
8.9 CONFIGURATION OF THE GRAVITY 40
9. CONFIGURATION OF THE READJUSTMENTS IN CALIBRATION 40
10. TECHNICAL PARAMETERS 41
11. ERROR MESSAGES 46
12. GUARANTEE 47
INDEX

ESESMANUAL DE USUARIO BR95
6
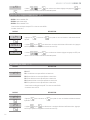
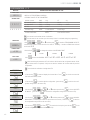
1. ALIMENTACIÓN
BR95
Entrada 230~240V
Salida 9V 500mA
Batería recargable 6V/1,2Ah
2. ANTES DE SU UTILIZACIÓN
1. Utilice una fuente eléctrica independiente para evitar perturbaciones eléctricas.
2. No colocar ningún objeto sobre la plataforma en el momento de poner en marcha el indicador.
3. Por favor, permita que la báscula se precaliente durante 2-3 minutos antes de su utilización.
4. Evitar cambios de temperatura muy bruscos y corrientes de aire.
5. No sobrecargar la báscula, nunca exceder la capacidad máxima.
3. CONSUMO
BR95
Vida de la batería: sin la retroiluminación, aprox. 160 horas.
con la retroiluminación, aprox. 120 horas.
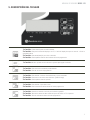
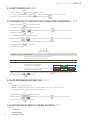
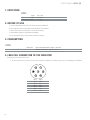
4. CONEXIÓN DE LA CÉLULA DE CARGA AL INDICADOR
• El conector de la célula de carga es de 7 pins.
• Cuando el indicador está trabajando, no quitar conector de la célula de carga, este acto podría dañar el equipo.
PIN 1 EXC +
PIN 2 SEN +
PIN 3 SIG +
PIN 4 SIG -
PIN 5 SEN -
PIN 6 EXC -
PIN 7 GND

7
ESESMANUAL DE USUARIO BR95
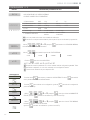
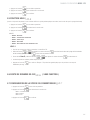
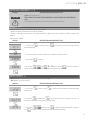
5. DESCRIPCIÓN DEL TECLADO
1a. función: Pulsar esta tecla para encender la balanza.
2a. función: Para poner la lectura del display a cero “0”, el valor del display tiene que ser menor al ±2% de la
capacidad máxima.
3a. función: Para sustraer(tarar) el peso de un contenedor.
4a. función: Para desplazarse hacía la derecha dentro del modo programación.
1a. función: Mantener pulsada esta tecla durante 3 segundos para apagar el indicador.
1a. función: Para seleccionar la unidad de pesada deseada.
2a. función: Para salir del modo de programación.
1a. función: Para visualizar el número de acumulaciones y el peso acumulado.
2a. función: Para borrar la memoria de acumulaciones. (pulsación larga)
3a. función: Para desplazarse hacía la izquierda.
1a. función: Para visualizar el peso bruto o neto.
2a. función: Para incrementar los valores dentro del modo programación.
1a. función: Acumula en memoria el valor de peso indicado en pantalla.
2a. función: Transmisión manual de datos a través del puerto RS-232 a un PC o impresora.
3a. función: Tecla de confirmación dentro del modo programación.

ESESMANUAL DE USUARIO BR95
8
6. APLICACIONES BR95
6.1 MODO DE PESAJE NORMAL
6.1.1 CONFIGURACIÓN DEL EQUIPO
6.1.2 PRIMERA CALIBRACIÓN
6.1.3 UTILIZACIÓN
6.2 MODO CUENTA PIEZAS
6.2.1 CONFIGURACIÓN DEL EQUIPO
6.2.2 PRIMERA CALIBRACIÓN
6.2.3 UTILIZACIÓN
6.3 LÍMITES Y ALARMA
6.4 RANGO UNITARIO/ MULTI RANGO / MULTI INTERVALO
6.1 MODO DE PESAJE NORMAL
6.1.1 CONFIGURACIÓN DEL EQUIPO
Vea apartado LF2 de parámetros técnicos
6.1.2 PRIMERA CALIBRACIÓN
Vea apartado LF1 de parámetros técnicos
6.1.3 UTILIZACIÓN
Una vez configurados todos los parámetros correctamente y calibrado el equipo, encienda el equipo.
• Asegúrese que el valor del visor, sin carga en la plataforma es 0, en caso contrario presione
• Sitúe el peso encima de la plataforma y la pantalla mostrará el peso.
• La acumulación y envío de datos dependerá del modo elegido en el apartado UF-6.
• Podrá visualizar los valores acumulados en cualquier momento presionando (TOTALIZACIÓN)
6.2 MODO CUENTA PIEZAS
6.2.1 CONFIGURACIÓN DEL EQUIPO
Vea apartado LF2 de parámetros técnicos
6.2.2 PRIMERA CALIBRACIÓN
Vea apartado LF1 de parámetros técnicos
6.2.3 UTILIZACIÓN
Una vez configurados todos los parámetros correctamente y calibrado el equipo, encienda el equipo.
Asegúrese que el valor del visor, sin carga en la plataforma es 0, en caso contrario presione .
PASOS;
1. Presione la tecla hasta que la pantalla muestre Pcs.
2. Presione sucesivamente para seleccionar la cantidad de piezas de la muestra. La pantalla mostrará sucesivamente
C 10 / C20 / C 50 / C 100 / C 200.
3. Sitúe la muestra sobre la plataforma, espere que se encienda el indicador de estabilidad y presione la tecla .
4. Sitúe el producto encima de la plataforma y la pantalla mostrará el número de piezas.
La acumulación y envío de datos dependerá del modo elegido en el apartado UF-6.
• Para volver al modo de pesaje normal, presione la tecla para volver a seleccionar Kg.
• Si desea volver al modo cuenta piezas, usando la misma muestra de referencia, presione nuevamente la tecla .
• Si desea cambiar la muestra de referencia, vuelva a repetir los pasos descritos anteriormente.

9
ESESMANUAL DE USUARIO BR95
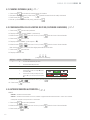
6.3 LÍMITES Y ALARMA
Usted puede configurar los límites superior e inferior de la muestra situada encima de la plataforma.
El display mostrará si se encuentra por debajo del limite inferior Lo, por encima del límite superior Hi o en la zona entre los dos límites Ok.
Así mismo usted puede configurar cuando desea que suene la alarma y si la estabilidad es necesaria para tal hecho.
Todo el procedimiento queda descrito en el apartado UF-2.Si usted tiene definidos límites en modo de pesaje normal y quiere utilizar los límites en
modo cuenta piezas, tendrá que definir los nuevos límites para este modo, cuando vuelva a modo peso se recuperarán los limites que ya tenia anteriormente.
Lo mismo ocurre en caso contrario.
6.4 RANGO UNITARIO/ MULTI-RANGO / MULTI-INTERVALO
El visor se puede configurar con un solo rango, es decir, un peso máximo y un valor de escalón. O bien como multi rango o multi intervalo,
en estos casos existe un peso máximo y dos escalones.
De 0 hasta la mitad de este peso máximo se usa el valor de escalón seleccionado(escalón 1) y de la mitad hasta el peso máximo, se usa el
siguiente valor de escalón(escalón 2).
El rango en el que usted se encuentra en cada momento lo señalan los indicadores de pantalla R1 y R2.
En el modo multi-intervalo conforme se va aumentando de peso en el rango 1 se usa el escalón 1, al pasar al rango 2 se usa el escalón 2.
Al disminuir el peso y volver al rango 1, se vuelve a usar el escalón 1 Por lo contrario en modo multi-rango, al disminuir el peso y volver al
rango 1, se continua usando el escalón 2 hasta llegar a 0.
En el apartado LF2 de parámetros técnicos podrá seleccionar el modo de rango.
7. PARÁMETROS
PARÁMETRO DESCRIPCIÓN
UF-1 Cuenta Internas (A/D)
UF-2 Configuración límites de peso (superior y inferior)
UF-3 Auto desconexión automática
UF-4 Retroiluminación del display
UF-5 Cuatro modos de hold
UF-6 Salida RS-232(PC / PRINT)
UF-7 Configuración de la velocidad del conversos (A/D)
UF-8 Ciega
UF-9 Configuración de gravedad
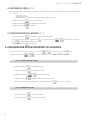
8. CONFIGURACIÓN PARÁMETROS
8.1 CUENTAS INTERNAS (A/D)
8.2 CONFIGURACIÓN DE LOS LÍMITES DE PESO (SUPERIOR E INFERIOR)
8.3 AUTODESCONEXIÓN AUTOMÁTICA
8.4 CONFIGURACIÓN DE LA ILUMINACIÓN DEL DISPLAY
8.5 FUNCIÓN HOLD
8.6 SALIDA DE DATOS RS-232
8.7 CONFIGURACIÓN DE LA VELOCIDAD DEL CONVERSOR AD
8.8 CIEGA
8.9 CONFIGURACIÓN DE LA GRAVEDAD
8.10 CONFIGURACIÓN DEL FILTRO DE PESAJE
8.11 CONFIGURACIÓN DEL FILTRO DE ESTABILIDAD
8.12 CONFIGURACIÓN DEL CERO INICIAL
Para acceder a la configuración de parámetros con la pantalla a cero, pulsar al mismo tiempo las teclas y .
Pulsar la tecla o para seleccionar el parámetro deseado (UF-1 ~ UF-11), para confirmar los cambios
realizados presione . Para volver al modo anterior pulse la tecla .

ESESMANUAL DE USUARIO BR95
10
8.1 CUENTAS INTERNAS (A/D) | UF-1
1. Pulsar la tecla para visualizar las cuentas internas de la balanza.
2. Para pasar al siguiente parámetro, pulsar la tecla la pantalla mostrará el valor de voltaje de la batería.
3. Pulsar la tecla para confirmar.
4. Para salir y volver al modo normal de pesaje, pulsar la tecla .
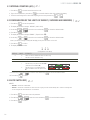
8.2 CONFIGURACIÓN DE LOS LÍMITES DE PESO (SUPERIOR E INFERIOR) | UF-2
1. Pulsar la tecla para acceder al parámetro.
2. El display mostrará el mensaje “000.00L” (Límite inferior)
3. Utilizar las teclas y para mover el cursor y la tecla para seleccionar el número deseado.
4. Pulsar la tecla para confirmar.
5. El display mostrará “000.00h” (Límite superior= Hi)
6. Utilizar las teclas y para mover el cursor y la tecla para seleccionar el número deseado.
Nota: Usted puede situarse encima del último dígito para modificarlo si hace falta.
7. Pulsar la tecla para confirmar.
8. El display mostrará el valor
A B C
0 0 0
(configuración de la alarma)
DISPLAY VALOR ESTABILIDAD
A 0 no hace falta estabilidad para sonar
1 hace falta estabilidad para sonar
B 0 siempre 0
C 0 alarma apagada
1 alarma suena si está en la franja Ok (entre
límites Lo y Hi)LOLO OKOK HIHI
2 alarma suena si está por debajo del límite
inferior Lo o por encima del límite superior
Hi
LOLO OKOK HIHI
9. Utilizar las teclas y para mover el cursor y la tecla para seleccionar el número deseado.
10. Pulsar la tecla para confirmar.
8.3 AUTODESCONEXIÓN AUTOMÁTICA | UF-3
MODOS:
• AoFF 00 – Autodesconexión desactivada.
• AoFF 01 – Autodesconexión activada a un minuto, la balanza se apagará automáticamente transcurrido 1 minuto sin ser utilizada.
• Usted puede configurar el valor que desee de 1 a 99 minutos
1. Pulsar la tecla para acceder al parámetro.
2. Utilizar las teclas y para mover el cursor y la tecla para seleccionar el número deseado.
3. Pulsar la tecla para confirmar.

11
ESESMANUAL DE USUARIO BR95
8.4 RETROILUMINACIÓN DEL DISPLAY | UF-4
MODOS:
• A: Automática.
• ON: Iluminación activada.
• OFF: Iluminación desactivada.
1. Pulsar la tecla para acceder al parámetro.
2. Pulsar la tecla para seleccionar el modo deseado.
3. Pulsar la tecla para confirmar.
8.5 FUNCIÓN HOLD | UF-5
(una vez retirado el objeto del plato, el display mantiene el peso fijado durante unos segundos, función muy útil para el pesaje de animales)
1. Pulsar la tecla para acceder al parámetro.
2. Pulsar la tecla para seleccionar el modo deseado.
3. Pulsar la tecla para confirmar.
MODOS:
• HOLD 0 : Desactivado.
• HOLD 1 : Animal en movimiento
• HOLD 2 : Valor de pico
• HOLD 3 : Hold estable
• HOLD 4 : Hold estable con auto cancelación a cero
HOLD 1.
• Una vez se ha accedido a este parámetro, la pantalla muestra PCt,
• Use las teclas y para mover el cursor y la tecla para seleccionar el valor del rango de HOLD deseado de 001 a 100.
• Pulsar la tecla para confirmar.
• La pantalla mostrará time 8, use la teclas y para mover el cursor y la tecla para seleccionar el número de
repeticiones deseado durante el rango de hold.
• Pulsar la tecla para confirmar. Ejemplo: PCt pequeño y time grande implica más precisión y mayor tiempo de estabilización.
8.6 SALIDA DE DATOS RS-232|UF-6 ( SIN FUNCIÓN )
8.7 CONFIGURACIÓN DE LA VELOCIDAD DEL CONVERSOR|UF-7
1. Pulsar la tecla para acceder al parámetro
2. Pulsar la tecla para seleccionar el modo deseado:
• Modo 1 : Normal
• Modo 2: Rápido
• Modo 3: Lento
3. Pulsar la tecla para confirmar.

ESESMANUAL DE USUARIO BR95
12
8.8 CIEGA|UF-8
Muestra 0 en pantalla hasta llegar a la siguiente división seleccionada. Empezando a mostrar valores a partir de esta división.
Ejemplo:
báscula con e=2g
ciega en 5 divisiones
Mostrará 0 hasta llegar a 2x5=10g el primer valor que mostrará será 12g.
1. Pulsar la tecla para acceder al parámetro
2. Pulsar la tecla para seleccionar.
3. Pulsar la tecla para confirmar.
8.9 CONFIGURACIÓN DE LA GRAVEDAD|UF-9
1. Pulsar la tecla para visualizar el valor de la gravedad actual.
2. Para cambiar el valor, pulsar la tecla , seguidamente utilizar las teclas y para mover el cursor y la tecla
para seleccionar el número deseado.
3. Pulsar la tecla para confirmar.
9. CONFIGURACIÓN DE REAJUSTES DE CALIBRACIÓN
1. Dentro del modo normal de pesaje, pulsar las teclas y , el display mostrará el mensaje ECF – 1.
2. Pulsar las teclas o para seleccionar la función deseada: ECF-1, ECF-2 o ECF-3
* ECF-1 CALIBRACIÓN DE CERO + PESO
Pulsar la tecla , el display mostrará CALZ.
Pulsar la tecla , para poner a cero la lectura del display.
Pulsar las teclas y para mover el cursor.
Pulsar la tecla introducir el valor de la pesa de calibración.
Colocar la pesa de calibración sobre la plataforma y pulsar la tecla para efectuar la calibración una vez la
lectura sea estable.
* ECF-2 CALIBRACIÓN DE CERO
Pulsar la tecla , el display mostrará CALZ.
Pulsar la tecla , para efectuar la calibración.

13
ESESMANUAL DE USUARIO BR95
* ECF-3 CALIBRACIÓN DE PESO (SPAN)
Pulsar la tecla , el display mostrará el valor del peso de calibración
Pulsar las teclas y para mover el cursor.
Pulsar la tecla para modificar el valor de la pesa de calibración.
Pulsar la tecla para confirmar.
Colocar la pesa de calibración sobre la plataforma y pulsar la tecla para efectuar la calibración una vez la
lectura sea estable.
10. PARÁMETROS TÉCNICOS
NO MODIFIQUE LOS PARÁMETROS TÉCNICOS SI NO ES ESTRICTAMENTE NECESARIO. UNA MALA CONFIGURACIÓN DE
ESTA SECCIÓN PUEDE PROVOCAR UN MAL FUNCIONAMIENTO DE LA BALANZA.
ENTRAR Y SALIR DE LA CALIBRACIÓN
DISPLAY DESCRIPCIÓN y SECUENCIA DE USO
• Con el visor apagado, presione y mantenga presionada la tecla hasta que la pantalla muestre
100911, suelte la tecla . Nos solicitará introducción de codigo PIN. Este es el 00020.
Presione la tecla para empezar o la tecla para salir del menú y el visor se reiniciará au-
tomáticamente.
LF 1
CALIBRACIÓN DE PESO LF 1
DISPLAY DESCRIPCIÓN y SECUENCIA DE USO
La calibración se puede realizar con cualquier peso, pero el peso no debe ser inferior a 1/3 de la
máxima capacidad ni nunca debe ser sobrepasada.
•Presione la tecla para empezar la calibración de zero (presione para salir de la calibra-
ción y volver al menú LF1)
LF 1
CAL Z
150.00 kg •Utilice , y , 0 ~ 9 y después para introducir el peso con el que se hará
la calibración. (Presione para salir de la calibración y volver al menú LF1)
150.00 kg •Sitúe el peso requerido sobre la báscula tal y cómo indica el display.
150.00 kg •Una vez estabilice, presione para calibrarla. (presione ESC para salir de la calibración y volver
al menú LF1).
LA CALIBRACIÓN SE TERMINARÁ Y LA BÁSULA VOLVERÁ AL MODO DE PESAJE AUTOMÁTICAMENTE.

ESESMANUAL DE USUARIO BR95
14
CONFIGURACIÓN LF 2
DISPLAY DESCRIPCIÓN y SECUENCIA DE USO
• VISUALIZACIÓN DE LAS CUENTAS INTERNAS
262144
• POSIBLES VALORES DE LOS PARÁMETROS
A: Sistema Métrico 0:NO 1: kg 2:T 3:g
100001
B: Sistema Americano 0:NO 1: lb 2:lb oz
C: otras unidades 0:NO 1: TW kg 2:HK kg 3:VISS
D: PCS 0:OFF 1: ON
A B C D E F E: doble rango 0:OFF 1: multi intervalo 2:multi rango
F: unidades de calibración 1: usar unidades
métricas 2: usar unidades
americanas
lb oz no se pueden seleccionar como unidades de calibración.
La bascula no nos dejará continuar hasta el próximo paso si hay un error durante la programación.
•Utilice , y , 0 ~ 9 y después para introducir LA CAPACIDAD MÁXIMA,
teniendo en cuenta el número de decimales.
000000kg
•Utilice , para cambiar la posición del PUNTO DECIMAL.
dP 0.0
d 0.00 d 0.000 d 0.0000 0.00000
• Presione para seleccionar la DIVISIÓN:
diV 01, diV 02, diV 05, diV10, diV 20, diV 50
diV 01
Después de entrar los parámetros LF2, el visor mostrará la última configuración guardada. Todos
los pasos deben completarse, si no el visor continuará con la configuración anterior.
Proceda con la calibración de peso después de LF2.
PROCEDIMIENTO:
LF 2 •Presione la tecla para empezar y mostrará el VALOR INTERNO. Presione para salir del
menú y la báscula se reiniciará automáticamente.
262144 •Presione para continuar con la configuración. (presione para salir de la configuración
y volver al menú LF2).
100001 • Utilice , y , 0 ~ 9 y después para seleccioinar las UNIDADES DE
PESAJE. (presione para salir de la calibración y volver al menú LF2).
000000kg • Utilice , y , 0 ~ 9 y después para seleccionar el PESO MÁXIMO,
teniendo en cuenta el número de decimales.
(presione para salir de la calibración y volver al menú LF2).

15
ESESMANUAL DE USUARIO BR95
d 0.0kg • Utilice , y después para mover el punto decimal. (presione para salir
de la configuración y volver al menú LF2).
div 01 • Utilice y después para cambiar el escalón (presione para salir de la configu-
ración y volver al menú LF2).
LF2 • Utilice , y para continuar con otras configuraciones o presione para salir
del menú y la báscula se reiniciará automáticamente).
CALIBRACIÓN LINEAL LF 3
Hasta 6 pasos de calibración W0 ~W6
Asegúrese que el plato de la báscula está vacío antes de empezar la calibración.
Presione para el primer punto de calibración.
Los puntos de calibración previos serán borrados y la pantalla mostrará CLEAR.
Presione para proceder con el siguiente punto de calibración.
Presione para volver al punto de calibración anterior.
Presione para guardar
Presione para terminar la calibración y volver al menú LF3.
DISPLAY DESCRIPCIÓN y SECUENCIA DE USO
LF3 •Presione empezar o para salir del menú y la báscula se reiniciará automáticamente.
W0 •Presione Utilice para calibrar el cero.
(presione para salir de la calibración y volver al menú LF3)
W1 •Sitúe 1/3 del peso máximo encima del palto y presione para calibrar 1/3 de la capacidad.
(presione para salir de la calibración y volver al menú LF3)
W2 •Sitúe 2/3 del peso máximo encima del palto y presione para calibrar 2/3 de la capacidad.
(presione para salir de la calibración y volver al menú LF3)
W3 •Sitúe el peso máximo encima del plato y presione para calibrar la plena capacidad. (presione
para salir de la calibración y volver al menú LF3)
W4 •Presione para completar la calibración lineal. (presione para salir de la calibración y
volver al menú LF3)

ESESMANUAL DE USUARIO BR95
16
LF3 •Utilice , y después para continuar con otros ajustes o presione para salir
del menú y la báscula se reiniciará automáticamente.
VELOCIDAD DEL CONVERTIDOR AD LF 4
SPEED 1 velocidad estándar 15Hz.
SPEED 2 alta velocidad 30Hz.
SPEED 3 baja velocidad 7.5Hz
*Esta función queda bloqueada cuando UF-5 se encuentra en modo HOLD 1.
*El valor de fábrica es 1
DISPLAY DESCRIPCIÓN y SECUENCIA DE USO
LF4 •Presione para empezar o para salir del menú y la báscula se reiniciará automática-
mente.
SPEED 1 • Utilice y después para seleccionar la velocidad del convertidor AD (presione
para salir de la configuración y volver al menú LF4)
LF 4 • Utilice , y después para continuar con otros ajustes o presione para salir
del menú y la báscula se reiniciará automáticamente.
CIEGA LF 5
DISPLAY DESCRIPCIÓN y SECUENCIA DE USO
ZP 0 OFF
ZP 1 Una división no se mostrará estando a cero
ZP 2 Dos divisiones no se mostrarán estando a cero
ZP 3 Tres divisiones no se mostrarán estando a cero
ZP 4 Cuatro divisiones no se mostrarán estando a cero
ZP 5 Cinco divisiones no se mostrarán estando a cero
*Esta función queda bloqueada cuando UF-5 se encuentra en modo HOLD 1
*El valor de fábrica es ZP 0
LF 5
DISPLAY DESCRIPCIÓN y SECUENCIA DE USO
•Presione para empezar o para salir del menú y la báscula se reiniciará automática-
mente.
LF 5
ZP 0 • Utilice y después para seleccionar cuantas divisiones nos e mostrarán a cero. (pre-
sione ESC para salir de la configuración y volver al menú LF4)

17
ESESMANUAL DE USUARIO BR95
LF 5 • Utilice , y después para continuar con otros ajustes o presione para
salir del menú y la báscula se reiniciará automáticamente.
CONFORMIDAD DE APROBACIÓN LF 6
DISPLAY DESCRIPCIÓN y SECUENCIA DE USO
nonE Versión no aprobada
NO MODIFIQUE BAJO NINGÚN CONCEPTO ESTE PARÁMETRO, SIEMPRE DEBE ESTAR
CONFIGURADO EN nonE.
El cambio de este parámetro implica el bloqueo de ciertas funcionalidades.
LF 6
!
GRAVEDAD LF 7
*Introduzca la gravedad de su zona antes de realizar la primera calibración.
*Introduzca la gravedad de destino después de realizar la calibración.
*El valor de gravedad será denegado si es mayor que 9.83217 (gravedad de polo) o inferior que 9.78031 (gravedad del ecua-
dor).
Valor de fábrica: 9.8035
DISPLAY DESCRIPCIÓN y SECUENCIA DE USO
• Presione para continuar o para salir del menú y la báscula se reiniciará automáti-
camente.
LF 7
-00- • La pantalla mostrará el número de pre-calibración durante un segundo.
9.8035 • Presione para continuar.
9.8035 • Utilice , y , 0 ~ 9 y después para introducir el valor de gravedad..
(presione ESC para salir de la configuración y volver al menú LF 7).
CERO INICIAL LF 8
SEtZ Y resetea el punto de cero cada vez que se reinita la báscula
SEtZ n reseteo del punto cero OFF
DISPLAY DESCRIPCIÓN y SECUENCIA DE USO
• Presione para empezar o para salir del menú y la báscula se reiniciará automática-
mente.
LF 8

ESESMANUAL DE USUARIO BR95
18
• Utilice y después para seleccionar el modo de cero inicial. (presione para
salir de la configuración y volver al menú LF8)SetZ Y
LF 8 • Utilice , y después para continuar con otros ajustes o presione para salir
del menú y la báscula se reiniciará automáticamente.
11. MENSAJES DE ERROR
MENSAJES DESCRIPCIÓN
Err H Punto cero demasiado alto (más del 10% de la capacidad máxima).
Z Err Punto cero demasiado alto (más del 10% de la capacidad máxima).
Err 1 Punto cero demasiado alto (modelo aprobado).
Err L Punto cero demasiado bajo.
Err 2 Punto cero demasiado bajo (modelo aprobado).
Err N El peso no es estable.
E4 Valor interno inestable.
OL Sobrecarga
O Err Sobrecarga
hhhhhh Sobrecarga
E3 Corrección de linealidad incorrecta o cancelación de corrección de linealidad.
LLLLLL El peso es demasiado bajo

19
ESESMANUAL DE USUARIO BR95
E5 Valor interno demasiado bajo.
Err4 E2ROM anormal
------ El precio total es superior a 999999
B Err El volumen de la batería es demasiado bajo
Err 10 Fallo de calibración, verifique la célula de carga
12. GARANTÍA
Esta balanza está garantizada contra todo defecto de fabricación y de material, por un periodo de 1 año a partir de la fecha de entrega.
Durante este periodo, GIROPÈS, se hará cargo de la reparación de la balanza.
Esta garantía no incluye los daños ocasionados por uso indebido o sobrecargas.
La garantía no cubre los gastos de envío (portes) necesarios para la reparación de la balanza.

FRFRMANUEL D’UTILISATION BR95
20
1. ALIMENTATION
BR95
Entrée 230~240V
Sortie 9V 500mA
Batterie 6V/1,2Ah
2. AVANT DE L’UTILISATION DU ÉQUIPEMENT
1. Le mantenir loin du tout materiel qui produit l’intérférence magnetique ou acoustique.
2. Avant de connecter l’indicateur, s’assurer que la plateforme soit vide.
3. S’il vous plaît permettre le indicateur et le balance préchauffer pendant 2-3 minutes avant utilisation.
4. Éviter les très brusques changements dans les courants d’air et de température.
5. Ne pas surcharger la balance, et ne dépasse jamais la capacité maximale.
3. CONSOMMATION
BR95
Durée de vie de la batterie: sans le rétroéclairage, aprox. 160 heures.
avec le rétroéclairage, aprox. 120 heures.
4. CONECTION DE L’INDICATEUR À UN CAPTEUR
• Connecteur de 7 pins.
• Lorsque le voyant est allumé, ne retirez pas le connecteur de la cellule de charge, cette action risquerait d’endommager l’équipement.
PIN 1 EXC +
PIN 2 SEN +
PIN 3 SIG +
PIN 4 SIG -
PIN 5 SEN -
PIN 6 EXC -
PIN 7 GND

FRFRMANUEL D’UTILISATION BR95
21
5. DESCRIPTION DU CLAVIER
1a. Fonction : Pulsar esta tecla para encender la balanza.
2a. Fonction : Pour remettre le poids à zéro “0”, mais la valeur affichée sur l’écran doit être inférieure à ± 2%
de la capacité maximale.
3a. Fonction : Pour soustraire le poids d’un récipient.
4a. Fonction : Pour déplacer un espace vers la droite ou vers le haut dans le mode de programmation.
1a. Fonction : Maintenir appuyée cette touche pendant 3 secondes pour éteindre l’indicateur.
1a. Fonction : Pour sélectionner l’unité de pesée désirée.
2a. Fonction : Pour sortir du mode de programmation.
1a. Fonction : Pour visualiser le nombre d’accumulations et le poids accumulé.
2a. Fonction : Pour supprimer la mémoire d’accumulations. (pulsation longue)
3a. Fonction : Pour déplacer un espace vers la gauche.
1a. Fonction : Pour visualiser le poids brut ou net.
2a. Fonction : Pour augmenter les valeurs dans le mode de programmation.
1a. Fonction : Cumule dans la mémoire la valeur du poids indiquée à l’écran.
2a. Fonction : Transmission manuelle de données grâce au port RS-232 à un PC ou une imprimante.
3a. Fonction : Touche de confirmation dans le mode de programmation.

FRFRMANUEL D’UTILISATION BR95
22
6. APPLICATIONS BR95
6.1 MODE DE PESAGE NORMAL
6.1.1 CONFIGURATION DE L’ÉQUIPEMENT
6.1.2 PREMIER CALIBRAGE
6.1.3 UTILISATION
6.2 MODE COMPTAGE DES PIÈCES
6.2.1 CONFIGURATION DE L’ÉQUIPEMENT
6.2.2 PREMIER CALIBRAGE
6.2.3 UTILISATION
6.3 LIMITES ET ALARME
6.4 PLAGE UNITAIRE/ MULTI-PLAGES / MULTI-INTERVALLES
6.1 CONFIGURATION DE L’ÉQUIPEMENT
6.1.1 CONFIGURATION DE L’ÉQUIPEMENT
Voir la section LF2 de paramètres techniques
6.1.2 PREMIER CALIBRAGE
Voir la section LF1 de paramètres techniques
6.1.3 UTILISATION
Une fois tous les paramètres correctement configurés et l’équipement calibré, allumez l’ordinateur.
• Assurez-vous que la valeur du viseur, sans charge sur la plateforme, est de 0, dans le cas contraire, appuyez sur
• Placez le poids sur la plateforme et l’écran affichera le poids.
• L’accumulation et l’envoi de données dépendront du mode choisi dans la rubrique UF-6.
• Vous pourrez afficher les valeurs accumulées à tout moment en appuyant sur (TOTALISATION)
6.2 MODE COMPTAGE DES PIÈCES
6.2.1 CONFIGURATION DE L’ÉQUIPEMENT
Voir la section LF2 de paramètres techniques
6.2.2 PREMIER CALIBRAGE
Voir la section LF1 de paramètres techniques
6.2.3 UTILISATION
Une fois tous les paramètres correctement configurés et l’équipement calibré, allumez l’ordinateur.
Assurez-vous que la valeur du viseur, sans charge sur la plateforme, est de 0, dans le cas contraire, appuyez sur .
ÉTAPES;
1. Appuyez sur la touche jusqu’à ce que l’écran affiche Pcs.
2. Appuyez successivement pour sélectionner la quantité de pièces de l’échantillon. L’écran affichera successivement C10 /
C20 / C 50 / C 100 / C 200
3. Placez l’échantillon sur la plateforme, attendez que le voyant de stabilité s’allume et appuyez sur la touche .
4. Placez l’échantillon sur la plateforme, attendez que le voyant de stabilité s’allume et appuyez sur la touche
L’accumulation et l’envoi de données dépendront du mode choisi dans la section UF-6.
• Pour revenir au mode de pesage normal, appuyez sur pour sélectionnez de nouveau Kg.
• Pour revenir au mode de comptage de pièces, en utilisant le même échantillon de référence, appuyez à nouveau sur la touche .
• Si vous voulez changer l’échantillon de référence, répétez les étapes ci-dessus.

FRFRMANUEL D’UTILISATION BR95
23
6.3 LIMITES ET ALARME
Vous pouvez définir les limites supérieures et inférieures de l’échantillon placé sur la plateforme
L’affichage indiquera s’il est en dessous de la limite inférieure Lo, au-dessus de la limite supérieure Hi ou dans la zone comprise entre les deux
limites Ok. Vous pouvez également configurer le moment où vous souhaiter que l’alarme sonne et si la stabilité est nécessaire pour cela. Toute
la procédure est décrite dans la section UF-2.Si vous avez défini des limites en mode de pesage normal et que vous voulez utiliser les limites
en mode de comptage de pièces, vous devrez définir les nouvelles limites pour ce mode, lorsque vous revenez en mode poids, les limites que
vous aviez précédemment seront restaurées. Il en va de même dans le cas contraire.
6.4 PLAGE UNITAIRE/ MULTI-PLAGES / MULTI-INTERVALLES
L’affichage peut être configuré avec une seule plage, c’est-à-dire un poids maximal et une valeur d’échelon. Que ce soit en multi-plages ou en
multi-intervalles, il y a un poids maximal dans ces cas et deux échalons.
De 0 à la moitié de ce poids maximal, la valeur d’échelon sélectionnée est utilisée (échelon 1) et de la moitié jusqu’au poids maximal, la
valeur d’échelon suivante est utilisée (échelon 2).
La plage dans laquelle vous vous trouvez est signalée à tout moment par les indicateurs d’écran R1 et R2.
Dans le mode multi-intervalles, à mesure que le poids dans la plage 1 augmente, on utilise l’échelon 1, en passant à la plage 2 l’échelon 2 est utilisé.
En diminuant le poids et en revenant à la plage 1, l’échelon 1 est de nouveau utilisé. Dans le cas contraire, en mode multi-intervalles, en
diminuant le poids et en revenant à la plage 1, l’échelon 2 reste utilisé jusqu’à ce que l’on arrive à 0.
Dans la section LF2 de paramètres techniques, vous pourrez sélectionner le mode de plage.
7. PARAMÈTRES
PARAMÈTRES DESCRIPTION
UF-1 Compte interne (A/D)
UF-2 Configuration des limites de poids (supérieure ou inférieure)
UF-3 Auto-déconnexion automatique
UF-4 Configuration de l’éclairage de l’écran
UF-5 Fonction HOLD
UF-6 Sortie de données RS-232 (PC / PRINT)
UF-7 Configuration de la vitesse convertisseur (A/D)
UF-8 Moyenne du zéro
UF-9 Configuration de la gravité
8. CONFIGURATION PARAMÈTRES
8.1 COMPTE INTERNE (A/D)
8.2 CONFIGURATION DES LIMITES DE POIDS (SUPÉRIEURE OU INFÉRIEURE)
8.3 AUTO-DÉCONNEXION AUTOMATIQUE
8.4 CONFIGURATION DE L’ÉCLAIRAGE DE L’ÉCRAN
8.5 FONCTION HOLD
8.6 SORTIE DE DONNÉES RS-232 (PC / PRINT)
8.7 CONFIGURATION DE LA VITESSE DU CONVERTISSEUR (A/D)
8.8 MOYENNE DU ZÉRO
8.9 CONFIGURATION DE LA GRAVITÉ
8.10 CONFIGURATION DE LE FILTRE DE PESAGE
8.11 CONFIGURATION DE LE FILTRE DE STABILITÉ
8.12 CONFIGURATION DU ZÉRO INITIAL
Pour accéder à la configuration des paramètres, appuyer en même temps sur les touches et .
Appuyer sur la touche ou pour sélectionner le paramètre choisi (UF-1 ~ UF-11 ), appuyez sur la touche pour
confirmer les modifications. Pour retourner à la mode precedent appuyez sur la touche .

FRFRMANUEL D’UTILISATION BR95
24
8.1 COMPTE INTERNE (A/D) | UF-1
1. Appuyer sur la touche l’écran affichera la valeur interne.
2. Pour passer au paramètre suivant appuyer sur la touche et l’écran affichera le voltaje de la batterie..
3. Pour sortir et revenir au mode normal de pesage, appuyer sur la touche .
8.2 CONFIGURATION DU LIMITES DE POIDS (SUPÉRIEURE OU INFÉRIEURE) | UF-2
1. Appuyer sur la touche pour accéder au paramètre.
2. L’écran affichera le message “000.00L” (Limite inférieure)
3. Utiliser les touches and pour déplacer le curseur et la touche pour sélectionner le nombre voulu.
4. Appuyer sur la touche pour confirmer.
5. L’écran affichera “000.00h” (Limite supérieure= Hi)
6. Utiliser les touches et pour déplacer le curseur et la touche pour sélectionner le nombre voulu.
Remarque : Vous pouvez vous placer sur le dernier chiffre pour le modifier si besoin.
7. Appuyer sur la touche pour confirmer.
8. L’écran affichera la valeur
A B C
0 0 0
(paramètres d’alarme)
DISPLAY VALOR ESTABILIDAD
A 0 la stabilité n’est pas nécessaire pour que l’alarme sonne
1 la stabilité est nécessaire pour que l’alarme sonne
B 0 toujours 0
C 0 alarme éteinte
1 l’alarme sonne s’il se situe dans la
bande Ok (entre limites Lo et Hi)LOLO OKOK HIHI
2 l’alarme sonne s’il se situe sous la limite inférieure Lo ou
au-dessus de la limite supérieure Hi LOLO OKOK HIHI
9. Utiliser les touches et pour déplacer le curseur et la touche pour sélectionner le nombre voulu.
10. Appuyer sur la touche pour confirmer.
8.3 AUTO-DÉCONNEXION AUTOMATI QUE | UF-3
MODES:
• AoFF 00 – Auto-déconnexion désactivée.
• AoFF 01 – Auto-déconnexion activée, la balance s’éteindra automatiquement après une minute sans utilisation.
• Vous pouvez configurer la valeur que vous souhaitez de 1 à 99 minutes.
1. Appuyer sur la touche pour accéder au paramètre.
2. Utiliser les touches et pour déplacer le curseur et la touche pour sélectionner le mode voulu.
3. Appuyer sur la touche pour confirmer.
8.4 CONFIGURATION DU RÉTRO-ÉCLAIRAGE DE L’ÉCRAN| UF-4
MODES:
• A: Automatique.
• ON: Éclairage actif.
• OFF: Éclairage inactif.

FRFRMANUEL D’UTILISATION BR95
25
1. Appuyer sur la touche pour accéder au paramètre.
2. Appuyer sur la touche ppour sélectionner le mode voulu.
3. Appuyer sur la touche pour confirmer.
8.5 FONCTION HOLD | UF-5
(une fois l’objet retiré du plateau, l’écran continue d’afficher le poids pendant quelques secondes, fonction très utile pour le pesage d’animaux)
1. Appuyer sur la touche pour accéder au paramètre.
2. Appuyer sur la touche pour sélectionner le mode voulu.
3. Appuyer sur la touche pour confirmer.
MODES:
• HOLD 0 : Désactivé.
• HOLD 1 : animaux dans mouvement
• HOLD 2 : Valeur de pic
• HOLD 3 : Hold stable
• HOLD 4 : Hold stable avec auto annulation à zéro
HOLD 1.
• Une fois que vous avez accédé à ce paramètre, l’écran affiche PCt,
• Utiliser les touches et pour déplacer le curseur et la touche pour sélectionner la valeur de la plage de Hold souhaitée
de 001 à 100.Appuyer sur la touche pour accéder au paramètre
• L’écran affiche time 8, uUtiliser les touches et pour déplacer le curseur et la touche pour sélectionner le
• nombre de répétitions souhaité pendant la place de hold.
• Appuyer sur la touche pour confirmer. Exemple : PCt petit et time grand implique plus de précision et un temps de
stabilisation plus long
8.6 SORTIE DE DONNÉES RS-232|UF-6 ( SANS FUNCTION )
8.7 CONFIGURATION DE LA VITESSE DU CONVERTISSEUR||UF-7
1. Appuyer sur la touche pour accéder au paramètre.
2. Appuyer sur la touche ppour sélectionner le mode voulu.
• Mode 1 : Normal
• Mode 2: Rapide
• Mode 3: Lent
3. Appuyer sur la touche pour confirmer.

FRFRMANUEL D’UTILISATION BR95
26
8.8 MOYENNE DU ZÉRO||UF-8
L’écran affiche 0 jusqu’à ce qu’il parvienne à la division sélectionnée suivante En commençant à afficher les valeurs de cette division.
Ejemplo:
balance avec e=2g
Aveugle dans 5 divisions
Affichera 0 jusqu’à parvenir à 2x5=10g, la première valeur qu’il affichera sera 12g.
1. Appuyer sur la touche pour accéder au paramètre.
2. Appuyer sur la touche ppour sélectionner le mode voulu.
3. Appuyer sur la touche pour confirmer.
8.9 CONFIGURATION DE LA GRAVITÉ|UF-9
1. Appuyer sur la touche pour visualiser la valeur actuelle de la gravité.
2. Pour changer la valeur, appuyer sur la touche , puis utiliser les touches et pour déplacer le curseur et la
touche pour sélectionner le nombre voulu.
3. Appuyer sur la touche pour confirmer.
9. CONFIGURATION DE RÉAJUSTEMENTS DE CALIBRAGE
1. Dans le mode normal de pesage, appuyer sur les touches et , l’écran affichera le message ECF – 1.
2. Appuyer sur les touches ou pour sélectionner la fonction voulue: ECF-1, ECF-2 o ECF-3
* ECF-1 CALIBRAGE DU ZÉRO+POIDS
Appuyer sur la touche , l’écran affichera CALZ.
Appuyer sur la touche , pour mettre à zéro l’écran.
Appuyer sur les touches y pour déplacer le curseur.
Appuyer sur la touche et introduire la valeur du poids de calibrage.
Placer le poids de calibrage sur la plateforme et appuyer sur la touche pour effectuer le calibrage.
* ECF-2 CALIBRACIÓN DE CERO
Appuyer sur la touche , l’écran affichera CALZ.
Appuyer sur la touche , pour effectuer le calibrage.

FRFRMANUEL D’UTILISATION BR95
27
* ECF-3 CALIBRACIÓN DE PESO (SPAN)
Appuyer sur la touche , el display mostrará el valor del peso de calibración
Appuyer sur la touche y para mover el cursor.
Appuyer sur la touche para modificar el valor de la pesa de calibración.
Appuyer sur la touche para confirmar.
Placer le poids de calibrage sur la plateforme et appuyer sur la touche pour effectuer le calibrage.
10. PARAMÈTRES TECHNIQUES
NE MODIFIEZ PAS LES PARAMÈTRES TECHNIQUES SI CE N’EST PAS STRICTEMENT NÉCESSAIRE. UNE MAUVAISE
CONFIGURATION DE CETTE SECTION PEUT ENTRAINER UN DYSFONCTIONNEMENT DE LA BALANCE.
ENTRÉE ET SORTIE
DISPLAY description
Avec l’indicateur éteint, accéder au mode de configuration des paramètres, appuyer sur la touche
l’écran affichera 100911, relâchez la touche . Vous nous demanderez l’introduction de code PIN.
C’est 00020.
Appuyez sur la touche pour commencer ou la touche pour sortie du menu et le indicateur
redémarre automatiquement.
LF 1
MENU DE CALIBRATION DE POIDS LF 1
DISPLAY description
Le calibrage peut être effectué avec n’importe quel poids, mais le poids ne doit pas être inférieur à 1/3
de la capacité maximale et celle-ci ne doit jamais être dépassée.
•Appuyez sur la touche pour commencer le calibrage de zéro (appuyez sur pour quitter le
calibrage et revenir au menu LF1)
LF 1
CAL Z
150.00 kg •Utilisez , et , 0 ~ 9 et puis pour introduire le poids avec lequel se fera le
calibrage. (Presione para salir de la calibración y volver al menú LF1)
150.00 kg •Placez le poids requis sur la balance tel qu’indiqué par l’affichage.
150.00 kg •Une fois stable, appuyez sur pour la calibrer. (Appuyez sur ESC pour quitter le calibrage et
revenir au menu LF1).
LE CALIBRAGE SE FINIRA ET LA BALANCE REVIENDRA EN MODE DE PESAGE AUTOMATIQUE.

FRFRMANUEL D’UTILISATION BR95
28
MENU DE CONFIGURATION DE PARAMÈTRES LF 2
DISPLAY DESCRIPTION
• AFFICHAGE des comptes internes de l’équipement.
262144
• CE MENU, DOIT ÊTRE CHANGÉ SEULEMENT POUR DES CONFIGURATIONS SPÉCIALES
A: Système métrique 0:Aucun 1: kg 2:T 3:g
100001
B: Système Américain 0:Aucun 1: lb 2:lb oz
C: Autres Unités 0:Aucun 1: TW kg 2:HK kg 3:VISS
D: Pièces 0:OFF 1: ON
A B C D E F E: Double rango 0:OFF 1: multi interval 2 : multirang
F: Unité de calibration 1: Européenne 2 : Américaine
lb oz ne peuvent ne pas être sélectionnés comme unité de calibrage.
La balance ne vous laissera pas passer à l’étape suivante s’il ya une erreur lors de la programmation.
•Utiliser , et , 0 ~ 9 et après pour sélectionner la capacité maximale de
l’équipement, en considérant les décimaux.
000000kg
•Utiliser , pour sélectionner le point décimal.
dP 0.0
d 0.00 d 0.000 d 0.0000 0.00000
• APPUYEZ SUR pour sélectionner la DIVISION:
diV 01, diV 02, diV 05, diV10, diV 20, diV 50
diV 01
Après avoir saisi les paramètres LF2, l’écran affichera la dernière configuration enregistrée. Toutes
les étapes doivent être complétées, dans le cas contraire l’affichage continuera avec la configuration précédente.
Passez au calibrage du poids après LF2.
PROCÉDURE:
LF 2 •Appuyez sur pour commencer et la valeur interne s’affichera. Appuyez sur pour quitter le
menu et la balance redémarrera automatiquement.
262144 •Presione pour poursuivre la configuration. (appuyez sur pour quitter la configuration
et revenir au menu LF2).
100001 • Utilisez , y , 0 ~ 9 et puis pour sélectionner les UNITÉS DE PESAGE.
(appuyez sur pour quitter le calibrage et revenir au menu LF2)
000000kg • Utilisez , y , 0 ~ 9 et puis pour sélectioner, en considérant les déci-
maux. (appuyez surz sur pour quitter le calibrage et revenir au menu LF2)

FRFRMANUEL D’UTILISATION BR95
29
d 0.0kg • Utilisez , et puis pour sélectionner le POIDS MAXIMAL. (appuyez sur pou-
rquitter le calibrage et revenir au menu LF2).
div 01 • Utilisez y después pour changer d’échelon (appuyez sur pour quitter la configu-
ration et revenir au menu LF2).
LF2 • Utilisez , et pour continuer avec d’autres configurations ou appuyez sur
pour quitter le menu et la balance redémarrera automatiquement).
CALIBRAGE LINÉAIRE LF 3
Jusqu’à 6 étapes de calibrage W0 ~W6
Assurez-vous que le plateau de la balance est vide avant de commencer le calibrage.
Appuyez sur pour le premier point de calibrage.
Les points de calibrage précédents seront effacés et l’écran affichera CLEAR.
Appuyez sur pour passer au point de calibrage suivant.
Appuyez sur pour revenir au point de calibrage précédent.
Appuyez sur pour enregistrer.
Appuyez sur pour quitter le calibrage et revenir au menu LF3.
DISPLAY DESCRIPTION
LF3 •Appuyez sur commencer ou pour quitter le menu et la balance redémarrera automati-
quement.
W0 •Appuyez sur pour calibrer le zéro.
(presione pour quitter le calibrage et revenir au menu LF3)
W1 •Placez 1/3 du poids maximal sur le plateau et appuyez sur pour calibrer 1/3 de la capacité.
(appuyez sur pour quitter le calibrage et revenir au menu LF3)
W2 •Placez 2/3 du poids maximal sur le plateau et appuyez sur pour calibrer 2/3 de la capacité.
(appuyez sur pour quitter le calibrage et revenir au menu LF3)
W3 •Placez le poids maximal sur le plateau et appuyez sur our calibrer la pleine capacité. (appuyez
sur pour quitter le calibrage et revenir au menu LF3)
W4 •Appuyez sur para completar la calibración lineal. (presione pour quitter le calibrage
et revenir au menu LF3)

FRFRMANUEL D’UTILISATION BR95
30
LF3 •Utilisez , et puis pour continuer avec d’autres réglages ou appuyez sur pour
quitter le menu et la balance redémarrera automatiquement.
VITESSE DU CONVERTISSEUR AD LF 4
SPEED 1 vitesse standard 15Hz.
SPEED 2 rapide vitesse 30Hz.
SPEED 3 vitesse standard 7.5Hz
*Cette fonction est bloquée lorsque UF-5 se situe en mode HOLD 1.
*La valeur d’usine est 1
DISPLAY DESCRIPTION
LF4 •Appuyez sur commencer ou pour quitter le menu et la balance redémarrera automati-
quement.
SPEED 1 • Utilisez et puis pour sélectionner le nombre de divisions s’afficheront à zéro. (appuyez
sur ESC pour quitter la configuration et revenir au menu LF4)
LF 4 • Utilisez , et puis pour continuer avec d’autres réglages ou appuyez sur ESC pour
quitter le menu et la balance redémarrera automatiquement.
MOYENNE DU ZÉRO LF 5
DISPLAY DESCRIPTION
ZP 0 OFF
ZP 1 Une division ne sera pas affichée en étant à zéro
ZP 2 Deux divisions ne seront pas affichées en étant à zéro
ZP 3 Trois divisions ne seront pas affichées en étant à zéro
ZP 4 Quatre divisions ne seront pas affichées en étant à zéro
ZP 5 Cinq divisions ne seront pas affichées en étant à zéro
*Cette fonction est bloquée lorsque UF-5 se situe en mode HOLD 1
*La valeur d’usine est ZP 0
LF 5
DISPLAY DESCRIPTION
•Appuyez paour commencer ou pour quitter le menu et la balance redémarrera automa-
tiquement.
LF 5
ZP 0 • Utilisez et puis pour sélectionner le nombre de divisions s’afficheront à zéro. (appuyez
sur ESC pour quitter la configuration et revenir au menu LF5)

FRFRMANUEL D’UTILISATION BR95
31
LF 5 • Utilisez , et puis pour continuer avec d’autres réglages ou appuyez sur ESC pour
quitter le menu et la balance redémarrera automatiquement.
CONFORMITÉ D’APPROBATION LF 6
DISPLAY DESCRIPTION
nonE Version non approuvée
NE MODIFIEZ CE PARAMÈTRE EN AUCUN CAS, IL DOIT TOUJOURS ÊTRE
RÉGLÉ SUR NONE.
Le changement de ce paramètre implique le blocage de certaines fonctionnalités.
LF 6
!
GRAVEDAD LF 7
*Introduisez la gravité de votre zone avant de réaliser le premier calibrage.
*Introduisez la gravité du lieu de destination après avoir réalisé le premier calibrage.
*La valeur de gravité sera rejetée si elle est supérieure à 9.83217 (gravité de pôle) ou inférieure à 9.78031 (gravité de l’équateur).
Valeur d’usine : 9.8035
DISPLAY DESCRIPTION
• Appuyez paour commencer ou pour quitter le menu et la balance redémarrera automati-
quement.LF 7
-00- • L’écran affichera le numéro de précalibrage pendant une seconde.
9.8035 • Appuyez sur pour continuer.
9.8035 • Utilisez , et , 0 ~ 9 et puis ppour introduire la valeur de gravité... (ap-
puyez sur ESC pour quitter la configuration et revenir au menu LF 7).
CERO INICIAL LF 8
SEtZ Y réinitialise le point de zéro chaque fois que la balance redémarre
SEtZ n réinitialisation du point zéro OFF
DISPLAY DESCRIPCIÓN y SECUENCIA DE USO
• Appuyez paour commencer ou pour quitter le menu et la balance redémarrera automati-
quement.LF 8

ESESMANUAL DE USUARIO BR95
32
• Utilisez et puis pour sélectionner le nombre de divisions s’afficheront à zéro. (appuyez
sur ESC pour quitter la configuration et revenir au menu LF8)
SetZ Y
LF 8 • Utilisez , et puis pour continuer avec d’autres réglages ou appuyez sur ESC pour
quitter le menu et la balance redémarrera automatiquement.
11. MESSAGES D’ERREUR
MESSAGE DESCRIPTION
Err H Le zéro initial est trop élevé (plus de 10% de la capacité maximale).
Z Err Le zéro initial est trop élevé (plus de 10% de la capacité maximale).
Err 1 Le zéro initial est trop élevé (modèle approuvé)
Err L Le zéro initial est trop faible (moins de 10% de la capacité maximale).
Err 2 Le zéro initial est trop faible (modèle approuvé).
Err N Le poids n’est pas stable.
E4 Le code interne n’est pas stable.
OL Surcharge
O Err Surcharge
hhhhhh Surcharge, la capacité maximale de la balance a été dépassée + 9d.
E3 Correction de linéarité incorrecte ou annulation de la correction de linéarité.
LLLLLL Le poids est trop faible.
E5 Le code interne est trop bas.

FRFRMANUEL D’UTILISATION BR95
33
Err4 E2ROM anormal
------ Dépasse le prix total de 99999.
B Err Le volume de la batterie est trop faible.
Err 10 Échec de l’étalonnage, vérifier la cellule de charge.
12. GARANTIE
Cette balance est garantie contre tout défaut de fabrication et de materiel, pour une période de 1 an à partir de la date de la livraison
Pendant cette période, GIROPÈS, se chargera de la réparation de la balance.
Cette garantie n’inclut pas les dommages causés par une mauvaise manipulation ou surcharge.
La garantie ne couvre pas les frais de transport de retour nécessaire pour réparer la balance.

ENENUSER’S MANUAL BR95
34
1. EXCITATION
BR95
Input 230~240V
Output 9V 500mA
Rechargeable Battery 6V/1,2Ah
2. BEFORE ITS USE
1. Use an independent electric source to prevent electronic disturbances.
2. Don’t place any object on the platform when switching on the indicator.
3. Please, warm-up the scale during 2-3 minutes before using it.
4. Avoid sudden changes in temperature and draughts.
5. Don’t overload the scale; do not exceed its maximum capacity.
3. CONSUMPTION
BR95
Battery life: without back illumination, approx, 160 hours.
With back illumination, approx, 120 hours.
4. LOAD CELL CONNECTION TO THE INDICATOR
The connector of the load cell has 7 pins
• Do not disconnect the connector of the load cell when the indicator is working, because you could damage the equipment.
PIN 1 EXC +
PIN 2 SEN +
PIN 3 SIG +
PIN 4 SIG -
PIN 5 SEN -
PIN 6 EXC -
PIN 7 GND

35
ENENUSER’S MANUAL BR95
5. KEYBOARD DESCRIPTION
First function: Press this key to switch on the scale.
Second function: to place the reading of the display at “0”, the value of the display must be lower to + 2% of
the maximum capacity.
Third function: to subtract the weight of a recipient
Fourth function: to move to the right in the programming mode.
First function: press and hold the key during 3 seconds to switch of the indicator.
First function: to choose the unit of weight.
Second function: to exit from the programming mode.
First fonction: to remove (tare) the weight of a container.
Second fonction: To remove the memory of the accumulations. (long press)
Third fonction; to move to the left.
First fonction: to accumulate in memory the value of the weight that appears in the screen.
Third fonction: to increase the values inside the programming.
First fonction: to view the number of accumulations and the accumulated weight.
Second fonction: manual transmission of data through RS-232 port to a PC or printer.
Third fonction: confirmation key in the programming mode.

ENENUSER’S MANUAL BR95
36
6. BR95 APPLICATIONS
6.1 NORMAL WEIGHING MODE
6.1.1 EQUIPMENT CONFIGURATION
6.1.2 FIRST CALIBRATION
6.1.3 USE
6.2 MODE COMPTEUSE
6.2.1 EQUIPMENT CONFIGURATION
6.2.2 FIRST CALIBRATION
6.2.3 USE
6.3 LIMITS AND ALARM
6.4 UNIT RANGE/ MULTI RANGE/ MULTI INTERVAL
6.1 NORMAL WEIGHING MODE
6.1.1 CONFIGURATION OF THE EQUIPMENT
See section LF2 of the technical parameters
6.1.2 FIRST CALIBRATION
See section LF1 of the technical parameters
6.1.3 USE
Switch on the equipment when all the parameters have been correctly configured and the equipment has been calibrated
• Make sure than the value of the indicator, without load on the platform, is 0. If this is not the case, press .
• Place the weight on the platform and the platform will show the weight.
• The accumulation and sending of data will depend on the mode chosen in the section UF-6
• You can display the accumulated values at any time by pressing (TOTALIZING)
6.2 PIECE COUNTING MODE
6.2.1 CONFIGURATION OF THE EQUIPMENT
See section LF2 of the technical parameters
6.2.2 FIRST CALIBRATION
See section LF1 of the technical parameters
6.2.3 USE
Switch on the equipment when all the parameters have been correctly configured. Make sure that the value on the visor, with no load on the
platform, is 0. If this is not the case press the key .
STEPS TO FOLLOW;
1. Press the key until the symbol PCS appears on the screen
2. Press the key successively to choose the quantity of pieces of the sample. On the screen will appear, successively, C10/C20/
C50/C100/C200.
3. Place the sample on the platform, and wait until the sign of stability and press the key .
4. Place the product on the platform and the screen will show the number of pieces.
The accumulation and the sending of data will depend on the mode chosen in the section UF-6.
• To turn to the normal weighing mode, press the key to select Kg again.
• If the user wants to go back to the piece counting mode, using the same sample of reference, press the key again.
• If the user want to change the sample of reference, the user must repeat the steps described above.

37
ENENUSER’S MANUAL BR95
6.3 LIMITS AND ALARM
The user can configure the superior and inferior limits of the sample placed on the platform.
The display will show if the sample is lower to the inferior limit Lo, above the superior limit Hi or in the zone between the two limits OK
The user can configure when he wants to make the alarm ring and the stability needed to make it happen.
All the procedure is described in the section UF-2.
If the user wants to define the limits in the normal weighing mode and wants to use the limits in piece counting mode, he must define the new
limits for this mode, when it changes to weight mode again, the user will recover the limits he already has. The same happens otherwise.
6.4 UNIT RANGE / MULTI-RANGE / MULTI-INTERVAL
The indicator can be configured with an only range, a maximum weight and a value of step. It can also be configured as multi range or multi interval,
in such cases there is a maximum weight and two steps.
From 0 to the medium weight of these maximum weight it is used the value of the chosen step ( step 1) and from the half to the maximum weight
it is used the next value in the step ( step 2).
The screen indicators R1 and R2 point out the range which the user is using at every moment.
In the multi interval mode the weight increases, in the range use it used step 1, when the user goes to range 2 the step 2 is used.
When the weight decreases and the user go back to range 1, the step 1 is used again. On the contrary, in mode multi range, when the weight
decreases and the device go back to range 1, the device continues using step 2 until it reaches 0.
In the section LF2 of the technical parameters the user can choose the range mode.
7. PARAMETERS
PARAMETER DESCRIPTION
UF-1 Internal calculation (A/D)
UF-2 Limit Configuration of weight ( superior and inferior)
UF-3 auto auto off
UF-4 Back illumination of display
UF-5 Four modes of hold
UF-6 RS-232 Output ( PC/PRINT)
UF-7 Configuration of the speed of the converter (A/D)
UF-8 blind
UF-9 Configuration of gravity
8. PARAMETERS CONFIGURATION
8.1 INTERNAL COUNTING (A/D)
8.2 CONFIGURATION OF THE WEIGHT LIMITS (SUPERIOR AND INFERIOR)
8.3 AUTO SWITCH OFF
8.4 CONFIGURATION OF THE ILLUMINATION OF THE DISPLAY
8.5 HOLD FUNCTION
8.6 RS-232 DATA EXIT
8.7 CONFIGURATION OF THE SPEED OF THE AD CONVERTER
8.8 BLIND
8.9 CONFIGURATION OF THE GRAVITY
8.10 CONFIGURATION OF THE WEIGHING FILTER
8.11 CONFIGURATION OF THE STABILITY FILTER
8.12 CONFIGURATION OF THE INITIAL ZERO
To access the configuration of parameters when the screen is in zero, the user must press at the same time the keys and .
Press the key or o choose the desired character (UF-1 ~ UF-11), for confirm the changes done, press
To go back to the previous mode press the key .

ENENUSER’S MANUAL BR95
38
8.1 INTERNAL COUNTING (A/D) | UF-1
1. Press the key to view the internal sums of the scale.
2. To go to the next parameter, press the key the screen will show the value of the voltage of the battery.
3. To exit this mode and go back to the normal weighing, the user must press the key or .
8.2 CONFIGURATION OF THE LIMITS OF WEIGHT ( SUPERIOR AND INGERIOR) | UF-2
1. Press the key to access the parameter.
2. The display will show the message “ 000.00L” ( inferior limit)
3. Use the keys and to move the cursor and the key to choose the desired number..
4. Press the key to confirm.
5. The display will show the message “000.00h” (Superior limit=Hi)
6. Use the keys and to move the cursor and the key to choose the desired number.
Note: If you need to change or modify the last digit you can place the cursor on it to do it.
7. Press the key to confirm.
8. The display will show the value.
A B C
0 0 0
(configuration of the alarm)
DISPLAY VALUE ESTABILITY
A 0 There is no need to stabilize the alarm to make it ring
1 The alarm must be stabilized to ring
B 0 Always 0
C 0 Alarm switched off
1 The alarm ring if it is place on the band OK
( between the limits Lo and Hi)LOLO OKOK HIHI
2 The alarm rings if it is situated below the
inferior limit Lo or above the superior limit
Hi
LOLO OKOK HIHI
9. Press the keys and to move the cursor and the key to choose the desired number..
10. Press the key to confirm.
8.3 AUTO SWITCH OFF| UF-3
MODES:
• AoFF 00 – Auto switch off deactivated
• AoFF 01 – Auto switch off activated in a minute. The scale is going to switch off automatically after 1 minute of not being used.
• You can configure the value wished from 1 to 99 minutes.
1. Press the key to have an access to the parameter.
2. Press the keys and to move the cursor and the key to choose the desired number.
3. Press the key to confirm.

39
ENENUSER’S MANUAL BR95
8.4 DISPLAY BACKLIGHTING | UF-4
MODES:
• A: Automatic.
• ON: Illumination Activated.
• OFF: Illumination Deactivated.
1. Press the key to have an access to the parameter.
2. Press the key to select the desired mode.
3. Press the key to confirm.
8.5 HOLD FUNCTION | UF-5
(Once the object is retired from the plate, the display maintains the weight fixed during some seconds. This function is very useful for the weighing of
animals)
1. Press the key to access to the parameter.
2. Press the key to choose the desired mode.
3. Press the key to confirm.
MODES:
• HOLD 0 : Deactivated.
• HOLD 1 : Animal in movement
• HOLD 2 : Value of peak
• HOLD 3 : Hold steady
• HOLD 4 : Hold steady with self cancelling at zero.
HOLD 1.
• When the user can access this parameter, the screen shows the message PCt,
• Use the keys and to move the cursor and the key to choose the desired value of the range of HOLD, you can choose
a number from 001 to 100.
• Press the key to confirm.
• It will appear on the screen the message time 8, use the keys and to move the cursor and the key o choose the
number of times you want to repeat during the range of hold.
• Press the key to confirm. Example: PCt small and big time means more accuracy and longer stabilization.
8.6 RS-232 DATA EXIT|UF-6 ( NO FUNCTION )
8.7 CONFIGURATION OF THE SPEED OF THE CONVERTER |UF-7
1. Press the key to access the parameter.
2. Press the key to choose the desired mode:
• Mode 1 : Normal
• Mode 2: Fast
• Mode 3: Slow
3. Press the key to confirm.

ENENUSER’S MANUAL BR95
40
8.8 BLIND|UF-8
It appears 0 on screen until the next division is selected. It starts to show values from that division.
Example:
Scale with e =2g
Blind in 5 divisions
It will show 0 until it reaches 25= 10 g, the first value it will show will be 12g.
1. Press the key to access the parameter.
2. Press the key to select.
3. Press the key to confirm..
8.9 CONFIGURATION OF GRAVITY|UF-9
1. Press the key to view the value of the actual gravity.
2. To change the value, press the key , next you must use the key and to move the cursor and the key to
select the desired number.
3. Press the key to confirm.
9. CONFIGURATION OF THE READJUSTMENTS IN CALIBRATION
1. When the user is in the normal mode of weighing, he must press the keys and , the message ECF-1 is going to appear on
the display.
2. Press the keys or to select the desired function: ECF-1, ECF-2 or ECF-3
* ECF-1 CALIBRATION OF ZERO + WEIGHT
Press the key ,the display will show CALZ.
Press the key ,to put the reading of the display to zero.
Press the keys and to move the cursor.
Press the key to introduce the value of the weight of calibration.
Place the weight of calibration on the platform and press the key to do the calibration once the reading is steady.
* ECF-2 CALIBRATION OF ZERO
Press the key , the display will show CALZ.
Press the key , to calibration.

41
ENENUSER’S MANUAL BR95
* CALIBRATION OF WEIGHT (SPAN)
Press the key , the display will show the value of the weight of calibration.
Press the keys and to move the cursor.
Pulsar la tecla to modify the value of the weight of calibration.
Pulsar la tecla to confirm.
Place the weight of calibration on the platform and press the key to do the calibration once the reading is stable.
10. TECHNICAL PARAMETERS
DO NOT MODIFY THE TECHNICAL PARAMETERS IF IT IS NOT STRICTLY NEEDED. A BAD CONFIGURATION OF THIS SECTION CAN
CAUSE A WRONG FUNCTIONING OF THE SCALE.
ENTRANCE AND EXIT OF THE CALIBRATION
DISPLAY DESCRIPTION AND SEQUENCE OF USE
• With the visor switched off, press and hold the key until the message 100911, appears on the
screen, then you can release the key . It will ask us to enter the PIN code. This is 00020.
• Press the key to start or the key to exit the menu and the indicator will begin again automatically.
LF 1
CALIBRATION OF THE WEIGHT LF 1
DISPLAY DESCRIPTION AND SEQUENCE OF USE
The calibration can be done with any weight, but the weight ca not be inferior to 1/3 of the maximum
capacity and it must also never be exceeded.
•Press the key to start the calibration of zero ( press to exit the calibration and go back
to the menu LF1)
LF 1
CAL Z
150.00 kg •Use , and , 0 ~ 9 and then press to introduce the weight with which the
calibration will be done. ( press the key to exit the calibration and go back to the menu LF1)
150.00 kg •Place the required weight on the scale as it is indicated in the display.
150.00 kg •Once everything is steady, press the key to calibrate it ( press the key ESC to exit the calibration
and go back to the menu LF1).
THE CALIBRATION IS GOING TO FINISH AND THE SCALE WILL GO VACK TO THE WEIGHING MODE AUTOMATICALLY.

ENENUSER’S MANUAL BR95
42
CONFIGURATION LF 2
DISPLAY DESCRIPTION AND SEQUENCE OF USE
FIRST STEP
•DISPLAY OF THE INTERNAL COUNTING
262144
SECOND STEP •POSSIBLE VALUES OF THE PARAMETERS
A: Metric system 0:NO 1: kg 2:T 3:g
100001
B: American system 0:NO 1: lb 2:lb oz
C: other unities 0:NO 1: TW kg 2:HK kg 3:VISS
D: PCS 0:OFF 1: ON
A B C D E F E: double range 0:OFF 1: multi interval 2:multi range
F: units of calibration 1:use metric
unities 2:use american unities
lb oz cannot be selected as unities of calibration.
The scale won’t let us continue up to the next step if there is a mistake during the programming.
THIRD STEP
•Use , and , 0 ~ 9 and then press to introduce THE MAXIMUM CAPACITY,
considering the number of decimal zeros to be used. Ex. 150.00kg = introduce 15000 if then selected
as decimal d0.00
000000kg
FOURTH STEP
•Use the Keys , to change the position of the DECIMAL POINT.
dP 0.0
d 0.00 d 0.000 d 0.0000 0.00000
FIFTH STEP •Use to select the DIVISION: diV 01, diV 02, diV 05, diV10, diV 20, diV 50
diV 01
After introducing the parameters LF2, the indicator will show the last configuration saved. All the
steps to follow must be completed, if they are not done the indicator will continue with the previous
configuration.
Proceed with the calibration of weight after LF2.
PROCESS
LF 2 •Press the key to start and display the internal value. Press to exit the menu and the
scale will automatically restart.
262144 •Press the key To continue with the configuration. (press the key to exit from the confi-
guration and go back to the menu LF2).
100001 •Use the keys , and , 0 ~ 9 and then press the key to choose the UNITS
OF WEIGHT . (press the key to exit from the configuration and go back to the menu LF2).
000000kg •Use the keys , and , 0 ~ 9 and then press the key to choose the MAXI-
MUM WEIGHT, considering the number of decimal zeros to be used. ( Press the key to exit from
the configuration and go back to the menu LF2).
d 0.0kg •Use the keys , and Then To move the decimal point ( press the key To exit
from the configuration and go back to the menu LF2).

43
ENENUSER’S MANUAL BR95
div 01 •Use and then to change the step. (Press the key To exit from the configuration
and go back to the menu LF2).
LF2 •Use , and then To continue with the other configuration or press the key
to exit from the menu and the scale will begin again automatically).
LINEAL CALIBRATION LF 3
Up to six steps of calibration W0 ~W6
Make sure that the plate of the scale is empty before starting the calibration.
Press the key for the first point of calibration.
The previous points of calibration will be removed and the message CLEAR is going to appear on the screen.
Press the key to proceed with the next point of calibration.
Press the key to go back to the previous point of calibration.
Press the key to keep everything.
Press the key to finish the calibration and go back to the menu LF3.
DISPLAY DESCRIPTION AND SEQUENCE OF USE
LF3 •Press the Key to start or the key To exit the menu and the scale will start again auto-
matically
W0 •Press the Key to calibrate the zero.
( press the key to exit from the calibration and go back to the menu LF3)
W1 • Place 1/3 of the maximum weight on the plate and press to calibrate 2/3 th the capacity.
(press the key to exit from the calibration and go back to the menu LF3)
W2 •Place 2/3 of the maximum weight on the plate and press to calibrate 2/3 th the capacity.
(press the key to exit from the calibration and go back to the menu LF3)
W3 •Place the maximum weight on the plate and press the key to calibrate the full capacity. (press
the key to exit from the calibration and go back to the menu LF3)
W4 •Press the key to complete the lineal calibration. (press the key to exit from the calibra-
tion and go back to the menu LF3)
LF3 •Use the keys , and then the key to continue with other adjustments and press
the key to exit from the menu and the scale will begin again automatically.

ENENUSER’S MANUAL BR95
44
SPEED OF THE AD CONVERTER LF 4
SPEED 1 standard speed 15Hz.
SPEED 2 high speed 30Hz.
SPEED 3 low speed 7.5Hz
*This function stays blocked when UF-5 is in mode HOLD 1.
*The value of factory is 1
DISPLAY DESCRIPTION AND SEQUENCE OF USE
LF4 •Press the key to start or the key to exit from the menu and the scale is going to begin
again automatically.
SPEED 1 •Use the key and then the key to select the speed of the AD converter ( press the key
to exit from the configuration and go back to the menu LF4)
LF 4 •Use the keys , and then to continue with the other adjustment and press the key
to exit from the menu and the scale will start again automatically.
BLINF LF 5
DISPLAY DESCRIPTION AND SEQUENCE OF USE
ZP 0 OFF
ZP 1 One division will not show being at zero
ZP 2 Two division will not show being at zero
ZP 3 Three divisions will not show being at zero
ZP 4 Four divisions will not show being at zero
ZP 5 Five divisions will not show being at zero
*This function is going to be blocked when UF-5 is in mode HOLD 1
*The value of factory is ZP 0
LF 5
DISPLAY DESCRIPTION AND SEQUENCE OF USE
• Press the key to start or the key to exit from the menu and the scale will start again
automatically.
LF 5
ZP 0 • Use the key and the key to select how many divisions will show when in zero ( press
ESC to exit from the configuration and go back to the menu LF4)
LF 5 • Use the keys , and then the key to continue with other adjustment or press the
key to exit from the menu and the scale is going to start automatically.

45
ENENUSER’S MANUAL BR95
APPROVAL CONFIRMITY LF 6
DISPLAY DESCRIPTION AND SEQUENCE OF USE
nonE Version not approved
DON’T MODIFY, IN NO WAY, THIS PARAMETER. IT MUST ALWAYS BE CONFIGURED AT
nonE.
The change of this parameter implies the blocking of some functionalities.
LF 6
!
GRAVITY LF 7
*Introduce the gravity of your zone before doing the first calibration.
*Introduce the gravity of destination after doing the calibration.
*The value of the gravity will be denied if it is bigger than 9.83217 ( gravity of the pole) or inferior to 9.78031 ( gravity of the
equator).
Value of factory: 9.8035
DISPLAY DESCRIPTION AND SEQUENCE OF USE
• Press the key to continue or the key to exit from the menu and the scale will start
again automatically.LF 7
-00- • The screen is going to show the number of pre-calibration during one second.
9.8035 • Press the key to continue.
9.8035 • Use the keys , and , 0 ~ 9 and then the key to introduce the value of
gravity ( press ESC to exit from the configuration and go back to the menu LF7)
INITIAL ZERO LF 8
SEtZ Y resets of the point of zero every time that the scale is begun again.
SEtZ n resets of the point zero OFF
DISPLAY DESCRIPTION AND SEQUENCE OF USE
• Press the key to start or the key to exit from the menu and the scale will start again
automatically.LF 8
• Use the key and then the key to choose the mode of zero initial ( press the key …to
exit from the configuration and go back to the menu LF8)
SetZ Y
LF 8 • Use the keys , and then the key to continue with other adjustments o press the
key to exit from the menu and the scale will start again automatically.

ENENUSER’S MANUAL BR95
46
11. ERROR MESSAGES
MESSAGE DESCRIPTION
Err H lnitial zero too high (over 10% of max. cap).
Z Err lnitial zero too high (over 10% of max. cap).
Err 1 Initial zero too high (approved model).
Err L Initial zero too low (less than 10% of max. cap).
Err 2 Initial zero too low (approved model).
Err N Unstable internal value.
E4 Internal code is not stable.
OL Overloading
O Err Overloading
hhhhhh Overloading
E3 Linearity correcting not well or linearity correcting cancel.
LLLLLL Weight is too low.
E5 Internal code is too low.
Err4 E2ROM abnormal.
------ Total price is more than 999999.
B Err Battery volume is too low.
Err 10 Calibration failure, check the loadcell.

BR95
12. GUARANTEE
This scale has a warranty against all manufacture and material defects, for a period of a year starting with the delivery date.
During this period, GIROPES, will be in charge of the repairing of the scale.
This warranty does not include the damages done by overload or wrong use.
The warranty does not cover the delivery expenses necessary for the repair of the scale.

BR95


BR95

BR95

marca propiedad de | est une marque de | trade mark propiety of:
Pol. Empordà Internacional- Calle Molló, 3
17469 VILAMALLA - (Girona) SPAIN
T. (34) 972 527 212
-
 1
1
-
 2
2
-
 3
3
-
 4
4
-
 5
5
-
 6
6
-
 7
7
-
 8
8
-
 9
9
-
 10
10
-
 11
11
-
 12
12
-
 13
13
-
 14
14
-
 15
15
-
 16
16
-
 17
17
-
 18
18
-
 19
19
-
 20
20
-
 21
21
-
 22
22
-
 23
23
-
 24
24
-
 25
25
-
 26
26
-
 27
27
-
 28
28
-
 29
29
-
 30
30
-
 31
31
-
 32
32
-
 33
33
-
 34
34
-
 35
35
-
 36
36
-
 37
37
-
 38
38
-
 39
39
-
 40
40
-
 41
41
-
 42
42
-
 43
43
-
 44
44
-
 45
45
-
 46
46
-
 47
47
-
 48
48
-
 49
49
-
 50
50
-
 51
51
-
 52
52


Baxtran TMH Manual de usuario
- Categoría
- Escalas personales
- Tipo
- Manual de usuario
En otros idiomas
- français: Baxtran TMH Manuel utilisateur
- English: Baxtran TMH User manual