Optelec Clearview+ El manual del propietario
- Tipo
- El manual del propietario

ClearView+
Advanced Features and Functions
Erweiterte Ausstattungsmerkmale und Funktionen
Fonctionnalités et fonctions avancées
Geavanceerde eigenschappen en functies
Funzioni Avanzate
Características y funciones avanzad
~
Optelec

Optelec ClearView+
2
ClearView+
Advanced Features and Functions .................................. 9
1. Introduction ........................................................... 10
About this manual .................................................... 11
2. Unpacking, Installation and Setup ....................... 12
3. Operation ............................................................... 14
Operation – Switching ON / OFF ............................. 14
Adjusting the magnification ..................................... 14
Choosing viewing modes ........................................ 15
Auto-focus lock ........................................................ 15
Object lighting ON /OFF .......................................... 16
Adjusting image control ........................................... 16
Adjusting the brightness .......................................... 16
Displaying system information on-screen ................ 16
Locking the reading table ........................................ 17
Using the footswitch ................................................ 17
4. Feature Packs ........................................................ 18
4.1 Feature Pack Basic ............................................... 18
Semi-colors ............................................................. 18
Find function (position locator) ................................ 19
Pointer (position locator) ......................................... 19
4.2 Feature Pack Advanced ........................................ 20
Switching between the ClearView+ and a computer /
external source image ............................................. 20
Activating line markers / window shades ................. 21
Sizing the lines markers / window shades ............... 21
Positioning lines markers / window shades ............. 21
Horizontal / vertical button ....................................... 21
5. Adjusting the Monitor ........................................... 22
6. Troubleshooting .................................................... 23
7. Contacting Product Support ................................ 24

Optelec ClearView+
3
ClearView+
Erweiterte Ausstattungsmerkmale und Funktionen ..... 25
1. Einleitung ............................................................... 26
Über dieses Handbuch ............................................ 27
2. Auspacken, Aufbau und Inbetriebnahme ............ 28
3. Bedienung .............................................................. 30
Ein- und Ausschalten .............................................. 30
Wahl des Ansichtsmodus ........................................ 30
Einstellung der Vergrößerung.................................. 31
Ausschalten des Autofokus ..................................... 31
Ein- und Ausschalten der Objektbeleuchtung ......... 32
Einstellen der Bildkontrolle ...................................... 32
Anpassung der Helligkeit ......................................... 32
Anzeige der Systeminformationen auf dem Bildschirm
................................................................................ 33
Feststellen des Lesetisches .................................... 33
Nutzen des Fußschalters ........................................ 33
4. Erweiterungssatz ................................................... 34
4.1 Basis-Erweiterungssatz ........................................ 34
Lesefarben .............................................................. 34
Übersichtsmodus (Positionsanzeiger) ..................... 35
Lichtzeiger (Positionsanzeiger) ............................... 35
4.2 Komfort-Erweiterungssatz ................................... 35
Umschalten zwischen integrierter Kamera und
PC/externer Quelle .................................................. 36
Einschalten von Leselinien und Bildabdeckungen... 37
Platzierung von Leselinien/Bildabdeckungen .......... 37
Abstand der Linien und Bildabdeckungen ............... 37
Horizontal/Vertikal-Taste ......................................... 37
5. Einstellung des Monitors ...................................... 38
6. Problembehandlung .............................................. 39
7. Kontakt/Beratung .................................................. 40

Optelec ClearView+
4
ClearView+
Fonctionnalités et fonctions avancées .......................... 41
1. Introduction ........................................................... 42
À propos du manuel ................................................ 43
2. Déballage, installation et réglage ......................... 44
3. Fonctionnement .................................................... 46
Interrupteur On / Off ................................................ 46
Sélection du mode de visualisation ......................... 46
Réglage du grossissement ...................................... 47
Verrouillage de la fonction mise au point automatique
................................................................................ 47
Éclairage On / Off .................................................... 48
Réglage de l’affichage des images .......................... 48
Réglage de la luminosité ......................................... 48
Affichage des renseignements du système à l’écran
................................................................................ 48
Verrouillage du plateau de lecture ........................... 49
Utilisation de la pédale ............................................ 49
4. Les modules de fonctions .................................... 50
4.1 Module de fonctions de base ............................... 50
Combinaisons de couleur ........................................ 50
Fonction rechercher (indicateur de position) ........... 51
Indicateur de position .............................................. 51
4.2 Module de fonctions avancées ............................ 51
Basculement entre la caméra interne, la source
externe et l’ordinateur .............................................. 52
Activation des lignes et des caches ......................... 52
Positionnement des lignes et des caches ............... 53
Dimension des ligne et des caches ......................... 53
Le bouton horizontal / vertical.................................. 53
5. Réglage du moniteur ............................................. 54
6. Dépannage ............................................................. 55
7. Coordonnées et soutien ....................................... 56

Optelec ClearView+
5
ClearView+
Geavanceerde eigenschappen en functies ................... 57
1. Introductie .............................................................. 58
Over deze handleiding ............................................ 59
2. Uitpakken en installatie ........................................ 60
3. Gebruik ................................................................... 62
Aan / uit schakelaar ................................................. 62
Verschillende leesstanden instellen ........................ 62
Vergroting regelen ................................................... 63
Focus toets/Autofocus blokkering ............................ 63
Objectverlichting aan/uit .......................................... 64
Beeldkwaliteit/contrast aanpassen .......................... 64
Helderheid aanpassen ............................................ 64
Systeeminformatie in beeld zetten .......................... 65
Blokkeren van de beweegbare leestafel .................. 65
Gebruik maken van een voetschakelaar ................. 65
4. Pluspakketten ........................................................ 66
4.1 Pluspakket – Basis ................................................ 66
Verschillende voor- en achtergrond kleuren ............ 66
instellen ................................................................... 66
Zoekfunctie (positie bepalen op het beeldscherm) .. 67
Pointer (positie bepalen op het beeldscherm) ......... 67
4.2 Pluspakket - Uitgebreid ........................................ 67
Schakelen tussen camerabeeld en het PC
beeld/externe bron .................................................. 68
Activeren van lijnen en beeldafdekking ................... 68
Positioneren van lijnen en beeldafdekking .............. 69
Positie aanpassen van lijnen en beeldafdekking ..... 69
Horizontaal / verticaal aanpassen van ..................... 69
leesondersteuning ................................................... 69
5. Het verstellen van de monitor .............................. 70
6. Problemen oplossen ............................................. 71
7. Contact en service ................................................ 72

Optelec ClearView+
6
ClearView+
Funzioni Avanzate ........................................................... 73
1. Introduzione ........................................................... 74
A proposito di questo manuale ................................ 75
2. Apertura della confezione, installazione e
accensione ............................................................. 76
3. Funzionamento ...................................................... 78
Accensione/Spegnimento ........................................ 78
Differenti modalità di visualizzazione ....................... 78
Regolazione dell’ingrandimento .............................. 79
Blocco della messa a fuoco automatica (Auto-focus)
................................................................................ 79
Illuminazione oggetto ON /OFF ............................... 80
Regolazione controllo immagine ............................. 80
Regolazione luminosità ........................................... 80
Informazioni sistema ............................................... 80
Blocco del piano di lettura ....................................... 81
Utilizzo dell’interruttore a pedale ............................. 81
4. Feature Pack .......................................................... 82
4.1 Feature Pack Basic ............................................... 82
Combinazioni colore ................................................ 82
Funzione Trova (indicatore di posizione) ................. 83
Puntatore (indicatore di posizione) .......................... 83
4.2 Feature Pack – Advanced ..................................... 83
Commutazione tra la telecamera interna e il PC /
fonte esterna ........................................................... 84
Attivazione dei marcatori di righe / finestre .............. 85
Posizionamento di righe / finestre ........................... 85
Dimensione di righe / finestre .................................. 85
Pulsante orizzontale / verticale ................................ 85
5. Regolazione del Monitor ....................................... 86
6. Risoluzione dei problemi ...................................... 87
7. Contatti / Assistenza tecnica ................................ 88

Optelec ClearView+
7
ClearView+
Características y funciones avanzadas ......................... 89
1. Felicitaciones por su ClearView+ ......................... 90
Acerca de este manual ............................................ 91
2. Desembalaje, instalación y configuración .......... 92
3. Operación .............................................................. 94
Botón On / Off (encendido / apagado) ..................... 94
Diversos modos de visualización ............................ 94
Ajuste de la amplificación ........................................ 95
Bloqueo del auto-foco ............................................. 95
Iluminación del objeto encendido/apagado ............. 96
Ajuste de control de la imagen ................................ 96
Ajuste de brillo ......................................................... 96
Mostrar la informacion de sistema en pantalla ........ 96
Freno del tablero de lectura .................................... 97
Utilizar el Pedal ....................................................... 97
4. Módulos de funciones .......................................... 98
4.1 Módulo de funciones básicas .............................. 98
Semi - colores ......................................................... 98
Función Buscar (localizador de posición) ................ 99
Puntero (localizador de posición) ............................ 99
4.2 Módulo de funciones avanzadas ......................... 99
Cambie entre la cámara y la PC interna/la fuente
externa .................................................................. 100
Activación de marcadores de línea / tonos de
ventanas ................................................................ 101
Posición de líneas / ventanas ................................ 101
Dimensionar líneas / ventanas .............................. 101
Botón horizontal / vertical ...................................... 102
5. Ajuste de la pantalla del monitor ....................... 103
6. Problemas eventuales y su solución ................. 104
7. Contacto / soporte al producto .......................... 106


Optelec ClearView+
English 9
ClearView+
Advanced Features and Functions
Since 1975, Optelec has been developing and producing
innovative products to assist vision-impaired people with
their daily activities to maintain and regain independence.
Visit Optelec’s website at www.optelec.com for more
information on products and services.
Every effort has been made to ensure that the information
contained in this user manual is correct at the time of
publication. Neither Optelec, nor any of its associates, shall
be held responsible for any errors or damages that may
result from any incorrect use of the information contained in
this manual.

Optelec ClearView+
10 English
1. Introduction
Congratulations on choosing the ClearView+, an auto-focus
desktop electronic video magnifier developed by Optelec in
the Netherlands. The ClearView+ enables you to read, write,
view photos, do work and much more.
The ClearView+ magnifies and enhances text, objects and
images in different colors, brightness and contrast. It is easy
to operate and can be used at home, in school or at work.
The ClearView+ has a unique ergonomic design that
focuses on simplicity. The quality reading table allows users
to move text and objects smoothly beneath the camera and
it integrates the user-friendly control panel. The auto-focus
feature has been incorporated as standard in every
ClearView+ model. Customized ClearView+ monitors can be
adjusted to prevent glare and light reflections as well as to
ensure a more comfortable reading posture.
This manual helps you become familiar with the ClearView+
features and operation. Read this manual thoroughly before
setting up and using the ClearView+.
Note that the ClearView+ is a modular system. Different
ClearView+ models can be assembled by selecting the
various modules. This user manual covers all of the models
currently available. A number of features and functions can
be added by installing different modules. However it may be
possible that your model does not support some of the
functions or features described in this manual.

Optelec ClearView+
English 11
If you have any questions or suggestions concerning the
use of this product, contact your Optelec distributor or
Optelec’s headquarters by consulting the contact
information page found at the end of this manual. Your
feedback is greatly appreciated. We hope you enjoy working
with your ClearView+.
About this manual
At Optelec, we are constantly improving our products and
their functionalities. Therefore, it is possible that this manual
is not the latest version. Download the most up-to-date
manual on www.optelec.com at the Support section.

Optelec ClearView+
12 English
2. Unpacking, Installation and Setup
The ClearView+ is a modular system with a standard HDMI
output that allows you to connect your ClearView+ to any
HDMI-compatible monitor or TV.
Your ClearView+ consists of the following:
- A base unit with a reading table and integrated control
panel
- An electronic box with the camera module, light
sources and input / output connectors. You have the
choice between:
˗ HD 720P
˗ Full HD 1080P (for superior image quality)
- Customized ClearView+ monitor. The ClearView+
offers the following monitor options:
˗ 22” high brightness TFT monitor
˗ 24” high brightness TFT monitor
˗ 24” touch screen Speech monitor
For adjusting the different monitors to your preferred
position, refer to chapter 5. These monitors may only be
fitted as an integrated part of the unit.
- Feature Packs (optional) for additional ClearView+
functionality. Optelec offers two feature packs:
˗ Feature Pack Basic (with Semi-color, Find and
Pointer functions)
˗ Feature Pack Advanced (with Semi-color, Find
and Pointer functions, Line markers, Window
shade and PC-switch functions)

Optelec ClearView+
English 13
- Footswitch (optional) for toggling between the images
of the ClearView+ and of external sources, such as
computers (for Color, HD and PC units).
- Power supply and cables for connecting the
ClearView+ to an electrical wall outlet.
- ClearView+ Setup and Use
- ClearView+ Safety and Care
- ClearView+ Installation guide.
Note: if your ClearView+ system was delivered to you in
separate modules, unpack each module carefully
before proceeding with installation, and consult the
accompanying installation guide to install the different
modules. Contact your Optelec distributor for further
instructions if required.

Optelec ClearView+
14 English
3. Operation
When using the ClearView+, place your hands on the wrist
support at the front of the table for easier access to the
control buttons, and for steady table movement.
Operation – Switching ON / OFF
To power both the system and monitor, press the ON /
OFF button that is located right above the
magnification button on the reading table. The ClearView+
will start up in the same viewing mode as when it was
powered off.
It takes about 10 seconds for the camera unit to initialize
before it displays an image. Within about 1 minute, the
ClearView+ system’s light source will achieve full brightness,
providing optimal image quality.
Note: a non-ClearView+ monitor must be switched on and
off separately.
Adjusting the magnification
Locate the zoom button in the center of the table,
and turn it clockwise to increase the magnification,
and counter-clockwise to decrease it.

Optelec ClearView+
English 15
Choosing viewing modes
Pressing this button cycles you
through 3 different viewing
modes:
1. Photo mode full color (or gray scale with a
monochrome unit)
2. Reading mode: This mode enhances the foreground
/ background contrast. Pictures and text are
displayed in high contrast black and white.
If an optional Feature Pack was purchased with the
ClearView+, the background and foreground color
combination can be changed.
3. Reverse reading mode: This mode reverses the
chosen background and foreground color
combinations of the reading mode.
4. Photo mode gray scale (if enabled)
Note: If the default gray scale setting is enabled on your
ClearView+, this button also includes a fourth viewing
mode, which shows the image in gray scale (true
black and white).
Auto-focus lock
The ClearView+ features an automatic focus system that
produces a sharp on-screen image at any time.
When switching the ClearView+ on, the system starts up in
the auto-focus mode. Pressing the auto-focus button stops
the ClearView+ from continuously operating the auto-focus
feature and fixes the focus on the object being viewed. This
can be useful for tasks, such as writing, painting or crafts.

Optelec ClearView+
16 English
When the auto-focus feature is in locked mode, a red light
on the central control button (mode / zoom) lights up. To
turn the auto-focus back on, simply press the auto-focus
button again. The red indicator light turns off.
Object lighting ON /OFF
Pressing this button for four seconds turns off the
object lighting. You can choose this option to make it
easier to read glossy articles such as magazines
and photos. Pressing the button once advances the viewing
mode by one position and turns the lights back on; or
pressing the button for four seconds turns the object lighting
back to the same viewing mode.
Adjusting image control
Press and hold the right or left side of this button to
adjust the image control. The image control may be
adjusted to make the characters or other on-screen
elements sharper, if they are not clearly visible.
Note: If the default control setting is changed on your
ClearView+, pressing this button adjusts the brightness.
Adjusting the brightness
Press the left or right adjustment button while
pressing the auto-focus button to adjust the
brightness.
Note: If the default control setting is changed on your
ClearView+, pressing these buttons adjusts the image
control.
Displaying system information on-screen
The magnification factor and the system configuration
(system modules) can be displayed on-screen. Press

Optelec ClearView+
English 17
the auto-focus button for four seconds to have this
information displayed. Press it again for four seconds
to turn this feature off.
Locking the reading table
Lift the red lever located at the front
of the table to lock the table in a
stable position. This is very useful
when writing, painting and doing
hobbies and crafts. Unlock the table by simply lifting the
lever again.
Note: When the ClearView+ power is off, the brake
automatically locks into position. When the ClearView+ is
switched on, the brake unlocks. Make sure to push the
reading table backwards to its home position prior to
turning off.
Using the footswitch
The footswitch allows you to toggle between the ClearView+
and of an external source such as a PC (computer).

Optelec ClearView+
18 English
4. Feature Packs
Feature Packs provide increased functionality to the
ClearView+. Optelec offers two Feature Packs: a Basic and
Advanced Feature Pack.
4.1 Feature Pack Basic
The Feature Pack Basic offers selectable semi-color
combinations, grayscale, Full Color+, and the find and
position locator.
Semi-colors
Pressing this button in reading mode or reverse
reading mode cycles you through 7 different foreground and
background color combinations. You may choose to display
text in a choice of color combinations when additional
contrast is needed, or when a different color combination
provides increased visibility. Press and hold the button for
two seconds to instantly return to black and white. Press
and hold the button again for two seconds to return to your
last selected semi-color combination.
Press this button in photo mode to toggle between the full
color, Full Color+ and gray scale mode. In Full Color+ mode,
colors are more saturated, which enhances the color image
and provides more contrast.

Optelec ClearView+
English 19
Find function (position locator)
The find function provides you with a quick overview of
the text, which helps you easily locate the part of a
document which is of interest.
Press the position locator button to activate the find function.
When the find function is activated, the ClearView+
automatically zooms out to the minimum magnification, and
displays a crosshair target to indicate the center of the
screen. Position the text you wish to read in the crosshair’s
target by moving the reading table. Once the document has
been positioned, press the button again to zoom in on the
selected text in your previous magnification setting.
Pointer (position locator)
Pressing this button for three seconds
activates a red LED light, which shows as a
red spotlight on the object in the center of the
reading table. It serves to indicate the center
of the on-screen image. To assist with writing, place a pen
in the red spotlight on the reading table and see the pen
displayed in the center of your screen. Press this button
again to deactivate the LED light.

Optelec ClearView+
20 English
4.2 Feature Pack Advanced
The Feature Pack Advanced contains all the features of the
Feature Pack Basic and adds the line marker, window
shade and PC-switch functions. For a description of the
semi-colors and position locator functions, refer to section
4.1 Feature Pack Basic.
Switching between the ClearView+ and a
computer / external source image
If a computer or another external source is connected to the
ClearView+, press this button or the footswitch if fitted to
toggle between the ClearView+ image and the full screen
computer image.
To display the computer image on your ClearView+ monitor
correctly, make sure that your computer’s resolution is set
accordingly:
˗ For the ClearView+ 22” TFT monitor, the resolution
must be set to 1680 x 1050.
˗ For the ClearView+ 24” TFT monitor or 24” touch screen
monitor, set the resolution to 1920 x 1080.

Optelec ClearView+
English 21
Activating line markers / window shades
Pressing this button cycles you through the line
markers, window shades and full screen camera
image modes. Line markers are used as guides to make
reading text easier. The window
shades function may be used to
block a part of an image when screen
brightness becomes inconvenient or
when needing to concentrate on only
one or two lines of text is preferred.
Sizing the lines markers / window shades
When line markers or window shades
are activated, turning this button
narrows or widens the space between the
line markers / window edges. This can either
be modified horizontally or vertically by using this button .
Positioning lines markers / window shades
When line markers or window shades
are activated, turning this button
changes their position on screen. Line
markers and window shades may be displayed horizontally
and vertically depending upon the status of this button
described below .
Horizontal / vertical button
Pressing this button allows you to switch
the line markers / window shades from the
vertical to the horizontal position.

Optelec ClearView+
22 English
5. Adjusting the Monitor
The ClearView+ TFT monitor with standard arm can be
adjusted in height and viewing angle for an optimal reading
position. Adjusting the monitor assists in preventing glare.
Firmly grip the flat panel on both sides to adjust to your
preferred position.
The ClearView+ monitors equipped with the ultra-flexible
TFT arm allows you to adjust the monitor to a preferred
position. The monitor can be moved up or down, forward or
backward, and tilted horizontally and vertically for optimal
ergonomic and viewing comfort. To place the monitor in
your preferred position, firmly grip the flat panel on both
sides by the surrounding frame, and move or tilt it as
required.
Refer to the poster included in the monitor box for more
information about adjusting the ultra-flexible TFT arm.
Avoid putting any magnetic or metal objects in front of or
near the monitor as they may damage the monitor.

Optelec ClearView+
English 23
6. Troubleshooting
Manufacturer’s default settings
If you experience any difficulty operating the system,
reset the factory default settings. Switch the ClearView+
off and wait 3 seconds. Then press and hold the On / Off
button till the red ring light starts flashing.
No image on the ClearView+ monitor after it is switched
on
- Check all cables and hardware are connected properly
and securely.
- Check that the unit is receiving power by verifying that
the green indictor LED light is lit on the power supply.
- Ensure sure the monitor is switched on if a non-
ClearView+ monitor is connected.
Image is not in focus
- Check the auto-focus lock (the lit red circle around the
mode button means that the focus is locked). Press the
focus button to return to auto-focus mode.
- Carefully clean the mirror on the camera unit with a
non-abrasive cloth.
- Clean the monitor screen with a non-abrasive cloth.
Pictures and text look gray or have low contrast
- Press the mode button to switch to the high contrast
reading mode.
- Adjust the image control or brightness level on the
control panel.
- If you are using a non-ClearView+ monitor, modify the
monitor’s brightness and contrast settings .

Optelec ClearView+
24 English
The computer image is not displaying
- Check to see if the Advanced Feature Pack is installed.
- Verify the computer’s video (HDMI) connection to the
base unit (do not connect the PC directly to the
monitor).
- Check the status of the button.
- When operating with the footswitch, check to see if the
Advanced Feature Pack is installed.
- Check the computer for any malfunction by connecting
the PC directly into the monitor.
- Make sure the PC resolution is set to 1920x1080.
The reading table does not move or does not move
smoothly
- Unlock the table by pulling the lever, located under the
front of the table.
- Inspect the tracks for dust or any other obstructions.
7. Contacting Product Support
If you have questions about operating, installing or setting
up your ClearView+, contact your Optelec distributor or the
Optelec office nearest you. See the last pages of this
manual for a complete list of Optelec addresses.

Optelec ClearView+
Deutsch 25
ClearView+
Erweiterte Ausstattungsmerkmale und
Funktionen
Optelec ist Teil der Tieman-Gruppe und wurde 1975 in
Rockanje in den Niederlanden gegründet. Seit 1975
entwickelt und produziert Optelec innovative Produkte, die
sehbehinderten und blinden Menschen den Alltag
erleichtern. Ausführlichere Informationen über die Produkte
von Optelec erhalten Sie auf der Website www.optelec.com.
Optelec hat alles dafür getan, um sicherzustellen, dass zum
Zeitpunkt der Herausgabe dieser Bedienungsanleitung alle
darin enthaltenen Informationen richtig sind. Weder Optelec
noch dessen Partner übernehmen die Verantwortung für
Fehler oder Schäden, die durch die falsche Nutzung der
Informationen in dieser Bedienungsanleitung entstehen.

Optelec ClearView+
26 Deutsch
1. Einleitung
Wir gratulieren Ihnen, dass Sie sich für einen ClearView+,
ein Bildschirmlesegerät mit Autofokus, der Firma Optelec
entschieden haben. Der ClearView+ ermöglicht es Ihnen,
wieder Spaß beim Lesen, Schreiben, Fotoansehen, Basteln
etc. zu haben.
Durch die einfache Bedienung können Sie Texte oder
Objekte in verschiedenen Farben vergrößern und die
Helligkeit sowie den Kontrast anpassen. Sie können den
ClearView+ zu Hause, in der Schule oder im Büro benutzen.
Der ClearView+ ist in seinem besonders ergonomischen
Design auf Einfachheit ausgelegt. Sein benutzerfreundliches
Bedienelement ist in den Lesetisch integriert. Der Autofokus
gehört zur Standardausstattung bei jedem ClearView+
Modell. Die Systemmonitore können so ausgerichtet
werden, dass Blendungen und Spiegelungen vermieden
werden und Sie eine bequeme Sitzposition haben.
Diese Anleitung wird Sie mit den Funktionen und der
Grundbedienung des ClearView+ vertraut machen. Bitte
lesen Sie die Bedienungsanleitung sorgfältig durch, bevor
Sie den ClearView+ benutzen. Sollten Sie Fragen oder
Anregungen zur Nutzung dieses Produktes haben, wenden
Sie sich bitte an Ihren Händler oder direkt an Optelec. Die
entsprechenden Kontaktdaten finden Sie auf der letzten
Seite dieser Bedienungsanleitung. Wir freuen uns über Ihre
Rückmeldung und wünschen Ihnen viel Spaß bei der
Nutzung des ClearView+.

Optelec ClearView+
Deutsch 27
** Der ClearView+ ist ein Modulsystem. Sie können den
ClearView+ mit verschiedenen Modulen betreiben. Diese
Bedienungsanleitung beinhaltet alle gegenwärtig
erhältlichen Modelle. Ausstattung und Funktionen können
über verschiedene Module/Bausteine hinzugefügt oder
entfernt werden. Daher ist es möglich, dass Ihr ClearView+
manche Funktionen, die in dieser Anleitung beschrieben
werden, nicht unterstützt (z.B. 22” TFT-Bildschirm,
elektronische Box für HD-Einheiten oder die knopflose
Bedienung).
Über dieses Handbuch
Bei Optelec werden Produkte mit deren Funktionen
kontinuierlich verbessert. Neue Funktionen könnten deshalb
nicht immer aktuell in die mitgelieferten
Bedienungsanleitungen eingefügt sein. Bitte informieren Sie
sich auf unserer Homepage www.optelec.de im Bereich
Kundenservice über neue Versionen Ihrer
Bedienungsanleitung.

Optelec ClearView+
28 Deutsch
2. Auspacken, Aufbau und Inbetriebnahme
Der ClearView+ ist ein Modulsystem mit einem
standardisierten HDMI-Ausgang, der es ermöglicht,
praktisch jeden HDMI-kompatiblen Monitor oder
Flachbildschirm (TFT) an den ClearView+ anzuschließen.
Der ClearView+ besteht aus folgenden Einzelbauteilen:
- Basiseinheit mit Lesetisch und integriertem Bedienfeld
- Elektronikbox mit Kamera, Lichtquelle und Eingangs-
/Ausgangsanschlüssen. Sie können wählen zwischen:
˗ HD 720P
˗ Full HD 1080P (für brillante Bildqualität)
- ClearView+ Systemmonitor: Der ClearView+ ist mit
folgenden Monitorarten erhältlich:
˗ 55cm TFT- Bildschirm mit hoher Helligkeit
˗ 61cm TFT- Bildschirm mit hoher Helligkeit
˗ 61cm Touchscreen- Bildschirm mit
Sprachausgabe
Um die verschiedenen Monitore in Ihre gewünschte Position
zu bringen, lesen Sie bitte Kapitel 5. Alle Monitore können
nur als integrierter Teil der Einheit genutzt werden.
- Erweiterungssatz (optional) für Sonderfunktionen des
ClearView+. Optelec bietet zwei Erweiterungssätze an:
• Erweiterungssatz 1 - Basis Modul
• Erweiterungssatz 2 - Komfort Modul
Für den vollen Bedienungsumfang der PC-Einheit
benötigen Sie den Erweiterungssatz 2.

Optelec ClearView+
Deutsch 29
- Fußschalter (optional), um zwischen dem Bild der
eingebauten Kamera und externen Quellen, z. B. PC-
Bild, umzuschalten.
- Netzteil und Kabel, um den ClearView+ an die
Stromversorgung anzuschließen.
- ClearView+ Vorbereitung und Verwendung
- ClearView+ Sicherheit und Pflege
- Einem Informationsblatt für die Installation.
** Sollte Ihr ClearView+ in einzelnen Modulen geliefert
werden, packen Sie vor dem Aufbau alle Teile vorsichtig
aus und beachten Sie die beiliegende Anleitung, um die
einzelnen Teile zusammenzubauen.

Optelec ClearView+
30 Deutsch
3. Bedienung
Legen Sie während der Nutzung des ClearView+ die Hände
auf die Handauflage an der Tischfront. Gleichzeitig können
Sie die Bedienelemente einfach erreichen und zudem den
Lesetisch verschieben.
Ein- und Ausschalten
Drücken Sie den Ein-/Ausschalter, der sich über der
Vergrößerungstaste befindet, um das Gerät und den
Monitor einzuschalten. Der ClearView+ startet mit denselben
Farbeinstellungen, die Sie vor dem Ausschalten eingestellt
hatten. Es dauert ungefähr zehn Sekunden, bis die Kamera
ein Bild auf dem Monitor abbildet. Innerhalb einer Minute
erreicht die ClearView+-Lichtquelle ihre volle Helligkeit, um
eine optimale Bildqualität zu gewährleisten. Ein Monitor, der
nicht zu dem ClearView+-Modulsystem gehört, muss
separat ein- bzw. ausgeschaltet werden.
Wahl des Ansichtsmodus
Durch Drücken dieser Taste können
Sie zwischen den drei bzw. vier
verschiedenen Ansichtsmodi wählen:
1. Fotomodus mit Echtfarben
2. Lesemodus: Dieser Modus erhöht den Kontrast
zwischen Vorder- und Hintergrund. Bilder und Texte

Optelec ClearView+
Deutsch 31
werden in Schwarz/Weiß dargestellt. Falls Sie ein
Erweiterungssatz mit Lesefarben benutzen, kann die
Farbkombination für Vorder- und Hintergrund
geändert werden.
3. Umgekehrter Lesemodus: Dieser Modus kehrt die
im Lesemodus ausgewählten Vorder- und
Hintergrundfarben um.
4. Fotomodus mit Graustufe (nur bei Voreinstellung
im Service-Menü)
Achtung: Wenn die voreingestellte Graustufe des
ClearView+ verändert worden ist, können Sie durch
Drücken dieser Taste zwischen vier verschiedenen
Ansichtsmodi wählen, inklusive dem folgenden
Modus:
Einstellung der Vergrößerung
Um die Vergrößerung zu erhöhen, drehen Sie den
Zoom-Knopf, der sich in der Mitte des Tisches
befindet, im Uhrzeigersinn. Um die Vergrößerung zu
reduzieren, drehen Sie den Knopf gegen den Uhrzeigersinn.
Ausschalten des Autofokus
Der ClearView+ ist mit einem automatischen Zoom
ausgestattet, der Ihnen jederzeit ein scharfes Bild
liefert. Wenn Sie den ClearView+ einschalten, startet
automatisch der Autofokus.

Optelec ClearView+
32 Deutsch
Durch Drücken der Autofokus-Taste können Sie das
automatische Scharfstellen ausschalten. Dies ist sinnvoll,
wenn Sie schreiben, zeichnen oder basteln wollen. Wenn
der automatische Fokus ausgeschaltet ist, leuchtet ein rotes
Lämpchen an der Kontrolltaste (Modus/Zoom). Um den
Autofokus wieder anzuschalten, drücken Sie die Taste
erneut. Das rote Lämpchen erlischt daraufhin.
Ein- und Ausschalten der Objektbeleuchtung
Um die Objektbeleuchtung auszuschalten, halten Sie
die Taste vier Sekunden lang gedrückt. Sie sollten
diese Funktion wählen, wenn Sie glänzende
Zeitschriften/Dokumente lesen wollen, um Reflexionen auf
den Seiten zu vermeiden. Um die Beleuchtung wieder
einzuschalten, drücken Sie die Taste erneut vier Sekunden
lang.
Einstellen der Bildkontrolle
Halten Sie die linke oder rechte Seite dieser Taste
gedrückt, um die Bildkontrolle einzustellen. Sie
können damit Symbole oder Teile von Dokumenten scharf
stellen, wenn diese nicht deutlich abgebildet werden.
Achtung: Wenn die Voreinstellung Ihres ClearView+
verändert worden ist, können Sie durch Drücken
dieser Taste die Helligkeit anpassen.
Anpassung der Helligkeit
Drücken Sie gleichzeitig die linke bzw. rechte
Seite der Einstellungstaste und die
Autofokus-Taste, um die Helligkeit anzupassen.
Achtung: Wenn die Voreinstellung Ihres ClearView+
verändert worden ist, wird durch Drücken der
beiden Knöpfe die Bildkontrolle angepasst.

Optelec ClearView+
Deutsch 33
Anzeige der Systeminformationen auf dem
Bildschirm
Sie können sich den Vergrösserungsfaktor und die
Systemkon-figuration auf dem Bildschirm anzeigen lassen.
Halten Sie dazu die Autofokus-Taste vier Sekunden lang
gedrückt. Um diese Informationen wieder auszublenden,
drücken Sie die Taste erneut vier Sekunden lang.
Feststellen des Lesetisches
Heben Sie den kleinen roten Hebel
an der Vorderseite des Tisches
leicht an, um den Tisch
festzustellen. Das erleichtert Ihnen
das Schreiben oder Malen. Um den
Tisch wieder zu lösen, heben Sie den Hebel erneut an.
Achtung: Wenn der ClearView+ ausgeschaltet ist, ist der
Tisch automatisch festgestellt
(Verriegelungsstellung). Sobald Sie den ClearView+
einschalten, wird der Tisch automatisch wieder
beweglich. Schieben Sie deshalb den Tisch in die
Ausgangsposition, bevor Sie das Gerät ausschalten.
Nutzen des Fußschalters
Mit Hilfe des optional erhältlichen Fußschalters können Sie
zwischen dem Bild der ClearView+ und einer externen
HDMI-Quelle umschalten.

Optelec ClearView+
34 Deutsch
4. Erweiterungssatz
Erweiterungssätze sind optional. Die Erweiterungssätze
liefern Ihnen weitere Funktionen für den ClearView+.
Optelec bietet Ihnen zwei Erweiterungssätze: Basis-
Erweiterungssatz und Komfort-Erweiterungssatz.
4.1 Basis-Erweiterungssatz
Das Feature Pack Basic bietet auswählbare
Lesefarbenkombinationen, Graustufen, Echtfarbe+, den
Übersichtsmodus und den Lichtzeiger.
Lesefarben
Wenn Sie diese Taste im „Lesemodus“ oder dem
„umgekehrten Lesemodus“ drücken, können Sie zwischen
sieben verschiedenen Farbkombinationen für Vorder- und
Hintergrund wählen.
Sie können einstellen, dass der Text in zwei auswählbaren
Farben dargestellt wird, wenn Sie einen größeren Kontrast
benötigen oder andere Farbkombinationen besser lesbar
sind. Halten Sie die Taste zwei Sekunden lang gedrückt, um
wieder zum normalen Modus Schwarz auf Weiß
zurückzukehren. Drücken und halten Sie diese Taste noch
einmal für 2 Sekunden, so kehren Sie wieder zu Ihrer
letzten Farbkombination zurück.

Optelec ClearView+
Deutsch 35
Drücken Sie diese Taste im Fotomodus, um zwischen
Echtfarbe-, Echtfarbe+ und Graustufenmodus zu wechseln.
Im Echtfarbenmodus+ sind die Farben gesättigter um das
Farbbild zu verbessern und mit mehr Kontrast darzustellen.
Übersichtsmodus (Positionsanzeiger)
Der Übersichtsmodus ist ein hilfreiches Werkzeug, mit dem
Sie durch Ihren Text scrollen können, um sich einen
Überblick über das Dokument zu verschaffen, das Sie
gerade lesen.
Drücken Sie die Taste "Positionsanzeiger" kurz, um den
Übersichtsmodus zu aktivieren. Dies bedeutet, dass die
kleinste Vergrößerungsstufe eingestellt wird und ein
Fadenkreuz in der Mitte des Bildschirms erscheint.
Positionieren Sie nun mit Hilfe des Lesetisches den Text,
den Sie lesen möchten, in der Mitte des Fadenkreuzes. Ist
der Text ausgerichtet, drücken Sie die Taste erneut. Der
ClearView+ wird nun automatisch die auswählte
Textpassage in der von Ihnen voreingestellten Größe
darstellen.
Lichtzeiger (Positionsanzeiger)
Wenn Sie diese Taste drei Sekunden lang
drücken, erscheint ein LED-Licht in der Mitte
des Lesetisches. Es zeigt Ihnen die Mitte der
Abbildung auf dem Bildschirm an. Halten Sie
einen Stift in den Lichtzeiger auf dem Lesetisch, und er wird
in der Mitte des Bildschirms abgebildet. Drücken Sie diese
Taste erneut, so wird das LED-Licht wieder ausgeschaltet.
4.2 Komfort-Erweiterungssatz
Der Erweiterungssatz 2 enthält folgende Funktionen:
auswählbare Lese-farben, Positionsanzeiger und
Übersichtsmodus, einstellbare Hilfslinien, einstellbare

Optelec ClearView+
36 Deutsch
Bildschirmabdeckung und eine Umschaltfunktion auf einen
externen PC. Für eine Beschreibung der Vorder- und
Hintergrundfarben sowie der Funktion Übersichtsmodus und
Pointer lesen Sie bitte das Kapitel 4.1.
Umschalten zwischen integrierter Kamera und
PC/externer Quelle
Wenn ein PC oder eine andere externe HDMI-Quelle
an Ihren ClearView+ angeschlossen ist, können Sie über
diese Taste oder den Fußschalter zwischen dem Bild der
integrierten Kamera und dem PC-Vollbild umschalten.
Um das PC-Bild an Ihrem ClearView+-Bildschirm korrekt
anzeigen zu können, stellen Sie sicher, dass die Auflösung
an Ihrem Computer dazu passend eingestellt ist:
- Bei einem ClearView+ 22“ TFT-Flachbildschirm muss
die Auflösung auf 1680 x 1050 eingestellt werden.
- Für den ClearView + 61cm TFT-Bildschirm und den
61cm -Touchscreen-Bildschirm muss die Auflösung auf
1920 x 1080 eingestellt werden.

Optelec ClearView+
Deutsch 37
Einschalten von Leselinien und Bildabdeckungen
Durch Drücken dieser Taste können Sie zwischen
Leselinien, Bildabdeckungen und dem Vollbild der
Kamera wählen. Leselinien helfen, sich leichter im Text zu
orientieren.
Mit Hilfe der Bildabdeckungen
können Sie Teile des Bildes
ausblenden, wenn die
Bildschirmhelligkeit unangenehm
ist.
Platzierung von Leselinien/Bildabdeckungen
Wenn Sie Leselinien oder
Bildabdeckungen ausgewählt haben,
können Sie über diese Taste die
Position der Leselinien und Bildabdeckungen
auf dem Bildschirm ändern. Sie können die Leselinien und
Bildabdeckungen über die Taste entweder horizontal oder
vertikal ausrichten .
Abstand der Linien und Bildabdeckungen
Wenn Sie Leselinien oder
Bildabdeckungen ausgewählt haben,
können Sie über diese Taste den
Abstand zwischen den Kanten der
Leselinien/Bildabdeckungen auf dem Bildschirm verändern.
Das Verändern des Abstandes kann entweder horizontal
oder vertikal erfolgen. Dies hängt von dem Status der
Horizontal/Vertikal-Taste ab .
Horizontal/Vertikal-Taste
Wenn Sie diese Taste drücken, können
Sie die Leselinien/Bildabdeckungen
horizontal oder vertikal ausrichten.

Optelec ClearView+
38 Deutsch
5. Einstellung des Monitors
Der ClearView + TFT Bildschirm mit Standardarm kann in
der Höhe und im Betrachtungswinkel so angepasst werden,
dass Sie eine optimale Sitzposition beim Lesen haben.
Außerdem werden Blendungen vermieden. Fassen Sie den
Monitorhalter fest an beiden Seiten an und bringen Sie ihn
in die gewünschte Position.
Die TFT Bildschirme von ClearView+ mit einem Ultraflexarm
sind in vier verschiedene Richtungen beweglich. Mit dessen
Hilfe können Sie den Bildschirm in jede gewünschte
Position bringen. Für einen optimalen Lesekomfort können
Sie den Monitor hoch und runter, vor- und zurückbewegen
und entsprechend anwinkeln.
Um den Monitor in die gewünschte Position zu bringen,
fassen Sie ihn an beiden Seiten an und bewegen oder
kippen ihn in die gewünschte Position.
Weitere Informationen über den Ultraflexarm entnehmen Sie
bitte dem beigefügten Informationsblatt.
Stellen Sie sicher, dass keine magnetischen Gegenstände
in die Nähe des Monitors gelangen, da dieser sonst
beschädigt werden könnte.

Optelec ClearView+
Deutsch 39
6. Problembehandlung
Fabrikeinstellungen
Falls bei der Bedienung Probleme auftreten, können Sie
das Gerät auf die Fabrikeinstellungen zurücksetzen.
Schalten Sie dazu das Gerät aus, warten Sie drei
Sekunden und halten Sie anschließend den Ein-
/Ausschalter drei Sekunden lang gedrückt. Ihr ClearView+
startet nun wieder mit den ursprünglichen
Fabrikeinstellungen.
Nach dem Einschalten erscheint kein Bild auf dem
ClearView+-Bildschirm
- Überprüfen Sie, ob das Gerät wirklich eingeschaltet ist
(rotes Lämpchen am Lesetisch muss leuchten).
- Prüfen Sie alle Kabel- und Hardwareverbindungen.
- Falls Sie keinen original ClearView+-Monitor benutzen,
überprüfen Sie bitte, ob Ihr Monitor separat
eingeschaltet ist.
Bild wird nicht scharf
- Überprüfen Sie, ob der Autofokus ausgeschaltet ist (ein
rotes Lämpchen an der zentralen Kontrolltaste
leuchtet). Drücken Sie die Autofokus-Taste, um den
Autofokus einzuschalten.
- Reinigen Sie den Spiegel an der Kamera vorsichtig mit
einem weichen Tuch.
- Reinigen Sie den Monitor mit einem weichen Tuch.
Bilder oder Texte sehen grau aus oder sind kontrastarm
- Drücken Sie die Modustaste und wechseln Sie in den
kontrastreichen Lesemodus.
- Passen Sie die Bildeinstellungen oder die Bildhelligkeit
an.

Optelec ClearView+
40 Deutsch
- Falls Sie keinen original ClearView+-Monitor benutzen,
ändern Sie die Helligkeit bzw. die Einstellungen für den
Kontrast separat an Ihrem Monitor.
Computerbild wird nicht angezeigt
- Prüfen Sie, ob der Erweiterungssatz installiert ist.
- Prüfen Sie, ob der HDMI-Ausgang des Computers mit
der Basiseinheit des ClearView+ verbunden ist
(verbinden Sie den Computer nicht direkt mit dem
Monitor).
- Überprüfen Sie den Status der Taste.
- Bei Nutzung des Fußschalters: Überprüfen Sie, ob der
Erweiterungs-satz installiert ist.
- Prüfen Sie den Computer auf Fehlfunktionen, indem
Sie den PC direkt mit dem Monitor verbinden.
- Stellen Sie sicher, dass die PC-Auflösung auf
1920x1080 eingestellt ist.
Der Lesetisch bewegt sich nicht oder nicht problemlos
- Lösen Sie den Tisch, indem Sie den Hebel unterhalb
der Tischfront betätigen.
- Überprüfen Sie, ob sich in der Laufschiene des Tisches
Staub oder Fremdkörper festgesetzt haben.
7. Kontakt/Beratung
Falls Sie Fragen zur Bedienung, Installation oder
Einstellung Ihres ClearView+ haben, wenden Sie sich bitte
direkt an Ihren Händler oder die nächste Optelec-
Niederlassung. Eine Liste mit entsprechenden Adressen
finden Sie auf der letzten Seite dieser Bedienungsanleitung.

Optelec ClearView+
Français 41
ClearView+
Fonctionnalités et fonctions avancées
Depuis 1975, la société Optelec développe et met au point
des produits novateurs à l’intention des personnes aveugles
et malvoyantes, afin qu’elles puissent réaliser ses activités
quotidiennes.
Pour plus de renseignements sur nos produits et nos
services, nous vous invitons à visiter notre site web à
l'adresse www.optelec.com.
Nous certifions avoir mis tout en oeuvre afin de garantir que
les renseignements contenus dans ce manuel d'utilisation
ne comportent aucune erreur au moment de sa publication.
La société Optelec et ses distributeurs déclinent toute
responsabilité en cas d'erreurs ou de dommages résultant
d'une mauvaise utilisation des renseignements contenus
dans ce manuel.

Optelec ClearView+
42 Français
1. Introduction
Nous vous félicitons d’avoir choisi le ClearView+ d’Optelec,
le téléagrandisseur avec mise au point automatique. Le
ClearView+ vous permet de lire, d’écrire, de regarder des
photos, de faire du bricolage et plus encore. Facile d'emploi,
cet appareil vous permet de grossir des documents et des
objets à l’aide de différentes fonctions de couleur, de
luminosité et de contraste.
Son design ergonomique ainsi que la convivialité de son
panneau de commande, intégré dans le plateau de lecture,
font du ClearView+ un appareil simple que vous pouvez
utiliser à la maison, à l’école ou au bureau.
La fonction de mise au point automatique est intégrée dans
tous les modèles ClearView+ en tant qu’option standard. Les
moniteurs personnalisés du ClearView+ peuvent être réglés
pour prévenir les éblouissements et les reflets de lumière,
ainsi que pour permettre à l’utilisateur une posture
confortable.
Ce manuel vous permettra de vous familiariser avec les
caractéristiques et le fonctionnement de base du
ClearView+. Veuillez lire attentivement ce manuel avant de
régler et d’utiliser votre appareil.
Si vous avez des questions ou des suggestions à propos de
l’utilisation de ce produit, veuillez communiquer avec votre
distributeur ou avec le siège social d’Optelec en consultant la
liste des coordonnées des différents bureaux d’Optelec
présentée à la dernière page du manuel. Vos commentaires
sont grandement appréciés. Nous vous souhaitons beaucoup
de plaisir avec votre ClearView+.

Optelec ClearView+
Français 43
** Le ClearView+ est un système modulaire, et peut donc
être composé de différents modules. Tous les modèles
ClearView+ actuellement disponibles sont décrits dans ce
manuel. Les différents modules vous permettent d’ajouter
ou d’enlever au ClearView+ de nombreuses caractéristiques
et fonctions. Il est donc possible que votre appareil ne
puisse supporter l'une ou l'autre des fonctions décrites (par
exemple, le moniteur à écran plat de 22”, le boîtier
électronique pour le système haute définition, ou le module
de fonction Zero Button).
À propos du manuel
Optelec améliore constamment ses produits ainsi que leurs
fonctions. Il est donc possible que ce manuel ne soit pas à
jour. Veuillez vous rendre à la section Support de notre site
Internet www.optelec.com pour télécharger la dernière
version de ce manuel.

Optelec ClearView+
44 Français
2. Déballage, installation et réglage
Le ClearView+ est un système modulaire muni d’une sortie
HDMI standard, qui vous permet de connecter le ClearView+
à n’importe quel moniteur HDMI compatible, ou à un
téléviseur.
L’appareil ClearView+ comprend:
- L’unité de base avec un plateau de lecture muni
d’un panneau de commande intégré;
- Un boîtier électronique avec un module de caméra,
des sources lumineuses et des connecteurs d’entrée et
de sortie. Vous avez le choix entre:
˗ Le moniteur à écran HD 720P
˗ Le moniteur à écran HD 1080P (pour une
superbe qualité d’image)
- Le moniteur personnalisé du ClearView+. Vous
pouvez choisir parmi les options de moniteur suivantes:
˗ Le moniteur à écran TFT de 22”
˗ Le moniteur à écran TFT de 24”
˗ Moniteur avec synthèse vocale à écran tactile de
24”
Pour connaître comment ajuster les différents
moniteurs à la position désirée, veuillez lire le chapitre
5. Les moniteurs font partie intégrale du système
ClearView+, et ne peuvent être utilisés qu’avec le
ClearView+.

Optelec ClearView+
Français 45
- Les modules de fonctions (offerts en option) vous
permettent de rajouter au ClearView+ des fonctions
supplémentaires. Deux types de modules de fonctions
vous sont proposés:
˗ Le module de fonctions de base
˗ Le module de fonctions avancées
- La pédale (offerte en option) pour basculer entre
l’image de la caméra interne et l’image d’une source
externe, telle qu’un ordinateur.
- Un adaptateur et des câbles pour brancher le
ClearView+ dans une prise de courant électrique.
- ClearView+ Configuration et utilisation
- ClearView+ Sécurité et entretien
- Le plan de montage.
** Si votre système ClearView+ vous a été livré en
modules séparés, veuillez déballer soigneusement tous
les modules avant de procéder au montage. Pour
assembler les différents modules, consultez le plan de
montage qui vous a été fourni.

Optelec ClearView+
46 Français
3. Fonctionnement
Pour permettre un accès facile aux boutons de contrôle, et
pour assurer la stabilité au plateau de lecture lorsque vous
utilisez le ClearView+, veuillez placer vos mains sur le
repose-poignets situé devant le plateau de lecture.
Interrupteur On / Off
Appuyez sur la touche On / Off pour allumer le
système et son moniteur. Au démarrage, le mode du
ClearView+ sera celui qui était activé au moment où vous
avez éteint l'appareil. Si votre moniteur n'est pas un
moniteur ClearView+, vous devrez l'allumer et l'éteindre
séparément.
Sélection du mode de visualisation
Ce bouton vous permet de
sélectionner parmi trois modes
de visualisation différents.
1. Mode Photo couleur.
2. Mode lecture: ce mode permet d’optimiser le contraste
de l’avant et de l’arrière-plan. Les textes et les images
seront affichés en noir et blanc. Si vous avez acheté le
Module de fonctions avec des combinaisons de couleur

Optelec ClearView+
Français 47
(offert en option), les combinaisons de couleur d’avant
et d’arrière-plan peuvent ainsi être modifiées.
3. Mode lecture inversé: ce mode vous permet d’inverser
la sélection de combinaison de couleur de l'avant et de
l’arrière-plan.
4. Modes photo dans l’échelle de gris.
Remarque: si le réglage par défaut de l’échelle de gris de
votre ClearView+ a été modifié, ce bouton vous
permettra de sélectionner parmi 4 modes de
visualisation, y compris:
Réglage du grossissement
Tournez le bouton zoom, qui se trouve au centre du
plateau, dans le sens des aiguilles d'une montre
pour augmenter le grossissement, et dans le sens
inverse des aiguilles d'une montre pour réduire le
grossissement.
Verrouillage de la fonction mise au point automatique
Le ClearView+ est doté d'un système de mise au point
automatique. Le système emploie automatiquement la
mise au point de tout élément placé sous la caméra afin de
produire une image à l'écran d'une grande netteté. Lorsque
vous allumez le ClearView+, le système démarre en mode de
mise au point automatique.
Pour désactiver la mise au point continue du ClearView+, il
suffit d’appuyer sur la touche de la mise au point
automatique. Cette fonction est très utile pour certaines
activités comme l'écriture, la peinture ou les travaux
manuels. Lorsque cette fonction est verrouillée, le voyant
lumineux rouge de la touche de commande centrale (mode /
zoom) s’allumera. Pour réactiver la fonction de mise au point

Optelec ClearView+
48 Français
automatique, il suffit d'appuyer de nouveau sur la même
touche, et le voyant lumineux rouge s'éteindra.
Éclairage On / Off
Pour éteindre l’éclairage, appuyez sur cette touche
pendant 4 secondes. Cela peut facilité la lecture de
documents et de magazines en format papier glacé.
L’éclairage se rallumera si un changement au mode de
visualisation est effectué, ou lorsque vous appuyez sur la
touche d’éclairage On / Off pendant 4 secondes.
Réglage de l’affichage des images
Pour ajuster l’affichage des images, appuyez sur
cette touche, tout en maintenant soit sa partie
droite ou gauche bien enfoncée. À l’aide de cette touche,
vous pouvez, ainsi, ajuster la clarté ou la netteté des
caractères ou des autres éléments affichés.
Remarque: si le réglage par défaut de l’affichage des
images de votre ClearView+ a été modifié, ce
bouton vous permettra d’ajuster la luminosité.
Réglage de la luminosité
Pour ajuster la luminosité, appuyez sur la
partie droite ou gauche de la touche
d’ajustement, tout en maintenant la touche de mise au point
automatique bien enfoncée.
Remarque: si le réglage par défaut du contrôle d’image de
votre ClearView+ a été modifié, ces touches vous
permettront d’ajuster l’affichage de l’image.
Affichage des renseignements du système à l’écran
Pour visualiser les renseignements du système,
appuyez sur la touche de mise au point automatique

Optelec ClearView+
Français 49
pendant 4 secondes. Cela vous permet de voir affichés à
l’écran le niveau de grossissement ainsi que la
configuration du système. Si vous appuyez sur cette touche
de nouveau, l’écran reprendra son fonctionnement habituel.
Verrouillage du plateau de lecture
Soulevez légèrement le levier
rouge situé sur le devant du plateau
afin d’y empêcher tout mouvement.
Cette fonction vous permet de
verrouiller le plateau dans une
position stable. Cela facilite, ainsi, les activités d'écriture et
de peinture lorsque vous utiliser le plateau de lecture. Pour
annuler le verrouillage du plateau, il suffit de soulever de
nouveau le levier.
Remarque: lorsque le système est éteint, le verrouillage est
automatiquement activé (en position verrouillage).
Lorsque vous allumez votre système ClearView+, le
verrouillage est annulé (en position déverrouillage).
Assurez-vous que le plateau de lecture est bien
centré avant d'éteindre le système.
Utilisation de la pédale
La pédale (offerte en option) vous permet de basculer entre
l’image de la caméra interne et l’image d’une source
externe.

Optelec ClearView+
50 Français
4. Les modules de fonctions
Les modules de fonctions vous permettent d’optimiser les
fonctions du ClearView+. Optelec vous propose deux types
de module de fonctions : le module de fonctions avancées
et le module de fonctions de base.
4.1 Module de fonctions de base
Le module de fonctions de base propose des combinaisons
de couleurs sélectionnables, des niveaux de gris, pleine
couleur+ et le localisateur de recherche et de position.
Combinaisons de couleur
Cette touche vous permet de sélectionner parmi 7
combinaisons de couleur d'avant et d'arrière-plan, soit en
mode lecture ou en mode de lecture inversé. Vous pouvez
faire afficher du texte, en choisissant l’une des
combinaisons de couleur, lorsque vous avez besoin de plus
de contraste, ou d’une meilleure visibilité. Pour revenir
rapidement au mode noir et blanc, appuyez sur la touche de
nouveau. Pour revenir rapidement à la dernière sélection de
combinaison de couleur, appuyez de nouveau sur cette
touche, et maintenez-la enfoncée pendant 2 secondes.
Appuyez sur ce bouton en mode photo pour basculer en
mode couleur, pleine couleur+ et niveaux de gris. En mode
pleine couleur+, les couleurs sont plus saturées ce qui
améliore l’image couleur et augmente les contrastes.

Optelec ClearView+
Français 51
Fonction rechercher (indicateur de position)
La fonction rechercher vous permet d’obtenir un aperçu
complet de votre document de lecture, et vous offre la
possibilité de cibler un bloc de texte précis.
Pour activer cette fonction, appuyez sur la touche de
l’indicateur de position pendant quelques secondes. Dès
qu’elle est activée, le ClearView+ affichera automatiquement
le plan général de votre document, et fera apparaître un
signal lumineux pour indiquer le centre de l’écran. Dirigez le
plateau de lecture de manière à positionner le texte, que
vous désirez lire, au centre de l’écran. Une fois le texte est
bien positionné, appuyez de nouveau sur la touche, puis le
ClearView+ affichera en gros plan le texte de la position
sélectionnée, et reviendra automatiquement à votre réglage
de grossissement précédent.
Indicateur de position
Cette touche vous permet d’activer une lumière LED, qui
s’allume dans le plateau de lecture. Ce point lumineux se
trouve au centre du plateau de lecture, et sert à indiquer
l’endroit où se trouve le centre de l’image affichée. Pour
activer cette fonction, appuyez sur la touche pendant trois
secondes, et posez ensuite un stylo sur le point lumineux
dans le plateau de lecture, puis l’image du stylo s’affichera
au centre de l’écran. Pour désactiver cette fonction,
appuyez sur la touche de l’indicateur de position de
nouveau.
4.2 Module de fonctions avancées
Le module de fonctions avancées comprend la fonction
combinaison de couleur, l’indicateur de position,
l’interrupteur PC, ainsi que les ligne et les cache. Pour plus
de renseignements sur la fonction combinaison de couleur
et sur l’indicateur de position, veuillez lire le paragraphe 4.1
Le module de fonctions de base.

Optelec ClearView+
52 Français
Basculement entre la caméra interne, la source
externe et l’ordinateur
Si un ordinateur ou une autre source externe est connecté
au ClearView+ veuillez appuyer sur cette touche, ou utilisez
la pédale au pied, pour basculer entre l’image de la caméra
et l’image de l’écran de l’ordinateur.
Afin de faire afficher correctement l’image de l’ordinateur sur
l’écran du moniteur ClearView+, assurez-vous de bien
vouloir régler la résolution de votre ordinateur selon les
indications suivantes:
˗ Pour le moniteur ClearView+ à écran plat de 22”, vous
devez régler la résolution à 1680 x 1050.
˗ Pour le moniteur TFT 24” CllearView + et l’écran tactile
24”, vous devez régler la résolution à 1920 X 1080.
Activation des lignes et des caches
Au moment que vous appuyez sur cette touche, vous
avez le choix de basculer parmi trois modes: ligne, cache et

Optelec ClearView+
Français 53
affichage plein écran. Les lignes sont
utilisées comme guides pour faciliter
la lecture de texte. Les caches
servent à bloquer une partie de
l’image lorsque la luminosité de
l’écran est gênante.
Positionnement des lignes et des caches
Lorsque les lignes et les caches sont
activés (voir plus loin), le fait de
tourner le bouton illustré ci-contre, vous
permet de modifier la position des lignes et des caches à
l'écran. Les lignes et les caches apparaissent en position
verticale ou en position horizontale, selon l'état du bouton .
Dimension des ligne et des caches
Lorsque les lignes ou les caches est
activé, le fait de tourner le bouton
illustré ci-contre, vous permet de modifier la
distance entre les lignes et le contour des
caches. La modification de la taille des lignes et des caches
peut se faire soit dans le sens horizontal ou dans le sens
vertical, selon l'état du bouton horizontal / vertical.
Le bouton horizontal / vertical
Ce bouton vous permet de modifier la
position des lignes et des caches, en
passant de la position verticale à la position
horizontale, et vice-versa.
Remarque: les lignes et les caches ne peuvent être utilisés
qu’en mode lecture.

Optelec ClearView+
54 Français
5. Réglage du moniteur
La hauteur ainsi que l’angle de visualisation des moniteurs
ClearView+ avec bras standard peuvent être réglés, afin de
prévenir les éblouissements et les reflets de lumière, ainsi
que pour permettre à l’utilisateur une posture confortable.
Pour se faire, saisissez fermement l’écran plat des deux
côtés, puis ajustez l’écran dans la position désirée.
Les moniteurs ClearView+ avec le bras électronique ultra-
flexible et multidirectionnel vous permet d’ajuster le
moniteur à la position désirée. Pour optimiser le confort de
la lecture, vous pouvez, ainsi, monter ou baisser le
moniteur, le diriger vers l’avant ou vers l’arrière, et aussi
l’incliner vers la droite, vers la gauche, vers le haut ou vers
le bas.
Pour ajuster le moniteur dans la position désirée, saisissez
fermement l’écran plat des deux côtés, puis dirigez ou
inclinez le moniteur.
Pour connaître comment ajuster le bras électronique ultra-
flexible et multidirectionnel, veuillez consulter le feuillet qui
vous a été fourni dans la boîte du moniteur.
Évitez de placer tout objet magnétique ou métallique devant
ou près du moniteur car ces derniers peuvent
l’endommager.

Optelec ClearView+
Français 55
6. Dépannage
Aucune image n'apparaît sur le moniteur du ClearView+
après sa mise en fonction:
- Vérifiez que le système est bien branché (bouton rouge
sur le panneau de commande).
- Vérifiez que tous les câbles et toutes les connexions
des dispositifs sont bien en place.
- Vérifiez que le moniteur est bien connecté, si vous
utilisez un moniteur autre qu'un moniteur ClearView+.
L'image n'est pas claire
- Vérifiez que le mode de mise au point automatique ne
soit pas verrouillé (la lumière rouge autour de son
bouton indique si le mode de mise au point
automatique est désactivé). Appuyez sur la touche de
mise au point pour réactiver la fonction de mise au
point automatique.
- Nettoyez soigneusement le miroir de la caméra à l'aide
d'un linge doux.
- Nettoyez soigneusement l'écran du moniteur à l'aide
d'un linge doux.
Les images et le texte sont ternes ou présentent un
faible contraste
- Enfoncez la touche Mode pour accéder au mode
lecture contraste élevé.
- Augmentez la luminosité/le contraste sur le panneau de
commande.
- Si vous utilisez votre propre moniteur: modifiez les
paramètres luminosité et contraste de votre moniteur.
L'image de l'ordinateur ne s'affiche pas
- Vérifiez si vous avez installé le Module de fonctions
avancées (vérifiez également avec la pédale).

Optelec ClearView+
56 Français
- Vérifiez que les câbles de connexion vidéo (HDMI) de
l'ordinateur sont bien connectés à l'unité centrale (ne
branchez pas le PC directement au moniteur).
- Vérifiez la position du bouton de sélection.
- Vérifiez le fonctionnement de l'ordinateur en connectant
le PC directement au moniteur.
- Assurez-vous que la résolution du PC est réglée sur
1920 X 1080.
Le plateau de lecture est bloqué ou se déplace
difficilement
- Déverrouillez le plateau en levant le levier rouge sous
le devant du plateau.
- Vérifiez que les coulisses ne sont pas entravées par la
poussière ou par de petits corps étrangers.
Remise à zéro
Si vous remarquez des difficultés avec la mise en marche
du système, vous pouvez procéder à une remise à zéro du
système en sélectionnant par défaut les paramètres du
fabriquant.
Éteignez l'appareil, attendez 3 secondes et appuyez ensuite
sur la touche on / off en la maintenant enfoncée pendant 3
secondes. Votre ClearView+ redémarrera en mode par
défaut.
7. Coordonnées et soutien
Si vous avez des questions concernant le fonctionnement,
l'utilisation ou l'installation de votre système, n'hésitez pas à
communiquer avec votre distributeur ClearView+ ou le siège
Optelec le plus proche. Vous trouverez à la dernière page
de ce manuel une liste complète des adresses Optelec.

Optelec ClearView+
Nederlands 57
ClearView+
Geavanceerde eigenschappen en functies
Sinds 1975 ontwikkelt en produceert Optelec innovatieve
producten die blinden en slechtzienden helpen bij dagelijkse
activiteiten.
Bezoek de Optelec website op www.optelec.nl voor een
overzicht van alle Optelec producten en diensten.
Deze gebruikershandleiding is met de grootste zorg
samengesteld zodat de informatie klopt op de datum van
uitgifte. Optelec en de distributeurs van Optelec nemen
geen verantwoordelijkheid voor schade aan uw ClearView+
door gebruik anders dan in deze handleiding.

Optelec ClearView+
58 Nederlands
1. Introductie
Gefeliciteerd met de aanschaf van uw ClearView+, een
automatisch scherpstellende beeldschermloep, ontwikkeld
door Optelec om slechtzienden te ondersteunen.
ClearView+ kan gebruikt worden bij lezen, schrijven, het
bekijken van foto’s en uitvoeren van hobby’s.
Met eenvoudige bediening vergroot u teksten en objecten in
meerdere kleuren. Helderheid en contrast kunnen naar
wens worden ingesteld. Het ergonomische ontwerp en de
uitgebreide mogelijkheden maken van de ClearView+ een
uitstekend hulpmiddel voor thuis, op het werk en op school.
De ClearView+ beschikt over unieke functionaliteit, waarbij
het accent is gelegd op gebruiksgemak en ergonomie. Het
bedieningspaneel is geïntegreerd in het beweegbare
leesplateau en is eenvoudig in gebruik. Iedere ClearView+ is
standaard voorzien van autofocus. Om schitteringen en
lichtreflecties te voorkomen, kunnen de ClearView+
monitoren worden versteld in kijkhoek. Dit zorgt voor een
comfortabeler leeshouding. Indien u de ClearView+ met plat
beeldscherm heeft aangeschaft, kunt u tevens de hoogte
van de monitor verstellen.
Lees deze gebruikershandleiding grondig door voordat u uw
systeem installeert en gaat gebruiken. Indien u nog vragen
of verzoeken heeft na het lezen van deze handleiding,
aarzel dan niet om contact op te nemen met uw leverancier.
** Deze gebruikershandleiding bevat informatie over alle
courante ClearView+ modellen. De ClearView+ wordt
samengesteld uit verschillende modules. Het is mogelijk dat
uw model afwijkt van de beschreven functionaliteit of dat

Optelec ClearView+
Nederlands 59
een bepaalde module niet aanwezig is (bijvoorbeeld een
andere monitor, monitor plaat of Pluspakket).
Over deze handleiding
Optelec verbetert continue haar producten en de
functionaliteit ervan. Het kan daarom voorkomen dat deze
handleiding niet de meest recente versie is. Kijk daarom op
onze website www.optelec.nl onder Support om te zien of er
een recentere versie beschikbaar is

Optelec ClearView+
60 Nederlands
2. Uitpakken en installatie
De ClearView+ is een modulair systeem met een standaard
HDMI uitgang. Dit betekent dat u uw ClearView+ op vrijwel
iedere computer monitor of TV kunt aansluiten, als de
monitor of TV een HDMI aansluiting heeft.
Uw ClearView+ systeem bestaat uit:
- Basis unit met beweegbaar leesplateau en
geïntegreerd bedienpaneel.
- Elektronica unit bestaand uit een cameradeel,
verlichting en aansluitpunten voor de snoeren. U heeft
keuze uit:
˗ HD 720P
˗ FULL HD 1080P (met uitstekende beeldkwaliteit)
- Specifieke ClearView+ monitor (optioneel).
ClearView+ kan geleverd worden met een:
˗ 22” hoog contrast TFT monitor
˗ 24” hoog contrast TFT monitor
˗ 24” Spraak monitor met aanraakscherm
Alle beeldschermen zijn in kijkhoek verstelbaar (zie
hoofdstuk 5). De ClearView+ monitoren kunnen óp het
systeem (basis unit) worden geplaatst. Een monitorplaat
is hierbij niet nodig.
- Pluspakket (optioneel). Het Pluspakket voorziet uw
ClearView+ van extra functies (zie Hoofdstuk 5 & 6) en
kan worden aangesloten op ieder monochroom of
kleurensysteem. Optelec biedt 2 verschillende
pluspakketten:
˗ Basis Pluspakket

Optelec ClearView+
Nederlands 61
˗ Uitgebreid Pluspakket
- Voetschakelaar (optioneel, alleen te gebruiken bij
kleuren- en computersystemen).
- Snoeren en adapter om de ClearView+ aan te sluiten.
- ClearView+ Installatie en gebruik
- ClearView+ Veiligheid en verzorging
- ClearView+ installatieboekje.
** Wanneer uw ClearView+ systeem is geleverd in losse
modules, gebruik dan de installatieposter als leidraad om
uw systeem te installeren.

Optelec ClearView+
62 Nederlands
3. Gebruik
Leg uw handen op de polssteunen, welke zich aan de
voorzijde van het leesplateau bevinden, wanneer u de
ClearView+ gebruikt. Hierdoor zijn de toetsen altijd binnen
handbereik en kunt u de tafel eenvoudig bewegen.
Aan / uit schakelaar
Druk deze toets in om het systeem aan- en uit te
schakelen. Wanneer een specifieke ClearView+
monitor is aangesloten, zal deze ook aan- en
uitschakelen. De ClearView+ start altijd op in de stand
waarin het systeem is uitgeschakeld.
Verschillende leesstanden instellen
Door op deze toets te drukken ziet
u achtereenvolgens 3 verschillende
leesstanden.
1. Fotostand met echte kleuren.
2. Hoog contrast Tekststand positief. In deze stand
wordt het contrast tussen de voor- en achtergrond
vergroot. Zwart / wit is hierbij de standaard weergave.
Wanneer een Pluspakket is geïnstalleerd, kunnen de
voor- en achtergrond kleuren worden veranderd.
3. Hoog contrast Tekststand negatief. In deze
leesstand wisselen (inverteren) de voor- en achtergrond

Optelec ClearView+
Nederlands 63
kleuren. Ook in deze stand wordt het contrast van de
voor- en achtergrond verhoogd en kunnen de voor- en
achtergrond kleuren worden aangepast.
4. Fotostand met grijstinten
NB: Wanneer de grijs instelling op uw ClearView+
geactiveerd is, ziet u door op deze toets te drukken 4
verschillende leesstanden inclusief:
Vergroting regelen
Draai de vergrotingsknop met de klok mee om
beeld te vergroten en tegen de klok in om het beeld
te verkleinen.
Focus toets/Autofocus blokkering
De ClearView+ is voorzien van een autofocus stand,
die ervoor zorgt dat het beeld automatisch scherpstelt.
Wanneer de ClearView+ wordt aangezet zal het systeem
altijd in deze stand opstarten. Door op de focus toets te
drukken zal de ClearView+ de scherpstelling “bevriezen”,
waardoor het systeem niet langer continu zal scherpstellen.
Dit is met name van belang bij taken als schrijven,
schilderen of het uitvoeren van hobby’s.
Wanneer de autofocus is geblokkeerd, is een rood licht op
de centrale knop in het midden van de leestafel zichtbaar.
Wanneer u deze focustoets nogmaals indrukt, schakelt dit
rode licht automatisch uit en keert u terug naar de autofocus
stand.

Optelec ClearView+
64 Nederlands
Objectverlichting aan/uit
Door vier seconden op deze toets te drukken, wordt
de objectverlichting uitgeschakeld. Deze weergave
maakt het mogelijk glossy magazines / documenten
te lezen. Door vier seconden weer op deze toets te drukken
of een andere leesstand te kiezen, wordt de
objectverlichting terug ingeschakeld. De objectverlichting
kan worden in- en uitgeschakeld in elk van bovengenoemde
leesstanden.
Beeldkwaliteit/contrast aanpassen
Houdt de linker of de rechter toets ingedrukt om het
contrast van het beeld aan te passen. U kunt deze toets
gebruiken om letters of andere delen van de tekst scherper
te maken als ze niet duidelijk zichtbaar zijn.
NB: De monteur kan de beeldkwaliteit/contrast instelling op
uw ClearView+ veranderen naar helderheid aanpassen.
U zult dan door op deze toetsen te drukken de
instellingen van de helderheid aanpassen.
Helderheid aanpassen
Druk op de linker- of de rechtertoets, terwijl u
de autofocus toets ingedrukt houdt om de
helderheid aan te passen.
NB: De monteur kan de helderheidinstelling op uw
ClearView+ veranderen naar beeldkwaliteit/contrast
aanpassen. U zult dan door op deze toetsen te drukken
de instellingen van de beeldkwaliteit/contrast
aanpassen.

Optelec ClearView+
Nederlands 65
Systeeminformatie in beeld zetten
U kunt de vergrotingsfactor en de systeemconfiguratie
(informatie over systeemtype en monitor type) in beeld
zetten. Druk de focus toets gedurende vier seconden in om
systeeminformatie weer te geven op het scherm van uw
systeem. Druk de toets nogmaals gedurende vier seconden
in om deze informatieweergave uit te schakelen.
Blokkeren van de beweegbare
leestafel
Duw de rode greep aan de
voorzijde onder de leestafel kort
omhoog om de beweging van de
tafel te blokkeren. In de geblokkeerde stand worden taken
als schrijven en schilderen onder de camera vereenvoudigd.
Duw de rode greep nogmaals omhoog om de blokkering op
te heffen.
NB: Wanneer de ClearView+ wordt uitgeschakeld, wordt de
tafel automatisch geblokkeerd. Bij het inschakelen van
het systeem wordt de rem automatisch vrij gezet. Zorg
ervoor dat u de leestafel in een veilige positie zet
voordat u het systeem uitschakelt.
Gebruik maken van een voetschakelaar
Met de optionele voetschakelaar schakelt u tussen het
camerabeeld en het PC beeld.

Optelec ClearView+
66 Nederlands
4. Pluspakketten
Het Pluspakket vergroot het aantal functies van de
ClearView+. Optelec biedt een keuze uit twee verschillende
Pluspakketten;
• Basis versie
• Uitgebreide versie
4.1 Pluspakket – Basis
Het Basis Pluspakket beschikt over functies voor het
instellen van verschillende voor- en achtergrond kleuren,
grijstinten, fotostand, fotostand+, en voor de
Pointer/Zoekfunctie (positie bepalen op het beeldscherm).
Verschillende voor- en achtergrond kleuren
instellen
Door in de hoogcontrast leesstand op deze toets te drukken
kunnen 7 verschillende voor- en achtergrond kleuren-
combinaties worden gekozen. U kiest deze kleuren wanneer
meer contrast nodig is of wanneer alternatieve kleuren een
beter overzicht geven. Door de toets twee seconden
ingedrukt te houden, keert u versnelt terug naar de zwart /
wit stand. Door de toets opnieuw twee seconden ingedrukt
te houden, keert u versnelt terug naar de laatste
geselecteerde voor- en achtergrond kleur. Door op deze
toets te drukken in de fotostand kunt u schakelen tussen
fotostand met echte kleuren, fotostand+ waarbij de kleuren
meer verzadigd zijn voor extra contrast, of met grijstinten.

Optelec ClearView+
Nederlands 67
Zoekfunctie (positie bepalen op het beeldscherm)
De zoekfunctie is een handig hulpmiddel om het gewenste
tekstgedeelte te vinden doordat er een overzicht over het
document wordt gegeven. Druk de pointer in om de
zoekfunctie te activeren. Nu gaat het beeld naar de laagste
vergrotingsstand, en verschijnt een kruis met daarin een
rechthoek waarmee het midden van het scherm wordt
gemarkeerd. Positioneer de gewenste tekst in het midden
van het kruis en druk de knop opnieuw in. Er wordt nu
automatisch vergroot naar de vergrotingsstand waarin de
ClearView+ stond.
Pointer (positie bepalen op het beeldscherm)
Door deze toets in te drukken wordt een rode
lichtmarkering geactiveerd die centraal op het
leesplateau zichtbaar is. De lichtmarkering
geeft het midden van uw beeldscherm aan.
Plaats een pen op het papier in de lichtmarkering. Op het
beeldscherm ziet u de pen direct terug in het midden van uw
beeldscherm.
4.2 Pluspakket - Uitgebreid
Het Uitgebreid Pluspakket beschikt over functies voor het
instellen van verschillende voor- en achtergrond kleuren,
voor de Pointer/Zoekfunctie (positie bepalen op het
beeldscherm), voor het schakelen tussen camera- en PC
beeld en voor de lijn en afdekking functies. Voor meer
informatie over het instellen van de verschillende voor- en
achtergrond kleuren, en over de Pointer/Zoekfunctie kijkt u
naar hoofdstuk 4.1.

Optelec ClearView+
68 Nederlands
Schakelen tussen camerabeeld en het PC
beeld/externe bron
Indien een PC of andere externe bron is aangesloten
op de ClearView+ schakelt u met deze toets of de
voetschakelaar (optioneel) tussen het camerabeeld, het PC
beeld, of een andere HDMI bron, zoals een externe camera.
Voor een correcte weergave van het PC beeld op de
ClearView+ monitor stelt u de resolutie van uw PC als volgt
in:
˗ Met een ClearView+ 22” TFT monitor: 1680 x 1050
˗ Met een ClearView+ 24” TFT monitor of het 24”
aanraakscherm: 1920 x 1080
Activeren van lijnen en beeldafdekking
Door deze knop in te drukken, worden
achtereenvolgens referentielijnen, beeldafdekking en
volledig camerabeeld op het
scherm van uw ClearView+
geactiveerd. De lijnen kunnen het
lezen van teksten (horizontaal of in
kolomvorm) vergemakkelijken.

Optelec ClearView+
Nederlands 69
Beeldschermafdekking wordt veelal gebruikt om een deel
van de tekst te blinderen.
Positioneren van lijnen en beeldafdekking
Wanneer lijnen en beeldafdekking zijn
geactiveerd, kan door middel van het
draaien aan deze toets de positie van de
lijnen of beeldafdekking worden gewijzigd. Het veranderen
van de positie kan zowel in horizontale als verticale richting,
afhankelijk van de instelling van de horizontaal/ verticaal
knop .
Positie aanpassen van lijnen en beeldafdekking
Wanneer lijnen of beeldafdekking zijn
geactiveerd kan, door middel van het
draaien van deze knop, de afstand tussen de
delen van de beeldafdekking en de lijnen
worden vergroot of verkleind. Het veranderen van de
afstand kan zowel in horizontale als verticale richting,
afhankelijk van de instelling van de horizontaal / verticaal
knop .
Horizontaal / verticaal aanpassen van
leesondersteuning
Door deze knop in te drukken schakelt u
tussen geactiveerde lijnen en beeldafdekking
van horizontaal naar verticaal.

Optelec ClearView+
70 Nederlands
5. Het verstellen van de monitor
De ClearView+ TFT monitor met standaard arm kan zowel in
hoogte als in kijkhoek worden versteld en garandeert
zodoende een optimaal kijkgemak en minimale
lichtreflecties. Om het scherm in de gewenste positie te
plaatsen, pakt u het scherm aan beide zijden vast en
beweegt u het scherm voorzichtig omhoog of omlaag. Pas
de kijkhoek van het scherm aan om lichtreflecties te
voorkomen.
De ClearView TFT monitoren die worden geleverd met een
“Ultra Flexibele TFT Arm”, geven u de mogelijkheid de
monitor in elke gewenste positie te zetten. De monitor kan
naar boven en naar beneden, naar voren en naar achteren
en van links naar rechts worden bewogen.
Om de monitor in de gewenste positie te plaatsen, pakt u
met beide handen de monitor stevig beet.
Kijkt u alstublieft op de poster in de monitor doos voor meer
informatie over het instellen van de “Ultra Flexibele TFT
Arm”.
Let op dat u geen magnetische of metalen voorwerpen in de
buurt van de monitor houdt aangezien deze de elektronica
in de monitor kunnen beschadigen.

Optelec ClearView+
Nederlands 71
6. Problemen oplossen
Er is geen beeld
- Controleer of het apparaat is ingeschakeld (rode knop
op de X-Y tafel)
- Controleer of alle modulen correct zijn aangesloten
- Controleer of alle stroomkabels goed zijn aangesloten
- Controleer, indien u geen ClearView+ monitor gebruikt,
of uw monitor is ingeschakeld
Het beeld is onscherp
- Controleer de stand van de auto focus (wanneer een
rood licht brandt op de centrale knop, die zich in het
midden van de leestafel bevindt, is de automatische
scherpstelling geblokkeerd). Druk de focus toets
nogmaals in om terug te keren naar automatische
scherpstelling
- Maak de cameraspiegel in de behuizing met een droge,
zachte doek voorzichtig schoon
- Maak het beeldscherm met een droge, zachte doek
voorzichtig schoon
Tekst en afbeeldingen worden in grijstinten
weergegeven of hebben verminderd contrast
- Druk op de leesstandentoets om terug te keren naar de
hoogcontrast leesstand
- Verander de beeldkwaliteit of helderheid op het
bedieningspaneel
- Verhoog, wanneer u uw eigen monitor gebruikt, de
helderheid- en contrastinstellingen van deze monitor
Er is geen computerbeeld
- Controleer of een uitgebreid Plus pakket is
geïnstalleerd

Optelec ClearView+
72 Nederlands
- Controleer alle aansluitingen tussen computer en Basis
unit (verbindt de computer via de Basis unit aan de
monitor)
- Controleer de status van de toets
- Sluit de monitor rechtstreeks aan op de computer en
controleer of deze beeld geeft
- Indien u een voetschakelaar gebruikt: controleer of het
uitgebreid Pluspakket is geïnstalleerd
- Zorg ervoor dat de PC resolutie op 1920x1080 staat.
Het leesplateau functioneert niet
- Zorg dat de rem niet is geblokkeerd. U kunt de rem
eenvoudig deblokkeren door de rode greep aan de
voorzijde onder de leestafel kort omhoog te duwen
- Inspecteer de rails op stof of andere delen
Systeem resetten naar fabrieksinstellingen
Indien gewenst kunt u de ClearView+ eenvoudig
terugzetten naar de fabrieksinstellingen. Schakel de
unit uit en wacht drie seconden. Druk nogmaals de aan
/ uit knop in en houdt deze drie seconden ingedrukt. Uw
ClearView+ is nu ingeschakeld volgens de
fabrieksinstellingen.
7. Contact en service
Wanneer u vragen heeft over bediening, gebruik of
installatie van uw ClearView+, neem dan contact op met uw
leverancier of een Optelec kantoor. Op de laatste pagina
van deze handleiding staat een adresoverzicht van alle
Optelec vestigingen.

Optelec ClearView+
Italiano 73
ClearView+
Funzioni Avanzate
Dal 1975, Optelec sviluppa e produce soluzioni innovative
per aiutare ciechi e ipovedenti nelle loro attività quotidiane.
Visitate il sito web di Optelec all’indirizzo www.optelec.com
per ulteriori informazioni sui prodotti e i servizi Optelec.
Le informazioni contenute nel presente manuale sono
corrette e aggiornate alla data della sua pubblicazione.
Nè Optelec, nè alcuno dei suoi rappresentanti, possono
essere ritenuti responsabili per errori o danni risultanti da un
impiego non corretto delle informazioni contenute in questo
manuale.

Optelec ClearView+
74 Italiano
1. Introduzione
Congratulazioni per l’acquisto di ClearView+, un sistema
elettronico ingrandente da tavolo, progettato da Optelec.
ClearView+ permette di leggere, scrivere, vedere fotografie,
eseguire lavoretti manuali e molte altre attività.
Attraverso semplici comandi, è possibile ingrandire testi ed
oggetti in differenti colori, con luminosità e contrasto
regolabili. Grazie al suo design compatto, ClearView+ è lo
strumento ideale in ambito domestico, scolastico e
professionale.
ClearView+ ha un design unico ed ergonomico, per favorire
la semplicità di utilizzo: il pannello dei comandi è integrato
nel piano di lettura, la messa a fuoco automatica è presente
in tutti i modelli ClearView+. I monitor ClearView+ possono
essere inclinati per evitare fastidiosi riflessi di luce e si
possono posizionare in base alle esigenze personali, per la
vostra comodità di utilizzo.
È importante leggere questo manuale prima di utilizzare
questo videoingranditore. Se avete domande o richieste
inerenti a questo prodotto, non esitate a contattare il vostro
distributore locale o la sede centrale Optelec facendo
riferimento ai contatti elencati nell’ultima pagina del
manuale. Ogni vostro riscontro sarà apprezzato.
** ClearView+ è un sistema modulare: è possibile quindi
assemblare differenti modelli ClearView+. Questo manuale
si riferisce a tutti i modelli attualmente disponibili. Comandi e
funzioni possono essere aggiunti o rimossi in funzione dei
moduli installati. E’ quindi possibile che il modello da voi
acquistato non includa una funzione o un modulo descritti in
questo manuale.


Optelec ClearView+
76 Italiano
2. Apertura della confezione, installazione e
accensione
ClearView+ è un sistema modulare con un’uscita standard di
tipo HDMI. Ciò significa che è possibile collegare
ClearView+ a tutti i monitor compatibili HDMI, siano essi
schermi catodici (CRT) o schermi piatti a cristalli liquidi
(TFT) o ad un apparecchio TV.
Il sistema ClearView+ è composto da:
- Una Base, con un piano di lettura che integra il pannello
dei comandi;
- Una Elettronica, con telecamera, fonte luminosa e
connettori di entrata ed uscita. E’ possibile scegliere tra:
˗ Unità HD 720P (Alta Definizione)
˗ Unità Full HD 1080P (Alta Definizione, con ottima
qualità dell’immagine)
- Un Monitor ClearView+ personalizzato. ClearView+ è
disponibile con i seguenti monitor:
˗ TFT 22” alta luminosità
˗ TFT 24” alta luminosità
˗ Monitor 24” HD touch screen con Sintesi Vocale
Per regolare il monitor nella posizione più adatta e comoda
per voi, fate riferimento al capitolo 5. Tutti i monitor possono
essere usati solo come parte integrante dell’unità.
- Feature Pack (kit opzionale) permette di aggiungere
ulteriori funzioni a ClearView+. Sono disponibili 2 tipi di
Feature Pack:
˗ Feature Pack Basic
˗ Feature Pack Advanced

Optelec ClearView+
Italiano 77
- Interruttore a pedale (opzionale) per passare
dall’immagine della telecamera interna all’immagine di
fonti esterne, per esempio l’immagine del PC.
- Un alimentatore con relativi cavi per collegare
ClearView+ ad una presa elettrica.
- ClearView+ Installazione ed uso
- ClearView+ Sicurezza e cura
- ClearView guida per l’installazione.
** Nel caso in cui il sistema ClearView+ sia stato fornito in
moduli separati, disimballare tutti i moduli accuratamente
prima della loro installazione e consultare le relative guide di
installazione a corredo.

Optelec ClearView+
78 Italiano
3. Funzionamento
Per un comodo utilizzo dei pulsanti di controllo e per un
movimento corretto del piano di lettura durante l’utilizzo di
ClearView+, tenete le mani sul supporto per i polsi, che si
trova sulla parte anteriore del piano di lettura.
Accensione/Spegnimento
Premere il pulsante On / Off per accendere/spegnere sia
il sistema che il monitor. ClearView+ si avvierà nella stessa
modalità colori in cui si trovava al momento del suo ultimo
spegnimento. Un monitor non Optelec dovrà essere
acceso/spento separatamente.
Differenti modalità di visualizzazione
Premendo questo pulsante si compie
un ciclo di 3 diverse modalità di
visualizzazione:
1. Modalità fotografica a colori.
2. Modalità lettura: questa modalità migliora il contrasto
tra primo piano e sfondo. Le immagini e i testi verranno
visualizzati in bianco e nero. Se è stato acquistato un

Optelec ClearView+
Italiano 79
Feature Pack con la funzione combinazioni colore, i
colori di sfondo e primo piano possono essere
modificati.
3. Modalità di lettura inversa: con questa modalità si
invertono le combinazioni scelte per i colori di sfondo e
primo piano della Modalità Lettura.
4. Modalità fotografica scala di grigi
Nota: se nel vostro ClearView+ è stata attivata la modalità
scala di grigi, questo pulsante attiverà un ciclo di 4
differenti modalità di visualizzazione, includendo
anche:
Regolazione dell’ingrandimento
Ruotare il pulsante dello zoom (ingrandimento),
situato al centro del piano di lettura: in senso orario
per aumentare l’ingrandimento e in senso anti-
orario per diminuirlo.
Blocco della messa a fuoco automatica (Auto-
focus)
ClearView+ ha un sistema di messa a fuoco
automatica. Il sistema mette automaticamente a fuoco
qualsiasi oggetto posto sotto la telecamera, riproducendone
l’immagine nitida sul monitor. Quando si accende
ClearView+, il sistema si avvia in modalità di messa a fuoco
automatica.
Se si preme questo pulsante Auto Focus, si arresta il
processo continuo di messa a fuoco. Questa condizione si
rivela utile nel caso di scrittura, pittura o piccoli lavori
manuali. Quando la funzione di messa a fuoco automatica è
bloccata, s’illumina un indicatore rosso intorno al pulsante di
comando generale (modalità / zoom).

Optelec ClearView+
80 Italiano
Per riattivare la funzione di messa a fuoco automatica,
premere nuovamente il pulsante Auto Focus. L’indicatore
luminoso rosso si spegnerà.
Illuminazione oggetto ON /OFF
Premendo questo pulsante per quattro secondi,
potete spegnere l’illuminazione sull’oggetto che
volete ingrandire. Questo permette di facilitare la lettura di
riviste e documenti su carta patinata. Cambiando la
modalità di visualizzazione o premendo ancora questo
pulsante per quattro secondi, verrà riattivata l’illuminazione.
Regolazione controllo immagine
Premete la parte sinistra o destra di questo
pulsante per regolare il controllo dell’immagine.
Potrebbe essere utile regolare questo controllo per dare più
contrasto e rendere più visibili i caratteri o altri elementi di
un documento.
Nota: se le impostazioni di controllo predefinite sono state
modificate, premendo questo pulsante verrà regolata
la luminosità.
Regolazione luminosità
Per regolare la luminosità, premete la parte
sinistra o destra del pulsante di regolazione
insieme al pulsante auto-focus.
Nota: se le impostazioni di controllo predefinite sono state
modificate, premendo questi pulsanti verrà regolato il
controllo immagine.
Informazioni sistema
E’ possibile visualizzare sullo schermo il livello di
ingrandimento e la configurazione del sistema (moduli

Optelec ClearView+
Italiano 81
sistema). Premere il pulsante Auto-focus per quattro
secondi per visualizzare queste informazioni. Premerlo
nuovamente per quattro secondi per rimuoverle.
Blocco del piano di lettura
Sollevare leggermente verso l’alto la
levetta rossa posta al centro del
piano di lettura, per bloccare il
movimento del piano stesso. Tale
posizione facilita la scrittura o la pittura sul piano di lettura.
Per sbloccarlo, sollevare nuovamente la levetta verso l’alto.
Nota: Quando l’apparecchio è spento, o staccato
dall’alimentazione elettrica, il freno si attiva
automaticamente (posizione di blocco). Quando si
accende ClearView+, il freno viene disattivato
(posizione di sblocco). Assicurarsi di sistemare il piano
di lettura XY nella posizione corretta, prima di
spegnere l’apparecchio.
Utilizzo dell’interruttore a pedale
L’interruttore a pedale (opzionale) permette di passare
dall’immagine della telecamera interna all’immagine di una
fonte esterna e viceversa.

Optelec ClearView+
82 Italiano
4. Feature Pack
Attenzione: i Feature Pack sono opzionali.
l Feature Pack aumentano le funzionalità di ClearView+.
Optelec offre 2 tipi di Feature Pack: Basic e Advanced.
4.1 Feature Pack Basic
Il Feature Pack Basic offre combinazioni di colori
selezionabili, scala dei grigi, Colori reali+, Puntatore e
funzione Trova.
Combinazioni colore
Premendo questo pulsante nelle modalità lettura ad
alto contrasto, si può percorrere un ciclo di 7 differenti
combinazioni di colori per primo piano e sfondo. Potete
scegliere di visualizzare un testo per il quale si desidera un
maggior contrasto, scegliendo una certa coppia di colori,
oppure combinazioni di colori che garantiscano una migliore
visualizzazione. Tenere premuto questo pulsante per due
secondi per ritornare alla modalità nero su bianco. Premere
il pulsante di nuovo per due secondi per tornare alla
combinazione precedente.
Premere questo pulsante in modalità fotografica per
scorrere le varie modalità (Colori reali, Colori reali+ e scala
dei grigi).

Optelec ClearView+
Italiano 83
In modalità Colori reali+, i colori sono più saturi, quindi
migliora il contrasto dei colori.
Funzione Trova (indicatore di posizione)
La funzione Trova è molto utile, poichè permette di
avere una panoramica dell’intero documento che state
leggendo, per individuare rapidamente la parte di testo che
interessa.
Per attivare la funzione Trova, premere e subito rilasciare il
pulsante per l’indicatore di posizione. Quando la funzione
Trova è attivata, ClearView+ attiverà automaticamente
l’ingrandimento minimo e visualizzerà un mirino che indica il
centro dello schermo. Posizionare la parte di testo che si
desidera leggere nel mirino, muovendo il ripiano di lettura.
Dopo aver posizionato correttamente il documento, premere
ancora una volta il pulsante per ingrandire il testo scelto,
tornando così al livello di ingrandimento scelto
precedentemente.
Puntatore (indicatore di posizione)
Premendo questo pulsante per tre secondi si
attiva un indicatore a LED al centro del piano
di lettura. Se si posiziona ad esempio una
penna sull’indicatore luminoso del piano di
lettura, si vedrà la penna stessa visualizzata al centro dello
schermo. Premete di nuovo il pulsante per disattivare
l’indicatore a LED.
4.2 Feature Pack – Advanced
Il Feature Pack Advanced contiene le combinazioni di
colori, l’Indicatore di posizione, lo switch per il PC, i
marcatori orizzontali righe e finestre. Per una descrizione
delle combinazioni di colori e dell’indicatore di posizione
leggete il paragrafo 4.1 “Feature Pack – Basic”.

Optelec ClearView+
84 Italiano
Commutazione tra la telecamera interna e il PC /
fonte esterna
Nel caso in cui ClearView+ sia collegato ad un computer, o
ad un’altra fonte esterna, premere questo pulsante, oppure
l’interruttore a pedale, per commutare tra l’immagine
proveniente dalla telecamera interna e quella proveniente
dal PC.
Per visualizzare al meglio l’immagine del PC sul monitor
ClearView+, accertarsi che la risoluzione del PC sia
impostata correttamente:
˗ Con un monitor ClearView+ 22” TFT la risoluzione deve
essere impostata a 1680 x 1050.
˗ Con un monitor ClearView+ 24” TFT e per il monitor 24”
touch screen, la risoluzione deve essere impostata a
1920 x 1080.

Optelec ClearView+
Italiano 85
Attivazione dei marcatori di righe / finestre
Premendo questo pulsante, si attiveranno in
sequenza i marcatori di righe, di finestre e le
immagini a tutto schermo provenienti dalla
telecamera. I marcatori di righe vengono utilizzati come
guide per rendere più facile la
lettura di un testo. I marcatori di
finestre vengono utilizzati per
oscurare una parte dell’immagine,
nel caso in cui la luminosità dello
schermo provochi disturbo.
Posizionamento di righe / finestre
Quando sono attivati i marcatori per
righe o finestre (vedere più avanti),
con la rotazione di questo pulsante si
modificherà la posizione dei marcatori di righe o di finestre
sullo schermo.
I marcatori di righe e di finestre potranno essere visualizzati
sia in posizione orizzontale, sia in posizione verticale, a
seconda dello stato del pulsante .
Dimensione di righe / finestre
Quando sono attivati i marcatori di righe o finestre,
ruotando questo pulsante, si modificherà la distanza
tra i marcatori di righe o tra i bordi delle finestre sullo
schermo. Questa modifica potrà essere eseguita sia
orizzontalmente sia verticalmente, a seconda dello stato del
pulsante orizzontale / verticale .
Pulsante orizzontale / verticale
Premendo questo pulsante, si commuta la posizione
di righe / finestre da verticale a orizzontale.

Optelec ClearView+
86 Italiano
5. Regolazione del Monitor
Il monitor ClearView+ TFT con braccio standard permette di
regolare l’altezza e l’inclinazione, per ottenere una posizione
di lettura più comoda ed evitare fastidiosi riflessi. Afferrate lo
schermo ai suoi lati con entrambe le mani e posizionatelo
come preferite.
II monitor ClearView+ TFT includono un braccio ultra
flessibile multi direzionale (Ultra Flexible TFT Arm), che
permette di regolare il monitor nella posizione preferita. Il
monitor può essere spostato verso il basso e verso l’alto, in
avanti e all’indietro, verso destra e verso sinistra, per la
massima comodità di lettura.
Per posizionare il monitor afferrate lo schermo ai suoi lati
con entrambe le mani e posizionatelo come preferite.
Fate riferimento alla scheda inclusa nella confezione del
monitor per ulteriori informazioni sulla regolazione del
braccio.
Accertatevi di non posizionare materiale magnetico o di
metallo vicino al monitor, per evitare che venga
danneggiato.

Optelec ClearView+
Italiano 87
6. Risoluzione dei problemi
Non compare alcuna immagine sullo schermo di
ClearView+, una volta acceso l’apparecchio:
- Verificare che l’apparecchio sia stato acceso (con il
pulsante rosso di accensione sul piano di lettura).
- Verificare tutte le connessioni dei cavi e delle parti
hardware.
- Verificare l’alimentazione del monitor, nel caso venga
utilizzato un monitor proprio.
Immagine non a fuoco
- Verificare lo stato del blocco della messa a fuoco
(l’indicatore rosso, attorno al pulsante che attiva le varie
modalità, indica il blocco della messa a fuoco). Premere
il pulsante relativo per far ritorno alla messa a fuoco
automatica.
- Pulire accuratamente lo specchio della telecamera con
un panno non abrasivo.
- Pulire lo schermo del monitor con un panno non
abrasivo inumidito con uno spray per vetri.
Le immagini e i testi appaiono grigi o hanno un basso
contrasto
- Premere il pulsante Modalità per commutare in modalità
lettura ad alto contrasto.
- Aumentare luminosità/contrasto sul pannello dei
comandi.
- Nel caso si utilizzi un proprio monitor: modificare le
regolazioni di luminosità e contrasto del monitor.
Non viene visualizzata l’immagine del computer
- Verificare l’installazione del Feature Pack Advanced
(necessario anche quando si usa l’interruttore a pedale).

Optelec ClearView+
88 Italiano
- Verificare i cavi di connessione video (HDMI) dal
computer verso la Base (non collegare il computer
direttamente al monitor).
- Verificare lo stato del pulsante .
- Con l’interruttore a pedale: verificare l’installazione del
Feature Pack Advanced.
- Verificare eventuali malfunzionamenti del computer,
collegando direttamente il PC al monitor.
- Accertatevi che la risoluzione del PC sia impostata a
1920x1080.
Il piano di lettura non si muove o non scorre bene
- Sbloccare il piano sollevando la levetta posta sotto la
parte anteriore del piano.
- Verificare la presenza sui binari di polvere o altri oggetti
estranei.
Ripristino delle impostazioni di fabbrica
Se il funzionamento dovesse presentare problemi, si
potrà eseguire un reset del sistema, ripristinando le
impostazioni di fabbrica.
Accendere l’apparecchio, attendere 3 secondi, quindi
premere e mantenere premuto il pulsante On / Off per 3
secondi. ClearView+ si riavvierà con le impostazioni
originali di fabbrica.
7. Contatti / Assistenza tecnica
In caso di domande relative al funzionamento, all’utilizzo o
all’installazione del sistema, contattate il vostro distributore
Optelec.

Optelec ClearView+
Español 89
ClearView+
Características y funciones avanzadas
Desde 1975, Optelec ha desarrollado y fabricado productos
innovadores para ayudar a ciegos e incapacitados visuales
en sus actividades diarias.
Si desea obtener más información sobre todos los
productos y servicios de Optelec, haga el favor de dirijirse a
la página web de Optelec: www.optelec.com.
Hemos hecho todo lo posible para asegurarnos de que la
información contenida en este manual fuera correcta al
momento de su emisión. Ni Optelec ni sus agentes asumen
responsabilidad alguna por errores u omisiones que puedan
existir; tampoco asumimos obligación alguna por daños
resultantes del uso de la información contenida en este
manual.

Optelec ClearView+
90 Español
1. Felicitaciones por su ClearView+
Felicitaciones por la compra de su ClearView+. ClearView+
es un sistema de amplificación de objetos y textos,
proyectados en pantalla de vídeo, con auto-foco continuo,
destinado a ayudar a personas con deficiencias visuales.
ClearView+ está diseñado para ser colocado sobre una
mesa o un escritorio, con el fin de que el usuario pueda, de
manera autónoma, leer, escribir, ver fotografías, hacer
manualidades, dedicarse a sus hobbies, y muchas cosas
más.
Es fácil y simple de operar y permite ampliar textos y
objetos en diferentes colores, con brillo y contraste
regulables. Debido a su diseño “slim” y a su amplia
funcionabilidad, ClearView+ proporciona ayuda práctica en
el hogar, en el trabajo y en la escuela.
El sistema ClearView+ ofrece una funcionabilidad única en
su género. Diseñado en función de la ergonomía del
usuario, el panel de operaciones está integrado al tablero
de lectura y es sumamente simple de operar.
El auto-foco continuo ha sido incorporado como
componente estándar en todos los modelos de ClearView+.
Los monitores ClearView+ personalizados pueden ser
inclinados para evitar el resplandor y la reflexión de la luz,
siendo su posición ajustable para mayor comodidad del
usuario.
En el modelo ClearView+, con pantalla plana personalizada,
es también posible ajustar el ángulo visual y la altura del
monitor.
Lea atentamente este manual antes de armar, configurar y
usar su sistema.

Optelec ClearView+
Español 91
Si después de haber leído este manual, tiene preguntas,
inquietudes o puntos a clarificar, no dude en consultarnos,
consultar a su proveedor o a su distribuidor local.
Acerca de este manual
Debido a que estámos constantemente mejorando nuestros
productos y sus funcionalidades, es posible que no sea la
versión más reciente de este manual. Por favor, descargue
la última versión de este manual en la página de
www.optelec.com.
Este manual del usuario corresponde a todos los modelos
actuales del sistema ClearView+. ClearView+ se arma con
diferentes módulos. Es posible que el modelo que usted
tiene no incluya alguna de las funciones o de los módulos
descritos en este manual (por ejemplo: el monitor, monitor
plateado o los módulos de funciones).

Optelec ClearView+
92 Español
2. Desembalaje, instalación y configuración
El ClearView+ es un sistema modular con una salida HDMI
estándar que le permite conectar su ClearView+ a
prácticamente cualquier monitor o televisor compatibles con
HDMI.
Su ClearView+ consta de:
- Una unidad de base, con un tablero de lectura y un
panel de control integrado.
- Una caja electrónica, con módulo de cámara, fuentes
de luz y conectores de entrada y de salida. Es posible
elegir entre:
˗ la unidad HD 720P
˗ la unidad Full HD 1080P (con calidad de imagen
superior)
- Un monitor personalizado ClearView+. ClearView+
está disponible con las siguientes opciones de
monitores:
˗ 22” de alto brillo TFT monitor
˗ 24” de alto brillo TFT monitor
˗ Pantalla táctil de 24” con voz
Para ajustar los diferentes monitores a su posición
predilecta, por favor, consulte el capítulo 5. Los
monitores solo pueden utilizarse como una parte
integrada a la unidad.
- Un módulo de funciones (optativo) para proporcionar
funcionalidades adicionales al ClearView+. Optelec
ofrece 2 módulos de funciones:
˗ El módulo de funciones básicas,
˗ el módulo de funciones avanzadas.

Optelec ClearView+
Español 93
- Un pedal (optativo) para alternar la imagen de la
cámara interna y las fuentes externas como la imagen
de una PC.
- Una fuente de alimentación y cables para conectar el
ClearView+ a un tomacorriente.
- ClearView+ Primeros pasos y funcionamiento
- ClearView+ Seguridad y matenimiento
- ClearView+ Guía de instalación.
**Si su sistema ClearView+ viene en módulos separados,
desembale todos los módulos con cuidado antes de la
instalación y verifique la guía de instalación incluida para
instalar los diferentes módulos.

Optelec ClearView+
94 Español
3. Operación
Cuando utilice el ClearView+, para facilitar el acceso a los
botones de control y permitir un movimiento estable del
tablero, ubique las manos sobre el apoya muñecas, en la
parte frontal del tablero.
Botón On / Off (encendido / apagado)
Presione el botón ON / OFF (encendido/apagado)
ubicado arriba del botón de zoom, en el tablero de lectura,
para encender el sistema y el monitor. El ClearView+ se
encenderá en el mismo modo de color en el que se apagó.
La unidad de la cámara tarda unos 10 segundos en
inicializarse antes de mostrar una imagen. Dentro de
aproximadamente 1 minuto, la fuente de luz de ClearView+
alcanzará su luminosidad total, brindando una calidad de
imagen óptima.
Un monitor que no sea ClearView+ deberá encenderse y
apagarse de manera independiente.
Diversos modos de visualización
Presionar este botón le
completará un ciclo con 3
diversos modos de visualización:

Optelec ClearView+
Español 95
1. Modo de la foto a todo color.
2. Modo de lectura: Este modo realza el contraste del
primero plano/del fondo. Los cuadros y el texto serán
exhibidos en blanco y negro. Si el paquete de la
característica opcional fue comprado con la unidad, la
combinación de color de fondo y del primero plano
que usted ha seleccionado con el botón del semi-
color (véase más lejos) aparecerá.
3. Modo de lectura inverso: Lo contrario de este modo
las combinaciones elegidas de color de fondo y del
primero plano. También realza el contraste del
primero plano/del fondo.
4. Escala de grises del modo de la foto
Nota: Si el ajuste de la escala de grises del defecto se
cambia en su ClearView+ este botón le completará un
ciclo con 4 diversos modos de visualización
incluyendo:
Ajuste de la amplificación
Haga girar el botón “Zoom” en sentido horario
para aumentar la amplificación y en sentido
contrario para reducirla.
Bloqueo del auto-foco
Para bloquear/desactivar la unidad de auto-foco
continuo se debe presionar el botón “Auto Focus”.
Cuando se llevan a cabo tareas como escribir a mano,
pintar o realizar artesanías se puede prescindir del auto-
foco, por lo tanto es muy útil que éste se pueda desactivar.
Si el enfoque automático está bloqueado / desactivado, se
enciende una luz roja en el botón de control central (mode /
zoom). Para reactivar el enfoque automático basta con
presionar nuevamente el botón “Auto Focus”. La luz
indicadora roja se apagará.

Optelec ClearView+
96 Español
Iluminación del objeto encendido/apagado
Presionar este botón durante cuatro segundos le
permite apagar la iluminación del objeto. Esta
opción resulta útil a la hora de leer revistas o
documentos con un papel brillante. Cambiar el modo de
visualización o presionar el botón nuevamente durante
cuatro segundos volverá a encender la iluminación del
objeto.
Ajuste de control de la imagen
Presione y mantenga presionado el lado derecho o
izquierdo de este botón para regular el control de imagen.
Puede regular el control de la imagen para mejorar la
definición de los caracteres u otros elementos del
documento que no se vean con claridad.
Nota: Si la configuración por defecto está modificada en su
ClearView+, oprimir este botón ajustará el brillo.
Ajuste de brillo
Presione el botón de regulación izquierdo o derecho
mientras mantiene oprimido el botón “Auto Focus” para
regular el brillo.
Mostrar la informacion de sistema en pantalla
Es posible visualizar el factor de zoom y la
configuración del sistema (módulos del sistema) en
pantalla. Presione el botón “Auto Focus” durante
cuatro segundos para mostrar esta información.
Vuelva a presionarlo una vez más durante cuatro
segundos para quitar esta información.

Optelec ClearView+
Español 97
Freno del tablero de lectura
Para bloquear el movimiento del
tablero de lectura, mueva
ligeramente hacia arriba la palanca
roja situada en la parte delantera
del mismo. El freno permite al usuario mantener el tablero
detenido firmemente en la posición deseada. El tablero de
lectura también puede usarse para escribir a mano o para
pintar. Para desbloquearlo, se vuelve a mover la palanca
roja hacia arriba.
Nota: Cuando el sistema está apagado o desconectado, el
freno se activa automáticamente (posición de
bloqueo). Cuando se enciende el ClearView+, el freno
se desactiva (posición de desbloqueo). Asegúrese de
que el tablero de lectura esté en la posición inicial
antes de apagar el sistema.
Utilizar el Pedal
El pedal alterna entre la imagen de la cámara interna y la
fuente externa.

Optelec ClearView+
98 Español
4. Módulos de funciones
Los módulos de funciones aumentan la funcionalidad del
ClearView+. Optelec ofrece 2 módulos de funciones:
avanzadas y básicas.
4.1 Módulo de funciones básicas
El Módulo de Funciones Básico ofrece la posibilidad de
seleccionar combinaciones de semi-color, escala de grises,
Todo color+, así como el localizador de posición y
búsqueda.
Semi - colores
Presionar este botón en modos de lectura del alto
contraste le completa un ciclo con diversas
combinaciones de color de fondo del primero plano 7 y.
Usted puede elegir exhibir el texto en un par de colores
seleccionables cuando o más contraste es necesario o
cuando las combinaciones de color alternas proporcionan
una mejor visibilidad. Presione este botón en el modo foto
para conmutar entre los modos Todo color, Todo color+ y
Escala de grises. En el modo Todo color+, los colores son
más saturados, lo cual mejora la imagen y ofrece mayor
contraste.

Optelec ClearView+
Español 99
Función Buscar (localizador de posición)
La función buscar ofrece un panorama rápido del texto que
lo ayuda a ubicar facilmente la parte relevante del
documento.
Presione brevemente el botón localizador de posición para
activar la función Buscar. Cuando la función Buscar está
activada, el ClearView+ se alejará con el zoom a la
magnificación mínima y mostrará una cruz para indicar el
centro de la pantalla. Ubique el texto que desee leer en la
intersección de la cruz moviendo el tablero X-Y. Luego de
ubicar el documento, vuelva a pulsar el botón para
acercarse con el zoom al texto seleccionado y para volver a
su configuración de magnificación anterior.
Puntero (localizador de posición)
Presionar este botón durante tres segundos
activará la luz LED, que aparecerá en el
centro del tablero de lectura para marcar el
centro de la imagen en pantalla. Ubique un
bolígrafo en la luz indicadora del tablero de
lectura para verlo aparecer en el centro de la pantalla.
Vuelva a oprimir el botón para desactivar la luz LED.
4.2 Módulo de funciones avanzadas
El módulo de funciones avanzadas consta de las
funcionalidades de los semicolores, el localizador de
posición, el conmutador PC y los marcadores de líneas y
ventanas. Para obtener una descripción de las
funcionalidades de los semicolores y el localizador de
posición, por favor consulte la sección 4.1 “Módulo de
funciones básicas”.

Optelec ClearView+
100 Español
Cambie entre la cámara y la PC interna/la fuente
externa
Si la PC o la otra fuente de Optelec del external está
conectada con el ClearView+, presione este botón, o el
interruptor de pie, para accionar la palanca entre la imagen
interna de la cámara, o una imagen de plena pantalla de la
PC.
Para mostrar la imagen de la PC en su monitor ClearView+
correctamente, verifique que la resolución de su PC esté
configurada en consecuencia:
˗ Con un monitor TFT de 22” ClearView+, la resolución
debe ser de 1680 x 1050.
˗ Con el monitor TFT de 24” y la pantalla táctil de 24 de
ClearView+, la resolución debe ser de 1920 x 1080.

Optelec ClearView+
Español 101
Activación de marcadores de línea / tonos de
ventanas
Pulsando este botón se pasa por marcadores de
línea, tonos de ventanas e
imágenes de cámara de pantalla
completa (no hay marcadores en
este modo). Los marcadores de
línea sirven de guía, para que la
lectura de textos resulte más fácil.
La función de ventana se puede usar para anular parte de
la imagen en caso de que la luminosidad de la pantalla
resulte molesta.
Nota: Los marcadores de líneas y las ventanas solo
pueden mostrarse en “Modo de lectura” o en “Modo
de lectura inverso” (pero no en “Modo de foto”) y no
en la pantalla dividida vertical de la unidad
ClearView+ color.
Posición de líneas / ventanas
Si los marcadores de líneas o
ventanas están activados (ver más
abajo) y se quiere cambiar su posición en la pantalla, se
hace girar la perilla cuyo ícon aquí se representa. Los
marcadores de línea y las ventanas se pueden visualizar en
posición horizontal o vertical, segúnel sentido del botón
Dimensionar líneas / ventanas
Si los marcadores de las líneas o de
las ventanas están activados, se
puede cambiar la distancia entre
ellos en la pantalla haciendo girar la perilla. El cambio de
tamaño puede hacerse horizontal o verticalmente, lo que
dependerá de la posición (horizontal / vertical) del botón
.

Optelec ClearView+
102 Español
Botón horizontal / vertical
Presionando este botón se cambian
las líneas y las ventanas de la
posición vertical a la posición horizontal.
Nota: Los marcadores de línea y las ventanas sólo se
pueden visualizar cuando aparece la imagen de la
cámara interna.

Optelec ClearView+
Español 103
5. Ajuste de la pantalla del monitor
Es posible regular la altura y el ángulo de visualización del
monitor TFT de ClearView+ con el brazo estándar. Regular
el monitor permite evitar todo reflejo. Sujete firmemente el
panel plano de ambos lados para ubicarlo en su posición
preferida.
Los monitores TFT de ClearView+ se entregan con un
“Brazo TFT ultra flexible” que le permite ubicar el monitor en
su posición preferida. El monitor puede moverse hacia
arriba y hacia abajo, hacia adelante y hacia atrás; también
puede inclinarse hacia la izquierda o la derecha, hacia
arriba o abajo para así obtener un ángulo de visualización
óptimo.
Para ubicar el monitor en su posición preferida, sujete
firmemente el panel plano de ambos lados, muévalo o
inclínelo.
Por favor, consulte el afiche incluido en la caja del monitor
para obtener más información sobre cómo regular el “Brazo
TFT ultra flexible”.
Asegúrese de no ubicar ningún material magnético ni
metálico delante o cerca del monitor, ya que esto podría
dañarlo.

Optelec ClearView+
104 Español
6. Problemas eventuales y su solución
No hay imagen en el monitor ClearView+ después de
encenderlo:
- Verifique que la unidad esté encendida (botón rojo
“Power” en el tablero X / Y) y que haya corriente.
- Controle todos los contactos y las conexiones tanto de
cables como de hardware.
Imagen fuera de foco
- Verifique si el auto–foco automático está desactivado
(la luz roja alrededor del botón “Mode” indica que el
enfoque está bloqueado) Presione el botón de enfoque
para volver al auto-foco automático y continuo.
- Limpie cuidadosamente el espejo de la cámara usando
un paño no abrasivo.
- Limpie la pantalla del monitor con un paño no abrasivo
rociado con un producto para limpieza de vidrios
líquido.
Ilustraciones y textos parecen grises o tienen poco
contraste
- Presione el botón “Mode” para pasar al modo de
lectura de mayor contraste.
- Aumente luminosidad/contraste en el panel de control.
- Si usa su propio monitor HDMI ( PC’s solamente),
cambie la configuración de luminosidad y contraste en
el monitor.
- Controle que ambas fuentes de luz, a ambos lados del
brazo de la cámara, estén encendidas.
No aparece imagen en el ordenador
- Asegúrese de haber instalado el módulo de funciones
avanzadas.

Optelec ClearView+
Español 105
- Controle los cables de contacto del vídeo (HDMI) del
ordenador a la unidad básica (no conecte la PC
directamente al monitor).
- Controle la posición del botón .
- Verifique que no haya desperfectos en el ordenador,
conectando la PC directamente con el monitor.
- Asegúrese de que la resolución del PC es de
1920x1080.
La imagen salta en modo Picture-in-Picture (solamente
en unidades de PC)
- Verifique que la tasa de actualización del modo de
vídeo esté configurada en 60.
- Verifique que la resolución de vídeo del ordenador esté
configurada entre 640 x 480 y 1280 x 1024.
El tablero X / Y no se mueve o no se mueve de manera
fluída
- Desbloquee el tablero subiendo la palanca que se
encuentra debajo de la parte delantera del mismo.
- Verifique que las diapositivas no presenten polvo o que
no haya objetos ajenos al tablero X / Y.
Apagar y encender
Si se tiene problemas operando el sistema, se lo puede
apagar y volver a encender en posición de defecto de
fabricación. Apague el sistema, espere 3 segundos y
luego oprima y mantenga oprimido el botón de
encendido / apagado durante otros 3 segundos. De
esta forma, su ClearView+ se encenderá en modo
“defecto de fábrica”.

Optelec ClearView+
106 Español
7. Contacto / soporte al producto
Si tiene preguntas sobre cómo armar, operar, usar o instalar
su sistema, le rogamos se ponga en contacto con el
distribuidor, su proveedor o con la oficina de Optelec más
cercana a su domicilio. Consulte la última página de este
manual donde se incluye una lista completa de direcciones
de las oficinas de Optelec en el mundo.

Optelec ClearView+
107
Optelec Offices Worldwide | Optelec kantoren
wereldwijd | Optelec dans le monde | Filiali Optelec nel
mondo | Optelec oficinas por todo el mundo | Optelec
Zweigniederlassungen Weltweit
Optelec Europe
Pesetastraat 5a
2991 XT Barendrecht
The Netherlands
T: +31 (0)88 6783 444
www.optelec.com
Optelec US
17757 US Highway 19 North,
Suite 560,
Clearwater, FL 33764
U.S.A.
T: +1 (800) 444-4443
www.optelec.com
Optelec NV
Baron Ruzettelaan 29
8310 Bruges
Belgium
T: +32 (0)50 35 7555
www.optelec.be
Optelec Canada
1812, Boulevard Marie-Victorin
Longueuil, QC J4G 1Y9
Canada
T: +1 (0)450 677-1171
www.optelec.ca
Optelec GmbH
Fritzlarer Strasse 25
34613 Schwalmstadt
Germany
T: +49 (0)6691 96170
www.optelec.de
Optelec Nederland BV
Pesetastraat 5a
2991 XT Barendrecht
The Netherlands
T: +31 (0)88 6783 555
www.optelec.nl
Optelec UK
Unit C, Plot 5,
Merlin Way Quarry Hill Ind. Estate,
Ilkeston, Derbyshire, DE7 4RA
United Kingdom
T: +44 (1923) 23 13 13
www.optelec.co.uk

Optelec ClearView+
108
RFD-06014
Rev: A
Version 1.0
© August 2021 Optelec, The Netherlands
All rights reserved
Optelec
-
 1
1
-
 2
2
-
 3
3
-
 4
4
-
 5
5
-
 6
6
-
 7
7
-
 8
8
-
 9
9
-
 10
10
-
 11
11
-
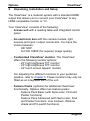 12
12
-
 13
13
-
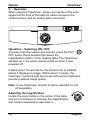 14
14
-
 15
15
-
 16
16
-
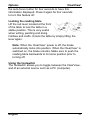 17
17
-
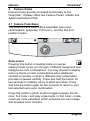 18
18
-
 19
19
-
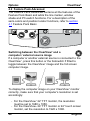 20
20
-
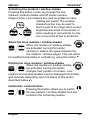 21
21
-
 22
22
-
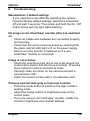 23
23
-
 24
24
-
 25
25
-
 26
26
-
 27
27
-
 28
28
-
 29
29
-
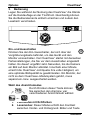 30
30
-
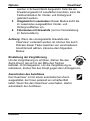 31
31
-
 32
32
-
 33
33
-
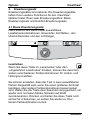 34
34
-
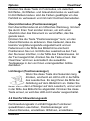 35
35
-
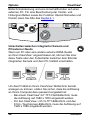 36
36
-
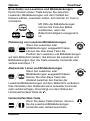 37
37
-
 38
38
-
 39
39
-
 40
40
-
 41
41
-
 42
42
-
 43
43
-
 44
44
-
 45
45
-
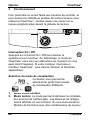 46
46
-
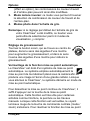 47
47
-
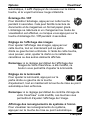 48
48
-
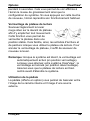 49
49
-
 50
50
-
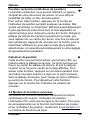 51
51
-
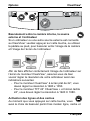 52
52
-
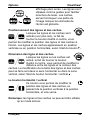 53
53
-
 54
54
-
 55
55
-
 56
56
-
 57
57
-
 58
58
-
 59
59
-
 60
60
-
 61
61
-
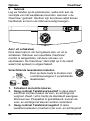 62
62
-
 63
63
-
 64
64
-
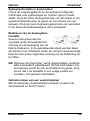 65
65
-
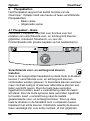 66
66
-
 67
67
-
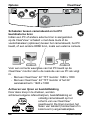 68
68
-
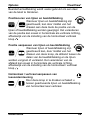 69
69
-
 70
70
-
 71
71
-
 72
72
-
 73
73
-
 74
74
-
 75
75
-
 76
76
-
 77
77
-
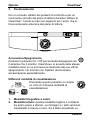 78
78
-
 79
79
-
 80
80
-
 81
81
-
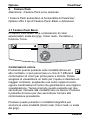 82
82
-
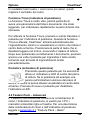 83
83
-
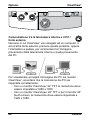 84
84
-
 85
85
-
 86
86
-
 87
87
-
 88
88
-
 89
89
-
 90
90
-
 91
91
-
 92
92
-
 93
93
-
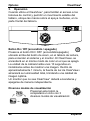 94
94
-
 95
95
-
 96
96
-
 97
97
-
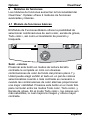 98
98
-
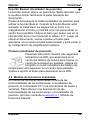 99
99
-
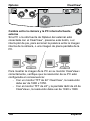 100
100
-
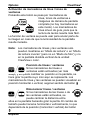 101
101
-
 102
102
-
 103
103
-
 104
104
-
 105
105
-
 106
106
-
 107
107
-
 108
108


Optelec Clearview+ El manual del propietario
- Tipo
- El manual del propietario
en otros idiomas
- français: Optelec Clearview+ Le manuel du propriétaire
- italiano: Optelec Clearview+ Manuale del proprietario
- English: Optelec Clearview+ Owner's manual
- Deutsch: Optelec Clearview+ Bedienungsanleitung
- Nederlands: Optelec Clearview+ de handleiding