
1
HAMPTONBAY.COM
Please contact 1-855-HD-HAMPTON for further assistance.
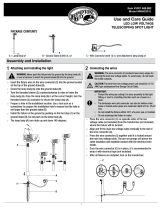
PACKAGE CONTENTS
NOTE: Do not use a hammer. If the ground is
hard, use water to soften or a trowel to loosen
the soil.
Attaching and installing the
light
Connecting the wires
□ Attach the light (A) to the post (B) by inserting the
bottom of the light (A) into the top of the post (B).
□ Attach the post (B) to the stake (C) by inserting the
bottom of the post (B) and twisting it clockwise.
□ Push the stake assembly into the ground by
grasping the post. Do not push on the light.
1 2
IMPORTANT: Protect the wiring by routing it in
close proximity to the light, tting, or next to a
building structure such as a house or a deck.
IMPORTANT: Do not bury the wiring by more
than 6 in. (15.24 cm) in order to connect to the
main secondary wire.
IMPORTANT: Do not submerge in water. This
product could be damaged.
IMPORTANT: Do not install the light within 10 ft.
(3 m) of a pool, spa, or fountain.
A
B
D
C
D
CAUTION: The wire from the low voltage power
unit shall be 12-16 AWG type underground Low
Energy Circuit Cable.
Assembly and Installation
Path Light
Use and Care Guide
Item #1000 XXX XXX
Model #29607
A
B
C
D
Part Description Quantity
A Light 1
B Post 1
C Stake 1
D Connector 1
□ Detach and place the wire connector (D) on opposite sides of the low voltage cable
where the xture will be located.
□ Align and t the main low voltage cable vertically in the slot of the wire connector as
shown.
□ Press the wire connector (D) together until fully seated and locked around the cable.
Pre-set prongs will pierce the cable insulation and establish contact. Turn on the power
unit. If the light xture does not turn on, repeat operations 2 and 3.
□ Once the clip-on connector is in place, wrap it with electrical tape (not included) for
additional protection.

2
Care & Cleaning
Troubleshooting
Warranty
□ Before attempting to clean the xture, disconnect the power to the xture by turning the breaker off or removing the fuse from the fuse box.
□ To clean the xture, use a dry or slightly dampened clean cloth.
□ Do not use cleaners with chemicals, solvents, or harsh abrasives, as damage to the xture may occur.
The manufacturer warrants this product to be free for ve (5) years against any defects that are due to faulty materials or workmanship. This warranty applies only
to the original consumer and only to products used in normal use and service. If this product is found to be defective, the manufacturer’s only obligation, and your
exclusive remedy, is the repair or replacement of the product at the manufacturer’s discretion, provided that the product has not been damaged through misuse,
abuse, accident, modications, alterations, neglect or mishandling. This warranty shall not apply to any product that is found to have been improperly installed, set
up, or used in any way not in accordance with the instructions supplied with the product. This warranty shall not apply to a failure of the product as a result of an
accident, misuse, abuse, negligence, alteration, or faulty installation or any other failure not relating to faulty workmanship. This warranty shall not apply to the nish
on any portion of the product, such as surface and/or weathering, as this is considered normal wear and tear. The manufacturer does not warrant and specically
disclaims any warranty, whether expressed or implied, or tness for a particular purpose, other than the warranty contained herein. The manufacturer specically
disclaims any liability and shall not be liable for any consequential or incidental loss or damage, including any labor/expense costs involved in the replacement or
repair of said product.
Contact the Customer Service Team at 1-855-HD-HAMPTON or visit www.HamptonBay.com.
Problem Possible Cause Solution
Lights do not turn on. □ There is no power.
□ There is a disconnection or
break in the wire.
□ The transformer setting is
incorrect.
□ Check the outlet and ensure that a breaker or GFCI circuit has not been tripped.
□ Follow the wires from the xture and ensure a continuous connected path back to the
transformer.
□ Check the settings on the transformer.
Lights icker. □ There is a loose wire con-
nector to the xture.
□ Tighten the wire connector and ensure the metal contacts pierce the insulation on the low
voltage cable from the transformer.
Lights icker (all xtures). □ There is a loose
connection at the
transformer.
□ Unplug the transformer from the outlet and visually inspect the positive and negative
connecting posts. Each wire should be securely screwed in and not in contact with any
other.

1
HAMPTONBAY.COM
Para más asistencia, llama al 1-855-HD-HAMPTON.
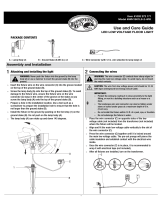
CONTENIDO DEL PAQUETE
NOTA: No uses un martillo. Si el suelo está duro,
usa agua para ablandarlo o una espátula para
aojar la tierra.
Cómo jar e instalar
la lámpara
Cómo conectar los cables
□ Instala el cabezal de la lámpara (A)
al poste (B) insertando aquel (A) en el
extremo superior del poste (B) y girándolo
en el sentido del reloj.
□ Instala el poste (B) en la estaca (C)
insertando la parte inferior del poste (B)
en la parte superior de la estaca (C)
y girándolo en el sentido del reloj.
□ Empuja el conjunto de la estaca en la tierra,
sosteniendo el poste. No empujes por la
lámpara.
1 2
IMPORTANTE: Protege el cableado pasándolo
muy cerca de la lámpara o moldura, o cerca de
una estructura como una casa o terraza.
IMPORTANTE: No entierres el cableado más
de 6 plg (15.24 cm) para conectarlo al cable
secundario principal.
IMPORTANTE: No sumergir en agua. El producto
puede dañarse.
IMPORTANTE: No instales la lámpara a una
distancia menor de 3 m de una piscina, spa
o fuente.
A
B
D
C
D
PRECAUCIÓN: El cable de la unidad de energía de
bajo voltaje será uno de Circuito de Bajo Consumo
de Energía, soterrado, del tipo AWG calibre 12-16.
Ensamblaje e instalación
Lámpara para sendero
Guía de uso y mantenimiento
Artículo núm. xxxx xxx xxx
Modelo núm. 29607
A
B
C
D
Pieza Descripción Cantidad
A Cabezal de la lámpara 1
B Poste 1
C Estaca 1
D Conector 1
□ Separa y coloca el conector de cable (D) en los extremos opuestos del cable
de bajo voltaje donde se conectará la lámpara.
□ Alinea y ajusta el cable de bajo voltaje verticalmente en la ranura del conector
de cable, como se muestra.
□ Presiona para unir el conector de cable (D) hasta que esté bien asentado y seguro
alrededor del cable. Las clavijas preubicadas atravesarán el aislamiento del cable
y harán contacto. Enciende la fuente de energía. Si la lámpara no enciende, repite
los pasos 2 y 3.
□ Una vez colocado el conector con abrazadera, cúbrelo con cinta de electricista
(no incluida) como medida de protección adicional.

2
Cuidado y limpieza
Solución de problemas
Garantía
□ Antes de limpiar la lámpara, desconecta la electricidad apagando el cortacircuitos o quitando el fusible en la caja correspondiente.
□ Para limpiar la lámpara, usa un paño seco o ligeramente humedecido.
□ No uses limpiadores con productos químicos, solventes o abrasivos intensos para no dañar la lámpara.
El fabricante garantiza que este producto no presentará defectos materiales ni de fabricación durante cinco (5) años. Esta garantía es válida solo para el consumidor
original y cubre solo productos en uso y servicio normales. Si se detecta algún defecto en este producto, la única obligación y solución exclusiva del fabricante,
a su entera discreción, será reparar o reponer el producto, siempre que este no haya sido dañado por mal uso, abuso, accidente, modicaciones, alteraciones,
negligencia o manejo indebido. Esta garantía no cubre ningún producto instalado, congurado o usado incorrectamente sin seguir las instrucciones adjuntas al
producto. Esta garantía no cubre fallas del producto como resultado de un accidente, mal uso, abuso, negligencia, modicaciones o instalación defectuosa, ni
cualquier otra falla no relacionada con defectos de fabricación. Esta garantía no se aplica al acabado de ninguna parte del producto, como la supercie, ni al
deterioro por condiciones ambientales, que se considera desgaste normal. El fabricante no garantiza y rechaza especícamente cualquier garantía explícita
o implícita, o sobre la idoneidad del producto para un propósito en particular distinto del de la garantía indicada aquí. El fabricante rechaza especícamente
cualquier obligación y no será responsable por ningún daño o pérdida directo o indirecto, incluyendo cualquier costo de mano de obra y los gastos relacionados
con la reposición o reparación de dicho producto.
Comuníquese con el equipo de servicio al cliente por el teléfono 1-855-HD-HAMPTON o visite www.HamptonBay.com.
Problema Causa posible Solución
Las lámparas no encienden. □ No circula corriente
eléctrica.
□ Hay un cable
desconectado/roto.
□ La conguración del
transformador es incorrecta.
□ Revisa el tomacorriente y asegúrate de que no se ha fundido un cortacircuitos o circuito
con interruptor diferencial.
□ Sigue los cables de la lámpara para garantizar una conexión continua hasta el transformador.
□ Revisa la conguración del transformador.
Las luces parpadean. □ Está suelto un conector de
cable que va a la lámpara.
□ Aprieta el conector de cable y asegúrate de que los contactos de metal perforen
el aislamiento en el cable de bajo voltaje del transformador.
Las luces parpadean
(en todas las lámparas).
□ Hay una conexión suelta
en el transformador.
□ Desconecta el transformador del tomacorriente y revisa los postes de conexión positivo
y negativo. Cada cable debe estar bien atornillado y sin contacto con ningún otro.
-
 1
1
-
 2
2
-
 3
3
-
 4
4
En otros idiomas
- English: Hampton Bay 29607 Installation guide
Documentos relacionados
-
 Hampton Bay 21400 Guía de instalación
-
 Hampton Bay 29102 Guía de instalación
-
 Hampton Bay 29608 Guía de instalación
-
 Hampton Bay 21401 Guía de instalación
-
 Hampton Bay IWW6626L Instrucciones de operación
-
 Hampton Bay IWW1501L-2 Guía de instalación
-
 Hampton Bay JAQ1501L-2-4PK/Crac Instrucciones de operación
-
 Hampton Bay JEF1501L-3 Instrucciones de operación
-
 Hampton Bay IWH5301L Instrucciones de operación
-
 Hampton Bay IWH1501LS-2-12PK Instrucciones de operación


