
IB10-S
IB10-S
ES-EN-FR-IT-PT-DE
INDICADOR
INDICATOR
INDICATEUR
INDICATORE
INDICADOR
ANZEIGE
V.2
31/08/2020
marca propiedad de | trade mark propiety of | est une marque de | marchio di proprietà di|
marca propriedade de | Die Marke ist Eigentum von
Pol. Empordà Internacional - C. Molló, 3
17469 VILAMALLA - (Girona) SPAIN
T. (34) 972 527 212 - F. (34) 972 527 211
El fabricante se reserva el derecho de modificar sin previo aviso las características de sus productos para introducir mejoras técnicas o cumplir con nuevas regulaciones oficiales./The
manufacturer reserves the right to modify the specifications of its products in order to make technical improvements or comply with new regulations / Le constructeur se réserve le droit de
modifier les caractéristiques de ses produits en vue d’y apporter des améliorations techniques ou de respecter de nouvelles réglamentations / Il produttore si riserva il diritto di modificare le
caratteristiche dei suoi prodotti senza preavviso per introdurre miglioramenti tecnici o per conformarsi a nuove norme ufficiali / O fabricante reserva-se o direito de modificar sem aviso prévio
as características dos seus produtos para introduzir melhorias técnicas ou para cumprir as novas regulações oficiais / Der Hersteller behält sich das Recht vor, ohne Vorankündigung die
Eigenschaften seiner Produkte zu ändern, um weitere Verbesserungen zu erzielen oder offizielle Richtlinien einzuhalten.

ÍNDICE
ES
1.
ALIMENTACIÓN 8
2.
ANTES DE LA UTILIZACIÓN 8
3.
CONSUMO 8
4.
CONEXIÓN DE LA CÉLULA DE CARGA AL INDICADOR 8
5.
DESCRIPCIÓN DEL TECLADO 9
6.
APLICACIONES IB10-S 10
6.1 TARA 10
6.2 MODO DE PESAJE NORMAL 10
6.2.1 CONFIGURACIÓN DEL EQUIPO 10
6.2.2 PRIMERA CALIBRACIÓN 10
6.2.3 UTILIZACIÓN 10
6.3 MODO CUENTA PIEZAS 10
6.3.1 CONFIGURACIÓN DEL EQUIPO 10
6.3.2 PRIMERA CALIBRACIÓN 10
6.3.3 UTILIZACIÓN 10
6.4 LÍMITES Y ALARMA 11
6.5 RANGO UNITARIO / MULTI-RANGO / MULTI-INTERVALO 11
7.
PARÁMETROS 11
8.
CONFIGURACIÓN PARÁMETROS 11
8.1 CUENTAS INTERNAS (A/D) 12
8.2 CONFIGURACIÓN DE LOS LÍMITES DE PESO (SUPERIOR E INFERIOR) 12
8.3 AUTODESCONEXIÓN AUTOMÁTICA 12
8.4 RETROILUMINACIÓN DEL DISPLAY 13
8.5 FUNCIÓN HOLD 13
8.6 SALIDA DE DATOS RS-232 (SIN FUNCIÓN) 13
8.7 CONFIGURACIÓN DE LA VELOCIDAD DEL CONVERSOR AD 15
8.8 CONDICIONANTE DE VISUALIZACIÓN DE CERO 15
8.9 CONFIGURACIÓN DE LA GRAVEDAD 15
9.
CONFIGURACIÓN DE REAJUSTES DE CALIBRACIÓN 15
10.
PARÁMETROS TÉCNICOS 16
11.
GARANTÍA 21

IB10-S
3
INDEX
EN
1. EXCITATION
22
2. BEFORE ITS USE
22
3. CONSUMPTION
22
4. LOAD CELL CONNECTION TO THE INDICATOR
22
5. KEYBOARD DESCRIPTION
23
6. IB10-S APPLICATIONS
24
6.1 TARA
24
6.2 NORMAL WEIGHING MODE
24
6.2.1 EQUIPMENT CONFIGURATION
24
6.2.2 FIRST CALIBRATION 24
6.2.3 USE
24
6.3 MODE COMPTEUSE
24
6.3.1 EQUIPMENT CONFIGURATION
24
6.3.2 FIRST CALIBRATION 24
6.3.3 USE
24
6.4 LIMITS AND ALARM
25
6.5 UNIT RANGE/ MULTI RANGE/ MULTI INTERVAL 25
7. PARAMETERS
25
8. PARAMETERS CONFIGURATION
25
8.1 INTERNAL COUNTING (A/D) 26
8.2 CONFIGURATION OF THE WEIGHT LIMITS (SUPERIOR AND INFERIOR) 26
8.3 AUTO SWITCH OFF 26
8.4 CONFIGURATION OF THE ILLUMINATION OF THE DISPLAY 27
8.5 HOLD FUNCTION 27
8.6 RS-232 DATA EXIT 27
8.7 CONFIGURATION OF THE SPEED OF THE AD CONVERTER 29
8.8 ZERO WEIGHT DISPLAY CONDITION 29
8.9 CONFIGURATION OF THE GRAVITY 29
9.
CONFIGURATION OF THE READJUSTMENTS IN CALIBRATION 29
10.
TECHNICAL PARAMETERS 30
11.
WARRANTY 35

IB10-S
4
INDEX
FR
1. ALIMENTATION
36
2. AVANT DE L’UTILISATION DU ÉQUIPEMENT
36
3. CONSOMMATION
36
4. CONNEXION DE LA CELLUL E DE CHARGE À L’INDICAT EUR
36
5. DESCRIPTION DU CLA VIER
37
6. APLICATIONS IB10-S
38
6.1 TARE
38
6.2 MODE DE PESAGE
38
6.2.1 CONFIGURATION DE L’ÉQUIPEMENT
38
6.2.2 PREMIER CALIBRAGE
38
6.2.3 UTILISATION
38
6.3 MODE COMPTEUSES 38
6.3.1 CONFIGURATION DE L’ÉQUIPEMENT
38
6.3.2 PREMIER CALIBRAGE
38
6.3.3 UTILISATION
38
6.4 LIMITES ET UNE ALARME 39
6.5 PLAGE UNITAIRE / MULTI-PLAGES / MULTI-INTERVALLES
39
7. PARAMÈTRES
39
8. CONFIGURATION PARAMÈTRES
39
8.1 COMPTE INTERNE A/D) 40
8.2 CONFIGURATION DU LIMITES DE POIDS (SUPÉRIEUR ET INFÉRIEUR) 40
8.3 AUTODÉCONNEXION AUTOMATIQUE 40
8.4 CONFIGURATION DU RÉTRO-ECLAIRAGE DE L’ÉCRAN 41
8.5 FONCTION HOLD 41
8.6 SORTIE DE DONNÉES RS-232 (SANS FUNCTION) 41
8.7 CONFIGURATION DE LA VITESSE DU CONVERTISSEUR 43
8.8 CONDITION D’AFFICHAGE DE ZÉRO 43
8.9 CONFIGURATION DE LA GRAVITÉ 43
9.
CONFIGURATION DE REAJUSTES DE CALIBRATION 43
10.
PARAMÈTRES TECHNIQUES 44
11.
GARANTIE 49

IB10-S
5
INDICE
IT
1.
ALIMENTAZIONE 50
2.
PRIMA DELL’USO 50
3.
CONSUMO 50
4.
COLLEGAMENTO TRA LA CELLA DI CARICO E L’INDICATORE 50
5.
DESCRIZIONE DELLA TASTIERA 51
6.
APPLICAZIONI IB10-S 52
6.1 TARA 52
6.2 MODALITÀ DI PESATURA NORMALE 52
6.2.1 CONFIGURAZIONE DEL DISPOSITIVO 52
6.2.2 PRIMA CALIBRAZIONE 52
6.2.3 UTILIZZO 52
6.3 MODALITÀ CONTAPEZZI 52
6.3.1 CONFIGURAZIONE DEL DISPOSITIVO 52
6.3.2 PRIMA CALIBRAZIONE 52
6.3.3 UTILIZZO 52
6.4 LIMITI E ALLARME 53
6.5 RANGE UNITARIO/MULTI-RANGE/MULTI-INTERVALLO 53
7.
PARAMETRI 53
8.
CONFIGURAZIONE DEI PARAMETRI 53
8.1 CALCOLI INTERNI (A/D) 54
8.2 CONFIGURAZIONE DEI LIMITI DI PESO (SUPERIORE E INFERIORE) 54
8.3 SPEGNIMENTO AUTOMATICO 54
8.4 RETROILLUMINAZIONE DEL DISPLAY 55
8.5 FUNZIONE HOLD 55
8.6 USCITA DATI RS-232 (NESSUNA FUNZIONE) 55
8.7 CONFIGURAZIONE DELLA VELOCITÀ DEL CONVERTITORE AD 57
8.8 CONDIZIONE DI VISUALIZZAZIONE DELLO ZERO 57
8.9 CONFIGURAZIONE DELLA GRAVITÀ 57
9.
CONFIGURAZIONE DELLE REGOLAZIONI DELLA CALIBRAZIONE 57
10.
PARAMETRI TECNICI 58
11.
GARANZIA 63

IB10-S
6
ÍNDICE
PT
1. ALIMENTAÇÃO
64
2. ANTES DA UTILIZAÇÃO
64
3. CONSUMO
64
4. LIGAÇÃO DA CÉLULA DE CARGA AO INDICADOR
64
5. DESCRIÇÃO DO TECLADO
65
6. APLICAÇÕES IB10-S
66
6.1 TARA
66
6.2 MODO DE PESAGEM NORMAL
66
6.2.1 CONFIGURAÇÃO DO EQUIPAMENTO
66
6.2.2 PRIMEIRA CALIBRAÇÃO
66
6.2.3 UTILIZAÇÃO
66
6.3 MODO CONTA PEÇAS 66
6.3.1 CONFIGURAÇÃO DO EQUIPAMENTO
66
6.3.2 PRIMEIRA CALIBRAÇÃO
66
6.3.3 UTILIZAÇÃO 66
6.4 LIMITES E ALARME 67
6.5 FAIXA UNITÁRIA / MULTI-FAIXA / MULTI-INTERVALO 67
7. PARÂMETROS
67
8. CONFIGURAÇÃO PARÂMETROS
67
8.1 CONTAS INTERNAS (A/D) 68
8.2 CONFIGURAÇÃO DOS LIMITES DE PESO (SUPERIOR E INFERIOR) 68
8.3 AUTODESLIGAMENTO AUTOMÁTICO 68
8.4 RETROILUMINAÇÃO DO DISPLAY 69
8.5 FUNÇÃO HOLD 69
8.6 SAÍDA DE DADOS RS-232 (SEM FUNÇÃO) 69
8.7 CONFIGURAÇÃO DA VELOCIDADE DO CONVERSOR AD 71
8.8 CONDICIONANTE DE VISUALIZAÇÃO DO ZERO 71
8.9 CONFIGURAÇÃO DA GRAVIDADE 71
9.
CONFIGURAÇÃO DE REAJUSTES DE CALIBRAÇÃO 71
10.
PARÂMETROS TÉCNICOS 72
11.
GARANTIA 77

IB10-S
7
INHALTSVERZEICHNIS
DE
1.
LEBENSMITTELINDUSTRIE 78
2.
VOR DER INBETRIEBNAHME 78
3.
VERBRAUCH 78
4.
ANSCHLUSS DER WAAGE AN DIE ANZEIGE 78
5.
BESCHREIBUNG DER TASTATUR 79
6.
IB10-S ANWENDUNGEN 80
6.1 TARA 80
6.2 NORMALER WÄGEMODUS 80
6.2.1 GERÄTEKONFIGURATION 80
6.2.2 ERSTE KALIBRIERUNG 80
6.2.3 BETRIEB 80
6.3 STÜCKZÄHLMODUS 80
6.3.1 GERÄTEKONFIGURATION 80
6.3.2 ERSTE KALIBRIERUNG 80
6.3.3 BETRIEB 80
6.4 GRENZWERTE UND ALARM 81
6.5 EINHEITSBEREICH / MEHRBEREICH / MULTI-INTERVALL 81
7.
PARAMETER 81
8.
PARAMETEREINSTELLUNG 81
8.1 INTERNE ZÄHLUNGEN (A/D) 82
8.2 EINSTELLUNG DER GEWICHTSGRENZEN (HÖCHST- UND MINDEST-
GEWICHT) 82
8.3 AUTOMATISCHE ABSCHALTUNG 83
8.4 DISPLAY-HINTERGRUNDBELEUCHTUNG 83
8.5 HOLD-FUNKTION 83
8.6 DATENAUSGABE RS-232 (OHNE FUNKTION) 84
8.7 EINSTELLUNG DER GESCHWINDIGKEIT DES KONVERTERS AD 85
8.8 NULL-ANZEIGE-BEDINGUNG 85
8.9 EINSTELLUNG DER GRAVITATION 86
9.
KALIBRIERUNGSEINSTELLUNG 86
10.
TECHNISCHE PARAMETER 87
11.
GARANTIE 92

MANUAL DE USUARIO
IB10-S ES
8
1.
ALIMENTACIÓN
IB10-S
Entrada 230~240V
Salida 9V 500mA
Batería recargable 6V/1,2Ah
2.
ANTES DE SU UTILIZACIÓN
1. Utilice una fuente eléctrica independiente para evitar perturbaciones eléctricas.
2. No colocar ningún objeto sobre la plataforma en el momento de poner en marcha el indicador.
3. Por favor, permita que la báscula se precaliente durante 2-3 minutos antes de su utilización.
4. Evitar cambios de temperatura muy bruscos y corrientes de aire.
5. No sobrecargar la báscula, nunca exceder la capacidad máxima.
3.
CONSUMO
IB10-S
Vida de la batería: sin la retroiluminación, aprox. 160 horas.
con la retroiluminación, aprox. 120 horas.
4.
CONEXIÓN DE LA CÉLULA DE CARGA AL INDICADOR
El conector de la célula de carga es de 7 pins:
• Cuando el indicador está trabajando, no quitar conector de la célula de carga, este acto podría dañar el equipo.
PIN 1 EXC +
PIN 2 SEN +
PIN 3 SIG +
PIN 4 SIG -
PIN 5 SEN -
PIN 6 EXC -
PIN 7 GND

MANUAL DE USUARIO
IB10-S ES
9
5.
DESCRIPCIÓN DEL TECLADO
1a. función: Pulsar esta tecla para encender la balanza.
2a. función: Para poner la lectura del display a cero “0”, el valor del display tiene que ser menor al ±2% de la
capacidad máxima.
3a. función Para sustraer (tarar) el peso de un contenedor.
1a. función: Mantener pulsada esta tecla durante 3 segundos para apagar el indicador.
1a. función: Cambiar a recuento de piezas.
2a. función: Para salir del modo de programación.
1a. función: Para mostrar la acumulación total.
2a. función: Para borrar la memoria de acumulaciones. (pulsación larga)
3a. función: Para aumentar los valores dentro de la programación.
1a. función: Realizar una Tara.
2a. función: Para incrementar los valores dentro del modo programación.
1a. función: Para acumular en la memoria el valor del peso en la pantalla.
2a. función: Transmisión manual de datos a través del puerto RS-232 a un PC o impresora.
3a. función: Tecla de confirmación dentro del modo programación.
IB10-S

MANUAL DE USUARIO
IB10-S ES
6.
APLICACIONES IB10-S
6.1 TARA
6.2 MODO DE PESAJE NORMAL
6.2.1 CONFIGURACIÓN DEL EQUIPO
6.2.2 PRIMERA CALIBRACIÓN
6.2.3 UTILIZACIÓN
6.3 MODO CUENTA PIEZAS
6.3.1 CONFIGURACIÓN DEL EQUIPO
6.3.2 PRIMERA CALIBRACIÓN
6.3.3 UTILIZACIÓN
6.4 LÍMITES Y ALARMA
6.5 RANGO UNITARIO/ MULTI RANGO / MULTI INTERVALO
6.1 TARA
Coloque un recipiente en la plataforma, se mostrará el valor de su peso. Presione la tecla para tarar la balanza. El peso que era
visualizado se almacena como el valor de tara y ese valor se resta de la pantalla, dejando cero en la pantalla.
El indicador “NET” se activará. A medida que se agregue el producto, solo se mostrará el peso del producto. La báscula podría ser tarada por
segunda vez si otro tipo de producto tuviera que ser añadido al primero.
Nuevamente, solo se mostrará el peso que se agrega después de la tara. Cuando se quita el recipiente, se mostrará un valor negativo. Si
la bácula se tara justo antes de quitar el recipiente, el valor mostrado es el peso bruto del recipiente más todo el producto que se quitó. El
indicador cero también estará encendido porque la plataforma vuelve a la misma condición que tenía inicialmente.
6.2 MODO DE PESAJE NORMAL
6.2.1 CONFIGURACIÓN DEL EQUIPO
Vea apartado LF2 de parámetros técnicos
6.2.2 PRIMERA CALIBRACIÓN
Vea apartado LF1 de parámetros técnicos
6.2.3 UTILIZACIÓN
Una vez configurados todos los parámetros correctamente y calibrado el equipo, encienda el equipo.
• Asegúrese que el valor del visor, sin carga en la plataforma es 0, en caso contrario presione .
• Sitúe el peso encima de la plataforma y la pantalla mostrará el peso.
• La acumulación y envío de datos dependerá del modo elegido en el apartado UF-6.
• Podrá visualizar los valores acumulados en cualquier momento presionando (TOTALIZACIÓN)
(La acumulación solo funciona con el protocolo de impresión activo)
6.3 MODO CUENTA PIEZAS
6.3.1 CONFIGURACIÓN DEL EQUIPO
Vea apartado LF2 de parámetros técnicos
6.3.2 PRIMERA CALIBRACIÓN
Vea apartado LF1 de parámetros técnicos
6.3.3 UTILIZACIÓN
Una vez configurados todos los parámetros correctamente y calibrado el equipo, encienda el equipo. Asegúrese que el valor del visor, sin
carga en la plataforma es 0, en caso contrario presione .
PASOS;
1. Presione la tecla hasta que la pantalla muestre PCS.
2.
Presione la tecla sucesivamente para seleccionar la cantidad de piezas de la muestra. La pantalla mostrará sucesivamente
C 10 / C20 / C 50 / C 100 / C 200.
3. Sitúe la muestra sobre la plataforma, espere que se encienda el indicador de estabilidad y presione la tecla
4. Sitúe el producto encima de la plataforma y la pantalla mostrará el número de piezas.
10 La acumulación y envío de datos dependerá del modo elegido en el apartado UF-6.

MANUAL DE USUARIO
IB10-S ES
11
• Para volver al modo de pesaje normal, presione la tecla para volver a seleccionar kg.
• Si desea volver al modo cuenta piezas, usando la misma muestra de referencia, presione nuevamente la tecla .
• Si desea cambiar la muestra de referencia, vuelva a repetir los pasos descritos anteriormente.
6.4 LÍMITES Y ALARMA
El usuario puede configurar los límites bajo y alto de la muestra colocada en la plataforma.
La pantalla mostrará si la muestra está por debajo del límite Lo, por encima del límite Hi o en la zona entre los dos límites OK.
Así mismo usted puede configurar cuando desea que suene la alarma y si la estabilidad es necesaria para tal hecho.
Todo el procedimiento queda descrito en el apartado UF-2. Si usted tiene definidos límites en modo de pesaje normal y quiere utilizar los límites
en modo cuenta piezas, tendrá que definir los nuevos límites para este modo, cuando vuelva a modo peso se recuperarán los limites que ya tenia
anteriormente. Lo mismo ocurre en caso contrario.
6.5 RANGO UNITARIO/ MULTI-RANGO / MULTI-INTERVALO
El visor se puede configurar con un solo Rango-unitario, es decir, un peso máximo y un valor de escalón. O bien como multi rango o multi
intervalo, en estos casos existe un peso máximo y dos escalones.
De 0 hasta la mitad de este peso máximo se usa el valor de escalón seleccionado (escalón 1) y de la mitad hasta el peso máximo, se usa el
siguiente valor de escalón (escalón 2).
El rango en el que usted se encuentra en cada momento lo señalan los indicadores de pantalla R1 y R2.
En el modo multi-intervalo conforme se va aumentando de peso en el rango 1 se usa el escalón 1, al pasar al rango 2 se usa el escalón 2. Al
disminuir el peso y volver al rango 1, se vuelve a usar el escalón 1 Por lo contrario en modo multi-rango, al disminuir el peso y volver al rango
1, se continua usando el escalón 2 hasta llegar a 0.
En el apartado LF2 de parámetros técnicos podrá seleccionar el modo de rango.
7.
PARÁMETROS
PARÁMETRO DESCRIPCIÓN
UF-1 Cuenta Internas (A/D)
UF-2 Configuración límites de peso (superior y inferior)
UF-3 Auto desconexión automática
UF-4 Retroiluminación del display
UF-5 Cuatro modos de hold
UF-6 Salida RS-232(PC / PRINT)
UF-7 Configuración de la velocidad del conversos (A/D)
UF-8 Condicionante de visualización de cero
UF-9 Configuración de gravedad
8.
CONFIGURACIÓN PARÁMETROS
8.1 CUENTAS INTERNAS (A/D)
8.2 CONFIGURACIÓN DE LOS LÍMITES DE PESO (SUPERIOR E INFERIOR)
8.3 AUTODESCONEXIÓN AUTOMÁTICA
8.4 CONFIGURACIÓN DE LA ILUMINACIÓN DEL DISPLAY
8.5 FUNCIÓN HOLD
8.6 SALIDA DE DATOS RS-232
8.7 CONFIGURACIÓN DE LA VELOCIDAD DEL CONVERSOR AD
8.8 CONDICIONANTE DE VISUALIZACIÓN DE CERO
8.9 CONFIGURACIÓN DE LA GRAVEDAD
Para acceder a la configuración de parámetros con la pantalla a cero, pulsar al mismo tiempo las teclas y .
Pulsar la tecla o para seleccionar el parámetro deseado (UF-1 ~ UF-11), para confirmar los cambios realizados presione
. Para volver al modo anterior pulse la tecla .

MANUAL DE USUARIO
IB10-S ES
12
8.1 CUENTAS INTERNAS (A/D) | UF-1
1. Pulsar la tecla para visualizar las cuentas internas de la balanza.
2. Para pasar al siguiente parámetro, pulsar la tecla la pantalla mostrará el valor de voltaje de la batería.
3. Para salir de este modo y volver al pesaje normal, el usuario debe presionar la tecla o .
8.2 CONFIGURACIÓN DE LOS LÍMITES DE PESO (SUPERIOR E INFERIOR) | UF-2
1. Pulsar la tecla para acceder al parámetro.
2. El display mostrará el mensaje “000.00L” (Límite inferior=LO).
3. Utilizar las teclas y para mover el cursor y la tecla para seleccionar el número deseado.
4. Pulsar la tecla para confirmar.
5. La pantalla mostrará “000.00h” (Límite superior=Hi)
6. Utilizar las teclas y para mover la tecla para seleccionar el número desado.
Nota: Usted puede situarse encima del último dígito para modificarlo si hace falta.
7. Pulsar la tecla para confirmar.
8. La pantalla mostrará el valor.
A B C
0 0 0
(configuración de la alarma)
límites Lo y Hi)
inferior Lo o por encima del límite superior
9. Utiliza las teclas y para mover el cursor y la tecla para seleccionar el número deseado.
10. Pulsar la tecla para confirmar.
8.3 AUTODESCONEXIÓN AUTOMÁTICA| UF-3
MODOS:
• AoFF 00 – Autodesconexión desactivada.
• AoFF 01 – Autodesconexión activada a un minuto, la balanza se apagará automáticamente transcurrido 1 minuto sin ser utilizada.
• Usted puede configurar el valor que desee de 1 a 99 minutos.
1. Pulsar la tecla para acceder al parámetro.
2. Utilizar las teclas y para mover el cursor y la tecla para seleccionar el número deseado.
3. Pulsar la tecla para confirmar.
LO
OK
HI
LO
OK
HI
PANTALLA VALOR ESTABILIDAD
A 0 No es necesario estabilizar el peso de la alarma para que suene
1 El peso de la alarma debe estabilizarse para que suene
B 0 Siempre 0
C 0 Alarma apagada
1
Alarma suena si está en la franja Ok (entre
2
Alarma suena si está por debajo del límite
Hi

MANUAL DE USUARIO
IB10-S ES
13
8.4 RETROILUMINACIÓN DE LA PANTALLA| UF-4
MODOS:
• Lit A: Automática.
• Lit ON: Iluminación activada.
• Lit OFF: Iluminación desactivada.
1. Pulsar la tecla para acceder al parámetro.
2. Pulsar la tecla para seleccionar el modo deseado.
3. Pulsar la tecla para confirmar.
8.5 FUNCIÓN HOLD | UF-5
(una vez retirado el objeto del plato, el display mantiene el peso fijado durante unos segundos, función muy útil para el pesaje de animales)
1. Pulsar la tecla para acceder al parámetro.
2. Pulsar la tecla para seleccionar el modo deseado.
3. Pulsar la tecla para confirmar.
MODES:
• HOLD 0 : Desactivado.
• HOLD 1 : Animal en movimiento
HOLD 1.
Una vez se ha accedido a este parámetro, la pantalla muestra PCt,
• Use las teclas y para mover el cursor y la tecla para seleccionar el valor del rango de HOLD deseado de 001 a
100.
• Pulsar la tecla para confirmar.
• La pantalla mostrará time 8, use la teclas y para mover el cursor y la tecla para seleccionar el número de
repeticiones deseado durante el rango de hold.
• Pulsar la tecla para confirmar. Ejemplo: PCt pequeño y time grande implica más precisión y mayor tiempo de estabilización.
8.6 SALIDA DE DATOS RS-232 |UF-6
0 RS232 desconectado
1 Salida estable Formato 1
2 Salida continua Formato 1
3 Salida manual Formato 1
4 Salida estable Formato 2
5 Salida continua Formato 2
6 Salida manual Formato 2
7 Salida con acumulación manual - Formato 3 Formato de impresión
8 Salida con auto-acumulación - Formato 3 Formato de impresión
9 Salida con acumulación manual - Formato 4 Formato de impresión
10 Salida con auto-acumulación - Formato 4 Formato de impresión

MANUAL DE USUARIO
IB10-S ES
14
RS232 Baud rate
b1200 Baud rate 1200
b2400 Baud rate 2400
b4800 Baud rate 4800
b9600 Baud rate 9600
b19200 Baud rate 19200
b38400 Baud rate 38400
Protocolo de comunicación
Estandard EIA-RS232 C señal UART
FORMAT0:
1. Salida serie: 1200/2400/4800/9600/19200/38400 BPS
2. Bits de datos: 8 BITS
3. Bits de paridad: ninguno
4. Bits de parada: 1 BIT
bit de inicio Bits de datos Bits de parada
OBSERVACIONES:
Formato 1 ejemplo de salida: Formato 2 ejemplo de salida:
Formato 3 ejemplo de salida: Formato 4 ejemplo de salida:
ST, GS, +001. 000 Kg +001. 000kg
S/
N
WT/
Kg
-----------------------------
0001
1.000
0002
2.000
0002
3.000
TIQUET NO. 0001
G
3.000Kg
T
1.000Kg
N
2.000kg
NÚMERO TOTAL
DE
TIQUETES
0001
TOTAL
NET0
2.000

MANUAL DE USUARIO
IB10-S ES
,
8.7 CONFIGURACIÓN DE LA VELOCIDAD DEL CONVERSOR |UF-7
1. Pulsar la tecla para acceder al parámetro.
2. Pulsar la tecla para seleccionar el modo deseado:
•
Modo 1 : Normal
•
Modo 2: Rápido
•
Modo 3: Lento
3. Pulsar la tecla para confirmar.
8.8 CONDICIONANTE DE VISUALIZACIÓN DE CERO|UF-8
Muestra 0 en pantalla hasta llegar a la siguiente división seleccionada. Empezando a mostrar valores a partir de esta división.
Ejemplo:
báscula con e =2g
Ciega en 5 divisiones
Mostrará 0 hasta llegar a 2x5=10g el primer valor que mostrará será 12g
1. Pulsar la tecla para acceder al parámetro.
2. Pulsar la tecla para seleccionar.
3. Pulsar la tecla para confirmar.
8.9 CONFIGURACIÓN DE LA GRAVEDAD|UF-9
1. Pulsar la tecla para visualizar el valor de la gravedad actual.
2. Para cambiar el valor, pulsar la tecla , seguidamente utilizar las teclas y para mover el cursor y la tecla
para seleccionar el número deseado.
3. Pulsar la tecla para confirmar.
9.
CONFIGURACIÓN DE REAJUSTES DE CALIBRACIÓN
1. Dentro del modo normal de pesaje, pulsar las teclas y , el display mostrará el mensaje ECF – 1.
2. Pulsar la teclas o para seleccionar la función deseada: ECF-1, ECF-2 o ECF-3
* ECF-1 CALIBRACIÓN DE CERO + PESO
Pulsar la tecla , el display mostrará CALZ.
Pulsar la tecla , para poner a cero la lectura del display.
Pulsar las teclas y para mover el cursor.
Pulsar la tecla introducir el valor de la pesa de calibración.
Colocar la pesa de calibración sobre la plataforma y pulsar la tecla para efectuar la calibración una vez la lectura
sea estable.
* ECF-2 CALIBRACIÓN DE CERO
Pulsar la tecla , el display mostrará CALZ.
Pulsar la tecla para efectuar la calibración. 15

MANUAL DE USUARIO
IB10-S ES
16
CALIBRACIÓN DE PESO LF 1
* ECF-3 CALIBRACIÓN DE PESO (SPAN)
Pulsar la tecla , el display mostrará el valor del peso de calibración.
Pulsar las teclas y para mover el cursor.
Pulsar la tecla para modificar el valor de la pesa de calibració
Pulsar la tecla para confirmar.
Colocar la pesa de calibración sobre la plataforma y pulsar la tecla para efectuar la calibración una vez la lectura
sea estable.
10.
PARÁMETROS TÉCNICOS
NO MODIFIQUE LOS PARÁMETROS TÉCNICOS SI NO ES ESTRICTAMENTE NECESARIO. UNA MALA CONFIGURACIÓN DE ESTA
SECCIÓN PUEDE PROVOCAR UN MAL FUNCIONAMIENTO DE LA BALANZA.
ENTRAR Y SALIR DE LA CALIBRACIÓN
PANTALLA DESCRIPCIÓN Y SECUENCIA DE USO
•Con el visor apagado, presione y mantenga presionada la tecla hasta que la pantalla muestre
LF 1 00911, suelte la tecla .Si el dispositivo le solicita una contraseña, debe escribir 0020 con las teclas
de flecha y presionar Enter para validar
•Presione la tecla para empezar o la tecla para salir del menú y el visor se reiniciará
automáticamente.
PANTALLA DESCRIPCIÓN Y SECUENCIA DE USO
LF 1
CAL Z
La calibración se puede realizar con cualquier peso, pero el peso no debe ser inferior a 1/3 de la
máxima capacidad ni nunca debe ser sobrepasada.
• Presione la tecla para empezar la calibración de zero (presione para salir de la calibra-
ción y volver al menú LF1)
•Utilize , y , 0 ~ 9 y después para introducir el peso con el que se
hará la calibración. (Presione para salir de la calibración y volver al menú LF1)
150.00 kg •Sitúe el peso requerido sobre la báscula tal y cómo indica el display.
150.00 kg •Una vez estabilice, presione para calibrarla. (presione ESC para salir de la calibración y volver
al menú LF1).
LA CALIBRACIÓN SE TERMINARÁ Y LA BÁSULA VOLVERÁ AL MODO DE PESAJE AUTOMÁTICAMENTE.
PANTALLA DESCRIPCIÓN Y SECUENCIA DE USO
PRIMER PASO
262144 •VISUALIZACIÓN DE LAS CUENTAS INTERNAS
150.00 kg
CONFIGURACIÓN
LF 2

MANUAL DE USUARIO
IB10-S ES
17
diV 01
métrica
SEGUNDO PASO •POSIBLES VALORES DE LOS PARÁMETROS
F: Unidades de calibración 1: usar unidades 2: : usar unidades americanas
TERCER PESO
CUARTO PASO
dP 0.0
lb oz no se pueden seleccionar como unidades de calibración.
La bascula no nos dejará continuar hasta el próximo paso si hay un error durante la programación.
•Utilice , y , 0 ~ 9 y después para introducir LA CAPACIDAD MÁXI-
MA, teniendo en cuenta el número de decimales. Ej. 150.00kg = introduzca 15000 si luego se selec-
ciona como decimal d0.00.
•Utilice , para cambiar la posición del PUNTO DECIMAL.
d 0.00 d 0.000 d 0.0000 0.00000
QUINTO PASO •Utilice para seleccionar la DIVISIÓN: diV 01, diV 02, diV 05, diV10, diV 20, diV
50
PROCEDIMIENTO
Después de entrar los parámetros LF2, el visor mostrará la última configuración guardada. Todos
los pasos deben completarse, si no el visor continuará con la configuración anterior.
Proceda con la calibración de peso después de LF2.
•Presione para empezar y mostrará el VALOR INTERNO. Presione para salir del menú
y la báscula se reiniciará automáticamente.
•Presione para continuar con la configuración. (presione para salir de la configura-
ción y volver al menú LF2).
•Utilice , y , 0 ~ 9 y después pulse para seleccioinar las UNIDADES
DE PESAJE (presione para salir de la calibración y volver al menú LF2).
•Utilice , y , 0 ~ 9 y después para seleccionar el PESO MÁXIMO,
teniendo en cuenta el número de decimales.
•Utilice , y después ara mover el punto decimal. (presione para salir de
la configuración y volver al menú LF2).
•Utilice y después para cambiar el escalón (presione para salir de la configu-
ración y volver al menú LF2).
000000kg
LF 2
262144
100001
000000kg
d 0.0kg
div 01
A: Sistema Métrico
0:NO
1: kg
2:T
3:g
B: Sistema Americano 0:NO 1: lb 2:lb oz
1 0 0 0 0 1
C:Otras unidades 0:NO 1: TW kg 2:HK kg 3:VISS
D: PCS 0:OFF 1: ON
A B C D E F E: Doble rango 0:OFF 1: multi intervalo 2: multi rango

MANUAL DE USUARIO
IB10-S ES
18
•Utilice , y para continuar con otras configuraciones o presione para
salir del menú y la báscula se reiniciará automáticamente).
CALIBRACIÓN LINEAL LF 3
Hasta 6 pasos de calibración W0 ~W6
Asegúrese que el plato de la báscula está vacío antes de empezar la calibración.
Presione para el primer punto de calibración.
Los puntos de calibración previos serán borrados y la pantalla mostrará CLEAR.
Presione para proceder con el siguiente punto de calibración.
Presione para volver al punto de calibración anterior.
Presione para guardar.
Presione para terminar la calibración y volver al menú LF3.
PANTALLA DESCRIPCIÓN Y SECUENCIA DE USO
LF3
•Presione empezar o para salir del menú y la báscula automáticamente.
W0 •Presione utilize para calibrar el cero..
( presione para salir de la calibración y volver al menú LF3).
W1 • Sitúe 1/3 del peso máximo encima del palto y presione to calibrate 2/3 th the capacity.
(presione para salir de la calibración y volver al menú LF3).
W2 •Sitúe 2/3 del peso máximo encima del palto y presione para calibrar 1/3 de la capacidad..
(presione para salir de la calibración y volver al menú LF3).
W3 •Sitúe el peso máximo encima del plato y presione para calibrar la plena capacidad. (presio-
ne para salir de la calibración y volver al menú LF3).
W4
• Presione para completar la calibración lineal. (presione para salir de la calibración
y volver al menú LF3).
LF3 •Utilice , y después para continuar con otros ajustes o presione para
salir del menú y la báscula se reiniciará automáticamente.
LF2

MANUAL DE USUARIO
IB10-S ES
19
VELOCIDAD DEL CONVERTIDOR AD LF 4
SPEED 1 velocidad estándar 15Hz
SPEED 2 alta velocidad 30Hz.
SPEED 3 baja velocidad 7.5Hz
*Esta función queda bloqueada cuando UF-5 se encuentra en modo HOLD 1.
*El valor de fábrica es 1
PANTALLA DESCRIPCIÓN Y SECUENCIA DE USO
•Presione para empezar o para salir del menú y la báscula se reiniciará automática-
mente.
•
Utilice y después para seleccionar la velocidad del convertidor AD (presione
para salir de la configuración y volver al menú LF4)
• Utilice , y después para continuar con otros ajustes o presione para
salir del menú y la báscula se reiniciará automáticamente.
PANTALLA DESCRIPCIÓN Y SECUENCIA DE USO
ZP 0 OFF
ZP 1 Una división no se mostrará estando a cero
ZP 2 Dos divisiones no se mostrarán estando a cero
ZP 3 Tres divisiones no se mostrarán estando a cero
ZP 4 Cuatro divisiones no se mostrarán estando a cero
ZP 5 Cinco divisiones no se mostrarán estando a cero
*Esta función queda bloqueada cuando UF-5 se encuentra en modo HOLD 1
*El valor de fábrica es ZP 0
PANTALLA DESCRIPCIÓN Y SECUENCIA DE USO
• Utilice y después para salir del menú y la báscula se reiniciará automáticamente.
• Utilice y después para seleccionar cuantas divisiones nos e mostrarán a cero. (
presione ESC para salir de la configuración y volver al menú LF4).
• Utilice , y después para continuar con otros ajustes o presione para
salir del menú y la báscula se reiniciará automáticamente.
CIEGA
LF 5
LF 5
LF4
LF 4
LF 5
ZP 0
LF 5
SPEED 1

MANUAL DE USUARIO
IB10-S ES
20
*Introduzca la gravedad de su zona antes de realizar la primera calibración.
*Introduzca la gravedad de destino después de realizar la calibración.
*El valor de gravedad será denegado si es mayor que 9.83217 (gravedad de polo) o inferior que 9.78031 (gravedad del ecua-
dor).
Valor de fábrica: 9.8035
PANTALLA DESCRIPCIÓN Y SECUENCIA DE USO
•Presione para continuar o para salir del menú y la báscula se reiniciará automáti-
camente.
•La pantalla mostrará el número de pre-calibración durante un segundo.
•Presione para continuar.
•Utilice , y , 0 ~ 9 y después para introducir el valor de gravedad.
(presione ESC para salir de la configuración y volver al menú LF 7).
CERO INICIAL LF 8
SEtZ Y resetea el punto de cero cada vez que se reinita la báscula.
SEtZ n reseteo del punto cero OFF.
PANTALLA DESCRIPCIÓN Y SECUENCIA DE USO
•Presione para empezar o para salir del menú y la báscula se reiniciará automáti-
camente
SetZ Y •Utilice y después para seleccionar el modo de cero inicial. (presione para
salir de la configuración y volver al menú LF8)
LF 8 •Utilice , y después para continuar con otros ajustes o presione para
salir del menú y la báscula se reiniciará automáticamente.
GRAVEDAD
LF 7
CONFIGURADO EN nonE.
!
El cambio de este parámetro implica el bloqueo de ciertas funcionalidades.
nonE
Versión no aprobada
NO MODIFIQUE BAJO NINGÚN CONCEPTO ESTE PARÁMETRO, SIEMPRE DEBE ESTAR
CONFORMIDAD DE APROBACIÓN LF 6
LF 6
LF 7
-00-
9.8035
LF 8
9.8035
DESCRIPCIÓN Y SECUENCIA DE USO PANTALLA

MANUAL DE USUARIO
IB10-S ES
21
11.
GARANTÍA
Esta balanza está garantizada contra todo defecto de fabricación y de material, por un periodo de 1 año a partir de la fecha de entrega.
Durante este periodo, GIROPÈS, se hará cargo de la reparación de la balanza.
Esta garantía no incluye los daños ocasionados por uso indebido o sobrecargas.
La garantía no cubre los gastos de envío (portes) necesarios para la reparación de la balanza.

USER’S MANUAL
IB10-S EN
22
1.
EXCITATION
IB10-S
Input 230~240V
Output 9V 500mA
Rechargeable Battery 6V/1,2Ah
2.
BEFORE ITS USE
1. Use an independent electric source to prevent electronic disturbances.
2. Don’t place any object on the platform when switching on the indicator.
3. Please, warm-up the scale during 2-3 minutes before using it.
4. Avoid sudden changes in temperature and draughts.
5. Don’t overload the scale; do not exceed its maximum capacity.
3.
CONSUMPTION
IB10-S
Battery life: without back illumination, approx, 160 hours.
With back illumination, approx, 120 hours.
4.
LOAD CELL CONNECTION TO THE INDICATOR
The connector of the load cell has 7 pins
• Do not disconnect the connector of the load cell when the indicator is working, because you could damage the equipment.
PIN 1 EXC +
PIN 2 SEN +
PIN 3 SIG +
PIN 4 SIG -
PIN 5 SEN -
PIN 6 EXC -
PIN 7 GND

USER’S MANUAL
IB10-S EN
23
5.
KEYBOARD DESCRIPTION
First function: Press this key to switch on the scale.
Second function: To place the reading of the display at “0”, the value of the display must be lower to + 2% of
the maximum capacity.
Third function: To subtract the weight of a recipient.
First function: Press and hold the key during 3 seconds to switch off the indicator.
First function: Change to Piece-counting.
Second function: To exit from the menu.
First function: To show the total accumulation.
Second function: To remove the memory of the accumulations.
Third function; To increase the values inside the programming.
First function: Perform a Tara.
Second function: To move to the left in the programming mode.
First function: To accumulate in memory the value of the weight on the screen.
Second function: manual transmission of data through RS-232 port to a PC or printer.
Third function: confirmation key in the programming mode.
IB10-S

USER’S MANUAL
IB10-S EN
24
6.
IB10-S APPLICATIONS
6.1 TARA
6.2 NORMAL WEIGHING MODE
6.2.1 EQUIPMENT CONFIGURATION
6.2.2 FIRST CALIBRATION
6.2.3 USE
6.3 PIECE COUNTING MODE
6.3.1 EQUIPMENT CONFIGURATION
6.3.2 FIRST CALIBRATION
6.3.3 USE
6.4 LIMITS AND ALARM
6.5 MONO-RANGE / MULTI RANGE/ MULTI INTERVAL
6.1 TARA
Place a container on the platform, a value for its weight will be displayed. Press the key to tare the scale. The weight that was
displayed is stored as the tare value and that value is substracted from the display, leaving zero on the display. The
“NET” indicator will be on. As product is added only the weight of the product will be shown. The scale could be tared a second time if another
type of product was to be added to the first one. Again only the weight that is added after taring will be displayed. When the container is
removed a negative value will be shown. If the scale was tared just before removing
the container this value is the gross weight of the container plus all product that was removed. The zero indicator will also be on because the
platform is back to the same condition it was when the key was last pressed.
6.2 NORMAL WEIGHING MODE
6.2.1 CONFIGURATION OF THE EQUIPMENT
See section LF2 of the technical parameters
6.2.2 FIRST CALIBRATION
See section LF1 of the technical parameters
6.2.3 USE
Switch on the equipment when all the parameters have been correctly configured and the equipment has been calibrated
• Make sure than the value of the indicator, without load on the platform, is 0. If this is not the case, press .
• Place the weight on the platform and the platform will show the weight.
• The accumulation and sending of data will depend on the mode chosen in the section UF-6
• You can display the accumulated values at any time by pressing (TOTALIZING)
(Accumulation is only working with acive printprotocol)
6.3 PIECE COUNTING MODE
6.3.1 CONFIGURATION OF THE EQUIPMENT
See section LF2 of the technical parameters
6.3.2 FIRST CALIBRATION
See section LF1 of the technical parameters
6.3.3 USE
Switch on the equipment when all the parameters have been correctly configured. Make sure that the value on the visor, with no load on the
platform, is 0. If this is not the case press the key .
STEPS TO FOLLOW;
1. Press the key until the symbol PCS appears on the screen
2. Press the key successively to choose the quantity of pieces of the sample. On the screen will appear, successively, C10/C20/
C50/C100/C200.
3. Place the sample on the platform, and wait until the sign of stability and press the key
4. Place the product on the platform and the screen will show the number of pieces.

USER’S MANUAL
IB10-S EN
The accumulation and the sending of data will depend on the mode chosen in the section UF-6.
• To turn to the normal weighing mode, press the key to select Kg again.
• If the user wants to go back to the piece counting mode, using the same sample of reference, press the key again.
• If the user want to change the sample of reference, the user must repeat the steps described above.
6.4 LIMITS AND ALARM
The user can configure the Low and High limits of the sample placed on the platform.
The display will show if the sample is below limit Lo, above the superior limit Hi or in the zone between the two limits OK
The user can configure to make the alarm ring.
All the procedure is described in the section UF-2.
If the user wants to define the limits in the normal weighing mode and wants to use the limits in piece counting mode, he must define the new
limits for this mode, when it changes to weight mode again, the user will recover the limits he already has. The same happens otherwise.
6.5 MONO-RANGE / MULTI-RANGE / MULTI-INTERVAL
The indicator can be configured with an Mono-range, a maximum weight and a value of step. It can also be configured as multi range or multi
interval, in such cases there is a maximum weight.
From 0 to the medium weight of these maximum weight it is used the value of the chosen step ( step 1) and from the half to the maximum weight
it is used the next value in the step ( step 2).
The screen indicators R1 and R2 point out the range which the user is using at every moment.
In the multi interval mode the weight increases, in the range use it used step 1, when the user goes to range 2 the step 2 is used.
When the weight decreases and the user go back to range 1, the step 1 is used again. On the contrary, in mode multi range, when the weight
decreases and the device go back to range 1, the device continues using step 2 until it reaches 0.
In the section LF2 of the technical parameters the user can choose the range mode.
7.
PARAMETERS
PARAMETER DESCRIPTION
UF-1 Internal calculation (A/D)
UF-2 Limit Configuration of weight ( superior and inferior)
UF-3 auto auto off
UF-4 Back illumination of display
UF-5 Four modes of hold
UF-6 RS-232 Output ( PC/PRINT)
UF-7 Configuration of the speed of the converter (A/D)
UF-8 Zero Weight Display Condition
UF-9 Configuration of gravity
8.
PARAMETERS CONFIGURATION
8.1 INTERNAL COUNTING (A/D)
8.2 CONFIGURATION OF THE WEIGHT LIMITS (SUPERIOR AND INFERIOR)
8.3 AUTO SWITCH OFF
8.4 CONFIGURATION OF THE ILLUMINATION OF THE DISPLAY
8.5 HOLD FUNCTION
8.6 RS-232 DATA EXIT
8.7 CONFIGURATION OF THE SPEED OF THE AD CONVERTER
8.8 ZERO WEIGHT DISPLAY CONDITION
8.9 CONFIGURATION OF THE GRAVITY
To access the configuration of parameters when the screen is in zero, the user must press at the same time the keys and .
Press the key or to choose the desired character (UF-1 ~ UF-9), for confirm the changes done, press
25
To go back to the previous mode press the key .

USER’S MANUAL
IB10-S EN
26
(configuration of the alarm)
DISPLAY VALUE ESTABILITY
8.1 INTERNAL COUNTING (A/D) | UF-1
1. Press the key to view the internal sums of the scale.
2. To go to the next parameter, press the key the screen will show the value of the voltage of the battery.
3. To exit this mode and go back to the normal weighing, the user must press the key or .
8.2 CONFIGURATION OF THE LIMITS OF WEIGHT ( SUPERIOR AND INGERIOR) | UF-2
1. Press the key to access the parameter.
2. The display will show the message “ 000.00L” ( Low limit = LO)
3. Use the keys and to move the cursor and the key to choose the desired number..
4. Press the key to confirm.
5. The display will show the message “000.00h” (Superior limit=Hi)
6. Use the keys and to move the cursor and the key to choose the desired number.
Note: If you need to change or modify the last digit you can place the cursor on it to do it.
7. Press the key to confirm.
8. The display will show the value.
A B C
0 0 0
A 0 There is no need to stabilize the alarmweight to make it ring
1 The alarmweight must be stabilized to ring
B 0 Always 0
C 0 Alarm switched off
1 The alarm ring if it is place on the band OK
( between the limits Lo and Hi)
2 The alarm rings if it is situated below the
inferior limit Lo or above the superior limit
Hi
9. Press the keys and to move the cursor and the key to choose the desired number.
10. Press the key to confirm.
8.3 AUTO SWITCH OFF| UF-3
MODES:
• AoFF 00 – Auto switch off deactivated
• AoFF 01 – Auto switch off activated in a minute. The scale is going to switch off automatically after 1 minute of not being used.
• You can configure the value wished from 1 to 99 minutes.
1. Press the key to have an access to the parameter.
2. Press the keys and to move the cursor and the key to choose the desired number.
3. Press the key to confirm.
LO
OK
HI
LO
OK
HI

USER’S MANUAL
IB10-S EN
27
8.4 DISPLAY BACKLIGHTING | UF-4
MODES:
• Lit A: Automatic.
• Lit ON: Illumination Activated.
• Lit OFF: Illumination Desactivated.
1. Press the key to have an access to the parameter.
2. Press the key to select the desired mode.
3. Press the key to confirm.
8.5 HOLD FUNCTION | UF-5
(Once the object is retired from the plate, the display maintains the weight fixed during some seconds. This function is very useful for the weighing of
animals)
1. Press the key to access to the parameter.
2. Press the key to choose the desired mode.
3. Press the key to confirm.
MODES:
• HOLD 0 : Deactivated.
• HOLD 1 : Animal in movement
HOLD 1.
• When the user can access this parameter, the screen shows the message PCt,
• Use the keys and to move the cursor and the key to choose the desired value of the range of HOLD, you can
choose a number from 001 to 100.
• Press the key to confirm.
• It will appear on the screen the message time 8, use the keys and to move the cursor and the key o choose the
number of times you want to repeat during the range of hold.
• Press the key to confirm. Example: PCt small and big time means more accuracy and longer stabilization.
8.6 RS-232 DATA EXIT|UF-6
0 RS232 disable
1 Stable output Format 1
2 Stream output Format 1
3 Manual output Format 1
4 Stable output Format 2
5 Stream output Format 2
6 Manual output Format 2
7 Manual accumulate output - Format 3 Printformat
8 Auto accumulate output - Format 3 Printformat
9 Manual accumulate output - Format 4 Printformat
10 Auto accumulate output - Format 4 Printformat

USER’S MANUAL
IB10-S EN
28
RS232 Baud rate
b1200 Baud rate 1200
b2400 Baud rate 2400
b4800 Baud rate 4800
b9600 Baud rate 9600
b19200 Baud rate 19200
b38400 Baud rate 38400
Commmunication Protocol
UART signal of EIA-RS232 C
FORMAT:
1. Serial Output: 1200/2400/4800/9600/19200/38400 BPS
2. Data bits: 8 BITS
3. Parity bits: None
4. Stop bits: 1 BIT
start bit Data bits Stop bits
REMARKS:
Format 1 output examples: Format 2 output examples:
Format 3 output examples: Format 4 output examples:
ST, GS, +001. 000 Kg +001. 000kg
3.000
0002
2.000
0002
1.000
0001
-----------------------------
WT/Kg
S/N
TICKET NO. 0001
G
3.000Kg
T
1.000Kg
N
2.000kg
TOTAL NUMBER
OF
TICKETS 0001
TOTAL
NET
2.000

USER’S MANUAL
IB10-S EN
29
8.7 CONFIGURATION OF THE SPEED OF THE CONVERTER |UF-7
1. Press the key to access the parameter.
2. Press the key to choose the desired mode:
•
Mode 1 : Normal
•
Mode 2: Fast
•
Mode 3: Slow
3. Press the key to confirm.
8.8 ZERO WEIGHT DISPLAY CONDITION|UF-8
It appears 0 on screen until the next division is selected. It starts to show values from that division.
Example:
Scale with e =2g
Blind in 5 divisions
It will show 0 until it reaches 25= 10 g, the first value it will show will be 12g.
1. Press the key to access the parameter.
2. Press the key to select.
3. Press the key to confirm.
8.9 CONFIGURATION OF GRAVITY|UF-9
1. Press the key to view the value of the actual gravity.
2. To change the value, press the key , next you must use the key and to move the cursor and the key to
select the desired number.
3. Press the key to confirm.
9.
CONFIGURATION OF THE READJUSTMENTS IN CALIBRATION
1. When the user is in the normal mode of weighing, he must press the keys and , the message ECF-1 is going to appear
on the display.
2. Press the keys or to select the desired function: ECF-1, ECF-2 or ECF-3
* ECF-1 CALIBRATION OF ZERO + WEIGHT
Press the key ,the display will show CALZ.
Press the key ,to put the reading of the display to zero.
Press the keys and to move the cursor.
Press the key to introduce the value of the weight of calibration.
Place the weight of calibration on the platform and press the key to do the calibration once the reading is steady.
* ECF-2 CALIBRATION OF ZERO
Press the key , the display will show CALZ.
Press the key , to put the reading of the display to zero.

USER’S MANUAL
IB10-S EN
30
* CALIBRATION OF WEIGHT (SPAN)
Press the key , the display will show the value of the weight of calibration.
Press the keys and to move the cursor.
Press the key to modify the value of the weight of calibration.
Press the key to confirm.
Place the weight of calibration on the platform and press the key to do the calibration once the reading is stable.
10.
TECHNICAL PARAMETERS
DO NOT MODIFY THE TECHNICAL PARAMETERS IF IT IS NOT STRICTLY NEEDED. A BAD CONFIGURATION OF THIS SECTION CAN
CAUSE A WRONG FUNCTIONING OF THE SCALE.
ENTRANCE AND EXIT OF THE CALIBRATION
DISPLAY DESCRIPTION AND SEQUENCE OF USE
• Press the key to start or the key to exit the menu and the indicator will begin again automatically.
CALIBRATION OF THE WEIGHT LF 1
DISPLAY DESCRIPTION AND SEQUENCE OF USE
LF 1
CAL Z
The calibration can be done with any weight, but the weight ca not be inferior to 1/3 of the maximum
capacity and it must also never be exceeded.
• Press the key to start the calibration of zero (press to exit the calibration and go back
to the menu LF1)
•Use , and , 0 ~ 9 and then press to introduce the weight with which
the calibration will be done. (press the key to exit the calibration and go back to the menu LF1)
150.00 kg •Place the required weight on the scale as it is indicated in the display.
150.00 kg •Once everything is steady, press the key to calibrate it ( press the key ESC to exit the calibration
and go back to the menu LF1).
THE CALIBRATION IS GOING TO FINISH AND THE SCALE WILL GO VACK TO THE WEIGHING MODE AUTOMATICALLY.
CONFIGURATION LF 2
DISPLAY DESCRIPTION AND SEQUENCE OF USE
FIRST STEP
262144 •DISPLAY OF THE INTERNAL COUNTING
150.00 kg
• With the visor switched off, press and hold the key
until the message 00911, appears on the
LF 1
screen, then you can release the key
. If device ask you for a password, you must type 0020
with arrow keys and press Enter for to validate

USER’S MANUAL
IB10-S EN
31
unitie
SECOND STEP •POSSIBLE VALUES OF THE PARAMETERS
F: units of calibration 1:use metric
lb oz cannot be selected as unities of calibration.
2:use american unities
THIRD STEP
FOURTH STEP
dP 0.0
The scale won’t let us continue up to the next step if there is a mistake during the programming.
•Use , and , 0 ~ 9 and then press to introduce THE MAXIMUM CA-
PACITY, considering the number of decimal zeros to be used. Ex. 150.00kg = introduce 15000 if then
selected as decimal d0.00
•Use the Keys , to change the position of the DECIMAL POINT.
d 0.00 d 0.000 d 0.0000 0.00000
FIFTH STEP •Use to select the DIVISION: diV 01, diV 02, diV 05, diV10, diV 20, diV 50
diV 01
PROCESS
After introducing the parameters LF2, the indicator will show the last configuration saved. All the
steps to follow must be completed, if they are not done the indicator will continue with the previous
configuration.
Proceed with the calibration of weight after LF2.
• Press the key to start and display the internal value. Press to exit the menu and the
scale will automatically restart.
•
Press the key to continue with the configuration. (press the key to exit from the con-
figuration and go back to the menu LF2).
•Use the keys , and , 0 ~ 9 and then press the key to choose the
UNITS OF WEIGHT. (press the key to exit from the configuration and go back to the menu LF2).
•Use the keys , and , 0 ~ 9 and then press the key to choose the
MAXIMUM WEIGHT. press the key to exit from the configuration and go back to the menu LF2).
•Use the keys , and then to move the decimal point ( press the key to
exit from the configuration and go back to the menu LF2).
•Use and then to change the step. (Press the key To exit from the configuration
and go back to the menu LF2).
000000kg
LF 2
262144
100001
000000kg
d 0.0kg
div 01
A: Metric system
0:NO
1: kg
2:T
3:g
B: American system 0:NO 1: lb 2:lb oz
1 0 0 0 0 1 C: other unities 0:NO 1: TW kg 2:HK kg 3:VISS
D: PCS 0:OFF 1: ON
A B C D E F E: double range 0:OFF 1: multi interval 2:multi range

USER’S MANUAL
IB10-S EN
32
•Use , and then to continue with the other configuration or press the key
to exit from the menu and the scale will begin again automatically).
LINEAL CALIBRATION LF 3
Up to six steps of calibration W0 ~W6
Make sure that the plate of the scale is empty before starting the calibration.
Press the key for the first point of calibration.
The previous points of calibration will be removed and the message CLEAR is going to appear on the screen.
Press the key to proceed with the next point of calibration.
Press the key to go back to the previous point of calibration.
Press the key to keep everything.
Press the key to finish the calibration and go back to the menu LF3.
DISPLAY DESCRIPTION AND SEQUENCE OF USE
LF3
• Press the Key to start or the key To exit the menu and the scale will start again au-
tomatically
W0 •Press the Key to calibrate the zero.
( press the key to exit from the calibration and go back to the menu LF3)
W1 • Place 1/3 of the maximum weight on the plate and press to calibrate 2/3 th the capacity.
(press the key to exit from the calibration and go back to the menu LF3)
W2 •Place 2/3 of the maximum weight on the plate and press to calibrate 2/3 th the capacity.
(press the key to exit from the calibration and go back to the menu LF3)
W3 •Place the maximum weight on the plate and press the key to calibrate the full capacity. (press
the key to exit from the calibration and go back to the menu LF3)
W4
•Press the key to complete the lineal calibration. (press the key to exit from the cali-
bration and go back to the menu LF3)
LF3 •Use the keys , and then the key to continue with other adjustments and press
the key to exit from the menu and the scale will begin again automatically.
LF2

USER’S MANUAL
IB10-S EN
33
SPEED OF THE AD CONVERTER LF 4
SPEED 1 standard speed 15Hz.
SPEED 2 high speed 30Hz.
SPEED 3 low speed 7.5Hz
*This function stays blocked when UF-5 is in mode HOLD 1.
*The value of factory is 1
DISPLAY DESCRIPTION AND SEQUENCE OF USE
•Press the key to start or the key to exit from the menu and the scale is going to begin
again automatically.
•Use the key and then the key to select the speed of the AD converter (press the key
to exit from the configuration and go back to the menu LF4)
•Use the keys , and then to continue with the other adjustment and press the
key to exit from the menu and the scale will start again automatically.
DISPLAY DESCRIPTION AND SEQUENCE OF USE
ZP 0 OFF
ZP 1 One division will not show being at zero
ZP 2 Two division will not show being at zero
ZP 3 Three divisions will not show being at zero
ZP 4 Four divisions will not show being at zero
ZP 5 Five divisions will not show being at zero
*This function is going to be blocked when UF-5 is in mode HOLD 1
*The value of factory is ZP 0
DISPLAY DESCRIPTION AND SEQUENCE OF USE
• Press the key to start or the key to exit from the menu and the scale will start again
automatically.
• Use the key and the key to select how many divisions will show when in zero ( press
ESC to exit from the configuration and go back to the menu LF4)
• Use the keys , and then the key to continue with other adjustment or press the
key to exit from the menu and the scale is going to start automatically.
BLINF
LF 5
LF4
LF 4
LF 5
LF 5
ZP 0
LF 5
SPEED 1

USER’S MANUAL
IB10-S EN
34
*Introduce the gravity of your zone before doing the first calibration.
*Introduce the gravity of destination after doing the calibration.
*The value of the gravity will be denied if it is bigger than 9.83217 ( gravity of the pole) or inferior to 9.78031 ( gravity of the
equator).
Value of factory: 9.8035
DISPLAY DESCRIPTION AND SEQUENCE OF USE
• Press the key to continue or the key to exit from the menu and the scale will start
again automatically.
• The screen is going to show the number of pre-calibration during one second.
• Press the key to continue.
• Use the keys , and , 0 ~ 9 and then the key to introduce the value
of gravity ( press ESC to exit from the configuration and go back to the menu LF7)
INITIAL ZERO LF 8
SEtZ Y resets of the point of zero every time that the scale is begun again.
SEtZ n resets of the point zero OFF
DISPLAY DESCRIPTION AND SEQUENCE OF USE
• Press the key to start or the key to exit from the menu and the scale will start again
automatically.
SetZ Y • Use the key and then the key to choose the mode of zero initial ( press the key
to exit from the configuration and go back to the menu LF8)
LF 8 • Use the keys , and then the key to continue with other adjustments o press
the key to exit from the menu and the scale will start again automatically.
GRAVITY
LF 7
nonE Version not approved
DON’T MODIFY, IN NO WAY, THIS PARAMETER. IT MUST ALWAYS BE CONFIGURED AT
nonE.
!
The change of this parameter implies the blocking of some functionalities.
DESCRIPTION AND SEQUENCE OF USE
DISPLAY
APPROVAL CONFIRMITY
LF 6
LF 6
LF 7
-00-
9.8035
LF 8
9.8035

USER’S MANUAL
IB10-S EN
35
11.
WARRANTY
This scale has a warranty against all manufacture and material defects, for a period of a year starting with the delivery date.
During this period, GIROPES, will be in charge of the repairing of the scale.
This warranty does not include the damages done by overload or wrong use.
The warranty does not cover the delivery expenses necessary for the repair of the scale.

MANUEL D’UTILISATION
IB10-S FR
36
1.
ALIMENTATION
IB10-S
Entrée 230~240V
Sortie 9V 500mA
Batterie 6V/1,2Ah
2.
AVANT DE L’UTILISATION DU ÉQUIPEMENT
1. Le mantenir loin du tout materiel qui produit l’intérférence magnetique ou acoustique.
2. Avant de connecter l’indicateur, s’assurer que la plateforme soit vide.
3. S’il vous plaît permettre le indicateur et le balance préchauffer pendant 2-3 minutes avant utilisation.
4. Éviter les très brusques changements dans les courants d’air et de température.
5. Ne pas surcharger la balance, et ne dépasse jamais la capacité maximale.
3.
CONSOMMATION
IB10-S
Durée de vie de la batterie: sans le rétroéclairage, aprox. 160 heures.
avec le rétroéclairage, aprox. 120 heures.
4.
CONECTION DE L’INDICATEUR À UN CAPTEUR
Le connecteur du capteur de force est à 7 broches:
• Lorsque le voyant est allumé, ne retirez pas le connecteur de la cellule de charge, cette action risquerait d’endommager l’équipement.
PIN 1 EXC +
PIN 2 SEN +
PIN 3 SIG +
PIN 4 SIG -
PIN 5 SEN -
PIN 6 EXC -
PIN 7 GND

MANUEL D’UTILISATION
IB10-S FR
37
5.
DESCRIPTION DU CLAVIER
1a. fonction: Appuyez sur cette touche pour allumer la balance.
2a. fonction: Pour remettre le poids à zéro “0”, mais la valeur affichée sur l’écran doit être inférieure à ± 2%de
la capacité maximale.
3a. fonction Pour soustraire le poids d’un récipient.
1a. fonction: Maintenir appuyée cette touche pendant 3 secondes pour éteindre l’indicateur.
1a. fonction: Change au mode countpiece.
2a. fonction: Pour sortir du le menu.
1a. fonction: Afficher l’accumulation totale.
2a. fonction: Pour supprimer la mémoire d’accumulations. (pulsation longue)
3a. fonction: Pour incrementer les valeurs dans la programation.
1a. fonction: Pour faire la tare.
2a. fonction: Pour déplacer à gauche dans la programation.
1a. fonction: Pour accumuler en memoire la valeur de poids que s’affiche.
2a. fonction: Transmission manuelle de données grâce au port RS-232 à un PC ou une imprimante.
3a. fonction: Touche de confirmation dans le mode de programmation.
IB10-S

MANUEL D’UTILISATION
IB10-S FR
38
6.
APPLICATIONS IB10-S
6.1 TARE
6.2 MODE DE PESAGE NORMAL
6.2.1 CONFIGURATION DE L’ÉQUIPEMENT
6.2.2 PREMIER CALIBRAGE
6.2.3 UTILISATION
6.3 MODE COMPTAGE DES PIÈCES
6.3.1 CONFIGURATION DE L’ÉQUIPEMENT
6.3.2 PREMIER CALIBRAGE
6.3.3 UTILISATION
6.4 LIMITES ET ALARME
6.5 PLAGE UINTAIRE / MULTI-PLAGES / MULTI-INTERVALLES
6.1 TARE
Placez un conteneur sur la plate-forme, la valeur de son poids sera affichée. Appuyez sur la pour tarer la balance. Le poids qui était
affiché est stocké comme valeur de tare et cette valeur est soustraite de l’affichage, laissant zéro sur l’affichage.
L’indicateur “NET” s’allumera. Au fur et à mesure que le produit est ajouté, seul le poids du produit sera affiché. La balance pourrait être tarée
une deuxième fois si un autre type de produit devait être ajouté au premier.
Encore une fois, seul le poids ajouté après la tare sera affiché. Lorsque le conteneur est retiré, une valeur négative s’affiche. Si la balance est
tarée juste avant de retirer le conteneur, la valeur indiquée est le poids brut du conteneur plus tout le produit qui a été retiré. L’indicateur zéro
sera également allumé car la plate-forme revient à la même condition qu’elle avait à l’origine.
6.2 MODE DE PESAGE NORMAL
6.2.1 CONFIGURATION DE L’ÉQUIPEMENT
Voir la section LF2 de paramètres techniques
6.2.2 PREMIER CALIBRAGE
Voir la section LF1 de paramètres techniques
6.2.3 UTILISATION
Une fois tous les paramètres correctement configurés et l’équipement calibré, allumez l’ordinateur.
• Assurez-vous que la valeur du viseur, sans charge sur la plateforme, est de 0, dans le cas contraire, appuyez sur .
• Placez le poids sur la plateforme et l’écran affichera le poids.
• L’accumulation et l’envoi de données dépendront du mode choisi dans la rubrique UF-6.
• Vous pourrez afficher les valeurs accumulées à tout moment en appuyant sur (TOTALISATION)
(Le cumul ne fonctionne qu’avec le protocole d’impression actif)
6.3 MODE COMPTAGE DES PIÈCES
6.3.1 CONFIGURATION DE L’ÉQUIPEMENT
Voir la section LF2 de paramètres techniques
6.3.2 PREMIER CALIBRAGE
Voir la section LF1 de paramètres techniques
6.3.3 UTILISATION
Une fois tous les paramètres correctement configurés et l’équipement calibré, allumez l’ordinateur.
Assurez-vous que la valeur du viseur, sans charge sur la plateforme, est de 0, dans le cas contraire, appuyez sur .
ÉTAPES;
1. Appuyez sur la touche jusqu’à ce que l’écran affiche PCS.
2.
Appuyez successivement pour sélectionner la quantité de pièces de l’échantillon. L’écran affichera successivement
C10 / C20 / C 50 / C 100 / C 200.
3. Placez l’échantillon sur la plateforme, attendez que le voyant de stabilité s’allume et appuyez sur la touche .
4. Placez l’échantillon sur la plateforme, attendez que le voyant de stabilité s’allume et appuyez sur la touche.
L’accumulation et l’envoi de données dépendront du mode choisi dans la section UF-6.

MANUEL D’UTILISATION
IB10-S FR
39
• Pour revenir au mode de pesage normal, appuyez sur pour sélectionnez de nouveau Kg.
• Pour revenir au mode de comptage de pièces, en utilisant le même échantillon de référence, appuyez à nouveau sur la touche .
• Si vous voulez changer l’échantillon de référence, répétez les étapes ci-dessus.
6.4 LIMITES ET ALARME
Vous pouvez définir les limites supérieures et inférieures de l’échantillon placé sur la plateforme
L’affichage indiquera s’il est en dessous de la limite inférieure Lo, au-dessus de la limite supérieure Hi ou dans la zone comprise entre les deux
limites Ok.
Vous pouvez également configurer le moment où vous souhaiter que l’alarme sonne et si la stabilité est nécessaire pour cela. Toute la procédure
est décrite dans la section UF-2. Si vous avez défini des limites en mode de pesage normal et que vous voulez utiliser les limites en mode de
comptage de pièces, vous devrez définir les nouvelles limites pour ce mode, lorsque vous revenez en mode poids, les limites que vous aviez
précédemment seront restaurées. Il en va de même dans le cas contraire.
6.5 PLAGE UNITAIRE/ MULTI-PLAGES / MULTI-INTERVALLES
L’affichage peut être configuré avec une seule plage unitaire, c’est-à-dire un poids maximal et une valeur d’échelon. Que ce soit en multi-plages
ou en multi-intervalles, il y a un poids maximal dans ces cas et deux échalons.
De 0 à la moitié de ce poids maximal, la valeur d’échelon sélectionnée est utilisée (échelon 1) et de la moitié jusqu’au poids maximal, la valeur
d’échelon suivante est utilisée (échelon 2).
La plage dans laquelle vous vous trouvez est signalée à tout moment par les indicateurs d’écran R1 et R2.
Dans le mode multi-intervalles, à mesure que le poids dans la plage 1 augmente, on utilise l’échelon 1, en passant à la plage 2 l’échelon 2 est
utilisé. En diminuant le poids et en revenant à la plage 1, l’échelon 1 est de nouveau utilisé. Dans le cas contraire, en mode multi-intervalles, en
diminuant le poids et en revenant à la plage 1, l’échelon 2 reste utilisé jusqu’à ce que l’on arrive à 0.
Dans la section LF2 de paramètres techniques, vous pourrez sélectionner le mode de plage.
7.
PARAMÈTRES
PARAMÈTRES DESCRIPTION
UF-1 Compte interne (A/D)
UF-2 Configuration des limites de poids (supérieure ou inférieure)
UF-3 Auto-déconnexion automatique
UF-4 Configuration de l’éclairage de l’écran
UF-5 Fonction HOLD
UF-6 Sortie de données RS-232 (PC / PRINT)
UF-7 Configuration de la vitesse convertisseur (A/D)
UF-8 Condition d’affichage de zéro
UF-9 Configuration de la gravité
8.
CONFIGURATION PARAMÈTRES
8.1 COMPTE INTERNE (A/D)
8.2 CONFIGURATION DES LIMITES DE POIDS (SUPÉRIEURE OU INFÉRIEURE)
8.3 AUTO-DÉCONNEXION AUTOMATIQUE
8.4 CONFIGURATION DE L’ÉCLAIRAGE DE L’ÉCRAN
8.5 FONCTION HOLD
8.6 SORTIE DE DONNÉES RS-232 (PC / PRINT)
8.7 CONFIGURATION DE LA VITESSE CONVERTISSEUR (A/D)
8.8 CONDITION D’AFFICHAGE DE ZÉRO
8.9 CONFIGURATION DE LA GRAVITÉ
Pour accéder à la configuration des paramètres, appuyer en même temps sur les touches et .
Appuyer sur la touche ou pour sélectionner le paramètre choisi (UF-1 ~ UF-11 ), appuyez sur la touche . Pour
confirmer les modifications. Pour retourner à la mode precedent appuyez sur la touche .

MANUEL D’UTILISATION
IB10-S FR
40
8.1 COMPTE INTERNE (A/D) | UF-1
1. Appuyer sur la touche l’écran affichera la valeur interne.
2. Pour passer au paramètre suivant appuyer sur la touche et l’écran affichera le voltaje de la batterie.
3. Pour sortir et revenir au mode normal de pesage, appuyer sur la touche ou .
8.2 CONFIGURATION DU LIMITES DE POIDS (SUPÉRIEURE OU INFÉRIEURE) | UF-2
1. Appuyer sur la touche pour accéder au paramètre.
2. L’écran affichera le message “000.00L” (Limite inférieure=LO).
3. Utiliser les touches et pour déplacer le curseur et la touche pour sélectionner le nombre voulu.
4. Appuyer sur la touche pour confirmer.
5. L’écran affichera “000.00h” (Limite supérieure= Hi)
6. Utiliser les touches et pour déplacer le curseur et la touche pour sélectionner le nobre voulu.
Remarque : Vous pouvez vous placer sur le dernier chiffre pour le modifier si besoin.
7. Appuyer sur la touche pour confirmer.
8. L’écran affichera la valeur.
A B C
0 0 0
(paramètres d’alarme)
A 0 Il n’est pas nécessaire de stabiliser le poids de l’alarme pour le faire sonner
1 Le poids de l’alarme doit être stabilisé pour sonner
B 0 toujours 0
C 0 alarme éteinte
1 l’alarme sonne s’il se situe dans la
bande Ok (entre limites Lo et Hi)
2 l’alarme sonne s’il se situe sous la limite
inférieure Lo ou au-dessus de la limite
supérieure Hi
9. Utiliser les touches et pour déplacer le curseur et la touche pour sélectionner le nombre voulu.
10. Appuyer sur la touche pour confirmer.
8.3 AUTO-DÉCONNEXION AUTOMATIQUE| UF-3
MODES:
• AoFF 00 – Auto-déconnexion désactivée.
• AoFF 01 – Auto-déconnexion activée, la balance s’éteindra automatiquement après une minute sans utilisation.
• Vous pouvez configurer la valeur que vous souhaitez de 1 à 99 minutes.
1. Appuyer sur la touche pour accéder au paramètre.
2. Utiliser les touches et pour déplacer le curseur et la touche pour sélectionner le mode voulu.
3. Appuyer sur la touche pour confirmer.
ÉCRAN VALEUR STABILITÉ
LO
OK
HI
LO
OK
HI

MANUEL D’UTILISATION
IB10-S FR
41
8.4 CONFIGURATION DU RÉTRO-ÉCLAIRAGE DE L’ÉCRAN| UF-4
MODES:
• Lit A: Automatique.
• Lit ON: Éclairage actif.
• Lit OFF: Éclairage inactif.
1. Appuyer sur la touche pour accéder au paramètre.
2. Appuyer sur la touche pour sélectionner le mode voulu.
3. Appuyer sur la touche pour confirmer.
8.5 FONCTION HOLD | UF-5
(une fois l’objet retiré du plateau, l’écran continue d’afficher le poids pendant quelques secondes, fonction très utile pour le pesage d’animaux)
1. Appuyer sur la touche pour accéder au paramètre.
2. Appuyer sur la touche pour sélectionner le mode voulu.
3. Appuyer sur la touche pour confirmer.
MODES:
• HOLD 0 : Désactivé.
• HOLD 1 : Animaux dans mouvement
HOLD 1.
Une fois que vous avez accédé à ce paramètre, l’écran affiche PCt,
• Utiliser les touches et pour déplacer le curseur et la touche pour sélectionner la valeur de la plage de Hold e
001 à 100. Appuyer sur la touche.
• Appuyer sur la touche pour confirmer..
• L’écran affiche time 8, Utiliser les touches et pour déplacer le curseur et la touche pour sélectionner le
nombre de répétitions souhaité pendant la place de hold.
• Appuyer sur la touche pour confirmer. Exemple: PCt petit et time grand implique plus de précision et un temps de stabilisation
plus long.
8.6 SORTIE DE DONNÉES RS-232 |UF-6
0 RS232 étient
1 Sortie stable Format 1
2 Sortie continue Format 1
3 Sortie manuel Format 1
4 Sortie stable Format 2
5 Sortie continue Format 2
6 Sortie manuel Format 2
7 Sortie avec auto-accumulation - Format 3 Format de imprésion
8 Sortie avec accumulation manuel - Format 3 Format de imprésion
9 Sortie avec auto-accumulation - Format 4 Format de imprésion
10 Sortie avec accumulation manuel - Format 4 Format de imprésion

MANUEL D’UTILISATION
IB10-S FR
42
RS232 Baud rate
b1200 Baud rate 1200
b2400 Baud rate 2400
b4800 Baud rate 4800
b9600 Baud rate 9600
b19200 Baud rate 19200
b38400 Baud rate 38400
Protocole de comunication
Estandard EIA-RS232 C signal UART
FORMAT:
1. Sórtie série: 1200/2400/4800/9600/19200/38400 BPS
2. Bits de dónnes: 8 BITS
3. Bits de parité: None
4. Bits d’ârret: 1 BIT
bit d’inicialization Data bits Stop bits
REMARQUES:
Exemples de sortie au format 1: Exemples de sortie au format 1:
Format 3 output examples: Format 4 output examples:
ST, GS, +001. 000 Kg +001. 000kg
S/N
WT/Kg
-----------------------------
0001
1.000
0002
2.000
0002
3.000
TICKET NO. 0001
G
3.000Kg
T
1.000Kg
N
2.000kg
TOTAL NUMBER
OF
TICKETS
0001
TOTAL
NET
2.000

MANUEL D’UTILISATION
IB10-S FR
43
8.7 CONFIGURATION DE LA VITESSE DU CONVERTISSEUR |UF-7
1. Appuyer sur la touche pour accéder au paramètre.
2. Appuyer sur la touche pour sélectionner le mode voulu.
•
Mode 1 : Normal
•
Mode 2: Rapide
•
Mode 3: Lent
3. Appuyer sur la touche pour confirmer.
8.8 CONDITION D’AFFICHAGE DE ZÉRO|UF-8
L’écran affiche 0 jusqu’à ce qu’il parvienne à la division sélectionnée suivante En commençant à afficher les valeurs de cette division.
Example:
Balance avec e=2g
Aveugle dans 5 divisions
Affichera 0 jusqu’à parvenir à 2x5=10g, la première valeur qu’il affichera sera 12g
1. Appuyer sur la touche pour accéder au paramètre.
2. Appuyer sur la touche pour sélectionner le mode voulu.
3. Appuyer sur la touche pour confirmer.
8.9 CONFIGURATION DE LA GRAVITÉ|UF-9
1. Appuyer sur la touche pour visualiser la valeur actuelle de la gravité.
2. Pour changer la valeur, appuyer sur la touche , puis utiliser les touches et pour déplacer le curseur et la
pour sélectionner le nombre voulu.
3. Appuyer sur la touche pour confirmer.
9.
CONFIGURATION DE RÉAJUSTEMENTS DE CALIBRAGE
1. Dans le mode normal de pesage, appuyer sur les touches et , l’écran affichera le message ECF-1.
2. Appuyer sur les touches et pour sélectionner la fonction voulue: ECF-1, ECF-2 o ECF-3.
* ECF-1 CALIBRAGE DU ZÉRO+POIDS
Appuyer sur la touche , l’écran affichera CALZ.
Appuyer sur la touche , pour mettre à zéro l’écran.
Appuyer sur les touches et pour déplacer le curseur.
Appuyer sur la touche et introduire la valeur du poids de calibrage.
Placer le poids de calibrage sur la plateforme et appuyer sur la touche pour effectuer le calibrage.
* ECF-2 CALIBRAGE DU ZÉRO
Appuyer sur la touche , l’écran affichera CALZ.
Appuyer sur la touche , pour effectuer le calibrage.

MANUEL D’UTILISATION
IB10-S FR
44
* ECF-3 CALIBRAGE DU POIDS (SPAN)
Appuyer sur la touche , l’écran affichera la valeur du poids d’étalonnage.
Appuyer sur les touches et pour déplacer le curseur.
Appuyer sur la touche pour changer la valeur du poids d’étalonnage.
Appuyer sur la touche pour confirmer.
Placer le poids de calibrage sur la plateforme et appuyer sur la touche pour effectuer le calibrage.
10.
PARAMÈTRES TECHNIQUES
NE MODIFIEZ PAS LES PARAMÈTRES TECHNIQUES SI CE N’EST PAS STRICTEMENT NÉCESSAIRE. UNE MAUVAISE CONFIGU-
RATION DE CETTE SECTION PEUT ENTRAINER UN DYSFONCTIONNEMENT DE LA BALANCE.
ENTRÉE ET SORTIE
• Avec l’indicateur éteint, accéder au mode de configuration des paramètres, appuyer sur la touche
l’écran affichera 00911, relâchez la touche . si l'appareil vous demande un mot de passe,
LF 1
vous devez taper 0020 avec les touches fléchées et appuyer sur Entrée pour valider
• Appuyez sur la touche pour commencer ou la touche pour sortie du menu et le indicateur
redémarre automatiquement..
ÉCRAN DESCRIPTION ET SÉQUENCE D’UTILISATION
LF 1
CAL Z
Le calibrage peut être effectué avec n’importe quel poids, mais le poids ne doit pas être inférieur à
1/3 de la capacité maximale et celle-ci ne doit jamais être dépassée.
•Appuyez sur la touche pour commencer le calibrage de zéro (appuyez sur pour quitter
le calibrage et revenir au menu LF1)
•Utilisez , et , 0 ~ 9 et puis pour introduire le poids avec lequel se fera
le calibrage. (Appuyez sur la touche pour quitter l’étalonnage et revenir au menu LF1)
150.00 kg •Placez le poids requis sur la balance tel qu’indiqué par l’affichage.
150.00 kg •Une fois stable, appuyez sur pour la calibrer. (Appuyez sur ESC pour quitter le calibrage et
al menú LF1).
LE CALIBRAGE SE FINIRA ET LA BALANCE REVIENDRA EN MODE DE PESAGE AUTOMATIQUE.
ÉCRAN DESCRIPTION ET SÉQUENCE D’UTILISATION
PREMIER ÉTAPE
•AFFICHAGE DES COMPTES INTERNES DE L’ÉQUIPEMENT.
150.00 kg
MENU DE CALIBRATION DE POIDS LF 1
MENU DE CONFIGURATION DE PARAMÈTRES
LF 2
ÉCRAN DESCRIPTION ET SÉQUENCE D’UTILISATION
262144

MANUEL D’UTILISATION
IB10-S FR
45
diV 01
DEUXIÈME ÉTAPE •CE MENU, DOIT ÊTRE CHANGÉ SEULEMENT POUR DES CONFIGURATIONS SPÉCIALES
TROISIÈME ÉTAPE
QUATRIÈME ÉTAPE
dP 0.0
lb oz ne peuvent ne pas être sélectionnés comme unité de calibrage.
La balance ne vous laissera pas passer à l’étape suivante s’il ya une erreur lors de la programmation.
•Utiliser , et , 0 ~ 9 et après pour sélectionner LA CAPACITÉ MAXI-
MALE, de l’équipement, en considérant les décimaux. Ex. 150.00kg = entrez 15000 si ensuite sélec-
tionné comme décimal d0.00.
•Utiliser , pour sélectionner le POINT DÉCIMAL.
d 0.00 d 0.000 d 0.0000 0.00000
CINQUIÈME ÉTAPE •Utiliser pour sélectionner la DIVISION diV 01, diV 02, diV 05, diV10, diV 20, diV
50
PROCÉDURE
Après avoir saisi les paramètres LF2, l’écran affichera la dernière configuration enregistrée. Toutes
les étapes doivent être complétées, dans le cas contraire l’affichage continuera avec la configuration
précédente.
Passez au calibrage du poids après LF2.
• Appuyez sur pour commencer et la VALEUR INTERNE s’affichera. Appuyez sur pour
quitter le menu et la balance redémarrera automatiquement.
• Appuyez sur pour poursuivre la configuration. (appuyez sur pour quitter la configu-
ration et revenir au menu LF2).
•Utilisez , et , 0 ~ 9 et puis pour sélectionner les UNITÉS DE
PESAGE. (appuyez sur pour quitter le calibrage et revenir au menu LF2).
•Utilisez , et , 0 ~ 9 et puis pour sélectioner, en considérant les
maux. (appuyez surz sur pour quitter le calibrage et revenir au menu LF2)
•Utilisez , et puis pour sélectionner le POIDS MAXIMAL. (appuyez sur
pour quitter le calibrage et revenir au menu LF2).
•Utilisez et puis pour changer d’échelon (appuyez sur pour quitter la configu-
ration et revenir au menu LF2).
000000kg
LF 2
262144
100001
000000kg
d 0.0kg
div 01
A: Système métrique
0:NO
1: kg
2:T
3:g
B: Système Américain 0:NO 1: lb 2:lb oz
1 0 0 0 0 1 C: Autres Unités 0:NO 1: TW kg 2:HK kg
3:VISS
D: Pièces 0:OFF 1: ON
A B C D E F E: Double gamme 0:OFF 1: multi interval 2: multirang
F: Unité de calibration
1: Européenne
2: : Américaine

MANUEL D’UTILISATION
IB10-S FR
46
•Utilisez , et pour continuer avec d’autres configurations ou appuyez sur
pour quitter le menu et la balance redémarrera automatiquement).
CALIBRAGE LINÉAIRE LF 3
Jusqu’à 6 étapes de calibrage W0 ~W6
Assurez-vous que le plateau de la balance est vide avant de commencer le calibrage.
Appuyez sur pour le premier point de calibrage.
Les points de calibrage précédents seront effacés et l’écran affichera CLEAR.
Appuyez sur pour passer au point de calibrage suivant.
Appuyez sur pour revenir au point de calibrage précédent.
Appuyez sur pour enregistrer.
Appuyez sur pour quitter le calibrage et revenir au menu LF3.
ÉCRAN DESCRIPTION ET SÉQUENCE D’UTILISATION
LF3
• Appuyez sur commencer ou pour quitter le menu et la balance redémarrera auto-
matiquement.
W0 •Appuyez sur pour calibrer le zéro.
(appuyez sur pour quitter le calibrage et revenir au menu LF3)
W1 • Placez 1/3 du poids maximal sur le plateau et appuyez sur pour calibrer 1/3 de la capacité.
(appuyez sur pour quitter le calibrage et revenir au menu LF3)
W2 •Placez 2/3 du poids maximal sur le plateau et appuyez sur pour calibrer 2/3 de la capacité.
(appuyez sur .
pour quitter le calibrage et revenir au menu LF3)
W3 •Placez le poids maximal sur le plateau et appuyez sur our calibrer la pleine capacité. (appu-
yez pour quitter le calibrage et revenir au menu LF3)
W4
• Appuyez sur pour terminer calibrage linéaire. (appuyez sur pour quitter le calibrage
et revenir au menu LF3)
LF3 •Utilisez , et puis pour continuer avec d’autres réglages ou appuyez sur
quitter le menu et la balance redémarrera automatiquement.
LF2

MANUEL D’UTILISATION
IB10-S FR
47
VITESSE DU CONVERTISSEUR AD LF 4
SPEED 1 vitesse standard 15Hz.
SPEED 2 rapide vitesse 30Hz.
SPEED 3 vitesse standard 7.5Hz
*Cette fonction est bloquée lorsque UF-5 se situe en mode HOLD 1.
*La valeur d’usine est 1
ÉCRAN DESCRIPTION ET SÉQUENCE D’UTILISATION
•Appuyez sur commencer ou pour quitter le menu et la balance redémarrera auto-
matiquement.
• Utilisez et puis pour sélectionner le nombre de divisions s’afficheront à zéro. (appu-
yez sur ESC pour quitter la configuration et revenir au menu LF4)
•Utilisez , et puis pour continuer avec d’autres réglages ou appuyez sur
pour quitter le menu et la balance redémarrera automatiquement.
ÉCRAN DESCRIPTION ET SÉQUENCE D’UTILISATION
ZP 0 OFF
ZP 1 Une division ne sera pas affichée en étant à zéro
ZP 2 Deux divisions ne seront pas affichées en étant à zéro
ZP 3 Trois divisions ne seront pas affichées en étant à zéro
ZP 4 Quatre divisions ne seront pas affichées en étant à zéro
ZP 5 Cinq divisions ne seront pas affichées en étant à zéro
*Cette fonction est bloquée lorsque UF-5 se situe en mode HOLD 1
*La valeur d’usine est ZP 0
ÉCRAN DESCRIPTION ET SÉQUENCE D’UTILISATION
• Appuyez paour commencer ou pour quitter le menu et la balance redémarrera
automatiquement.
• Utilisez et puis pour sélectionner le nombre de divisions s’afficheront à zéro. (sur
pour quitter la configuration et revenir au menu LF5)
• Utilisez , et puis pour continuer avec d’autres réglages ou appuyez sur
pour quitter le menu et la balance redémarrera automatiquement.
MOYENNE DU ZÉRO
LF 5
LF4
LF 4
LF 5
LF 5
ZP 0
LF 5
SPEED 1

MANUEL D’UTILISATION
IB10-S FR
48
*Introduisez la gravité de votre zone avant de réaliser le premier calibrage.
*Introduisez la gravité du lieu de destination après avoir réalisé le premier calibrage.
*La valeur de gravité sera rejetée si elle est supérieure à 9.83217 (gravité de pôle) ou inférieure à 9.78031 (gravité de l’équateur).
Valeur d’usine : 9.8035
ÉCRAN DESCRIPTION ET SÉQUENCE D’UTILISATION
• Appuyez pour commencer ou pour quitter le menu et la balance redémarrera
automatiquement
• L’écran affichera le numéro de précalibrage pendant une seconde.
• Appuyez sur pour continuer.
• Utilisez , y , 0 ~ 9 y después ppour introduire la valeur de gravi-
té... (apuyez sur ESC pour quitter la configuration et revenir au menu LF 7).
ZÉRO INITIAL LF 8
SEtZ Y réinitialise le point de zéro chaque fois que la balance redémarre
SEtZ n réinitialisation du point zéro OFF
ÉCRAN DESCRIPTION ET SÉQUENCE D’UTILISATION
• Appuyez paour commencer ou pour quitter le menu et la balance redémarrera
automatiquement.
SetZ Y • Utilisez et puis pour sélectionner le nombre de divisions s’afficheront à zéro. (appu-
yez pour quitter la configuration et revenir au menu LF8).
LF 8 • Utilisez , et puis pour continuer avec d’autres réglages ou appuyez sur
pour quitter le menu et la balance redémarrera automatiquement.
GRAVITÉ
LF 7
DESCRIPTION ET SÉQUENCE D’UTILISATION
nonE
Version non approuvée
NE MODIFIEZ CE PARAMÈTRE EN AUCUN CAS, IL DOIT TOUJOURS ÊTRE RÉGLÉ SUR
NONE.
Le changement de ce paramètre implique le blocage de certaines fonctionnalités
ÉCRAN
!
CONFORMITÉ D’APPROBATION
LF 6
LF 6
LF 7
-00-
9.8035
LF 8
9.8035

MANUEL D’UTILISATION
IB10-S FR
49
11.
GARANTIE
Cette balance est garantie contre tout défaut de fabrication et de materiel, pour une période de 1 an à partir de la date de la livraison Pendant
cette période, GIROPÈS, se chargera de la réparation de la balance.
Cette garantie n’inclut pas les dommages causés par une mauvaise manipulation ou surcharge.
La garantie ne couvre pas les frais de transport de retour nécessaire pour réparer la balance.

MANUALE UTENTE
IB10-S IT
50
1.
ALIMENTAZIONE
IB10-S
Ingresso 230~240 V
Uscita 9 V/500 mA
Batteria ricaricabile 6 V/1,2 Ah
2.
PRIMA DELL’USO
1. Per evitare disturbi elettrici, utilizzare una sorgente elettrica indipendente.
2. Durante l’avvio dell’indicatore, non collocare nessun oggetto sul piatto.
3. Prima di utilizzare la bascula, consentirne il preriscaldamento per 2-3 minuti.
4. Evitare bruschi cambi di temperatura e correnti d’aria.
5. Non superare la capacità massima della bascula.
3.
CONSUMO
IB10-S
Durata della batteria: senza la retroilluminazione, 160 ore ca.
con la retroilluminazione, 120 ore ca.
4.
COLLEGAMENTO TRA LA CELLA DI CARICO E L’INDICATORE
Il connettore della cella di carico è a 7 pin:
• Quando l'indicatore è in funzione, non rimuovere il connettore dalla cella di carico, in quanto questa operazione potrebbe danneggiare il
dispositivo.
PIN 1 EXC +
PIN 2 SEN +
PIN 3 SIG +
PIN 4 SIG -
PIN 5 SEN -
PIN 6 EXC -
PIN 7 GND

MANUALE UTENTE
IB10-S FR
51
5.
DESCRIZIONE DELLA TASTIERA
1a funzione: Per accendere la bilancia, premere questo tasto.
2a funzione: Per mettere la lettura del display a zero “0”, il valore del display deve essere minore di ±2% rispetto
alla capacità massima.
3a funzione Per sottrarre (tarare) il peso di un contenitore.
1a funzione: Per spegnere l’indicatore, mantenere premuto questo tasto per 3 secondi.
1a funzione: Per passare al conteggio dei pezzi.
2a funzione: Per uscire dalla modalità di programmazione.
1a funzione: Per mostrare l'accumulo totale.
2a funzione: Per cancellare la memoria di accumulo. (pressione lunga)
3a funzione: Per aumentare i valori in modalità di programmazione.
1a funzione: Per eseguire una tara.
2a funzione: Per aumentare i valori in modalità di programmazione.
1a funzione: Per accumulare il valore del peso sul display in memoria.
2a funzione: Trasmissione manuale dei dati a un PC o una stampante mediante la porta RS-232.
3a funzione: Tasto di conferma in modalità di programmazione.
IB10-S

MANUALE UTENTE
IB10-S IT
52
6.
APPLICAZIONI IB10-S
6.1 TARA
6.2 MODALITÀ DI PESATURA NORMALE
6.2.1 CONFIGURAZIONE DEL DISPOSITIVO
6.2.2 PRIMA CALIBRAZIONE
6.2.3 UTILIZZO
6.3 MODALITÀ CONTAPEZZI
6.3.1 CONFIGURAZIONE DEL DISPOSITIVO
6.3.2 PRIMA CALIBRAZIONE
6.3.3 UTILIZZO
6.4 LIMITI E ALLARME
6.5 RANGE UNITARIO/MULTI-RANGE/MULTI-INTERVALLO
6.1 TARA
Posizionare un recipiente sulla piattaforma, verrà visualizzato il valore del suo peso. Premere il tasto per tarare la bilancia. Il peso
visualizzato viene memorizzato come valore di tara e tale valore è sottratto dalla misurazione, lasciando zero sul display.
Si accende l'indicatore "NET". Man mano che il prodotto viene aggiunto, verrà visualizzato solo il peso del prodotto. La bascula può essere
tarata una seconda volta se deve essere aggiunto un altro tipo di prodotto.
Anche in questo caso, verrà visualizzato solo il peso aggiunto dopo aver eseguito la tara. Quando il recipiente viene tolto, viene visualizzato
un valore negativo. Se la bascula è stata tarata poco prima della rimozione del recipiente, il valore indicato è il peso lordo del recipiente
più tutto il prodotto rimosso. L'indicatore dello zero sarà attivo anche perché la piattaforma è tornata nella stessa situazione in cui si trovava
inizialmente.
6.2 MODALITÀ DI PESATURA NORMALE
6.2.1 CONFIGURAZIONE DEL DISPOSITIVO
Consultare la sezione LF2 sui parametri tecnici
6.2.2 PRIMA CALIBRAZIONE
Consultare la sezione LF1 sui parametri tecnici
6.2.3 UTILIZZO
Dopo aver configurato correttamente tutti i parametri e aver effettuato la calibrazione, accendere il dispositivo.
• Verificare che il valore del visore, senza carico sulla piattaforma, sia pari a 0; in caso contrario, premere .
• Collocare il prodotto sulla piattaforma: lo schermo visualizzerà il peso corrispondente.
• L’accumulo e l’invio dei dati dipenderà dalla modalità scelta nella sezione UF-6.
• I valori accumulati possono essere visualizzati in qualsiasi momento premendo (TOTALIZZAZIONE)
(L'accumulo funziona solo con il protocollo di stampa attivo)
6.3 MODALITÀ CONTAPEZZI
6.3.1 CONFIGURAZIONE DEL DISPOSITIVO
Consultare la sezione LF2 sui parametri tecnici
6.3.2 PRIMA CALIBRAZIONE
Consultare la sezione LF1 sui parametri tecnici
6.3.3 UTILIZZO
Dopo aver configurato correttamente tutti i parametri e aver effettuato la calibrazione, accendere il dispositivo. Verificare che il valore del
visore, senza carico sulla piattaforma, sia pari a 0; in caso contrario, premere .
PASSAGGI;
1. Premere il tasto finché sullo schermo non viene visualizzato PCS.
2.
Premere il tasto per selezionare la quantità di pezzi del campione. Lo schermo visualizzerà successivamente
C 10 / C20 / C 50 / C 100 / C 200.
3. Porre il campione sulla piattaforma, aspettare che si accenda l’indicatore di stabilità e premere il tasto
4. Collocare il prodotto sulla piattaforma; sul display viene visualizzato il numero di pezzi.

MANUALE UTENTE
IB10-S FR
L’accumulo e l’invio dei dati dipenderà dalla modalità scelta nella sezione UF-6.
• Per tornare alla modalità di pesatura normale, premere il tasto per tornare a selezionare kg.
• Per tornare alla modalità contapezzi usando lo stesso campione di riferimento, premere nuovamente il tasto .
• Per modificare il campione di riferimento, ripetere i passaggi descritti precedentemente.
6.4 LIMITI E ALLARME
L'utente può impostare i limiti basso e alto del campione posto sulla piattaforma.
Il display mostra se il campione si trova sotto al limite Lo, sopra al limite Hi o nella zona compresa tra i due limiti OK.
Inoltre, è possibile configurare l’orario dell’allarme e se è necessaria la stabilità per tale circostanza.
Il procedimento completo è descritto nella sezione UF-2. Se sono stati definiti i limiti nella modalità di pesatura normale ed è necessario
utilizzare i limiti nella modalità di contapezzi, sarà necessario definire i nuovi limiti per questa modalità. Quando si torna alla modalità di
pesatura, vengono ripristinati i limiti configurati precedentemente. La stessa cosa avviene in caso contrario.
6.5 RANGE UNITARIO/MULTI-RANGE/MULTI-INTERVALLO
lo schermo può essere configurato con un solo range unitario, cioè con un peso massimo e un valore intermedio, oppure come multi-range
o multi-intervallo. In tali casi, esiste un peso massimo e due valori intermedi.
Da 0 alla metà di questo peso massimo si utilizza il valore intermedio selezionato (intermedio 1), mentre dalla metà al peso massimo si usa
il valore intermedio successivo (intermedio 2).
L'intervallo in cui ci si trova in un determinato momento è indicato dagli indicatori di visualizzazione R1 e R2.
Nella modalità multi-intervallo, man mano che aumenta il peso nel range 1 si usa il valore intermedio 1, mentre nel passare al range 2
si usa il valore intermedio 2. Quando diminuisce il peso e si torna nel range 1, si usa di nuovo il valore intermedio 1. Al contrario, nella
modalità multi-range, quando diminuisce il peso e si torna al range 1, si continua a usare il valore intermedio 2 fino ad arrivare a 0.
Per selezionare la modalità di range, consultare la sezione LF2 sui parametri tecnici.
7.
PARAMETRI
PARAMETRO DESCRIZIONE
UF-1 Calcoli interni (A/D)
UF-2 Configurazione dei limiti di peso (superiore e inferiore)
UF-3 Spegnimento automatico
UF-4 Retroilluminazione del display
UF-5 Quattro modalità di Hold
UF-6 Uscita RS-232 (PC/STAMPANTE)
UF-7 Configurazione della velocità del convertitore (AD)
UF-8 Condizione di visualizzazione dello zero
UF-9 Configurazione della gravità
8.
CONFIGURAZIONE DEI PARAMETRI
8.1 CALCOLI INTERNI (A/D)
8.2 CONFIGURAZIONE DEI LIMITI DI PESO (SUPERIORE E INFERIORE)
8.3 SPEGNIMENTO AUTOMATICO
8.4 CONFIGURAZIONE DELL’ILLUMINAZIONE DEL DISPLAY
8.5 FUNZIONE HOLD
8.6 USCITA DEI DATI RS-232
8.7 CONFIGURAZIONE DELLA VELOCITÀ DEL CONVERTITORE AD
8.8 CONDIZIONE DI VISUALIZZAZIONE DELLO ZERO
8.9 CONFIGURAZIONE DELLA GRAVITÀ
Per accedere alla configurazione dei parametri con il display su zero, premere contemporaneamente i tasti e .
Premere il tasto o per selezionare il parametro desiderato (UF-1 ~ UF-11); per confermare le modifiche
premere . Per tornare alla modalità precedente, premere il tasto . 53

MANUALE UTENTE
IB10-S IT
54
8.1 CALCOLI INTERNI (A/D) | UF-1
1. Per visualizzare i calcoli interni della bilancia, premere il tasto .
2. Per passare al parametro successivo, premere il tasto , il display mostrerà il valore della tensione della batteria.
3. Per uscire da questa modalità e tornare alla pesatura normale, premere il tasto o .
8.2 CONFIGURAZIONE DEI LIMITI DI PESO (SUPERIORE E INFERIORE) | UF-2
1. Premere il tasto per accedere al parametro.
2. Il display visualizza il messaggio “000.00L” (limite inferiore=LO).
3. Utilizzare i tasti e per spostare il cursore e il tasto per selezionare il numero desiderato.
4. Per confermare, premere il tasto .
5. Il display visualizzerà “000.00h” (limite superiore= Hi)
6. Utilizzare i tasti e per spostare il cursore e il tasto per selezionare il numero desiderato.
Nota: Per modificare l’ultima cifra, basta posizionarvi sopra il cursore.
7. Per confermare, premere il tasto .
8. Sul display verrà visualizzato il valore.
A
B
C
0
0
0
(configurazione dell’allarme)
DISPLAY VALORE STABILITÀ
A 0 Non c'è bisogno di stabilizzare il peso dell'allarme per suonare
1 Il peso dell'allarme deve essere stabilizzato per poter suonare
B 0 Sempre 0
C 0 Allarme spento
1 L’allarme suona se è nella fascia Ok (tra i
limiti Lo e Hi)
2 L’allarme suona se è sotto al limite inferiore
Lo o sopra al limite superiore Hi
9. Utilizzare i tasti e per spostare il cursore e il tasto per selezionare il numero desiderato.
10. Per confermare, premere il tasto .
8.3 SPEGNIMENTO AUTOMATICO| UF-3
MODALITÀ:
• AoFF 00 – Spegnimento automatico disattivato.
• AoFF 01 – Spegnimento automatico attivato a un minuto: la bilancia si spegnerà automaticamente dopo 1 minuto di inutilizzo.
• È possibile configurare il valore desiderato da 1 a 99 minuti.
1. Premere il tasto per accedere al parametro.
2. Utilizzare i tasti e per spostare il cursore e il tasto per selezionare il numero desiderato.
3. Per confermare, premere il tasto .
LO
OK
HI
LO
OK
HI

MANUALE UTENTE
IB10-S FR
55
8.4 RETROILLUMINAZIONE DEL DISPLAY| UF-4
MODALITÀ:
• Lit A: automatica.
• Lit ON: illuminazione attivata.
• Lit OFF: illuminazione disattivata.
1. Premere il tasto per accedere al parametro.
2. Per selezionare la modalità desiderata, premere il tasto .
3. Per confermare, premere il tasto .
8.5 FUNZIONE HOLD | UF-5
(Una volta rimosso l’oggetto dal piatto, il display mantiene il peso fissato per alcuni secondi, funzione molto utile per la pesatura degli animali)
1. Premere il tasto per accedere al parametro.
2. Per selezionare la modalità desiderata, premere il tasto .
3. Per confermare, premere il tasto .
MODALITÀ:
• HOLD 0: disattivata
• HOLD 1 : animale in movimento
HOLD 1.
Dopo aver effettuato l’accesso a questo parametro, il display visualizza PCt,
• Utilizzare i tasti e per spostare il cursore e per selezionare il valore del range di HOLD desiderato da 001 a
100.
• Per confermare, premere il tasto .
• Il display visualizzerà time 8, usare i tasti e per spostare il cursore e il tasto per selezionare il numero di
ripetizioni desiderato durante il range di Hold.
• Per confermare, premere il tasto . Esempio: PCt piccolo e time grande implicano una precisione e un tempo di stabilizzazione
maggiori.
8.6 USCITA DEI DATI RS-232 |UF-6
0 RS232 scollegata
1 Uscita stabile Formato 1
2 Uscita continua Formato 1
3 Uscita manuale Formato 1
4 Uscita stabile Formato 2
5 Uscita continua Formato 2
6 Uscita manuale Formato 2
7 Uscita con accumulo manuale - Formato 3 Formato di stampa
8 Uscita con auto-accumulo - Formato 3 Formato di stampa
9 Uscita con accumulo manuale - Formato 4 Formato di stampa
10 Uscita con auto-accumulo - Formato 4 Formato di stampa

MANUALE UTENTE
IB10-S IT
56
Velocità di trasmissione RS232
b1200 Velocità di trasmissione 1200
b2400 Velocità di trasmissione 2400
b4800 Velocità di trasmissione 4800
b9600 Velocità di trasmissione 9600
b19200 Velocità di trasmissione 19200
b38400 Velocità di trasmissione 38400
Protocollo di comunicazione
Standard EIA-RS232 C segnale UART
FORMAT0:
1. Uscita serie: 1200/2400/4800/9600/19200/38400 BPS
2. Bit di dati: 8 BIT
3. Bit di parità: nessuno
4. Bit di arresto: 1 BIT
Bit di avvio Bit di dati Bit di arresto
OSSERVAZIONI:
Formato 1 esempio di uscita: Formato 2 esempio di uscita:
Formato 3 esempio di uscita: Formato 4 esempio di uscita:
ST, GS, +001. 000 Kg
+001. 000kg
S/N
WT/Kg
-----------------------------
0001
1.000
0002
2.000
0002
3.000
TICKET N. 0001
G
3.000 Kg
T
1.000 Kg
N
2.000kg
NUMERO TOTALE
DI
TICKET
0001
TOTALE
NET0
2.000

MANUALE UTENTE
IB10-S FR
57
8.7 CONFIGURAZIONENE DELLA VELOCITÀ DEL CONVERTITORE |UF-7
1. Premere il tasto per accedere al parametro.
2. Premere il tasto per selezionare la modalità desiderata:
•
Modalità 1: Normale
•
Modalità 2: Rapida
•
Modalità 3: Lenta
3. Per confermare, premere il tasto .
8.8 CONDIZIONE DI VISUALIZZAZIONE ZERO|UF-8
Mostra 0 sul display fino ad arrivare alla seguente suddivisione selezionata. Inizia a mostrare i valori a partire da questa suddivisione.
Esempio:
bascula con e=2g
cieca su 5 suddivisioni
Mostrerà 0 fino ad arrivare a 2x5=10g, il primo valore visualizzato sarà 12 g.
1. Per accedere al parametro, premere il tasto .
2. Per selezionare, premere il tasto .
3. Per confermare, premere il tasto .
8.9 CONFIGURAZIONE DELLA GRAVITÀ|UF-9
1. Premere il tasto per visualizzare il valore della gravità corrente.
2. Per modificare il valore premere il tasto , quindi utilizzare i tasti e per spostare il cursore e il tasto per
selezionare il numero desiderato.
3. Per confermare, premere il tasto .
9.
CONFIGURAZIONE DELLE REGOLAZIONI DELLA CALIBRAZIONE
1. Nella modalità normale di pesatura, premere i tasti y , sul display viene visualizzato il messaggio ECF – 1.
2. Premere i tasti o per selezionare la funzione desiderata: ECF-1, ECF-2 o ECF-3
*ECF-1 CALIBRAZIONE DELLO ZERO+PESO
Premere il tasto , sul display verrà visualizzato CALZ.
Per azzerare la lettura del display, premere il tasto .
Per spostare il cursore, premere i tasti e .
Per inserire il valore del peso di calibratura, premere il tasto .
Per effettuare la calibrazione, collocare il peso sulla piattaforma e, una volta che la lettura è stabile, premere il tasto
.
*ECF-2 CALIBRAZIONE DELLO ZERO
Premere il tasto , sul display verrà visualizzato CALZ.
Per effettuare la calibratura, premere il tasto .

MANUALE UTENTE
IB10-S IT
*ECF-3 CALIBRAZIONE DEL PESO (SPAN)
Premere il tasto : il display mostrerà il valore del peso di calibrazione
Per spostare il cursore, premere i tasti e
Per modificare il valore del peso di calibrazione, premere il tasto .
Per confermare, premere il tasto .
Per effettuare la calibrazione, collocare il peso sulla piattaforma e, una volta che la lettura è stabile, premere il tasto
.
10.
PARAMETRI TECNICI
NON MODIFICARE I PARAMETRI TECNICI SE NON È STRETTAMENTE NECESSARIO. UN'ERRATA CONFIGURAZIONE DI QUESTA
SEZIONE PUÒ CAUSARE UN MALFUNZIONAMENTO DELLA BILANCIA.
ENTRARE E USCIRE DALLA CALIBRAZIONE
CALIBRAZIONE DEL PESO LF 1
DISPLAY DESCRIZIONE E SEQUENZA D’USO
LF 1
CAL Z
La calibrazione può essere effettuata con qualsiasi peso, purché non sia inferiore a 1/3 della capa-
cità massima e quest’ultima non venga superata.
• Premere il tasto per iniziare la calibrazione dello zero (premere per uscire dalla calibra-
zione e tornare al menu LF1)
•Utilizzare , e , 0 ~ 9 e quindi per inserire il peso con cui si eseguirà
la calibrazione. (Premere per uscire dalla calibrazione e tornare al menu LF1)
•Collocare il peso richiesto sulla bascula come indicato sul display.
150,00 kg •Una volta che è stabile, per calibrarla premere . (premere ESC per uscire dalla calibrazione e
tornare al menu LF1).
LA CALIBRAZIONE TERMINERÀ E LA BASCULA TORNERÀ AUTOMATICAMENTE ALLA MODALITÀ DI PESATURA.
DISPLAY DESCRIZIONE E SEQUENZA D’USO
PRIMO PASSAGGIO
58 262144 •VISUALIZZAZIONE DEI CALCOLI INTERNI
150,00 kg
• Con lo schermo spento, premere e tenere premuto il tasto
fino a quando sul display non viene
LF 1
visualizzato
00911
, quindi rilasciare il tasto
. se il dispositivo richiede una password, è necessario
digitare 0020 con i tasti freccia e premere Invio per confermare
• Premere il tasto
automaticamente
automaticamente.
per iniziare o il tasto
per uscire dal menu: lo schermo si riavvierà
DISPLAY DESCRIZIONE E SEQUENZA D’USO
CONFIGURAZIONE LF 2
150,00 kg

MANUALE UTENTE
IB10-S FR
59
metrich
SECONDO PAS-
SAGGIO
•POSSIBILI VALORI DEI PARAMETRI
A: Sistema metrico 0 NO 1: kg 2: T 3: g
B: Sistema americano 0 NO 1: lb 2: lb oz
1 0 0 0 0 1 C: altre unità 0 NO 1: TW kg 2: HK kg 3:VISS
D: PCS 0:OFF 1: ON
A B C D E F E: doppio range 0:OFF 1: multi intervallo 2: multi range
F: unità di calibrazione 1: usare unità 2: : usare unità americane
TERZO PESO
QUARTO PASSAG-
GIO
dP 0.0
lb e oz non possono essere selezionate come unità di calibrazione.
Se c’è un errore durante la programmazione, la bascula non ci consentirà di andare al passaggio
seguente.
•Utilizzare , y , 0 ~ 9 e quindi per introdurre LA CAPACITÀ MASSI-
MA, tenendo conto del numero di decimali. Es. 150,00 kg = introdurre 15000 se si seleziona come
decimale d0.00.
•Utilizzare , per modificare la posizione del PUNTO DECIMALE.
d 0.00 d 0.000 d 0.0000 0.00000
QUINTO PASSAG-
GIO •Utilizzare per selezionare la SUDDIVISIONE: diV 01, diV 02, diV 05, diV10, diV 20,
diV 01
PROCEDURA
diV 50
Dopo aver inserito i parametri LF2, lo schermo visualizzerà l’ultima configurazione salvata. Tutti
i passaggi devono essere completati; in caso contrario, lo schermo continuerà con la configurazione
precedente.
Procedere con la calibrazione del peso dopo LF2.
•Premere per iniziare; verrà visualizzato il VALORE INTERNO. Premere per uscire dal
menu: la bascula si riavvierà automaticamente.
• Per continuare con la configurazione, premere . (per uscire dalla configurazione e tornare al
menu LF2, premere ).
•Utilizzare , e , 0 ~ 9 e quindi premere per selezionare le UNITÀ DI
PESATURA (premere per uscire dalla calibrazione e tornare al menu LF2).
•Utilizzare , y , 0 ~ 9 e quindi per selezionare il PESO MASSIMO,
tenendo conto del numero di decimali.
• Utilizzare , e quindi per spostare il punto decimale. (per uscire dalla configu-
razione e tornare al menu LF2, premere ).
•Utilizzare e quindi per cambiare l’intermedio (premere per uscire dalla con-
figurazione e tornare al menu LF2).
000000kg
LF 2
262144
100001
000000kg
d 0.0 kg
div 01

MANUALE UTENTE
IB10-S IT
60
•Utilizzare , y per continuare con altre configurazioni o premere per
uscire dal menu, la bascula si riavvierà automaticamente).
CALIBRAZIONE LINEARE LF 3
Fino a 6 passaggi di calibrazione W0~W6
Prima di iniziare la calibrazione, verificare che il piatto della bascula sia vuoto.
Per il primo punto di calibrazione, premere .
I punti di calibrazione precedenti verranno cancellati e sul display verrà visualizzato CLEAR.
Per procedere con il seguente punto di calibrazione, premere .
Per tornare al punto di calibrazione precedente, premere .
Per salvare, premere .
Premere per terminare la calibrazione e tornare al menu LF3.
DISPLAY DESCRIZIONE E SEQUENZA D’USO
LF3
•Premere per iniziare o per uscire dal menu: la bascula si riavvierà automaticamente.
W0 •Premere per calibrare lo zero
(per uscire dalla calibrazione e tornare al menu LF3, premere )
W1 • Collocare 1/3 del peso massimo sul piatto e premere per calibrare 2/3 della capacità. (per
uscire dalla calibrazione e tornare al menu LF3, premere )
W2 •Collocare 2/3 del peso massimo sul piatto e premere per calibrare 1/3 della capacità. (per
uscire dalla calibrazione e tornare al menu LF3, premere )
W3 •Collocare il peso massimo sul piatto e premere per calibrare la piena capacità. (per uscire
dalla calibrazione e tornare al menu LF3, premere )
W4
• Per completare la calibrazione lineare, premere . (per uscire dalla calibrazione e tornare al
menu LF3, premere )
LF3 •Utilizzare , e quindi per continuare con altre regolazioni o premere per
uscire dal menu; la bascula si riavvierà automaticamente.
LF2

MANUALE UTENTE
IB10-S FR
61
VELOCITÀ DEL CONVERTITORE AD LF 4
SPEED 1 velocità standard 15 Hz.
SPEED 2 alta velocità 30 Hz.
SPEED 3 bassa velocità 7,5 Hz.
*Questa funzione rimane bloccata quando UF-5 è in modalità HOLD 1.
*Il valore di fabbrica è 1.
DISPLAY DESCRIZIONE E SEQUENZA D’USO
•Premere per iniziare o per uscire dal menu: la bascula si riavvierà automaticamente.
•Utilizzare e quindi per selezionare la velocità del convertitore AD (premere
per uscire dalla configurazione e tornare al menu LF4)
•Utilizzare , e quindi per continuare con altre regolazioni o premere
per uscire dal menu: la bascula si riavvierà automaticamente.
DISPLAY DESCRIZIONE E SEQUENZA D’USO
ZP 0 OFF
ZP 1 Una suddivisione non verrà mostrata quando è a zero
ZP 2 Due suddivisioni non verranno mostrate quando è a zero
ZP 3 Tre suddivisioni non verranno mostrate quando è a zero
ZP 4 Quattro suddivisioni non verranno mostrate quando è a zero
ZP 5 Cinque suddivisioni non verranno mostrate quando è a zero
*Questa funzione rimane bloccata quando UF-5 è in modalità HOLD 1.
*Il valore di fabbrica è ZP 0.
DISPLAY DESCRIZIONE E SEQUENZA D’USO
• Utilizzare e quindi per uscire dal menu: la bascula si riavvierà automaticamente.
• Utilizzare e quindi per selezionare quante suddivisioni non verranno mostrate a zero.
(per uscire dalla configurazione e tornare al menu LF4, premere ESC)
• Utilizzare , e quindi per continuare con altre regolazioni o premere
per uscire dal menu: la bascula si riavvierà automaticamente.
CIECA
LF 5
LF 5
LF4
LF 4
LF 5
ZP 0
LF 5
SPEED 1

MANUALE UTENTE
IB10-S IT
62
*Prima di effettuare la prima calibrazione, inserire la gravità della propria zona.
*Dopo aver effettuato la calibrazione, inserire la gravità della destinazione.
*Il valore della gravità sarà rifiutato se è maggiore di 9.83217 (gravità del polo) o minore di 9.78031 (gravità dell’equatore).
Valore di fabbrica: 9.8035
DISPLAY DESCRIZIONE E SEQUENZA D’USO
• Premere per continuare o per uscire dal menu: la bascula si riavvierà automatica-
mente.
• Sul display verrà visualizzato il numero di precalibrazione per un secondo.
• Premere per continuare.
• Utilizzare , e , 0 ~ 9 e quindi per introdurre il valore della gravità.
(premere ESC per uscire dalla configurazione e tornare al menu LF 7).
ZERO INIZIALE LF 8
SEtZ Y resetta il punto dello zero ogni volta che si riavvia la bascula.
SEtZ n reset del punto zero OFF.
DISPLAY DESCRIZIONE E SEQUENZA D’USO
LF 8
• Premere per iniziare o per uscire dal menu: la bascula si riavvierà automaticamente
SetZ Y • Utilizzare e quindi per selezionare la modalità zero iniziale. (per uscire dalla configu-
razione e tornare al menu LF8, premere ).
LF 8 • Utilizzare , e quindi per continuare con altre regolazioni o premere
per uscire dal menu: la bascula si riavvierà automaticamente.
GRAVITÀ
LF 7
nonE Versione non approvata
NON MODIFICARE PER NESSUN MOTIVO QUESTO PARAMETRO, CHE DEVE SEMPRE ESSE
-
RE CONFIGURATO COME EN nonE.
!
La modifica di questo parametro implica il blocco di alcune funzionalità.
DESCRIZIONE E SEQUENZA D’USO
DISPLAY
CONFORMITÀ DI APPROVAZIONE
LF 6
LF 6
LF 7
-00-
9.8035
9.8035

MANUALE UTENTE
IB10-S FR
63
11.
GARANZIA
Questa bilancia è coperta da una garanzia contro qualsiasi difetto di fabbricazione e materiale, per un periodo di un anno, a partire dalla data
di consegna. Durante questo periodo, GIROPÈS si farà carico della riparazione della stessa.
Tale garanzia non include i danni causati da uso improprio o sovraccarichi.
La garanzia non copre le spese di spedizione necessarie alla riparazione della bilancia.

MANUAL DO USUÁRIO
IB10-S PT
64
1.
ALIMENTAÇÃO IB10-S
Entrada 230~240V
Saída 9V 500mA
Bateria recarregável 6V/1,2Ah
2.
ANTES DA SUA UTILIZAÇÃO
1. Utilize uma fonte elétrica independente para evitar perturbações elétricas.
2. Não colocar nenhum objeto sobre a plataforma no momento de arrancar o indicador.
3. Por favor, permita que a balança aqueça previamente durante 2-3 minutos antes da sua utilização.
4. Evitar mudanças de temperatura muito bruscas e correntes de ar.
5. Não sobrecarregar a balança, nunca exceder a capacidade máxima.
3.
CONSUMO
IB10-S
Vida da bateria: sem a retroiluminação, aprox. 160 horas.
com a retroiluminação, aprox. 120 horas.
4.
LIGAÇÃO DA CÉLULA DE CARGA AO INDICADOR
O conector da célula de carga é de 7 pins:
• Quando o indicador estiver a funcionar, não retire o conector da célula de carga, este ato pode danificar o equipamento
PIN 1 EXC +
PIN 2 SEN +
PIN 3 SIG +
PIN 4 SIG -
PIN 5 SEN -
PIN 6 EXC -
PIN 7 GND

MANUAL DO USUÁRIO
IB10-S PT
65
5.
DESCRIÇÃO DO TECLADO
1a. função; Premir esta tecla para acender a balança.
2a função Para ajustar a leitura do display a zero “0", o valor do display deve ser inferior a ±2% da capacidade
máxima.
3a. função; Para subtrair (tarar) o peso de um contentor.
1a. função; Manter a tecla premida durante 3 segundos para apagar o indicador.
1a. função: Mudar para a contagem de peças.
2a. função; Para sair do modo de programação.
1a. função: Para mostrar a acumulação total.
2a. função: Para limpar a memória de acumulação. (imprensa longa)
3a. função: Para aumentar os valores dentro da programação.
1a. função: Realizar uma Tara.
2a. função; Para incrementar os valores dentro do modo programação.
1a. função: Para acumular na memória o valor do peso no ecrã.
2a. função; Transmissão manual de dados através do porto RS-232 a um PC ou impressora.
3a. função; Tecla de confirmação dentro do modo programação.
IB10-S

MANUAL DO USUÁRIO
IB10-S PT
66
6.
APLICAÇÕES IB10-S
6.1 TARA
6.2 MODO DE PESAGEM NORMAL
6.2.1 CONFIGURAÇÃO DO EQUIPAMENTO
6.2.2 PRIMEIRA CALIBRAÇÃO
6.2.3 UTILIZAÇÃO
6.3 MODO CONTA PEÇAS
6.3.1 CONFIGURAÇÃO DO EQUIPAMENTO
6.3.2 PRIMEIRA CALIBRAÇÃO
6.3.3 UTILIZAÇÃO
6.4 LIMITES E ALARME
6.5 FAIXA UNITÁRIA / MULTI-FAIXA / MULTI-INTERVALO
6.1 TARA
Coloque um recipiente na plataforma; o valor do seu peso será indicado. Pressione a tecla para tarar a balança. O peso que era
visualizado é armazenado como o valor da tara e esse valor é removido do visor, deixando zero no ecrã.
O indicador "NET" será ativado. À medida que o produto é adicionado, apenas se visualiza o peso do produto. A balança pode ser tarada
uma segunda vez se tiver de ser acrescentado outro tipo de produto ao primeiro.
Novamente, apenas se visualizará o peso adicionado após a tara. Quando o recipiente é removido, visualiza-se um valor negativo. Se a
balança for tarada imediatamente antes da remoção do recipiente, o valor apresentado é o peso bruto do recipiente mais todo o produto
removido. O indicador de zero também estará ligado porque a plataforma volta à mesma condição inicial.
6.2 MODO DE PESAGEM NORMAL
6.2.1 CONFIGURAÇÃO DO EQUIPAMENTO
Ver secção LF2 de parâmetros técnicos
6.2.2 PRIMEIRA CALIBRAÇÃO
Ver secção LF1 de parâmetros técnicos
6.2.3 UTILIZAÇÃO
Depois de configurar todos os parâmetros corretamente e calibrar o equipamento, acenda o equipamento.
• Assegure-se de que o valor do visor, sem carga na plataforma é 0, caso contrário pressione .
• Situe o peso em cima da plataforma e o ecrã irá mostrar o peso.
• A acumulação e envio de dados irá depender do modo selecionado na secção UF-6
• Poderá visualizar os valores acumulados em qualquer momento pressionando(TOTALIZAÇÃO )
(A acumulação só funciona com o protocolo de impressão ativo)
6.3 MODO CONTA PEÇAS
6.3.1 CONFIGURAÇÃO DO EQUIPAMENTO
Ver secção LF2 de parâmetros técnicos
6.3.2 PRIMEIRA CALIBRAÇÃO
Ver secção LF1 de parâmetros técnicos
6.3.3 UTILIZAÇÃO
Quando todos os parâmetros tiverem sido configurados corretamente e o equipamento estiver calibrado, ligue o equipamento. Certifique-se
de que o valor do visor, sem carga na plataforma, é 0, caso contrário pressione .
PASSOS;
1. Pressione a tecla até aparecer no ecrã PCS.
2.
Pressione a tecla sucessivamente para selecionar a quantidade de peças da mostra. O ecrã mostrará sucessivamente
C 10 / C20 / C 50 / C 100 / C 200.
3. Situe a amostra em cima da plataforma, espere que o indicador de estabilidade acenda e pressione a tecla .
4. Situe o peso em cima da plataforma e o ecrã irá mostrar o número de peças.
A acumulação e envio de dados irá depender do modo selecionado na secção UF-6

MANUAL DO USUÁRIO
IB10-S PT
67
• Para regressar ao modo de pesagem normal, pressione a tecla para voltar a selecionar kg.
• Se desejar voltar ao modo conta peças, usando a mesma amostra de referência, pressione novamente a tecla .
• Se desejar mudar a amostra de referência, volte a repetir os passos descritos anteriormente.
6.4 LIMITES E ALARME
O usuário pode definir os limites baixo e alto da amostra colocada na plataforma.
O ecrã irá mostrar se está abaixo do limite inferior Lo, acima do limite superior Hi ou na zona entre os dois limites Ok.
Quando desejar, poderá configurar para emitir o alarme e se a estabilidade é necessária para tal.
Este procedimento fica descrito na secção UF-2. Se tiver definido limites em modo de pesagem em modo normal e desejar utilizar os limites
em modo contador de peças, terá que definir os novos limites para este modo, quando voltar ao modo peso serão recuperados os limites
anteriores. Acontecerá o mesmo no caso contrário.
6.5 FAIXA UNITÁRIA / MULTI-FAIXA / MULTI-INTERVALO
O visor pode ser configurado com um único intervalo de unidade, ou seja, com um peso máximo e um valor de passo. Ou como multi-faixa
ou multi-intervalo, caso em que há um peso máximo e dois passos.
De 0 até à metade deste peso máximo usa-se o valor de passo selecionado(passo 1) e da metade até ao peso máximo, usa-se o seguinte
valor de passo (passo 2).
O intervalo em que se encontra num determinado momento é indicado pelos indicadores de ecrã R1 e R2.
No modo multi-intervalo à medida que se vai aumentando de peso na faixa 1 usa-se o passo 1, ao passar a faixa 2 usa-se o passo 2. Ao
diminuir o peso e voltar à faixa 1, volta-se a usar o passo 1 Contrariamente, no modo multi-faixa, ao diminuir o peso e voltar à faixa 1,
continua-se a usar o passo 2 até chegar a 0.
Na secção LF2 de parâmetros técnicos poderá selecionar o modo de faixa.
7.
PARÂMETROS
PARÂMETRO DESCRIÇÃO
UF-1 Contas internas (A/D)
UF-2 Configuração dos limites de peso (superior e inferior)
UF-3 Auto desligamento automático
UF-4 Retroiluminação do display
UF-5 Quatro modos de hold
UF-6 Saída RS-232(PC / PRINT)
UF-7 Configuração da velocidade do conversor (A/D)
UF-8 Condicionante de visualização do zero
UF-9 Configuração da gravidade
8.
CONFIGURAÇÃO PARÂMETROS
8.1 CONTAS INTERNAS (A/D)
8.2 CONFIGURAÇÃO DOS LIMITES DE PESO (SUPERIOR E INFERIOR)
8.3 AUTODESLIGAMENTO AUTOMÁTICO
8.4 CONFIGURAÇÃO DA ILUMINAÇÃO DO DISPLAY
8.5 FUNÇÃO HOLD
8.6 SAÍDA DE DADOS RS-232
8.7 CONFIGURAÇÃO DA VELOCIDADE DO CONVERSOR AD
8.8 CONDICIONANTE DE VISUALIZAÇÃO DO ZERO
8.9 CONFIGURAÇÃO DA GRAVIDADE
Para aceder à configuração de parâmetros com o ecrã a zero, premir as teclas ao mesmo tempo y .
Premir a tecla ou para selecionar o parâmetro desejado (UF-1 ~ UF-11), para confirmar as mudanças realizadas
prime . Para voltar ao modo anterior prima a tecla .

MANUAL DO USUÁRIO
IB10-S PT
68
8.1 CONTAS INTERNAS (A/D) | UF-1
1. Premir a tecla para visualizar as contas internas da balança.
2. Para passar para o seguinte parâmetro, premir a tecla o ecrã irá mostrar o valor de voltagem da bateria.
3. Para sair deste modo e retornar à pesagem normal, o usuário deve pressionar a tecla ou .
8.2 CONFIGURAÇÃO DOS LIMITES DE PESO (SUPERIOR E INFERIOR) | UF-2
1. Premir a tecla para aceder ao parâmetro.
2. O display mostrará a mensagem “000.00L” (Limite inferior=LO).
3. Utilizar as teclas e para mover o cursor e a tecla para selecionar o número desejado.
4. Premir a tecla para confirmar.
5. O ecrã mostrará "000.00h" (Limite superior=Olá)
6. Utilizar as teclas e para mover a tecla para selecionar o número desejado.
Nota: Poderá situar-se em cima do último dígito para modificá-lo se for necessário.
7. Premir a tecla para confirmar.
8. O ecrã mostrará o valor.
A B C
0 0 0
(Configuração do alarme)
limites Lo e Hi)
inferior Lo ou acima do limite superior Hi
9. Utilizar as teclas e para mover o cursor e a tecla para selecionar o número desejado.
10. Premir a tecla para confirmar.
8.3 DESLIGAMENTO AUTOMÁTICO | UF-3
MODOS:
• AoFF 00 – Desligamento automático desativado.
• AoFF 01 – Desconexão automática ativada a um minuto, a balança apagará automaticamente após 1 minuto sem ser utilizada.
• Poderá configurar o valor desejado de 1 a 99 minutos
1. Premir a tecla para aceder ao parâmetro.
2. Utilizar as teclas e para mover o cursor e a tecla para selecionar o número desejado.
3. Premir a tecla para confirmar.
LO
OK
HI
LO
OK
HI
ECRÃ VALOR ESTABILIDADE
A 0 Não há necessidade de estabilizar o peso do alarme para soar
1 O peso do alarme deve ser estabilizado para soar
B 0 Sempre 0
C 0 Alarme apagado
1
Alarme soa se estiver na franja Ok (entre
2
Alarme soa se estiver abaixo do limite

MANUAL DO USUÁRIO
IB10-S PT
69
8.4 RETROILUMINAÇÃO DO ECRÃ | UF-4
MODOS:
• Lit A: Automática.
• Lit ON: Iluminação ativada.
• Lit OFF: Iluminação desativada.
1. Premir a tecla para aceder ao parâmetro.
2. Premir a tecla para selecionar o modo desejado.
3. Premir a tecla para confirmar.
8.5 FUNÇÃO HOLD | UF-5
(um vez retirado o objeto do prato, o display mantém o peso fixado durante uns segundos, função muito útil para a pesagem de animais)
1. Premir a tecla para aceder ao parâmetro.
2. Premir a tecla para selecionar o modo desejado.
3. Premir a tecla para confirmar.
MODOS:
• HOLD 0 : Desativado.
• HOLD 1 Animal em movimento
HOLD 1.
Quando este parâmetro tiver sido alcançado, o ecrã mostrará PCt,
• Use as teclas e para mover o cursor e a tecla para selecionar o valor da faixa de HOLD desejado de 001 a
100.
• Premir a tecla para confirmar.
• O ecrã mostrará time 8, use as teclas e para mover o cursor e a tecla para selecionar o número de
repetições desejado durante a faixa de hold.
• Premir a tecla para confirmar. Exemplo: PCt pequeno e time grande implica mais precisão e maior tempo de estabilização.
8.6 SAÍDA DE DADOS RS-232 |UF-6
0 RS232 desligado
1 Saída estável Formato 1
2 Saída contínua Formato 1
3 Saída manual Formato 1
4 Saída estável Formato 2
5 Saída contínua Formato 2
6 Saída manual Formato 2
7 Saída com acumulação manual - Formato 3 Formato de impressão
8 Saída com auto-acumulação - Formato 3 Formato de impressão
9 Saída com acumulação manual - Formato 4 Formato de impressão
10 Saída com auto-acumulação - Formato 4 Formato de impressão

MANUAL DO USUÁRIO
IB10-S PT
70
RS232 Taxa de Baud
b1200 Taxa de Baud 1200
b2400 Taxa de Baud 2400
b4800 Taxa de Baud 4800
b9600 Taxa de Baud 9600
b19200 Taxa de Baud 19200
b38400 Taxa de Baud 38400
Protocolo de comunicação
Padrão EIA-RS232 C sinal UART
FORMAT0:
1. Saída série: 1200/2400/4800/9600/19200/38400 BPS
2. Bits de dados: 8 BITS
3. Bits de paridade: nenhuma
4. Bits de paragem: 1 BIT
bit inicial Bits de dados Bits de paragem
OBSERVAÇÕES:
Exemplo de saída de formato 1: Exemplo de saída de formato 2:
Exemplo de saída de formato 3: Exemplo de saída de formato 4:
ST, GS, +001. 000 Kg +001. 000kg
S/N
WT/Kg
-----------------------------
0001
1.000
0002
2.000
0002
3.000
BILHETE N
0001
G
3.000Kg
T
1.000Kg
N
2 000kg
NÚ
MERO TOTAL
DE
BILHETES
0001
TOTAL
LÍQUIDO
2.000

MANUAL DO USUÁRIO
IB10-S PT
71
8.7 CONFIGURAÇÃO DA VELOCIDADE DO CONVERSOR |UF-7
1. Premir a tecla para aceder ao parâmetro.
2. Premir a tecla para selecionar o modo desejado:
•
Modo 1 : Normal
•
Modo 2: Rápido
•
Modo 3: Lento
3. Premir a tecla para confirmar.
8.8 CONDICIONANTE DE VISUALIZAÇÃO DO ZERO|UF-8
Mostra 0 no ecrã até chegar à seguinte divisão selecionada seja alcançada. Começando a mostrar valores desta divisão.
Exemplo:
Balança com e =2g
Cega em 5 divisões
Mostrará 0 até chegar a 2x5=10g o primeiro valor que mostrará será 12g.
1. Premir a tecla para aceder ao parâmetro.
2. Premir a tecla para selecionar.
3. Premir a tecla para confirmar.
8.9 CONFIGURAÇÃO DA GRAVIDADE|UF-9
1. Premir a tecla para visualizar o valor da gravidade atual.
2. Para mudar o valor, premir a tecla , posteriormente utilizar as teclas y para mover o cursor e a tecla
para selecionar o número desejado.
3. Premir a tecla para confirmar.
9.
CONFIGURAÇÃO DE REAJUSTES DE CALIBRAÇÃO
1. Dentro do modo normal de pesagem, premir as teclas e , o display mostrará a mensagem ECF – 1.
2. Pressione as teclas ou para selecionar a função desejada: ECF-1, ECF-2 ou ECF-3
* ECF-1 CALIBRAÇÃO DE ZERO + PESO
Premir a tecla , o display mostrará CALZ.
Premir a tecla , para pôr a zero a leitura do display.
Premir as teclas e para mover o cursor.
Premir a tecla introduzir o valor do peso de calibração.
Colocar o peso de calibração sobre a plataforma e premir a tecla para efetuar a calibração quando a leitura
for estável.
* ECF-2 CALIBRAÇÃO DE ZERO
Premir a tecla , o display mostrará CALZ.
Premir a tecla , para efetuar a calibração.

MANUAL DO USUÁRIO
IB10-S PT
72
* ECF-3 CALIBRAÇÃO DE PESO (SPAN)
Premir a tecla , o display mostrará o valor do peso de calibração
Premir as teclas e para mover o cursor.
Premir a tecla para modificar o valor do peso de calibração.
Premir a tecla para confirmar.
Colocar o peso de calibração sobre a plataforma e premir a tecla para efetuar a calibração quando a leitura
for estável.
10.
PARÂMETROS TÉCNICOS
NÃO MODIFIQUE OS PARÂMETROS TÉCNICOS SE NÃO FOR ESTRITAMENTE NECESSÁRIO. UMA MÁ CONFIGURAÇÃO DESTA
SECÇÃO PODE PROVOCAR UM MAU FUNCIONAMENTO DA BALANÇA.
ENTRAR E SAIR DA CALIBRAÇÃO
CALIBRAÇÃO DO PESO LF 1
ECRÃ DESCRIÇÃO E SEQUÊNCIA DE UTILIZAÇÃO
LF 1
CAL Z
A calibração pode ser realizada com qualquer peso, mas o peso não deve ser inferior a 1/3 da
capacidade máxima que nunca deve ser excedida.
• Prima a tecla para começar a calibração de zero (pressione para sair da calibração e
voltar ao menu LF1)
•Utilize , e , 0 ~ 9 e depois para introduzir o peso com o qual se vai
fazer a calibração. (Pressione para sair da calibração e regressar ao menu LF1)
150.00 kg •Situe o peso requerido sobre a balança e como indicado no display.
150.00 kg •Assim que estabilizar, pressione para calibrá-la. (pressione ESC para sair da calibração e
regressar ao menu LF1).
A CALIBRAÇÃO SERÁ CONCLUÍDA E A BALANÇA VOLTARÁ AO MODO DE PESAGEM AUTOMATICAMENTE.
ECRÃ DESCRIÇÃO E SEQUÊNCIA DE UTILIZAÇÃO
PRIMEIRO PASSO
262144 • VISUALIZAÇÃO DAS CONTAS INTERNAS
150.00 kg
• Com o visor apagado, pressione e mantenha pressionada a tecla
até que o ecrã mostre
LF 1
00911, solte a tecla
. se o dispositivo solicitar uma senha, você deve digitar 0020 com as teclas
de seta e pressionar Enter para validar
• Pressione a tecla
automaticamente.
para começar ou a tecla
para sair do menu e o visor será reiniciado
ECRÃ DESCRIÇÃO E SEQUÊNCIA DE UTILIZAÇÃO
CONFIGURAÇÃO
LF 2

MANUAL DO USUÁRIO
IB10-S PT
73
métrica
SEGUNDO PASSO •POSSÍVEIS VALORES DOS PARÂMETROS
F: Unidades de calibração 1: usar unidades 2: : usar unidades americanas
TERCEIRO PESO
lb oz não se podem selecionar como unidades de calibração.
A balança não nos deixará continuar até ao próximo passo se houver um erro durante a programa-
ção.
QUARTO PASSO
dP 0.0
QUINTO PASSO
diV 01
PROCEDIMENTO
•Utilize , e , 0 ~ 9 e depois para introduzir A CAPACIDADE MÁXIMA,
tendo em conta o número de decimais. Por exemplo, 150,00kg = introduzir 15000 se d0,00for então
seleccionado como decimal.
•Utilize , para mudar a posição do PONTO DECIMAL.
d 0.00 d 0.000 d 0.0000 0.00000
•Utilize para selecionar a DIVISÃO: diV 01, diV 02, diV 05, diV10, diV 20, diV 50
Depois de introduzir os parâmetros LF2, o visor mostrará a última configuração guardada. Todos
os passos devem ser completados, caso contrário o visor continuará com a configuração anterior.
Proceda com a calibração de peso depois de LF2.
•Pressione para começar e mostrar o VALOR INTERNO. Pressione para sair do menu e
a balança reiniciará automaticamente.
•Pressione para continuar com a configuração. (pressione para sair da configuração
e voltar ao menu LF2).
•Utilize , e , 0 ~ 9 e depois prima para selecionar as UNIDADES DE
PESAGEM (prima para sair da calibração e voltar ao menu LF2).
•Utilize , e , 0 ~ 9 e depois para selecionar o PESO MÁXIMO,
tendo em conta o número de decimais.
•Utilize , e depois para mover o ponto decimal. (pressione para sair da
configuração e regressar ao menu LF2).
•Utilize e depois para mudar o escalão (prima para sair da configuração e
regressar ao menu LF2).
000000kg
LF 2
262144
100001
000000kg
d 0.0kg
div 01
A: Sistema Métrico
0:NÃO
1: kg
2:T
3:g
B: Sistema Americano 0:NÃO 1: lb 2:lb oz
1 0 0 0 0 1 C: Outras unidades 0:NÃO 1: TW kg 2:HK kg 3:VISS
D: PCS 0:OFF 1: ON
A B C D E F E: Faixa dupla 0:OFF 1: multi intervalo 2: multi faixa

MANUAL DO USUÁRIO
IB10-S PT
74
•Utilize , e para continuar com outras configurações ou pressione para
sair do menu e a balança reiniciará automaticamente).
CALIBRAÇÃO LINEAR LF 3
Até 6 passos de calibração W0 ~W6
Assegure-se que o prato da balança está vazio antes de começar a calibração.
Prima para o primeiro ponto de calibração.
Os pontos de calibração prévios serão eliminados e o ecrã mostrará CLEAR.
Prima para continuar com o seguinte ponto de calibração.
Prima para regressar ao ponto de calibração anterior.
Prima para guardar.
Prima para terminar a calibração e regressar ao menu LF3.
ECRÃ DESCRIÇÃO E SEQUÊNCIA DE UTILIZAÇÃO
LF3
•Prima começar ou para sair automaticamente do menu e da balança.
W0 •Prima utilize para calibrar o zero..
(Prima para sair da calibração e regressar ao menu LF3)
W1 • Coloque 1/3 do peso máximo em cima do prato e prima para calibrar 2/3 da capacidade.
(prima para sair da calibração e regressar ao menu LF3).
W2 •Coloque 2/3 do peso máximo em cima do prato e prima para calibrar 1/3 da capacidade..
(prima para sair da calibração e regressar ao menu LF3).
W3 •Coloque o peso máximo em cima do prato e prima para calibrar a capacidade plena. (Prima
para sair da calibração e regressar ao menu LF3).
W4
•Prima para completar a calibração linear. (Prima para sair da configuração e voltar
ao menu LF2).
LF3 •Utilize , e depois para continuar com outros ajustes ou prima para sair
do menu e a balança reiniciará automaticamente.
LF2

MANUAL DO USUÁRIO
IB10-S PT
75
VELOCIDADE DO CONVERSOR AD LF 4
SPEED 1 velocidade padrão 15Hz.
SPEED 2 alta velocidade 30Hz.
SPEED 3 baixa velocidade 7.5Hz.
*Esta função fica bloqueada quando UF-5 estiver em modo HOLD 1.
*O valor de fábrica é 1
ECRÃ DESCRIÇÃO E SEQUÊNCIA DE UTILIZAÇÃO
• Pressione para começar o para sair do menu e a balança será reiniciada automati-
camente.
• Utilize e depois para selecionar a velocidade do conversor AD (prima para sair
da configuração e regressar ao menu LF4).
• Utilize , e depois para continuar com outros ajustes ou prima para
sair do menu e ablança reiniciará automaticamente.
ECRÃ DESCRIÇÃO E SEQUÊNCIA DE UTILIZAÇÃO
ZP 0 OFF
ZP 1 Uma divisão não será mostrada estando em zero
ZP 2 Duas divisões não serão mostradas estando em zero
ZP 3 Três divisões não serão mostradas estando em zero
ZP 4 Quatro divisões não serão mostradas estando em zero
ZP 5 Cinco divisões não serão mostradas estando em zero
*Esta função fica bloqueada quando UF-5 estiver em modo HOLD 1.
*O valor de fábrica é ZP 0
ECRÃ DESCRIÇÃO E SEQUÊNCIA DE UTILIZAÇÃO
• Utilize e depois para sair do menu e a balança reiniciará automaticamente.
• Utilize e depois para selecionar o número de divisões que mostrarão zero. ( prima
ESC para sair da configuração e regressar ao menu LF4).
• Utilize , e depois para continuar com outros ajustes ou prima para
sair do menu e a balança reiniciará automaticamente.
CEGA
LF 5
LF 5
LF4
LF 4
LF 5
ZP 0
LF 5
SPEED 1

MANUAL DO USUÁRIO
IB10-S PT
76
*Introduza a gravidade da sua zona antes de realizar a primeira calibração.
*Introduza a gravidade de destino depois de realizar a primeira calibração.
*O valor de gravidade será rejeitado se for superior a 9.83217 (gravidade de pólo) ou inferior a 9.78031 (gravidade do equador).
Valor de fábrica: 9.8035
ECRÃ DESCRIÇÃO E SEQUÊNCIA DE UTILIZAÇÃO
• Prima para continuar ou para sair do menu e a balança reiniciará automaticamente.
• O ecrã mostrará o número de pré-calibração durante um segundo.
• Prima para continuar.
• Utilize , e , 0 ~ 9 e depois para introduzir o valor de gravidade.
(prima ESC para sair da configuração e regressar ao menu LF 7).
ZERO INICIAL LF 8
SEtZ Y reinicia o ponto de zero cada vez que se reiniciar a balança
SEtZ n reinicia o ponto zero OFF
ECRÃ DESCRIÇÃO E SEQUÊNCIA DE UTILIZAÇÃO
LF 8
• Prima para começar ou para sair do menu e balança reiniciará automaticamente
SetZ Y • Utilize e depois para selecionar o modo de zero inicial. (Prima para sair da
configuração e regressar ao menu LF8)
LF 8 • Utilize , e depois para continuar com outros ajustes ou prima para
sair do menu e a balança será reiniciada automaticamente.
GRAVIDADE
LF 7
DESCRIÇÃO E SEQUÊNCIA DE UTILIZAÇÃO
nonE
Versão não aprovada
NUNCA MODIFIQUE ESTE PARÂMETRO, DEVE
ESTAR SEMPRE CONFIGURADO EM nonE.
A mudança deste parâmetro implica o bloqueio de certas funcionalidades.
ECRÃ
!
CONFORMIDADE DA APROVAÇÃO
LF 6
LF 6
LF 7
-00-
9.8035
9.8035

MANUAL DO USUÁRIO
IB10-S PT
77
11.
GARANTIA
Esta balança possui garantia contra todos os defeitos de fabrico e de material, por um período de 1 ano a partir da data de entrega. durante
este período, a GIROPÈS, será responsável pela reparação da balança.
Esta garantia não inclui os danos provocados pela utilização indevida ou por sobrecargas.
A garantia não cobre as despesas de envio (fretes) necessários para a reparação da balança.

BEDIENUNGSANLEITUNG
IB10-S DE
78
1.
LEBENSMITTELINDUSTRIE
IB10-S
Eingang 230 - 240V
Ausgabe 9V/500mA
Akku 6V/1,2Ah
2.
VOR DER INBETRIEBNAHME
1. Verwenden Sie eine separate Stromquelle, um elektrische Störungen zu vermeiden.
2. Wenn Sie die Anzeige einschalten darf sich kein Gegenstand auf der Wägeplatte befinden.
3. Warten Sie nach dem Einschalten 2-3 Minuten, damit sich die Waage vorwärmen kann.
4. Vermeiden Sie plötzliche Temperaturschwankungen und Zugluft.
5. Überladen Sie die Waage nicht und überschreiten Sie nie die Maximalkapazität.
3.
VERBRAUCH
IB10-S
Akkulaufzeit: ohne die Hintergrundbeleuchtung, ca. 160 Stunden.
mit Hintergrundbeleuchtung, ca. 120 Stunden.
4.
ANSCHLUSS DER WAAGE AN DIE ANZEIGE
Der Stecker der Wägezelle hat 7 Pins:
• Ziehen Sie nicht den Stecker der Wägezelle, wenn die Anzeige in Betrieb ist. Dies könnte das Gerät beschädigen.
PIN 1 EXC +
PIN 2 SEN -
PIN 3 SIG +
PIN 4 SIG -
PIN 5 SEN -
PIN 6 EXC -
PIN 7 GND

BEDIENUNGSANLEITUNG
IB10-S DE
79
5.
BESCHREIBUNG DER TASTATUR
1. Funktion: Drücken Sie diese Taste, um die Waage einzuschalten.
2. Funktion: Um die Displayanzeige auf Null „0“ zu setzen, muss der angezeigte Wert weniger als ± 2 % der
Maximalkapazität betragen.
3. Funktion Um das Gewicht eines Behälters abzuziehen (zu tarieren).
1. Funktion: Halten Sie diese Taste für 3 Sekunden gedrückt, um die Anzeige auszuschalten.
1. Funktion: Wechseln Sie zur Stückzählung.
2. Funktion: So verlassen Sie den Programmiermodus.
1. Funktion: Zur Anzeige der Gesamtkumulation.
2. Funktion: Zum Löschen des Akkumulationsspeichers. (lange drücken)
3. Funktion: Um die Werte innerhalb der Programmierung zu erhöhen.
1. Funktion: Führen Sie eine Tara durch.
2. Funktion: Um die Werte im Programmiermodus zu erhöhen.
1. Funktion: Um den Gewichtswert auf der Anzeige im Speicher zu akkumulieren.
2. Funktion: Manuelle Datenübertragung auf einen PC oder Drucker über den Port RS-232.
3. Funktion: Bestätigungstaste im Programmiermodus.
IB10-S

BEDIENUNGSANLEITUNG
IB10-S DE
80
6.
IB10-S ANWENDUNGEN
6.1 TARA
6.2 NORMALER WÄGEMODUS
6.2.1 GERÄTEKONFIGURATION
6.2.2 ERSTE KALIBRIERUNG
6.2.3 BETRIEB
6.3 STÜCKZÄHLMODUS
6.3.1 GERÄTEKONFIGURATION
6.3.2 ERSTE KALIBRIERUNG
6.3.3 BETRIEB
6.4 GRENZWERTE UND ALARM
6.5 EINHEITSBEREICH / MEHRBEREICH / MULTI-INTERVALL
6.1 TARA
Stellen Sie einen Behälter auf die Wägeplatte; sein Gewicht wird angezeigt. Drücken Sie die Taste , um die Waage zu tarieren. Das
angezeigte Gewicht
wird als Tarawert gespeichert, und dieser Wert wird von der Anzeige subtrahiert, so dass auf dem Bildschirm Null verbleibt.
Die „NET“ Anzeige wird aktiviert. Wenn das Produkt hinzugefügt wird, wird nur das Gewicht des Produkts angezeigt. Die Waage könnte ein
zweites Mal tariert werden, wenn zum ersten Mal ein anderer Produkttyp hinzugefügt werden müsste.
Auch hier wird nur das nach dem Einstellen der Tara hinzugefügte Gewicht angezeigt. Entfernt man den Behälter, wird ein negativer Wert
angezeigt. Wenn die Waage kurz vor Entfernen des Behälters tariert wird, ist der angezeigte Wert das Bruttogewicht des Behälters zuzüglich
des ganzen entnommenen Produkts. Der Nullindikator wird auch deshalb eingeschaltet sein, weil die Wägeplatte wieder in den gleichen
Zustand wie zu Beginn zurückkehrt.
6.2 NORMALER WÄGEMODUS
6.2.1 GERÄTEKONFIGURATION
Siehe Abschnitt LF2 über technische Parameter
6.2.2 ERSTE KALIBRIERUNG
Siehe Abschnitt LF1 über technische Parameter
6.2.3 BETRIEB
Nachdem alle Parameter korrekt eingestellt und das Gerät kalibriert worden sind, schalten Sie das Gerät ein.
• Stellen Sie sicher, dass der Wert der Anzeige ohne Gewicht auf der Wägeplatte 0 ist, andernfalls drücken Sie .
• Positionieren Sie das Gewicht auf die Wägeplatte und auf dem Display erscheint das Gewicht.
• Die Speicherung und Datenweiterleitung hängt vom unter Abschnitt UF-6 gewählten Modus ab.
• Sie können die akkumulierten Werte jederzeit einsehen, indem Sie (TOTALISIERUNG) drücken
(Akkumulation funktioniert nur mit dem aktiven Druckprotokoll)
6.3 STÜCKZÄHLMODUS
6.3.1 GERÄTEKONFIGURATION
Siehe Abschnitt LF2 über technische Parameter
6.3.2 ERSTE KALIBRIERUNG
Siehe Abschnitt LF1 über technische Parameter
6.3.3 BETRIEB
Nachdem alle Parameter korrekt eingestellt und das Gerät kalibriert worden sind, schalten Sie das Gerät ein. Stellen Sie sicher, dass der Wert
der Anzeige ohne Gewicht auf der Wägeplatte 0 ist, andernfalls drücken Sie .
SCHRITTE;
1. Drücken Sie die Taste bis auf dem Display PCS erscheint.
2.
Drücken Sie die Taste nacheinander, um die Stückzahl der Probe auszuwählen. Auf dem Display erscheint nacheinander
C 10 / C20 / C 50 / C 100 / C 200.
3. Stellen Sie Probe auf die Wägeplatte, warten Sie auf die Stabilitätsanzeige und drücken Sie die Taste

BEDIENUNGSANLEITUNG
IB10-S DE
81
4. Stellen Sie das Produkt auf die Wägeplatte. Auf dem Display erscheint die Stückzahl.
Die Speicherung und Datenweiterleitung hängt vom unter Abschnitt UF-6 gewählten Modus ab.
• Um zum normalen Wägemodus zurückzukehren, drücken Sie die Taste , um wieder kg zu auszuwählen.
• Wenn Sie zum Stückzählmodus zurückkehren möchten, verwenden Sie die gleiche Referenzprobe und drücken erneut die Taste .
• Möchten Sie die Referenzprobe wechseln, wiederholen Sie die oben beschriebenen Schritte.
6.4 GRENZWERTE UND ALARM
Der Benutzer kann die unteren und oberen Grenzwerte der auf die Wägeplatte gelegten Probe einstellen.
Die Anzeige zeigt an, ob die Probe unterhalb der Lo-Grenze, oberhalb der Hi-Grenze oder im Bereich zwischen den beiden OK-Grenzen liegt.
Sie können auch einstellen, wann der Alarm ertönen soll und ob dafür die Stabilität erforderlich ist.
Das gesamte Verfahren wird in Abschnitt UF-2 beschrieben. Wenn Sie Grenzwerte im normalen Wägemodus definiert haben und die Grenzwerte
im Stückzahlmodus verwenden möchten, müssen Sie die neuen Grenzwerte für diesen Modus definieren. Wenn Sie zum Wägemodus
zurückkehren, werden die zuvor festgelegten Grenzwerte wiederhergestellt. Dasselbe gilt im umgekehrten Fall.
6.5 EINHEITSBEREICH / MEHRBEREICH / MULTI-INTERVALL
Der Indikator kann mit einem einzigen Einheitenbereich eingestellt werden, d.h. mit einem Maximalgewicht und einem Stufenwert. Oder als
Multi-Bereich oder Multi-Intervall, in diesen Fällen gibt es ein Maximalgewicht und zwei Stufen.
Von 0 bis zur Hälfte dieses Maximalgewichts wird der gewählte Stufenwert (Stufe 1) verwendet, und von der Hälfte bis zum Maximalgewicht
wird der nächste Stufenwert (Stufe 2) verwendet.
Der Bereich, in dem Sie sich zu einem bestimmten Zeitpunkt befinden, wird durch die Anzeigeindikatoren R1 und R2 angezeigt.
Im Mehrschrittmodus wird mit zunehmender Gewichtszunahme im Bereich 1 die Stufe 1, beim Übergang in den Bereich 2 die Stufe 2
verwendet. Beim Verringern des Gewichts und der Rückkehr zu Bereich 1 wird wieder Schritt 1 verwendet, im Gegensatz dazu wird im
Mehrbereichsmodus beim Verringern des Gewichts und der Rückkehr zu Bereich 1 wieder Schritt 2 verwendet, bis er 0 erreicht.
Im Abschnitt LF2 der technischen Parameter können Sie den Bereichsmodus auswählen.
7.
PARAMETER
PARAMETER BESCHREIBUNG
UF-1 Interne Zählungen (A/D)
UF-2 Einstellung der Gewichtsgrenze (Höchst- und Mindestge-
wicht)
UF-3 Automatische Abschaltung
UF-4 Display-Hintergrundbeleuchtung
UF-5 Vier Hold-Modi
UF-6 RS-232(PC / PRINT)-Ausgabe
UF-7 Wandler-Geschwindigkeitseinstellung (A/D)
UF-8 Null-Anzeige-Bedingung
UF-9 Einstellung der Gravitation
8.
PARAMETEREINSTELLUNG
8.1 INTERNE ZÄHLUNGEN (A/D)
8.2 EINSTELLUNG DER GEWICHTSGRENZEN (HÖCHST- UND MINDESTGE-
WICHT)
8.3 AUTOMATISCHE ABSCHALTUNG
8.4 EINSTELLUNG DER DISPLAYBELEUCHTUNG
8.5 HOLD-FUNKTION
8.6 DATENAUSGABE RS-232
8.7 EINSTELLUNG DER GESCHWINDIGKEIT DES KONVERTERS AD
8.8 NULL-ANZEIGE-BEDINGUNG
8.9 EINSTELLUNG DER GRAVITATION

BEDIENUNGSANLEITUNG
IB10-S DE
82
Um auf die Parametereinstellung mit auf Null gesetztem Display zuzugreifen, drücken Sie gleichzeitig die Tasten und .
Drücken Sie die Taste oder , um den gewünschten Parameter (UF-1 ~ UF-11) zu wählen und die Änderungen zu bestätigen
Drücken Sie . Um zum vorherigen Modus zurückzukehren, drücken Sie die Taste .
8.1 INTERNE ZÄHLUNGEN (A/D) | UF-1
1. Drücken Sie die Taste , um die internen Zählungen der Waage anzuzeigen.
2. Drücken Sie die Taste , um zum nächsten Parameter zu gelangen. Auf dem Display erscheint die Batteriespannung.
3. Um diesen Modus zu verlassen und zum normalen Wiegen zurückzukehren, muss der Benutzer die Taste oder drücken.
8.2 KONFIGURATION DER GEWICHTSGRENZEN (HÖCHST- UND MINDESTGEWICHT | UF-2
1. Drücken Sie die Taste , um auf den Parameter zuzugreifen.
2. Auf dem Display erscheint die Meldung „000.00L“ (Mindestgewicht=LO).
3. Benutzen Sie die Tasten und , um den Cursor zu bewegen und die Taste , um die gewünschte Zahl zu wählen.
4. Zum Bestätigen die Taste drücken.
5. Auf dem Display erscheint „000.00h“ (Höchstgewicht=Hi)
6. Benutzen Sie die Tasten und , um den Cursor zu bewegen und die Taste , um die gewünschte Zahl zu wählen.
Hinweis: Sie können sich über die letzte Ziffer bewegen, um sie bei Bedarf zu ändern.
7. Drücken Sie die Taste , um zu bestätigen.
8. Auf dem Display erscheint der Wert.
A B C
0 0 0
(Einstellung des Alarms)
SCHIRM
des Bereiches Ok befindet (zwischen den
der Mindestwert Lo oder höher als der
9. Benutzen Sie die Tasten und , um den Cursor zu bewegen und die Taste , um die gewünschte Zahl zu wählen.
10. Zum Bestätigen die Taste drücken.
LO
OK
HI
LO
OK
HI
BILD- WERT STABILITÄT
A 0 Keine Notwendigkeit, das Gewicht des zu ertönenden Alarms zu stabilisieren
1 Das Gewicht des Alarms muss stabilisiert werden, damit er ertönt
B 0 Immer 0
C 0 Alarm ausgeschaltet
1
Alarm ertönt, wenn sich der Wert innerhalb
Grenzwerten Lo und Hi)
2
Alarm ertönt, wenn der Wert niedriger als
Höchstwert Hi ist

BEDIENUNGSANLEITUNG
IB10-S DE
83
8.3 AUTOMATISCHE ABSCHALTUNG | UF-3
METHODEN:
• AoFF 00 - Automatische Abschaltung deaktiviert.
• AoFF 01 – Automatische Abschaltung aktiviert. Die Waage schaltet sich automatisch ab, wenn innerhalb von 1 Minute keine Aktion durchgeführt wird.
• Sie können den gewünschten Wert von 1 bis 99 Minuten einstellen.
1. Drücken Sie die Taste , um auf den Parameter zuzugreifen.
2. Benutzen Sie die Tasten und , um den Cursor zu bewegen und die Taste , um die gewünschte Zahl zu wählen.
3. Zum Bestätigen die Taste drücken.
8.4 DISPLAY-HINTERGRUNDBELEUCHTUNG UF-4
METHODEN:
• Lit A: Automatisch.
• Lit ON: Beleuchtung aktiviert.
• Lit OFF: Beleuchtung deaktiviert.
1. Drücken Sie die Taste , um auf den Parameter zuzugreifen.
2. Drücken Sie die Taste , um den gewünschten Modus auszuwählen.
3. Drücken Sie die Taste um zu bestätigen.
8.5 HOLD-FUNKTION | UF-5
(sobald das Objekt von der Platte entfernt wird, hält die Anzeige das eingestellte Gewicht für einige Sekunden, eine sehr nützliche Funktion zum
Wiegen von Tieren)
1. Drücken Sie die Taste , um auf den Parameter zuzugreifen.
2. Drücken Sie die Taste , um den gewünschten Modus auszuwählen.
3. Drücken Sie die Taste , um zu bestätigen.
MODES:
• HOLD 0 : Deaktiviert.
• HOLD 1 : Tier in Bewegung.
HOLD 1.
Wurde dieser Parameter ausgewählt, zeigt das Display PCt,
• Verwenden Sie die Tasten und , um den Cursor zu bewegen und die Taste , um den gewünschten Wert des
HOLD-Bereiches von 001 bis 100 auszuwählen.
• Drücken Sie die Taste , um zu bestätigen.
• Auf dem Display erscheint time 8. Verwenden Sie die Tasten und , um den Cursor zu bewegen und die Taste ,
um die gewünschte Anzahl an Wiederholungen im Hold-Bereich auszuwählen.
• Zum Bestätigen die Taste drücken. Beispiel: PCt niedrig und time hoch bedeutet mehr Präzision und mehr Zeit zur
Stabilisierung.

BEDIENUNGSANLEITUNG
IB10-S DE
84
8.6 DATENAUSGABE RS-232 |UF-6
RS232-Baudrate
b1200 Baudrate 1200
b2400 Baudrate 2400
b4800 Baudrate 4800
b9600 Baudrate 9600
b19200 Baudrate 19200
b38400 Baudrate 38400
Kommunikationsprotokoll
Standard EIA-RS232 C UART-Signal
FORMAT:
1. Serielle Ausgabe: 1200/2400/4800/9600/19200/38400 BPS
2. Daten-Bits 8 BITS
3. Paritätsbits: keine
4. Stoppbits: 1 BIT
Startbit Daten-Bits Stoppbits
0
1
2
3
4
5
6
7
RS232 abgeschaltet
Stabile Ausgabe
Kontinuierliche Ausgabe
Manuelle Ausgabe
Stabile Ausgabe
Kontinuierliche Ausgabe
Manuelle Ausgabe
Ausgabe mit manueller Akkumu
-
lation
-
Ausgabe mit automatischer
Akkumul
ation -
Ausgabe mit manueller Akkumu
-
lation
-
Ausgabe mit automatischer
Akkumulation -
Format 1.
Format 1.
Format 1.
Format 2.
Format 2.
Format 2.
Format 3. Druckformat
8
Format 3.
Druckformat
9
Format 4.
Druckformat
10
Format 4.
Druckformat

BEDIENUNGSANLEITUNG
IB10-S DE
85
ANMERKUNGEN:
Beispiel einer Ausgabe im Format 1: Beispiel einer Ausgabe im Format 2:
Beispiel einer Ausgabe im Format 3: Beispiel einer Ausgabe im Format 4:
8.7 EINSTELLUNG DER GESCHWINDIGKEIT DES KONVERTERS |UF-7
1. Drücken Sie die Taste , um auf den Parameter zuzugreifen.
2. Drücken Sie die Taste , um den gewünschten Modus auszuwählen.
•
Modus 1 : Normal
•
Modus 2: Schnell
•
Modus 3: Langsam
3. Zum Bestätigen die Taste drücken.
8.8 NULL-ANZEIGE-BEDINGUNG|UF-8
Das Display zeigt 0 bis die nächste ausgewählte Unterteilung erreicht wird. Es werden Werte ab dieser Unterteilung angezeigt.
Beispiel:
Waage mit e=2 g
Ziffernschritt hat 5 Unterteilungen
Es wird 0 angezeigt bis 2x5=10 g erreicht wird. Der erste angezeigte Wert beträgt 12 g.
Drücken Sie die Taste , um auf den Parameter zuzugreifen.
2. Drücken Sie die Taste , um auszuwählen.
3. Drücken Sie die Taste , um zu bestätigen.
ST, GS, +001. 000 kg +001. 000 kg
S/N
WT/Kg
-----------------------------
0001
1.000
0002
2.000
0002
3.000
TIQUET NO. 0001
G
3.000 kg
T
1.000 kg
N
2.000 kg
GESAMTZAHL
DER
TICKETS
0001
INSGESAMT
NETT0
2.000

BEDIENUNGSANLEITUNG
IB10-S DE
86
8.9 EINSTELLUNG DER GRAVITATION|UF-9
1. Die Taste drücken, um den aktuellen Gravitationswert anzuzeigen.
2. Um den Wert zu ändern, drücken Sie die Taste , dann verwenden Sie die Tasten und , um den Cursor zu be-
wegen und die Taste , um die gewünschte Zahl auszuwählen.
3. Zum Bestätigen die Taste drücken.
9.
KALIBRIERUNGSEINSTELLUNG
1. Drücken Sie im normalen Wägemodus die Tasten und . Auf dem Display erscheint die MeldungECF – 1.
2. Drücken Sie die Tasten oder , um die gewünschte Funktion auszuwählen: ECF-1, ECF-2 oder ECF-3
* ECF-1 NULL- + GEWICHTSKALIBRIERUNG
Drücken Sie die Taste . Auf dem Display erscheint CALZ.
Drücken Sie die Taste , um die Displayanzeige auf Null zu setzen.
Drücken Sie die Tasten und , um den Cursor zu bewegen.
Drücken Sie die Taste und geben Sie den Wert des Kalibriergewichts ein.
Stellen Sie das Kalibriergewicht auf die Wägeplatte und drücken Sie die Taste , um die Kalibrierung zu
starten sobald die Anzeige stabil ist.
* ECF-2 NULLKALIBRIERUNG
Drücken Sie die Taste . Auf dem Display erscheint CALZ.
Drücken Sie die Taste , um die Kalibrierung durchzuführen.
* ECF-3 GEWICHTSKALIBRIERUNG (SPAN)
Drücken Sie die Taste . Auf dem Display erscheint der Wert des Kalibriergewichts.
Drücken Sie die Tasten und , um den Cursor zu bewegen.
Drücken Sie die Taste , um den Wert des Kalibriergewichts zu ändern
Zum Bestätigen die Taste , drücken.
Stellen Sie das Kalibriergewicht auf die Wägeplatte und drücken Sie die Taste , um die Kalibrierung zu
starten sobald die Anzeige stabil ist.

87
BILDSCHIRM BESCHREIBUNG UND ABFOLGE
10.
TECHNISCHE PARAMETER BEDIENUNGSANLEITUNG IB10-S DE
ÄNDERN SIE DIE TECHNISCHEN PARAMETER NICHT, WENN ES NICHT UNBEDINGT NOTWENDIG IST. EINE FEHLEINSTELLUNG
DIESES ABSCHNITTS KANN ZU EINER FEHLFUNKTION DER WAAGE FÜHREN.
KALIBRIERUNG BEGINNEN UND BEENDEN
LF 1
• Halten Sie bei ausgeschalteter Anzeige die Taste gedrückt, bis auf dem Display 00911 er-
scheint und lassen Sie dann die Taste los. Wenn das Gerät Sie nach einem Passwort fragt,
müssen Sie 0020 mit den Pfeiltasten eingeben und zur Bestätigung die Eingabetaste drücken
• Drücken Sie die Taste zum Starten oder die Taste um das Menü zu verlassen, und die
Anzeige wird neu gestartet
Automatisch.
BILDSCHIRM BESCHREIBUNG UND ABFOLGE
LF 1
CAL Z
Die Kalibrierung kann mit jedem Gewicht erfolgen, wobei das Gewicht nicht kleiner als 1/3 der
Maximalkapazität sein und die Waage niemals überladen werden darf.
• Drücken Sie die Taste , um die Null-Kalibrierung zu starten (drücken Sie , um die
Kalibrierung zu beenden und zum Menü LF1 zurückzukehren)
• Verwenden Sie , und , 0 ~ 9 und danach , um das Gewicht einzu-
geben mit dem die Kalibrierung durchgeführt werden soll. (Drücken Sie , um die Kalibrierung zu
beenden und zum Menü LF1 zurückzukehren).
150.00 kg •Stellen Sie das erforderliche Gewicht auf die Waage, das auf dem Display aufblinkt.
150.00 kg •Wenn sich die Anzeige stabilisiert, drücken Sie , um zu kalibrieren. (drücken Sie ESC, um die
Kalibrierung zu beenden und zum Menü LF1 zurückzukehren).
DIE KALIBRIERUNG WIRD BEENDET UND DIE WAAGE KEHRT AUTOMATISCH ZUM WÄGEMODUS ZURÜCK.
150.00 kg
GEWICHTSKALIBRIERUNG LF 1

88
diV 01
val
heiten
BEDIENUNGSANLEITUNG IB10-S DE
KONFIGURATION LF 2
BILDSCHIRM BESCHREIBUNG UND ABFOLGE
ERSTER SCHRITT
262144
ZWEITER SCHRITT
• ANZEIGE DER INTERNEN ZÄHLUNGEN
•MÖGLICHE PARAMETERWERTE
A: Metrisches System 0:NO 1: kg 2: T 3: g
B: Amerikanisches
System 0:NO 1: lb 2:lb oz
C: Andere Einheiten 0:NO 1: TW kg 2: HK kg 3:VISS
D: PCS 0-OFF 1: ON
E: Doppelter Erfas-
sungsbereich 0-OFF 1: Mehrfachinter- 2: Mehrfachbereich
F: Kalibrierungseinheiten 1: Metrische Ein- 2: : Amerikanische Einheiten verwenden
DRITTES GEWICHT
VIERTER SCHRITT
dP 0.0
lb oz können nicht als Kalibriereinheiten ausgewählt werden.
Der nächste Schritt kann nicht ausgeführt werden, wenn während der Programmierung ein Fehler
auftritt.
• Verwenden Sie , und , 0 ~ 9 und danach , um DIE MAXIMALE KA-
PAZITÄT einzugeben, wobei die Anzahl der Dezimalstellen zu berücksichtigen ist. Beisp. 150.00kg =
geben Sie 15000 ein, wenn dann d0.00als Dezimalzahl gewählt wird.
•Verwenden Sie und , um die Position des DEZIMALPUNKTES zu ändern .
d 0.00 d 0.000 d 0.0000 0.00000
FÜNFTER SCHRITT •Verwenden Sie , um die DIVISION auszuwählen: diV 01, diV 02, diV 05, diV10, diV
20, diV 50
Nach dem Zugreifen auf die Parameter LF2 zeigt das Display die zuletzt gespeicherte Einstellung
an. Alle Schritte müssen abgeschlossen werden. Andernfalls kehrt die Anzeige zur vorigen Einstellung
zurück.
Führen Sie nach Konfiguration von LF2 die Kalibrierung des Gewichts aus.
VORGEHENSWEISE
• Drücken Sie , um zu starten, und es wird der INTERNE WERT angezeigt. Drücken Sie ,
um das Menü zu verlassen. Die Waage startet automatisch neu.
• Drücken Sie , um mit der Konfiguration fortzufahren. (drücken Sie , um die Konfigura-
tion zu beenden und zum Menü LF2 zurückzukehren).
• Verwenden Sie , und , 0 ~ 9 und drücken Sie dann , um die
WÄGUNGSEINHEITEN auszuwählen (drücken Sie um die Kalibrierung zu beenden und zum
LF2-Menü zurückzukehren).
• Verwenden Sie , und , 0 ~ 9 und dann , um das MAXIMALGE-
WICHT unter Berücksichtigung der Anzahl der Dezimalstellen auszuwählen.
• Verwenden Sie , und dann , um den Dezimalpunkt zu bewegen. (drücken Sie
, um die Konfiguration zu beenden und zum Menü LF2 zurückzukehren).
000000kg
LF 2
262144
100001
000000kg
d 0,0kg
1 0 0 0 0 1
A B C D E F

BEDIENUNGSANLEITUNG
IB10-S DE
• Verwenden Sie und dann , um die Stufe zu ändern (drücken Sie , um die
Konfiguration zu beenden und zum Menü LF2 zurückzukehren).
• Verwenden Sie , und , um mit anderen Konfigurationen fortzufahren oder
drücken Sie , um das Menü zu verlassen. Die Waage startet automatisch neu.
LINEARE KALIBRIERUNG
LF 3
Bis zu 6 Kalibrierungsschritte W0 ~W6
Stellen Sie sicher, dass die Wägeplatte leer ist, bevor Sie mit der Kalibrierung beginnen.
Drücken Sie für den ersten Kalibrierpunkt.
Die vorherigen Kalibrierpunkte werden gelöscht und das Display zeigt CLEAR an.
Drücken Sie , um mit dem nächsten Kalibrierpunkt fortzufahren.
Drücken Sie , um zum vorherigen Kalibrierpunkt zurückzukehren.
Drücken Sie zum Speichern.
Drücken Sie , um die Kalibrierung zu beenden und zum Menü LF3 zurückzukehren.
BILDSCHIRM BESCHREIBUNG UND ABFOLGE
LF3
• Drücken Sie , um zu beginnen oder , um das Menü zu verlassen. Die Waage startet
automatisch neu.
W0 •Drücken Sie , um den Nullpunkt zu kalibrieren.
(Drücken Sie , um die Kalibrierung zu beenden und zum Menü LF3 zurückzukehren).
W1 • Legen Sie 1/3 des Maximalgewichts auf die Wägeplatte und drücken Sie, um 2/3 der
Kapazität zu kalibrieren. (Drücken Sie , um die Kalibrierung zu beenden und zum Menü LF3
zurückzukehren).
W2 •Legen Sie 2/3 des Maximalgewichts auf die Wägeplatte und drücken Sie, um 1/3 der Kapazi-
tät zu kalibrieren. (Drücken Sie , um die Kalibrierung zu beenden und zum Menü LF3 zurück-
zukehren).
W3 •Legen Sie das Maximalgewicht auf die Wägeplatte und drücken Sie , um die volle Kapazität zu
kalibrieren. (drücken Sie , um die Kalibrierung zu beenden und zum Menü LF3 zurückzukehren).
W4
• Drücken Sie , um die lineare Kalibrierung abzuschließen. (drücken Sie , um die Kali-
brierung zu beenden und zum Menü LF3 zurückzukehren).
LF3 • Verwenden Sie , und dann , um mit anderen Einstellungen fortzufahren oder
drücken Sie , um das Menü zu verlassen. Die Waage startet automatisch neu. 89
div 01
LF2

BEDIENUNGSANLEITUNG
IB10-S DE
90
GESCHWINDIGKEIT DES KONVERTERS AD LF 4
SPEED 1 Standardgeschwindigkeit 15 Hz.
SPEED 2 hohe Geschwindigkeit 30 Hz.
SPEED 3 niedrige Geschwindigkeit 7,5 Hz
*Diese Funktion ist gesperrt, wenn UF-5 sich im HOLD-Modus 1 befindet.
*Die Werkseinstellung ist 1
BILDSCHIRM BESCHREIBUNG UND ABFOLGE
•Drücken Sie , um zu beginnen oder , um das Menü zu verlassen. Die Waage startet
automatisch neu.
• Verwenden Sie und dann , um die Geschwindigkeit des Stromrichters AD auszu-
wählen (drücken Sie , um die Konfiguration zu beenden und zum Menü LF4 zurückzukehren)
• Verwenden Sie , und dann , um mit anderen Einstellungen fortzufahren oder
drücken Sie , um das Menü zu verlassen. Die Waage startet automatisch neu.
BILDSCHIRM BESCHREIBUNG UND ABFOLGE
ZP 0 OFF
ZP 1 Eine Division befindet sich nicht auf Null
ZP 2 Zwei Divisionen befinden sich nicht auf Null
ZP 3 Drei Divisionen befinden sich nicht auf Null
ZP 4 Vier Divisionen befindet sich nicht auf Null
ZP 5 Fünf Divisionen befinden sich nicht auf Null
*Diese Funktion ist gesperrt, wenn UF-5 sich im HOLD-Modus 1 befindet
*Die Werkseinstellung ist ZP 0
BILDSCHIRM BESCHREIBUNG UND ABFOLGE
• Drücken Sie und danach , um das Menü zu verlassen. Die Waage startet automatisch
neu.
• Verwenden Sie und dann , um die Divisionen auszuwählen, die sich nicht auf Null
befinden. (drücken Sie ESC, um die Konfiguration zu beenden und zum Menü LF4 zurückzukehren)
• Verwenden Sie , und dann , um mit anderen Einstellungen fortzufahren oder
drücken Sie , um das Menü zu verlassen. Die Waage startet automatisch neu.
TEILWERT
LF 5
LF4
LF 4
LF 5
LF 5
ZP 0
LF 5
SPEED 1

BEDIENUNGSANLEITUNG
IB10-S DE
91
*Geben Sie die Gravitation Ihres Gebietes ein bevor Sie die erste Kalibrierung durchführen.
*Geben Sie die Gravitation des Bestimmungsortes ein nachdem Sie die erste Kalibrierung durchgeführt haben.
*Der Gravitationswert wird abgelehnt, wenn er größer als 9.83217 (Polgravitation) oder kleiner als 9.78031 ist (Gravitation des
Äquators).
Werkseinstellung: 9.8035
BILDSCHIRM BESCHREIBUNG UND ABFOLGE
• Drücken Sie , um fortzufahren oder , um das Menü zu verlassen. Die Waage startet
automatisch neu.
• Auf dem Display erscheint für eine Sekunde die Zahl der Vorkalibrierung.
• Drücken Sie , um fortzufahren.
• Verwenden Sie , und , 0 ~ 9 und dann , um den Gravitationswert
einzugeben. (drücken Sie ESC, um die Konfiguration zu beenden und zum Menü LF 7 zurückzukehren)
START-NULL LF 8
SEtZ Y setzt den Nullpunkt immer zurück wenn die Waage neu startet.
SEtZ n Zurücksetzen des Nullpunktes Off.
BILDSCHIRM BESCHREIBUNG UND ABFOLGE
• Drücken Sie , um zu beginnen oder , um das Menü zu verlassen. Die Waage startet
automatisch neu.
SetZ Y • Verwenden Sie und dann , um den Modus Start-Null auszuwählen. (drücken Sie
, um die Konfiguration zu beenden und zum Menü LF8 zurückzukehren)
LF 8 •Verwenden Sie , und dann , um mit anderen Einstellungen fortzufahren oder
drücken Sie , um das Menü zu verlassen. Die Waage startet automatisch neu.
GRAVITATION
LF 7
nonE Nicht genehmigte Version
ÄNDERN SIE DIESEN PARAMETER UNTER KEINEN UMSTÄNDEN, ER MUSS IMMER AUF
nonE GESETZT WERDEN.
!
Durch die Änderung dieses Parameters werden verschiedene Funktionen blockiert.
BESCHREIBUNG UND ABFOLGE
BILDSCHIRM
ZULASSUNGSGENEHMIGUNG
LF 6
LF 6
LF 7
-00-
9.8035
LF 8
9.8035

BEDIENUNGSANLEITUNG
IB10-S DE
92
11.
GARANTIE
Auf diese Waage erhalten Sie ab Lieferdatum 1 Jahr Garantie auf alle Herstellungs- und Materialfehler. In diesem Zeitraum übernimmt GIROPÈS
die Reparaturkosten für die Waage.
Schäden durch unsachgemäße Verwendung oder Überlastung sind von der Garantie ausgenommen.
Die Versandkosten für die Reparatur der Waage fallen nicht unter die Garantieleistungen.

IB10-S
93

94
IB10-S

IB10-S
95

marca propiedad de | trade mark propiety of | est une marque de |
marchio di proprietà di| marca propriedade de | Die Marke ist Eigentum von
Pol. Empordà Internacional - C. Molló, 3
17469 VILAMALLA - (Girona) SPAIN T.
(34) 972 527 212 - F. (34) 972 527 211
-
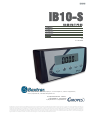 1
1
-
 2
2
-
 3
3
-
 4
4
-
 5
5
-
 6
6
-
 7
7
-
 8
8
-
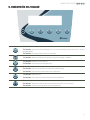 9
9
-
 10
10
-
 11
11
-
 12
12
-
 13
13
-
 14
14
-
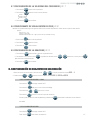 15
15
-
 16
16
-
 17
17
-
 18
18
-
 19
19
-
 20
20
-
 21
21
-
 22
22
-
 23
23
-
 24
24
-
 25
25
-
 26
26
-
 27
27
-
 28
28
-
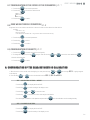 29
29
-
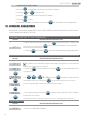 30
30
-
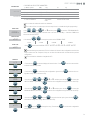 31
31
-
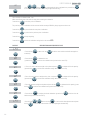 32
32
-
 33
33
-
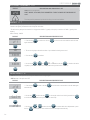 34
34
-
 35
35
-
 36
36
-
 37
37
-
 38
38
-
 39
39
-
 40
40
-
 41
41
-
 42
42
-
 43
43
-
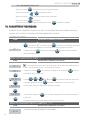 44
44
-
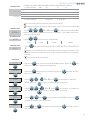 45
45
-
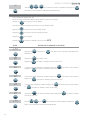 46
46
-
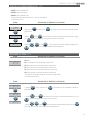 47
47
-
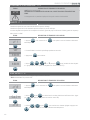 48
48
-
 49
49
-
 50
50
-
 51
51
-
 52
52
-
 53
53
-
 54
54
-
 55
55
-
 56
56
-
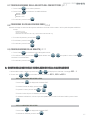 57
57
-
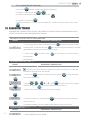 58
58
-
 59
59
-
 60
60
-
 61
61
-
 62
62
-
 63
63
-
 64
64
-
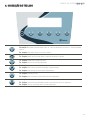 65
65
-
 66
66
-
 67
67
-
 68
68
-
 69
69
-
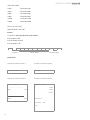 70
70
-
 71
71
-
 72
72
-
 73
73
-
 74
74
-
 75
75
-
 76
76
-
 77
77
-
 78
78
-
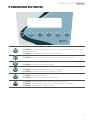 79
79
-
 80
80
-
 81
81
-
 82
82
-
 83
83
-
 84
84
-
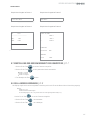 85
85
-
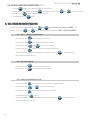 86
86
-
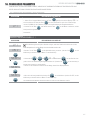 87
87
-
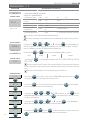 88
88
-
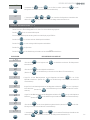 89
89
-
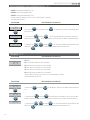 90
90
-
 91
91
-
 92
92
-
 93
93
-
 94
94
-
 95
95
-
 96
96


Baxtran AIS Manual de usuario
- Tipo
- Manual de usuario
en otros idiomas
- français: Baxtran AIS Manuel utilisateur
- italiano: Baxtran AIS Manuale utente
- English: Baxtran AIS User manual
- Deutsch: Baxtran AIS Benutzerhandbuch
- português: Baxtran AIS Manual do usuário