DRENCH
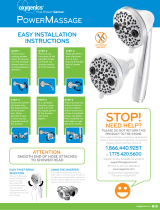
PASO 1
Quite su cabezal
de ducha existente.
Para la extracción,
gire el cabezal de
ducha existente en
el sentido contrario
a las agujas del
reloj.
PASO 2
Quite cualquier
remanente de vieja
cinta de plomería
y enjuague el
caño de la ducha
durante 5 a 10
segundos.
PASO 3
Envuelva con cinta
de plomero en
el sentido de las
agujas del reloj
con 3 o 4 vuelvas
alrededor del brazo
de ducha.
PASO 4
Enrosque el
desviador en el
sentido de las
agujas del reloj a la
porción encintada
del brazo de la
ducha. Envuelva los
extremos roscados
del desviador con
3 vueltas de cinta
de plomero.
PASO 5
En el sentido de
las agujas del reloj,
fije la ducha tipo
lluvia a la porción
del derivador con
cinta de plomería
y ajustelo por
mano. Quita las
juntas conectados
a la manguera y
ponelos identro de
los dos extremos
de la manguera.
PASO 6
Fije el de la
manguera al
desviador y ajústelo
a mano. Fije el a
manguera la base
de la ducha de
mano y ajústelo a
mano. Ponga la
unidad de mano
en el sujetador del
lado derecho del
desviador.
INSTRUCCIONES PARA
LA INSTALACIÓN FÁCIL
Para el uso con válvulas de
compensación automáticas
nominal de 1.35 GPM
(5.11 L/min) o menos.
SELECCIÓN DE LLUVIA
DE GIRO FÁCIL
Disfrutar de varios
patrones de lluvia
durante su ducha nunca
fue más fácil. Con el
diseño de giro fácil de la
Drench, sólo debe rotar el
seleccionador fácil de lluvia
para un cambio rápido
de lluvia.
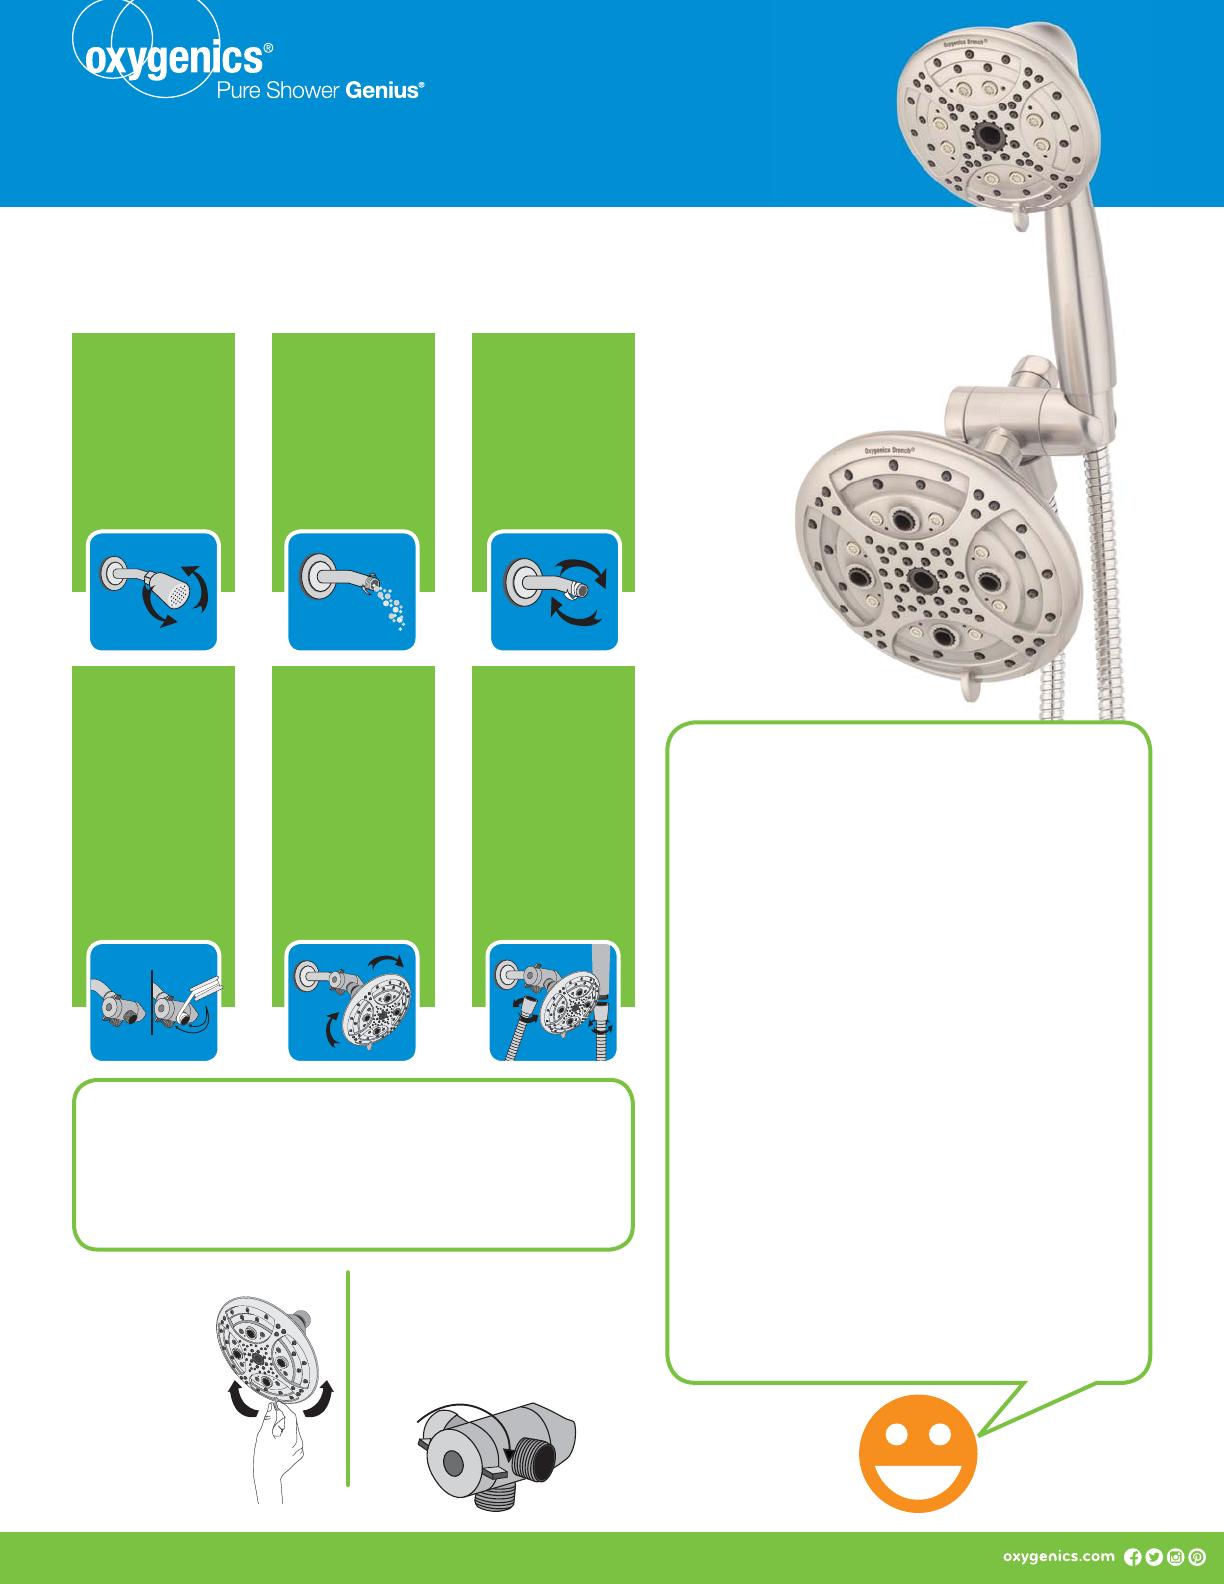
CÓMO USAR EL DESVIADOR
Para cambiar la lluvia de la ducha: Ponga su
dedo índice en una palanca y el pulgar en la
otra y gírelas en el sentido de las agujas del
reloj o en el sentido contrario a las agujas del
reloj (dependiendo de la posición actual) hasta
que sienta que hace un clic en su lugar.
ATENCIÓN:
LAS JUNTAS ESTAN PRE-INSTALADO
EN EL EXTREMO DE LA MANGUERA
Las juntas tiene que insertarse a los dos extremos de la
manguera para funcionar correctamente.
¡
DETÉNGASE!
¿NECESITAS AYUDA?
NO DEVUELVA ESTE PRODUCTO
A LA TIENDA.
Si necesita asistencia de instalación, partes de repuesto o
si tiene preguntas sobre su garantía, contacte a atención
al cliente al
TELÉFONO:
1-866-440-9257
o al
775-420-5600
CHAT EN VIVO:
www.oxygenics.com
CORREO ELECTRÓNICO:
support@oxygenics.com
EN LÍNEA:
www.oxygenics.com/claims
Horario de atención:
De lunes a jueves de 7:00 am a 5:00 pm PST
Viernes de 7:00 am a 4:30 pm PST *
* Cerrado en todos los días festivos observados
a nivel nacional