LG 47LM8650 El manual del propietario

Categoría
Televisores de plasma
Tipo
El manual del propietario

Este manual también es adecuado para

www.lg.comP/NO : MFL67468153 (1207-REV03)
Please read this manual carefully before operating your set
and retain it for future reference.
OWNER’S MANUAL
LED LCD TV
47LM8600
55LM8600
47LM8650
55LM8650
Do not use this apparatus near water.
Short-circuit
Breaker
Power Supply
Clean only with a dry cloth.
Short-circuit
Breaker
Power Supply
Do not block any ventilation openings. Install
in accordance with the manufacturer’s
instructions.
Short-circuit
Breaker
Power Supply
Do not install near any heat sources such
as radiators, heat registers, stoves, or other
apparatus (including amplifiers) that produce
heat.
Short-circuit
Breaker
Power Supply
Do not defeat the safety purpose of the
polarized or grounding-type plug. A polarized
plug has two blades with one wider than the
other. A grounding type plug has two blades
and a third grounding prong. The wide blade
or the third prong are provided for your safety.
If the provided plug does not fit into your
outlet, consult an electrician for replacement
of the obsolete outlet (Can differ by country).
Short-circuit
Breaker
Power Supply
IMPORTANT SAFETY INSTRUCTIONS
Always comply with the following precautions to avoid dangerous situations and ensure peak performance
of your product.
Read these instructions.
Keep these instructions.
Heed all warnings.
Follow all instructions.
Short-circuit
Breaker
Power Supply
WARNING/CAUTION
RISK OF ELECTRIC SHOCK
DO NOT OPEN
TO REDUCE THE RISK OF ELECTRIC SHOCK
DO NOT REMOVE COVER (OR BACK). NO
USER SERVICEABLE PARTS INSIDE. REFER
TO QUALIFIED SERVICE PERSONNEL.
WARNING/CAUTION
RISK OF ELECTRIC SHOCK
DO NOT OPEN
The lightning flash with arrowhead
symbol, within an equilateral triangle,
is intended to alert the user to the
presence of uninsulated “dangerous voltage”
within the product’s enclosure that may be of
sufficient magnitude to constitute a risk of
electric shock to persons.
WARNING/CAUTION
RISK OF ELECTRIC SHOCK
DO NOT OPEN
The exclamation point within an
equilateral triangle is intended to alert
the user to the presence of important
operating and maintenance (servicing)
instructions in the literature accompanying
the appliance.
WARNING/CAUTION
- TO REDUCE THE RISK OF FIRE AND
ELECTRIC SHOCK, DO NOT EXPOSE THIS
PRODUCT TO RAIN OR MOISTURE.
2
IMPORTANT SAFETY INSTRUCTIONS
ENGLISH
ENGLISH
3
IMPORTANT SAFETY INSTRUCTIONS
Protect the power cord from being walked on
or pinched particularly at plugs, convenience
receptacles, and the point where they exit
from the apparatus.
Short-circuit
Breaker
Power Supply
Only use attachments/accessories specified
by the manufacturer.
Short-circuit
Breaker
Power Supply
Use only with a cart, stand, tripod, bracket,
or table specified by the manufacturer, or
sold with the apparatus. When a cart is used,
use caution when moving the cart/apparatus
combination to avoid injury from tip-over.
Short-circuit
Breaker
Power Supply
Unplug this apparatus during lightning
storms or when unused for long periods of
time.
Short-circuit
Breaker
Power Supply
Refer all servicing to qualified service
personnel. Servicing is required when
the apparatus has been damaged in any
way, such as power-supply cord or plug is
damaged, liquid has been spilled or objects
have fallen into the apparatus, the apparatus
has been exposed to rain or moisture, does
not operate normally, or has been dropped.
Short-circuit
Breaker
Power Supply
Do not stick metal objects or any other
conductive material into the power cord. Do
not touch the end of the power cord while it
is plugged in.
Keep the packing anti-moisture material or
vinyl packing out of the reach of children.
Anti-moisture material is harmful if
swallowed. If swallowed by mistake, force
the patient to vomit and visit the nearest
hospital. Additionally, vinyl packing can
cause suffocation. Keep it out of the reach of
children.
CAUTION concerning the Power Cord
(Can differ by country):
It is recommended that appliances be
placed upon a dedicated circuit; that is, a
single outlet circuit which powers only that
appliance and has no additional outlets or
branch circuits. Check the specification page
of this owner’s manual to be certain. Do not
connect too many appliances to the same
AC power outlet as this could result in fire or
electric shock. Do not overload wall outlets.
Overloaded wall outlets, loose or damaged
wall outlets, extension cords, frayed power
cords, or damaged or cracked wire insulation
are dangerous. Any of these conditions could
result in electric shock or fire. Periodically
examine the cord of your appliance, and
if its appearance indicates damage or
deterioration, unplug it, discontinue use of
the appliance, and have the cord replaced
with an exact replacement part by an
authorized service. Protect the power cord
from physical or mechanical abuse, such as
being twisted, kinked, pinched, closed in a
door, or walked upon. Pay particular attention
to plugs, wall outlets, and the point where
the cord exits the appliance. Do not move
the TV with the power cord plugged in. Do
not use a damaged or loose power cord. Be
sure do grasp the plug when unplugging the
power cord. Do not pull on the power cord
to unplug the TV.
Short-circuit
Breaker
Power Supply
ENGLISH
4
IMPORTANT SAFETY INSTRUCTIONS
Warning
- To reduce the risk of fire or
electrical shock, do not expose this product
to rain, moisture or other liquids. Do not
touch the TV with wet hands. Do not install
this product near flammable objects such
as gasoline or candles, or expose the TV to
direct air conditioning.
Short-circuit
Breaker
Power Supply
Do not expose to dripping or splashing and
do not place objects filled with liquids, such
as vases, cups, etc. on or over the apparatus
(e.g. on shelves above the unit).
Short-circuit
Breaker
Power Supply
Grounding
(Except for devices which are not grounded.)
Ensure that you connect the earth ground
wire to prevent possible electric shock
(i.e. a TV with a three-prong grounded AC
plug must be connected to a three-prong
grounded AC outlet). If grounding methods
are not possible, have a qualified electrician
install a separate circuit breaker. Do not try to
ground the unit by connecting it to telephone
wires, lightening rods, or gas pipes.
Short-circuit
Breaker
Power Supply
DISCONNECTING DEVICE FROM THE MAIN
POWER
Mains plug is the disconnecting device. The
plug must remain readily operable.
As long as this unit is connected to the AC
wall outlet, it is not disconnected from the
AC power source even if the unit is turned
off.
Do not attempt to modify this product in any
way without written authorization from LG
Electronics. Unauthorized modification could
void the user’s authority to operate this
product.
ANTENNAS Outdoor antenna grounding
(Can differ by country):
If an outdoor antenna is installed, follow
the precautions below. An outdoor antenna
system should not be located in the vicinity
of overhead power lines or other electric light
or power circuits, or where it can come in
contact with such power lines or circuits as
death or serious injury can occur. Be sure the
antenna system is grounded so as to provide
some protection against voltage surges
and built-up static charges. Section 810 of
the National Electrical Code (NEC) in the
U.S.A. provides information with respect to
proper grounding of the mast and supporting
structure, grounding of the lead-in wire to
an antenna discharge unit, size of grounding
conductors, location of antenna discharge
unit, connection to grounding electrodes and
requirements for the grounding electrode.
Antenna grounding according to the National
Electrical Code, ANSI/NFPA 70
Short-circuit
Breaker
Power Supply
NEC: National Electrical Code
Ground Clamp
Antenna Lead in Wire
Antenna Discharge Unit
(NEC Section 810-20)
Grounding Conductor
(NEC Section 810-21)
Power Service Grounding
Electrode System
(NEC Art 250, Part H)
Electric Service
Equipment
Ground Clamp
ENGLISH
5
IMPORTANT SAFETY INSTRUCTIONS
Cleaning
When cleaning, unplug the power cord and
wipe gently with a soft cloth to prevent
scratching. Do not spray water or other
liquids directly on the TV as electric shock
may occur. Do not clean with chemicals
such as alcohol, thinners or benzine.
Moving
Make sure the product is turned off,
unplugged and all cables have been
removed. It may take 2 or more people to
carry larger TVs. Do not press or put stress
on the front panel of the TV.
Ventilation
Install your TV where there is proper
ventilation. Do not install in a confined
space such as a bookcase. Do not cover the
product with cloth or other materials while
plugged. Do not install in excessively dusty
places.
If you smell smoke or other odors coming
from the TV, unplug the power cord and
contact an authorized service center.
Do not press strongly upon the panel with a
hand or a sharp object such as a nail, pencil
or pen, or make a scratch on it.
Keep the product away from direct sunlight.
Short-circuit
Breaker
Power Supply
Never touch this apparatus or antenna during
a thunder or lightning storm.
When mounting a TV on the wall, make sure
not to install the TV by hanging the power
and signal cables on the back of the TV.
Do not allow an impact shock or any objects
to fall into the product, and do not drop
anything onto the screen.
Dot Defect
The Plasma or LCD panel is a high
technology product with resolution of two
million to six million pixels. In a very few
cases, you could see fine dots on the screen
while you’re viewing the TV. Those dots
are deactivated pixels and do not affect the
performance and reliability of the TV.
Generated Sound
“Cracking” noise: A cracking noise that
occurs when watching or turning off the TV
is generated by plastic thermal contraction
due to temperature and humidity. This noise
is common for products where thermal
deformation is required.
Electrical circuit humming/panel buzzing: A
low level noise is generated from a high-
speed switching circuit, which supplies a
large amount of current to operate a product.
It varies depending on the product.
This generated sound does not affect the
performance and reliability of the product.
Take care not to touch the ventilation
openings. When watching the TV for a long
period, the ventilation openings may become
hot. This does not affect the performance of
the product or cause defects in the product.
If the TV feels cold to the touch, there may
be a small “flicker” when it is turned on. This
is normal, there is nothing wrong with TV.
Some minute dot defects may be visible on
the screen, appearing as tiny red, green, or
blue spots. However, they have no adverse
effect on the TV’s performance. Avoid
touching the LCD screen or holding your
finger(s) against it for long periods of time.
Doing so may produce some temporary
distortion effects on the screen.
ENGLISH
6
IMPORTANT SAFETY INSTRUCTIONS
DISPOSAL (Hg lamp only used in LCD TVs)
The fluorescent lamp used in this product contains
a small amount of mercury. Do not dispose of this
product with general household waste. Disposal of
this product must be carried out in accordance to
the regulations of your local authority.
Preventing “Image burn” or “Burn-in” on your TV screen
If a fixed image displays on the TV screen
for a long period of time, it will be imprinted
and become a permanent disfigurement on
the screen. This is “image burn” or “burn-in”
and not covered by the warranty.
If the aspect ratio of the TV is set to 4:3 for
a long period of time, image burn may occur
on the letterboxed area of the screen.
Avoid displaying a fixed image on the TV
screen for a long period of time (2 or more
hours for LCD, 1 or more hours for the
Plasma TV) to prevent image burn.
For USA and Canada
NOTE TO CABLE/TV INSTALLER
This reminder is provided to call the CATV system
installer’s attention to Article 820-40 of the
National Electric Code (U.S.A.). The code provides
guidelines for proper grounding and, in particular,
specifies that the cable ground shall be connected
to the grounding system of the building, as close
to the point of the cable entry as practical.
ENGLISH
7
IMPORTANT SAFETY INSTRUCTIONS
Viewing 3D Imaging
WARNING
Viewing Environment
Viewing Time
- When watching 3D contents, take 5 - 15 minute breaks every hour. Viewing 3D contents for a long
period of time may cause headache, dizziness, fatigue or eye strain.
Those that have a photosensitive seizure or chronic illness
Some users may experience a seizure or other abnormal symptoms when they are exposed to a
flashing light or particular pattern from 3D contents.
Do not watch 3D videos if you feel nausea, are pregnant and/ or have a chronic illness such as
epilepsy, cardiac disorder, or blood pressure disease, etc.
3D Contents are not recommended to those who suffer from stereo blindness or stereo anomaly.
Double images or discomfort in viewing may be experienced.
If you have strabismus (cross-eyed), amblyopia (weak eyesight) or astigmatism, you may have trouble
sensing depth and easily feel fatigue due to double images. It is advised to take frequent breaks than
the average adult.
If your eyesight varies between your right and left eye, revise your eyesight prior to watching 3D
contents.
Symptoms which require discontinuation or refraining from watching 3D contents
Do not watch 3D contents when you feel fatigue from lack of sleep, overwork or drinking.
When these symptoms are experienced, stop using/watching 3D contents and get enough rest until
the symptom subsides.
- Consult your doctor when the symptoms persist. Symptoms may include headache, eyeball pain,
dizziness, nausea, palpitation, blurriness, discomfort, double image, visual inconvenience or fatigue.
ENGLISH
8
IMPORTANT SAFETY INSTRUCTIONS
CAUTION
Viewing Environment
Viewing Distance
- Maintain a distance of at least twice the screen diagonal length when watching 3D contents. If you
feel discomfort in viewing 3D contents, move further away from the TV.
Viewing Age
Infants / Children
- Usage/ Viewing 3D contents for children under the age of 5 are prohibited.
- Children under the age of 10 may overreact and become overly excited because their vision is in
development (for example: trying to touch the screen or trying to jump into it. Special monitoring and
extra attention is required for children watching 3D contents.
- Children have greater binocular disparity of 3D presentations than adults because the distance
between the eyes is shorter than one of adults. Therefore they will perceive more stereoscopic depth
compared to adults for the same 3D image.
Teenagers
- Teenagers under the age of 19 may be stimulated to light coming from 3D videos. Advise them not to
watch 3D videos for a long time when they are tired.
Elderly
- The elderly may perceive less of a 3D effect than the youth. Do not sit closer to the TV than the
recommended distance.
Cautions when using the 3D glasses
Make sure to use LG 3D glasses. Otherwise, you may not be able to view 3D videos properly.
Do not use 3D glasses instead of your normal glasses, sunglasses or protective goggles.
Using modified 3D glasses may cause eye strain or image distortion.
Do not keep your 3D glasses in extremely high or low temperatures. It will cause deformation.
The 3D glasses are fragile and are easy to be scratched. Always use a soft, clean piece of cloth when
wiping the lenses. Do not scratch the lenses of the 3D glasses with sharp objects or clean/wipe them
with chemicals.
ENGLISH
9
LICENSES / OPEN SOURCE SOFTWARE NOTICE
LICENSES
Supported licenses may differ by model. For more information about licenses, visit www.lg.com.
Manufactured under license from Dolby Laboratories. “Dolby” and the double-D
symbol are trademarks of Dolby Laboratories.
HDMI, the HDMI logo and High-Definition Multimedia Interface are trademarks or
registered trademarks of HDMI Licensing LLC.
ABOUT DIVX VIDEO: DivX
®
is a digital video format created by DivX, LLC, a
subsidiary of Rovi Corporation. This is an official DivX Certified
®
device that plays
DivX video. Visit divx.com for more information and software tools to convert your
files into DivX video.
ABOUT DIVX VIDEO-ON-DEMAND: This DivX Certified
®
device must be registered
in order to play purchased DivX Video-on-Demand (VOD) movies. To obtain your
registration code, locate the DivX VOD section in your device setup menu. Go to
vod.divx.com for more information on how to complete your registration.
“DivX Certified
®
to play DivX
®
video up to HD 1080p, including premium content.”
“DivX
®
, DivX Certified
®
and associated logos are trademarks of Rovi Corporation
or its subsidiaries and are used under license.”
“Covered by one or more of the following U.S. patents:
7,295,673; 7,460,668; 7,515,710; 7,519,274”
Manufactured under license under U.S. Patent Nos: 5,956,674; 5,974,380;
6,487,535 & other U.S. and worldwide patents issued & pending. DTS, the Symbol
& DTS and the Symbol together are registered trademarks & DTS 2.0+Digital
Out is a trademark of DTS, Inc. Product includes software. © DTS, Inc. All Rights
Reserved.
OPEN SOURCE SOFTWARE NOTICE
To obtain the source code under GPL, LGPL, MPL and other open source licenses, that is contained in this
product, please visit http://opensource.lge.com.
In addition to the source code, all referred license terms, warranty disclaimers and copyright notices are
available for download.
LG Electronics will also provide open source code to you on CD-ROM for a charge covering the cost of
performing such distribution (such as the cost of media, shipping and handling) upon email request to
[email protected]. This offer is valid for three (3) years from the date on which you purchased the
product.
ENGLISH
10
TABLE OF CONTENTS
TABLE OF CONTENTS
Image shown may differ from your TV.
Your TV’s OSD (On Screen Display) may
differ slightly from that shown in this
manual.
The available menus and options may differ
from the input source or product model that
you are using.
New features may be added to this TV in
the future.
NOTE
2 IMPORTANT SAFETY INSTRUCTIONS
7 Viewing 3D Imaging
9 LICENSES
9 OPEN SOURCE SOFTWARE NOTICE
10 TABLE OF CONTENTS
11 INSTALLATION PROCEDURE
11 ASSEMBLING AND PREPARING
11 Unpacking
13 Optional Extras
14 Parts and buttons
15 Lifting and moving the TV
16 Setting up the TV
16 - Attaching the stand
18 - Mounting on a table
19 - Tidying cables
20 - Mounting on a wall
21 MAKING CONNECTIONS
21 Connecting to an antenna or cable
22 Connecting to a HD receiver, DVD, or VCR
player
22 - HDMI Connection
23 - DVI to HDMI Connection
24 - Connecting to a mobile phone
25 - Component Connection
26 - Composite Connection
27 Connecting to a PC
27 - HDMI Connection, DVI to HDMI
Connection or RGB Connection
29 Connecting to an Audio System
29 - Digital Optical Audio Connection
30 Connecting to a USB
31 REMOTE CONTROL
31 Magic Remote Control Functions
32 - Registering Magic Remote Control
32 - How to use Magic Remote Control
32 - Precautions to Take when Using the
Magic Remote Control
33 WATCHING TV
33 Turning the TV on for the first time
34 USING THE USER GUIDE
35 SPECIFICATIONS
39 MAINTENANCE
39 Cleaning Your TV
39 - Screen, frame, cabinet and stand
39 - Power cord
39 TROUBLESHOOTING
ENGLISH
11
ASSEMBLING AND PREPARING
INSTALLATION PROCEDURE
1
Open the package and make sure all the accessories are included.
2
Attach the stand to the TV set.
3
Connect an external device to the TV set.
4
Make sure the network connection is available.
You can use the TV network functions only when the network connection is made.
ASSEMBLING AND PREPARING
Unpacking
Check your product box for the following items. If there are any missing accessories, contact the local
dealer where you purchased your product. The illustrations in this manual may differ from the actual
product and item.
Do not use any unapproved items to ensure the safety and product life span.
Any damages or injuries by using unapproved items are not covered by the warranty.
In case of some model, the thin film on screen is a part of TV, So don’t take it off.
CAUTION
The items supplied with your product may vary depending on the model.
Product specifications or contents of this manual may be changed without prior notice due to
upgrade of product functions.
For an optimal connection, HDMI cables and USB devices should have bezels less than 10 mm (0.39
inches) thick and 18 mm (0.7 inches) width.
Use an extension cable that supports USB 2.0 if the USB cable or USB memory stick does not fit
into your TV’s USB port.
B
A
A
B
*A
10 mm (0.39 inches)
*B
18 mm (0.7 inches)
NOTE
ENGLISH
12
ASSEMBLING AND PREPARING
Magic remote control,
Batteries (AA)
(See p.31)
Owner’s manual Cinema 3D glasses
The number of 3D glasses
may differ depending on the
model or country.
Stand body
(See p.16)
Stand base
(See p.16)
Stand screws
8 EA, M4 x 20
(See p.16)
Cable holder
(See p.19)
Component video cable
(See p.25)
Composite video cable
(See p.25, 26)
Polishing cloth
(Depending on model)
Use this to remove dust
from the cabinet.
ENGLISH
13
ASSEMBLING AND PREPARING
Optional Extras
Optional extras can be changed or modified for quality improvement without any notification.
Contact your dealer for buying these items.
These devices only work with certain models.
AN-MR300
Magic remote control
AG-F2**, AG-F3**
Cinema 3D glasses
The model name or design may be changed manufacturer’s circumstances or policies.
ENGLISH
14
ASSEMBLING AND PREPARING
Parts and buttons
Button Description
/ (^ / v) Scrolls through the saved channels.
/ (+ / -)
Adjusts the volume level.
(OK
)
Selects the highlighted menu option or confirms an input.
(SETTINGS)
Accesses the main menus, or saves your input and exits the menus.
(INPUT)
Changes the input source.
(
/ I)
Turns the power on or off.
1 Intelligent sensor - Adjusts the image quality and brightness based on the surrounding environment.
Speakers
Screen
Buttons
LG Logo Light
Power indicator
Remote control and
intelligent
1
sensors
ENGLISH
15
ASSEMBLING AND PREPARING
Lifting and moving the TV
When moving or lifting the TV, read the following
to prevent the TV from being scratched or
damaged and for safe transportation regardless of
its type and size.
Avoid touching the screen at all times, as
this may result in damage to the screen.
CAUTION
It is recommended to move the TV in the
box or packing material that the TV originally
came in.
Before moving or lifting the TV, disconnect
the power cord and all cables.
When holding the TV, the screen should face
away from you to avoid damage.
Hold the top and bottom of the TV frame
firmly. Make sure not to hold the transparent
part, speaker, or speaker grill area.
When transporting a large TV, there should
be at least 2 people.
When transporting the TV by hand, hold the
TV as shown in the following illustration.
When transporting the TV, do not expose the
TV to jolts or excessive vibration.
When transporting the TV, keep the TV
upright, never turn the TV on its side or tilt
towards the left or right.
Whenever you handle TV, Protection pad
should be covered with side of TV.
Protection pad
ENGLISH
16
ASSEMBLING AND PREPARING
When attaching the stand to the TV
set, place the screen facing down on a
cushioned table or flat surface to protect
the screen from scratches.
CAUTION
2
Setting up the TV
Put your TV on a pedestal stand and mount the TV on a table or wall.
Attaching the stand
If you are not mounting the TV to a wall, use the following instructions to attach the stand.
1
Front
Top View
Stand Body
Stand Base
M4 x 20
4 EA
3
ENGLISH
17
ASSEMBLING AND PREPARING
Remove the stand before installing the TV
on a wall mount by performing the stand
attachment in reverse.
NOTE
Remove protection pads after installing
TV.
CAUTION
5
Make sure that the screws are fastened
completely. (If they are not fastened
securely enough, the TV may tilt forward
after being installed.)
Do not fasten the screws with too much
force; otherwise they may be worn out
and get loosened.
CAUTION
4
M4 x 20
4 EA
Protection pad
ENGLISH
18
ASSEMBLING AND PREPARING
Mounting on a table
1
Lift and tilt the TV into its upright position on a
table.
- Leave a 10 cm (4 inch) (minimum) space from
the wall for proper ventilation.
10 cm
10 cm
10 cm
10 cm
(4
in
ch
es)
2
Connect the power cord to a wall outlet.
Do not place the TV near or on sources
of heat, as this may result in fire or other
damage.
CAUTION
Adjusting the angle of the TV to suit view
Swivel 10 degrees to the left or right and adjust
the angle of the TV to suit your view.
10˚10˚
When adjusting the angle of the TV, watch
out for your fingers.
- Personal injury may occur if hands or
fingers are pinched. If the product is tilted
too much, it may fall, causing damage or
injury.
Rear
Front
CAUTION
ENGLISH
19
ASSEMBLING AND PREPARING
Securing the TV to a wall (optional)
1
Insert and tighten the eye-bolts, or TV brackets
and bolts on the back of the TV.
- If there are bolts inserted at the eye-bolts
position, remove the bolts first.
2
Mount the wall brackets with the bolts to the
wall.
Match the location of the wall bracket and the
eye-bolts on the rear of the TV.
3
Connect the eye-bolts and wall brackets tightly
with a sturdy rope.
Make sure to keep the rope horizontal with the
flat surface.
Make sure that children do not climb on or
hang on the TV.
CAUTION
Use a platform or cabinet that is strong and
large enough to support the TV securely.
Brackets, bolts and ropes are optional. You
can obtain additional accessories from your
local dealer.
NOTE
Tidying cables
1
Gather and bind the cables with the cable
management clip.
Cable management clip
2
Gather and bind the cables with the cable
holder on the back of the TV.
Cable holder
Do not move the TV by holding the cable
holder and cable management clip, as the
cable holders may break, and injuries and
damage to the TV may occur.
CAUTION
ENGLISH
20
ASSEMBLING AND PREPARING
Mounting on a wall
Attach an optional wall mount bracket at the rear
of the TV carefully and install the wall mount
bracket on a solid wall perpendicular to the
floor. When you attach the TV to other building
materials, please contact qualified personnel.
We recommend that you use an LG brand wall
mount when mounting the TV to a wall.
10 cm
10 cm
10 cm
10 cm
(4
in
ch
es)
Make sure to use screws and wall mounts that
meet the VESA standard. Standard dimensions for
the wall mount kits are described in the following
table.
Model 47LM8600
47LM8650
55LM8600
55LM8650
VESA (A x B)
A
B
400 x 400
Standard screw M6
Number of screws 4
Wall mount bracket
(optional)
LSW400BX
LSW420BX
Disconnect the power first, and then move
or install the TV. Otherwise electric shock
may occur.
If you install the TV on a ceiling or slanted
wall, it may fall and result in severe injury.
Use an authorized LG wall mount and
contact the local dealer or qualified
personnel.
Do not over tighten the screws as this may
cause damage to the TV and void your
warranty.
Use the screws and wall mounts that meet
the VESA standard. Any damages or injuries
by misuse or using an improper accessory
are not covered by the warranty.
CAUTION
Use the screws that are listed on the VESA
standard screw specifications.
The wall mount kit includes an installation
manual and necessary parts.
The wall mount bracket is optional. You can
obtain additional accessories from your local
dealer.
The length of screws may differ depending
on the wall mount. Make sure to use the
proper length.
For more information, refer to the manual
supplied with the wall mount.
NOTE
Attaching the wall mount bracket
1
In order to protect the TV screen (scratch,
fingerprint), put TV on flat table without
removing wrapping bag.
2
After removing the wrapping bag on the back
of the TV, install TV according to manual
included in wall mounting bracket product.
3
Remove protection pads after installing TV.
ENGLISH
21
MAKING CONNECTIONS
MAKING CONNECTIONS
Connect various external devices to the TV and switch input modes to select an external device. For more
information of external device’s connection, refer to the manual provided with each device.
Available external devices are: HD receivers, DVD players, VCRs, audio systems, USB storage devices, PC,
gaming devices, and other external devices.
If you record a TV program on a DVD recorder or VCR, make sure to connect the TV signal input
cable to the TV through a DVD recorder or VCR. For more information of recording, refer to the
manual provided with the connected device.
The external device connection may differ from the model.
Connect external devices to the TV regardless of the order of the TV port.
NOTE
Connecting to an antenna or cable
Connect an antenna, cable, or cable box to watch TV while referring to the following. The illustrations may
differ from the actual items and a RF cable is optional.
ANTENNA / CABLE
VHF Antenna
UHF Antenna
Antenna
Terminal
Coaxial (75Ω)
Make sure not to bend the copper wire of
the RF cable.
Copper wire
Complete all connections between devices,
and then connect the power cord to the
power outlet to prevent damage to your TV.
CAUTION
Use a signal splitter to use more than 2 TVs.
Visit http://lgknowledgebase.com for more
information about the antenna and cable
connection. Search for antenna.
NOTE
ENGLISH
22
MAKING CONNECTIONS
Connecting to a HD receiver, DVD, or VCR player
Connect a HD receiver, DVD, or VCR player to the TV and select an appropriate input mode.
HDMI Connection
HDMI is the best way to connect a device.
Transmits the digital video and audio signals from an external device to the TV. Connect the external device
and the TV with the HDMI cable as shown in the following illustration.
Use the latest High Speed HDMI™ Cable with CEC (Customer Electronics Control) function.
High Speed HDMI™ Cables are tested to carry an HD signal up to 1080p and higher.
NOTE
Choose any HDMI input port to connect. It does not matter which port you use.
HDMI
2 3 1
(ARC)
4
(MHL)
/ DVI IN
DVD/ Blu-Ray / HD Cable Box / HD STB
(*Not Provided)
ARC (Audio Return Channel)
When connected with a high-speed
HDMI cable, digital audio can be sent
to a compactible device without an
additional optical audio cable.
ARC is only supported on the HDMI input
1 (ARC) port. An external audio device
that supports ARC should be connected
to HDMI 1 if you wish to use ARC
DTV Audio Supported Codec: MPEG, Dolby
Digital
HDMI Audio Supporeted Format: Dolby
Digital, PCM (Up to 192 KHz, 32k/44.1k/48k
/88k/96k/176k/192k) -> Not supported DTS.
NOTE
ENGLISH
23
MAKING CONNECTIONS
DVI to HDMI Connection
Transmits the digital video signal from an external device to the TV. Connect the external device and the
TV with the DVI-HDMI cable as shown in the following illustration. To transmit an audio signal, connect an
audio cable.
(RGB/HDMI-PC)
AUDIO
(RGB/DVI)
AUDIO
2 3 1
(ARC)
4
(MHL)
/ DVI IN
AUDIO OUT
DVI OUT
(*Not Provided)
(*Not Provided)
DVD/ Blu-Ray / HD Cable Box
ENGLISH
24
MAKING CONNECTIONS
Connecting to a mobile phone
Mobile High-definition Link (MHL) is an interface for transmitting digital audiovisual signals from mobile
phones to television sets.
Connect the mobile phone to the HDMI/DVI IN 4 (MHL) port to view the phone screen on the TV.
This only works for the MHL-enabled phone.
Some applications can be operated by the remote control.
For some mobile phones supporting MHL, you can control with the Magic Remote Control.
The MHL passive cable is needed to connect the TV and a mobile phone.
NOTE
2 3 1
(ARC)
4
(MHL)
/ DVI IN
(*Not Provided)
MHL Cable
Mobile phone
ENGLISH
25
MAKING CONNECTIONS
Component Connection
Transmits analog video and audio signals from an external device to the TV. Connect the external device
and the TV with a component cable as shown in the following illustration.
If cables are installed incorrectly, it could case the image to display in black and white or with
distorted color.
Check to ensure the cables are matched with the corresponding color connection.
NOTE
VIDEO
AUDIO
L R
DVD/ Blu-Ray / HD Cable Box
(Use the component video cable provided.)(Use the composite video cable provided.)
(*Not Provided)
(*Not Provided)
GREEN
RED
BLUE
YELLOW
GREENYELLOW
WHITE
RED
GREEN
RED
BLUE
GREEN
RED
BLUE
WHITE
RED
WHITE
RED
IN
COMPONENT
AV
VIDEO AUDIO
Y
P
B
P
R
ENGLISH
26
MAKING CONNECTIONS
Composite Connection
Transmits analog video and audio signals from an external device to the TV. Connect the external device
and the TV with the composite cable as shown in the following illustration.
If you have a mono VCR, connect the audio cable from the VCR to the AUDIO L/MONO jack of the
TV.
Check to ensure the cables are matched with the corresponding color connection.
NOTE
IN
COMPONENT
AV
VIDEO AUDIO
Y
P
B
P
R
VIDEO
MONO
( )
AUDIOL R
VCR / DVD/ Blu-Ray / HD Cable Box
(*Not Provided)
YELLOW
WHITE
RED
YELLOW
WHITE
RED
YELLOW
YELLOW
WHITE
RED
(Use the composite video cable provided.)
ENGLISH
27
MAKING CONNECTIONS
Connecting to a PC
It is recommended to use the HDMI connection for the best image quality.
Depending on the graphics card, DOS mode video may not work if a HDMI to DVI Cable is in use.
In PC mode, there may be noise associated with the resolution, vertical pattern, contrast or
brightness. If noise is present, change the PC output to another resolution, change the refresh rate
to another rate or adjust the brightness and contrast on the PICTURE menu until the picture is clear.
The synchronization input form for Horizontal and Vertical frequencies is separate.
Depending on the graphics card, some resolution settings may not allow the image to be positioned
on the screen properly.
NOTE
HDMI Connection, DVI to HDMI Connection or RGB Connection
Choose method A, B, or C to make connection.
Method A: HDMI Connection
HDMI
2 3 1
(ARC)
4
(MHL)
/ DVI IN
Choose any HDMI input port to connect.
It does not matter which port you use.
(*Not Provided)
PC
ENGLISH
28
MAKING CONNECTIONS
Method B: DVI to HDMI Connection
(RGB/HDMI-PC)
AUDIO
(RGB/DVI)
AUDIO
2 3 1
(ARC)
4
(MHL)
/ DVI IN
AUDIO OUT
DVI OUT
(*Not Provided)
(*Not Provided)
PC
Method C: RGB Connection
RGB OUT (PC)
AUDIO OUT
(PC)
RGB
(RGB/HDMI-PC)
AUDIO
(PC)
RGB
(RGB/DVI)
AUDIO
(*Not Provided)
(*Not Provided)
PC
ENGLISH
29
MAKING CONNECTIONS
Connecting to an Audio System
You may use an optional external audio system instead of the built-in speaker.
If you use an optional external audio device instead of the built-in speaker, set the TV speaker
feature to off.
NOTE
Digital Optical Audio Connection
Transmits a digital audio signal from the TV to an external device. Connect the external device and the TV
with the optical audio cable as shown in the following illustration.
Do not look into the optical output port. Looking at the laser beam may damage your vision.
Audio with ACP (Audio Copy Protection) function may block digital audio output.
NOTE
OPTICAL
AUDIO IN
OPTICAL
DIGITAL
AUDIO
OUT
Digital Audio System
(*Not Provided)
ENGLISH
30
MAKING CONNECTIONS
Connecting to a USB
Connect a USB storage device such as a USB flash memory, external hard drive, or a USB memory card
reader to the TV and access the Smart Share menu to use various multimedia files.
To use a HDD device, make sure that it is connected to the USB IN 1 HDD IN port.
To store apps on a USB storage device, make sure that it is connected to the USB IN 3 USB Apps
port.
Some USB Hubs may not work. If a USB device connected using a USB Hub is not detected,
connect it to the USB port on the TV directly.
NOTE
USBHDD IN USB Apps
1
2
3
USB IN
USB
HDD
USB Hub
(*Not Provided)
(*Not Provided)
(*Not Provided)
Choose any USB input port to connect.
It does not matter which port you use.
ENGLISH
31
REMOTE CONTROL
REMOTE CONTROL
Magic Remote Control Functions
When the message “Magic remote control battery is low. Change the battery.” is
displayed, replace the battery. To replace batteries, open the battery cover, replace
batteries (1.5 V AA) matching
and ends to the label inside the compartment,
and close the battery cover. Be sure to point the remote control at the remote control
sensor on the TV. To remove the batteries, perform the installation actions in reverse.
Do not mix old and new batteries, as this may damage the remote control.
CAUTION
Make sure to point the remote control at the remote control sensor on the TV.
(
POWER
)
Turns the TV on or off.
HOME
Accesses the Home menu.
Navigation buttons
(up/down/left/right)
Scrolls through menus or options.
Pointer (RF transmitter)
BACK
Returns to the previous level.
VOL
Adjusts the volume level.
CH
Scrolls through the saved channels.
(MUTE)
Mutes all sounds.
MY APPS
Shows the list of Apps.
Q.MENU
Accesses the quick menu.
Used for viewing 3D video.
Wheel (OK)
Selects menus or options and confirms
your input.
Scrolls through the saved channels.
If you press the navigation button while
moving the pointer on the screen, the
pointer disappears, and the Magic remote
control works as a regular remote control.
To display the pointer again, shake the
Magic remote control from side to side.
Voice Search
(Depending on country)
Select the Voice Search icon on the screen.
Speak slowly and precisely. When a voice
is recognized, the processing message
appears on the screen. Use the magic
remote control no further than 15 cm from
your face. (This is a beta version and only
available in selected functions for supported
models.)
Image shown may differ from
your remote control.
NOTE
ENGLISH
32
REMOTE CONTROL
Registering Magic Remote Control
The Magic Remote Control operates by pairing
with your TV.
Once you purchased the TV, please register the
Magic remote control as follows;
How to register the Magic Remote Control
(Wheel)
To register automatically, turn the TV
on and press the
Wheel (OK)
. When
registration is completed, the completion
message appears on the screen.
If registration fails, turn the TV off and
back on, then press the
Wheel (OK)
to
complete registration.
How to Re-register the Magic Remote Control
BACK
HOME
1 Press and hold the
BACK
and
HOME
buttons together for 5 seconds
to reset, then register it by following
“How to register the Magic remote
control” above.
2 To re-register the Magic remote control,
press and hold the
BACK
button for 5
seconds toward the TV.
How to use Magic Remote Control
1 You can move the pointer by aiming the
Pointer Receiver of the remote control
at your TV then move it left, right, up or
down.
»
If the pointer does not work properly
leave the remote control for 10 seconds
then use it again.
2 If the pointer disappears, move the
remote control slightly to left or right.
Then, it will automatically appear on the
screen.
»
If the pointer has not been used for a
certain period of time, it will disappear.
i
1
3
2
1
If you press
Wheel (OK)
on the Magic
remote control, the screen appears.
Shows information about the current program
and screen.
2
Pressing this button will display number
keypad which you can select channel number.
3
You can select My Apps Menu.
Precautions to Take when Using
the Magic Remote Control
Use the Magic remote control within the
maximum communication distance (10 m,
32.8ft). Using the remote control beyond
this distance, or with an object obstructing it,
may cause a communication failure.
A communication failure may occur due to
nearby devices. Electrical devices such as
a microwave oven or wireless LAN product
may cause interference, as these use the
same bandwidth (2.4 GHz) as the Magic
remote control.
The Magic remote control may be damaged
or may malfunction if it is dropped or
receives a heavy impact.
Take care not to bump into nearby furniture
or other people when using the Magic
remote control.
Manufacturer and installer cannot provide
service related to human safety as the
applicable wireless device has possibility of
electric wave interference.
It is recommended that an Access Point (AP)
be located more than 1 m (3.28 ft) away
from the TV. If the AP is installed closer than
1 m (3.28 ft), the Magic remote control may
not perform as expected due to frequency
interference.
ENGLISH
33
WATCHING TV
WATCHING TV
Turning the TV on for the first
time
When you turn the TV on for the first time, the
Initial setting screen appears. Select a language
and customize the basic settings.
1
Connect the power cord to a power outlet.
2
In Standby mode, press the power button on
the remote control to turn the TV on.
The Initial setting screen appears if you turn
the TV on for the first time.
You can also access
Initial Setting
by
accessing
OPTION
in the main menu.
NOTE
3
Follow the on-screen instructions to customize
your TV settings according to your preferences.
Language Selection
Selects a language to
display.
Using the Magic
remote control
Sets the Magic remote
contol.
Environment Selection
Select
Home*
for the
home environment.
Time Zone Setting
Selects the time zone and
daylight saving.
Network Connection
Sets your network to
enable network-related
features on the TV.
Auto Tuning
Scans and saves available
channels automatically.
Setting is complete.
Confirms the setting
options.
Select
Home
when prompted.
Store
mode puts the TV in demo mode.
If you select
Store
, the any customized
settings will switch back to the default
settings of
Store
in 5 minutes.
NOTE
4
When the basic settings are complete,
press the
Wheel (OK)
.
If you do not complete the Initial setting,
it will appear whenever the TV turns on.
Disconnect the power cord from the
power outlet when you do not use the TV
for a long period of time.
NOTE
5
To turn the TV off, press the power button on
the remote control.
ENGLISH
34
USING THE USER GUIDE
User Guide allows you to more easily access the
detailed TV information.
1
Press
HOME
button to access the HOME
menu.
2
Select
User Guide
and press the
Wheel (OK)
.
User Guide
User Guide
CHANNEL Setting
PICTURE, SOUND Setting
OPTION
LG SMART Function
Advabced Function
Information
To use input device
To use Energy Saving feature
To set time options
To set TV lock options
To set language
Disabled Assistance
To set Magic Remote Control
1
2 3
4
1
Shows the current channel.
2
Allows to select the category you want.
3
Allows to select the item you want.
You can use / button to move between
pages.
4
Allows to browse the description of the
function you want from the index.
USING THE USER GUIDE
Try Now Zoom In Close
User Guide
OPTION > To set language
HOME Settings OPTION Language
Selects Menu Language and Audio Language displayed on the screen.
Menu
Language
Selects a screen menu language.
Audio
Language
[In Digital Mode Only]
Selects the desired language when watching digital
broadcasting containing several audio languages.
Voice Search
Language
Select the language to make voice search.
Only the voice search adopted model can support this
setting.
CHANNEL Setting
PICTURE, SOUND Setting
OPTION
LG SMART Function
Advabced Function
Information
1
2 3
Try Now Zoom Out Close
HOME Settings OPTION Language
Selects Menu Language and Audio Language displayed on the screen.
Menu
Language
Selects a screen menu language.
Audio
Language
[In Digital Mode Only]
Selects the desired language when watching digital
broadcasting containing several audio languages.
Voice Search
Language
Select the language to make voice search.
Only the voice search adopted model can support this
setting.
3
1
Shows the description of the selected menu.
You can use / to move between pages.
2
Moves to the selected menu directly from the
User Guide.
3
Zooms in or out the screen.
ENGLISH
35
SPECIFICATIONS
SPECIFICATIONS
Product specifications may be changed without prior notice due to upgrade of product functions.
Power requirement USA, Canada, Mexico: AC 120 V ~ 50 / 60 Hz
Other Country: AC 100 - 240 V ~ 50 / 60 Hz
Television System NTSC-M, ATSC, 64 & 256 QAM
Program Coverage VHF 2-13, UHF 14-69, CATV 1-135, DTV 2-69, CADTV 1-135
External Antenna Impedance
75
Ω
Environment
condition
Operating Temperature 0 - 40 °C
Operating Humidity Less than 80 %
Storage Temperature -20 - 60 °C
Storage Humidity Less than 85 %
MODELS
47LM8600
(47LM8600-UC)
55LM8600
(55LM8600-UC)
47LM8650
(47LM8650-UC)
55LM8650
(55LM8650-UC)
Dimensions
(W x H x D)
With stand 1063.0 x 701.0 x 263.0 mm
(41.8 x 27.5 x 10.3 inch)
1232.0 x 795.0 x 331.0 mm
(48.5 x 31.2 x 13.0 inch)
Without stand 1063.0 x 628.0 x 33.4 mm
(41.8 x 24.7 x 1.3 inch)
1232.0 x 723.0 x 33.6 mm
(48.5 x 28.4 x 1.3 inch)
Weight With stand 18.0 kg (39.6 lbs) 25.9 kg (57.0 lbs)
Without stand 15.8 kg (34.8 lbs) 22.2 kg (48.9 lbs)
Current Value / Power consumption 1.4 A / 140 W 1.7 A / 170 W
ENGLISH
36
SPECIFICATIONS
3D supported formats
Video, which is input as below media contents is switched into the 3D screen automatically.
3D supported formats automatically
Input Signal
Horizontal
Frequency
(kHz)
Vertical
Frequency
(Hz)
Playable 3D video format
HDMI
640 x 480
31.469 59.94
Top & Bottom, Side by Side (Half), Side by Side (Full)
31.5 60
62.938 59.94
Frame Packing, Line Alternative
63 60
480p
31.469 59.94
Top & Bottom, Side by Side (Half), Side by Side (Full)
31.5 60
62.938 59.94
Frame Packing, Line Alternative
63 60
720p
44.96 59.94
Top & Bottom, Side by Side (Half), Side by Side (Full)
45.00 60
89.91 59.94
Frame Packing, Line Alternative
90.00 60
1080i
33.72 59.94
Top & Bottom, Side by Side (Half), Side by Side (Full)
33.75 60
67.50
59.94
Frame Packing, Field Alternative
60
1080p
26.97 23.97
Top & Bottom, Side by Side (Half), Side by Side (Full)
27.00 24
33.72 29.976
33.75 30
43.94 23.97
Frame Packing, Line Alternative
54 24
67.432 29.976
67.50 30
67.43 59.94
Top & Bottom, Side by Side (Half)
67.50 60
USB
1080p 33.75 30
Side by Side (Half), Top & Bottom, Checker Board,
MPO (Photo)
DLNA
1080p 33.75 30
ENGLISH
37
SPECIFICATIONS
For models supporting WiDi, you can set the 3D mode in the same way as in RGB (PC) mode.
3D supported formats manually
Input Signal
Horizontal
Frequency
(kHz)
Vertical
Frequency
(Hz)
Playable 3D video format
HDMI - DTV
720p 45.00 60
2D to 3D, Side by Side (Half), Top & Bottom,
Single Frame Sequential
1080i 33.75 60 2D to 3D, Side by Side (Half), Top & Bottom
1080p
27.00 24
2D to 3D, Side by Side (Half), Top & Bottom,
Checker Board
33.75 30
67.50 60
2D to 3D, Side by Side (Half), Top & Bottom,
Checker Board, Single Frame Sequential,
Row Interleaving, Column Interleaving
Others - - 2D to 3D
HDMI - PC
1024 x 768 48.36
60
2D to 3D, Side by Side (Half), Top & Bottom
1360 x 768 47.71
1920 x 1080 67.50
2D to 3D, Side by Side (Half), Top & Bottom,
Checker Board, Single Frame Sequential,
Row Interleaving, Column Interleaving
Others - - 2D to 3D
RGB - PC
1024 x 768 48.36
60 2Dto3D, Side by Side (Half), Top & Bottom1360 x 768 47.71
1920 x 1080 67.50
Others - - 2D to 3D
Component
720p 45.00 60
2D to 3D, Side by Side (Half), Top & Bottom
1080i 33.75 60
1080p
27.00 24
33.75 30
67.50 60
Others - - 2D to 3D
USB
1080p 33.75 30 2D to 3D, Side by Side (Half), Top & Bottom,
Checker Board, Row Interleaving,
Column Interleaving, Single Frame Sequential
(Photo: Side by Side (Half), Top & Bottom)
DLNA
1080p 33.75 30
Input Signal Playable 3D video format
DTV
HD 2D to 3D, Side by Side (Half), Top & Bottom
SD 2D to 3D
ENGLISH
38
SPECIFICATIONS
HDMI (DTV) supported mode
Resolution
Horizontal
Frequency (kHz)
Vertical
Frequency (Hz)
720x480p
31.47 59.94
31.50 60.00
1280x720p
44.96 59.94
45.00 60.00
1920x1080i
33.72 59.94
33.75 60.00
1920x1080p
26.97 23.976
27.00 24.00
33.71 29.97
33.75 30.00
67.432 59.94
67.50 60.00
Component supported mode
Resolution
Horizontal
Frequency (kHz)
Vertical
Frequency (Hz)
720x480i
15.73 59.94
15.73 60.00
720x480p
31.47 59.94
31.50 60.00
1280x720p
44.96 59.94
45.00 60.00
1920x1080i
33.72 59.94
33.75 60.00
1920x1080p
26.97 23.976
27.00 24.00
33.71 29.97
33.75 30.00
67.432 59.94
67.500 60.00
Component port connecting information
Component ports on the
TV
Y P
B
P
R
Video output ports
on DVD player
Y P
B
P
R
Y B-Y R-Y
Y Cb Cr
Y Pb Pr
Wireless LAN module(TWFM-B003D)
specification
Standard
IEEE802.11a/b/g/n
Frequency Range
2400 to 2483.5 MHz
5150 to 5250 MHz
5725 to 5850 MHz
Modulation
CCK / OFDM / MIMO
Output Power (Typical)
802.11a: 15 dBm
802.11b: 14 dBm
802.11g: 17 dBm
802.11n - 2.4GHz: 17 dBm
802.11n - 5GHz: 15 dBm
Data rate
802.11a/g: 54 Mbps
802.11b: 11 Mbps
802.11n: 300 Mbps
Antenna Gain (Typical)
2400 to 2483.5 MHz: -2.5 dBi
5150 to 5250 MHz: -2.2 dBi
5725 to 5850 MHz: -2.9 dBi
Occupied bandwidth
802.11a/b/g: HT20
802.11n: HT20/40
Because band channel used by the country could
be different, the user can not change or adjust the
operating frequency and this product is set for the
regional frequency table.
FCC ID of Wi-Fi module inside TV
FCC ID: BEJTWFM-B003D
Bluetooth module (BM-LDS302) specification
Standard
Bluetooth Version 3.0
Frequency Range
2400 ~ 2483.5 MHz
Output Power (Max.)
10 dBm or lower
Data rate (Max.)
3 Mbps
Communication
Distance
Line of Open Sight
approx. 10 m
FCC ID of Bluetooth module inside TV
FCC ID: BEJLDS302
ENGLISH
39
MAINTENANCE & TROUBLESHOOTING
MAINTENANCE
Cleaning Your TV
Clean your TV regularly to keep the best performance and to extend the product lifespan.
Make sure to turn the power off and disconnect the power cord and all other cables first.
When the TV is left unattended or unused for a long time, disconnect the power cord from the wall
outlet to prevent possible damage from lightning or power surges.
CAUTION
Screen, frame, cabinet and stand
To remove dust or light dirt, wipe the surface with a dry, clean, and soft cloth.
To remove major dirt, wipe the surface with a soft cloth dampened in clean water or a diluted mild
detergent. Then wipe immediately with a dry cloth.
Do not push, rub, or hit the surface with your fingernail or a sharp object, as this may result in
scratches on the screen and image distortions.
Do not use any chemicals, such as waxes, benzene, alcohol, thinners, insecticides, air fresheners,
lubricants, as these may damage the screen’s finish and cause discoloration.
Do not spray liquid onto the surface. If water enters the TV, it may result in fire, electric shock, or
malfunction.
CAUTION
Power cord
Remove the accumulated dust or dirt on the power cord regularly.
TROUBLESHOOTING
Problem Solution
Cannot control the TV with the
remote control.
Check the remote control sensor on the product and try again.
Check if there is any obstacle between the product and the remote control.
Check if the batteries are still working and properly installed (
to , to ).
No image display and no sound is
produced.
Check if the product is turned on.
Check if the power cord is connected to a wall outlet.
Check if there is a problem in the wall outlet by connecting other products.
The TV turns off suddenly.
Check the power control settings. The power supply may be interrupted.
Check if the Auto sleep feature is activated in the Time settings.
If there is no signal while the TV is on, the TV will turn off automatically after 15
minutes of inactivity.
The model and serial number of the TV is located
on the back and one side of the TV.
Record it below should you ever need service.
MODEL
SERIAL
This product qualifies for ENERGY STAR in the
“factory default (Home Use)” setting.
Changing the factory default settings or enabling
other features may increase power consumption
that could exceed the limits necessary to quality
for ENERGY STAR.
www.lg.com
Lea atentamente este manual antes de poner en marcha el equipo
y consérvelo para futuras consultas.
47LM8600
55LM8600
47LM8650
55LM8650
MANUAL DEL USUARIO
TELEVISOR LCD CON LED
ESPAÑOL
2
INSTRUCCIONES DE SEGURIDAD IMPORTANTES
WARNING/CAUTION
RISK OF ELECTRIC SHOCK
DO NOT OPEN
ADVERTENCIA/
pRECAuCIóN
RIESGO DE CHOQuE
ELECTRICO NO ABRIR
PARA REDUCIR EL RIESGO DE DESCARGAS
ELÉCTRICAS, NO QUITE LA CUBIERTA
(O LA PARTE POSTERIOR). EL USUARIO
NO PUEDE CAMBIAR NI REPARAR LOS
COMPONENTES INTERNOS. CONSULTE
ÚNICAMENTE AL PERSONAL DE SERVICIO
CALIFICADO.
WARNING/CAUTION
RISK OF ELECTRIC SHOCK
DO NOT OPEN
El símbolo de relámpago con una
punta de flecha, dentro de un triángulo
equilátero, tiene como fin alertar al
usuario sobre la presencia en el producto de
“voltaje peligroso” sin aislar que puede tener
la potencia suficiente para presentar riesgo de
descargas eléctricas a los usuarios.
WARNING/CAUTION
RISK OF ELECTRIC SHOCK
DO NOT OPEN
El signo de admiración dentro de un
triángulo equilátero tiene el fin de
alertar al usuario sobre la presencia de
instrucciones importantes de funcionamiento
y de mantenimiento (servicio) en el folleto
que compaña al equipo.
ADVERTENCIA/PRECAUCIÓN
- PARA REDUCIR EL RIESGO DE INCENDIOS
O DESCARGAS ELÉCTRICAS, NO EXPONGA
EL PRODUCTO A LA LLUVIA O LA
HUMEDAD.
No use el aparato cerca del agua.
Short-circuit
Breaker
Power Supply
Limpie únicamente con un paño seco.
Short-circuit
Breaker
Power Supply
No tape ni bloquee las aberturas de
ventilación. Realice la instalación siguiendo
las instrucciones del fabricante.
Short-circuit
Breaker
Power Supply
No instale el producto cerca de fuentes de
calor como radiadores, rejillas de calefacción
central, estufas u otro tipo de aparatos que
emitan calor (incluidos los amplificadores).
Short-circuit
Breaker
Power Supply
No anule el propósito de seguridad del
enchufe polarizado o del enchufe a tierra. Un
enchufe polarizado tiene dos clavijas, una
más ancha que la otra. Un enchufe a tierra
tiene dos clavijas y un tercer terminal de
puesta a tierra. La clavija ancha o el terminal
de puesta a tierra se proveen para proteger
al usuario. Si el enchufe del equipo no entra
en la toma, consulte a un electricista para
cambiar el tomacorriente (puede variar según
el país).
Short-circuit
Breaker
Power Supply
INSTRUCCIONES DE SEGURIDAD IMPORTANTES
Siga siempre estas instrucciones para evitar situaciones peligrosas y garantizar el rendimiento máximo del
producto.
Lea estas instrucciones.
Conserve estas instrucciones.
Preste atención a las advertencias.
Siga todas las instrucciones.
ESPAÑOL
3
INSTRUCCIONES DE SEGURIDAD IMPORTANTES
Asegúrese de que el cable de alimentación
esté protegido para evitar que lo pisen o
aplasten, especialmente en los enchufes, los
tomacorrientes o el punto de salida desde el
aparato.
Short-circuit
Breaker
Power Supply
Use únicamente los accesorios
recomendados por el fabricante.
Short-circuit
Breaker
Power Supply
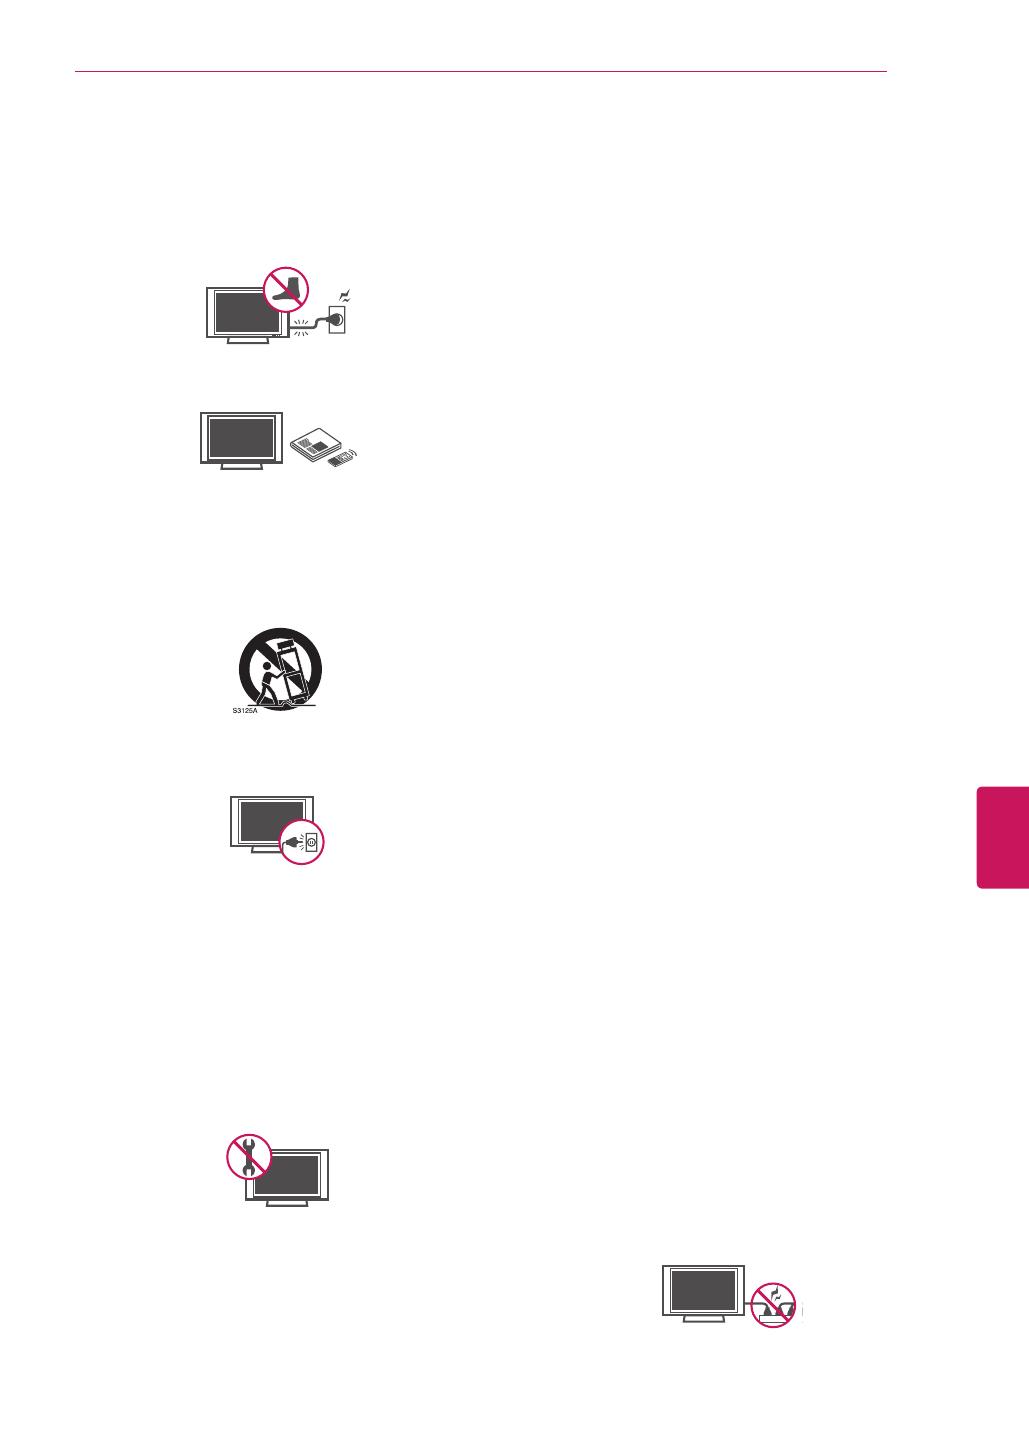
Use el producto únicamente en mesas
portátiles, pies, trípodes, soportes o mesas
indicados por el fabricante o provistos con el
aparato. Al emplear una mesa portátil, tenga
cuidado al moverla con el aparato encima,
para evitar daños por caídas.
Short-circuit
Breaker
Power Supply
Desenchufe el aparato durante tormentas
eléctricas o si no planea usarlo durante un
periodo prolongado.
Short-circuit
Breaker
Power Supply
Consulte todas las cuestiones de servicio
de mantenimiento al personal de servicio
calificado. El servicio es necesario cuando
el aparato sufre algún tipo de daño, por
ejemplo, cuando un cable de suministro
eléctrico o un conector está dañado, se
derrama líquido o se cae un objeto dentro
del aparato, el aparato se expone a la lluvia o
a la humedad, no funciona en forma normal
o sufre una caída.
Short-circuit
Breaker
Power Supply
No inserte objetos de metal u otro material
conductor en el cable de alimentación. No
toque el extremo del cable de alimentación
mientras esté enchufado.
Mantenga el material de embalaje contra
la humedad y el embalaje de vinilo fuera
del alcance de los niños. El material contra
la humedad es dañino si se ingiere. Si se
ingiere por accidente, obligue a la persona a
vomitarlo y acuda al hospital más cercano.
Además, el embalaje de vinilo puede provocar
asfixia. Manténgalo fuera del alcance de los
niños.
PRECAUCIÓN con respecto al cable de
alimentación (puede variar según el país):
Se recomienda colocar los aparatos en un
circuito específico, es decir, un tomacorriente
único que alimente solamente al aparato,
y que no tenga otros tomacorrientes ni
circuitos derivados. Consulte la página de
especificaciones en el manual del usuario.
No conecte demasiados aparatos a la misma
toma de corriente de CA, dado que podría
provocar incendios o descargas eléctricas.
No sobrecargue los tomacorrientes de la
pared. Asegúrese de que los tomacorrientes
de la pared no estén sobrecargados, sueltos
ni dañados, y que los alargues, los cables
de alimentación y el aislamiento de los
cables no estén desgastados, ya que estas
condiciones son peligrosas. Cualquiera de
estos casos podría provocar incendios o
descargas eléctricas. Examine regularmente
el cable del aparato; si le parece que está
dañado o deteriorado, desenchúfelo y no use
más ese cable. Llame al personal de servicio
técnico autorizado para que lo reemplace por
uno exactamente igual. Proteja el cable de
alimentación de daños físicos o mecánicos,
es decir, que no se tuerza, doble, deforme,
que no quede atrapado al cerrar una puerta
y que no lo pisen. Preste especial atención
a los enchufes, tomacorrientes de la pared
y al punto de salida del cable en el aparato.
No mueva el televisor con el cable de
alimentación enchufado. No use un cable de
alimentación que esté suelto o dañado. Al
desenchufar el cable, asegúrese de hacerlo
desde el enchufe. No tire del cable para
desenchufar el televisor.
Short-circuit
Breaker
Power Supply
ESPAÑOL
4
INSTRUCCIONES DE SEGURIDAD IMPORTANTES
Advertencia
- para disminuir los riesgos de
incendio o descargas eléctricas, no exponga
el producto a la lluvia, la humedad u otro tipo
de líquidos. No toque el televisor con las
manos mojadas. No instale el producto cerca
de objetos inflamables como combustible
o velas, ni lo exponga al aire acondicionado
directo.
Short-circuit
Breaker
Power Supply
No exponga el producto a ningún tipo de
goteo ni salpicaduras, y no coloque sobre
o por encima del televisor (por ejemplo, en
estantes que pudieran encontrarse arriba
de la unidad) ningún tipo de objeto que
contenga líquido, como floreros, tazas, etc.
Short-circuit
Breaker
Power Supply
Puesta a tierra
(Excepto dispositivos sin conexión a tierra.)
Asegúrese de que el cable de puesta a
tierra esté conectado para evitar descargas
eléctricas (es decir, un televisor con un
enchufe de CA de tres clavijas debe
conectarse a un tomacorriente de CA con
puesta a tierra de tres clavijas). Si no puede
colocarse ninguna puesta a tierra, solicite
a un electricista calificado que instale un
disyuntor. No intente improvisar una puesta
a tierra con conexiones a cables de teléfono,
pararrayos o caños de gas.
Short-circuit
Breaker
Power Supply
Alimentación
Interruptor
diferencial
DESCONECTE EL DISPOSITIVO DE LA
FUENTE DE ALIMENTACION PRINCIPAL
El enchufe de conexión a la red de
electricidad es el dispositivo de desconexión.
Este enchufe debe permanecer siempre
disponible.
Mientras la unidad esté conectada al
tomacorriente de CA de la pared, no se
desconectará de la fuente de alimentación
de CA, aún cuando el aparato esté apagado.
No intente modificar este producto de
ninguna manera sin autorización previa por
escrito de LG Electronics. Cualquier tipo de
modificación sin autorización previa podría
anular la autoridad del usuario para usar el
producto.
ANTENAS - Puesta a tierra con una antena
exterior
(puede variar según el país):
Si instala una antena exterior, tome las
siguientes precauciones. No se debe instalar
el sistema de antena exterior cerca de las
líneas aéreas de transmisión de energía, de
ningún circuito o luz eléctrica, ni en ningún
lugar donde pudiera entrar en contacto con
este tipo de cables eléctricos o circuitos,
dado que podría provocar daños graves
o incluso la muerte. Asegúrese de que
el sistema de antena tenga una puesta a
tierra para proteger contra sobretensiones
y acumulaciones de cargas estáticas.
La Sección 810 del Código nacional de
electricidad (NEC) de los Estados Unidos
establece la forma de realizar una puesta a
tierra correcta del mástil, de la estructura de
soporte, del cable de bajada a una unidad
de descarga de la antena, el tamaño de los
conductores de puesta a tierra, la ubicación
de la unidad de descarga de la antena, y la
conexión y los requisitos de los electrodos
de puesta a tierra
Puesta a tierra de la antena según el Código
nacional de electricidad, ANSI/NFPA 70
Short-circuit
Breaker
Power Supply
NEC: National Electrical Code
(Código nacional de electricidad)
Abrazadera de
puesta a tierra
Cable de entrada de la
antena
Unidad de descarga de
la antena (NEC, Sección
810-20)
Conductor de puesta a
ti err aa ( NEC , Sec ció n
810-21)
Sis tem a de elec trodos
de conexn a tierra del
servicio de energía (NEC,
Artículo 250, Parte H)
Equipo de
servicio eléctrico
Abrazadera de
puesta a tierra
ESPAÑOL
5
INSTRUCCIONES DE SEGURIDAD IMPORTANTES
Limpieza
Al efectuar la limpieza, desenchufe el cable
de alimentación y limpie suavemente con un
paño suave para no rayar la superficie. No
rocíe con agua ni otros líquidos directamente
sobre el televisor, dado que podría provocar
una descarga eléctrica. No limpie con
productos químicos como alcohol, diluyentes
o bencina.
Traslados
Asegúrese de que el aparato esté apagado,
desenchufado y que no quede ningún cable
conectado. Es posible que se necesiten dos
personas para trasladar los televisores de
gran tamaño. No ejerza presión ni empuje el
panel frontal del televisor.
Ventilación
Instale el televisor en un lugar bien ventilado.
No lo coloque en un lugar cerrado como, por
ejemplo, un estante para libros. No cubra el
producto con telas ni ningún otro material
mientras esté enchufado. No lo instale en
lugares con demasiado polvo.
Si huele humo u otros olores que provienen
de la TV, desconecte el cable de alimentación
y comuníquese con un centro de servicio
autorizado.
No ejerza demasiada presión sobre el panel
con la mano ni con objetos punzantes, como
un clavo, una lapicera o un lápiz, ni raye la
superficie.
Mantenga el aparato alejado de la luz solar
directa.
Short-circuit
Breaker
Power Supply
Nunca toque el aparato o la antena durante
una tormenta eléctrica o con truenos.
Al montar el televisor en la pared, asegúrese
de que los cables de alimentación y de señal
no queden colgando en la parte posterior.
No permita que se golpee el producto o que
algún objeto se caiga dentro de él, ni que se
golpee la pantalla.
Aparición de puntos
El panel de plasma o LCD es un producto
de alta tecnología con una resolución de
entre dos y seis millones de píxeles. En raras
ocasiones, es posible que note la presencia
de pequeños puntos en la pantalla mientras
mira televisión. Estos puntos son píxeles
desactivados y no afectan el rendimiento ni
la fiabilidad del televisor.
Reproducción de ruidos
“Crujidos”: es posible que se produzcan
crujidos cuando esté mirando televisión
o al apagar el televisor; se trata de un
ruido generado por la contracción térmica
del plástico debido a la temperatura y la
humedad. Este ruido es común en productos
donde se requiere la deformación térmica.
Zumbidos en el circuito eléctrico o el panel:
se trata de un ruido de bajo nivel, generado
por un circuito de conmutación de alta
velocidad, que suministra una gran cantidad
de corriente para que un producto pueda
funcionar. Varía según cada producto.
Este ruido no afecta el rendimiento ni la
fiabilidad del producto.
Tenga cuidado de no tocar las aberturas de
ventilación. Al mirar televisión durante largos
periodos, las aberturas de ventilación pueden
calentarse. Esto no afecta el rendimiento ni
causa defectos en el producto.
Si siente que el televisor está frío al
tocarlo, es posible que ocurra un pequeño
“parpadeo” cuando lo prenda. Se trata de
algo normal y no significa que el televisor
esté dañado. También es posible que
aparezcan pequeños puntos en la pantalla,
de color rojo, verde o azul. Sin embargo,
no afectan el rendimiento del televisor. No
toque la pantalla LCD ni coloque los dedos
sobre ella durante mucho tiempo. Esto
podría producir algunos efectos de distorsión
temporales en la pantalla.
ESPAÑOL
6
INSTRUCCIONES DE SEGURIDAD IMPORTANTES
DESECHO (la lámpara de mercurio solo se utiliza
en televisores LCD)
Este producto tiene una lámpara fluorescente
que contiene una pequeña cantidad de mercurio.
No tire este producto junto con los desechos
domésticos comunes. Debe desecharse conforme
las disposiciones de la autoridad local.
Cómo evitar el efecto de “degradación de la
imagen por sobreexposición” o “quemadura de
pantalla” del televisor
Si se muestra una imagen fija en la pantalla
del televisor durante un período largo, esta
quedará impresa y se convertirá en una
distorsión permanente de la pantalla. A este
desperfecto se lo conoce como “degradación
de la imagen por sobreexposición” o
“quemadura de pantalla” y no está cubierto
por la garantía.
Si la relación de aspecto del televisor se
establece durante mucho tiempo en 4:3, se
puede producir una degradación de imagen
en las zonas de bandas del formato buzón.
Evite emitir imágenes fijas en la pantalla del
televisor durante períodos prolongados (2
horas o más para LCD, 1 hora o más para
TV de plasma) para evitar la degradación de
imagen.
Para Estados Unidos y Canadá
NOTA PARA EL INSTALADOR DE CATV
Se recomienda al instalador de televisión por cable
(CATV) que consulte el Artículo 820-40 del Código
nacional de electricidad de los Estados Unidos. El
código establece las disposiciones para efectuar
una puesta a tierra correcta, y en especial, indica
que el cable de puesta a tierra debe conectarse al
sistema de puesta a tierra del edificio lo más cerca
posible del punto de entrada del cable.
ESPAÑOL
7
INSTRUCCIONES DE SEGURIDAD IMPORTANTES
Ver imágenes en 3D
ADVERTENCIA
Entorno de visualización
Tiempo de visualización
- Cuando vea contenido en 3D, tome un descanso de 5 a 15 minutos cada hora. Ver contenido en 3D
durante un período prolongado puede causar dolor de cabeza, mareos, fatiga o fatiga visual.
Personas que experimenten convulsiones por fotosensibilidad o enfermedades crónicas
Algunos usuarios pueden experimentar convulsiones o síntomas anormales cuando se exponen a
una luz destellante o a un patrón específico proveniente de contenido en 3D.
No vea videos en 3D si experimenta náuseas, si está embarazada o sufre de una enfermedad crónica
como epilepsia, afecciones cardiacas o enfermedades relacionadas con la presión arterial, etc.
Se recomienda que las personas que sufran de ceguera estereoscópica o anomalías estereoscópicas
no vean contenido en 3D. Puede experimentar imágenes dobles o incomodidad al ver contenido en
3D.
Si sufre de estrabismo (visión cruzada), ambliopía (ojo vago) o astigmatismo, puede experimentar
problemas al percibir la profundidad y sentir fatiga con facilidad debido a las imágenes dobles. Se
recomienda tomar descansos más frecuentes que el adulto promedio.
Si su vista experimenta variaciones entre su ojo derecho y su ojo izquierdo, realícese un examen a la
vista antes de ver contenido en 3D.
Síntomas que requieren descontinuación o abstinencia de ver contenido en 3D
No vea contenido en 3D cuando experimente fatiga debido a falta de sueño, exceso de trabajo o por
el consumo de bebidas alcohólicas.
Si experimenta éstos síntomas, deje de ver contenido en 3D y descanse hasta que los síntomas
desaparezcan.
- Consulte a su médico si los síntomas persisten. Entre los síntomas se pueden encontrar dolor de
cabeza, dolor ocular, mareos, visión borrosa, incomodidad, imágenes dobles, incomodidad visual o
fatiga.
ESPAÑOL
8
INSTRUCCIONES DE SEGURIDAD IMPORTANTES
PRECAUCIÓN
Entorno de visualización
Distancia de visualización
- Mantenga una distancia de al menos dos veces la longitud diagonal de la pantalla cuando vea
contenido en 3D. Si siente incomodidad al ver contenido en 3D, aléjese del TV.
Edad de visualización recomendada
Infantes/Niños
- Se prohíbe el uso y visualización de contenido en 3D a niños menores de 5 años de edad.
- Los niños menores de 10 años de edad pueden reaccionar exageradamente y alborotarse demasiado
debido a que su visión se encuentra en desarrollo (por ejemplo: tratar de tocar la pantalla o saltar hacia
ella). Se requiere supervisar y dedicar atención especial a niños que vean contenido en 3D.
- Los niños presentan una disparidad binocular para ver contenido en 3D mayor que la de los adultos,
debido a que la distancia que separa los ojos es menor que la de los adultos. Por lo tanto, los niños
perciben una profundidad estereoscópica mayor en comparación con los adultos al ver la misma
imagen 3D.
Adolescentes
- Los adolescentes menores de 19 años de edad pueden recibir una mayor estimulación a la luz
proveniente de videos en 3D. Recomiéndeles no ver videos en 3D durante un período de tiempo
prolongado si están cansados.
Personas mayores
- Las personas de edad avanzada pueden percibir un efecto menor del contenido en 3D en comparación
con los jóvenes. La distancia desde donde usted está sentado y el TV no debe ser inferior a la
recomendada.
Use los anteojos 3D con precaución
Asegúrese de usar anteojos 3D LG. De lo contrario, no podrá ver correctamente los videos en 3D.
No use anteojos 3D en lugar de sus anteojos normales, anteojos de sol o gafas protectoras.
Usar anteojos 3D modificados puede causar fatiga visual o imágenes distorsionadas.
No guarde sus anteojos 3D a temperaturas extremadamente altas o bajas. Provocará que se
deformen.
Los anteojos 3D son frágiles y se rayan fácilmente. Siempre use una tela suave y limpia para limpiar
las lentes. No raye las lentes de los anteojos 3D con objetos afilados ni las limpie con productos
químicos.
ESPAÑOL
9
LICENCIAS / AVISO SOBRE SOFTWARE DE CÓDIGO ABIERTO
LICENCIAS
Las licencias admitidas pueden variar según el modelo. Para obtener más información sobre las licencias,
visite www.lg.com.
Fabricado con la licencia de Dolby Laboratories. “Dolby” y el símbolo de las dos D
son marcas comerciales de Dolby Laboratories.
HDMI, el logotipo HDMI y High-Definition Multimedia Interface son marcas
comerciales o marcas registradas de HDMI Licensing LLC.
ACERCA DE VIDEO DIVX: DivX® es un formato de video digital creado por
DivX, LLC, una subsidiaria de Rovi Corporation. Este es un dispositivo oficial con
certificación DivX Certified® que reproduce videos DivX. Visite divx.com si desea
obtener más información y herramientas de software para convertir los archivos en
videos DivX.
ACERCA DE LA FUNCIÓN DE VIDEO A PEDIDO DIVX: Este dispositivo con
certificación DivX Certified® debe registrarse para reproducir películas de video a
pedido DivX que se hayan adquirido. Para obtener su código de registro, busque
la sección DivX VOD en el menú de configuración del dispositivo. Vaya a vod.divx.
com para obtener más información sobre cómo realizar el registro.
“DivX Certified® para reproducir videos DivX® hasta HD 1080p, incluido el
contenido premium”.
“DivX®, DivX Certified® y los logotipos asociados son marcas comerciales de Rovi
Corporation o sus subsidiarias y se utilizan bajo licencia”.
“Cubierto por una o más de las siguientes patentes de los Estados Unidos:
7,295,673; 7,460,668; 7,515,710; 7,519,274”.
Fabricado bajo licencia con los números de patente de los EE.UU: 5,956,674;
5,974,380; 6,487,535 y otras patentes emitidas y pendientes en todo el mundo.
DTS, el símbolo & DTS y el símbolo en conjunto son marcas comerciales
registradas & DTS 2.0+Digital Out es una marca comercial de DTS, Inc. El producto
incluye el software. © DTS, Inc. Todos los derechos reservados.
AVISO SOBRE SOFTWARE DE CÓDIGO ABIERTO
Para obtener el código fuente de GPL, LGPL, MPL y otras licencias de fuente abierta, que se incluyen en
este producto, visite http://opensource.lge.com.
Además del código fuente, se pueden descargar todos los términos de licencia, las exenciones de
garantías y los derechos de autor mencionados.
Además, LG Electronics le proporcionará el código fuente abierto en CD-ROM por un valor que cubre el
coste de realizar dicha distribución (como el coste de los medios, el envío y la manipulación) previa solicitud
vía correo electrónico a [email protected]. Esta oferta es válida por tres (3) años a partir de la fecha en
que compre el producto.
ESPAÑOL
10
CONTENIDO
CONTENIDO
2 INSTRUCCIONES DE SEGURIDAD
IMPORTANTES
7 Ver imágenes en 3D
9 LICENCIAS
9 AVISO SOBRE SOFTWARE DE
CÓDIGO ABIERTO
10 CONTENIDO
11 PROCEDIMIENTO DE INSTALACIÓN
11 MONTAJE Y PREPARACIÓN
11 Desempacar
13 Complementos opcionales
14 Componentes y botones
15 Levantar y trasladar el televisor
16 Configurar el televisor
16 - Colocar el pie
18 - Montar sobre una mesa
19 - Sujetar los cables
20 - Montar en la pared
21 ESTABLECER CONEXIONES
21 Conexión de una antena o un cable
22 Conexión a un receptor de HD, reproductor
de DVD o VCR
22 - Conexión HDMI
23 - Conexión DVI a HDMI
24 - Conexión a un teléfono móvil
25 - Conexión por componente
26 - Conexión compuesta
27 Conectarse a un PC
27 - Conexión HDMI, Conexión DVI a HDMI o
Conexión RGB
29 Conexión a un sistema de audio
29 - Conexión de audio óptica digital
30 Conexión a un dispositivo USB
31 CONTROL REMOTO
31 Funciones del control remoto Mágico
32 - Cómo registrar el control remoto Mágico
32 - Cómo utilizar el control remoto Mágico
32 - Precauciones que debe seguir al utilizar el
control remoto Mágico
33 MIRAR TV
33 Encender el televisor por primera vez
34 CÓMO UTILIzAR LA GUíA DEL
USUARIO
35 ESPECIFICACIONES
39 MANTENIMIENTO
39 Limpieza del TV
39 - Pantalla, marco, gabinete y base
39 - Cable de alimentación
39 SOLUCIÓN DE PROBLEMAS
La imagen puede ser diferente a la de su
televisor.
El OSD (On Screen Display, Despliegue
En la Pantalla) de su TV puede ser un poco
diferente que este manual.
Los menús y las opciones disponibles
pueden variar según la fuente de entrada
que utilice.
Es posible que se agreguen nuevas
funciones a este televisor en el futuro.
NOTA
ESPAÑOL
11
MONTAJE Y PREPARACIÓN
PROCEDIMIENTO DE INSTALACIÓN
1
Abra el paquete y asegúrese de que todos los accesorios estén incluidos.
2
Instale la base del televisor.
3
Conecte un dispositivo externo al televisor.
4
Asegúrese de que la conexión de red esté disponible.
Solo podrá usar las funciones de red del TV cuando se haya establecido la conexión a la red.
MONTAJE Y PREPARACIÓN
Desempacar
Verifique que la caja del producto contenga los siguientes elementos. Si falta algún accesorio, co-
muníquese con el distribuidor local mediante el cual adquirió el producto. Las ilustraciones de este manual
pueden diferir del producto que usted adquirió.
No use ningún producto no autorizado para garantizar la seguridad y la vida útil del producto.
Ningun daño o lesiones por el uso de elementos no autorizados no están cubiertos por la garantía.
En algunos modelos, la película delgada sobre la pantalla forma parte del televisor. Por ese motivo,
no debe quitarla.
PRECAUCIÓN
Los artículos suministrados con el producto adquirido pueden variar según el modelo.
Es posible que cambien las especificaciones del producto o el contenido del manual sin previo aviso
debido a las actualizaciones de las funciones del producto.
Para que la conexión sea óptima, los cables HDMI y los dispositivos USB tienen que tener biseles
que no superen los 10 mm (0,39 pulgada) de espesor y 18 mm (0,7 pulgada) de ancho.
Utilice un cable de extensión que sea compatible con USB 2.0, en caso de que el cable USB o la
tarjeta de memoria USB no encajen en el puerto USB del TV.
B
A
A
B
*A
10 mm (0.39 pulgada)
*B
18 mm (0.7 pulgada)
NOTA
ESPAÑOL
12
MONTAJE Y PREPARACIÓN
Control remoto Mágico y
baterías (AA)
(Consulte p.31)
Manual del usuario Anteojos 3D para cine
La cantidad de anteojos
3D puede variar según el
modelo o el país.
Cuerpo de Soporte
(Consulte p.16)
Base Soporte
(Consulte p.16)
Tornillos de soporte
8 PZ, M4 x 20
(Consulte p.16)
Sujetacables
(Consulte p.19)
Cable de video componente
(Consulte p.25)
Cable de video compuesto
(Consulte p.25, 26)
Paño de limpieza
(Según los modelos)
Úselo para quitar el polvo del
gabinete.
ESPAÑOL
13
MONTAJE Y PREPARACIÓN
Complementos opcionales
Los complementos opcionales se pueden cambiar o modificar para mejorar la calidad, sin necesidad de
aviso previo.
Para adquirir estos elementos, comuníquese con su distribuidor.
Estos dispositivos solo funcionarán en ciertos modelos.
AN-MR300
Control remoto Mágico
AG-F2**, AG-F3**
Anteojos 3D para cine
Es posible que el nombre o el diseño del modelo hayan cambiado, debido a las circunstancias o políticas
del fabricante.
ESPAÑOL
14
MONTAJE Y PREPARACIÓN
Componentes y botones
Botón Descripción
/ (^ / v) Permite desplazarse por los canales guardados.
/ (+ / -)
Ajusta el nivel del volumen.
(OK
)
Selecciona la opción de menú resaltada o confirma una entrada.
(SETTINGS)
Permite acceder a los menús principales o guardar las entradas y salir de los menús.
(INPUT)
Cambia la fuente de entrada.
(
/ I)
Enciende o apaga el aparato.
1 Sensor inteligente - Ajusta la calidad y brillo de la imagen basada en ambiente a su alrededor.
Parlantes
Pantalla
Botón
Luz del logotipo de LG
Indicador de encendido
Control remoto y
sensores inteligentes
1
ESPAÑOL
15
MONTAJE Y PREPARACIÓN
Levantar y trasladar el
televisor
Si desea levantar o trasladar el televisor, lea las
instrucciones a continuación para no rayar o dañar
el aparato, y para transportarlo de forma segura,
independientemente del tamaño o tipo de aparato.
No toque la pantalla. De lo contrario, podría
dañarla.
PRECAUCIÓN
Se recomienda trasladar el televisor en la
caja o el material de embalaje en el que lo
recibió al comprarlo.
Antes de mover o levantar el televisor,
desconecte el cable de alimentación y el
resto de los cables.
Cuando sostenga el televisor, la pantalla
debe quedar alejada de usted para evitar
algun daño.
Sostenga con firmeza la parte superior e
inferior del marco del televisor. Asegúrese
de no sostenerlo por la parte transparente,
por el parlante o por el área de rejillas de los
parlantes.
Si desea transportar un televisor grande,
necesita la ayuda de dos personas como
mínimo.
Al transportar el televisor con las manos,
sosténgalo como se indica en esta
ilustración.
Al transportar el televisor, no lo someta a
sacudones o vibración excesiva.
Al transportar el televisor manténgalo en
posición vertical, nunca lo apoye sobre uno
de los costados, ni lo incline hacia la derecha
o la izquierda.
Siempre que manipule el TV, los costados
deben cubrirse con la almohadilla de
protección.
Almohadilla de protección
ESPAÑOL
16
MONTAJE Y PREPARACIÓN
Configurar el televisor
Coloque el televisor en un soporte de pedestal sobre una mesa o la pared.
Colocar el pie
Si no instala el televisor en una pared, siga estas instrucciones para colocar el pie.
Al instalar la base del televisor, ponga
la pantalla hacia abajo sobre una mesa
acolchada o una superficie plana para
evitar rayas.
PRECAUCIÓN
2
1
Parte frontal
Vista superior
Cuerpo de
Soporte
Base Soporte
M4 x 20
4 PZ
3
ESPAÑOL
17
MONTAJE Y PREPARACIÓN
Antes de montar el televisor en la pared,
retire la base, realizando la instalación de
ésta en orden inverso.
NOTA
Asegúrese de que los tornillos estén
completamente ajustados. (Si no están lo
suficientemente ajustados, el TV puede
inclinarse hacia delante después de
instalarse.)
No ajuste los tornillos con demasiada
fuerza, de lo contrario, se pueden
desgastar y aflojar.
PRECAUCIÓN
Retire las almohadillas de protección
después de instalar el TV.
PRECAUCIÓN
54
M4 x 20
4 PZ
Almohadilla de protección
ESPAÑOL
18
MONTAJE Y PREPARACIÓN
Montar sobre una mesa
1
Levante el televisor y déjelo en posición
vertical sobre la mesa.
- Deje un espacio mínimo de 10 cm
(4 pulgadas) entre el televisor y la pared para
asegurar una ventilación adecuada.
10 cm
10 cm
10 cm
10 cm
(4 p
u
lg
ad
as)
2
Conecte el cable de alimentación al
tomacorriente de la pared.
No colocar la television cerca de fuentes
de calor, puede resultar quemada u
ocasionar otro daño.
PRECAUCIÓN
Ajuste el ángulo del TV para una mejor visibilidad
Rote el aparato 10 grados hacia la izquierda o la
derecha y ajuste el ángulo del televisor según su
preferencia.
10˚10˚
Al ajustar el ángulo del televisor, tenga
cuidado con sus dedos.
- Si los dedos o las manos quedan atrapados,
se pueden provocar lesiones corporales.
Si el producto se inclina demasiado, podría
caerse, lo que podría provocar lesiones o
daños.
Rear
Front
Parte delantera Parte posterior
PRECAUCIÓN
ESPAÑOL
19
MONTAJE Y PREPARACIÓN
Fijación del televisor a la pared (opcional)
1
Inserte y ajuste los tornillos de ojo del televisor
en su parte posterior.
- En caso de que haya tornillos insertados,
primero retírelos.
2
Utilice los tornillos para colocar los soportes
correspondientes en la pared.
Acople el soporte de la pared con los tornillos
de ojo a la parte posterior del televisor.
3
Conecte los tornillos de ojo y los soportes con
un cordón fuerte y ajústelos con firmeza.
Asegúrese de mantener el cordón en posición
horizontal a la superficie plana.
Asegúrese de que los niños no se suban al
televisor ni se cuelguen de él.
PRECAUCIÓN
Utilice una plataforma o un armario que sea
lo suficientemente fuerte y grande para
sostener el televisor de manera segura.
Los soportes, los tornillos y los cordones
son opcionales. Puede solicitar otros
accesorios a través de su distribuidor local.
NOTA
Sujetar los cables
1
Agrupe y ate los cables con la abrazadera
correspondiente.
Cable management clip
Organizador de cables
2
Agrupe y ate los cables con el sujetacables.
Cable holder
Sujetacables
No mueva el televisor tirando del
sujetacables, dado que podría romperse y
provocarle lesiones o dañar el televisor.
PRECAUCIÓN
ESPAÑOL
20
MONTAJE Y PREPARACIÓN
Montar en la pared
Coloque con cuidado un soporte de pared opcional
en la parte posterior del televisor e instálelo en
una pared sólida, perpendicular al suelo. Para
montar el televisor sobre otros materiales de
construcción, póngase en contacto con personal
técnico calificado.
Se recomienda utilizar un soporte de pared de la
marca LG para montar el TV en una pared.
10 cm
10 cm
10 cm
10 cm
(4
p
u
lg
ad
as)
Asegúrese de usar tornillos y soportes de pared
que cumplan con el estándar VESA. En la tabla
siguiente se detallan las dimensiones de los
conjuntos de montaje de pared.
Modelo 47LM8600
47LM8650
55LM8600
55LM8650
VESA (A x B)
A
B
400 x 400
Tornillo estándar M6
Cantidad de tornillos 4
Soporte de pared
(opcional)
LSW400BX
LSW420BX
Antes de mover o instalar el televisor,
desconecte el cable de alimentación. De
lo contrario, podría provocar una descarga
eléctrica.
Si instala el televisor en el cielo raso o
en una pared inclinada, podría caerse y
provocar lesiones graves. Utilice un soporte
de pared autorizado por LG y comuníquese
con el distribuidor local o con personal
técnico calificado.
No ajuste excesivamente los tornillos, dado
que podría dañar el televisor y anular la
garantía.
Utilice tornillos y soportes de pared que
cumplan con la norma VESA. La garantía no
cubre daños o lesiones provocados por el
uso incorrecto del aparato o de accesorios
no autorizados.
PRECAUCIÓN
Utilice los tornillos enumerados en las
especificaciones del estándar VESA.
El conjunto de montaje de pared incluye
un manual de instalación y las piezas
necesarias.
El soporte de pared es opcional.
Para obtener accesorios adicionales,
comuníquese con su distribuidor local.
La longitud de los tornillos puede variar
según el tipo de soporte de pared.
Asegúrese de utilizar la longitud adecuada.
Para obtener más información, consulte
el manual suministrado con el montaje de
pared.
NOTA
Instalación del soporte de pared
1
Para proteger la pantalla del TV (de rayas y
huellas dactilares), coloque el TV sobre una
mesa plana sin retirar la bolsa de embalaje.
2
Después de retirar la bolsa de embalaje en la
parte posterior del TV, instale el TV de acuerdo
con las instrucciones que aparecen en el
manual del producto de soporte de pared.
3
Retire las almohadillas de protección después
de instalar el TV.
ESPAÑOL
21
ESTABLECER CONEXIONES
Conecte varios dispositivos externos al televisor y cambie los modos de entrada para seleccionar un dis-
positivo externo. Para obtener más información sobre cómo conectar dispositivos externos, consulte sus
respectivos manuales. Entre los dispositivos externos disponibles pueden mencionarse los siguientes:
receptores de HD, reproductores de DVD, VCR, sistemas de audio, dispositivos de almacenamiento USB,
PC, dispositivos de juegos, etc.
Si graba un programa de TV en una grabadora de DVD o VCR, asegúrese de conectar el cable de
entrada de señal al televisor a través de uno de estos dos dispositivos. Para obtener más información
acerca de la grabación, consulte el manual proporcionado con el dispositivo conectado.
La conexión del dispositivo externo puede variar según el modelo.
Conecte los dispositivos externos al televisor independientemente del orden del puerto del aparato.
NOTA
Conexión de una antena o un cable
Para mirar televisión, conecte una antena, un cable o una caja de cable y siga estas instrucciones. Las
ilustraciones pueden diferir de los elementos reales y el cable RF es opcional.
ANTENNA / CABLE
VHF Antenna
UHF Antenna
Antenna
Terminal
Coaxial (75Ω)
Antena VHF
Antena UHF
Antena
Utilice un divisor de señal para más de 2
televisores.
Visite http://lgknowledgebase.com para
obtener más información sobre la conexión
de la antena y el cable. Busque la antena.
NOTA
Asegúrese de no doblar el alambre de cobre
del cable de RF.
Alambre de cobre
Primero conecte todos los dispositivos entre
sí y luego conecte el cable de alimentación
al tomacorriente, para que el televisor no
resulte dañado.
PRECAUCIÓN
ESPAÑOL
22
ESTABLECER CONEXIONES
Conexión a un receptor de HD, reproductor de DVD o VCR
Conecte un receptor de HD, reproductor de DVD o VCR al televisor y seleccione el modo de entrada
apropiado.
Conexión HDMI
La conexión HDMI es la mejor manera de conectar un dispositivo.
Transmite las señales de audio y video digitales de un dispositivo externo al televisor. Conecte el
dispositivo externo y el televisor con el cable HDMI tal como se muestra en la siguiente ilustración.
Utilice el cable HDMI™ de alta velocidad más reciente con la función CEC (control electrónico por
parte del cliente).
Los cables HDMI™ de alta velocidad están probados para transportar señales HD de hasta 1 080
progresivo y superiores.
NOTA
Escoja cualquier puerto de entrada HDMI para conectar. No importa qué puerto utilice.
HDMI
2 3 1
(ARC)
4
(MHL)
/ DVI IN
DVD/ Blu-Ray / HD Cable Box / HD STB
(*Not Provided)
DVD/ Blu-Ray / Caja de cable HD / HD STB
(*No incluido)
ARC (canal de retorno de audio)
Al estar conectado un cable HDMI de alta
velocidad, el audio digital puede enviarse a
un dispositivo compatible sin un cable de
audio óptico adicional.
El canal de retorno de audio (ARC) solo es
compatible con el puerto HDMI de entrada
1 (ARC). Si desea utilizar un canal de
retorno de audio (ARC), deberá conectar un
dispositivo de audio externo compatible con
ARC a una entrada HDMI 1.
Códec de audio DTV compatible: MPEG,
Dolby Digital
Formato de audio HDMI compatible: Dolby
Digital, PCM (hasta 192 KHz, 32k/44.1k/48k/
88k/96k/176k/192k)
-> No compatible con DTS.
NOTA
ESPAÑOL
23
ESTABLECER CONEXIONES
Conexión DVI a HDMI
Transmite las señales de video digital de un dispositivo externo al televisor. Conecte el dispositivo externo
y el televisor con el cable DVI-HDMI tal como se muestra en la siguiente ilustración. Para transmitir una
señal de audio, conecte un cable de audio.
(RGB/HDMI-PC)
AUDIO
(RGB/DVI)
AUDIO
2 3 1
(ARC)
4
(MHL)
/ DVI IN
AUDIO OUT
DVI OUT
(*Not Provided)
(*Not Provided)
DVD/ Blu-Ray / HD Cable Box
(*No incluido)
(*No incluido)
DVD /Blu-Ray / Caja de cable HD
ESPAÑOL
24
ESTABLECER CONEXIONES
Conexión a un teléfono móvil
El enlace de alta definición móvil (MHL, por sus siglas en inglés) es una interfaz de transmisión de señales
audiovisuales digitales de teléfonos móviles a televisores.
Conecte el teléfono móvil al puerto HDMI/DVI IN 4 (MHL) para ver la pantalla del teléfono en el TV.
Esto solo funciona en teléfonos habilitados con MHL.
Algunas aplicaciones pueden funcionar con el control remoto.
En algunos teléfonos móviles compatibles con MHL, es posible utilizar el Control remoto Magic.
Se necesita el cable MHL pasivo para conectar el TV y un teléfono móvil.
NOTA
2 3 1
(ARC)
4
(MHL)
/ DVI IN
(*Not Provided)
MHL Cable
Mobile phone
(*No incluido)
Teléfono móvil
Cable MHL
ESPAÑOL
25
ESTABLECER CONEXIONES
Conexión por componente
Transmite las señales de audio y video analógicas de un dispositivo externo al televisor. Conecte el
dispositivo externo y el televisor con el cable componente tal como se muestra en la siguiente ilustración.
Si la instalación de los cables no es la adecuada, podría proyectarse una imagen en blanco y negro o
con colores distorsionados.
Revise y compruebe que los cables coincidan con las conexiones de color correspondientes.
NOTA
VIDEO
AUDIO
L R
DVD/ Blu-Ray / HD Cable Box
(Use the component video cable provided.)(Use the composite video cable provided.)
(*Not Provided)
(*Not Provided)
GREEN
RED
BLUE
YELLOW
GREENYELLOW
WHITE
RED
GREEN
RED
BLUE
GREEN
RED
BLUE
WHITE
RED
WHITE
RED
IN
COMPONENT
AV
VIDEO AUDIO
Y
P
B
P
R
(Use el cable de video componente
que se proporciona.)
(Use el cable de video compuesto
que se proporciona.)
(*No incluido)
(*No incluido)
VERDE
ROJO
AZUL
VERDE
ROJO
AZUL
VERDE
ROJO
AZUL
BLANCO
ROJO
AMARILLO
BLANCO
ROJO
BLANCO
ROJO
VERDEAMARILLO
DVD /Blu-Ray / Caja de cable HD
ESPAÑOL
26
ESTABLECER CONEXIONES
Conexión compuesta
Transmite las señales de audio y video analógicas de un dispositivo externo al televisor. Conecte el
dispositivo externo y el televisor con el cable compuesto tal como se muestra en la siguiente ilustración.
Si posee una VCR monofónica, conecte el cable de audio de la VCR a la toma AUDIO L/MONO del
televisor.
Revise y compruebe que los cables coincidan con las conexiones de color correspondientes.
NOTA
IN
COMPONENT
AV
VIDEO AUDIO
Y
P
B
P
R
VIDEO
MONO
( )
AUDIOL R
VCR / DVD/ Blu-Ray / HD Cable Box
(*Not Provided)
YELLOW
WHITE
RED
YELLOW
WHITE
RED
YELLOW
YELLOW
WHITE
RED
(Use the composite video cable provided.)
(Use el cable de video compuesto
que se proporciona.)
(*No incluido)
BLANCO
ROJO
AMARILLO AMARILLO AMARILLO
BLANCO
ROJO
BLANCO
ROJO
AMARILLO
VCR / DVD /Blu-Ray / Caja de cable HD
ESPAÑOL
27
ESTABLECER CONEXIONES
Conectarse a un PC
Se recomienda utilizar el televisor con la conexión HDMI para obtener una calidad de imagen óptima.
Según la tarjeta gráfica, es posible que no funcione el modo DOS cuando se utiliza un cable HDMI a
DVI.
En el modo PC, es posible que exista ruido asociado con la resolución, patrones verticales, contraste
o brillo. Si se producen ruidos, cambie la resolución de la salida de la PC, cambie la frecuencia de
actualización o ajuste el brillo y el contraste en el menú IMAGEN hasta que la imagen mejore.
La forma de onda de la entrada de sincronización para las frecuencias horizontales y verticales es
diferente.
Según la tarjeta gráfica, es posible que algunos ajustes de resolución no permitan que la imagen se
ubique en la pantalla de forma correcta.
NOTA
Conexión HDMI, Conexión DVI a HDMI o Conexión RGB
Escoja el método A, B o C para realizar la conexión.
Método A: Conexión HDMI
HDMI
2 3 1
(ARC)
4
(MHL)
/ DVI IN
Choose any HDMI input port to connect.
It does not matter which port you use.
(*Not Provided)
PC
Escoja cualquier puerto de entrada HDMI para conectar.
Se recomienda conectar el DVI-HDMI a HDMI IN 4.
(*No incluido)
ESPAÑOL
28
ESTABLECER CONEXIONES
Método B: Conexión DVI a HDMI
(RGB/HDMI-PC)
AUDIO
(RGB/DVI)
AUDIO
2 3 1
(ARC)
4
(MHL)
/ DVI IN
AUDIO OUT
DVI OUT
(*Not Provided)
(*Not Provided)
PC
(*No incluido)
(*No incluido)
Método C: Conexión RGB
RGB OUT (PC)
AUDIO OUT
(PC)
RGB
(RGB/HDMI-PC)
AUDIO
(PC)
RGB
(RGB/DVI)
AUDIO
(*Not Provided)
(*Not Provided)
PC
(*No incluido)
(*No incluido)
ESPAÑOL
29
ESTABLECER CONEXIONES
Conexión a un sistema de audio
Utilice un sistema de audio externo opcional en lugar del parlante incorporado.
Si utiliza un dispositivo de audio externo opcional en lugar del parlante incorporado, apague los
parlantes del televisor.
NOTA
Conexión de audio óptica digital
Transmite señales de audio digital del televisor a un dispositivo externo. Conecte el dispositivo externo y el
televisor con el cable de audio óptico tal como se muestra en la siguiente ilustración.
No mire hacia el puerto de salida óptica. Mirando el rayo láser puede dañar su visión.
Audio de ACP (Protección de copiar Audio) puede bloquear la función de salida de audio digital.
NOTA
OPTICAL
AUDIO IN
OPTICAL
DIGITAL
AUDIO
OUT
Digital Audio System
(*Not Provided)
(*No incluido)
Sistema de audio digital
ESPAÑOL
30
ESTABLECER CONEXIONES
Conexión a un dispositivo USB
Conecte un dispositivo de almacenamiento USB como una memoria USB Flash, un disco duro externo o
un lector de tarjetas de memoria USB al televisor y acceda al menú Mis medios para poder utilizar distintos
archivos multimedia.
Para usar un dispositivo HDD, compruebe que esté conectado al puerto USB IN 1 HDD IN.
Para almacenar las aplicaciones en un dispositivo de almacenamiento USB, asegúrese de que está
conectado al puerto USB en 3 puerto.
Es posible que algunos concentradores USB no funcionen. Si no se detecta un dispositivo USB
conectado mediante un concentrador USB, conéctelo directamente al puerto USB del TV.
NOTA
USBHDD IN USB Apps
1
2
3
USB IN
USB
HDD
USB Hub
(*Not Provided)
(*Not Provided)
(*Not Provided)
Choose any USB input port to connect.
It does not matter which port you use.
Escoja cualquier puerto de entrada USB para conectar.
No importa qué puerto utilice.
(*No incluido)
(*No incluido)
(*No incluido)
hub USB
ESPAÑOL
31
CONTROL REMOTO
CONTROL REMOTO
Funciones del control remoto Mágico
Cuando aparezca el mensaje “Batería baja en el mando a distancia Mágico. Cambie
la batería.”, reemplace la batería. Para reemplazar las baterías, abra la tapa del
compartimiento de baterías, reemplace las baterías (AA de 1,5 V)
y haga coincidir
los extremos con la etiqueta que se encuentra dentro del compartimiento.
A continuación, cierre la tapa. Asegúrese de que el control remoto apunte hacia
el sensor correspondiente del TV. Para extraer las baterías, realice los pasos de
instalación a la inversa.
No use baterías nuevas junto con otras usadas, ya que esto puede dañar el control remoto.
PRECAUCIÓN
Asegúrese de que el control remoto apunte hacia el sensor correspondiente del TV.
Puntero (transmisor de RF)
Búsqueda por voz
(Según el país)
Seleccione el icono Búsqueda por Voz en
la pantalla. Hable lento y preciso. Cuando
se reconoce una voz, el mensaje de
procesamiento aparece en la pantalla. Use
el Control remoto Magic a un máximo de
15 cm de su cara. (Esta es una versión beta
y solo está disponible en algunas funciones
de modelos compatibles.)
(
ENCENDIDO
)
Enciende o apaga el TV.
HOME
Permite acceder al menú inicio.
Botones de navegación
(arriba/abajo/izquierda/derecha)
Permiten desplazarse por los menús o las
opciones.
BACK
Permite volver al nivel anterior.
VOL
Ajusta el nivel del volumen.
CH
Permite desplazarse por los canales
guardados.
(SILENCIA)
Silencia todos los sonidos.
MY APPS
Muestra la lista de aplicaciones.
Q.MENU
Permite acceder al menú rápido.
Permite ver videos 3D.
Rueda (OK)
Permite seleccionar menús u opciones y
confirmar lo ingresado. Permite desplazarse
por los canales guardados. Si presiona
el botón de navegación mientras mueve
el puntero en la pantalla, el puntero
desaparecerá y el control remoto Mágico
funcionará como un control remoto normal.
Para volver a ver el puntero, sacuda el
control remoto Mágico de un lado a otro.
La imagen puede ser diferente a
la de su control remoto.
NOTA
ESPAÑOL
32
CONTROL REMOTO
Cómo registrar el control remoto
Mágico
El control remoto Mágico funciona al vincularlo
con el TV.
Luego de comprar el TV, registre el control remoto
Mágico de la siguiente manera;
Cómo registrar el control remoto Mágico
(Rueda)
Para registrarlo automáticamente, encienda
el TV y presione la
Rueda (OK)
. Cuando
finalice el registro, aparece el mensaje de
finalización en la pantalla.
Si falla el registro, apague el y vuelva a
encenderlo; luego presione la
Rueda (OK)
para finalizar el registro.
Cómo volver a registrar el control remoto Mágico
BACK
HOME
1 Mantenga presionados los botones
BACK
y
HOME
a la vez durante
5 segundos para restablecer el
sistema, luego regístrelo siguiendo
las instrucciones que se indican en
la sección “Cómo registrar el control
remoto Mágico” que está más adelante.
2 Para volver a registrar el control remoto
Magic (Mágico), mantenga presionado
el botón
BACK
durante 5 segundos,
apuntando hacia el TV.
Cómo utilizar el control remoto
Mágico
1 Para mover el puntero, apunte el receptor
del puntero del control remoto hacia el
TV y luego muévalo hacia la izquierda,
hacia la derecha, hacia arriba o hacia
abajo.
»
Si el puntero no funciona
adecuadamente, no utilice el control
remoto durante 10 segundos y luego
vuelva a intentarlo.
2 Si el puntero desaparece, mueva
levemente el control remoto hacia la
izquierda y derecha. Luego, aparecerá
automáticamente en la pantalla.
»
El puntero desaparece cuando no se
utiliza durante un período determinado.
i
1
3
2
1
Si presiona el botón
Rueda (OK)
del control
remoto Magic (Mágico), aparece la siguiente
pantalla.
Muestra información del programa actual y de
la pantalla.
2
Al pulsar este botón se mostrará teclado
numérico que se puede seleccionar el número
de canal.
3
Puede seleccionar el menú My Apps.
Precauciones que debe seguir al
utilizar el control remoto Mágico
Use el control remoto mágico dentro de la
distancia de comunicación máxima (10 m;
32,8 pies). El uso del control remoto fuera de
esta distancia o con un objeto que obstruya
la comunicación puede provocar un error.
Otros dispositivos cercanos pueden generar
errores en la comunicación. Los dispositivos
eléctricos como los hornos de microondas
o un producto con una LAN inalámbrica
pueden causar interferencias, ya que utilizan
el mismo ancho de banda (2,4 GHz) que el
control remoto Magic (Mágico).
Este control remoto puede dañarse o
funcionar mal si se cae o recibe un golpe
fuerte.
Al utilizar este control remoto Magic
(Mágico), procure no golpearlo contra los
muebles cercanos u otras personas.
El fabricante y el instalador no pueden brindar
servicios relacionados con la seguridad
de las personas, ya que es posible que el
dispositivo inalámbrico genere interferencias
de ondas eléctricas.
Se recomienda ubicar el punto de acceso
(AP) a más de 1 m (3,28 pies) de distancia
del TV. Si el punto de acceso se instala a
una distancia menor que 1 m (3,28 pies), es
posible que el control remoto Magic (Mágico)
no funcione según lo esperado debido a la
interferencia de las frecuencias.
ESPAÑOL
33
MIRAR TV
MIRAR TV
Encender el televisor por
primera vez
Al encender el televisor por primera vez, aparece
la pantalla de configuración inicial. Seleccione un
idioma y personalice la configuración básica.
1
Conecte el cable de alimentación a un
tomacorriente.
2
En modo de espera, presione el botón de
encendido en el control remoto para encender
el televisor.
Si es la primera vez que enciende el televisor,
aparecerá la pantalla de configuración inicial.
Para acceder a
Configuración Inicial
, vaya
a
OPCIÓN
en el menú principal.
NOTA
3
Siga las instrucciones en pantalla para
personalizar la configuración del televisor
según sus preferencias.
Selección de Idioma
Selecciona un idioma para
mostrar.
Uso del mando a
distancia Mágico
Configura el control remoto
Mágico.
Selección de Entorno
Seleccione
Home
* para el
entorno doméstico.
Config. de la Zona
Horaria
Selecciona la zona horaria y
el horario de verano.
Conexión de red
Configura la red para habilitar
la función relacionada con la
red en el TV.
Sintonización
automática
Busca y guarda
automáticamente los canales
disponibles.
Config. finalizada
Confirma las opciones de
configuración.
Seleccione
Hogar
cuando aparezca. El
modo
Tienda
coloca el TV en el modo
demo.
Si selecciona
Tienda
, los ajustes
personalizados se regresaran al ajuste de
tienda en 5 minutos.
NOTA
4
Una vez finalizada la configuración básica,
presione el
Rueda (OK)
.
Si no completa la configuración inicial,
aparecerá cada vez que encienda el
televisor.
Desconecte el cable de alimentación del
tomacorriente cuando no use el televisor
durante periodos prolongados.
NOTA
5
Para apagar el televisor, presione el botón de
encendido en el control remoto.
ESPAÑOL
34
CÓMO UTILIZAR LA GUÍA DEL USUARIO
CÓMO UTILIzAR LA
GUíA DEL USUARIO
La Guía del usuario le permite acceder de forma
más sencilla a la información detallada del TV.
1
Presione el botón
HOME
para ingresar al
menú HOME.
2
Seleccione
Guía del Usuario
y presione el
Rueda (OK)
.
Guía del Usuario
Guía del Usuario
Configuración CANAL
Configuracn IMAGEN, AUDIO
OPCIÓN
Función LG SMART
Función avanzada
Información
Para usar el dispositivo de entrada
Para usar la característica de Ahorro de Energía
Para configurar opciones de hora
Para configurar opciones de bloqueo de TV
Para configurar el idioma
Ayuda para discapacitados
Para usar el mando Magic
1
2 3
4
1
Muestra el canal actual.
2
Permite seleccionar la categoría que desea.
3
Permite seleccionar el ítem que desea.
Puede utilizar / para cambiar de página.
4
Permite buscar la descripción de la función que
desea en el índice.
Ir Ampliar Cerrar
Guía del Usuario
OPCIÓN > Para configurar el idioma
HOME Ajustes OPCIÓN Idioma
Selecciona el idioma del menú y el idioma de audio que se muestra en la pantalla.
Idioma del
menú
Selecciona un idioma para el menú en pantalla.
Idioma de
audio
[Sólo en modo digital]
Selecciona el idioma que desea para ver transmisiones digitales
que contengan varios idiomas de audio.
idioma de
Búsqueda por
voz
Seleccione el idioma para hacer la búsqueda por voz.
Sólo el modelo adoptado de búsqueda por voz es compatible
con esta configuración.
Configuración CANAL
Configuracn IMAGEN, AUDIO
OPCIÓN
Función LG SMART
Función avanzada
Información
1
2 3
Ir Reducir Cerrar
HOME Ajustes OPCIÓN Idioma
Selecciona el idioma del menú y el idioma de audio que se muestra en la pantalla.
Idioma del
menú
Selecciona un idioma para el menú en pantalla.
Idioma de
audio
[Sólo en modo digital]
Selecciona el idioma que desea para ver transmisiones digitales
que contengan varios idiomas de audio.
idioma de
Búsqueda por
voz
Seleccione el idioma para hacer la búsqueda por voz.
Sólo el modelo adoptado de búsqueda por voz es compatible
con esta configuración.
3
1
Muestra la descripción del menú
seleccionado.
Puede utilizar / para cambiar de página.
2
Se traslada al menú seleccionado
directamente desde la Guía del usuario.
3
Amplía o reduce el tamaño de la pantalla.
ESPAÑOL
35
ESPECIFICACIONES
ESPECIFICACIONES
Las especificaciones del producto pueden cambiar sin previo aviso debido a las actualizaciones de las
funciones de los productos.
Potencia requerida EUA, Canadá, México: AC 120 V ~ 50 / 60 Hz
Otro país: AC 100 - 240 V ~ 50 / 60 Hz
Sistema de televisión NTSC-M, ATSC, 64 y 256 QAM
Cobertura de programas VHF 2-13, UHF 14-69, CATV 1-135, DTV 2-69, CADTV 1-135
Impedancia de antena externa
75
Ω
Condición de
ambiente
Temperatura de funcionamiento 0 a 40 °C
Humedad de funcionamiento Inferior al 80 %
Temperatura de almacenamiento -20 a 60 °C
Humedad de almacenamiento Inferior al 85 %
MODELOS
47LM8600
(47LM8600-UC)
55LM8600
(55LM8600-UC)
47LM8650
(47LM8650-UC)
55LM8650
(55LM8650-UC)
Dimensiones
(ancho x altura x
profundidad)
Con pie 1 063,0 x 701,0 x 263,0 mm
(41,8 x 27,5 x 10,3 pulg.)
1 232,0 x 795,0 x 331,0 mm
(48,5 x 31,2 x 13,0 pulg.)
Sin pie 1 063,0 x 628,0 x 33,4 mm
(41,8 x 24,7 x 1,3 pulg.)
1 232,0 x 723,0 x 33,6 mm
(48,5 x 28,4 x 1,3 pulg.)
Peso Con pie 18,0 kg (39,6 libras) 25,9 kg (57,0 libras)
Sin pie 15,8 kg (34,8 libras) 22,2 kg (48,9 libras)
Valor actual / consumo de energía 1,4 A / 140 W 1,7 A / 170 W
ESPAÑOL
36
ESPECIFICACIONES
Formatos 3D admitidos
El video, que se presenta a continuación con contenidos multimedia de entrada, se convierte
automáticamente en la pantalla 3D.
Formatos 3D admitidos automáticamente
Entrada Señal
Frecuencia
horizontal
(kHz)
Frecuencia
vertical
(Hz)
Formato de video en 3D reproducible
HDMI
640 x 480
31.469 59.94
Arriba y abajo, Lado a lado (mitad), Lado a lado (completo)
31.5 60
62.938 59.94
Frame Packing, Line Alternative
63 60
480
progresivo
31.469 59.94
Arriba y abajo, Lado a lado (mitad), Lado a lado (completo)
31.5 60
62.938 59.94
Frame Packing, Line Alternative
63 60
720
progresivo
44.96 59.94
Arriba y abajo, Lado a lado (mitad), Lado a lado (completo)
45.00 60
89.91 59.94
Frame Packing, Line Alternative
90.00 60
1080
entrelazado
33.72 59.94
Arriba y abajo, Lado a lado (mitad), Lado a lado (completo)
33.75 60
67.50
59.94
Frame Packing, Field Alternative
60
1080
progresivo
26.97 23.97
Arriba y abajo, Lado a lado (mitad), Lado a lado (completo)
27.00 24
33.72 29.976
33.75 30
43.94 23.97
Frame Packing, Line Alternative
54 24
67.432 29.976
67.50 30
67.43 59.94
Arriba y abajo, Lado a lado (mitad)
67.50 60
USB
1080
progresivo
33.75 30
Lado a lado (mitad), Arriba y abajo, Damero,
MPO (foto)
DLNA
1080
progresivo
33.75 30
ESPAÑOL
37
ESPECIFICACIONES
Para modelos compatibles con WiDi, puede establecer el modo 3D de la misma manera que en el modo
RGB (PC).
Formatos 3D admitidos manualmente
Entrada Señal
Frecuencia
horizontal
(kHz)
Frecuencia
vertical
(Hz)
Formato de video en 3D reproducible
HDMI - DTV
720
progresivo
45.00 60
2D a 3D, Lado a lado (mitad), Arriba y abajo,
Secuencial de marco único
1080
entrelazado
33.75 60 2D a 3D, Lado a lado (mitad), Arriba y abajo
1080
progresivo
27.00 24
2D a 3D, Lado a lado (mitad), Arriba y abajo,
Damero
33.75 30
67.50 60
2D a 3D, Lado a lado (mitad), Arriba y abajo,
Damero, Secuencial de marco único,
Intercalación de filas, Intercalación de columnas
Otros - - 2D a 3D
HDMI - PC
1024 x 768 48.36
60
2D a 3D, Lado a lado (mitad), Arriba y abajo
1360 x 768 47.71
1920 x 1080 67.50
2D a 3D, Lado a lado (mitad), Arriba y abajo,
Damero, Secuencial de marco único
Otros - - 2D a 3D
RGB - PC
1024 x 768 48.36
60 2Dto3D, Lado a lado (mitad), Arriba y abajo1360 x 768 47.71
1920 x 1080 67.50
Otros - - 2D a 3D
Componente
720
progresivo
45.00 60
2D a 3D, Lado a lado (mitad), Arriba y abajo
1080
entrelazado
33.75 60
1080
progresivo
27.00 24
33.75 30
67.50 60
Otros - - 2D a 3D
USB
1080
progresivo
33.75 30
2D a 3D, Lado a lado (mitad), Arriba y abajo,
Damero, Intercalación de filas,
Intercalación de columnas, Secuencial de marco único
(Photo: Lado a lado (mitad), Arriba y abajo)
DLNA
1080
progresivo
33.75 30
Entrada Señal Formato de video en 3D reproducible
DTV
HD 2D a 3D, Lado a lado (mitad), Arriba y abajo
SD 2D a 3D
ESPAÑOL
38
ESPECIFICACIONES
Modo HDMI (DTV) admitido
Resolución
Frecuencia
horizontal (KHz)
Frecuencia
vertical (Hz)
720 x 480
progresivo
31,47 59,94
31,50 60,00
1280 x 720
progresivo
44,96 59,94
45,00 60,00
1920 x 1080
entrelazado
33,72 59,94
33,75 60,00
1920 x 1080
progresivo
26,97 23,976
27,00 24,00
33,71 29,97
33,75 30,00
67,432 59,94
67,50 60,00
Modo de componente admitido
Resolución
Frecuencia
horizontal (KHz)
Frecuencia
vertical (Hz)
720 x 480
entrelazado
15,73 59,94
15,73 60,00
720 x 480
progresivo
31,47 59,94
31,50 60,00
1280 x 720
progresivo
44,96 59,94
45,00 60,00
1920 x 1080
entrelazado
33,72 59,94
33,75 60,00
1920 x 1080
progresivo
26,97 23,976
27,00 24,00
33,71 29,97
33,75 30,00
67,432 59,94
67,500 60,00
Información de conexión de puerto componente
Puertos componente del televisor Y P
B
P
R
Puertos de salida de video del
reproductor de DVD
Y P
B
P
R
Y B-Y R-Y
Y Cb Cr
Y Pb Pr
Especificación del módulo Wi-Fi(TWFM-B003D)
Norma
IEEE802,11a/b/g/n
Rango de
frecuencias
2400 a 2483,5 MHz
5150 a 5250 MHz
5725 a 5850 MHz
Modulación
CCK / OFDM / MIMO
Potencia de salida
(típica)
802,11a: 15 dBm
802,11b: 14 dBm
802,11g: 17 dBm
802,11n - 2,4GHz: 17 dBm
802,11n - 5GHz: 15 dBm
Velocidad de
datos
802,11a/g: 54 Mbps
802,11b: 11 Mbps
802,11n: 300 Mbps
Ganancia de la
antena (típica)
2400 a 2483,5 MHz: -2,5 dBi
5150 a 5250 MHz: -2,2 dBi
5725 a 5850 MHz: -2,9 dBi
Ancho de banda
ocupado
802,11a/b/g: HT20
802,11n: HT20/40
Como el canal de banda en uso por el país puede
ser diferente, el usuario no puede cambiar ni
ajustar la frecuencia operativa, ya que este
producto está configurado según la tabla de
frecuencias regional.
ID de la FCC del módulo de Wi-Fi
interno del TV
ID de la FCC: BEJTWFM-B003D
Especificación del módulo Bluetooth
(BM-LDS302)
Norma
Bluetooth versión 3.0
Ancho de banda
2400 ~ 2483,5 MHz
Salida (máximo)
10 dBm o menos
Velocidad de
transferencia
(máximo)
3 Mbps
Distancia máxima
de comunicación
línea visual abierta, aprox. 10 m (30
pies)
ID de la FCC del módulo de Bluetooth
interno del TV
ID de la FCC: BEJLDS302
ESPAÑOL
39
MANTENIMIENTO & SOLUCIÓN DE PROBLEMAS
MANTENIMIENTO
Limpieza del TV
Limpie el TV con regularidad para conservar el rendimiento óptimo y prolongar la vida útil del.
En primer lugar, asegúrese de apagar la energía y desconectar el cable de alimentación y todos los
demás cables.
Cuando no utilice el TV durante mucho tiempo, desconecte el cable de alimentación de la toma de
corriente para evitar posibles daños por descargas o sobrecargas de energía.
PRECAUCIÓN
Pantalla, marco, gabinete y base
Para quitar el polvo o la suciedad leve, pase un paño seco, limpio y suave por la superficie.
Para eliminar suciedad de mayor importancia, limpie la superficie con un paño suave humedecido en agua
limpia o un detergente suave diluido. Después, pase de inmediato un paño seco.
No ejerza presión, refriegue ni golpee la superficie con las uñas ni un objeto afilado, ya que puede
rayar la pantalla y producir distorsiones en la imagen.
No utilice sustancias químicas (como ceras, bencina, alcohol, diluyentes, insecticidas, desodorantes
ambientales ni lubricantes) dado que pueden dañar el acabado de la pantalla y causar decoloración.
No rocíe líquido sobre la superficie. Si entra agua al TV, puede ocasionar incendios, descargas
eléctricas o mal funcionamiento.
PRECAUCIÓN
Cable de alimentación
Quite con regularidad el polvo o la suciedad acumulados en el cable de alimentación.
SOLUCIÓN DE PROBLEMAS
Problema Solución
No se puede controlar el televisor
con el control remoto.
Compruebe el sensor del control remoto en el producto e inténtelo de nuevo.
Compruebe que no haya ningún obstáculo entre el producto y el control remoto.
Compruebe que las baterías sigan funcionando y estén instaladas como
corresponde (
con , con ).
No se muestra ninguna imagen ni
se emite sonido.
Compruebe si el producto está encendido.
Compruebe si el cable de alimentación está conectado a la toma de la pared.
Conecte otros productos para comprobar si hay un problema con la toma de la
pared.
El televisor se apaga de repente.
Compruebe la configuración del control de energía. Es posible que el suministro
eléctrico se interrumpa.
Compruebe si la función de apagado automático no está activada en la
configuración de hora. Consulte “Temporizador”.
Si no hay señal mientras el televisor está encendido, este se apagará
automáticamente después de 15 minutos de inactividad.
Este producto reúne los requisitos ENERGY STAR
en el ajuste “Usar en Casa ”.
Cambiar los ajustes de imagen predeterminados
de fábrica o activar otras funciones, incrementará
el consumo de energía, pudiendo exceder los
límites de las condiciones impuestas por la clasifi-
cación Energy Star.
Los números de modelo y de serie del televisor
se encuentran ubicados en la parte posterior del
aparato. Regístrelos en el siguiente espacio por si
alguna vez necesita recurrir al servicio técnico.
MODELO
SERIE
  • Page 1 1
  • Page 2 2
  • Page 3 3
  • Page 4 4
  • Page 5 5
  • Page 6 6
  • Page 7 7
  • Page 8 8
  • Page 9 9
  • Page 10 10
  • Page 11 11
  • Page 12 12
  • Page 13 13
  • Page 14 14
  • Page 15 15
  • Page 16 16
  • Page 17 17
  • Page 18 18
  • Page 19 19
  • Page 20 20
  • Page 21 21
  • Page 22 22
  • Page 23 23
  • Page 24 24
  • Page 25 25
  • Page 26 26
  • Page 27 27
  • Page 28 28
  • Page 29 29
  • Page 30 30
  • Page 31 31
  • Page 32 32
  • Page 33 33
  • Page 34 34
  • Page 35 35
  • Page 36 36
  • Page 37 37
  • Page 38 38
  • Page 39 39
  • Page 40 40
  • Page 41 41
  • Page 42 42
  • Page 43 43
  • Page 44 44
  • Page 45 45
  • Page 46 46
  • Page 47 47
  • Page 48 48
  • Page 49 49
  • Page 50 50
  • Page 51 51
  • Page 52 52
  • Page 53 53
  • Page 54 54
  • Page 55 55
  • Page 56 56
  • Page 57 57
  • Page 58 58
  • Page 59 59
  • Page 60 60
  • Page 61 61
  • Page 62 62
  • Page 63 63
  • Page 64 64
  • Page 65 65
  • Page 66 66
  • Page 67 67
  • Page 68 68
  • Page 69 69
  • Page 70 70
  • Page 71 71
  • Page 72 72
  • Page 73 73
  • Page 74 74
  • Page 75 75
  • Page 76 76
  • Page 77 77
  • Page 78 78
  • Page 79 79
  • Page 80 80

LG 47LM8650 El manual del propietario

Categoría
Televisores de plasma
Tipo
El manual del propietario
Este manual también es adecuado para

En otros idiomas