
Manual de usuario
User Guide
LG-E975
MFL68604101 (1.0) www.lg.com
ESPAÑOL
E N G L I S H


Manual de usuario
•Laspantallasylasilustracionespuedenserdistintas
alasqueveaenelteléfono.
•Partedelcontenidodeestaguíapuedenoser
aplicablealteléfono,dependedelsoftwareydel
proveedordeservicios.Todalainformacióndeeste
documentopuedecambiarsinprevioaviso.
•Esteteléfononoesadecuadoparapersonasciegas,
yaquecuentaconuntecladodepantallatáctil.
•Copyright©2014LGElectronics,Inc.Reservados
todoslosderechos.LGyellogotipodeLGson
marcascomercialesregistradasdeLGGroupy
lasentidadesrelacionadas.Lasdemásmarcas
comercialessonpropiedaddesusrespectivos
propietarios.
•Google™,GoogleMaps™,Gmail™,Hangouts™
yPlayStore™sonmarcascomercialesdeGoogle,
Inc.
ESPAÑOL

2
Contenido
Directrices para un uso seguro y eficaz ..5
Aviso importante ....................................18
Familiarizarse con el teléfono ................24
Información general del teléfono ............24
Instalación de la tarjeta Micro-USIM.......26
Carga del teléfono .................................27
Bloqueo y desbloqueo de la pantalla ......27
Pantalla de inicio ....................................28
Sugerencias sobre la pantalla táctil........28
Pantalla principal ...................................29
Personalizacióndelapantalladepágina
principal..............................................30
Cómo volver a aplicaciones utilizadas
recientemente .......................................31
Notificaciones ........................................32
Aperturadelpaneldenoticaciones......32
Iconosdeindicadorenlabarrade
estado.................................................34
Teclado en pantalla ................................36
Introduccióndeletrasacentuadas.........36
Configuración de la cuenta de Google ...37
Conexión a redes y dispositivos.............38
Wi-Fi .....................................................38
ConexiónaredesWi-Fi........................38
ActivacióndelaconexiónWi-Fiyconexión
aunaredWi-Fi....................................38
Bluetooth ...............................................39
Cómo compartir la conexión de datos del
teléfono .................................................40
Wi-Fi Direct ...........................................42
Conexión a un USB con un cable
para PC .................................................42
Llamadas.................................................44
Realizar una llamada .............................44
Llamadas a contactos ............................44
Contestar y rechazar una llamada ..........44
Ajuste del volumen de la llamada
entrante .................................................45
Realizar una segunda llamada ...............45
Ver los registros de llamadas .................46
Ajustes de llamadas ...............................46
Contactos ................................................47
Buscar un contacto ................................47
Agregar un contacto nuevo ....................47
Contactos favoritos ................................47
Crear un grupo ......................................48
Mover contactos de su dispositivo viejo al
nuevo ....................................................48
Mensajes .................................................50
Enviar un mensaje .................................50
Organizar por nombre ...........................51
Modificación de los ajustes de
mensajes ...............................................51
E-mail ......................................................52
Administración de una cuenta de correo
electrónico.............................................52

3
Trabajo con las carpetas de cuenta ........52
Redacción y envío de correo electrónico 53
Cámara ....................................................54
Conocer el visor .....................................54
Utilizar la configuración avanzada ..........55
Cómo tomar una foto rápida .................56
Después de realizar una fotografía .........57
Ver las fotos guardadas .........................58
Videocámara ..........................................59
Conocer el visor .....................................59
Utilizar la configuración avanzada ..........60
Cómo grabar un vídeo rápido .................60
Después de grabar un vídeo ..................61
Ver los vídeos guardados .......................61
Ajustar el volumen durante la visualización
de un vídeo ............................................61
Función exclusiva de LG .........................62
Función QuickMemo ..............................62
UsodelasopcionesdeNotarápida......63
Visualizacióndelasnotasrápidas........63
Función Libreta de notas........................64
Creacióndeunanota...........................64
ConocerlaaplicaciónLibretadenotas..64
Estante...............................................64
Panelesdepropiedadesdepáginas......65
Visualizacióndelasnotasguardadasdela
Libretadenotas...................................65
QuickTranslator .....................................66
Función Live Zooming (Zoom en directo) 67
Función QSlide ......................................68
Función Reproducción dual ....................69
Reejo................................................69
Reproduccióndoble.............................70
LG SmartWorld ......................................70
CómoaccederaLGSmartWorlddesdeel
teléfono...............................................70
On-Screen Phone ..................................71
IconosdeOn-ScreenPhone.................71
FuncionesdeOn-ScreenPhone............72
CómoinstalarOn-ScreenPhoneenel
ordenador...........................................72
Multimedia ..............................................73
Galería ...................................................73
Visualizacióndeimágenes....................73
Reproduccióndevídeos.......................74
Edicióndefotosovídeos......................74
Borradodeimágenes...........................74
Establecercomofondodepantalla.......74
Vídeos ...................................................74
Reproduccióndeunvídeo....................75
Editor de vídeo .......................................76
Asistente de vídeo .................................77
Música ..................................................78
Reproducirunacanción.......................79
Añadirarchivosdemúsicaasuteléfono80
Transferenciademúsicamediante
Sincronizarmedios(MTP).....................80
Utilidades ................................................82
Definir una alarma .................................82
Uso de la calculadora.............................82

4
Adición de eventos al calendario ............82
Grabadora de voz...................................83
Grabarsonidoovoz.............................83
Enviarlagrabacióndevoz....................83
Administrador de tareas .........................84
Tareas ...................................................84
Polaris Office 4 ......................................84
Backup ..................................................85
Acercadelacopiadeseguridady
restauracióndelosdatosdel
smartphone.........................................85
Copiadeseguridad..............................86
Programacióndecopiasdeseguridad...86
Restauraciónygestióndearchivos.......86
Google+ ................................................87
Búsqueda de voz ...................................87
Descargas .............................................88
La Web.....................................................89
Internet ..................................................89
UsodelabarradeherramientasWeb....89
VisualizacióndepáginasWeb...............89
Aperturadeunapágina........................90
BúsquedaporvozenlaWeb.................90
Marcadores.........................................90
Historial...............................................90
Usodenavegadoremergente...............90
Chrome .................................................91
VisualizacióndepáginasWeb...............91
Aperturadeunapágina........................91
BúsquedaporvozenlaWeb.................91
Sincronizaciónconotrosdispositivos.....91
Ajustes ....................................................92
CONEXIONES INALÁMBRICAS Y REDES ..92
DISPOSITIVO ..........................................95
PERSONAL .............................................98
SISTEMA..............................................100
Software para PC (LG PC Suite) ...........102
Actualización de software
del teléfono ...........................................105
Actualización de software del teléfono .105
Actualización de software
del teléfono ...........................................106
Acerca de la guía de usuario ...............107
Acerca de la guía de usuario ................107
Acerca de la guía de usuario ...............108
Marcas comerciales.............................108
HD de DivX .........................................108
Dolby Mobile .......................................108
Accesorios ............................................109
Resolución de problemas .....................110
Preguntas frecuentes ...........................114
Contenido

5
Símbolo Descripción
Leaestasinstruccionesparaunusosegurodeestedispositivoinalámbrico
Extremesiemprelasprecaucionescuandoconduzcaparareducirelriesgo
deaccidentes.Noactiveeldispositivoinalámbricomientrasconduce.
Eldispositivosehaprobadoparasuusoaunadistanciade1.5cmentrela
parteposteriordelteléfonoyelcuerpodelusuario.
Laseparaciónmínimade1cmentreelcuerpodelusuarioylaparte
posteriordelteléfonoesunacondiciónobligatoriaparacumplircon
lanormativasobrelaexposiciónaRFdelaFCC.Paraobtenermás
información,consulteelmanualdelusuario.
Mantengaeldispositivoysusaccesoriosfueradelalcancedelosniños;no
permitaquelosniñosjueguenconellos.Eldispositivocuentaconpiezas
pequeñasdebordesafiladosquepuedencausardañosodesprendersey
provocarriesgodeasfixia.
Estedispositivopuedeemitirsonidosexcesivamenteelevados
Losfabricantesdemarcapasosrecomiendanmantenerlosteléfonosmóviles
aunadistanciamínimade15cmdeldispositivomédicoparaevitarposibles
interferencias.
Desactivesuteléfonocuandoselesoliciteenhospitales,clínicasocualquier
otrainstalaciónsanitaria.
Asíseevitanposiblesinterferenciasconequiposmédicossensiblesalos
mismos.
Directrices para un uso seguro y eficaz

6
Símbolo Descripción
Apaguesudispositivoinalámbricocuandoselesoliciteenaeropuertos
oaviones.Paraobtenerinformaciónacercadelusodedispositivos
inalámbricosabordodeunavión,consultealatripulación.Sieldispositivo
cuentacon"modovuelo",deberáactivarloantesdeembarcar.
Apagueelteléfonooeldispositivoinalámbricocuandoseencuentreen
áreasconriesgodeexplosiónoenzonasenlasquesesolicitequese
apaguenlosemisores-receptoresolosdispositivoselectrónicosparaevitar
provocarinterferenciasenlaactivacióndeexplosivos.
Entrelaszonasconriesgopotencialdeexplosionesseencuentran,además
delasestacionesdeservicio,lasinstalacionesportuarias,instalacionespara
eltransporteoelalmacenamientodecombustibleyproductosquímicos
yáreasenlasqueelairecontieneproductosquímicosopartículascomo
polen,polvooinclusopolvometálico.
Estedispositivopuedeemitirlucespotenteseintermitentes
Noexpongaeldispositivonisusaccesoriosalfuego.
Noexpongaeldispositivonisusaccesoriosamediosmagnéticos(disquetes,
tarjetasdecrédito,etc).
Noexpongaeldispositivonisusaccesoriosatemperaturasextremas(por
debajode-5°Coporencimade+55°C).
Noexpongaeldispositivonisusaccesoriosalahumedadnialíquidos.
Nointentedesmontareldispositivonisusaccesorios,estaacciónsolopodrá
realizarlaelpersonalautorizado.
Directrices para un uso seguro y eficaz

7
Símbolo Descripción
Comotodoslosdispositivosinalámbricos,estedispositivofuncionacon
señalesderadio,porloquelaconectividadnosegarantizaentodaslas
condiciones.Portanto,nodependaúnicamentedeundispositivoinalámbrico
paracomunicacionesdeemergencia.
UtilicesólolosaccesoriosaprobadosporLG
Leaestassencillasinstrucciones.Ignorarestasinstruccionespuedeserpeligrosoo
ilegal.
Enelcasodequeseprodujeraalgúnfallo,sudispositivointegraunaherramientade
softwarequerecopilaelregistrodefallos.
Laherramientasolorecopilalosdatosespecíficosdelfallo,comolapotenciadela
señal,posiciónporelID(identificación)delaceldacuandoseinterrumpelallamaday
lasaplicacionescargadas.Elregistrosoloseutilizaparadeterminarlacausadelfallo.
EstosregistrosestánencriptadosysolouncentrodereparacionesdeLGautorizado
puedeaccederaellas.Deberáenviarsudispositivoareparar.
Exposición a energía de radiofrecuencia
ESTEDISPOSITIVOCUMPLELASNORMATIVASINTERNACIONALESRELACIONADAS
CONLAEXPOSICIÓNALASONDASDERADIO
Estedispositivomóvilesuntransmisoryreceptordeondasderadio.Eldispositivoestá
diseñadoyfabricadoparanosobrepasarloslímitesdeexposiciónalaradiofrecuencia
(RF)recomendadosporlasnormativasinternacionales(ICNIRP).Estoslímitesforman
partededirectricesconunamplioámbitodeaplicaciónyestablecenlosnivelesde
energíaderadiofrecuenciapermitidosparalapoblaciónengeneral.Lasdirectrices
hansidodesarrolladaspororganizacionescientíficasindependientesatravésde
evaluacionesexhaustivasyperiódicasdeestudioscientíficos.Lasdirectricesincluyen
unmargendeseguridadsignificativodiseñadoparagarantizarlaseguridaddetodas

8
laspersonas,independientementedesuedadyestadodesalud.
Elestándardeexposiciónparalosdispositivosmóvilesutilizaunaunidaddemedida
conocidacomoTasaespecíficadeabsorciónoSAR(SpecificAbsorptionRate).Ellímite
deSARestablecidoenlasdirectricesinternacionalesesde2W/kg*.Laspruebasde
SARsellevanacaboutilizandoposicionesestándardefuncionamientomientrasel
dispositivotransmitealnivelmásaltodepotenciacertificadoentodaslasbandasde
frecuenciaprobadas.AunquelatasadeSARsedeterminealnivelmásaltodepotencia
certificado,laauténticatasaSARdeldispositivodurantesufuncionamientopuedeestar
muypordebajodelvalormáximo.Estosedebeaqueeldispositivoestádiseñadopara
funcionaravariosnivelesdepotencia,dependiendodelapotencianecesariapara
conectarseaunared.Engeneral,cuantomenorsealadistanciaaunaestaciónbase,
menorserálapotenciadesalidadeldispositivo.Antesdequeunmodelodeteléfono
estédisponibleparasuventaalpúblico,esnecesarioquecumplaconladirectiva
europeaR&TTE.Estadirectivaincluyecomorequisitoimprescindiblelaproteccióndela
saludyseguridaddelusuarioydecualquierotrapersonaquepudieraverseafectada
poreldispositivo.
ElvalormásaltodeSARregistradodurantelaspruebasdeusoauditivodeeste
dispositivoesde0.838W/kg.
Estedispositivocumplelasdirectricesdeexposiciónaradiofrecuenciacuandoseutiliza
enposiciónnormaljuntoaloídoocuandosesitúaaunadistanciadealmenos1,5cm
delcuerpo.Siseutilizaunacarcasadetransporte,unclipparaelcinturónocualquier
otrotipodesoporteparaelcuerpo,éstosnopuedencontenerpartesmetálicasy
debencolocarseaunadistanciadealmenos1,5cmdelcuerpo.Parapodertransmitir
archivosdedatosomensajes,estedispositivorequiereunaconexiónadecuadaala
red.Enalgunoscasos,latransmisióndearchivosdedatosomensajespuedeque
sufraretrasoshastaquedichaconexiónestédisponible.Compruebequesiguelas
instruccionesdedistanciadeseparaciónmencionadasanteriormentehastaquese
hayacompletadolatransmisión.ElvalormásaltodeSARregistrado(cuerpo)durante
laspruebasdeusodeestedispositivoesde0.737W/kg.
Directrices para un uso seguro y eficaz

9
*EllímitedetasaSARparadispositivosmóvilesutilizadosporelpúblicoesde2vatios/
kilogramo(W/kg)demediaporcadadiezgramosdetejidocorporal.Lasdirectrices
incorporanunmargendeseguridadimportanteparaproporcionarunaprotección
adicionalygarantizarlaseguridadcuandoseproduzcanvariacionesenlasmedidas.
LosvaloresdeSARpuedenvariardependiendodelosrequisitosdecadapaísyla
bandadered.
FCC Información de SAR
Sudispositivomóviltambiénestádiseñadoparasatisfacerlosrequisitosdeexposición
aondasderadioestablecidaporlaComisiónFederaldeComunicaciones(EE.UU.)y
MinisteriodeIndustriadeCanadá.EstosrequisitosseestablecióunlímitedeSARde
1,6W/kgenpromediomásde1gramodetejido.ElvalordeSARmásaltoqueseha
registradobajolaaplicacióndeesteestándardurantelacertificacióndelproductoes
de0.75W/kgdurantesuusoy1.49W/kgcuandosetransportajuntoalcuerpo.
Además,eldispositivosehaprobadoconlossoporteshabitualesparaelcuerpoauna
distanciade1cmentreelcuerpodelusuarioylaparteposteriordelteléfono.
Laseparaciónmínimade1cmentreelcuerpodelusuarioylaparteposteriordel
teléfonoesunacondiciónobligatoriaparacumplirconlanormativasobrelaexposición
aRFdelaFCC.
* Aviso y advertencia de la FCC
Aviso!
EstedispositivocumpleconlaParte15delReglamentodelaFCC.Elfuncionamiento
estásujetoalasdoscondicionessiguientes:
(1)Elpresentedispositivonodebecausarinterferenciasperjudiciales.
(2)Estedispositivodeberecibircualquierinterferencia,incluidaslasquepuedancausar
unfuncionamientonodeseado.

10
Precaución
Todocambioomodificaciónqueserealiceenlaunidadyquenohayasidoaprobado
deformaexpresaporelfabricantepodríaanularelderechodelusuarioautilizarel
equipo.
Cuidado y mantenimiento del producto
ADVERTENCIA
Utilice sólo baterías, cargadores y accesorios aprobados para su utilización
con este modelo de teléfono concreto. De lo contrario, puede quedar
invalidada cualquier aprobación o garantía para el teléfono, y puede resultar
peligroso.
•Nodesmonteestaunidad.Siesnecesariorepararla,llévelaauntécnicodeservicio
cualificado.
•Lasreparacionesqueserealicenbajogarantía,alaenteradiscrecióndeLG,pueden
incluirpiezasoplacasderepuestonuevasoreparadas,siemprequemantenganla
funcionalidaddelaspiezassustituidas.
•Manténgalaalejadadeaparatoseléctricoscomotelevisores,radiosyordenadores
personales.
•Launidaddebealejarsedefuentesdecalorcomoradiadoresuhornos.
•Noladejecaer.
•Noexpongaestaunidadavibracionesmecánicasogolpes.
•Apagueelteléfonoencualquierzonaenlaqueasíloexijannormativasespeciales.
Porejemplo,noloutiliceenhospitales,yaquepodríanverseafectadosequipos
médicossensibles.
•Nocojaelteléfonoconlasmanosmojadasmientrasseestácargando.Podríasufrir
unadescargaeléctricaydañargravementeelteléfono.
Directrices para un uso seguro y eficaz

11
•Nocargueelteléfonocercadematerialinflamableyaquepodríacalentarsey
provocarunincendio.
•Utiliceunpañosecoparalimpiarelexteriordelaunidad(noutilicedisolventescomo
benceno,diluyentesoalcohol).
•Nocargueelteléfonosobresuperficiesacolchadas.
•Elteléfonosedebecargarenunazonaconlaventilaciónadecuada.
•Noexpongaestaunidadahumoopolvoexcesivo.
•Nocoloqueelteléfonocercadetarjetasdecréditoobilletesdetransporte,podría
afectaralainformacióndelasbandasmagnéticas.
•Nogolpeelapantallaconunobjetopunzante,yaquepuedeestropearelteléfono.
•Noexpongaelteléfonoalíquidosnihumedad.
•Utiliceconcuidadolosaccesorios(porejemplo,losauriculares).Notoquelaantenasi
noesnecesario.
•Noutilice,toqueniintenteretirarnirepararelcristalagrietadosiestáastilladoo
presentaesquirlas.Lagarantíanocubrelosdañosenlapantallacausadosporeluso
incorrectodeldispositivo.
•Elteléfonoesundispositivoelectrónicoquegeneracalorenmodonormalde
funcionamiento.Sisehautilizadodeformaprolongada,elcontactodirectoconla
pielsinlaventilaciónadecuadapuedesermolestooprovocarquemaduras.Tenga
cuidadocuandomanipuleelteléfonodurantesufuncionamientoodespuésdeéste.
•Sielteléfonosemoja,desenchúfeloinmediatamenteydéjelosecarporcompleto.
Nointenteacelerarelprocesodesecadoconunafuentedecalorexterna,comoun
horno,unmicroondasounsecadordepelo.
•Ellíquidodelteléfonomojadocambiarelcolordelaetiquetadelproductodelinterior
delteléfono.Lagarantíanocubrelosdañosproducidosensudispositivocomo
consecuenciadelaexposiciónalíquidos.

12
Funcionamiento eficaz del teléfono
Dispositivos electrónicos
Todoslosteléfonosmóvilespuedenrecibirinterferenciasquepuedenafectaral
rendimiento.
•Noutilicesuteléfonomóvilcercadeaparatosmédicossinsolicitarpermiso.Evite
colocarelteléfonosobremarcapasos(esdecir,noselocoloqueenelbolsillode
lacamisa).Consulteconsumédicoparadeterminarsielteléfonopuedegenerar
interferenciasqueafectenalfuncionamientodesudispositivomédico.
•Algunosaudífonospuedenverseafectadosporteléfonosmóviles.
•Tambiénpuedengenerarpequeñasinterferenciasentelevisores,radios,ordenadores,
etc.
•Utiliceelteléfonoatemperaturasentre0ºCy40ºC,siesposible.Exponerel
teléfonoatemperaturasextremadamentebajasoaltaspodríaproducirdaños,un
funcionamientoincorrectooinclusounaexplosión.
Marcapasos
Losfabricantesdemarcapasosrecomiendanmantenerlosteléfonosmóvilesauna
distanciamínimade15cmdeldispositivomédicoparaevitarposiblesinterferencias.
Paraello,utiliceelteléfonoporelladocontrarioalmarcapasosynoselocoloqueenel
bolsillodelacamisa.
Hospitales
Desactivesudispositivoinalámbricocuandoselesoliciteenhospitales,clínicaso
cualquierotrainstalaciónsanitaria.Asíseevitanposiblesinterferenciasconequipos
médicossensiblesalasmismas.
Directrices para un uso seguro y eficaz

13
Seguridad vial
Compruebelasleyesynormativaslocalessobreelusodeteléfonosmóvilesdurantela
conducción.
•Noutiliceelteléfonomóvilmientrasconduzca.
•Dediquetodasuatenciónalaconducción.
•Salgadelacarreterayaparqueantesdehacerllamadasoresponderlassilas
condicionesdelaconducciónasílorequieren.
•Laenergíaderadiofrecuenciapuedeafectaraalgunossistemaselectrónicosdesu
vehículo,comolaradiodelcocheoelequipodeseguridad.
•Sisuvehículodisponedeunairbag,noloobstruyaconequiposinalámbricos
portátilesofijos.Podríanprovocarunfallodelairbagyocasionarlegravesheridas
debidoaunfuncionamientoindebido.
•Siescuchamúsicamientrasestáenlacalle,asegúresedequeelvolumentieneuna
intensidadrazonabledeformaquepuedaserconscientedeloquesucedeensu
entorno.Estoesimportantesobretodocercadelasvíasdetráfico.
Lesiones auditivas
Para evitar las posibles lesiones auditivas, no se exponga a altos
niveles de volumen durante largos períodos de tiempo.
Esposiblequeeloídosufradañoscuandoseveexpuestoasonidosdealtovolumen
durantelargosperíodos.Porlotanto,lerecomendamosquenoenciendaniapagueel
teléfonocercadelosoídos.Lerecomendamosigualmentequeelvolumendelamúsica
ydelasllamadasseestablezcaenunnivelrazonable.
•Siutilizaauriculares,bajeelvolumensinopuedeescucharalaspersonasquele
hablandecercaosilapersonasentadaasuladopuedeescucharloqueustedestá
escuchando.

14
NOTA: un nivel excesivo de sonido en los auriculares puede provocar
pérdida de audición.
Piezas de cristal
Algunaspiezasdesuteléfonomóvilestánfabricadasconcristal.Estecristalpuede
rompersesielteléfonocaesobreunasuperficieduraorecibeunimpactofuerte.Si
elcristalserompe,nolotoqueniintenteretirarlo.Noutilicesuteléfonohastaqueun
proveedorautorizadosustituyaelcristal.
Derribos
Noutiliceelteléfonomientrasserealizanderribos.Respetelasrestriccionesysigalas
normativas.
Entornos potencialmente explosivos
•Noutilicesuteléfonoengasolineras.
•Noloutilicecercadeproductosquímicosocombustibles.
•Notransporteoalmaceneexplosivos,líquidosogasesinflamablesenel
compartimentodesuvehículodondetengaelteléfonomóvilolosaccesorios.
En aviones
Losdispositivosinalámbricospuedenprovocarinterferenciasenlosaviones.
•Apagueelteléfonomóvilantesdeembarcar.
•Noloutiliceentierrasinelpermisodelatripulación.
Directrices para un uso seguro y eficaz

15
Niños
Dejeelteléfonoenunlugarsegurofueradelalcancedeniñospequeños.Incluyepiezas
pequeñasque,sisetragan,puedencausarasfixia.
Llamadas de emergencia
Puedequelasllamadasdeemergencianoesténdisponiblesentodaslasredes
móviles.Porello,nuncadebedependerúnicamentedesuteléfonopararealizar
llamadasdeemergencia.Consulteasuproveedordeservicioslocal.
Información y mantenimiento de la batería
•Noesnecesariodescargarporcompletolabateríaantesdevolveracargarla.A
diferenciadeotrossistemasdebaterías,noexisteningúnefectodememoriaque
puedaafectaralrendimientodelabatería.
•UtilicesólolasbateríasycargadoresdeLG.LoscargadoresdeLGhansido
diseñadosparamaximizarlavidadelabatería.
•Nodesmonteniprovoquecortocircuitosenlabatería.
•Sustituyalabateríacuandodejedefuncionarcorrectamente.Labateríapuede
recargarsecentenaresdevecesantesdequedebasustituirse.
•Recarguelabateríasinosehautilizadodurantemuchotiempoparamaximizarsu
funcionalidad.
•Noexpongaelcargadordelabateríaalaluzdirectadelsolynoloutiliceenentornos
muyhúmedos,comoenelcuartodebaño.
•Nodejelabateríaenlugaresfríosocalientes,yaquesepodríadeteriorarsu
rendimiento.
•Existeriesgodeexplosiónsilabateríasesustituyeporotradeuntipoincorrecto.
•Deshágasedelasbateríassegúnlasinstruccionesdelfabricante.Porfavor,recíclelas
siemprequeseaposible.Nolastirealabasuradoméstica.

16
•Sinecesitasustituirlabatería,llévelaalproveedoropuntodeservicioautorizadomás
cercanodeLGElectronicsparaobtenerasistencia.
•Desenchufesiempreelcargadordelatomadecorrienteunavezqueelteléfono
hayaterminadodecargarse,paraevitarasíunconsumodeenergíainnecesariodel
cargador.
•Laduraciónrealdelabateríadependerádelaconfiguracióndered,losajustesdel
producto,lospatronesdeuso,eltipodebateríaylascondicionesambientales.
•Asegúresedequeningúnelementoconbordesafilados,comodientesouñasde
animales,tocalabatería.Podríaprovocarunincendio.
DECLARACIÓN DE CONFORMIDAD
Por la presente, LG Electronics declara que el producto LG-E975 cumple
con los requisitos imprescindibles y cualquier otra disposición relevante de
la directiva 1999/5/EC. Puede consultar una copia de la Declaración de
conformidad en http://www.lg.com/global/declaration
Regulador y Seguridad
Vaya a "Ajustes del sistema > Acerca del teléfono > Normativa y
Seguridad" para consultar la información sobre normativa y seguridad
Información de contacto de la oficina para el cumplimiento de este producto:
LG Electronics Inc.
EU Representative, Krijgsman 1,
1186 DM Amstelveen, The Netherlands
Directrices para un uso seguro y eficaz

17
Cómo desechar las baterías y los acumuladores gastados
1 Estesímbolopuedeaparecerjuntoconlossímbolosquímicosdelmercurio
(Hg),cadmio(Cd)oplomo(Pb)silabateríacontienemásdel0,0005%de
mercurio,0,002%decadmioo0,004%deplomo.
2 Todaslasbateríasyacumuladoressedebendesechardeformadistintadel
serviciomunicipalderecogidadebasura,atravésdelospuntosderecogida
designadosporelgobiernoolasautoridadeslocales.
3 Lacorrectarecogidaytratamientodebateríasyacumuladorescontribuyea
evitarposiblesriesgosparaelmedioambiente,losanimalesylasaludpública.
4 Paraobtenermásinformaciónsobrecómodesecharlasbateríasyacumu-
ladoresantiguos,póngaseencontactoconelayuntamiento,elserviciode
recogidadebasurasoelestablecimientodondehayaadquiridoelproducto.
Cómo desechar aparatos eléctricos y electrónicos obsoletos
1 Todoslosaparatoseléctricosoelectrónicossedebendesechardeforma
distintadelserviciomunicipalderecogidadebasura,atravésdepuntos
derecogidadesignadosporelgobiernoolasautoridadeslocales.
2 Lacorrectarecogidaytratamientodelosdispositivosinservibles
contribuyeaevitarriesgospotencialesparaelmedioambienteylasalud
pública.
3 Paraobtenermásinformaciónsobrecómodesecharlosaparatosobsole-
tos,póngaseencontactoconsuayuntamiento,elservicioderecogidade
basuraoelestablecimientodondeadquirióelproducto.

18
Aviso importante
Antesdellamaralserviciodeatenciónalclienteollevarelteléfonoalserviciotécnico,
compruebesilosproblemasdesuteléfonosedescribenenestasección.
1. Memoria del teléfono
Cuandoquedemenosdel10%deespaciodisponibleenlamemoriadelteléfono,este
nopodrárecibirmensajes.Esnecesariocomprobarlamemoriadelteléfonoyeliminar
algunosdatos,comoaplicacionesomensajes,paradisponerdemásespacioenla
memoria.
Para desinstalar aplicaciones:
1 Toque >chaAplicaciones>Ajustes>AplicacionesenelDISPOSITIVO.
2 Cuandosemuestrentodaslasaplicaciones,despláceseyseleccionelaaplicación
quedeseadesinstalar.
3 ToqueDesinstalar.
2. Optimización de la duración de la batería
Puedeaumentarladuracióndelabateríaentrecargasmedianteladesconexiónde
aquellasfuncionesquenonecesitaejecutardeformaconstanteensegundoplano.
Puedesupervisarcómolasaplicacionesyrecursosdelsistemaconsumenlaenergía
delabatería.
Para aumentar la duración de la batería:
•Desactivelascomunicacionesporradioquenoestéutilizando.Sinoestáutilizando
lasfuncionesdeWi-Fi,BluetoothoGPS,apáguelas.
•Reduzcaelbrillodelapantallayestablezcauntiempodeesperadepantallamás
breve.
Lea esta información antes de comenzar a usar su
teléfono.

19
•DesactivelasincronizaciónautomáticadeGMail,Calendario,Contactosyotras
aplicaciones.
•Algunasdelasaplicacionesquehadescargadopuedenreducirladuracióndela
batería.
Para comprobar el nivel de carga de la batería:
•Toque >fichaAplicaciones>Ajustes > Acerca del teléfonoenelSISTEMA
>Batería.
Elestadodelabatería(cargándoseodescargándose)yelniveldelabatería(porcentaje
decargacompleta)semuestranenlapartesuperiordelapantalla.
Para supervisar y controlar cómo se utiliza la batería:
•Toque >fichaAplicaciones>Ajustes >Acerca del teléfonoenelSISTEMA>
Batería>Uso de la batería.
Eltiempodeusodelabateríasemuestraenlapantalla.Leindicaeltiempo
transcurridodesdequeseconectóporúltimavezaunafuentedealimentacióno,si
estáconectadoaunafuentedealimentación,eltiempotranscurridodesdelaúltimavez
queutilizólacargadelabatería.Lapantallamuestralasaplicacionesolosservicios
queutilizanlabatería,enordendemayoramenorconsumo.
3. Antes de instalar una aplicación o un sistema
operativo de fuente abierta
ADVERTENCIA
Si instala y utiliza un sistema operativo diferente al proporcionado por el
fabricante, puede hacer que el teléfono no funcione correctamente. Además,
la garantía de su teléfono se anulará.

20
ADVERTENCIA
Para proteger el teléfono y sus datos personales, descargue únicamente
aplicaciones que procedan de fuentes seguras, como Play Store™. Si se han
instalado aplicaciones de forma incorrecta en su teléfono, es posible que este
no funcione normalmente o que se produzca un error grave. Debe desinstalar
del teléfono dichas aplicaciones y todos sus datos y ajustes.
4. Uso de un patrón de desbloqueo
Permiteestablecerunpatróndedesbloqueoparaprotegerelteléfono.Toque >
fichaAplicaciones>Ajustes>Bloqueo de pantallaenelDISPOSITIVO>Tipo
de bloqueo>Patrón.Abreunapantallaqueleguiaráenlacreacióndeunpatrón
dedesbloqueodepantalla.Comomedidadeseguridadporsiolvidasupatrónde
desbloqueo,creeunPINdeseguridad.
Precaución: antes de establecer un patrón de desbloqueo, debe crear una
cuenta de Google. No olvide el PIN de seguridad que estableció al crear el
patrón de bloqueo.
ADVERTENCIA
Precauciones al utilizar el patrón de bloqueo.
Es muy importante que recuerde el patrón de desbloqueo que ha
establecido. No podrá acceder al teléfono si utiliza un patrón incorrecto 5
veces. Tiene 5 oportunidades para introducir el patrón de desbloqueo, el
PIN o la contraseña. Si ha agotado las cinco oportunidades, puede volver a
intentarlo tras 30 segundos.
Si no puede recordar el patrón de desbloqueo, el PIN o la contraseña:
< Si ha olvidado el patrón >
SihainiciadosesiónensucuentadeGoogledesdeelteléfonoperohacometidocinco
erroresalintroducirelpatrón,pulseelbotón¿Has olvidado el patrón?delaparte
Aviso importante

21
inferiordelapantalla.Acontinuación,selesolicitaráqueiniciesesiónensucuentade
GoogleoqueescribaelPINdeseguridadqueintrodujoalcrearelpatróndebloqueo.
SinohacreadounacuentadeGoogleenelteléfonoohaolvidadolacopiade
seguridadPIN,necesitarárealizarunrestablecimientocompleto.
< Si ha olvidado el PIN o la contraseña >
SiolvidasuPINocontraseña,deberáhacerunrestablecimientocompleto.
Precaución: si hace un restablecimiento completo, se eliminarán todas las
aplicaciones y los datos de usuario.
NOTA: si no ha iniciado sesión en su cuenta de Google y ha olvidado el
patrón de desbloqueo, deberá introducir su PIN de seguridad.
5. Uso del restablecimiento completo (restablecimiento
a los ajustes de fábrica)
Sielteléfononovuelveasusajustesoriginales,realiceunrestablecimientocompleto
(restablecimientoalosajustesdefábrica)parainicializarlo.
1 Apagueelteléfono.
2 Mantengapulsadaslatecladeencendido/bloqueo+teclaparabajarelvolumen
delteléfono.
3 Sueltelatecladeencendido/bloqueoúnicamentecuandosemuestreellogotipo
deLG.Acontinuación,mantengapulsadainmediatamentelatecladeencendido/
bloqueodenuevo.
4 SueltetodaslasteclascuandosemuestrelapantallaRestaurardatosdefábrica.
5 Pulselatecladevolumenparadesplazarsealaopciónquedeseey,acontinu-
ación,pulselatecladeencendido/bloqueoparaconrmar.

22
ADVERTENCIA
Si realiza un restablecimiento completo, se eliminarán todas las aplicaciones y
los datos del usuario, así como la licencia DRM. Recuerde realizar una copia
de seguridad de todos los datos importantes antes de realizar un reinicio
completo.
Restaurar datos de fábrica -borratodoslosdatosdelteléfono,exceptolos
siguientes.Encasodeerrorofallodeldispositivo,estepuedecrearunregistrode
errorconinformaciónsobreelestadodeldispositivoenelmomentodelerror.La
informacióndelregistrodeerrorpuedeincluirdatossobrenombresdeaplicacionesy
suuso,laubicaciónyelnúmerodelteléfonomóvil,estadodelGPS,usodelamemoria
yotrainformaciónnopersonalsobreelestadodeldispositivo.Estainformaciónse
almacenaenelteléfonoysoloLGpuedeaccederaellasisedevuelveelteléfono
físicamenteaLGparasureparaciónyservicio.Lainformacióndelregistrodeerrores
utilizadaporLGúnicamentepararealizareldiagnóstico,repararymejorarlosproductos
yserviciosdeLG.
6. Apertura y cambio de aplicaciones
RealizarvariastareasresultasencilloconAndroidporqueesposibleejecutarmásde
unaaplicaciónalavez.Nohaynecesidaddesalirdeunaaplicaciónparaabrirotra.
Puedeutilizarvariasaplicacionesabiertasycambiardeunaaotra.
Androidgestionacadaaplicación,deteniéndolaeiniciándolasegúnseanecesario,para
garantizarquelasaplicacionesinactivasnoconsumenrecursosinnecesariamente.
1 Mantengapulsadalatecla de Inicio .Apareceráunalistadelasaplicaciones
utilizadasrecientemente.
2 2.Presionelaaplicaciónalaquedeseeacceder.Estonodetienelaejecuciónen
segundoplanodelaaplicaciónanteriorenelteléfono.Asegúresedepresionarla
teclaAtrás parasalirdeunaaplicacióndespuésdeutilizarla.
•Paradetenerlasaplicaciones,presioneAdministrador de tareasenlalistade
Aviso importante

23
aplicacionesrecientesy,acontinuación,presioneDeteneroDetenertodo.
•Paraeliminarunaaplicacióndelalistadeaplicacionesrecientes,deslicelavista
previadelaaplicaciónhacialaizquierdaohacialaderecha.Paraborrartodaslas
aplicaciones,presioneBorrar todo.
7. Transferencia de música, fotos y vídeos mediante
Sincronizar medios (MTP)
1 Toque >chaAplicaciones>Ajustes>Almacenamientoparavericarel
sistemadealmacenamiento.
2 ConecteelteléfonoalPCmedianteelcableUSB.
3 Seleccionar método de conexión USBsemostraráenlapantalladelteléfono.
SeleccionelaopciónSincronizar medios (MTP).
4 AbralacarpetadelamemoriaenelPC.Ahorapodráverelcontenidodealmace-
namientomasivoenelordenadorytransferirlosarchivosdelPCalacarpetade
memoriadeldispositivooviceversa.
9. Mantenga el teléfono en posición vertical
Mantengaelteléfonoenposiciónvertical,comoloharíaconunteléfonoconvencional.
Suteléfonodisponedeunaantenainterna.Tengacuidadodenodañarnirayarlaparte
posteriordelteléfono,yaquesurendimientopodríaverseafectado.
Alrealizarorecibirllamadasoalenviarorecibirdatos,evitesujetarlaparteinferiordel
teléfonodondeseencuentralaantena.Estopodríaafectaralacalidaddelasllamadas.
10. Cuando la pantalla se bloquea
Si la pantalla se bloquea o el teléfono no responde al intentar utilizarlo:
Mantengapulsadalatecladeencendido/bloqueodurante10segundosparaapagar
elteléfono.Sisiguesinfuncionar,póngaseencontactoconelcentrodeservicio.

24
Información general del teléfono
Auricular
Lente de la cámara delantera
Proximidad / Sensor luminoso
Tecla de inicio
•Vuelvealapantalladeiniciodesdecualquierotrapantalla.
Tecla Atrás
•Vuelvealapantallaanterior.Saledelaaplicacióndespués
deutilizarla.
Tecla de encendido/bloqueo
•Enciendeyapagaelteléfonosisemantienepulsadaestatecla.
•Púlselabrevementeparabloquear/desbloquearlapantalla.
Tecla de menú
•Compruebelasopcionesdisponibles.
•MantengapulsadaestateclaparairaGoogleSearch™.
Pantalla táctil
Notificación LED
NOTA: sensor de proximidad
Al recibir y realizar llamadas, el sensor de proximidad apaga automáticamente la
luz de fondo y bloquea la pantalla táctil cuando detecta que el teléfono está cerca
de la oreja. Esto amplía la duración de la batería y evita que el teclado táctil se
active por accidente durante las llamadas.
ADVERTENCIA
Si coloca un objeto pesado sobre el teléfono o se sienta sobre él, puede dañar la
pantalla LCD y las funciones de la pantalla táctil. No cubra el sensor de proximidad
de la pantalla LCD con película de protección. Esto podría hacer que el sensor no
funcionara correctamente.
Familiarizarse con el teléfono

25
Teclas de volumen
•En la pantalla de inicio:controlaelvolumendeltimbre
•Durante una llamada: controlaelvolumendelauricular
•Durante la reproducción de una pista: controlaelvolumendeforma
continua
SUGERENCIA: Función QuickMemo
Mantenga pulsadas las teclas para subir y bajar el volumen durante
un segundo para utilizar la función Nota rápida.
Tecla de encendido/bloqueo
Bandeja de la tarjeta SIM
ADVERTENCIA:
• Esta pieza cierra el compartimento de la batería. No abra la cubierta
posterior.
• Tenga cuidado de no dañar el punto táctil NFC del teléfono que forma parte
de la antena NFC.
Conector del
auricular
Flash
Altavoz
Puerto del cargador/USB/MHL
Micrófono
Lente de la
cámara
Micrófono
Punto táctil
NFC

26
Instalación de la tarjeta Micro-USIM
Antesdeempezaraexplorarsunuevoteléfono,esposiblequeseanecesarioinsertar
latarjetaMicro-USIM.
Elbotóndeexpulsiónesunapequeñaaperturaredondajustoencimadelatapadela
bandeja.ParainstalarunatarjetaMicro-USIMnueva:
1 IntroduzcalaherramientadeexpulsióndeMicro-USIMquevieneconelteléfono
(ounapuntana)enlaaperturadelbotóndeexpulsiónyempujermepero
suavementehastaqueaparezcalabandeja.
2 ExtraigalabandejaycoloquelatarjetaMicro-USIMensuinterior,conloscontac-
toshaciafueraylaesquinarecortadahacialaderecha.Sólohayunaformade
ajustarlatarjetasinesfuerzoenlabandeja.
3 Vuelvaacolocarconcuidadolabandejaenlaranurayempújelasuavemente
haciaelteléfono.
NOTA: asegúrese de que el área de contactos dorados de la tarjeta esté
orientada hacia abajo.
Apertura del botón
de expulsión
Familiarizarse con el teléfono

27
Carga del teléfono
Elconectordelcargadorseencuentraenlaparteinferiordelteléfono.Inserteun
extremodelcabledecargaenelteléfonoyenchufeelotroextremoaunatomade
alimentacióneléctrica.
Bloqueo y desbloqueo de la pantalla
Sinoutilizaelteléfonoduranteuntiempo,lapantallaseapagaysebloquea
automáticamente.Estocontribuyeaevitartoquesaccidentalesyahorraenergíadela
batería.
Sinoestáutilizandoelteléfono,pulselatecladeencendido/bloqueo para
bloquearlo.
Sihayalgúnprogramaejecutándosecuandosebloquealapantalla,esposibleque
sigaejecutándoseenelmododebloqueo.Serecomiendasalirdetodoslosprogramas
antesdeentrarenelmododebloqueo,paraevitarcargasinnecesarias(p.ej.,una
llamadatelefónica,unaccesoWebycomunicacionesdedatos).
Paraactivardenuevoelteléfono,pulselatecla de encendido/bloqueo .Aparecerá
lapantalladebloqueo.Toquelapantalladebloqueoydesliceeldedoencualquier
direcciónparadesbloquearlapantalladeinicio.Aparecerálaúltimapantallaquetenía
abierta.
NOTA: debe realizarse una
primera carga completa para
mejorar la vida útil de la batería.

28
Pantalla de inicio
Sugerencias sobre la pantalla táctil
Acontinuación,lepresentamosalgunassugerenciassobrecómonavegarporel
teléfono.
Tocar: toquesóloconundedoparaseleccionarelementos,enlaces,accesosdirectosy
letraseneltecladoenpantalla.
Mantener pulsado:paramantenerpulsadounelementoenpantalla,tóqueloyno
levanteeldedohastaqueseproduzcaunaacción.Porejemplo,paraabrirlasopciones
disponiblesdeuncontacto,mantengapulsadoelcontactoenlalistaContactoshasta
queseabraelmenúcontextual.
Arrastrar:paraarrastrarunelemento,manténgalopulsadounelementounmomento
y,acontinuación,muevaeldedoporlapantallasinlevantarlohastaquellegue
alaposicióndedestino.Puedearrastrarelementosenlapantalladeiniciopara
recolocarlos.
Deslizar o desplazarse:paradeslizarodesplazarse,muevarápidamenteeldedo
sobrelasuperficiedelapantallasindetenersedesdeelmomentoenquehatocado
lapantalla(paranoarrastrarelelemento).Porejemplo,puededeslizareldedosobre
lapantallahaciaarribaohaciaabajoparadesplazarseporunalista,onavegarporlas
diferentespantallasdeiniciodeslizandoeldedodeizquierdaaderecha(yviceversa).
Tocar dos veces:toquedosvecesparaampliarunapáginaWebounmapa.Por
ejemplo,toquedosvecesrápidamenteunazonadelapáginaWebparaajustarlaal
anchodelapantalla.Tambiénpuedetocardosvecesparaampliaryreduciralahora
dehacerunafotografía(conlacámara)ydeutilizarmapas.
Juntar y separar los dedos para ajustar el tamaño de la imagen:utilicelosdedos
índiceypulgarjuntándolosyseparándolosparaacercaroalejarlaimagencuando
utiliceelnavegador,Mapasoexaminefotografías.
Girar la pantalla:enmuchasaplicacionesymenús,laorientacióndelapantallase
ajustaalaorientaciónfísicadeldispositivo.

29
NOTA:
•Para seleccionar un elemento, toque la parte central del icono.
•No ejerza una presión excesiva. La pantalla táctil es lo suficientemente
sensible como para detectar un toque ligero pero firme.
•Utilice la punta del dedo para tocar la opción que desee. Intente no tocar
ninguna otra tecla.
Pantalla principal
Lapantalladeinicioeselpuntodeinicioprincipalparalamayoríadeaplicaciones
yfunciones.Permiteagregardistintostiposdeelementoscomoaccesosdirectosa
aplicacionesowidgetsdeGoogleparaofrecerunaccesoinstantáneoalasaplicaciones
yalainformación.Esteesellienzopredeterminadoypuedeaccederseaéldesde
cualquiermenúpresionando .

30
Barra de estado
Muestrainformacióndeestadodelteléfonocomola
hora,laintensidaddelaseñal,elestadodelabateríae
iconosdenotificación.
Widget
Loswidgetssonaplicacionesindependientesalasque
sepuedeaccederatravésdelapantallaAplicaciones,
delapantalladeinicioodelapantalladeinicio
extendida.Adiferenciadelosaccesosdirectos,elwidget
semuestracomounaaplicaciónenpantalla.
Iconos de aplicaciones
Presioneenunicono(deaplicación,carpeta,etc.)para
abrirloyutilizarlo.
Indicador de ubicación
Indicaellienzodepantalladeinicioqueseestá
mostrando.
Área de tecla rápida
Permiteaccederconunsolotoquealafunciónen
cualquierlienzodelapantalladeinicio.
Pantalla de inicio ampliada
Elsistemaoperativoofrecevarioslienzosdepantallasdeinicioparaproporcionarmás
espacioenelqueagregariconos,widgetsuotroselementos.
Desliceeldedoaladerechaoalaizquierdaporlapantalladeinicio.
Personalización de la pantalla de página principal
Puedepersonalizarlapantalladeiniciomediantelaincorporacióndeaplicacioneso
widgetsocambiandolosfondosdepantalla.
Para añadir elementos a la pantalla de inicio:
1 Tambiénpuedemantenerpulsadalapartevacíadelapantalladeinicio.
Pantalla de inicio

31
2 EnelmenúdelmodoAñadir,seleccioneloselementosquedeseeañadir.Acon-
tinuación,podráverenlapantalladeinicioloselementosañadidos.
3 Arrástrelosalaubicaciónquedeseeylevanteeldedo.
SUGERENCIA: Para añadir el icono de una aplicación a la pantalla de inicio
desde el menú Aplicaciones, toque y mantenga pulsada la aplicación que
desee añadir.
Para eliminar un elemento de la pantalla de inicio:
•Enlapantalla de inicio,toqueymantengapulsadoeliconoquedeseeeliminary
arrástrelohasta
SUGERENCIA: Uso de carpetas
Puede combinar varios iconos de aplicaciones en una carpeta. Suelte el
icono de una aplicación encima de otro en la pantalla de inicio para que se
combinen los dos iconos.
NOTA: nosepuedeeliminarlateclaAplicaciones.
Personalización de los iconos de aplicaciones en la pantalla de inicio
1 Toquedemaneracontinuauniconodeaplicaciónhastadesbloquearlodela
posiciónenlaqueseencuentra.Acontinuación,suélteloenlapantalla.
Semostraráeliconodeedición enlaesquinasuperiorderechadelaapli-
cación.
2 Vuelvaapresionareliconodelaaplicaciónyseleccionesutamañoydiseño.
3 PresioneAceptarparaguardarelcambio.
Cómo volver a aplicaciones utilizadas recientemente
1 ToqueymantengapulsadalateclaInicio.Apareceráunaventanaemergentecon
losiconosdelasaplicacionesutilizadasrecientemente.
2 Toqueuniconoparaabrirsuaplicación.TambiénpuedetocarlateclaAtrás para

32
volveralapantallaanterior.
Notificaciones
Lasnotificacionesleavisandelallegadadenuevosmensajes,eventosdecalendario
oalarmas,asícomodeeventosqueseesténrealizandoenesemomentocomopor
ejemplo,comocuandoestáenunallamada.
Enelpaneldenotificacionespuedeverelestadoactualdelteléfonoylasnotificaciones
pendientes.
Cuandoserecibeunanotificación,semuestraeliconocorrespondienteenlaparte
superiordelapantalla.Losiconosdenotificacionespendientessemuestranala
izquierda,mientrasquelosiconosdelsistema,quemuestranlaintensidaddelabatería
odelaredWi-Fi,semuestranaladerecha.
NOTA: las opciones disponibles pueden variar en función de la región o el
proveedor de servicios.
Notificaciones
pendientes
Bluetooth, Wi-Fi y
estado de la batería
Apertura del panel de notificaciones
Desdelabarradeestado,desliceeldedohaciaabajoparaabrirelpanelde
notificaciones.
Pantalla de inicio

33
Área de cambio rápido
Presionelasteclasdecambioparaactivarlaso
desactivarlas.Toquedemaneracontinuacadatecla
paraaccederalmenúdeajustesdelafunción.Para
vermásteclasdecambio,desliceeldedoaizquierdao
derecha.Presione
paraeliminar,añadiroreordenar
teclasdecambio.
Aplicaciones de QSlide
PresioneunaaplicaciónQSlideparaabrirlaenuna
ventanapequeñaenlapantalla.Presione
para
eliminar,añadiroreordenaraplicacionesdeQSlide.
Presioneparaborrartodaslasnotificaciones.
Notificaciones
Semuestranlasnotificacionesactuales,juntoconuna
brevedescripcióndecadauna.Presionesobreuna
notificaciónparaverla.
Paracerrarelpaneldenotificaciones,toquelafichay
arrástrelahacialapartesuperiordelapantalla.

34
Pantalla de inicio
Iconos de indicador en la barra de estado
Losiconosdeindicadorsemuestranenlabarradeestadoenlapartesuperiorde
lapantalla,einformanacercadellamadasperdidas,nuevosmensajes,eventosde
calendarioyestadosdeldispositivoentreotros.
Losiconosquesemuestranenlapartesuperiordelapantallaproporcionan
informaciónacercadelestadodeldispositivo.Enlatablasiguientesemuestranalgunos
delosiconosmáshabituales.
Icono Descripción Icono Descripción
FaltalatarjetaMicro-USIM Mododevibración
Sinseñal Bateríacargadaporcompleto
Modoavión Bateríaencarga
ConectadoaunaredWi-Fi Descargandodatos
Auricularesdecable Cargandodatos
Llamadaencurso GPSrecibiendodatos
Llamadaenespera
Recibiendodatosde
ubicacióndelGPS

35
Llamadaperdida
Losdatosseestán
sincronizando
Bluetoothestáactivado NuevoGmail
Advertenciadelsistema NuevomensajedeHangouts
Alarmaactivada Nuevomensaje
Nuevobuzóndevoz
Elteléfonoestáconectado
alPCatravésdeuncable
USBoestáactivalafunción
MódemUSB
Eltimbreestásilenciado
LazonaWi-Fiportátilestá
activa
NFCactivado
TantoelanclajedeUSBcomo
lazonaWi-Fiportátilestán
activos
Seestáreproduciendola
canción
NOTA: la localización de los iconos en la barra de estado pueden diferir
según la función o servicio.

36
Teclado en pantalla
Puedeintroducirtextoconeltecladoenpantalla.Eltecladoenpantallaaparece
automáticamenteenlapantallacuandonecesitaintroducirtexto.Paramostrar
manualmenteelteclado,sólotienequetocarelcampodetextoenelquedesea
introducirtexto.
Uso del teclado e introducción de texto
Pulseesteiconounavezparaescribirenmayúsculaslapróximaletraquese
introduzca.Toquedosvecesparaescribirsiempreenmayúscula.
Toqueesteiconoparapasaraltecladonuméricoydesímbolos.
Toqueesteiconoparaintroducirunespacio.
Toqueparacrearunanuevalínea.
Toqueesteiconoparaeliminarelcarácteranterior.
Introducción de letras acentuadas
Alseleccionarfrancésoespañolcomoidiomadeescrituradetexto,puedeescribir
caracteresespecialesfrancesesoespañoles(p.ej.,"á").
Porejemplo,paraintroducir"á",mantengapulsadalatecla"a"hastaqueaumentela
tecladeampliaciónysemuestrencaracteresdediferentesidiomas.
Acontinuación,seleccioneelcarácterespecialquedesee.
Pantalla de inicio

37
Configuración de la cuenta de Google
Alencenderelteléfonoporprimeravez,podráactivarlared,accederasucuentade
GoogleyconfigurarlamaneraenquedeseautilizaralgunosserviciosdeGoogle.
Para configurar la cuenta de Google:
•IniciesesiónenunacuentadeGoogledesdelapantalladeconfiguraciónque
aparece.
O
•Toque >fichaAplicaciones>seleccioneunaaplicacióndeGoogle,comoGmail
>seleccioneCrear cuentaparacrearunanuevacuenta.
SitieneunacuentadeGoogle,toqueUsar cuenta,introduzcasudireccióndecorreo
electrónicoycontraseñay,acontinuación,toque .
UnavezquehaconfiguradosucuentadeGoogleenelteléfono,estesesincronizará
automáticamenteconsucuentadeGoogledelaWeb.
Suscontactos,mensajesdeGmail,eventosdecalendarioyotrainformacióndeestas
aplicacionesyserviciosdelaWebsesincronizanconsuteléfono.(Estodependeráde
susajustesdesincronización).
Traseliniciodesesión,puedeutilizarGmail™ylosserviciosdeGoogleincluidosenel
teléfono.

38
Conexión a redes y dispositivos
Wi-Fi
ConWi-Fi,puedeutilizarelaccesoaInternetdealtavelocidadconlacoberturadel
puntodeaccesoinalámbrico.DisfrutedeInternetsincablesutilizandounaredWi-Fi,
sincargosadicionales.
Conexión a redes Wi-Fi
ParautilizarlaconexiónWi-Fidelteléfonosedebeaccederaunpuntodeacceso
inalámbricoo"zonaWi-Fi".Algunospuntosdeaccesoestánabiertosybastacon
conectarseaellos.Otrosestánocultosoutilizanfuncionesdeseguridad,porloquees
necesarioconfigurarelteléfonoparapoderconectarseaellos.
DesconectelaconexiónWi-Ficuandonolaestéutilizandoparaaumentarladuración
delabatería.
NOTA: si no se encuentra dentro de un área Wi-Fi o desactiva la opción
de Wi-Fi, es posible que su operador de telefonía móvil aplique cargos
adicionales por el uso de datos móviles.
Activación de la conexión Wi-Fi y conexión a una red Wi-Fi
1 Toque >chaAplicaciones>Ajustes>Wi-FienlachaCONEXIONES
INALÁMBRICASYREDES.
2 EstablezcaWi-FienActivadoparaactivarestafunciónycomenzarabuscar
redesWi-Fidisponibles.
3 ToqueelmenúWi-FidenuevoparaverunalistaderedesWi-Fiactivasydentro
delradiodealcance.
•Lasredessegurassemuestranconuniconodecandado.
4 Toqueunaredparaconectarsealamisma.
•Silaredestáprotegida,selesolicitaráqueintroduzcalacontraseñauotras
credenciales.(Solicitealadministradordelaredlosdetalles).
5 LabarradeestadomuestraiconosqueindicanelestadodelaconexiónWi-Fi.

39
Bluetooth
PuedeutilizarlatecnologíaBluetoothparaenviardatosejecutandolaaplicación
correspondiente,peronodesdeelmenúBluetooth,comoenlamayoríadelosdemás
teléfonosmóviles.
NOTA:
•LG no se hace responsable de la pérdida, interceptación o uso indebido
de los datos enviados o recibidos a través de la funcionalidad inalámbrica
Bluetooth.
•Asegúrese siempre de que los dispositivos con los que comparte
información, o de los que recibe datos, son fiables y seguros. Si hay
obstáculos entre los dispositivos, la distancia de funcionamiento puede
reducirse.
•Algunos dispositivos, especialmente los que no cuentan con la certificación
de Bluetooth SIG, pueden ser incompatibles con su teléfono.
Activación del Bluetooth y asociación del teléfono con un dispositivo Bluetooth
Debevincularlosdispositivosparapoderconectarse.
1 Toque >chaAplicaciones>Ajustes>establezca BluetoothenActivado
enlachaCONEXIONESINALÁMBRICASYREDES
2 ToquedenuevoelmenúBluetooth.Semostrarálaopciónparaquesuteléfono
estévisibleyparaquepuedabuscarotrosdispositivos.Entonces,toqueBuscar
dispositivosparaverlosqueestándentrodelalcancedelBluetooth.
3 Seleccionedelalistaeldispositivoconelquedeseaasociarse.
Cuandosecompletelaasociación,suteléfonoseconectaráaldispositivo.
NOTA: algunos dispositivos, especialmente los auriculares o los kits manos
libres para automóvil, pueden tener un PIN de Bluetooth fijo, tal como 0000.
Si el otro dispositivo tiene un PIN, se le pedirá que lo introduzca.

40
Envío de datos mediante la funcionalidad inalámbrica Bluetooth
1 Seleccioneunarchivooelemento,comouncontacto,uneventodecalendario
ounarchivomultimedia,desdelaaplicacióncorrespondienteodesdeDescargas.
2 SeleccionelaopcióndeenvíodedatosatravésdeBluetooth.
NOTA: el método para seleccionar una opción dependerá del tipo de dato.
3 BuscaryvincularseaundispositivoBluetooth.
Recepción de datos mediante la funcionalidad inalámbrica Bluetooth
1 Toque >cha Aplicaciones>Ajustes>establezca Bluetooth en Activado.
Presionedenuevoelmenú
2 Bluetoothymarquelacasilladevericaciónenlapartesuperiordelapantalla
paraquelopuedanverotrosdispositivos.
NOTA: para seleccionar el tiempo que estará visible el dispositivo, toque
> Tiempo de visibilidad excedido.
3 SeleccioneVincularparaconrmarquedesearecibirdatosdesdeeldispositivo.
Cómo compartir la conexión de datos del teléfono
LasfuncionesdeanclajedeUSBydezonaWi-Fiportátilsondegranutilidadcuando
nohayconexionesinalámbricasdisponibles.Puedecompartirlaconexióndedatos
delaredmóvildelteléfonoconunsoloordenadoratravésdeuncableUSB(Módem
USB).Tambiénpuedecompartirlaconexióndedatosdelaredmóvildelteléfonocon
variosdispositivosalavez;paraello,sólotienequeactivarenelteléfonolaopciónMi
zonaWi-Fi.
Cuandoelteléfonocompartesuconexióndedatos,apareceuniconoenlabarrade
estadoysemuestraunanotificaciónsalienteenelbuzóndenotificaciones.
ParaobtenerlainformaciónmásrecienteacercadelanclajeylaszonasWi-Fiportátiles,
incluidoslossistemasoperativoscompatiblesyotrosdatos,visitehttp://www.android.
com/tether.
Conexión a redes y dispositivos

41
Para cambiar los ajustes de Mi zona Wi-Fi:
1 Toque >cha Aplicaciones>Ajustes>Anclaje a red y Redes>interrup-
tor Punto de acceso Wi-Fi paraactivarlo.
2 IntroduzcaunacontraseñaypresioneGuardar.
SUGERENCIA: si su ordenador posee el sistema operativo Windows 7
o una distribución reciente de algunas versiones de Linux (como Ubuntu),
no tendrá que preparar el ordenador para la activación del modo USB. No
obstante, si dispone de una versión anterior de Windows u otro sistema
operativo, puede que necesite preparar el ordenador para establecer
una conexión de red a través de USB. Para obtener la información más
actualizada sobre los sistemas operativos que admiten el anclaje de USB y
acerca de cómo configurarlos, visite http://www.android.com/tether.
Para cambiar el nombre de la zona Wi-Fi portátil o protegerla:
PuedecambiarelnombredelaredWi-Fi(SSID)delteléfonoyprotegersuredWi-Fi.
1 Toque >cha Aplicaciones>Ajustes >Anclaje a red y Redes >Punto
de acceso Wi-Fi.
2 ToqueConfigurar punto de acceso Wi-Fi.
•SeabriráelcuadrodediálogoConfigurar punto de acceso Wi-Fi.
•PuedecambiarelSSID de red(SSID)queotrosordenadoresvenalexplorarlas
redesWi-Fi.
•TambiénpuedetocarelmenúSeguridadparaconfigurarlaredconlaseguridad
AccesoprotegidoWi-Fi2(WPA2)conunaclavepreviamentecompartida(PSK).
•SitocalaopcióndeseguridadWPA2 PSK,seañadeuncampodecontraseña
alcuadrodediálogoConfigurar punto de acceso Wi-Fi.Paraintroduciruna
contraseña,tienequeconectarsealazonaWi-Fidelteléfonoconunordenadoru
otrodispositivo.PuedeestablecerAbiertaenelmenúSeguridadparaquitarla
seguridaddelaredWi-Fi.
3 ToqueGuardar.

42
ATENCIÓN: si establece la opción de seguridad como Abrir, no podrá
impedir el uso no autorizado de los servicios en línea por parte de otras
personas y es posible que esto ocasione gastos adicionales. Para impedir
el uso no autorizado, se recomienda que mantenga activada la opción de
seguridad.
Wi-Fi Direct
Wi-FiDirectescompatibleconunaconexióndirectaentredispositivosconWi-Fi
habilitadosinunpuntodeacceso.DebidoalaltoconsumodebateríadeWi-FiDirect,
lerecomendamosqueconecteelteléfonoaunatomadecorrientecuandoutilicela
funciónWi-FiDirect.CompruebedeantemanosuredWi-FiyWi-FiDirect,yasegúrese
dequeseconectaalamismaredqueelrestodeusuarios.
Conexión a un USB con un cable para PC
AprendaaconectarsuteléfonoaunPCmedianteuncablededatosUSBenlosmodos
deconexiónUSB.
Transferencia de música, fotos y vídeos mediante el modo Almacenamiento USB
masivo
1 ConecteelteléfonoalPCpormediodeuncableUSB.
2 SinohainstaladoelcontroladordelaplataformaAndroiddeLGenelPC,tendrá
quecambiarlosajustesmanualmente.SeleccioneAjustes del sistema>
Conexión a PC >Método de conexión USByseleccioneSincronizar medios
(MTP).
3 AhorapuedeverelcontenidodealmacenamientomasivoenelPCytransferirlos
archivos.
Sincronización con Windows Media Player
CompruebequeWindowsMediaPlayerestáinstaladoensuPC.
Conexión a redes y dispositivos

43
1 UtiliceelcableUSBparaconectarelteléfonoaunPCquetengainstaladoWin-
dowsMediaPlayer.
2 SeleccionelaopciónSincronizar medios (MTP).Unavezconectado,aparecerá
unaventanaemergenteenelPC.
3 AbraWindowsMediaPlayerparasincronizarlosarchivosdemúsica.
4 Editeointroduzcaelnombredeldispositivoenlaventanaemergente(sifuera
necesario).
5 Seleccioneyarrastrelosarchivosdemúsicaquedeseealalistadesincroni-
zación.
6 Comiencelasincronización.
•ParalasincronizaciónconWindowsMediaPlayerdebencumplirselossiguientes
requisitos.
Elementos Requisito
SO MicrosoftWindowsXPSP2,Vistaosuperior
Versiónde
WindowsMedia
Player
WindowsMediaPlayer10osuperior
•SilaversióninstaladadeWindowsMediaPlayeresinferiorala10,instaleaversión
10osuperior.

44
Llamadas
Realizar una llamada
1 Toque paraabrirelteclado.
2 Introduzcaelnúmeroutilizandoelteclado.Paraeliminarundígito,toque .
3 Toque pararealizarunallamada.
4 Paranalizarunallamada,toqueeliconoColgar .
SUGERENCIA: para introducir el signo "+" cuando realice llamadas
internacionales, mantenga pulsado .
Llamadas a contactos
1 Toque paraabrirlalistadecontactos.
2 Despláceseporlalistadecontactosointroduzcalasprimerasletrasdelcontacto
alquedeseallamarytoqueBuscar contactos.
3 Enlalista,toqueelcontactodosvecesotoqueel alquequierellamar.
Contestar y rechazar una llamada
Cuandorecibaunallamadaenmododebloqueo,deslice encualquierdirección
paraResponderalallamadaentrante.
Deslice encualquierdirecciónparaRechazarlallamadaentrante.
MantengapulsadoydesliceeliconoRechazar con mensajedesdelaparteinferiorsi
deseaenviarunmensaje.
SUGERENCIA: Rechazar con mensaje
Con esta opción, puede enviar rápidamente un mensaje. Esto es útil si tiene
que rechazar una llamada con un mensaje durante una reunión.

45
Ajuste del volumen de la llamada entrante
Paraajustarelvolumendelallamadaentrantedurantelallamada,utilicelateclade
subirybajarelvolumensituadaenlaparteizquierdadelteléfono.
Realizar una segunda llamada
1 Enlaprimerallamada,toqueMenú>Añadir llamada ymarqueelnúmero.
Tambiénpuedeaccederalosúltimosnúmerosmarcadostocando obuscando
contactostocando yseleccionandoelcontactoalquedeseallamar.
2 Toque pararealizarlallamada.
3 Ambasllamadasapareceránenlapantalladellamada.Laprimerallamadase
bloquearáysepondráenespera.
4 Toqueelnúmeroquesemuestraparaalternarentrellamadas.Otoque
Llamada a tresparacomenzarunaconferenciatelefónica.
5 Paranalizarlasllamadasactivas,toqueColgaropulselateclaInicio,deslicela
barradenoticaciónhaciaabajoyseleccioneeliconoFinalizar .
NOTA: se le cobrará por cada una de las llamadas realizadas.

46
Ver los registros de llamadas
Enlapantalladeinicio,toque yseleccionelafichaRegistros .
Permiteverlalistacompletadetodaslasllamadasrealizadas,recibidasyperdidas.
SUGERENCIA: Toque cualquier entrada del registro de llamadas para ver su
fecha, hora y duración.
SUGERENCIA: Toque la tecla Menú y, a continuación, toque Eliminar
todo para borrar todos los elementos registrados.
Ajustes de llamadas
Puedeconfigurarlosajustesdellamada,comolosdesvíosdellamadaylallamadaen
espera,asícomoelrestodefuncionesespecialesqueofrezcasuoperador.
1 Desdelapantalladeinicio,toque .
2 Toque .
3 ToqueAjustes de llamadasyseleccionelasopcionesquedeseeajustar.
Llamadas

47
Contactos
AñadacontactosalteléfonoysincronícelosconloscontactosdelacuentadeGoogley
otrascuentasqueadmitanlasincronizacióndecontactos.
Buscar un contacto
En la pantalla de inicio
1 Toque paraabrirlalistadecontactos.
2 ToqueBuscar contactoseintroduzcaelnombredelcontactomedianteel
teclado.
Agregar un contacto nuevo
1 Toque ,escribaelnúmerodelnuevocontactoy,acontinuación,toquelatecla
Menú .ToqueAñadir a contactos>Crear nuevo contacto.
2 Sideseaañadirunaimagenalnuevocontacto,toqueeláreadelaimagen.
SeleccioneentreHacer una fotooSeleccionar de galería.
3 Seleccioneeltipodecontactotocando .
4 Toqueunacategoríadeinformacióndecontactoeintroduzcalosdetallesdel
mismo.
5 ToqueGuardar.
Contactos favoritos
Puedeclasificarloscontactosalosquellamaconfrecuenciacomofavoritos.
Adición de un contacto a sus favoritos
1 Toque paraabrirlalistadecontactos.
2 Toqueuncontactoparaversusdetalles.
3 Toquelaestrellaaladerechadelnombredelcontacto.Laestrellasevolverá
amarilla.

48
Eliminación de un contacto de su lista de favoritos
1 Toque paraabrirlalistadecontactos.
2 Toquelacha yelijauncontactoparaversusdetalles.
3 Toquelaestrellaamarillaqueaparecealaderechadelnombredelcontacto.La
estrellasevuelvegrisyelcontactoseeliminadelosfavoritos.
Crear un grupo
1 Toque paraabrirlalistadecontactos.
2 ToqueGruposylateclaMenú .SeleccioneNuevo grupo.
3 Introduzcaelnombredelnuevogrupo.Puedeestableceruntonodellamadapara
elgrupoquehacreado.
4 ToqueGuardarparaguardarelgrupo.
NOTA: si elimina un grupo, no se borran los contactos asignados a ese
grupo. Continuarán almacenados en la lista de contactos.
Mover contactos de su dispositivo viejo al nuevo
1 ExporteloscontactoscomounarchivoCSVdesdeeldispositivoantiguoalorde-
nadormedianteunprogramadesincronización.
2 Primero,instale"LGPCSuite"enelPC.Ejecuteelprogramayconecteelteléfono
móvilAndroidalordenadormedianteuncableUSB.
3 Enelmenúsuperior,seleccioneDispositivo > Importar al dispositivo > Impor-
tar contactos.
4 Apareceráunaventanaemergenteparaseleccionareltipodearchivoyunarchivo
paraimportar.
5 Enlaventanaemergente,hagaclicenSelect a file (Seleccionar un archivo)
paraqueaparezcaelExploradordeWindows.
Contactos

49
6 SeleccioneelarchivodecontactosquesevaaimportaralExploradordeWindows
yhagaclicenAbrir.
7 HagaclicenOK.
8 ApareceráunaventanaemergentedeField Mapping (Asignación de campo)
paravincularloscontactosdesudispositivoylosnuevosdatosdecontactos.
9 SisurgeunconictoentrelosdatosdeloscontactosdesuPCyloscontactosdel
dispositivo,hagalasseleccionesomodicacionesnecesariasenLGPCSuite.
10 HagaclicenOK.

50
Mensajes
SuteléfonocombinaSMSyMMSenunmenúintuitivoyfácildeusar.
Enviar un mensaje
1 Toque enlapantalladeinicioytoque paraabrirunmensajeenblanco.
2 IntroduzcaunnombredecontactoounnúmerodeteléfonoenelcampoPara.A
medidaqueintroduzcaelnombredelcontacto,apareceránloscontactosqueco-
incidan.Puedetocarundestinatariosugerido.Puedeañadirmásdeuncontacto.
NOTA: se le cobrará un mensaje de texto por cada destinatario a quien se le
envíe.
3 Toqueelcampo'Introducir mensaje'yempieceaescribirsumensaje.
4 Toque paraabrirelmenúdeopciones.ElijaentreMensaje rápido, Insertar
emoticono,Programar envío,Añadir asuntoyDescartar.
SUGERENCIA: Puede tocar el icono para adjuntar al mensaje el archivo
que desee compartir.
5 ToqueEnviarparaenviarelmensaje.
6 Lasrespuestasapareceránenlapantalla.Mientrasconsultayenvíamensajes
adicionales,secreaunacadenademensaje.
ADVERTENCIA: el límite de 160 caracteres puede variar de un país a
otro en función del idioma y de la codificación del SMS.
ADVERTENCIA: si añade un archivo de imagen, vídeo o audio a un
mensaje SMS, este se convertirá automáticamente en un MMS y se le
cargará el coste correspondiente.

51
Organizar por nombre
Losmensajes(SMSyMMS)intercambiadosconotrapersonapuedenvisualizarseen
ordencronológicoparaasímantenerlalógicadelaconversación.
Modificación de los ajustes de mensajes
Losajustesdemensajedelteléfonoestánpredefinidos,deestaformapuedeenviar
mensajesinmediatamente.Puedecambiarlosajustesconformeasuspreferencias.
•ToqueeliconoMensajesenlapantalladeinicio,pulse y,acontinuación,toque
Ajustes.

52
E-mail
PuedeutilizarlaaplicaciónE-mailparaleerloscorreoselectrónicosdeservicioscomo
Gmail.LaaplicaciónE-mailadmitelossiguientestiposdecuenta:POP3,IMAPy
Exchange.
Suproveedordeserviciosoadministradordelsistemapuedeproporcionarlelosajustes
decuentaquenecesite.
Administración de una cuenta de correo electrónico
LaprimeravezqueabralaaplicaciónE-mail,seabriráunasistentedeconfiguración
paraayudarleaconfigurarunacuentadecorreoelectrónico.
Traslaconfiguracióninicial,E-mailmuestraelcontenidodesubandejadeentrada.Si
haañadidomásdeunacuenta,puedecambiardecuenta.
Para añadir otra cuenta de correo electrónico:
•Toque >fichaAplicaciones>E-mail>presione >Ajustes >Añadir
cuenta.
Para cambiar los ajustes de una cuenta de correo electrónico:
•Toque >fichaAplicaciones>E-mail>presione >Ajustes >Ajustes
generales.
Para eliminar una cuenta de correo electrónico:
•Toque >fichaAplicaciones>E-mail>presione >Ajustes >presione
>Borrar cuenta > Seleccionelacuentaquedeseaeliminar>Borrar>seleccione
Sí.
Trabajo con las carpetas de cuenta
Toque >fichaAplicaciones>E-mail,toque yseleccioneCarpetas.
Cadacuentatienelassiguientescarpetas:Recibidos,Enviando,EnviadosyBorradores.
Segúnlasfuncionesqueadmitaelproveedordeserviciosdelacuenta,puedecontar
concarpetasadicionales.

53
Redacción y envío de correo electrónico
Para redactar y enviar un mensaje
1 DesdelaaplicaciónE-mail,toque .
2 Introduzcaladireccióndeldestinatariodelmensaje.Amedidaqueintroduzca
eltexto,apareceránlasdireccionesdesuscontactosquecoincidan.Separelas
distintasdireccionesconpuntoycoma.
3 ToqueelcampoCc/CcoparaañadirCc/Ccoytoque paraadjuntararchivos,si
fueranecesario.
4 Introduzcaeltextodelmensaje.
5 Toque .
Sinoestáconectadoaunared,porejemplo,siestátrabajandoenmodoavión,
losmensajesqueenvíeseguardaránenlacarpetadelabandejadesalidahasta
quevuelvaaestarconectadoalared.Sicontienealgúnmensajependiente,la
carpetaEnviandosemostraráenlapantallaCuentas.
SUGERENCIA: cuando llegue un correo electrónico nuevo a la bandeja de
entrada, recibirá una notificación mediante un sonido o una vibración. Toque
la notificación de correo electrónico para dejar de recibir notificaciones.

54
Cámara
ParaabrirlaaplicaciónCámara,toqueCámara enlapantalladeinicio.
Conocer el visor
Flash:elijaentreDesactivado ,Activado oAutomático .
Cambiar cámara:cambieentrelalentedelacámaratraseraylalentedela
cámaradelantera.
Modo disparo:elijaentreNormal,Tonodinámico,Panorama,Disparocontinuo,
Disparoretocado,DisparoRetroactivo,DeportesoNoche.
Ajustes:toqueesteiconoparaabrirelmenúdeajustes.
Modo de vídeo:presioneydesliceesteiconohaciaabajoparacambiaralmodode
vídeo.
Botón de captura
Galería:presioneestaopciónparaverlaúltimafotoquehacapturado.Estole
permiteaccederasugaleríayverlasfotosguardadasmientrasestáenelmodode
cámara.
NOTA: antes de tomar una fotografía, asegúrese de que la lente de la
cámara está limpia.

55
Utilizar la configuración avanzada
Enelvisor,toque paraabrirlasopcionesavanzadas.Puedemodificarlosajustesde
lacámaradesplazándoseporlalista.Trasseleccionarlaopcióndeseada,toquelatecla
Atrás.
Parahacerunafoto,digaunadelaspalabrassiguientes:Cheese,Smile,
Whisky,KimchioLG.
Defineycontrolalacantidaddeluzsolarquerecibelafoto.
Toqueparaseleccionarelmododeenfoque.
Seleccionalaresolucióndelafoto.Sieligealtaresolución,eltamañodel
archivoaumentará,loquesignificaquepodráalmacenarmenosfotosenla
memoria.
ElvalorISOdeterminalasensibilidaddelsensordeluzdelacámara.Cuanto
mayorseaelvalorISO,mássensibleserálacámara.Resultaútilenentornos
oscurosenlosquenoesposibleutilizarelflash.
Mejoralacalidaddecolorendistintascondicioneslumínicas.
Aplicaefectosartísticosasusimágenes.
Estableceelretrasoqueseaplicadespuésdepulsarelbotóndecaptura.
Resultamuycómodoparapodersalirunomismoenlafotografía.
Activeestaopciónparautilizarlosserviciosdeubicacióndelteléfono.
NOTA: esta función está disponible cuando está activada la
función GPS o está conectado a una red.
Seleccionaunsonidodedisparo.
Establezcalatecladevolumenparausarlacapturaoelzoom.
Abreunaguíadeayudaenlaqueseexplicanlasfunciones.
Restablecetodoslosajustespredeterminadosdelacámara.

56
SUGERENCIA:
•cuando salga de la cámara, algunos ajustes volverán a sus valores
predeterminados, como el balance de blancos, el tono de color, el
temporizador y el modo de escena. Compruébelos antes de realizar la
siguiente fotografía.
•El menú de ajustes se muestra sobre el visor, por lo que al cambiar el color
de la foto o los elementos de calidad, verá una vista previa de la imagen
modificada detrás del menú Ajustes.
Cómo tomar una foto rápida
1 AbralaaplicaciónCámara.
2 Conelteléfonoenposiciónhorizontal,apuntelalentehaciaelobjetoquedesea
fotograar.
3 Apareceráuncuadrodeenfoqueenelcentrodelapantalladelvisor.También
puedetocarencualquierpuntodelapantallaparaenfocarallí.
4 Cuandoelcuadrodeenfoquesevuelvaverde,signicaráquelacámaraha
enfocadoeltema.
5 Toque paracapturarlafotografía.
Cámara

57
Después de realizar una fotografía
Presionelaminiaturadelaimagenenlaparteinferiordelapantalladelacámarapara
verlaúltimafototomada.
Toqueesteiconoparahacerotrafotografíainmediatamente.
Presioneesteiconoparaenviarsufotoaotrosoparacompartirlaatravésde
serviciosderedessociales.
Toqueesteiconoparaborrarlafotografía.
PresioneparacompartirfotospormediodelafunciónSmartShare.
SUGERENCIA: Si dispone de una cuenta SNS y está configurada en el
teléfono, puede compartir la foto con la comunidad SNS.
NOTA: pueden aplicarse cargos adicionales cuando se descargan mensajes
MMS mientras se encuentre en itinerancia.
Toque la tecla Menú para abrir todas las opciones avanzadas.
Usar imagen como:presioneestaopciónparautilizarlafotografíacomoFotode
contacto,FondodepantallaoFondodebloqueo.
Mover:toqueparamoverlafotografíaaotrolugar.
Copiar:toqueparacopiarlafotoseleccionadayguardarlaenotroálbum.
Copiar al portapapeles:presioneestaopciónparacopiarlafotoyguardarlaenel
portapapeles.
Renombrar:toqueestaopciónparaeditarelnombredelafotoseleccionada.
Girar a la izquierda/derecha:toqueparagiraralaizquierdaoladerecha.
Recortar:permiterecortarlafoto.Desplaceeldedoporlapantallaparaseleccionarel
áreaquedeseerecortar.
Editar:

58
Permite ver y editar la foto.Modo presentación:lemuestraautomáticamentelas
imágenesdelacarpetaactualdeformaconsecutiva.
Añadir ubicación:cuandoelGeo-etiquetadoestádesactivado,permiteañadirla
informacióndeubicación.
Quitar ubicación:cuandoelGeo-etiquetadoestáactivado,permiteeliminarla
informacióndeubicación.
Mostrar en el mapa:cuandoelGeo-etiquetadoestáactivado,permiteverenla
informacióndeubicaciónenunmapa.
Detalles:permiteobtenermásinformaciónsobreelcontenido.
Ver las fotos guardadas
Presione Galería.
•Paravermásfotos,desplácesehacialaizquierdaohacialaderecha.
•Paraampliaroreducirlaimagen,puedetocardosveceslapantallacondosdedosy
juntarlososepararlos,respectivamente.
Cámara

59
Videocámara
Conocer el visor
Flash:elijaentredesactivado oActivado .
Cambiar cámara:cambientrelalentedelacámaratraseraylalentedelacámara
delantera.
Modo grabación:seleccioneentreNormalo Efecto en vivo.
Ajustes:presioneesteiconoparaabrirelmenúdeajustes.
Modo de cámara:presioneydesliceeliconohaciaarribaparacambiaralmodode
cámara.
Iniciar grabación
Galería:presioneestaopciónparaverelúltimovídeograbado.Lepermiteacceder
alagaleríayverlosvídeosguardadosenelmododevídeo.
SUGERENCIA:
Cuando esté grabando un vídeo, coloque dos dedos sobre la pantalla y
júntelos para utilizar la función de zoom.

60
Utilizar la configuración avanzada
Enelvisor,toque paraabrirtodaslasopcionesavanzadas.
Presioneparaconfigurareltamaño(enpíxeles)delvídeoquevaagrabar.
Defineycontrolalacantidaddeluzsolarqueentraporlalente.Desliceel
indicadordebrilloalolargodelabarra.Deslícelohacia"-"parareducirel
brillodelvídeoyhacia"+"paraaumentarlo.
Mejoralacalidaddecolorendistintascondicioneslumínicas.
Elijauntonodecolorparaaplicarloalanuevavista.
Activeestaopciónparautilizarlosserviciosdeubicacióndelteléfono.
NOTA: esta función está disponible cuando está activada la
función GPS o está conectado a una red.
Establezcalatecladevolumenparausarlagrabaciónoelzoom.
Abreunaguíadeayudaenlaqueseexplicanlasfunciones.
Restablecetodoslosajustespredeterminadosdelacámara.
Cómo grabar un vídeo rápido
1 AbralaaplicaciónCámaraytoqueelbotóndelmodo Vídeo.
2 Elvisordelavideocámaraapareceenlapantalla.
3 Mientrassujetaelteléfono,orientelalentehaciaelobjetoosujetoquedesee
grabarenvídeo.
4 Toque unavezparainiciarlagrabación.
5 Apareceunaluzrojaenlaesquinasuperiorizquierdadelvisorconuntemporiza-
dorqueindicaladuracióndelvídeo.
6 Toque enlapantallaparadetenerlagrabación.
Videocámara

61
SUGERENCIA!
: presione este icono para capturar imágenes durante la grabación de
vídeo.
: presione este icono para pausar la grabación de vídeo.
Después de grabar un vídeo
Enelvisor,presionelaminiaturadevídeoenlaparteinferiordelapantalladela
cámaraparaverelúltimovídeograbado.
Presioneesteiconoparagrabarotrovídeoinmediatamente.
Presioneesteiconoparaenviarsuvídeoaotrosoparacompartirlaatravés
deserviciosderedessociales.
Presioneesteiconoparaborrarelvídeo.
PresioneparacompartirvídeospormediodelafunciónSmartShare.
NOTA: pueden aplicarse cargos adicionales cuando se descargan mensajes
MMS mientras se encuentre en itinerancia.
Ver los vídeos guardados
1 Enelvisor,toque .
2 SemuestralaGaleríaenlapantalla.
3 Toqueunvídeoparareproducirloautomáticamente.
Ajustar el volumen durante la visualización de un vídeo
Paraajustarelvolumendeunvídeomientrasseestáreproduciendo,utilicelasteclas
devolumendelladoizquierdodelteléfono.

62
Función exclusiva de LG
Función QuickMemo
Utilicelafunción QuickMemoparatomarnotasduranteunallamadadeforma
prácticayeficaz,conunaimagenguardada,obienenlapantallaactualmenteactiva.
O
1 PuedeintroducirlafunciónQuick-
Memopulsandoalmismotiempola
teclaparasubirelvolumenylatecla
parabajarloduranteunsegundoen
lapantallaquequierecapturar.
O
Tambiénpuedetocarydeslizarlabarra
deestadohaciaabajoytocar
.
2 Seleccionelaopcióndemenúque
deseeentreTipo Bolígrafo,Colory
Borrador,ycreeunanota.

63
3 Toque enelmenúEditaryselec-
cióneloparaguardarlanotaconla
pantallaactivaactualmente.
NOTA:use la punta del dedo para utilizar la función Nota rápida, no la uña.
Uso de las opciones de Nota rápida
PuedeutilizarfácilmentelasopcionesdelMenúrápidoalutilizarlafunciónQuickMemo.
Toqueparaconservarlanotaactualenpantallayutilizarelteléfonoalavez.
Seleccionesideseautilizarlapantalladefondo.
DeshaceroRehacer.
Seleccioneeltipodelápizyelcolor.
Borralanotacreada.
Toqueparaenviarsunotaaotrosoparacompartirlaatravésdelosservicios
deredessociales.
GuardalanotaconlapantallaactualenlaGalería / Libreta de notas.
Visualización de las notas rápidas
ToqueGalería/Libreta de notasyseleccioneelálbumdeQuickMemo.

64
Función Libreta de notas
ConlaaplicaciónLibretadenotaspodráadministrarypersonalizarunagranvariedad
deinformación.LaLibretadenotaslepermitecrearnotasespecialescondibujos,
imágenes,mapasycalcomanías.
Creación de una nota
1 Toque >chaAplicaciones>Libreta de notas.
2 ToqueNueva notaparacrearunanotanueva.
3 Seleccioneelmodoquedesee(Cubierta, Título, Papel, Color de papel)ytoque
Aceptar.
4 Creeunanotasencillaenunapáginaenblanco.
Conocer la aplicación Libreta de notas
Paneles de propiedades de páginasEstante
Estante
Busquepáginasdenotas.
CompartaunarchivodelaLibretadenotas,unarchivoPDFounarchivode
imagenatravésdeE-mail/Gmail.
Función exclusiva de LG

65
BorrelalibretadenotasdelEstante.
Paneles de propiedades de páginas
Seleccioneelmododesólolecturaodeedición.
DeshaceroRehacer.
Toqueestebotónparaescribir.
Seleccioneeltipodebolígrafo,Espesor,OpacoyColor.
Borrelanotaquecreó.
Toqueparaadjuntararchivosalanota.
Toqueparaenviarsunotaaotrosoparacompartirlaatravésdelosservicios
deredessociales.
Guardelanotaconlapantallaactual.
Seleccioneparabloquearodesbloquearlateclafrontal.
Toqueestebotónparaaumentareláreadeintroduccióndetexto.
Visualización de las notas guardadas de la Libreta de notas
•LasnotasdelaLibretadenotasseguardanenelEstante.
•SiguardanotasdeQuickMemo,secrearáyguardaráautomáticamenteunanotade
QuickMemoenelEstante.
NOTA: para obtener más información sobre la guía de Libreta de notas,
consulte Libreta de notas > Guía de la Libreta de notas.

66
QuickTranslator
Apunteconlacámaradesusmartphonealafrasequedeseetraducirasuidioma.
Puedeobtenerunatraducciónentiemporealencualquiermomentoylugar.
EnlaGooglePlayStorepuedecomprarmásdiccionariospararealizartraducciones
cuandoestédesconectado.
Idiomadeorigen.
Idiomadedestino.
Traducirpalabra.
Traducirfrase.
Traducirbloque.
Ajustes.
1 Toque >chaAplicaciones>QuickTranslator.
2 ToquePalabra,LíneaoPárrafo.
3 Toqueelidiomaquedeseaparaseleccionarlo.
4 Apunteelteléfonounossegundoshaciaelobjetivoquedeseetraducir.
NOTA: sólo se proporciona un diccionario de forma gratuita. Si desea
diccionarios adicionales, deberá comprarlos por separado. En la lista
siguiente, seleccione el diccionario que desea instalar como diccionario
complementario.
NOTA: en función del tamaño, el color, el brillo y el ángulo de las letras del
texto que se desee traducir puede que exista alguna diferencia en la tasa de
reconocimiento.
Función exclusiva de LG

67
Función Live Zooming (Zoom en directo)
LiveZooming(Zoomendirecto)lepermiteacercaroalejarunapartedeunvídeoque
seestáreproduciendoparaaumentaroreducirlapartedeseada.
NOTA:
•Cuando esté en modo de reproducción de vídeo, deslice la pantalla hacia
arriba o hacia abajo para ajustar el brillo de la pantalla (en el lado izquierdo)
y el volumen (en el lado derecho).
•En el modo de reproducción de vídeo, el volumen se sigue ajustando
deslizando el dedo por la pantalla hacia la derecha o la izquierda.
NOTA: no ejerza una presión excesiva. La pantalla es lo suficientemente
sensible como para detectar un toque ligero pero firme.

68
Función QSlide
Lafunción QSlidepermitesuperponeralapantallaqueestáusandootrapantalla
translúcida,loquelepermiteverdospantallasalavez.
O
Toqueparasalirdelafunción
QSlideyvolveralmododeventana
atamañocompleto.
Toqueparaajustarla
transparencia.
Toqueparasalirdelafunción
QSlide.
Presioneparaajustareltamaño.
1 Toqueydeslicelabarradeestadohaciaabajo>toqueQSlideAplic.o
siestáutilizando
algunafuncióncompatibleconlafunciónQSlide>toque .Lafunciónse
mostrarádeformapermanenteenunapequeñaventanaenlapantalla.
2 Puederealizarunallamada,navegarporlaWeboelegirotrasopcionesdeltelé-
fono.Tambiénpuedeutilizarytocarlapantalladelasventanaspequeñascuando
labarradetransparencianoestécompleta .
NOTA: con la función QSlide admite hasta dos ventanas a la vez.
SUGERENCIA:
Toque y deslice el panel de notificaciones hacia abajo con el dedo.
Toque
para gestionar los "Ajustes rápidos" o "QSlide" en el panel de
notificaciones.
Función exclusiva de LG

69
Función Reproducción dual
Puedevisualizarunapantalladiferenteencadaunadelasdospantallasconectadasde
formainalámbricaoporcable.
1 LareproduccióndobleseejecutaaltocarlateclaInicio mientrassereproduce
contenidoenlapantallaexterna.
2 Puededejardereproducircontenidoenlapantallaexternapormediodelpanelde
noticaciones.
NOTA:
•Conecte su smartphone a una pantalla de forma inalámbrica (Miracast) o
por cable (cable MHL).
•Puede conectar un monitor o un televisor compatible con MHL o Miracast
a su smartphone.
•Es posible que algunos archivos de vídeo no sean compatibles con la
función de reproducción doble.
•Se recomienda el uso de cables apantallados LG MHL.
Reflejo
∙∙∙∙∙

70
Reproducción
doble
∙∙∙∙∙
NOTA:
•La reproducción doble es compatible con tres aplicaciones: Vídeos, Media
Home (solo MHL) y Polaris Office 4.
•La resolución mínima de la televisión para la reproducción doble de 720 p
(1.280 x 720)
LG SmartWorld
LGSmartWorldofrececontenidoemocionanteyvariadocomofuentes,temas,juegoso
aplicaciones.
Cómo acceder a LG SmartWorld desde el teléfono
1 Toque >chaAplicaciones>toqueelicono paraaccederaLG Smart-
World.
2 ToqueAccedereintroduzcaelIDylacontraseñadeLGSmartWorld.Sitodavíano
seharegistrado,toqueRegistrarparaaccederaLGSmartWorld.
3 Descargueelcontenidoquedesee.
•Cuandouselaredcelular,esposiblequesuoperadorlecobreunatarifaenfunción
delplandedatosquetengacontratado.
•EsposiblequeLGSmartWorldnoestédisponibleparatodoslosoperadoresoen
todoslospaíses.
Función exclusiva de LG

71
NOTA: ¿qué pasa si no hay ningún icono ?
1 Acceda a LG SmartWorld (www.lgworld.com) a través de un navegador
web para móviles y seleccione su país.
2 Descargue la aplicación LG SmartWorld.
3 Ejecute e instale el archivo descargado.
4 Acceda a LG SmartWorld tocando el icono
.
Beneficio especial disponible únicamente en LG SmartWorld
1 Decore su smartphone con su estilo. Utilice el tema de inicio, el teclado y
la fuente proporcionados en LG SmartWorld (Tenga en cuenta que este
servicio solo está disponible para ciertos dispositivos. Compruebe en el sitio
web de LG SmartWorld si lo está para el suyo)
2 Disfrute del servicio especial de LG SmartWorld al unirse a la promoción
ofrecida
On-Screen Phone
On-ScreenPhonelepermiteverlapantalladelteléfonomóvildesdeunordenadora
travésdelaconexiónUSBoBluetooth.Tambiénpuedecontrolarelteléfonomóvildesde
elordenadorconelratónoelteclado.
Iconos de On-Screen Phone
Permiteconectarelteléfonomóvilaunordenadorodesconectarlo.
PermitecambiarlaspreferenciasdeOn-ScreenPhone.
SaledelprogramaOn-ScreenPhone.
MaximizalaventanadeOn-ScreenPhone.
MinimizalaventanadeOn-ScreenPhone.

72
Funciones de On-Screen Phone
•Transferenciaycontrolentiemporeal:permitemostrarycontrolarlapantalladel
teléfonomóvilcuandoseconectaalPC.
•Controlmedianteelratón:permitecontrolarelteléfonomóvilmedianteelratónpara
hacerclicendeterminadoselementosyarrastrarlosenlapantalladelPC.
•Introduccióndetextoconelteclado:permiteredactarunmensajedetextoounanota
coneltecladodelordenador.
•Transferenciadearchivos(delteléfonomóvilalordenador):lepermiteenviararchivos
(porejemplo,fotos,vídeos,músicayarchivosdePolarisOffice)delteléfonomóvil
alordenador.Bastaconhacerclicconelbotónderechosobreelarchivoquedesea
enviaralPCyhacerclicen"GuardarenPC".
•Transferenciadearchivos(delPCalteléfonomóvil):permiteenviararchivosdel
PCalteléfonomóvil.Solotienequeseleccionarlosarchivosquedeseetransferiry
arrastrarlosysoltarlosenlaventanadeOn-ScreenPhone.Losarchivosseenvíany
seguardanenlatarjetaSDinterna.
•Notificacionesdeeventosentiemporeal:muestraunavisoemergentequeleinforma
decualquierllamadaomensajedetextoomultimedia.
Cómo instalar On-Screen Phone en el ordenador
1 VisitelapáginaWebdeLG(www.lg.com)yseleccioneunpaís.
2 DiríjaseaPostventa>Asistencia del teléfono móvil>seleccioneelmodelo
(LG-E975)>hagaclicenOSP(On-ScreenPhone)pararealizarladescarga.
PuedeinstalarOn-ScreenPhoneenelordenador.
Función exclusiva de LG

73
Galería
Puedealmacenararchivosmultimediaenunamemoriainternaparaaccederfácilmente
atodossusarchivosmultimedia.Utiliceestaaplicaciónparaverarchivosmultimedia
comofotografíasyvídeos.
1 Toque >chaAplicaciones>Galería.
Abraunalistadelasbarrasdecatálogodondesealmacenantodoslosarchivos
multimedia.
NOTA:
•En función del software que se haya instalado en el dispositivo, algunos
formatos de archivo no son compatibles.
•En función de su codificación, puede que algunos archivos no se muestren
correctamente.
Visualización de imágenes
AlabrirlaGaleríasemuestrantodaslascarpetasdisponibles.Cuandodesdeotra
aplicación,comoE-mail,seguardaunafotografía,secreaautomáticamentelacarpeta
dedescargas,enlaqueseguardarálafotografía.Delmismomodo,alrealizarseuna
capturadepantalla,secrealacarpetaCapturasdepantalla.Seleccionelacarpetaque
deseeabrir.
Lasfotossemuestranenlacarpetaordenadasporfechadecreación.Seleccioneuna
fotografíaparaverlaenpantallacompleta.Desplácesealaderechaoalaizquierda
paraverlaimagenanteriorosiguiente.
Acercar y alejar mediante el zoom
Paraampliarunaimagen,utiliceunodelosmétodossiguientes:
•Toquedosveceslazonaquedeseaampliar.
•Coloquedosdedossobrelazonaquedeseaampliarysepárelos.Júntelospara
reducirlaotoquedosvecesparavolveralavistainicial.
Multimedia

74
Reproducción de vídeos
Enlavistapreviadelosarchivosdevídeosemuestraelicono .Seleccioneelvídeo
quedeseeverytoque .SeiniciarálaaplicaciónVídeos.
Edición de fotos o vídeos
Cuandoestéviendounafotoounvídeo,toquelateclaMenú yutilicelasopciones
avanzadasdeedición.
•Modo presentación:comienzaunapresentaciónconlasimágenesdelacarpeta
actual.
Borrado de imágenes
Utiliceunodelosmétodossiguientes:
•Enunacarpeta,toque ,seleccionelasfotos/vídeosytoqueBorrar.
•Cuandoestéviendounafotoounvídeo,toque .
Establecer como fondo de pantalla
Cuandoestéviendounafoto,toquelateclaMenú >Usar imagen comoparafijar
laimagencomofondodepantallaoasignárselaauncontacto.
NOTA:
•Algunos formatos de archivo no son compatibles en función del software
instalado en el dispositivo.
•Si el tamaño de archivo es superior a la capacidad de memoria disponible,
puede producirse un error al abrir los archivos.
Vídeos
Elteléfonocuentaconunreproductordevídeointegradoparaquepuedareproducir
susvídeosfavoritos.Paraaccederalreproductordevídeo,toque >ficha
Aplicaciones>Vídeos.
Multimedia

75
Reproducción de un vídeo
1 Toque >chaAplicaciones>Vídeos.
2 Seleccioneelvídeoquedeseareproducir.
Toqueparaponer/continuarconlareproduccióndevídeo.
Toqueparaavanzar10segundos.
Toquepararetroceder10segundos.
Toqueparacontrolarelvolumendelvídeo.
Toqueparacambiarelaspectodelapantalladevídeo.
Presioneesteiconoparacapturarlaimagendurantela
reproduccióndeunvídeo.
ToqueparautilizarQSlide.
ToqueparairaSmartShare.
Toqueparabloquear/desbloquearunapantalladevídeo.

76
Paracambiarelvolumenmientrasestáviendounvídeo,pulselatecladevolumen
haciaarribaoabajoenelladoizquierdodelteléfono.
Toqueymantengapulsadocualquiervídeodelalista.Semostraránlasopciones
Compartir,Borrar,RecortaryDetalles.
Editor de vídeo
Puedeeditarfotografíasovídeosguardadosenelteléfono.
NOTA: la función de edición de vídeo sólo es compatible con fotos o vídeos
grabados con este teléfono.
< Pantalla de lista de proyectos >
Área de
botones
Área de lista
de proyectos
Ayuda
Crearproyecto
Losproyectos,comoporejemplo,losvídeos,debenexportarseparapoder
reproducirseenaplicaciones.
Reproducirproyecto
Borrarproyecto
CompartasuproyectoconaplicacionescomoYouTube
Multimedia

77
< Pantalla de edición de proyectos >
Área de la
línea de
tiempo
Área del visor
Vayaalapantalladelistadeproyectos.Elproyectoqueseestáeditando
actualmenteseguardadeformaautomática.
Dividirclipdevídeoendospartesatravésdelmarcador
Añadirefectodesonido
Añadirvídeo,imágenesoclipsdeaudio
Deshacerunaacción
Rehacerunaacción
Añadirtextoavídeooclipsdeimagen
Asistente de vídeo
Puedecrearsupropiapelículaconsusimágenes/vídeosymúsica.
1 Toque >chaAplicaciones>Asist. Vídeo.
2 Despuésdeverunapequeñaintroduccióndelospasosquesedebenseguir,
toqueAceptar.

78
3 Toque paraañadirimágenesovídeoasupelícula.
4 Toqueenlasimágenesovídeosquedeseey,acontinuación,en .
•Paraeliminarmensajesovídeos,toqueen yseleccionelosarchivosquedesee>
.
•Paracambiarsuposición,mantengapulsadaunaimagenounvídeoyarrástreloala
posiciónquedesee.
5 ToqueSeleccionar estiloparaseleccionarelestilodepelículaquedesee.
•Despláceseporlosestilosyseleccioneelquedesee.Amedidaqueseva
desplazandoporestosestilos,seirámostrandounavistaprevia.
6 ToqueSeleccionar músicaparaseleccionarlamúsicadefondo.
7 Toque parareproducirsupelícula.
8 Toque paraeditarelvideocliputilizandoTexto,CalcomaníaoPuntomágico.
•Traseditarelvídeo,toque .
9 Toque paraguardarelvídeo.
10 Toque paraverinformacióndeayudaacercadelusodeestafunción.
Música
Elteléfonocuentaconunreproductordemúsicaintegradoparaquepuedaescuchar
todassuscancionesfavoritas.Paraaccederalreproductordemúsica,toque >
fichaAplicaciones>Música.
Multimedia

79
Reproducir una canción
1 Toque >chaAplicaciones>Música.
2 ToqueCanciones.
3 Seleccionelacanciónquedeseareproducir.
/
Presioneesteiconoparapausar/reanudarlareproducción.
Presioneparapasaralapistasiguientedelálbum,listade
reproducciónoreproducciónaleatoria.Mantengapulsadopara
avanzarrápidamente.
Presioneparareiniciarlapistaactualopasaralapistaanteriordel
álbum,listadereproducciónoreproducciónaleatoria.Mantenga
pulsadopararetroceder.
Presioneparamostrarlabarradeslizantedevolumeny,a
continuación,ajusteelvolumendereproducción.
Toqueparaestablecerlosefectosdeaudio.

80
PresioneparaencontrararchivosconYouTube.
Presioneparaabrirlalistadereproducciónactual.
Presioneparaañadirlacanciónasusfavoritos.
Presioneparareproducirlalistadereproducciónactualenmodo
aleatorio(laspistassereproducenenordenaleatorio).
Presioneparacambiarlosmodosderepetición:repetirtodaslas
canciones,repetirlacanciónactualorepeticióndesactivada.
SmartShare.
Paracambiarelvolumenmientrasestáescuchandomúsica,pulselatecladevolumen
haciaarribaoabajoenelladoizquierdodelteléfono.
Mantengapulsadacualquiercancióndelalista.SemostraránlasopcionesReproducir,
Añadir a lista de reproducción,Compartir, Establecer como tono, Borrar, Detalles
yBuscar.
Añadir archivos de música a su teléfono
Comiencetransfiriendoarchivosdemúsicaasuteléfono:
•TransfieramúsicamedianteSincronizarmedios(MTP).
•DescargainalámbricadesdelaRed.
•Sincronizacióndelteléfonoconelordenador.
•RecepcióndearchivosmedianteBluetooth.
Transferencia de música mediante Sincronizar medios (MTP)
1 ConecteelteléfonoalPCmedianteelcableUSB.
2 SeleccionelaopciónSincronizar medios (MTP).Suteléfonoaparecerácomo
otrodiscoduroenelordenador.Hagaclicenlaunidadparaverla.Copielos
archivosdesuPCalacarpetadelaunidad.
Multimedia

81
3 Cuandoterminedetransferirlosarchivos,arrastrehaciaabajolabarradeestado
ytoqueTipo de conexión USB>Sólo carga.Ahorapuededesconectarel
dispositivodeformasegura.
NOTA:
•Algunos formatos de archivo no son compatibles en función del software
instalado en el dispositivo.
•Si el tamaño de archivo es superior a la capacidad de memoria disponible,
puede producirse un error al abrir los archivos.
NOTA: el copyright de los archivos de música puede estar protegido por
tratados internacionales y leyes nacionales.
Por tanto, puede que sea necesario obtener permiso o una licencia para
reproducir o copiar música.
En algunos países, las leyes nacionales prohíben la realización de copias de
material protegido con copyright. Antes de descargar o copiar el archivo,
infórmese sobre la legislación relativa a este tipo de material en el país
correspondiente.

82
Definir una alarma
1 Toque >chaAplicaciones>Alarma> .
2 Despuésdecongurarlaalarma,elteléfonoleindicarácuántotiempofaltapara
queseactive.
3 Puedecongurar:Repetir,Repetición de alarmas,Vibración,Tono de alarma,
Volumen de alarma, Inicio automático de aplic., Desbloqueo Inteligente y
Nota.ToqueGuardar.
NOTA: para cambiar los ajustes de la alarma en la pantalla que contiene la
lista de alarmas, toque la tecla Menú y seleccione Ajustes.
Uso de la calculadora
1 Toque >chaAplicaciones>Calculadora.
2 Toquelasteclasnuméricasparainsertarnúmeros.
3 Paracálculossencillos,toquelafunciónquedeseerealizar(+,–,xo÷),seguida
de=.
4 Paracálculosmáscomplejos,deslicelaparteizquierdayelijasin,cos,tan,log,
etc.
5 Paracomprobarelhistorial,toque ,yseleccioneelhistorialdecálculos.
Adición de eventos al calendario
1 Toque >chaAplicaciones>Calendario.
2 Puedebuscarenlapantallalosdiferentestiposdevistasdecalendario(Día(s),
Semana,Mes,Agenda).
3 Toquelafechaenlaquedeseaagregaruneventoytoque .
4 ToqueNombre del eventoeintroduzcaelnombredelevento.
Utilidades

83
5 ToqueUbicacióneintroduzcalaubicación.Compruebelafechaeindiquelahora
alaquedeseaqueempieceynaliceelevento.
6 Sideseaañadirunanotaalevento,toqueDescripciónyescribalosdetalles.
7 Sidesearepetirlaalarma,seleccioneREPETICIÓNyestablezcaRECORDATO-
RIOSsiesnecesario.
8 ToqueGuardarparaguardareleventoenelcalendario.
Grabadora de voz
Utilicelagrabadoradevozparagrabarnotasdevozuotrosarchivosdeaudio.
Grabar sonido o voz
1 Toque >chaAplicacionesyseleccioneGrabador de voz.
2 Toque paraempezarlagrabación.
3 Toque paranalizarlagrabación.
4 Toque paraescucharlagrabación.
NOTA: toque para acceder al álbum. Podrá escuchar la grabación
almacenada. El tiempo de grabación disponible diferir de tiempo de
grabación real.
Enviar la grabación de voz
1 Unaveznalizadalagrabación,puedeenviarelclipdeaudiotocando .
2 SeleccioneentreBluetooth,Unidad,E-mail,Gmail,Notas,MensajesoSmart-
Share Beam.Alseleccionarunadelasopciones,seañadelagrabacióndevozal
mensaje.Acontinuación,puedeescribirelmensajeyenviarlonormalmente.

84
Administrador de tareas
PuedeadministrarsusaplicacionespormediodelAdministradordetareas.Puede
comprobarfácilmenteelnúmerodeaplicacionesqueseestánejecutandoactualmente
ycerrarlasquedesee.Tambiénpuededesinstalarlasaplicacionesquetenga
instaladasensudispositivo.
Tareas
EstatareasepuedesincronizarconlacuentadeMSExchange.Puedecrearunatarea,
revisarlayeliminarlaenMSOutlookoMSOfficeOutlookWebAccess.
Para sincronizar MS Exchange
1 Desdelapantalladeinicio,toque>Ajustes.
2 ToqueCuentas y sincronización>AÑADIR CUENTA.
3 ToqueMicrosoft Exchangeparacrearunadireccióndecorreoelectrónicoy
contraseña.
4 Compruebequeexisteunamarcadevericaciónenlatareadesincronización.
Polaris Office 4
PolarisOfficeesunasoluciónprofesionaldeMobileOfficequepermitealosusuarios
visualizarcómodamentevariostiposdedocumentosdeOffice,incluidosarchivosde
Word,ExcelyPowerPoint,encualquiermomentoylugarmediantesudispositivomóvil.
Toque >fichaAplicaciones>Polaris Office 4
Visualización de archivos
Ahoralosusuariosdedispositivosmóvilespuedenvisualizarfácilmentemuchostipos
dearchivosdiferentes,incluyendodocumentosdeMicrosoftOfficeyAdobePDF,desde
sudispositivo.AlvisualizardocumentosconPolarisOffice,losobjetosyeldiseñoson
idénticosalosdeldocumentooriginal.
Utilidades

85
Backup
Acerca de la copia de seguridad y restauración de los datos
del smartphone
Serecomiendacrearyguardarregularmenteunarchivodecopiadeseguridaden
elmediodealmacenamientointerno,especialmenteantesdeactualizarcualquier
software.Elmantenimientodeunarchivodecopiadeseguridadactualizadoenla
memoriadealmacenamientopuedepermitirrecuperarlosdatosdelsmartphonesilo
pierde,selorobanoresultadañadoporunproblemaimprevisto.
EstaaplicaciónCopiadeseguridadescompatibleentresmartphonesLGydistintas
versionesdesoftwareosistemasoperativos.Porello,alcomprarunnuevosmartphone
LG,puederealizarunacopiadeseguridaddelosdatosquetengaensuteléfonoantiguo
enelnuevo.
SihapreinstaladolaaplicaciónBackupenelsmartphone,podrárealizaruna
copiadeseguridadyrestaurarlamayoríadelosdatosdelsmartphone,además
deAplicaciones,entrelasqueseincluyenlasaplicacionesnoprotegidas,sus
ajustes,Aplicaciones (descargadas), Aplicaciones (preinstaladas), Favoritos,
Calendario,Registro de llamadas,Contactos,Pantalla inicial, Mensajes de texto,
yConfiguración del sistema.Puede:
•Realizarunacopiadeseguridadmanualdelosdatosdelsmartphone.
•Planificarlascopiasdeseguridadautomáticasdelosdatosdelsmartphone.
•Restaurarlosdatosdelsmartphone.
NOTA: tenga en cuenta que la función Copia de seguridad no copia los
datos de usuario ni los datos multimedia (imágenes, vídeo y música). Para
hacer copias de seguridad de estos archivos, utilice Sincronizar medios
(MTP). Conecte su teléfono a su equipo por medio de un cable USB y toque
Sincronizar medios (MTP).

86
ADVERTENCIA
Para evitar que se apague el dispositivo de forma inesperada por falta de
energía durante las operaciones de copia de seguridad o restauración,
asegúrese de que la batería esté completamente cargada.
Copia de seguridad
1 Toque >cha Aplicaciones > LG Backup > Copia de seguridad.
2 Activelacasilladevericaciónqueestájuntoalelementodelquedeseerealizar
lacopiadeseguridady,acontinuación,presioneSiguientepararealizarlacopia
deseguridad.
3 ToqueAlmacenamientointerno>Iniciar.
4 Cuandohayanalizadolacopiadeseguridaddelosarchivosseleccionados,
toqueHechoparanalizarlacopiadeseguridad.
Programación de copias de seguridad
Tambiénpuedeprogramarcopiasdeseguridadautomáticasdelosdatosdel
smartphonesegúnsusajustesdeplanificación.Parahacerlo,realicelossiguientes
pasos:
Toque >cha Aplicaciones > LG Backup >Programar copia de seguridad.
Restauración y gestión de archivos
Puederestaurarlosarchivosaunestadoprevioatravésdeunacopiadeseguridad.
Pararestaurarlosdatosqueseencuentranenlamemoriadeldispositivo,elmodode
almacenamientomasivodebeestardesactivado.
Toque >cha Aplicaciones > LG Backup>Restauración y gestión de
archivos>Almacenamiento interno.
Utilidades

87
NOTA:
•todos los archivos que estén almacenados en el smartphone se borrarán
antes de que se restaure el archivo de copia de seguridad.
•tenga en cuenta que los datos del teléfono se sobrescribirán con el
contenido de la copia de seguridad.
•puede establecer Habilitar encriptación para encriptar los archivos de copia
de seguridad y así disfrutar de una protección adicional.
Google+
Utiliceestaaplicaciónparaestarconectadoconquiendeseeatravésdelserviciode
redsocialdeGoogle.
•Toque >fichaAplicaciones>Google+.
NOTA: en función de su región y de su proveedor de servicios, es posible
que esta aplicación no esté disponible.
Búsqueda de voz
UtiliceestaaplicaciónparabuscarpáginasWebporvoz.
1 Toque >chaAplicaciones>Búsqueda por voz.
2 DigaunapalabraounafrasecuandosemuestreHablar ahoraenlapantalla.
Seleccioneunadelaspalabrasclavesugeridasquesemuestran.
NOTA: en función de su región y de su proveedor de servicios, es posible
que esta aplicación no esté disponible.

88
Descargas
Utiliceestaaplicaciónparaverquéarchivoshansidodescargadospormediodelas
aplicaciones.
•Toque >fichaAplicaciones>Descargas.
NOTA: en función de su región y de su proveedor de servicios, es posible
que esta aplicación no esté disponible.
Utilidades

89
La Web
Internet
UtiliceestaaplicaciónparanavegarporInternet.Graciasalnavegadorpodráacceder
rápidamentedesdesuteléfonomóvilaunmundoatodocolordejuegos,música,
noticias,deporte,entretenimientoymuchomás,encualquierlugarysobrecualquier
tema.
NOTA: se aplicarán cargos adicionales cuando se conecte a estos servicios
y descargue contenido. Compruebe los gastos de transmisión de datos con
su proveedor de red.
1 Toque >chaAplicaciones>Internet.
Uso de la barra de herramientas Web
MantengapulsadalabarradeherramientasWebydesliceeldedohaciaarribapara
abrirla.
Toquepararetrocederunapágina.
Toqueestaopciónparairalasiguientepáginaalaquesehayaconectado
despuésdelapáginaactual.Estoeslocontrariodeloqueocurrecuando
tocalateclaAtrás,queledevuelvealapáginaanterior.
Toqueestaopciónparaaccederalapáginadeinicio.
Toqueestaopciónparaañadirunanuevaventana.
Toqueparaaccederalosfavoritos.
Visualización de páginas Web
Toqueelcampodedirección,escribaladirecciónWebytoqueIr.

90
Apertura de una página
Parairalanuevapágina,toque
ParairaotrapáginaWeb,toque ,desplácesehaciaarribaohaciaabajoytoquela
páginaquedeseeseleccionar.
Búsqueda por voz en la Web
Toqueenelcampodedirección,toque ,digaunapalabraclaveyseleccioneunade
lasqueselesugieren.
NOTA: en función de su región y de su proveedor de servicios, es posible
que esta función no esté disponible.
Marcadores
Paraañadirlapáginaactualasusfavoritos,toque >Añadir a Favoritos>
Aceptar.
ParaabrirunapáginaWebguardadacomofavorita,toque yseleccioneuna.
Historial
Toque >HistorialparaabrirunapáginaWebdelalistadepáginasvisitadas
recientemente.Paraborrarelhistorial,toqueMenú Limpiar historial.
Uso de navegador emergente
UtiliceestafunciónparaaccederaInternetsincerrarlaaplicaciónactual.
Mientrasseestévisualizandocontenido,comocontactosonotasqueincluyan
direccionesWeb,seleccioneunadirecciónWebytoquelaopcióncorrespondienteal
navegadoremergente.Toqueelnavegadoryarrástreloparamoverloaotraubicación.
Paraverelnavegadorenpantallacompleta,toque .
Paracerrarelnavegador,toque .
La Web

91
Chrome
UtiliceChromeparabuscarinformaciónynavegarporpáginasWeb.
1 Toque >chaAplicaciones>Chrome.
NOTA: en función de su región y su proveedor de servicios, es posible que
esta aplicación no esté disponible.
Visualización de páginas Web
ToqueelcampoDireccióneintroduzcaunadirecciónWebouncriteriodebúsqueda.
Apertura de una página
Vayaaunanuevapágina,ficha +Nueva pestaña.
ParairaotrapáginaWeb,toque ,desplácesehaciaarribaohaciaabajoytoquela
páginaquedeseeseleccionar.
Búsqueda por voz en la Web
Toqueenelcampodedirección,toque ,digaunapalabraclaveyseleccioneunade
lasqueselesugieren.
Sincronización con otros dispositivos
SincronicelafichasabiertasylosfavoritosparautilizarlosconChromeenotro
dispositivodespuésdehaberiniciadosesiónenlamismacuentadeGoogle.
Paraverlasfichasabiertasenotrosdispositivos,toqueMenú Otros
dispositivos.
SeleccionelapáginaWebquedeseeabrir.
Paraverlosfavoritos,toque .

92
Ajustes
Enestasecciónseofreceunadescripcióngeneraldeloselementosquepuedecambiar
atravésdelosmenúsdeajustesdelsistemadelteléfono.
Para acceder al menú Ajustes:
1 Enlapáginadeinicio,toque >chaAplicaciones>Ajustes.
o
enlapantalladeinicio,toque >Ajustes del sistema.
2 Seleccioneunacategoríadeajustesy,acontinuación,unaopción.
CONEXIONES INALÁMBRICAS Y REDES
Aquí,puedeadministrarlasconexionesWi-FiyBluetooth.Tambiénpuedeconfigurarlas
redesmóvilesycambiaralmodoavión.
< Wi-Fi >
Wi-Fi:conestaopciónseactivalafunciónWi-FiparaconectarsealasredesWi-Fi
disponibles.
SUGERENCIA: Cómo obtener la dirección MAC
Para configurar una conexión en algunas redes inalámbricas con filtro MAC,
tendrá que introducir la dirección MAC del teléfono en el router.
Puede encontrar la dirección MAC siguiendo las opciones de la interfaz de
usuario siguientes: toque la ficha Aplicaciones > Ajustes > Wi-Fi >
>
Avanzado > Dirección MAC.
< Bluetooth >
ActiveydesactivelafuncionalidadinalámbricaBluetooth.
< Datos móviles >
Muestraelusodelosdatosyellímitedeusodedatosmóvilesestablecido.
< Ajustes de llamadas >
Configurelosajustesdellamadastelefónicas,comoeldesvíodellamadasyotras
funcionesespecialesqueofrezcasuproveedor.

93
Buzón de voz:permiteseleccionarelserviciodebuzóndevozdeloperador.
Marcación fija:paraactivaryreunirunalistaconlosnúmerosalosquesepuede
llamardesdeelteléfono.NecesitaráelPIN2queeloperadorlehasuministrado.Sicrea
unalistademarcaciónfija,sólosepodránllamaralosnúmerosqueesténenestalista
desdeelteléfono.
Pantallaemergentedellamadaentrante:muestralapantallaemergentedellamada
entrantecuandohayaunaaplicaciónenuso.
Rechazar llamada:permiteestablecerlafunciónderechazodellamadas.Seleccione
MododerechazodellamadasoListaderechazados.Rechazarconmensaje:permite
enviarunmensajerápidocuandoserechazaunallamada.Estoesútilsitieneque
rechazarunallamadaduranteunareunión.
Ocultar identidad:ocultaelnombreyelnúmerodelapersonaquellama.
Desvío de llamadas:elijasideseadesviartodaslasllamadasoutilizarestafunción
sólocuandolalíneaestéocupada,cuandonohayarespuestaocuandonotenga
cobertura.
Respuesta automática:indiqueeltiempoantesdequeeldispositivomanoslibres
conectadorespondaautomáticamentealallamadaentrante.ElijaentreDeshabilitar,1
segundo,3segundosy5segundos.
Vibración de conexión:elteléfonovibracuandolaotraparterespondealallamada.
Guardarnúmerosdesconocidos:agreguenúmerosdesconocidosaloscontactos
despuésdeunallamada.
La tecla Power termina la llamada: permiteseleccionarcómofinalizarllamadas.
Restringidas:permitebloquearllamadasentrantes,salientesointernacionales.
Registro tiempos de llamadas:permitevisualizarladuracióndelasllamadas,incluida
laúltimallamada,todaslasllamadas,lasllamadasmarcadasylasllamadasrecibidas.
Configuración adicional:lepermitemodificarlosajustessiguientes:
Identificador de emisor:puedeindicarsideseamostrarsunúmeroalreceptordela
llamada.

94
Llamada en espera:siactivalallamadaenespera,eldispositivoleavisarádeque
tieneunallamadaenesperacuandoestéenotrallamada(dependedelproveedorde
red).
<Compartir y conectar>
NFC:elteléfonoesunteléfonomóvilconNFC.NFC(delinglésNearField
Communication,comunicacióndecampocercano)esunatecnologíadeconectividad
inalámbricaqueactivalacomunicacióndedosvíasentrelosdispositivoselectrónicos.
Funcionaaunadistanciadeunospocoscentímetros.Puedecompartirsucontenido
conunaetiquetaNFCuotrodispositivocompatibleconNFCsimplementetocándolos
consudispositivo.SitocaunaetiquetaNFCconsudispositivo,estemostraráel
contenidodelaetiqueta.
Para activar y desactivar NFC:desdelapantalladeinicio,toqueydesliceelpanel
denotificacioneshaciaabajoconeldedoy,acontinuación,seleccioneeliconoNFC
paraactivarlo.
NOTA: se puede utilizar la aplicación NFC con el modo Avión activado.
Uso de NFC:parautilizarNFC,asegúresedequeeldispositivoestéactivadoy,si
estuvieradesactivado,activeNFC.
Android Beam:cuandoestafunciónestáactivada,puedetransmitirelcontenidode
unaaplicaciónaotrodispositivocompatibleconNFCmanteniendoambosdispositivos
cerca.
Bastaconjuntarlosdispositivos(normalmenteporlaparteposterior)ytocarlapantalla.
Laaplicacióndeterminaquédatossetransmiten.
SmartShare Beam:permiterecibirarchivosdeteléfonosLG.
Servidor multimedia:permitecompartircontenidosmultimediacondispositivos
cercanosatravésdeDLNA.
Miracast:conMiracastpuedereproducirdeformainalámbricalapantallayelsonido
desuteléfonoenuntelevisorodispositivodeseguridadMiracast.
Ajustes

95
< Anclaje a red y Redes >
Punto de acceso Wi-Fi:tambiénpuedeutilizarelteléfonoparaproporcionarconexión
móvildebandaancha.Creeunpuntodeaccesoycompartalaconexión.Consulte
"Cómocompartirlaconexióndedatosdelteléfono"paraobtenermásinformación.
ConexiónaInternetmedianteBluetooth:permiteconfigurarelteléfonoparacompartir
suconexiónaInternet.
Ayuda:presioneparaverlainformacióndeayudaacercadelasfuncionesPuntode
accesoWi-FiyConexiónaInternetmedianteBluetooth.
Modo avión:sicambiaalmodoavión,sedesactivantodaslasconexiones
inalámbricas.
NOTA: debe establecer un PIN de bloqueo de pantalla o una contraseña
antes de poder usar el almacenamiento de credenciales.
Redes móviles:permiteconfigurarlasopcionesdeitineranciadedatos,operadoresy
mododered,nombresdepuntosdeacceso(APN),etc.
Aplicación SMS predeterminada:lepermiteestablecerlaaplicacióndeSMS
predeterminada.
VPN: muestralalistaderedesprivadasvirtuales(VPN)quesehanconfigurado
anteriormente.PermiteagregardistintostiposdeVPN.
DISPOSITIVO
< Sonido >
Perfil de sonido:puedeseleccionarentreSonido,VibraciónoSilencioso.
Controles de Volumen:puedeadministrarelvolumendeltonodelteléfono,delsonido
denotificación,deltoquerealimentaciónysistema,delamúsica,delosvídeos,delos
juegosydeotrosmedios.
Tiempo de descanso :ajustelashorasparadesactivartodoslossonidosexcepto
alarmasymedios.
Tono de llamada : lepermiteajustareltonodelteléfonopredeterminadoparalas

96
llamadasentrantes.
Timbre inteligente:activeestaopciónparaaumentarelvolumendeltonodellamada
deformaautomáticaenentornosruidosos.
Sonido con vibración:vibraciónparallamadasynotificaciones.
Notificaciones:lepermiteajustareltonodenotificaciónpredeterminado.
Respuesta táctil:lepermiteestablecerlarespuesta(tonosy/ovibración)mientrasusa
sudispositivo.
< Pantalla >
Brillo: permiteajustarelbrillodelapantalla.
Tiempo espera pantalla:permiteestablecereltiempoquepasaráhastaquela
pantallapasealmododeespera.
Pantalla giratoria: activeestaopciónparaqueelteléfonogirelapantalla
automáticamenteenfuncióndelaorientacióndelteléfono(retratoopaisaje).
Protector de pantalla: presioneelconmutadorProtectordepantallaparaactivarloo
desactivarlo.Activadopermitequesemuestreelsalvapantallascuandoelteléfonoestá
durmiendomientrasestáacopladoy/oencarga.
Tipo de fuente: cambiaeltipodefuentedelapantalla.
Tamaño de fuente: cambiaeltamañodelostiposdeletra.
Pantalla inteligente: activeestaopciónparamantenerlapantallaencendidamientras
elteléfonodetectasurostro.
Luz de tecla táctil frontal:permiteestablecereltiempodeencendidodelatecla
frontal.
Led de notificación: elLEDdenotificaciónseencuentraalaizquierdadelacámara
frontal.PuedevercómoseiluminaelindicadorLEDcuandosecargaelteléfonoo
cuandoserecibeunanotificaciónsiestáapagadalapantallaLCD.Puedeconfigurar
Flashnotificaciónparaactivarseodesactivarse.Puedeconfigurarlasdistintasopciones
delalistadeelementosdeflashdenotificación.
< Pantalla de inicio >
EstablezcaelTema, Fondo de pantalla, Efecto de pantalla, Permitir bucle de la
Ajustes

97
pantalla de iniciooSólo vista vertical.SeleccionelaopciónparaestablecerCopiade
seguridadyrestauracióndeinicio.
< Bloqueo de pantalla >
Tipo de bloqueo: estableceuntipodebloqueodepantallaparaprotegerelteléfono.
Abreunaseriedepantallasqueleguíaenlacreacióndeunpatróndedesbloqueode
pantalla.EstablezcaNinguno, Deslizamiento, Reconocimiento de cara, Patrón, PIN
oContraseña.
Sitienehabilitadoeltipodebloqueopatrón,cuandoenciendaelteléfonooactivela
pantalla,selesolicitaráquecreedibujeelpatróndedesbloqueoparadesbloquearla
pantalla.
< Movimiento >
Silenciar llamadas entrantes: volteeeldispositivoparasilenciarlasllamadas
entrantes.
Repetir o detener alarma:volteeeldispositivoparainterrumpirodetenerlaalarma.
Introducir pausa en vídeo:volteeeldispositivoparapausarlareproduccióndevídeo.
Ayuda:ayudaparalasfuncionesdemovimiento.
Calibración del sensor de movimiento:lepermitemejorarlaprecisióndela
inclinaciónylavelocidaddelsensor.
< Almacenamiento >
ALMACENAMIENTO INTERNO:permiteverelusodelalmacenamientointerno.
< Batería >
INFORMACIÓN SOBRE LA BATERÍA
Lainformaciónsobrelacargadelabateríasemuestraenformadegráficodela
bateríajuntoconelporcentajedecargarestanteysuestado.
Toqueeliconodecargadelabateríaparamostrarlapantalladeusodelabatería
conelfindeverelniveldeusodelabateríaysusdetallesdeuso.Muestralos
componentesylasaplicacionesqueestánusandoelmayorporcentajedealimentación
debatería.Presioneunadelasentradasparavermásinformacióndetallada.
Porcentaje de la batería en la barra de estado: activeestaopciónparamostrarel

98
porcentajedeniveldelabateríaenlabarradeestadojuntoaliconodelabatería.
AHORRO DE ENERGÍA
PresioneelconmutadorAhorrodeEnergíaparaactivarloodesactivarlo.PresioneAhorro
deEnergíaparaaccederalossiguientesajustes:
Ahorro de Energía:estableceelniveldeporcentajedecargadelabateríaqueactivará
automáticamenteAhorrodeEnergía.
Modo Eco: configureelmodoEcoparaprolongarlavidaútildesubateríaoptimizando
deformadinámicalapolíticadecontroldelaCPU.
Ayuda:presioneparaverinformacióndeayudaacercadelahorrodebatería.
< Aplicaciones >
Verygestionarsusaplicaciones.
<Tocar y pagar>
CuandoNFCestáactivado,puedeutilizarlafunciónTocarypagarparapagarpor
losartículosconsolotocarconsuteléfonounlectorenlacajaregistradora.Sisu
dispositivonotieneunaaplicaciónpredeterminada,puedebuscarotrasaplicacionesde
pagoenGooglePlay.
PERSONAL
< Cuentas y sincronización >
Permitequelasaplicacionessincronicendatosenunsegundoplano,tantosiestá
trabajandoconellascomosino.Sidesactivaestaopción,puedeahorrarbateríay
reducir(aunquenoeliminar)elusodedatos.
< Nube >
Añadaunacuentaenlanubeparausardeformarápidaysencillaelservicioenla
nubedeaplicacionesdeLG.
< Ubicación >
Alactivarelserviciodeubicación,elteléfonodeterminasuubicaciónaproximada
medianteelGPS,laconexiónWi-Fiylasredesmóviles.
Ajustes

99
Modo: permiteestablecerelmododeubicaciónenAlta exactitud, Ahorro de batería
ySolamente sensores del dispositivo.
< Seguridad >
Encriptar teléfono: lepermiteencriptardatosenelteléfonoaefectosdeseguridad.Se
lesolicitaráqueintroduzcaunPINocontraseñaparadescifrarsuteléfonocadavezque
loencienda.
Bloqueo de tarjeta SIM:permitebloquearocambiarelPINdelatarjetaMicro-USIM.
Escritura de contraseña visible:muestraelúltimocarácterdelacontraseñaocultaa
medidaquelaescribe.
Administradores de dispositivos:permitevisualizarodesactivarlosadministradores
delteléfono.
Orígenes desconocidos:ajustepredeterminadoparainstalaraplicacionesqueno
procedendelsitiodecompras.
Verificar aplicaciones: nopermitiroadvertirantesdelainstalacióndeaplicaciones
quepuedancausardaño.
Acceso a las notificaciones:muestralasnotificaciones.
Tipo de almacenamiento:muestraeltipodealmacenamiento.
Credenciales de confianza: muestracertificadosdeautenticacióndeconfianza.
Instalar desde memoria: permiteinstalarcertificadosencriptados.
Borrar certificados: eliminatodosloscertificados.
< Idioma y teclado >
Utilicelosajustesdeidiomaeintroduccióndetextoparaseleccionarelidiomayla
regióndeltextodelteléfonoyparaconfigurareltecladoenpantalla,incluidaslas
palabrasquehaañadidoaldiccionario.
< Copia de seguridad y reiniciar >
Cambielosajustesparaadministrarlaconfiguraciónylosdatos.
Copia de seguridad de datos: establezcaestevalorparahacerunacopiade
seguridaddesusajustesydatosdeaplicacionesenelservidordeGoogle.
Cuenta copia seguridad:configureestaopciónpararealizarunacopiadeseguridad
desucuenta.

100
Ajustes
Restauración automática:establezcaestaopciónpararestaurarsusajustesydatos
deaplicación,cuandotengaquereinstalarlasaplicacioneseneldispositivo.
Servicio LG Backup:realizaunacopiadeseguridaddetodalainformacióndel
dispositivoylarestauraencasodequesepierdanosesustituyanlosdatos.
Restaurar datos de fábrica:restablecelosajustesconlosvaloresdefábricayelimina
todossusdatos.Sirestableceelteléfonodeestaforma,selesolicitaráquevuelvaa
introducirlamismainformaciónquelaprimeravezqueinicióAndroid.
SISTEMA
< Fecha y hora >
UtilicelosajustesdeFecha y horaparaestablecercómosevisualizaránlasfechas.
Tambiénpuedeutilizarestosajustesparaestablecersupropiahorayzonahorariaen
vezdeobtenerlahoraactualdelaredmóvil.
< Accesibilidad >
UtilicelosajustesdeAccesibilidadparaconfigurarcualquiercomplementode
accesibilidadquehayainstaladoenelteléfono.
NOTA: requiere complementos adicionales para poder seleccionarlo.
< Conexión a PC >
Seleccionar método de conexión USB: establezcaelmododeseado:Sólocarga,
Sincronizarmedios(MTP),Anclajeared,SoftwareLGoEnviarimagen(PTP).
Preguntar al conectar: sepreguntaelmododeconexiónUSBalconectarseaun
ordenador.
Ayuda:ayudaconlaconexiónUSB.
PC Suite:activeestaopciónparautilizarLGPCSuiteconlaconexiónWi-Fi.
TengaencuentaquelaredWi-FideberíaestarconectadaparausarLGPCSuitea
travésdeunaconexiónWi-FienlosajustesdeCONEXIONESINALÁMBRICASYREDES.
Ayuda: ayudaconelsoftwareLG.

101
<Impresión>
Permiteimprimirelcontenidodedeterminadaspantallas(comopáginasWeb
mostradasenChrome)enunaimpresoraconectadaalamismaredWi-Fiqueel
dispositivoAndroid.
< Acerca del teléfono >
Podráverlainformaciónlegalycomprobarelestadodelteléfonoysuversiónde
software.

102
ElsoftwareparaPC"LGPCSuite"esunprogramaqueleayudaaconectarsudispositivoaunPC
atravésdeuncableUSByunaconexiónWi-Fi.Unavezconectado,puedeutilizarlasfuncionesdel
dispositivodesdeelP
Por medio de “LG PC Suite”, puede...
•Administraryreproducirsucontenidomultimedia(música,películasyfotos)desde
unPC.
•Enviarcontenidomultimediaasudispositivo.
•Sincronizardatos(calendarios,contactos,favoritos)entreundispositivoyunPC.
•Realizarcopiadeseguridaddelasaplicacionesquetieneenelteléfono.
•Actualizarelsoftwaredesudispositivo.
•Hacercopiasdeseguridadyrestablecerlosdatosdeldispositivo.
•Reproducircontenidomultimediadelordenadordesdeeldispositivo.
•Hacercopiadeseguridadycrearyeditarlasnotasdeldispositivo
NOTE: You can use the Help menu from the application to find out how to
use your "LG PC Suite" PC software.
Instalación del software para PC “LG PC Suite”
PuededescargarelsoftwareparaPC“LGPCSuite”delapáginaWebdeLG.
1 Diríjaseawww.lg.comyseleccioneunpaís.
2 VayaaSoporte>SERVICIO POSVENTA MÓVILES >Teléfonos móviles LG>
seleccione el modelo.
o
Vaya a Soporte>Móvil>Seleccione el modelo.
3 HagaclicenPC SYNCenMANUALES Y DESCARGASyhagaclicen DESCAR-
GARparadescargarelsoftwareparaPC"LGPCSuite".
Requisitos del sistema para el software para PC "LG PC Suite"
•Sistemaoperativo:WindowsXP(Servicepack3)32bits,WindowsVista,Windows7,
Windows8
•CPU:procesadorde1GHzosuperior
•Memoria:almenos512MBdeRAM
Software para PC (LG PC Suite)

103
•Tarjetagráfica:resoluciónde1024x768,32bitsosuperior
•Discoduro:500MBomásdeespaciolibreendiscoduro(esposiblequenecesite
másespaciolibreendisco,segúnelvolumendelosdatosalmacenados.)
•Softwarenecesario:controladoresLGintegrados,WindowsMediaPlayer10o
superior
NOTA: controlador USB de LG integrado
El controlador USB de LG integrado es necesario para conectar un dispositivo
LG y un ordenador, y se instala automáticamente al instalar la aplicación para PC
"LG PC Suite".
Sincronización del dispositivo con el PC
Paraunamayorcomodidad,losdatosdeldispositivoydelPCsepuedensincronizar
fácilmentepormediodelsoftwareparaPC"LGPCSuite".Sepuedensincronizarlos
contactos,loscalendariosylosfavoritos.
Elprocedimientoeselsiguiente:
1 Conecteelteléfonoalordenador.(utiliceuncableUSBounaconexiónWi-Fi).
2 CuandoaparezcaSeleccionar método de conexión USB,seleccioneSoftware
LG.
3 Despuésdeestablecerconexión,ejecuteelprogramayseleccionelaseccióndel
teléfonodelacategoríacorrespondiente,enlaparteizquierdadelapantalla.
4 Hagaclicen Información personalparaseleccionarlo.
5 Activelacasilladevericacióndelcontenidoquedeseesincronizaryhagaclicen
elbotónSincronización.
NOTA: para sincronizar el teléfono con el PC, debe instalar LG PC Suite en el
PC. Consulte las páginas anteriores para obtener instrucciones sobre cómo
instalar LG PC Suite.
Mover contactos de su dispositivo viejo al nuevo
1 ExporteloscontactoscomounarchivoCSVdesdeeldispositivoantiguoalorde-
nadormedianteunprogramadesincronización.

104
2 Primero,instale"LGPCSuite"enelPC.Ejecuteelprogramayconecteelteléfono
móvilAndroidalordenadormedianteuncableUSB.
3 Enelmenúsuperior,seleccioneTeléfono>Importar/Exportar contactos>
Exportar al teléfono.
4 Apareceráunaventanaemergenteparaseleccionareltipodearchivoyunarchivo
paraexportar.
5 Enlaventanaemergente,hagaclicenSeleccionar un archivo yapareceráel
ExploradordeWindows.
6 SeleccioneelarchivodecontactosquesevaaexportaralExploradordeWin-
dowsyhagaclicenAbrir.
7 HagaclicenExportar.
8 ApareceráunaventanaemergenteAsignación de campoparavincularlos
contactosdesudispositivoylosnuevosdatosdecontactos.
9 SisurgeunconictoentrelosdatosdeloscontactosdesuPCyloscontactosdel
dispositivo,hagalasseleccionesomodicacionesnecesariasenLGPCSuite.
10 HagaclicenAceptar.
Software para PC (LG PC Suite)

105
Actualización de software del teléfono
Actualización de software de teléfonos móviles LG desde Internet
Paraobtenermásinformaciónsobreelusodeestafunción,visitehttp://update.
lgmobile.comohttp://www.lg.com/common/index.jsp yseleccioneelpaísyel
idioma.
Estaopciónlepermiteactualizarcómodamenteelfirmwaredelteléfonoconlaúltima
versióndesdeInternet,sinnecesidaddevisitarningúncentrodeservicios.Esta
característicasóloestarádisponiblesiempreycuandoLGpubliqueunanuevaversión
defirmwareparaeseteléfono.
Elprogramadeactualizacióndelfirmwaredelteléfonomóvilrequierelaatencióndel
usuariodurantetodoelprocesodeactualización.Antesderealizarcualquieracción,
asegúresedeentendertodaslasinstruccionesynotas.SiextraeelcablededatosUSB
durantelaactualizaciónpuedecausardañosimportantesenelteléfonomóvil.
NOTA: LG se reserva el derecho de ofrecer actualizaciones de firmware
únicamente para modelos seleccionados según lo estime oportuno, y no
garantiza la disponibilidad de una versión actualizada del firmware para todos
los modelos de teléfono.
Actualización inalámbrica del software de teléfonos móviles LG
Estafunciónleayudaaactualizarcómodamenteelsoftwaredeldispositivoconuna
nuevaversiónatravésdeOTA,sintenerqueconectarsemedianteuncablededatos
USB.EstacaracterísticasóloestarádisponiblesiempreycuandoLGpubliqueuna
nuevaversióndefirmwareparaeseteléfono.
Enprimerlugar,debecomprobarlaversióndesoftwaredelteléfonomóvil:Ajustes
>Acerca del teléfono>Actualizar SW >Actualización de SW> Comprobar
actualizaciones ahora
Actualización de software del teléfono

106
NOTA: los datos personales del medio de almacenamiento interno del
teléfono, incluida la información sobre la cuenta de Google y cualquier otra
cuenta, los datos y ajustes del sistema y de las aplicaciones, cualquier
aplicación descargada y la licencia DRM, podrían eliminarse en el proceso
de actualización del software del teléfono. Por tanto, LG le recomienda que
realice una copia de seguridad de sus datos personales antes de actualizar
el software del teléfono. LG no se responsabiliza de las posibles pérdidas de
datos personales.
NOTA: esta función depende del proveedor de servicios de red, la región y
el país.
Actualización de software del teléfono

107
Acerca de la guía de usuario
•Antesdeutilizarsudispositivo,leadetenidamenteestemanual.Deestaforma,se
asegurarádeutilizarelteléfonocorrectamenteydeformasegura.
•Algunasdelasimágenesycapturasdepantallaindicadasenestaguíapuedendiferir
conrespectoasuteléfono.
•Sucontenidopuedediferirdelproductofinalodelsoftwareproporcionadoporsus
operadoresdetelefoníaoproveedoresdeservicios.Estecontenidoestásujetoa
cambiossinprevioaviso.Paraaccederalaúltimaversióndeestemanual,visiteel
sitioWebdeLGenwww.lg.com.
•Lasaplicacionesyfuncionesdesuteléfonopuedenvariarenfuncióndesupaís,su
regiónosusespecificacionesdehardware.LGnosehaceresponsabledeningún
problemaderendimientoresultantedelusodeaplicacionesdesarrolladaspor
proveedoresdistintosdeLG.
•LGnosehaceresponsabledeningúnproblemaderendimientooincompatibilidad
resultantedelaedicióndelosajustesdelregistroodelamodificacióndelsoftware
delsistemaoperativo.Cualquierintentodemodificacióndelsistemaoperativopuede
producirunfuncionamientoinesperadodeldispositivoodesusaplicaciones.
•Lalicenciadelsoftware,audio,fondodepantalla,imágenesydemásmedios
suministradosconsudispositivoesdeusolimitado.Siextraeyutilizaestos
materialesparausocomercialodecualquierotrotipo,esposiblequeesté
incurriendoenunainfraccióndelosderechosdelcopyright.Comousuario,esel
únicoresponsabledelusoilícitodelmaterialmultimedia.
•Esposiblequeseapliquencargosadicionalesporlosserviciosdedatos,como
mensajería,cargaydescarga,sincronizaciónautomáticaolosserviciosdeubicación.
Paraevitarelcobrodedichoscargos,seleccioneunplandedatosadecuadoasus
necesidades.Póngaseencontactoconsuproveedordeserviciosparaobtenermás
información.
Acerca de la guía de usuario

108
Marcas comerciales
•LGyellogotipodeLGsonmarcascomercialesregistradasdeLGElectronics.
•Lasdemásmarcascomercialesycopyrightsonpropiedaddesusrespectivospropietarios.
HD de DivX
ACERCA DE DIVX VIDEO:DivX
®
esunformatodevídeodigitalcreadoporDivX,LLC,
unaempresasubsidiariadeRoviCorporation.Estedispositivocuentaconlacertificación
oficialDivXCertified
®
parareproducirvídeoDivX.Visitedivx.comparaobtenermás
informaciónyherramientasdesoftwareparaconvertirsusarchivosavídeoDivX.
ACERCA DE DIVX VIDEO-ON-DEMAND:estedispositivoDivXCertified
®
deberá
registrarseparapoderreproducirlaspelículasDivXVideo-on-Demand(VOD)quehaya
comprado.Paraobtenerelcódigoderegistro,localicelasecciónDivXVODenelmenú
deconfiguracióndeldispositivo.Visitevod.divx.comparaobtenermásinformación
sobrecómocompletarelregistro.
DivX Certified
®
para reproducir vídeo DivX
®
hasta HD 720p, incluido el contenido
premium.
DivX
®
, DivX Certified
®
y los logotipos asociados son marcas comerciales de Rovi
Corporation o sus empresas subsidiarias y se utilizan con licencia.
Dolby Mobile
Fabricado bajo licencia de Dolby Laboratories. Dolby y el símbolo de la doble D
son marcas comerciales de Dolby Laboratories.
Aviso: software de código fuente abierto
Para obtener el código fuente correspondiente a GPL, LGPL, MPL y otras
licencias de código fuente abierto, visite http://opensource.lge.com/
Todos los términos de licencia, avisos y avisos de exención de
responsabilidad están disponibles para su descarga con el código fuente.
Acerca de la guía de usuario

109
Estosaccesoriosestándisponiblesparausarseconesteteléfono.(Los elementos que
se describen a continuación pueden ser opcionales.)
Adaptador de
viaje
Auriculares
estéreo
Guía de inicio
rápido
Cable de datos
Herramienta de
expulsión de
Micro-USIM
Accesorios
NOTA:
• Utilice siempre accesorios LG originales.
• Si no lo hace, la garantía puede quedar anulada.
• Los accesorios pueden variar en las distintas regiones.

110
Resolución de problemas
Enestecapítulosedescribenalgunosproblemasquesepuedenproducircuandouse
elteléfono.Parasolucionaralgunosdeellos,deberállamarasuproveedordeservicios,
aunquelamayoríadeproblemaspodrásolucionarlosustedmismo.
Mensaje Causas posibles Soluciones posibles
Error Micro-
USIM
No se ha
insertado la tarjeta
Micro-USIM en
el teléfono o está
insertada de forma
incorrecta.
Asegúrese de que la tarjeta Micro-
USIM se ha insertado correctamente.
Sin
conexión de
red/Se ha
perdido la
conexión de
red.
Señal débil o el
dispositivo está
fuera de la red
del proveedor de
servicios.
Muévase hacia una ventana o a un
área abierta. Compruebe el mapa de
cobertura del operador de red.
El operador ha
aplicado nuevos
servicios.
Compruebe si la tarjeta Micro-
USIM tiene más de 6-12 meses
de antigüedad. Si es así, cambie
la tarjeta Micro-USIM en la oficina
de su proveedor de red. Póngase
en contacto con su proveedor de
servicios.

111
Mensaje Causas posibles Soluciones posibles
Los
códigos no
coinciden
Para cambiar
un código de
seguridad, debe
volver a introducir
el código nuevo
para confirmarlo.
Si pierde el código, póngase en
contacto con el proveedor de
servicios.
Los dos códigos
que ha introducido
no coinciden.
No se
pueden
establecer
aplicaciones.
El proveedor
de servicios
no admite la
función o requiere
registrarse.
Póngase en contacto con su
proveedor de servicios.
Llamadas
no
disponibles
Error de
marcación
Red nueva no autorizada.
Se ha insertado
una nueva tarjeta
Micro-USIM.
Compruebe las nuevas restricciones.
Límite de cargos
por prepago
alcanzado.
Póngase en contacto con el proveedor
de servicios o restablezca el límite con
PIN2.

112
Mensaje Causas posibles Soluciones posibles
No se
puede
encender el
teléfono
La tecla Activar/
Desactivar se
ha pulsado muy
rápidamente.
Pulse la tecla Activar/Desactivar al
menos durante dos segundos.
La batería no está
cargada.
Cargue la batería. Compruebe el
indicador de carga en la pantalla.
Error al
cargar
La batería no está
cargada.
Cargue la batería.
La temperatura
exterior es
demasiado alta o
baja.
Asegúrese de que el teléfono se carga
a temperatura normal.
Problema de
contacto
Compruebe la conexión del cargador
al teléfono.
No hay tensión
Enchufe el cargador en una toma
distinta.
Cargador
defectuoso
Cambie el cargador.
Cargador erróneo
Utilice sólo accesorios de LG
originales.
Resolución de problemas

113
Mensaje Causas posibles Soluciones posibles
Número no
permitido
La función
Marcación fija está
activada.
Compruebe el menú Ajustes y
desactive la función.
No se
pueden
recibir/
enviar SMS
ni fotos
Memoria llena Borre algunos mensajes del teléfono.
Los
archivos no
se abren
Formato de
archivo no
compatible
Compruebe los formatos de archivo
admitidos.
La pantalla
no se
enciende
cuando
recibo una
llamada.
Problema del
sensor de
proximidad
Si utiliza una película o carcasa de
protección, asegúrese de no tapar
el área que rodea al sensor de
proximidad. Asegúrese de que el área
de alrededor del sensor de proximidad
está limpia.
Sin sonido Modo de vibración
Compruebe el estado de configuración
del menú de sonido para asegurarse
de que no está en modo silencio o de
vibración.
El
dispositivo
se bloquea
Problema
de software
intermitente
Intente actualizar el software a través
del sitio Web.

114
Antesdellamaralserviciodeatenciónalclienteollevarelteléfonoalserviciotécnico,
compruebesilosproblemasdesuteléfonosedescribenenestasección.
Categoría
Subcategoría
Pregunta Respuesta
BT
Bluetooth
Dispositivos
¿Cuáles son las
funciones disponibles
a través de Bluetooth?
Puede conectar un dispositivo de
audio Bluetooth, como por ejemplo,
unos auriculares estéreo/mono o
un kit de manos libres para coche,
para compartir imágenes, vídeos,
contactos, etc., mediante el menú
Galería/Contactos. Asimismo, cuando
un servidor FTP está conectado a
un dispositivo compatible, puede
compartir contenidos almacenados en
el medio de almacenamiento.
BT
Bluetooth
Auriculares
¿Si mis auriculares
Bluetooth están
conectados, puedo
escuchar música
a través de los
auriculares con un
cable de 3,5 mm?
Cuando unos auriculares Bluetooth
están conectados, todos los sonidos
del sistema se reproducen a través
de ellos. Como resultado, no podrá
escuchar música a través de los
auriculares con cable.
Datos
Contactos
Copia de
seguridad
¿Cómo puedo
realizar una copia
de seguridad de los
contactos?
Los contactos se pueden sincronizar
entre el teléfono y Gmail™.
Datos
Sincronización
¿Es posible configurar
una sincronización
unidireccional con
Gmail?
Solo está disponible la sincronización
bidireccional.
Preguntas frecuentes

115
Categoría
Subcategoría
Pregunta Respuesta
Datos
Sincronización
¿Es posible sincronizar
todas las carpetas de
correo electrónico?
La carpeta Recibidos se sincroniza
automáticamente. Puede ver otras
carpetas tocando la tecla Menú y
seleccionar Carpetas para elegir una
carpeta.
Google™
Service
Inicio de
sesión de
Gmail
¿Tengo que iniciar
sesión en Gmail
siempre que quiera
tener acceso a Gmail?
Una vez que haya iniciado sesión en
Gmail, no necesitará volver a hacerlo.
Google™
Service
Cuenta de
Google
¿Es posible filtrar los
correos electrónicos?
No, el filtrado de correos electrónicos
no se puede realizar a través del
teléfono.
Función del
teléfono
Correo
electrónico
¿Qué ocurre cuando
ejecuto otra aplicación
mientras escribo un
correo electrónico?
El correo electrónico se guardará
automáticamente como borrador.
Función del
teléfono
Tono
¿Existe alguna
limitación en el tamaño
de archivo cuando
utilizo un archivo MP3
como tono?
No hay ningún límite de tamaño de
archivo.

116
Categoría
Subcategoría
Pregunta Respuesta
Función del
teléfono
Hora del
mensaje
Mi teléfono no muestra
la hora de recepción
de mensajes anteriores
a 24 horas. ¿Cómo
puedo cambiarlo?
Sólo podrá ver la hora de recepción de
los mensajes recibidos durante el día
en curso.
Función del
teléfono
Navegación
¿Es posible instalar
otra aplicación de
navegación en el
teléfono?
Se puede instalar y utilizar cualquier
aplicación que esté disponible
en Android Market™ y que sea
compatible con el hardware.
Función del
teléfono
Sincronización
¿Es posible sincronizar
los contactos de todas
mis cuentas de correo
electrónico?
Sólo se pueden sincronizar los
contactos de Gmail y MS Exchange
Server (servidor de correo electrónico
empresarial).
Función del
teléfono
Espera y
pausa
¿Es posible usar la
opción de espera y
pausa al guardar un
número de teléfono?
Si ha transferido un contacto con
las funciones de espera y pausa
guardadas en el número, no podrá
utilizar dichas funciones. Necesitará
volver a guardar cada número.
Cómo guardar un número con la
opción de espera y pausa:
1. En la pantalla de inicio, toque el
icono Teléfono .
2. Marque el número y, a continuación,
toque la tecla Menú .
3. Toque Añadir pausa de dos
segundos o Añadir espera.
Preguntas frecuentes

117
Categoría
Subcategoría
Pregunta Respuesta
Función del
teléfono
Seguridad
¿Cuáles son las
funciones de
seguridad del
dispositivo?
Puede configurar el teléfono para que
le pida que introduzca un patrón de
desbloqueo para poder utilizarlo.

118
Categoría
Subcategoría
Pregunta Respuesta
Función del
teléfono
Desbloqueo
Patrón
¿Cómo se crea
el patrón de
desbloqueo?
1. Desde la pantalla de inicio, pulse la
tecla Menú .
2. Ajustes del sistema > Bloqueo de
pantalla.
3. Tipo de bloqueo > Patrón. La
primera vez que lo configure
aparecerá un breve tutorial sobre
la creación de un patrón de
desbloqueo.
4. Configúrelo dibujando el patrón
una vez y después otra vez para
confirmarlo.
Precauciones que debe tomar si usa el
patrón de bloqueo
Es muy importante que recuerde
el patrón de desbloqueo que ha
establecido. No podrá acceder
al teléfono si utiliza un patrón
incorrecto cinco veces. Tiene cinco
oportunidades para introducir el patrón
de desbloqueo, el PIN o la contraseña.
Si ha agotado las cinco oportunidades,
puede volver a intentarlo tras
30 segundos. (Otra opción es
preestablecer el PIN de seguridad y
usar el código PIN de seguridad para
desbloquear el patrón)
Preguntas frecuentes

119
Categoría
Subcategoría
Pregunta Respuesta
Función del
teléfono
Desbloqueo
Patrón
¿Qué debo hacer si
olvido el patrón de
desbloqueo y no he
creado la cuenta de
Google en el teléfono?
Si ha olvidado el patrón:
Si ha iniciado sesión en su cuenta
de Google desde el teléfono pero ha
cometido cinco errores al introducir
el patrón, toque el botón ¿Has
olvidado el patrón? A continuación,
se le solicitará que inicie sesión en su
cuenta de Google para desbloquear
el teléfono. Si no ha creado una
cuenta de Google en el teléfono o
la ha olvidado, necesitará realizar un
restablecimiento completo.
Precaución: si realiza un
restablecimiento a los ajustes de
fábrica, se eliminarán todas las
aplicaciones y los datos de usuario.
Recuerde realizar una copia de
seguridad de todos los datos
importantes antes de realizar un
restablecimiento a los ajustes de
fábrica.
Función del
teléfono
Memoria
¿Sabré que la
memoria está llena?
Sí, recibirá una notificación.

120
Categoría
Subcategoría
Pregunta Respuesta
Función del
teléfono
Compatibilidad
de idiomas
¿Es posible cambiar el
idioma del teléfono?
El teléfono tiene capacidades en varios
idiomas.
Para cambiar el idioma:
1. Desde la pantalla de inicio, pulse
la tecla Menú y Ajustes del
sistema.
2. Toque Idioma y teclado >
Seleccionar idioma.
3. Toque el idioma deseado.
Función del
teléfono
VPN
¿Cómo configuro una
red VPN?
La configuración del acceso VPN es
diferente para cada empresa. Para
configurar el acceso VPN desde el
teléfono, el administrador de la red de
la empresa deberá proporcionarle los
detalles.
Función del
teléfono
Tiempo de
espera de la
pantalla
La pantalla se apaga
tras solo 15 segundos.
¿Cómo puedo cambiar
la cantidad de tiempo
que transcurre hasta
que se apaga la luz de
fondo?
1. Desde la pantalla de inicio, pulse la
tecla Menú .
2. Toque Ajustes del sistema >
Pantalla.
3. En los ajustes de Pantalla, toque
Tiempo espera pantalla.
4. Toque el tiempo de espera que
prefiera para la luz de fondo de la
pantalla.
Preguntas frecuentes

121
Categoría
Subcategoría
Pregunta Respuesta
Función del
teléfono
Wi-Fi y red
móvil
Cuando estén
disponibles tanto la
conexión Wi-Fi como
la red móvil, ¿qué
servicio utilizará el
teléfono?
Al utilizar datos, el teléfono usará
la conexión Wi-Fi de forma
predeterminada (si está activada en el
teléfono). No obstante, no se notificará
cuando el teléfono cambie de una
conexión a otra.
Para saber qué conexión se está
usando, compruebe el icono de red
móvil o Wi-Fi de la parte superior de la
pantalla.
Función del
teléfono
Pantalla
principal
¿Es posible eliminar
una aplicación de la
pantalla principal?
Sí. Sólo tiene que mantener pulsado el
icono hasta que aparezca el icono de
papelera en la parte superior central
de la pantalla. A continuación, sin
levantar el dedo, arrastre el icono hasta
la papelera.
Función del
teléfono
Aplicación
He descargado una
aplicación y causa
muchos errores.
¿Cómo la elimino?
1. Desde la pantalla de inicio, pulse la
tecla Menú .
2. Toque Ajustes de aplicación >
DESCARGADA.
3. Toque la aplicación y, a
continuación, toque Desinstalar.
Función del
teléfono
Cargador
¿Es posible cargar
mi teléfono mediante
el cable de datos
USB sin instalar el
controlador USB
correspondiente?
Sí, el teléfono se cargará a través del
cable USB, independientemente de
si los controladores necesarios están
instalados o no.

122
Categoría
Subcategoría
Pregunta Respuesta
Función del
teléfono
Alarma
¿Puedo utilizar
archivos de música
para la alarma?
Sí. Después de guardar un archivo de
música como tono, puede utilizarlo
como alarma.
1. Mantenga pulsada una de las
canciones de una lista de la
biblioteca. En el menú que se abrirá,
toque Establecer como tono.
2. En una pantalla de ajuste del reloj
de la alarma, seleccione la canción
como tono.
Función del
teléfono
Alarma
Si el teléfono está
apagado, ¿la alarma
sonará o se activará?
No, no se admite esa función.
Función del
teléfono
Alarma
Si el volumen del
timbre está establecido
en Desconectado o en
Vibración, ¿se oirá la
alarma?
La alarma está programada para que
suene incluso en esos casos.
Solución de
recuperación
Reinicio
completo
(restablecimiento
a los ajustes
de fábrica)
¿Cómo puedo realizar
un reinicio completo
si no puedo tener
acceso al menú de
ajustes del teléfono?
Si el teléfono no vuelve a sus ajustes
originales, realice un restablecimiento
completo (restablecimiento a los
ajustes de fábrica) para inicializarlo.
Preguntas frecuentes

User Guide
• Screen displays and illustrations may differ from
those you see on actual phone.
• Some of the contents of this guide may not apply
to your phone, depending on the software and your
service provider. All information in this document is
subject to change without notice.
• This handset is not suitable for people who have a
visual impairment due to the touch screen keyboard.
• Copyright ©2014 LG Electronics, Inc. All rights
reserved. LG and the LG logo are registered
trademarks of LG Group and its related entities. All
other trademarks are the property of their respective
owners.
• Google™, Google Maps™, Gmail™, Hangouts™
and Play Store™ are trademarks of Google, Inc.
ENGLISH

2
Table of contents
Guidelines for safe and efficient use .......5
Important notice .....................................17
Getting to know your phone ...................23
Phone overview .....................................23
Installing the Micro-USIM card ...............25
Charging the phone ...............................26
Locking and unlocking the screen ..........26
Your Home screen ...................................27
Touch Screen tips ..................................27
Home screen .........................................28
Customizing the Home screen ..............29
Returning to recently-used applications .30
Notifications ..........................................30
Opening the notifications panel .............31
Indicator icons on the Status Bar ..........31
On-screen keyboard ..............................33
Entering accented letters ......................33
Google account setup .............................34
Connecting to Networks and Devices ....35
Wi-Fi .....................................................35
Connecting to Wi-Fi networks ...............35
Turning Wi-Fi on and connecting to a Wi-Fi
network ...............................................35
Bluetooth ...............................................36
Sharing your phone's data connection ...37
Wi-Fi Direct ...........................................39
PC connections with a USB cable ...........39
Calls ........................................................41
Making a call .........................................41
Calling your contacts .............................41
Answering and rejecting a call ...............41
Adjusting the in-call volume ...................42
Making a second call .............................42
Viewing your call logs ............................43
Call settings ...........................................43
Contacts ..................................................44
Searching for a contact ..........................44
Adding a new contact ............................44
Favorite contacts ...................................44
Creating a group ....................................45
Messaging ...............................................46
Sending a message ...............................46
Threaded box .......................................47
Changing your message settings ...........47
E-mail ......................................................48
Managing an email account ...................48
Working with account folders .................48
Composing and sending email ...............49
Camera ....................................................50
Getting to know the viewfinder ..............50
Using the advanced settings ..................51
Taking a quick photo .............................52
Once you've taken a photo.....................53
From your Gallery ..................................54

3
Video camera ..........................................55
Getting to know the viewfinder ..............55
Using the advanced settings ..................56
Recording a quick video .........................56
After recording a video...........................57
Watching your saved videos ..................57
Adjusting the volume when viewing a
video .....................................................57
LG Unique Function.................................58
QuickMemo function ..............................58
Using the QuickMemo options ..............59
Viewing the saved QuickMemo ............59
Notebook function .................................60
Making a note .....................................60
Getting to know the Notebook ...............60
Bookshelf ............................................60
Pages-Property panels .........................61
Viewing the saved notebook .................61
QuickTranslator .....................................62
Live Zooming function ...........................63
QSlide function ......................................64
Dual Play function ..................................64
Mirroring .............................................65
Dual Play .............................................65
LG SmartWorld ......................................66
How to Get to LG SmartWorld from Your
Phone .................................................66
On-Screen Phone ..................................67
On-Screen Phone icons ........................67
On-Screen Phone features ...................67
How to install On-Screen Phone on your
PC ......................................................68
Multimedia ..............................................69
Gallery ...................................................69
Viewing pictures ..................................69
Playing videos .....................................70
Editing photos/videos ...........................70
Deleting images ...................................70
Setting as wallpaper ............................70
Videos ...................................................71
Playing a video ....................................71
Video Editor ...........................................72
Video Wiz ...............................................73
Music ....................................................75
Playing a song .....................................75
Add music files to your phone ...............76
Transfer music using Media sync (MTP) 77
Utilities ....................................................78
Setting your alarm .................................78
Using your calculator .............................78
Adding an event to your calendar ...........78
Voice Recorder ......................................79
Recording a sound or voice ..................79
Sending the voice recording .................79
Task Manager ........................................80
Tasks .....................................................80
Polaris Office 4 ......................................80
Backup ..................................................81
About backing up and restoring smart
phone data ..........................................81

4
Backup ...............................................82
Scheduling backup ..............................82
File restore & management ..................82
Google+ ................................................83
Voice Search..........................................83
Downloads ............................................84
The Web ..................................................85
Internet ..................................................85
Using the Web toolbar ..........................85
Viewing webpages ...............................85
Opening a page ...................................86
Searching the web by voice ..................86
Bookmarks ..........................................86
History ................................................86
Using Popup Browser ...........................86
Chrome .................................................87
Viewing webpages ...............................87
Opening a page ...................................87
Syncing with other devices ...................87
Settings ...................................................88
WIRELESS & NETWORKS .......................88
DEVICE ..................................................91
PERSONAL .............................................93
SYSTEM .................................................95
PC software (LG PC Suite) ......................97
Phone software update ..........................99
Phone software update ..........................99
About this user guide ...........................101
About this user guide ...........................101
Trademarks .........................................101
DivX HD ..............................................102
Dolby Mobile .......................................102
Accessories ...........................................103
Troubleshooting ....................................104
FAQ ........................................................108
Table of contents

5
Symbol Description
Read these instructions for safe use of this wireless device
You must always exercise extreme caution when driving in order to reduce
the risk of accidents. Do not use your wireless device while driving.
This device, moreover, has been tested for use at a distance of 1.5 cm
between the back of the phone and the user's body.
To comply with RF exposure requirements established by the FCC, you must
maintain a minimum distance of 1 cm between the user's body and the back
of the phone. See the user manual for more information.
Do not leave the device or its accessories within the reach of children and do
not allow to play with. The device contains small parts with sharp edges that
may cause injury or break off and give rise to danger of suffocation.
This device may produce a loud sound
Pacemaker manufacturers recommend that you leave at least 15 cm
of space between other devices and a pacemaker to avoid potential
interference with the pacemaker.
Switch off your phone when prompted to do so in hospitals, clinics or health
care facilities.
These requests are designed to prevent possible interference with sensitive
medical devices.
Turn off your wireless device when prompted to do so by airport personnel
or aircraft. For information on the use of wireless devices on board aircraft,
contact the crew. If the device has a "flight mode", this must be activated
before boarding an aircraft.
Guidelines for safe and efficient use

6
Symbol Description
Turn off the device or wireless device when in any area in which they occur
explosions or areas where there are reports that indicate to "turn off two-way
radio" or "electronic devices" to avoid interfering with the operation of trigger
explosions.
Among the areas with potentially explosive atmospheres include fueling
areas are, the holds of ships, facilities for the transportation or storage of fuel
and chemicals, areas where the air contains chemicals or particles such as
grain, dust or metal powders.
This device may produce a bright or flashing light
Do not expose your device or its accessories to open flames.
Do not expose your device or its accessories to magnetic media (floppy
disks, credit cards, etc).
Do not expose your device or its accessories to extreme temperatures, ie
below -5 and above +55 ° C.
Do not expose your device or its accessories to liquid or moisture.
Not groped to disassemble the device or its accessories, only authorized
personnel can do it.
This device, like any wireless device, operates using radio signals which, by
their nature, are not able to guarantee connection in all conditions. Therefore,
for emergency communications, never rely solely upon any wireless device.
Only use approved accessories
Please read these simple guidelines. Not following these guidelines may be dangerous
Guidelines for safe and efficient use

7
or illegal.
Should a fault occur, a software tool is built into your device that will gather a fault log.
This tool gathers only data specific to the fault, such as signal strength, cell ID position
in sudden call drop and applications loaded.
The log is used only to help determine the cause of the fault.
These logs are encrypted and can only be accessed by an authorized LG Repair centre
should you need to return your device for repair.
Exposure to radio frequency energy
THIS DEVICE MEETS INTERNATIONAL GUIDELINES FOR EXPOSURE TO RADIO WAVES
Your mobile device is a radio transmitter and receiver. It is designed and manufactured
not to exceed the limits for exposure to radio frequency (RF) recommended by
international guidelines (ICNIRP). These limits are part of comprehensive guidelines and
establish permitted levels of RF energy for the general population.
The guidelines were developed by independent scientific organisations through periodic
and thorough evaluation of scientific studies. The guidelines include a substantial safety
margin designed to assure the safety of all persons, regardless of age or health.
The exposure standard for mobile devices employs a unit of measurement known as
the Specific Absorption Rate, or SAR. The SAR limit stated in the international guidelines
is 2.0 W/kg*. Tests for SAR are conducted using standard operating positions with the
device transmitting at its highest certified power level in all tested frequency bands.
Although the SAR is determined at the highest certified power level, the actual SAR
of the device while operating can be well below the maximum value. This is because
the device is designed to operate at multiple power levels so as to use only the power
required to reach the network. In general, the closer you are to a base station, the lower
the power output of the device.
Before a phone model is available for sale to the public, compliance with the European
R&TTE directive must be shown. This directive includes as one essential requirement
the protection of the health and the safety for the user and any other person.

8
The highest SAR value for this device when tested for use at the ear is 0.838 W/kg.
This device meets RF exposure guidelines when used either in the normal use position
against the ear or when positioned at least 1.5 cm away from the body. When a
carry case, belt clip or holder is used for body-worn operation, it should not contain
metal and should position the product at least 1.5 cm away from your body. In order
to transmit data files or messages, this device requires a quality connection to the
network. In some cases, transmission of data files or messages may be delayed until
such a connection is available. Ensure the above separation distance instructions are
followed until the transmission is completed.
The highest SAR value for this device when tested for use at the body is 0.737 W/kg.
* The SAR limit for mobile devices used by the public is 2.0 watts/ kilogram (W/
kg) averaged over ten grams of body tissue. The guidelines incorporate a substantial
margin of safety to give additional protection for the public and to account for any
variations in measurements.
SAR values may vary depending on national reporting requirements and the network
band.
FCC SAR information
Your mobile device is also designed to meet the requirements for exposure to radio
waves established by the Federal Communications Commission (USA) and Industry
Canada.
These requirements set a SAR limit of 1.6 W/kg averaged over 1 gram of tissue. The
highest SAR value reported under this standard during product certifi cation for use at
the ear is 0.75 W/kg and when properly worn on the body is 1.49 W/kg.
Additionally, this device was tested for typical body-worn operations with the back of the
phone kept 1cm (0.39 inches) between the users body and the back of the phone.
To comply with FCC RF exposure requirements, a minimum separation distance of 1cm
(0.39 inches) must be maintained between the user’s body and the back of the phone.
Guidelines for safe and efficient use

9
* FCC Notice & Caution
Notice!
This device complies with part 15 of the FCC Rules. Operation is subject to the
following two conditions:
(1) This device may not cause harmful interference, and
(2) this device must accept any interference received, including interference that may
cause undesired operation.
Caution!
Change or Modifications that are not specifically approved by the manufacturer could
void the user’s authority to operate the equipment.
Product care and maintenance
WARNING
Only use batteries, chargers and accessories approved for use with this
particular phone model. The use of any other types may invalidate any
approval or warranty applying to the phone and may be dangerous.
•Do not disassemble this unit. Take it to a qualified service technician when repair
work is required.
•Repairs under warranty, at LG's discretion, may include replacement parts or boards
that are either new or reconditioned, provided that they have functionality equal to
that of the parts being replaced.
•Keep away from electrical appliances such as TVs, radios and personal computers.
•The unit should be kept away from heat sources such as radiators or cookers.
•Do not drop.
•Do not subject this unit to mechanical vibration or shock.
•Switch off the phone in any area where you are required to by special regulations.

10
For example, do not use your phone in hospitals as it may affect sensitive medical
equipment.
•Do not handle the phone with wet hands while it is being charged. It may cause an
electric shock and can seriously damage your phone.
•Do not charge a handset near flammable material as the handset can become hot
and create a fire hazard.
•Use a dry cloth to clean the exterior of the unit (do not use solvents such as benzene,
thinner or alcohol).
•Do not charge the phone when it is on soft furnishings.
•The phone should be charged in a well ventilated area.
•Do not subject this unit to excessive smoke or dust.
•Do not keep the phone next to credit cards or transport tickets; it can affect the
information on the magnetic strips.
•Do not tap the screen with a sharp object as it may damage the phone.
•Do not expose the phone to liquid or moisture.
•Use accessories like earphones cautiously. Do not touch the antenna unnecessarily.
•Do not use, touch or attempt to remove or fix broken, chipped or cracked glass.
Damage to the glass display due to abuse or misuse is not covered under the
warranty.
•Your phone is an electronic device that generates heat during normal operation.
Extremely prolonged, direct skin contact in the absence of adequate ventilation may
result in discomfort or minor burns. Therefore, use care when handling your phone
during or immediately after operation.
•If your phone gets wet, immediately unplug it to dry off completely. Do not attempt
to accelerate the drying process with an external heating source, such as an oven,
microwave or hair dryer.
•The liquid in your wet phone, changes the color of the product label inside your
phone. Damage to your device as a result of exposure to liquid is not covered under
your warranty.
Guidelines for safe and efficient use

11
Efficient phone operation
Electronics devices
All mobile phones may receive interference, which could affect performance.
•Do not use your mobile phone near medical equipment without requesting
permission. Avoid placing the phone over pacemakers, for example, in your breast
pocket. Please consult your doctor to determine if operation of your phone may
interfere with the operation of your medical device.
•Some hearing aids might be disturbed by mobile phones.
•Minor interference may affect TVs, radios, PCs etc.
•Use your phone in temperatures between 0ºC and 40ºC, if possible. Exposing your
phone to extremely low or high temperatures may result in damage, malfunction, or
even explosion.
Pacemakers
Pacemaker manufacturers recommend that a minimum separation of 15cm be
maintained between a mobile phone and a pacemaker to avoid potential interference
with the pacemaker. To achieve this use the phone on the opposite ear to your
pacemaker and do not carry it in a breast pocket.

12
Hospitals
Switch off your wireless device when requested to do so in hospitals, clinics or health
care facilities. These requests are designed to prevent possible interference with
sensitive medical equipment.
Road safety
Check the laws and regulations on the use of mobile phones in the area when you drive.
•Do not use a hand-held phone while driving.
•Give full attention to driving.
•Pull off the road and park before making or answering a call if driving conditions so
require.
•RF energy may affect some electronic systems in your vehicle such as car stereos
and safety equipment.
•When your vehicle is equipped with an air bag, do not obstruct with installed or
portable wireless equipment. It can cause the air bag to fail or cause serious injury
due to improper performance.
•If you are listening to music whilst out and about, please ensure that the volume is
at a reasonable level so that you are aware of your surroundings. This is of particular
importance when near roads.
Avoid damage to your hearing
To prevent possible hearing damage, do not listen at high volume levels for
long periods.
Damage to your hearing can occur if you are exposed to loud sound for long periods of
time. We therefore recommend that you do not turn on or off the handset close to your
ear. We also recommend that music and call volumes are set to a reasonable level.

13
•When using headphones, turn the volume down if you cannot hear the people speaking
near you, or if the person sitting next to you can hear what you are listening to.
NOTE: Excessive sound pressure from earphones and headphones can
cause hearing loss.
Glass Parts
Some parts of your mobile device are made of glass. This glass could break if your
mobile device is dropped on a hard surface or receives a substantial impact. If the glass
breaks, do not touch or attempt to remove it. Stop using your mobile device until the
glass is replaced by an authorised service provider.
Blasting area
Do not use the phone where blasting is in progress. Observe restrictions and follow any
regulations or rules.
Potentially explosive atmospheres
•Do not use your phone at a refueling point.
•Do not use near fuel or chemicals.
•Do not transport or store flammable gas, liquid or explosives in the same
compartment of your vehicle as your mobile phone or accessories.
In aircraft
Wireless devices can cause interference in aircraft.
•Turn your mobile phone off before boarding any aircraft.
•Do not use it on the ground without permission from the crew.

14
Children
Keep the phone in a safe place out of the reach of small children. It includes small parts
which may cause a choking hazard if detached.
Emergency calls
Emergency calls may not be available on all mobile networks. Therefore you should
never depend solely on your phone for emergency calls. Check with your local service
provider.
Battery information and care
•You do not need to completely discharge the battery before recharging. Unlike other
battery systems, there is no memory effect that could compromise the battery's
performance.
•Use only LG batteries and chargers. LG chargers are designed to maximise the
battery life.
•Do not disassemble or short-circuit the battery.
•Replace the battery when it no longer provides acceptable performance. The battery
pack may be recharged hundreds of times before it needs replacing.
•Recharge the battery if it has not been used for a long time to maximise usability.
•Do not expose the battery charger to direct sunlight or use it in high humidity, such as
in the bathroom.
•Do not leave the battery in hot or cold places, as this may deteriorate battery
performance.
•There is risk of explosion if the battery is replaced with an incorrect type.
•Dispose of used batteries according to the manufacturer's instructions. Please recycle
when possible. Do not dispose as household waste.
•If you need to replace the battery, take it to the nearest authorised LG Electronics

15
service point or dealer for assistance.
•Always unplug the charger from the wall socket after the phone is fully charged to
save unnecessary power consumption of the charger.
•Actual battery life will depend on network configuration, product settings, usage
patterns, battery and environmental conditions.
•Make sure that no sharp-edged items such as animal’s teeth or nails, come into
contact with the battery. This could cause a fire.
DECLARATION OF CONFORMITY
Hereby, LG Electronics declares that this LG-E975 product is in compliance
with the essential requirements and other relevant provisions of Directive
1999/5/EC. A copy of the Declaration of Conformity can be found at
http://www.lg.com/global/declaration
Regulatory and Safety
Go to "System settings > About phone > Regulatory and Safety" to get
regulatory and safety information
Contact office for compliance of this product :
LG Electronics Inc.
EU Representative, Krijgsman 1,
1186 DM Amstelveen, The Netherlands

16
Disposal of waste batteries/accumulators
1 This symbol may be combined with chemical symbols for mercury (Hg), cad-
mium (Cd) or lead (Pb) if the battery Contains more than 0.0005% of mercury,
0.002% of cadmium or 0.004% of lead.
2 All batteries/accumulators should be disposed separately from the municipal
waste stream via designated collection facilities appointed by the government or
the local authorities.
3 The correct disposal of your old batteries/accumulators will help to prevent
potential negative consequences for the environment, animal and human health.
4 For more detailed information about disposal of your old batteries/ accumula-
tors, please contact your city office, waste disposal service or the shop where
you purchased the product.
Disposal of your old appliance
1 All electrical and electronic products should be disposed of separately
from the municipal waste stream via designated collection facilities ap-
pointed by the government or the local authorities.
2 The correct disposal of your old appliance will help prevent potential nega-
tive consequences for the environment and human health.
3 For more detailed information about disposal of your old appliance, please
contact your city office, waste disposal service or the shop where you
purchased the product.

17
Important notice
Please check to see whether any problems you encountered with your phone are
described in this section before taking the phone in for service or calling a service
representative.
1. Phone memory
When there is less than 10% of space available in your phone memory, your phone
cannot receive new messages. You need to check your phone memory and delete some
data, such as applications or messages, to make more memory available.
To uninstall applications:
1 Touch > Apps tab > Settings > Apps.
2 Once all applications appear, scroll to and select the application you want to
uninstall.
3 Touch Uninstall.
2. Optimizing battery life
Extend your battery's life between charges by turning off features that you don't need
to having running constantly in the background. You can monitor how applications and
system resources consume battery power.
Extending your phone's battery life:
• Turn off radio communications you are not using. If you are not using Wi-Fi, Bluetooth
or GPS, turn them off.
• Reduce screen brightness and set a shorter screen timeout.
• Turn off automatic syncing for Gmail, Calendar, Contacts and other applications.
• Some applications you have downloaded may reduce battery power.
Please read this before you start using your phone!

18
To check the battery power level:
• Touch > Apps tab > Settings > About phone > Battery.
The battery status (charging or discharging) and battery level (percentage charged) is
displayed at the top of the screen.
To monitor and control how battery power is being used:
• Touch > Apps tab > Settings > About phone > Battery > Battery use.
Battery usage time is displayed on the screen. It tells you how long it has been since
you last connected your phone to a power source or, if currently connected, how long
the phone was last running on battery power. The screen shows the applications or
services using battery power, listed in order from the greatest to smallest amount used.
3. Before installing an open source application and OS
WARNING
If you install and use an OS other than the one provided by the manufacturer
it may cause your phone to malfunction. In addition, your phone will no longer
be covered by the warranty.
WARNING
To protect your phone and personal data, only download applications from
trusted sources, such as Play Store™. If there are improperly installed
applications on your phone, the phone may not work normally or a serious
error may occur. You must uninstall those applications and all associated data
and settings from the phone.
Important notice

19
4. Using an unlock pattern
Set an unlock pattern to secure your phone. Touch > Apps tab > Settings > Lock
screen > Select screen lock > Pattern. This opens a screen that will guide you
through how to draw a screen unlock pattern. You have to create a Backup PIN as a
safety measure in case you forget your unlock pattern.
Caution: Create a Google account before setting an unlock pattern and
remember the Backup PIN you created when creating your pattern lock.
WARNING
Precautions to take when using pattern lock.
It is very important to remember the unlock pattern you set. You will not be
able to access your phone if you use an incorrect pattern 5 times. You have 5
opportunities to enter your unlock pattern, PIN or password. If you have used
all 5 opportunities, you can try again after 30 seconds.
When you can’t recall your unlock Pattern, PIN, or Password:
< If you have forgotten your pattern >
If you logged in to your Google account on the phone but failed to enter the correct
pattern 5 times, press the Forgot pattern? button at the bottom of the screen. You are
then required to log in with your Google Account or you have to enter the Backup PIN
which you entered when creating your Pattern Lock.
If you have not created a Google account on the phone or you forgot Backup PIN, you
have to perform a hard reset.
< If you have forgotten your PIN or Password >
If you forget your PIN or Password, you will need to perform a hard reset.
Caution: If you perform a hard reset, all user applications and user data will be
deleted.
NOTE: If you have not logged into your Google Account and have forgotten
your Unlock Pattern, you will need to enter your Backup PIN.

20
5. Using the hard reset (Factory reset)
If your phone does not restore to its original condition, use a Hard Reset (Factory Reset)
to initialize it.
1 Turn the power off.
2 Press and hold the Power/Lock key + Volume Down key on the phone.
3 Release the Power/Lock Key only when the LG logo is displayed, then immedi-
ately press and hold the Power/Lock Key again.
4 Release all keys when the Factory data reset screen is displayed.
5 Press the Volume Key to scroll to the desired option, then press the Power/Lock
Key to confirm.
WARNING
If you perform a Hard Reset, all user applications, user data and DRM
licenses will be deleted. Please remember to backup any important data
before performing a Hard Reset.
Factory data reset - Erases all data on the phone, except as follows. In the event
of device failure or error, your device may record in an error log information about the
device’s status at the time of the error event. The information recorded in the error log
may include data about application names and usage, cell phone location and number,
GPS status, memory usage and other non-personal device status information. This
information is stored on your phone, and can only be accessed by LG if the phone is
physically returned to LG for repair and service. The error log information is used by LG
only to diagnose, repair, and improve LG’s products and services.
Important notice

21
6. Opening and switching applications
Multi-tasking is easy with Android, you can keep more than one application running at
the same time. There is no need to quit an application before opening another one. Use
and switch between several open applications.
Android manages each application, stopping and starting them as needed to ensure
that idle applications don't consume resources unnecessarily.
1 Press and hold the Home Key . A list of recently used applications will be
displayed.
2 Tap the application you want to access. This does not stop the previous app run-
ning in the background on the phone. Make sure to tap Back Key to exit an
app after using it.
• To stop applications, tap Task Manager from the recent apps list, then tap Stop or
Stop all.
• To remove an app from the recent apps list, swipe the app preview to the left or right.
To clear all apps, tap Clear all.
7. Transferring music, photos and videos using Media
sync (MTP)
1 Touch > Apps tab > Settings > Storage to check out the storage media.
2 Connect the phone to your PC using the USB cable.
3 Select USB connection method will appear on your phone screen, select the
Media sync (MTP) option.
4 Open the memory folder on your PC. You can view the mass storage content on
your PC and transfer the files from PC to Device memory folder or vice versa.

22
8. Hold your phone upright
Hold your cell phone vertically, as you would a regular phone. Your phone has an
internal antenna. Be careful not to scratch or damage the back of the phone, as this
may affect performance.
When making/receiving calls or sending/receiving data, avoid holding the lower part of
the phone where the antenna is located. Doing so may affect call quality.
9. When the screen freezes
If the screen freezes or the phone does not respond when you try to operate it:
Press and hold the Power/Lock key for 10 seconds to turn your phone off.
If it still does not work, please contact the service center.
Important notice

23
Phone overview
Earpiece
Front-Facing Camera lens
Proximity / Luminance Sensor
Home key
• Return to the Home screen from any screen.
Back key
• Return to the previous screen. Exit an app after using it.
Power/Lock key
• Switch your phone on/off by pressing and holding this key
• Short press to lock/unlock the screen
Menu key
• Check what options are available.
Touch screen
Notification LED
NOTE: Proximity sensor
When receiving and making calls, the proximity sensor automatically turns
the backlight off and locks the touch screen by sensing when the phone is
near your ear. This extends battery life and prevents you from unintentionally
activating the touch screen during calls.
WARNING
Placing a heavy object on the phone or sitting on it can damage the LCD
and touch screen functions. Do not cover the LCD proximity sensor with
protective film. This could cause the sensor to malfunction.
Getting to know your phone

24
Volume keys
• On the Home screen: Controls ringer volume
• During a call: Controls your earpiece volume
• When playing a track: Controls volume continuously
TIP! QuickMemo function
Press and hold the Volume Up and Volume Down Keys for one
second to use the QuickMemo function.
Power/Lock key
SIM card tray
WARNING
• This part encloses the battery compartment. Please do not open the back
cover.
• Be careful not to damage the NFC touch point on the phone, which is part
of the NFC antenna.
Earphone Jack
Flash
Speaker
Charger/USB/MHL port
Microphone
Camera lens
Microphone
NFC touch
point
Getting to know your phone

25
Installing the Micro-USIM card
Before you start exploring your new phone, you may choose to insert the Micro-USIM
card.
The eject button is a small round aperture just above the tray door. To install a new
Micro-USIM card:
1 Insert the Micro-USIM ejection tool that comes with the phone (or a thin pin) into
the eject button aperture, and push gently but firmly until the tray pops out.
2 Remove the tray and place the Micro-USIM card inside it, with the contacts out
and the angled corner to the right. There is only one possible way to fit the card
snugly into the tray.
3 Carefully reposition the tray in the slot and push it gently back into the phone.
NOTE: Make sure the gold contact area on the card is facing downwards.
Eject button aperture

26
Charging the phone
The charger connector is at the bottom of the phone. Insert one end of the charging
cable into the phone and plug the other end into an electrical outlet.
NOTE: The battery must be fully charged initially to improve battery lifetime.
Locking and unlocking the screen
If you do not use the phone for a while, the screen will be automatically turned off and
locked. This helps to prevent accidental touches and saves battery power.
When you are not using the your phone, press the Power/Lock key to lock your
phone.
If there are any programs running when you lock your screen, they may be still running
in Lock mode. It is recommended that you exit all programs before entering Lock mode
to avoid unnecessary charges (e.g. phone calls, web access and data communications).
To wake up your phone, press the Power/Lock key . The Lock screen will appear.
Touch and slide the Lock screen in any direction to unlock your Home screen. The last
screen you viewed will open.
Getting to know your phone

27
Your Home screen
Touch Screen tips
Here are some tips on how to navigate on your phone.
Tap or touch – A single finger tap selects items, links, shortcuts and letters on the
on-screen keyboard.
Touch and hold – Touch and hold an item on the screen by touching it and not lifting
your finger until an action occurs. For example, to open a contact's available options,
touch and hold the contact in the Contacts list until the context menu opens.
Drag – Touch and hold an item for a moment and then, without lifting your finger, move
your finger on the screen until you reach the target position. You can drag items on the
Home screen to reposition them.
Swipe or slide – To swipe or slide, quickly move your finger across the surface of the
screen, without pausing when you first touch it (so you don’t drag an item instead). For
example, you can slide the screen up or down to scroll through a list, or browse through
the different Home screens by swiping from left to right (and vice versa).
Double-tap – Double-tap to zoom on a webpage or a map. For example, quickly
double-tap a section of a webpage to adjust that section to fit the width of the screen.
You can also double-tap to zoom in and out after taking a picture (using the Camera),
and when using Maps.
Pinch-to-Zoom – Use your index finger and thumb in a pinching or spreading motion
to zoom in or out when using the browser or Maps, or when browsing pictures.
Rotate the screen – From many applications and menus, the orientation of the screen
adjusts to the device's physical orientation.
NOTE:
• To select an item, touch the center of the icon.
• Do not press too hard; the touch screen is sensitive enough to pick up a
light, yet firm touch.
• Use the tip of your finger to touch the option you want. Be careful not to
touch any other keys.

28
Home screen
The Home screen is the starting point for many applications and functions, and it allows
you to add items like application shortcuts, or Google widgets to give you instant access
to information and applications. This is the default canvas and accessible from any
menu by tapping .
Status bar
Shows phone's status information including the time,
signal strength, battery status, and notification icons.
Widget
Widgets are self-contained applications that can be
accessed through the Apps screen or on the Home
screen or an extended home screen. Unlike a shortcut,
the Widget appears as an on-screen application.
Application Icons
Tap an icon (application, folder, etc.) to open and use it.
Location Indicator
Indicates which Home screen canvas you are viewing.
Quick Key Area
Provides one-touch access to the function in any home
screen canvas.
Extended home screen
The operating system provides multiple Home screen canvases to provide more space
for adding icons, widgets, and more.
Slide your finger left or right across the Home screen.
Your Home screen

29
Customizing the Home screen
You can customize your Home screen by adding apps, widgets or changing wallpapers.
To add items on your Home screen:
1 Touch and hold the empty part of the Home screen.
2 In the Add Mode menu, select the item you wish to add. You will then see this
added item on the Home screen.
3 Drag it to the desired location and lift your finger.
TIP! To add an application icon to the Home screen from the Apps menu,
touch and hold the application you want to add.
To remove an item from the Home screen:
• Home screen > touch and hold the icon you want to remove > drag it to
TIP! Using folders
You can combine several app icons in a folder. Drop one app icon over
another one on a Home screen, and the two icons will be combined.
NOTE: Apps key cannot be removed.
To customize apps icons on the Home screen
1 Touch and hold an application icon until it is unlocked from its current position.
Then drop it on the screen.
The editing icon will appear in the upper right corner of the application.
2 Tap the application icon again and select the desired icon design and size.
3 Tap OK to save the change.

30
Returning to recently-used applications
1 Touch and hold the Home key . The screen displays a pop-up containing the
icons of applications you used recently.
2 Touch an icon to open the application. Or touch the Back key to return to your
previous screen.
Notifications
Notifications alert you to the arrival of new messages, calendar events, and alarms, as
well as to ongoing events, such as when you are on a call.
From the notifications panel, you can view your phone’s current status and pending
notifications.
When a notification arrives, its icon appears at the top of the screen. Icons for pending
notifications appear on the left, and system icons showing things like Wi-Fi or bat tery
strength on the right.
NOTE: The available options may vary depending on the region or service
provider.
Pending
notifications
Bluetooth, Wi-Fi, &
battery status
Your Home screen

31
Opening the notifications panel
Swipe down from the status bar to open the notifications panel.
Quick Toggle Area
Tap each quick toggle key to turn it on/off. Touch
and hold the key to access the settings menu of the
function. To see more toggle keys, swipe left or right.
Tap
to remove, add, or rearrange toggle keys.
QSlide Apps
Tap a QSlide app to open as a small window on your
screen. Tap
to remove, add, or rearrange QSlide
apps.
Tap to clear all the notifications.
Notifications
The current notifications are listed, each with a brief
description. Tap a notification to view it.
To close the notifications panel, touch and drag the tab
toward the top of the screen.
Indicator icons on the Status Bar
Indicator icons appear on the status bar at the top of the screen to report missed calls,
new messages, calendar events, device status and more.
The icons displayed at the top of the screen provide information about the status of the
device. The icons listed in the table below are some of the most common ones.

32
Icon Description Icon Description
No Micro-USIM card Vibrate mode
No signal Battery fully charged
Airplane mode Battery is charging
Connected to a Wi-Fi network Downloading data
Wired headset Uploading data
Call in progress GPS is acquiring
Call hold
Receiving location data from
GPS
Missed call Data is syncing
Bluetooth is on New Gmail
System warning New Hangouts message
Alarm is set New message
New voicemail
Phone is connected to PC via
USB cable or USB tethering
is active
Ringer is silenced
Portable Wi-Fi hotspot is
active
Your Home screen

33
NFC is on
Both USB tethering and
portable hotspot are active
Song is playing
NOTE: The icons location in the status bar may differ according to the
function or service.
On-screen keyboard
You can enter text using the on-screen keyboard. The on-screen keyboard appears
automatically on the screen when you need to enter text. To manually display the
keyboard, simply touch a text field where you want to enter text.
Using the keypad & entering text
Tap once to capitalize the next letter you type. Double-tap for all caps.
Tap to switch to the numbers and symbols keyboard.
Tap to enter a space.
Tap to create a new line
Tap to delete the previous character.
Entering accented letters
When you select French or Spanish as the text entry language, you can enter special
French or Spanish characters (e.g. "á").
For example, to input "á", touch and hold the "a" key until the zoom-in key grows
bigger and displays characters from different languages.
Then select the special character you want.

34
Google account setup
When you first turn on your phone, you have the opportunity to activate the network, to
sign into your Google Account and select how you want to use certain Google services.
To set up your Google account:
• Sign into a Google Account from the prompted set-up screen.
OR
• Touch > Apps tab > select a Google application, such as Gmail > select New to
create a new account.
If you have a Google account, touch Existing, enter your email address and password,
then touch .
Once you have set up your Google account on your phone, your phone automatically
synchronizes with your Google account on the Web.
Your contacts, Gmail messages, Calendar events and other information from these
applications and services on the Web are synchronized with your phone. (This will
depend on your synchronization settings.)
After signing in, you can use Gmail™ and take advantage of Google services on your
phone.

35
Connecting to Networks and Devices
Wi-Fi
With Wi-Fi, you can use high-speed Internet access within the coverage of the wireless
access point (AP). Enjoy wireless Internet using Wi-Fi, without extra charges.
Connecting to Wi-Fi networks
To use Wi-Fi on your phone, you need to access a wireless access point or ‘hotspot’.
Some access points are open and you can simply connect to them. Others are hidden
or use security features; you must configure your phone to be able to connect to them.
Turn off Wi-Fi when you're not using it to extend the life of your battery.
NOTE: If you are out of the Wi-Fi zone or have set Wi-Fi to OFF, additional
charges may be applied by your mobile operator for mobile data use.
Turning Wi-Fi on and connecting to a Wi-Fi network
1 Touch > Apps tab > Settings > Wi-Fi.
2 Set Wi-Fi to ON to turn it on and start scanning for available Wi-Fi networks.
3 Tap the Wi-Fi menu again to see a list of active and in-range Wi-Fi networks.
• Secured networks are indicated by a lock icon.
4 Touch a network to connect to it.
• If the network is secured, you are prompted to enter a password or other
credentials. (Ask your network administrator for details)
5 The status bar displays icons that indicate Wi-Fi status.

36
Bluetooth
You can use Bluetooth to send data by running a corresponding application, but not
from the Bluetooth menu as on most other mobile phones.
NOTE:
• LG is not responsible for the loss, interception or misuse of data sent or
received via the Bluetooth wireless feature.
• Always ensure that you share and receive data with devices that are trusted
and properly secured. If there are obstacles between the devices, the
operating distance may be reduced.
• Some devices, especially those that are not tested or approved by
Bluetooth SIG, may be incompatible with your device.
Turning on Bluetooth and pairing up your phone with a Bluetooth device
You must pair your device with another device before you connect to it.
1 Touch > Apps tab > Settings > set Bluetooth to ON.
2 Tap the Bluetooth menu again. You will see the option to make your phone visible
and option to search devices Now tap Search for devices to view the devices in
the bluetooth Range.
3 Choose the device you want to pair with from the list.
Once the paring is successful, your device will connect to the device.
NOTE: Some devices, especially headsets or hands-free car kits, may have a
fixed Bluetooth PIN, such as 0000. If the other device has a PIN, you will be
asked to enter it.
Connecting to Networks and Devices

37
Send data using the Bluetooth wireless feature
1 Select a file or item, such as a contact, calendar event, or media file, from an ap-
propriate application or from Downloads.
2 Select the option for sending data via Bluetooth.
NOTE: The method for selecting an option may vary by data type.
3 Search for and pair with a Bluetooth-enabled device.
Receive data using the Bluetooth wireless feature
1 Touch > Apps tab > Settings > set Bluetooth to ON
2 Tap the Bluetooth menu again and mark the checkbox at the top of the screen to
make your phone visible to other devices.
NOTE: To select the length of time that your device will be visible, touch >
Visibility timeout.
3 Select Pair to confirm that you are willing to receive data from the device.
Sharing your phone's data connection
USB tethering and portable Wi-Fi hotspot are great features when there are no wireless
connections available. You can share your phone's mobile data connection with a
single computer via a USB cable (USB tethering). You can also share your phone's data
connection with more than one device at a time by turning your phone into a portable
Wi-Fi hotspot.
When your phone is sharing its data connection, an icon appears in the status bar and
as an ongoing notification in the notifications drawer.
For the latest information about tethering and portable hotspots, including supported
operating systems and other details, visit http://www.android.com/tether.

38
To change Portable Wi-Fi hotspot settings:
1 Touch > Apps tab > Settings > Tethering & networks > Wi-Fi hotspot
switch to activate.
2 Enter a password and tap Save.
TIP! If your computer is running Windows 7 or a recent distribution of some
flavours of Linux (such as Ubuntu), you will not usually need to prepare your
computer for tethering. But, if you are running an earlier version of Windows
or another operating system, you may need to prepare your computer to
establish a network connection via USB. For the most current information
about which operating systems support USB tethering and how to configure
them, visit http://www.android.com/tether.
To rename or secure your portable hotspot
You can change the name of your phone's Wi-Fi network name (SSID) and secure its
Wi-Fi network.
1 Touch > Apps tab > Settings > Tethering & networks > Wi-Fi hotspot.
2 Touch Set up Wi-Fi hotspot.
• The Set up Wi-Fi hotspot dialogue box will open.
• You can change the Network SSID (name) that other computers see when
scanning for Wi-Fi networks.
• You can also touch the Security menu to configure the network with Wi-Fi
Protected Access 2 (WPA2) security using a pre-shared key (PSK).
• If you touch the WPA2 PSK security option, a password field is added to the Set
up Wi-Fi hotspot dialogue box. If you enter a password, you will need to enter
that password when you connect to the phone's hotspot with a computer or other
device. You can set Open in the Security menu to remove security from your Wi-Fi
network.
3 Tap Save.
Connecting to Networks and Devices

39
ATTENTION! If you set the security option as Open, you cannot prevent
unauthorised usage of online services by other people and additional charges
may be incurred. To avoid unauthorized usage, you are advised to keep the
security option active.
Wi-Fi Direct
Wi-Fi Direct supports a direct connection between Wi-Fi enabled devices without an
access point. Due to the high battery usage of Wi-Fi direct, it is recommended that you
plug your phone into a power outlet while using the Wi-Fi Direct feature. Check your
Wi-Fi & Wi-Fi Directed network in advance and make sure the users are connected to
the same network.
PC connections with a USB cable
Learn to connect your device to a PC with a USB cable in USB connection modes.
Transferring music, photos and videos using the USB mass storage mode
1 Connect your phone to a PC using a USB cable.
2 If you haven't installed the LG Android Platform Driver on your PC, you will need to
manually change the settings. Choose System settings > PC connection > USB
connection method, then select Media sync (MTP).
3 You can now view the mass storage content on your PC and transfer the files.

40
Synchronize with Windows Media Player
Ensure that Windows Media Player is installed on your PC.
1 Use the USB cable to connect the phone to a PC on which Windows Media Player
has been installed.
2 Select the Media sync (MTP) option. When connected, a pop-up window will
appear on the PC.
3 Open Windows Media Player to synchronize music files.
4 Edit or enter your device’s name in the pop-up window (if necessary).
5 Select and drag the music files you want to the sync list.
6 Start synchronization.
• The following requirements must be satisfied to synchronize with Windows Media
Player.
Items Requirement
OS Microsoft Windows XP SP2, Vista or higher
Window Media Player version Windows Media Player 10 or higher
• If the Windows Media Player version is lower than 10, install version 10 or higher.
Connecting to Networks and Devices

41
Calls
Making a call
1 Touch to open the keypad.
2 Enter the number using the keypad. To delete a digit, touch the .
3 Touch to make a call.
4 To end a call, touch the End icon .
TIP! To enter "+" to make international calls, touch and hold .
Calling your contacts
1 Touch to open your contacts.
2 Scroll through the contact list or enter the first few letters of the contact you want
to call by touching Search contacts.
3 In the list, touch the contact twice or touch the you want to call.
Answering and rejecting a call
When you receive a call in Lock state, swipe the in any direction to Answer the
incoming call.
Swipe the in any direction to Decline an incoming call.
Hold and slide the Decline with message icon from the bottom if you want to send a
message.
TIP! Decline with message
You can send a message quickly using this function. This is useful if you need
to reject a call with message during a meeting.

42
Adjusting the in-call volume
To adjust the in-call volume during a call, use the Volume up and down keys on the left-
hand side of the phone.
Making a second call
1 During your first call, touch Menu > Add call and dial the number. You can also
go to the recently dialled numbers list by touching or can search contacts by
touching and selecting the contact you want to call.
2 Touch to make the call.
3 Both calls are displayed on the call screen. Your initial call is locked and put on
hold.
4 Touch the displayed number to toggle between calls. Or touch Merge calls to
start a conference call.
5 To end active calls, touch End or touch the Home key and slide the notification bar
down and select the End call icon .
NOTE: You are charged for each call you make.
Calls

43
Viewing your call logs
On the Home screen, touch and choose the Call logs tab .
View a complete list of all dialled, received and missed calls.
TIP! Touch any call log entry to view the date, time and duration of the call.
TIP! Touch the Menu key , then touch Delete all to delete all the
recorded items.
Call settings
You can configure phone call settings such as call forwarding, as well as other special
features offered by your carrier.
1 On the Home screen, touch .
2 Touch .
3 Tap Call settings and choose the options that you wish to adjust.

44
Contacts
Add contacts to your phone and synchronize them with the contacts in your Google
account or other accounts that support contact syncing.
Searching for a contact
On the Home screen
1 Touch to open your contacts.
2 Touch Search contacts and enter the contact name using the keyboard.
Adding a new contact
1 Touch , enter the new contact's number, then touch the Menu key . Touch
Add to Contacts > Create new contact.
2 If you want to add a picture to the new contact, touch the image area.
Choose from Take photo or Select from Gallery.
3 Select the contact type by touching .
4 Touch a category of contact information and enter the details about your contact.
5 Touch Save.
Favorite contacts
You can classify frequently called contacts as favorites.
Adding a contact to your favorites
1 Touch to open your contacts.
2 Touch a contact to view its details.
3 Touch the star to the right of the contact's name. The star will turn yellow color.

45
Removing a contact from your favorites list
1 Touch to open your contacts.
2 Touch the tab, and choose a contact to view its details.
3 Touch the yellow color star to the right of the contact's name. The star turns grey
and the contact is removed from your favorites.
Creating a group
1 Touch to open your contacts.
2 Touch Groups and touch the Menu key . Select New group.
3 Enter a name for the new group. You can also set a ringtone for the newly created
group.
4 Touch Save to save the group.
NOTE: If you delete a group, the contacts assigned to that group will not be
lost. They will remain in your contacts.

46
Messaging
Your phone combines SMS and MMS into one intuitive, easy-to-use menu.
Sending a message
1 Touch on the Home screen and touch to open a blank message.
2 Enter a contact name or contact number in the To field. As you enter the contact
name, matching contacts will appear. You can touch a suggested recipient. You
can add more than one contact.
NOTE: You will be charged for a text message for every person to whom you
send the message.
3 Touch the Enter message field and begin composing your message.
4 Touch to open the Options menu. Choose from Quick message, Insert
smiley, Schedule sending, Add subject, and Discard.
TIP! You can touch the icon to attach the file you want to share to your
message.
5 Touch Send to send your message.
6 Responses will appear on the screen. As you view and send additional messages,
a message thread is created.
WARNING: The 160-character limit may vary from country to country,
depending on the language and how the SMS is coded.
WARNING: If an image, video or audio file is added to an SMS
message, it is automatically converted into an MMS message and you are
charged accordingly.

47
Threaded box
Messages (SMS, MMS) exchanged with another party can be displayed in chronological
order so that you can conveniently see an overview of your conversation.
Changing your message settings
Your phone message settings are pre-defined, so you can send messages immediately.
You can change the settings according to your preferences.
• Touch the Messaging icon on the Home screen, touch and then tap Settings.

48
E-mail
You can use the E-mail application to read emails from services like Gmail. The E-mail
application supports the following account types: POP3, IMAP and Exchange.
Your service provider or system administrator can provide you with the account settings
you need.
Managing an email account
The first time you open the E-mail application, a set-up wizard opens to help you to set
up an email account.
After the initial set-up, E-mail displays the contents of your inbox. If you have added
more than one account, you can switch among accounts.
To add another email account:
• Touch > Apps tab > E-mail > tap > Settings > Add account.
To change an email account's settings:
• Touch > Apps tab > E-mail > tap > Settings > General settings.
To delete an email account:
• Touch > Apps tab > E-mail > tap > Settings > tap
> Remove account > Select the account to delete > Remove > select Yes.
Working with account folders
Touch > Apps tab > E-mail, tap and select Folders.
Each account has an Inbox, Outbox, Sent and Drafts folder. Depending on the features
supported by your account's service provider, you may have additional folders.

49
Composing and sending email
To compose and send a message
1 While in the E-mail application, touch the .
2 Enter an address for the message's intended recipient. As you enter text, matching
addresses will be proposed from your Contacts. Separate multiple addresses using
semicolons.
3 Touch the Cc/Bcc field to add a Cc/Bcc and Touch to attach files, if required.
4 Enter the text of the message.
5 Touch .
If you aren't connected to a network, for example, if you're working in airplane
mode, the messages that you send will be stored in your Outbox folder until you
connect to a network again. If it contains any pending messages, the Outbox will
be displayed on the Accounts screen.
TIP! When a new email arrives in your Inbox, you will be notified by a sound
or vibration.

50
Camera
To open the Camera application, Touch > Apps tab > .
Getting to know the viewfinder
Flash – Choose from Off , On , Auto .
Swap camera – Switch between the rear–facing camera lens and the front–facing
camera lens.
Shot mode – Choose from Normal, Dynamic tone, Panorama, Continuous shot,
Beauty shot, Time catch shot, Sports or Night.
Settings – Tap this icon to open the settings menu.
Video mode – Tap and slide down this icon to switch to video mode.
Capture button
Gallery – Tap to view the last photo you captured. This enables you to access your
gallery and view saved photos while in camera mode.
NOTE: Please ensure the camera lens is clean before taking pictures.

51
Using the advanced settings
In the viewfinder, tap to open the advanced options. You can change the camera
settings by scrolling through the list. After selecting the option, tap the Back key.
To take a photo, say one of the following words: Cheese, Smile, Whiskey,
Kimchi or LG.
Defines and controls the amount of sunlight entering the photo.
Tap to select the focus mode.
Selects photo resolution. If you choose high resolution, file size will increase,
which means you will be able to store fewer photos in the memory.
The ISO rating determines the sensitivity of the camera's light sensor. The
higher the ISO, the more sensitive the camera. This is useful in darker
conditions when you cannot use the flash.
Improves color quality in various lighting conditions.
Applies artistic effects to your pictures.
Sets a delay after the capture button is pressed. This is ideal if you want to
be in the photo.
Activate this to use your phone's location-based services.
NOTE: This function is available when the GPS function is active or
connected network.
Selects a shutter sound.
Set the Volume Key whether to use for the capture or zoom.
Opens the help guide to know how a function operates.
Restores all camera default settings.

52
TIP!
• When you exit the camera, some settings return to their defaults, such as
white balance, color effect, timer and scene mode. Check these before you
take your next photo.
• The setting menu is superimposed over the viewfinder, so when you change
photo color or quality elements, you will see a preview of the changed
image behind the Settings menu.
Taking a quick photo
1 Open the Camera application.
2 Holding the phone horizontally, point the lens towards the subject you want to
photograph.
3 A focus box will appear in the center of the viewfinder screen. You can also tap
anywhere on the screen to focus on that spot.
4 When the focus box turns green, the camera has focused on your subject.
5 Touch to capture the photo.
Camera

53
Once you've taken a photo
Tap the image thumbnail at the bottom of the Camera screen to view the last photo you
took.
Tap to take another photo immediately.
Tap to send your photo to others or share it via social network services.
Tap to delete the photo.
Tap to share photo using the SmartShare function.
TIP! If you have an SNS account and set it up on your phone, you can share
your photo with your SNS community.
NOTE: Additional charges may apply when MMS messages are downloaded
while roaming.
Touch the Menu key to open all advanced options.
Set image as – Touch to use the photo as a Contact photo, Home screen Wallpaper,
Lock screen wallpaper or Wallpaper.
Move – Touch to move the photo to another place.
Copy – Touch to copy the selected photo and save it to another album.
Copy to Clip Tray – Tap to copy the photo and store in the Clip Tray.
Rename – Touch to edit the name of the selected photo.
Rotate left/right – To rotate left or right.
Crop – Crop your photo. Move your finger across the screen to select the area to be
cropped.
Edit – View and edit the photo.

54
Slideshow – Automatically shows you the images in the current folder one after the
other.
Add location – Camera setup is set to off, the Geotagging, picture location information
is missing, the location information may be added.
Remove location – Camera setup is set to on Geotagging, photographs of the location
information , the location information can be deleted.
Show on map – Camera setup is set to on Geotagging, picture position information,
the corresponding location on the map can be viewed.
Details – Find out more information about the contents.
From your Gallery
Tap Gallery.
• To view more photos, scroll left or right.
• To zoom in or out, double-tap the screen or place two fingers and spread them apart
(move your fingers closer (move your fingers closer together to zoom out).
Camera

55
Video camera
Getting to know the viewfinder
Flash – Choose from Off , On .
Swap camera – Switch between the rear–facing camera lens and the front-facing
camera lens.
Recording mode – Choose from Normal or Live effect.
Settings – Tap this icon to open the settings menu.
Camera mode – Tap and slide up this icon to switch to camera mode.
Start recording
Gallery – Tap to view the last video you recorded. This enables you to access your
gallery and view your saved videos while in video mode.
TIP!
When recording a video, place two fingers on the screen and pinch to use the
Zoom function.

56
Using the advanced settings
Using the viewfinder, touch to open all the advanced options.
Tap to set the size (in pixels) of the video you are recording.
Defines and controls of the amount of sunlight entering the lens. Slide the
brightness indicator along the bar towards “-” for a lower brightness video or
towards “+” for a higher brightness video.
Improves color quality in various lighting conditions.
Choose a colour tone to use for your new view.
Activate this to use your phone's location-based services.
NOTE: This function is available when the GPS function is active or
connected network.
Set the Volume Key whether to use for the record or zoom.
Opens the help guide to know how a function operates.
Restores all camera default settings.
Recording a quick video
1 Open the Camera application and touch the Video mode button.
2 The video camera viewfinder appears on the screen.
3 Holding the phone, point the lens towards the subject you wish to capture in your
video.
4 Touch once to start recording.
5 A red light will appear at the top left corner of the viewfinder with a timer showing
the length of the video.
6 Touch on the screen to stop recording.
Video camera

57
TIP!
– Tap to capture an image during recording a video.
– Tap to pause recording a video.
After recording a video
In the viewfinder, tap the video thumbnail at the bottom of the screen to view the last
video you took.
Tap to record another video immediately.
Tap to send your video to others or share it via social network services.
Tap to delete the video.
Tap to share video using the SmartShare function.
NOTE: Additional charges may apply when MMS messages are downloaded
while roaming.
Watching your saved videos
1 In the viewfinder, tap .
2 Your Gallery will appear on the screen.
3 Tap a video to play it automatically.
Adjusting the volume when viewing a video
To adjust the volume of a video while it is playing, use the volume keys on the left side
of the phone.

58
LG Unique Function
QuickMemo function
Use the QuickMemo function to practically and efficiently create memos during a call,
with a saved picture or on the current phone screen.
OR
1 Enter the QuickMemo function
screen by pressing both the Volume
up and down keys for one second on
the screen you want to capture.
OR
Touch and slide the status bar downward
and touch
.
2 Select the desired menu option from
Pen type, Color, Eraser, and create
a memo.

59
3 Touch in the Edit menu and select
it to save the memo with the current
screen.
NOTE: Please use a fingertip while using the QuickMemo function. Do not
use your fingernail.
Using the QuickMemo options
You can easily use the QuickMenu options when using the QuickMemo function.
Touch to keep the current memo on the screen and use the phone
simultaneously.
Selects whether to use the background screen or not.
Undo or Redo.
Selects the pen type and the colour.
Erases the memo that you created.
Touch to send your memo to others or share it via social network services.
Saves the memo with the current screen in the Gallery/Notebook.
Viewing the saved QuickMemo
Touch Gallery/Notebook and select the QuickMemo album.

60
Notebook function
With the Notebook application, you can manage and personalize a wide variety of
information. Notebook allows you to create your own special notes with drawings,
images, maps and stickers.
Making a note
1 Touch > Apps tab > Notebook.
2 Touch New note to create a new note.
3 Select the desired mode (Cover, Title, Paper, Paper color) and then tap on OK.
4 Create a simple note on an empty page.
Getting to know the Notebook
Pages-property panelsBookshelf
Bookshelf
Search for pages of notes.
Share as Notebook file, a PDF file or Image file via E-mail/Gmail.
Delete the saved notebook from the Bookshelf.
LG Unique Function

61
Pages-Property panels
Select the Read-only or edit mode.
Undo or Redo.
Tap this button to write.
Select the Pen type, Thickness, Opacity and Color.
Erase the memo that you created.
Touch to attach files to the note.
Touch to send your note to others or share it via social network services.
Save the note with the current screen.
Select to lock or unlock the Front key.
Tap this button to enlarge the input area.
Viewing the saved notebook
• Saved Notebook memos are on the Bookshelf.
• If you save memos from QuickMemo, a QuickMemo note will be created and saved
on the Bookshelf automatically.
NOTE: For more information of the Notebook guide, please see Notebook >
Notebook guide.

62
QuickTranslator
Simply aim the camera of your smart phone at the foreign sentence you want to
understand. You can get the real-time translation anywhere and anytime.
You can buy additional dictionaries for offline translation from the Google Play Store.
Home language.
Destination language
Translation of word.
Translation of sentence.
Translation of block.
Settings.
1 Touch > Apps tab > QuickTranslator.
2 Touch Word, Line or Block.
3 Touch and select the desired language.
4 Hold the phone toward the subject you want to translate for a few seconds.
NOTE: Only one dictionary is provided free of charge. Additional dictionaries
must be purchased. Please select from the list below the dictionary you would
like to install as your complimentary dictionary.
NOTE: There may be a difference in the rate of recognization depending
on the size, font, color, brightness and angle of the letters that need to be
translated.
LG Unique Function

63
Live Zooming function
Live Zooming allows you to zoom in or zoom out on a portion of a video that is being
played to make the desired scan appear larger or smaller.
NOTE:
• When in video playback mode, slide the screen up or down,
the screen brightness (Left side), the Volume (Right side) will be adjusted.
• When in video playback mode, when you slide the screen left or right, the
playback position will be adjusted.
NOTE: Do not press too hard; the touch screen is sensitive enough to pick
up a light, but firm touch.

64
QSlide function
The QSlide function enables an overlay on your phone’s display for easy multi-window
viewing.
OR
Touch to exit the QSlide function
and return to full window.
Tap to adjust transparency.
Tap to end the QSlide function.
Tap to adjust the size.
1 Touch and slide the status bar downward > touch QSlide apps or when
using a function
supported by the QSlide function > touch . The function will be continuously
displayed as a small window on your screen.
2 You can make a call, browse the Web, or choose other phone options. You can also
use and tap the screen of the small windows when the transparency bar is not full
.
NOTE: The QSlide function can support up to two windows at the same time.
TIP!
Touch and slide the notification panel down with your finger.
Touch
to manage the "Quick settings" or "QSlide" in the notification panel.
Dual Play function
You can display different screens on the two displays connected wirelessly or by cable.
1 Dual play mode is executed by tapping the Home key when playing content on
the external display.
LG Unique Function

65
2 You can stop playing the content on the external display using the notification
panel.
NOTE:
• Connect your smart phone to a display wirelessly (Miracast) or by cable
(MHL cable).
• Some video files may not be supported by the dual play function.
• The Shielded LG MHL cable is recommended.
Mirroring
∙∙∙∙∙
Dual Play
∙∙∙∙∙
NOTE:
• Dual Play is supported by 3 applications - Videos, Media Home (MHL only),
Polaris Office 4.
• The minimum TV resolution required for dual play is 720p (1280x720)

66
LG SmartWorld
LG SmartWorld offers an assortment of exciting content - fonts, themes, games and
applications.
How to Get to LG SmartWorld from Your Phone
1 Touch > Apps tab > tap the icon to access LG SmartWorld.
2 Tap Sign in and enter ID/PW for LG SmartWorld. If you have not signed up yet, tap
Register to receive your LG SmartWorld membership.
3 Download the content you want.
• When you use Cellular network, data fee could be charged by data plan that you
signed- up with carrier.
• LG Smartworld may not be available from all carriers or in all countries.
NOTE: What if there is no icon?
1 Using a mobile Web browser, access LG SmartWorld (www.lgworld.com)
and select your country.
2 Download the LG SmartWorld App.
3 Run and install the downloaded file.
4 Access LG SmartWorld by tapping the
icon.
Special benefit only LG SmartWorld
1 Decorate your own style on your Smartphone, Use Home Theme &
keyboard Theme & Font that provided on LG SmartWorld (However this
service is available to specific device. please check in LG SmartWorld
website whether it is feasible or not whether it is feasible or not)
2 Enjoy LG SmartWorld's special service by joining promotion that
consistently provided
LG Unique Function

67
On-Screen Phone
On-Screen Phone allows you to view your mobile phone screen from a PC via a USB
or Wi-Fi connection. You can also control your mobile phone from your PC, using the
mouse or keyboard.
On-Screen Phone icons
Connects your mobile phone to your PC, or disconnects it.
Changes the On-Screen Phone preferences.
Exits the On-Screen Phone programme.
Maximises the On-Screen Phone window.
Minimize the On-Screen Phone window.
On-Screen Phone features
• Real-time transfer and control: displays and controls your mobile phone screen when
connected to your PC.
• Mouse control: allows you to control your mobile phone by using the mouse to click
and drag on your PC screen.
• Text input with keyboard: allows you to compose a text message or note using your
computer keyboard.
• File transfer (mobile phone to PC): sends files from your mobile phone (e.g. photos,
videos, music and POLARIS Viewer 5 files) to your PC. Simply right-click on the file
which you want to send to PC and click on "Save to PC".
• File transfer (PC to mobile phone): sends files from your PC to your mobile phone.
Just select the files you wish to transfer and drag and drop them into the On-Screen
Phone window. The files sent are stored in internal SD card.

68
• Real-time event notifications: prompts a pop-up to inform you of any incoming calls or
text/multimedia messages.
How to install On-Screen Phone on your PC
1 Visit LG Home (www.lg.com) and select a country of your choice.
2 Go to Support > Mobile Phone Support > Select the Model (LG-E975) >
ClickOSP ( On-Screen Phone ) to download. You can install the On-Screen Phone
on your PC.
LG Unique Function

69
Gallery
You can store multimedia files in internal memory for easy access to all your multimedia
files. Use this application to view multimedia files like pictures and videos.
1 Touch > Apps tab > Gallery.
You can manage and share all your image and video files with Gallery.
NOTE:
• Some file formats are not supported, depending on the software installed
on the device.
• Some files may not play properly, depending on how they are encoded.
Viewing pictures
Launching Gallery displays your available folders. When another application, such as
Email, saves a picture, the download folder is automatically created to contain the
picture. Likewise, capturing a screenshot automatically creates the Screenshots folder.
Select a folder to open it.
Pictures are displayed by creation date in a folder. Select a picture to view it full screen.
Scroll left or right to view the next or previous image.
Zooming in and out
Use one of the following methods to zoom in on an image:
• Double-tap anywhere to zoom in.
• Spread two fingers apart on any place to zoom in. Pinch to zoom out, or double-tap
to return.
Multimedia

70
Playing videos
Video files show the icon in the preview. Select a video to watch it and tap . The
Videos application will launch.
Editing photos/videos
When viewing an photo/video, tap the Menu key and use the advanced editing
options.
• Slideshow: start a slideshow with the images in the current folder.
Deleting images
Use one of the following methods:
• In a folder, tap and select photos/videos by ticking, and then tap on Delete.
• When viewing a photo/Video, tap .
Setting as wallpaper
When viewing a photo, touch the Menu key > Set image as to set the image as
wallpaper or to assign it to a contact.
NOTE:
• Some file formats are not supported, depending on the device software.
• If the file size exceeds the available memory, an error can occur when you
open files.
Multimedia

71
Videos
Your phone has a built-in video player that lets you play all of your favorite videos. To
access the video player, touch > Apps tab > Videos.
Playing a video
1 Touch > Apps tab > Videos.
2 Select the video you want to play.
Touch to pause/resume video playback.
Touch to go 10 seconds forward.
Touch to go 10 seconds backward.
Touch to manage the video volume.
Touch to change the ratio of the video screen.
Tap to capture image during playing a video.
Touch to use QSlide.
Touch to Smart Share
Touch to lock/unlock a video screen.

72
To change the volume while watching a video, press the up and down volume keys on
the left-hand side of the phone.
Touch and hold a video in the list. The Share, Delete, Trim and Details options will be
displayed.
Video Editor
You can edit the photos or videos stored on the phone.
NOTE: Video Editing function is supported only for photos or videos which
recorded with this phone.
< Project list screen >
Buttons area
Project list
area
Help
Creat project
Projects should be exported to play in applications such as videos
Play project
Delete project
Share project with application such as YouTube
Multimedia

73
< Project edit screen >
Timeline
area
Viewer area
Move to project list screen. Currently edited project is save automatically
Split video clip into two portions over the playhead
Add sound effect
Add video, image or audio clip
Undo an action
Redo an action
Add text to video or image clip
Video Wiz
You can make your own movie using your images/video and music.
1 Touch > Apps tab > Video Wiz.
2 After seeing the brief introduction on the steps to follow, tap OK.

74
3 Tap to add images or video to your movie.
4 Tap the desired images or videos, then tap .
• To remove images or videos, tap and select the desired files > .
• To rearrange them, touch and hold an image/video, and drag and drop it to the
desired position.
5 Tap Select style to select the desired movie style.
• Scroll through and select the style you want. As you scroll through the styles, a
preview will be displayed.
6 Tap Select music to set the background music.
7 Tap to play your movie.
8 Tap to edit the video clip using Text, Sticker or Magic Spot.
• After editing the video, tap .
9 Tap to save the video.
10 Tap to view the help information on using this feature.
Multimedia

75
Music
Your phone has a built-in music player that lets you play all your favorite tracks. To
access the music player, touch > Apps tab > Music.
Playing a song
1 Touch > Apps tab > Music.
2 Touch Songs.
3 Select the song you want to play.
/
Tap to pause/ resume playback.
Tap to skip to the next track in the album, playlist, or shuffle. Touch and
hold to fast forward.
Tap to restart the current track or skip to the previous track in the
album, playlist, or shuffle. Touch and hold to rewind.

76
Tap to display the Volume slider bar, then adjust the playback volume
on the slider bar.
Touch to set Sound Effects.
Tap to find the files with YouTube.
Tap to open the current playlist.
Tap to add the song to your favourites.
Tap to play the current playlist in shuffle mode (tracks are played in
random order).
Tap to toggle through the repeat modes to repeat all songs, repeat
current song, or repeat off.
SmartShare.
To change the volume while listening to music, press the up and down volume keys on
the left-hand side of the phone.
Touch and hold any song in the list. The Play, Add to playlist, Share, Set as ringtone,
Delete, Details and Search options will be displayed.
Add music files to your phone
Start by transferring music files to your phone:
• Transfer music using Media sync (MTP).
• Download from the wireless Web.
• Synchronize your phone to a computer.
• Receive files via Bluetooth.
Multimedia

77
Transfer music using Media sync (MTP)
1 Connect the phone to your PC using the USB cable.
2 Select the Media sync (MTP) option. Your phone will appear as another hard drive
on your computer. Click on the drive to view it. Copy the files from your PC to the
drive folder.
3 When you’re finished transferring files, swipe down on the Status Bar and touch
USB connected > Charge only. You may now safely unplug your device.
NOTE:
• Some file formats are not supported, depending on the device software.
• If the file size exceeds the available memory, an error can occur when you
open files.
NOTE: Music file copyrights may be protected by international treaties and
national copyright laws.
Therefore, it may be necessary to obtain permission or a licence to reproduce
or copy music.
In some countries, national laws prohibit private copying of copyrighted
material. Before downloading or copying the file, check the national laws of
the relevant country concerning the use of such material.

78
Setting your alarm
1 Touch > Apps tab > Alarm/Clock > .
2 After you set the alarm, your phone lets you know how much time is left before the
alarm will go off.
3 Set Repeat, Snooze duration, Vibration, Alarm sound, Alarm volume, Auto
app starter, Puzzle lock and Memo. Touch Save.
NOTE: To change alarm settings in the alarm list screen, touch and
select Settings.
Using your calculator
1 Touch > Apps tab > Calculator.
2 Touch the number keys to enter numbers.
3 For simple calculations, touch the function you want to perform (+, –, x or ÷)
followed by =.
4 For more complex calculations, slide the left then choose sin, cos, tan, log etc.
5 To check the history, touch , select calculation history.
Adding an event to your calendar
1 Touch > Apps tab > Calendar.
2 On the screen, you can find the different view types for the Calendar (Day, Week,
Month, Agenda).
3 Tap on the date for which you wish to add an event and touch .
4 Touch Event name and enter the event name.
5 Touch Location and enter the location. Check the date and enter the time you
wish your event to start and finish.
6 If you wish to add a note to your event, touch Description and enter the details.
Utilities

79
7 If you wish to repeat the alarm, set REPEAT and set REMINDERS, if necessary.
8 Touch Save to save the event in the calendar.
Voice Recorder
Use the voice recorder to record voice memos or other audio files.
Recording a sound or voice
1 Touch > the Apps tab and select Voice Recorder.
2 Touch to begin recording.
3 Touch to end the recording.
4 Touch to listen to the recording.
NOTE: Touch to access your album. You can listen to the saved
recording. The available recording time may differ from actual recording time.
Sending the voice recording
1 Once you have finished recording, you can send the audio clip by touching .
2 Choose from Bluetooth, Drive, E-mail, Gmail, Memo, Messaging or
SmartShare Beam. When you select, the voice recording is added to the
message. You may then write and send the message as you usually would.

80
Task Manager
You can manage your applications using Task Manager. You can easily check the
number of applications that are currently running and shut down certain applications.
Tasks
This task can be synchronized with MS Exchange account. You can create task, revise it
and delete it in MS outlook or MS Office Outlook Web Access.
To Synchronize MS Exchange
1 From the Home Screen, Touch > Settings.
2 Touch Accounts & sync > Add account.
3 Touch Microsoft Exchange to create Email address and Password.
4 Make sure if you checkmark Sync task.
Polaris Office 4
Polaris Office is a professional mobile office solution that lets users conveniently view
various types of office documents, including Word, Excel and PowerPoint files, anywhere
or anytime, using their mobile devices.
Touch > Apps tab > Polaris Office 4.
Viewing files
Mobile users can now easily view a wide variety of file types, including Microsoft Office
documents and Adobe PDF, right on their mobile devices. When viewing documents
using Polaris Office, the objects and layout remain the same as in the original
documents.
Utilities

81
Backup
About backing up and restoring smart phone data
It is recommended that you regularly create and save a backup file on the internal
storage, especially before updating any software. Maintaining a current backup file in
storage memory may allow you to recover smart phone data if your smart phone is lost,
stolen, or corrupted by an unforeseen issue.
This Backup application is supported between LG smart phones, other S/W versions or
OSs. As a result so, when you buy the new LG smart phone, you can backup the current
Your phone data to your new phone.
If you have preloaded Backup application on your smart phone, you can backup
and restore most of your smart phone data, Applications including unprotected
applications, their settings, Applications (Downloaded), Applications (Pre-installed),
Bookmarks, Calendar, Call log, Contacts, Home screen, Messages and System
settings using this application You may:
• Perform a manual backup of your smart phone data.
• Schedule automatic backups of your smart phone data.
• Restore your smart phone data.
NOTE: Please note that the Backup function does not support the backup of
User data & Media data (Picture/Video/Music). Please backup those files using
the Media sync (MTP). Connect your phone to your computer using a USB
cable and touch Media sync (MTP).

82
WARNING
To protect against unexpected shutoff during backup or restore operations, due
to insufficient battery power, you should always keep your battery fully charged.
Backup
1 Touch > Apps tab > LG Backup > Backup.
2 Select the check box next to the item you want to backup and tap Next to backup.
3 Touch Internal Storage > Start.
4 When all selected files have been backed up, you can touch Done to finish the
back up.
Scheduling backup
You can also program automatic backups for the data on your smart phone according
to your schedule setting. To do this, complete the following steps:
Touch > Apps tab > LG Backup > Schedule backup.
File restore & management
You can set to Backup file restore to desired status.
To restore data that is in your on-board device memory, mass storage mode must be
turned off.
Touch > Apps tab > LG Backup > File restore & management > Internal
Storage.
Utilities

83
NOTE:
• All files that are stored on your smart phone are deleted before the backup file is
restored.
• Please note that your phone data will be overwritten with the content of your
backup.
• You can set Enable encryption to encrypt your backup files for extra protection.
Google+
Use this application to stay connected with people via Google’s social network service.
• Touch > Apps tab > Google +.
NOTE: This application may not be available depending on the region or
service provider.
Voice Search
Use this application to search webpages using voice.
1 Touch > Apps tab > Voice Search.
2 Say a keyword or phrase when Speak now appears on the screen. Select one of
the suggested keywords that appear.
NOTE: This application may not be available depending on the region or
service provider.

84
Downloads
Use this application to see what files have been downloaded through the applications.
• Touch > Apps tab > Downloads.
NOTE: This application may not be available depending on the region or
service provider.
Utilities

85
The Web
Internet
Use this application to browse the Internet. Browser gives you a fast, full-color world of
games, music, news, sports, entertainment and much more, right on your mobile phone
wherever you are and whatever you enjoy.
NOTE: Additional charges apply when connecting to these services and
downloading content. Check data charges with your network provider.
1 Touch > Apps tab > Internet.
Using the Web toolbar
Touch and hold the Web toolbar and slide it upwards with your finger to open.
Touch to go back one page.
Touch to go forward one page, to the page you connected to after the current
one. This is the opposite of what happens when you touch the Back key,
which takes you to the previous page.
Touch to go to the Home page.
Touch to add a new window.
Touch to access bookmarks.
Viewing webpages
Tap the address field, enter the web address and tap Go.

86
Opening a page
To go to new page, tap
To go to another webpage, tap , scroll up or down, and tap the page to select it.
Searching the web by voice
Tap the address field, tap , speak a keyword, and then select one of the suggested
keywords that appear.
NOTE: This feature may not be available depending on the region or service
provider.
Bookmarks
To bookmark the current webpage, touch > Add to bookmarks > OK.
To open a bookmarked webpage, tap and select one.
History
Tap > History to open a webpage from the list of recently-visited webpages. To
clear the history, tap Menu Clear all history.
Using Popup Browser
Use this feature to access the Internet without closing the current application.
While viewing content, such as contacts or notes that include web addresses, select a
web address, and then tap Popup Browser to open the pop-up browser. Tap and drag
the browser to move it to another location.
To view the browser in full screen, tap .
To close the browser, tap .
The Web

87
Chrome
Use Chrome to search for information and browse webpages.
1 Touch > Apps tab > Chrome.
NOTE: This application may not be available, depending on your region and
service provider.
Viewing webpages
Tap the Address field, and then enter a web address or search criteria.
Opening a page
To go to a new page, tab > New tab.
To go to another webpage, tap , scroll up or down and tap the page to select it.
Syncing with other devices
Sync open tabs and bookmarks to use with Chrome on another device when you are
logged in with the same Google account.
To view open tabs on other devices, tap > Other devices.
Select a webpage to open.
To view bookmarks, tap .

88
Settings
This section provides an overview of items you can change using your phone's System
settings menus.
To access the Settings menu:
1 On the Home screen, touch > Apps tab > Settings.
or
On the Home screen, touch > System settings.
2 Select a setting category and select an option.
WIRELESS & NETWORKS
Here, you can manage Wi-Fi and Bluetooth. You can also set up mobile networks and
switch to airplane mode.
< Wi-Fi >
Wi-Fi – Turns on Wi-Fi to connect to available Wi-Fi networks.
TIP! How to obtain the MAC address
To set up a connection in some wireless networks with MAC filters, you may
need to enter the MAC address of your phone in the router.
You can find the MAC address in the following user interface: touch Apps tab
> Settings > Wi-Fi >
> Advanced Wi-Fi > MAC address.
< Bluetooth >
Turn the Bluetooth wireless feature on or off to use Bluetooth.
< Mobile data >
Displays the data usage and set mobile data usage limit.
< Call >
Configure phone call settings such as call forwarding and other special features offered
by your carrier.
Voicemail – Allows you to select your carrier’s voicemail service.

89
Fixed dialing numbers – Turn on and compile a list of numbers that can be called
from your phone. You’ll need your PIN2, which is available from your operator. Only
numbers within the fixed dial list can be called from your phone.
Incoming voice call pop-up – Display incoming voice call pop-up when an app is in
use.
Call reject – Allows you to set the call reject function. Choose from Call reject mode
or Rejection list.
Decline with message – When you want to reject a call, you can send a quick
message using this function. This is useful if you need to reject a call during a meeting.
Privacy keeper – Hides the caller name and number for an incoming call.
Call forwarding – Choose whether to divert all calls when the line is busy, when there
is no answer or when you have no signal.
Auto answer – Set the time before a connected hands-free device automatically
answers an incoming call. Choose from Disable, 1 second, 3 seconds, and 5 seconds.
Connection vibration – Vibrates your phone when the other party answers the call.
Save unknown numbers – Add unknown numbers to contacts after a call.
Power key ends call – Allows you to select your end call.
Call barring – Lock incoming, outgoing or international calls.
Call duration – View the duration of calls including Last call, All calls, Dialled calls and
Received calls.
Additional settings – Allows you to change the following settings:
Caller ID: Choose whether to display your number in an outgoing call.
Call waiting: If call waiting is activated, the handset will notify you of an incoming call
while you are on a call (depending on your network provider).
<Share & Connect>
NFC – Your phone is an NFC-enabled mobile phone. NFC (Near Field Communication)
is a wireless connectivity technology that enables two-way communication between
electronic devices. It operates over a distance of a few centimeters. You can share your

90
content with an NFC tag or another NFC support device by simply touching it with your
device. If you touch an NFC tag with your device, it will display the tag content on your
device.
To switch NFC on or off: From the Home screen, touch and slide the notification
panel down with your finger, then select the NFC icon to turn it on.
NOTE: When airplane mode is activated, the NFC application can be used.
Using NFC: To use NFC, make sure your device is switched on, and activate NFC if
disabled.
Android Beam – When this feature is turned on, you can beam app content to another
NFC-capable device by holding the devices close together.
Just bring the device together(typically back to back) and then touch your screen. The
app determines what gets beamed.
SmartShare Beam – Enable to receive files from LG phones.
Media server – Share media content on your phone with nearby device via DLNA.
Miracast – With Miracast, you can wirelessly mirror your phone screen and sound onto
a Miracast dongle or TV
< Tethering & networks >
Wi-Fi hotspot – You can also use your phone to provide a mobile broadband
connection. Create a hotspot and share your connection. Please read "Sharing your
phone's data connection" for more information.
Bluetooth tethering – Allows you to set your phone whether you are sharing the
Internet connection or not.
Help – Tap to view help information on the Wi-Fi hotspot and Bluetooth tethering
functions.
Airplane mode – After switching to Airplane mode, all wireless connections are
disabled.
Settings

91
NOTE: You must set a lock screen PIN or password before you can use
credential storage.
Mobile networks – Set options for data roaming, network mode & operators, access
point names (APNs) etc.
Default SMS app – Allows you to set the default SMS app.
VPN – Displays the list of Virtual Private Networks (VPNs) that you've previously
configured. Allows you to add different types of VPNs.
DEVICE
< Sound >
Sound profile – Choose the Sound, either Vibrate only or Silent.
Volumes – Manage the volume of Phone ringtone, Notification sound, Touch feedback
& system, Music, video, games and other media.
Quiet time – Set times to turn off all sounds except alarm and media.
Phone ringtone – Allows you to set your default incoming call ringtone.
Smart ringtone – Allows you to set increase phone ringtone volume automatically in
noisy environments.
Ringtone with vibration – Vibration feedback for calls and notifications.
Notification sound – Allows you to set your default notification ringtone.
Touch feedback & system – Allows you to set the feedback (tones and/or vibration)
while using your device.
< Display >
Brightness – Adjust the screen brightness.
Screen timeout – Set the time for screen timeout.
Auto-rotate screen – Checkmark to set the phone to automatically rotate the screen
based on the phone orientation (portrait or landscape).
Daydream – Tap the Daydream switch to toggle it On or Off. On allows the set

92
screensaver to be displayed when the phone is sleeping while docked and/or charging.
Font type – Change the type of display font.
Font size – Change the size of the display font.
Smart Screen – Checkmark to allow the screen to stay on when phone detects your
face.
Front touch key light – Set the front key light duration.
Notification flash – The Notification LED is located to the left of the front camera.
You can see the small LED light on when the phone is charging or when you receive a
notification if LCD screen turns off. You can configure the Notification flash to turn on/
off. You can set the various options from the list of notification flash items.
< Home screen >
Set the Theme, Wallpaper, Screen swipe effect, Allow Home screen looping or
Portrait view only. Select the option to set Home backup & restore.
< Lock screen >
Select screen lock – Set a screen lock type to secure your phone. Opens a set of
screens that guide you through drawing a screen unlock pattern. Set None, Swipe,
Face Unlock, Pattern, PIN or Password.
If you have enabled a Pattern lock type when you turn on your phone or wake up the
screen, you will be asked to draw your unlock pattern to unlock the screen.
< Gestures >
Silence incoming calls – Flip the device to mute incoming calls.
Snooze or stop alarm – Flip the device to snooze or stop alarm.
Pause video – Flip the device to pause playing video.
Help – Help for gesture functions.
Motion sensor calibration – Allows you to improve the accuracy of the tilt and speed
of the sensor.
< Storage >
INTERNAL STORAGE – View the internal storage usage.
Settings

93
< Battery >
BATTERY INFORMATION
The Battery charge information is displayed on a battery graphic along with the
percentage of the remaining charge and its status.
Touch the Battery charge icon to display the Battery use screen to see battery usage
level and battery use details. It displays which components and applications are using
the most battery power. Tap one of the entries to see more detailed information.
Battery percentage on status bar – Checkmark to display the battery level
percentage on the Status Bar next to the battery icon.
BATTERY SAVER
Tap the Battery saver switch to toggle it On or Off. Tap Battery saver to access the
following settings:
Battery saver – Sets the battery charge percent level that will automatically turn on
Battery saver.
Eco mode – Set the Eco mode to extend battery life by dynamically optimizing the CPU
control policy.
Help – Tap to view help information on the battery saver tips.
< Apps >
View and manage your applications.
<Tap & pay>
When NFC is turned on, you can use the tap & pay feature to pay for items just by
touching your phone to a reader at a register. If your device doesn’t have a default app,
you can browse Google Play for other payment apps.
PERSONAL
< Accounts & sync >
Permits applications to synchronize data in the background, whether or not you are

94
actively working in them. Deselecting this setting can save battery power and lower (but
not eliminate) data usage.
< Cloud >
Add a cloud account to quickly and easily use cloud service on LG apps.
< Location >
Turn on location service, your phone determines your approximate location using GPS,
Wi-Fi and mobile networks.
Mode – Set the location mode from High accuracy, Battery saving and Device
sensors only.
< Security >
Encrypt phone – Allows you to encrypt data on the phone for security. You will be
required to enter a PIN or password to decrypt your phone each time you power it on.
Set up SIM card lock – Set up Micro-USIM card lock or change the Micro-USIM card PIN.
Password typing visible – Show the last character of the hidden password as you
type.
Phone administrators – View or deactivate phone administrators.
Unknown sources – Default setting to install non-market applications.
Verify apps – Disallow or warn before installation of apps that may cause harm.
Notification access – Display the notifications.
Storage type – Display the storage type.
Trusted credentials – Display trusted CA certificates.
Install from storage – Choose to install encrypted certificates.
Clear credentials – Remove all certificates.
< Language & input >
Use the Language & input settings to select the language for the text on your phone
and to configure the on-screen keyboard, including words you've added to its dictionary.
< Backup & reset >
Change the settings for managing your settings and data.
Settings

95
Backup my data – Set to backup your settings and application data to the Google
server.
Backup account – Set to backup your account.
Automatic restore – Set to restore your settings and application data when the
applications are reinstalled on your device.
LG Backup service – Backs up all information on the device and restores it in the event of
data loss or replacement.
Factory data reset – Reset your settings to the factory default values and delete all
your data. If you reset the phone this way, you are prompted to re-enter the same
information as when you first started Android.
SYSTEM
< Date & time >
Use Date & time settings to set how dates will be displayed. You can also use these
settings to set your own time and time zone rather than obtaining the current time from
the mobile network.
< Accessibility >
Use the Accessibility settings to configure accessibility plug-ins you have installed on
your phone.
NOTE: Requires additional plug-ins to become selectable.
< PC connection >
Select USB connection method – Set the desired mode: Charge only, Media sync
(MTP), Tethering, LG software or Send images (PTP).
Ask upon connection – Ask in USB connection mode when connecting to a computer.
Help – Help for USB connection.
PC Suite – Checkmark this to use LG PC Suite with your Wi-Fi connection.

96
Please note that Wi-Fi network should be connected to LG PC Suite via a Wi-Fi
connection through WIRELESS & NETWORKS.
Help – Help for LG software.
<Printing>
Allows you to print the content of certain screens (such as web pages displayed in
Chrome) to a printer connected to the same Wi-Fi network as your Android device.
< About phone >
View legal information and check your phone status and software version.
Settings

97
"LG PC Suite" PC software is a program that helps you connect your device to a PC via a USB
cable and Wi-Fi. Once connected, you can use the functions of your device from your PC.
With your "LG PC Suite" PC Software, You Can...
• Manage and play your media contents (music, movie, picture) on your PC.
• Send multimedia contents to your device.
• Synchronizes data (schedules, contacts, bookmarks) in your device and PC.
• Backup the applications in your device.
• Update the softwares in your device.
• Backup and restore the device data.
• Play multimedia contents of your PC from your device.
• Backup and create and edit the memos in your device
NOTE: You can use the Help menu from the application to find out how to
use your "LG PC Suite" PC software.
Installing "LG PC Suite" PC Software
"LG PC Suite" PC software can be downloaded from the webpage of LG.
1 Go to www.lg.com and select a country of your choice.
2 Go to Support > MOBILE SUPPORT > LG Mobile Phones > Select the Model
or
Go to Support > Mobile > Select the Model.
3 Click PC SYNC from MANUALS & DOWNLOAD and click DOWNLOAD to down-
load "LG PC Suite" PC software.
System Requirements for "LG PC Suite" PC software
• OS: Windows XP (Service pack 3) 32bit, Windows Vista, Windows 7, Windows 8
• CPU: 1 GHz or higher processors
• Memory: 512 MB or higher RAMs
• Graphic card: 1024 x 768 resolution, 32 bit color or higher
• HDD: 500 MB or more free hard disk space (More free hard disk space may be
needed depending on the volume of data stored.)
• Required software: LG integrated drivers, Windows Media Player 10 or later
PC software (LG PC Suite)

98
NOTE: LG Integrated USB Driver
LG integrated USB driver is required to connect an LG device and PC and is
installed automatically when you install "LG PC Suite" PC software application.
Synchronizing your Device to a PC
Data from your device and PC can be synchronized easily with "LG PC Suite" PC software for
your convenience. Contacts, schedules and bookmarks can be synchronized.
The procedure is as follows:
1 Connect your device to PC. (Use a USB cable or Wi-Fi connection.)
2 The Select USB connection method will appear, then select LG software.
3 After connection, run the program and select the device section from the category
on the left side of the screen.
4 Click Personal information to select.
5 Select the checkbox of contents to synchronize and click the Sync button.
NOTE: To synchronize your phone with your PC, you need to install LG PC
Suite onto your PC. Please refer to previous pages to install LG PC Suite.
Moving contacts from your Old Device to your New Device
1 Export your contacts as a CSV file from your old device to your PC using a PC sync program.
2 Install "LG PC Suite" on the PC first. Run the program and connect your Android
mobile phone to the PC using a USB cable.
3 On the top menu, select Phone > Import/Export contacts > Export to your
phone.
4 A popup window to select the file type and a file to export will appear.
5 On the popup, click the Select a file and Windows Explorer will appear.
6 Select the contacts file to export in Windows Explorer and click the Open.
7 Click Export.
8 A Field mapping popup to link the contacts in your device and new contacts data will appear.
9 If there is a conflict between the data in your PC contacts and device contacts,
make the necessary selections or modifications in LG PC Suite.
10 Click OK.
PC software (LG PC Suite)

99
Phone software update
LG Mobile phone software update from the Internet
For more information about using this function, please visit
http://www.lg.com/common/index.jsp select your country and language.
This feature allows you to conveniently update the firmware on your phone to a newer
version from the Internet without needing to visit a service center. This feature will only
be available if and when LG makes a newer firmware version available for your device.
Because the mobile phone firmware update requires the user's full attention for the
duration of the update process, please make sure you check all instructions and notes
that appear at each step before proceeding. Please note that removing the USB data
cable during the upgrade may seriously damage your mobile phone.
NOTE: LG reserves the right to make firmware updates available only for
selected models at its own discretion and does not guarantee the availability
of the newer version of the firmware for all handset models.
LG Mobile Phone software update via Over-the-Air (OTA)
This feature allows you to conveniently update your phone's software to a newer
version via OTA, without connecting using a USB data cable. This feature will only be
available if and when LG makes a newer firmware version available for your device.
You should first check the software version on your mobile phone: Settings > About
phone > Update Center > Software update > Check now for update.
Phone software update

100
NOTE: Your personal data from internal phone storage—including
information about your Google account and any other accounts, your system/
application data and settings, any downloaded applications and your DRM
licence—might be lost in the process of updating your phone's software.
Therefore, LG recommends that you backup your personal data before
updating your phone's software. LG does not take responsibility for any loss
of personal data.
NOTE: This feature depends on your network service provider, region and
country.
Phone software update

101
About this user guide
• Before using your device, please carefully read this manual. This will ensure that you
use your phone safely and correctly.
• Some of the images and screenshots provided in this guide may appear differently on
your phone.
• Your content may differ from the final product, or from software supplied by service
providers or carriers, This content may be subject to change without prior notice. For
the latest version of this manual, please visit the LG website at www.lg.com.
• Your phone's applications and their functions may vary by country, region, or
hardware specifications. LG cannot be held liable for any performance issues resulting
from the use of applications developed by providers other than LG.
• LG cannot be held liable for performance or incompatibility issues resulting from
edited registry settings being edited or operating system software being modified. Any
attempt to customize your operating system may cause the device or its applications
to not work as they should.
• Software, audio, wallpaper, images, and other media supplied with your device are
licensed for limited use. If you extract and use these materials for commercial or
other purposes is, you may be infringing copyright laws. As a user, you are fully are
entirely responsible for the illegal use of media.
• Additional charges may be applied for data services, such as messaging, uploading
and downloading, auto-syncing, or using location services. To avoid additional
charges, select a data plan to is suitable for your needs. Contact your service provider
to obtain additional details.
Trademarks
• LG and the LG logo are registered trademarks of LG Electronics.
• All other trademarks and copyrights are the property of their respective owners.
About this user guide

102
DivX HD
ABOUT DIVX VIDEO: DivX
®
is a digital video format created by DivX, LLC, a subsidiary
of Rovi Corporation. This is an official DivX Certified
®
device that plays DivX video. Visit
divx.com for more information and software tools to convert your files into DivX videos.
ABOUT DIVX VIDEO-ON-DEMAND: This DivX Certified
®
device must be registered
in order to play purchased DivX Video-on-Demand (VOD) movies. To obtain your
registration code, locate the DivX VOD section in your device setup menu. Go to vod.
divx.com for more information on how to complete your registration.
DivX Certified
®
to play DivX
®
video up to HD 720p, including premium content.
DivX
®
, DivX Certified
®
and associated logos are trademarks of Rovi Corporation
or its subsidiaries and are used under license.
Dolby Mobile
Manufactured under license from Dolby Laboratories. Dolby and the double-D
symbol are trademarks of Dolby Laboratories.
Notice: Open Source Software
To obtain the corresponding source code under GPL, LGPL, MPL and other
open source licences, please visit http://opensource.lge.com/
All referred licence terms, disclaimers and notices are available for download
with the source code.
About this user guide

103
These accessories are available for use with the your phone. (Items described below
may be optional.)
Travel adaptor Stereo headset
Quick Start Guide Data cable
Micro-USIM
ejection tool
Accessories
NOTE:
• Always use genuine LG accessories.
• Failure to do this may void your warranty.
• Accessories may vary in different regions.

104
Troubleshooting
This chapter lists some problems you might encounter when using your phone. Some
problems require you to call your service provider, but most are easy to fix yourself.
Message Possible causes Possible corrective measures
Micro-USIM
error
There is no
Micro-USIM card
in the phone
or it is inserted
incorrectly.
Make sure that the Micro-USIM card is
correctly inserted.
No network
connection/
Dropped
network
Signal is weak or
you are outside the
carrier network.
Move toward a window or into
an open area. Check the network
operator coverage map.
Operator applied
new services.
Check whether the Micro-USIM card
is more than 6~12 months old. If
so, change your Micro-USIM at your
network provider's nearest branch.
Contact your service provider.
Codes do
not match
To change a
security code,
you will need
to confirm the
new code by
re-entering it.
If you forget the code, contact your
service provider.
The two codes
you have entered
do not match.

105
Message Possible causes Possible corrective measures
No
applications
can be set
Not supported by
service provider
or registration
required.
Contact your service provider.
Calls not
available
Dialling error New network not authorized.
New Micro-USIM
card inserted.
Check for new restrictions.
Pre-paid charge
limit reached.
Contact service provider or reset limit
with PIN2.
Phone
cannot be
switched on
On/Off key
pressed too briefly.
Press the On/Off key for at least two
seconds.
Battery is not
charged.
Charge battery. Check the charging
indicator on the display.

106
Message Possible causes Possible corrective measures
Charging
error
Battery is not
charged.
Charge battery.
Outside
temperature is too
hot or cold.
Make sure phone is charging at a
normal temperature.
Contact problem
Check the charger and its connection
to the phone.
No voltage Plug the charger into a different socket.
Charger defective Replace the charger.
Wrong charger Use only original LG accessories.
Number not
allowed
The Fixed dialling
number function
is on.
Check the Settings menu and turn the
function off.
Impossible
to receive /
send SMS
& photos
Memory full
Delete some messages from your
phone.
Files do not
open
Unsupported file
format
Check the supported file formats.
Troubleshooting

107
Message Possible causes Possible corrective measures
The screen
does not
turn on
when I
receive a
call.
Proximity sensor
problem
If you use a protection tape or case,
make sure it has not covered the area
around the proximity sensor. Make
sure that the area around the proximity
sensor is clean.
No sound Vibration mode
Check the settings status in the sound
menu to make sure you are not in
vibration or silent mode.
Hangs up
or freezes
Intermittent
software problem
Try to perform a software update via
the website.

108
Please check to see if any problems you have encountered with your phone are
described in this section before taking the phone in for service or calling a service
representative.
Category
Sub-
Category
Question Answer
BT
Bluetooth
Devices
What are the
functions available via
Bluetooth?
You can connect a Bluetooth audio
device such as a Stereo/Mono headset
or Car Kit to share pictures, videos,
contacts, etc. via Gallery/Contacts
menu. Also, when the FTP server is
connected to a compatible device,
you can share content stored on the
storage media.
BT
Bluetooth
Headset
If my Bluetooth
headset is connected,
can I listen to my
music through
my 3.5 mm wired
headphones?
When a Bluetooth headset is
connected, all system sounds are
played over the headset. As a result,
you will not be able to listen to music
through your wired headphones.
Data
Contacts
Backup
How can I backup
Contacts?
The Contacts data can be
synchronized between your phone and
Gmail™.
Data
Synchronization
Is it possible to set up
one-way sync with
Gmail?
Only two-way synchronization is
available.
FAQ

109
Category
Sub-
Category
Question Answer
Data
Synchronization
Is it possible to
synchronize all email
folders?
The Inbox is automatically
synchronized. You can view other
folders by Touching the Menu Key
and select Folders to choose a folder.
Google™
Service
Gmail Log-In
Do I have to log into
Gmail whenever I want
to access Gmail?
Once you have logged into Gmail, you
will not need to log into Gmail again.
Google™
Service
Google
Account
Is it possible to filter
emails?
No, email filtering is not supported via
the phone.
Phone
Function
Email
What happens when
I execute another
application while
writing an email?
Your email will automatically be saved
as a draft.
Phone
Function
Ringtone
Is there a file size
limitation for when I
want to use an. MP3
file as a ring tone?
There is no file size limitation.
Phone
Function
Message
Time
My phone does not
display the time of
receipt for messages
older than 24 hrs. How
can I change this?
You will only be able to see the times
for messages received the same day.
Phone
Function
Navigation
Is it possible to install
another navigation
application on my
phone?
Any application that is available at
Android Market™ and is compatible
with the hardware can be installed and
used.

110
Category
Sub-
Category
Question Answer
Phone
Function
Synchronisation
Is it possible to
synchronize my
contacts from all my
email accounts?
Only Gmail and MS Exchange server
(company email server) contacts can
be synchronized.
Phone
Function
Wait and
Pause
Is it possible to save a
contact with Wait and
Pause in the numbers?
If you transferred a contact with the W
& P functions saved into the number,
you will not be able to use those
features. You will need to re-save each
number.
How to save with Wait and Pause:
1. From the Home screen, touch the
Phone icon .
2. Dial the number, then touch the
Menu Key .
3. Touch Add 2-sec pause or Add
wait.
Phone
Function
Security
What are the phone’s
security functions?
You are able to set the phone to
require that an Unlock Pattern be
entered before the phone can be
accessed or used.
FAQ

111
Category
Sub-
Category
Question Answer
Phone
Function
Unlock
Pattern
How do I create the
Unlock Pattern?
1. From the Home screen, touch the
Menu Key .
2. Touch System settings > Lock
screen.
3. Touch Select screen lock >
Pattern. The first time you do this,
a short tutorial about creating an
Unlock Pattern will appear.
4. Set up by drawing your pattern
once, and once again for
confirmation.
Precautions to take when using the
pattern lock.
It is very important to remember the
unlock pattern you set. You will not
be able to access your phone if you
use an incorrect pattern five times.
You have five chances to enter your
unlock pattern, PIN or password. If you
have used all 5 opportunities, you can
try again after 30 seconds. (Or, if you
preset the backup PIN, you can use
the backup PIN code to unlock the
pattern.)

112
Category
Sub-
Category
Question Answer
Phone
Function
Unlock
Pattern
What should I do if
I forget the unlock
pattern and I didn’t
create my Google
account on the
phone?
If you have forgotten your pattern:
If you logged into your Google account
on the phone but failed to enter the
correct pattern 5 times, touch the
forgot pattern button. You are then
required to log in with your Google
account to unlock your phone. If you
have not created a Google account on
the phone or you have forgottenn it,
you will have to perform a hard reset.
Caution: If you perform a factory reset,
all user applications and user data
will be deleted. Please remember to
backup any important data before
performing a factory reset.
Phone
Function
Memory
Will I know when my
memory is full?
Yes, you will receive a notification.
Phone
Function
Language
Support
Is it possible to change
my phone's language?
The phone has multilingual capabilities.
To change the language:
1. From the Home screen, touch the
Menu Key and touch System
settings.
2. Touch Language & input > Select
language.
3. Touch the desired language.
FAQ

113
Category
Sub-
Category
Question Answer
Phone
Function
VPN
How do I set up a
VPN?
VPN access configuration is different
for each company. To configure VPN
access from your phone, you must
obtain the details from your company’s
network administrator.
Phone
Function
Screen time
out
My screen turns off
after only 15 seconds.
How can I change the
amount of time for the
backlight to turn off?
1. From the Home screen, press the
Menu Key .
2. Touch System settings > Display.
3. Under Display settings, touch
Screen timeout.
4. Touch the preferred screen backlight
timeout time.
Phone
Function
Wi-Fi &
mobile
network
When Wi-Fi and
mobile network are
both available, which
service will my phone
use?
When using data, your phone may
default to the Wi-Fi connection (if
Wi-Fi connectivity on your phone is
set to On). However, there will be no
notification when your phone switches
from one to the other.
To know which data connection is
being used, view the mobile network or
Wi-Fi icon at the top of your screen.
Phone
Function
Home
screen
Is it possible to remove
an application from the
Home screen?
Yes. Just touch and hold the icon until
the dustbin icon appears at the top
and center of the screen. Then, without
lifting your finger, drag the icon to the
trash can.

114
Category
Sub-
Category
Question Answer
Phone
Function
Application
I downloaded an
application and it
causes a lot of errors.
How do I remove it?
1. From the Home screen, press the
Menu Key .
2. Touch App settings >
DOWNLOADED.
3. Touch the application, then touch
Uninstall.
Phone
Function
Charger
Is it possible to charge
my phone using a USB
data cable without
installing the necessary
USB driver?
Yes, the phone will be charged by the
USB cable regardless of whether the
necessary drivers are installed or not.
Phone
Function
Alarm
Can I use music files
for my alarm?
Yes. After saving a music file as a
ringtone, you can use it as your alarm.
1. Touch and hold a song in a library
list. In the menu that opens, touch
Set as ringtone.
2. In the alarm clock setting screen,
select the song as a ringtone.
Phone
Function
Alarm
Will my alarm be
audible or will it go off
if the phone is turned
off?
No, this is not supported.
Phone
Function
Alarm
If my ringer volume is
set to Off or Vibrate,
will I hear my alarm?
Your alarm is programmed to be
audible even in these scenarios.
FAQ

115
Category
Sub-
Category
Question Answer
Recovery
Solution
Hard Reset
(Factory
Reset)
How can I perform a
factory reset if I can’t
access the phone’s
setting menu?
If your phone does not restore to its
original condition, use a hard reset
(factory reset) to initialize it.

CARTA DE GARANTÍA
TELEFONÍA MÓVIL
1.- Antes de poner en marcha el producto, lea detenidamente el
contenido de esta tarjeta de garantía. Asimismo, no ponga en
funcionamiento el producto antes de leer de manera detallada el
Manual de usuario.
2.- Guarde durante todo el período de garantía esta tarjeta
debidamente cumplimentada y sellada por el establecimiento
comercializador junto con la factura de compra.
3.- Cuando requiera cualquier servicio de reparación deberá mostrar
esta tarjeta de garantía.
4.- Para cualquier información que requiera sobre nuestros productos
o ante cualquier duda o consulta en relación a los mismos, puede
hacerlo a través de nuestra web o por medio de nuestra línea de
atención al cliente.
ESTAMOS A SU DISPOSICIÓN
Ante cualquier necesidad de asistencia,
puede ponerse en contacto con nosotros
mediante nuestra página Web, chat online,
correo electrónico o nuestro centro de
Atención al Cliente.
www.lg.com
www.lg.com/es/posventa
Atención al cliente
902 500 234

CERTIFICADO DE GARANTÍA
LG ELECTRONICS ESPAÑA S.A.U. (LGEES)
SE COMPROMETE A RESPETAR Y/O HACER CUMPLIR
LAS CONDICIONES DE COBERTURA DE LA PRESENTE GARANTÍA.
REQUISITOS PARA LA VALIDEZ DE LA GARANTÍA
(1) La presente garantía sólo ampara productos oficiales importados o comercializados por LG
dentro de la Unión Europea y para beneficiarse de la misma deberá:
(1.1) En el periodo pre-venta el establecimiento comercializador deberá reflejar el modelo del
dispositivo y número de IMEI o número de Serie (SN) del mismo.
(1.2) En el periodo de garantía será REQUISITO IMPRESCINDIBLE adjuntar, junto a la presente
garantía debidamente sellada por el establecimiento, el original del ticket o factura de
compra que identifique el dispositivo incluyendo modelo del terminal e IMEI del mismo.
(2) Para que la garantía sea válida es IMPRESCINDIBLE que el cliente final o establecimiento
comercializador cumplimente, en el momento de efectuar la adquisición, los datos de todos los
apartados que en la misma se indican.
(3) Los beneficios de la presente garantía sólo serán validos si se utilizan los Servicios Técnicos
autorizados que LG Electronics España, S.A.U. tiene establecidos en su Red de Asistencia
Técnica.
(4) El dispositivo debe ser utilizado de conformidad con las instrucciones que se detallan en el
manual de usuario.
PERIODO DE LA GARANTÍA
(1) La garantía se aplica a todos los dispositivos de Telefonía Móvil comercializados por LG dentro
de la Unión Europea.
El periodo de garantía es el siguiente:
-Dispositivo móvil (terminal): 2 años.
-Accesorios: 2 años.
- Medios o soporte de software (CD–ROM, tarjetas de memoria, USB, etc): 90 días.
(2) La aplicación de la garantía comienza a partir de la fecha de adquisición (fecha de factura)
y será de conformidad con lo establecido en la legislación que se encuentre vigente en el
momento de la fecha de la adquisición (fecha de factura compra).
(3) LG Electronics España, S.A.U. (LGEES) garantiza cualquier pieza o producto reparado por un
periodo de noventa (90) días a partir de su fecha de entrega, o hasta el final de la garantía,
aplicándose aquella cuya duración sea más larga. Eventualmente, en beneficio del propio cliente,
LGEES, solucionará la incidencia en el dispositivo de telefonía móvil sustituyendo el dispositivo
por otro equipo en perfectas condiciones de uso siendo equivalente en prestaciones y fiabilidad
al original, conservando el cliente todos los derechos y coberturas incluidos en la garantía. Todos
aquellos componentes de hardware sustituidos en garantía pasarán a ser propiedad de LGEES.

COBERTURAS DE LA GARANTÍA
NOTA IMPORTANTE
(1) La presente garantía comercial no afecta a los derechos que dispone el cliente final conforme
a las previsiones contenidas en el RDL 1/2007 de 16 de Noviembre de 2007 (BOE 287 de 30
de Noviembre de 2007), frente a la garantía por falta de conformidad del vendedor, que son
independientes y compatibles con la presente garantía.
(2) De acuerdo con lo previsto en el Título V, del RDL 1/2007, el cliente final tendrá derecho a exigir
al vendedor, y/o al productor en los casos determinados en la Ley, la reparación y sustitución del
producto, e incluso, en su caso, la rebaja en el precio o la resolución del contrato si ello no fuere
desproporcionado.
(3) El titular de la garantía disfrutará de los derechos y coberturas que se contienen en el presente
documento.
(4) Para reclamar los derechos y coberturas que se contienen en el presente documento el cliente
final dispondrá de la vía de comunicación con nuestro número de Atención al Cliente y/o por escrito
dirigiéndose a las Oficinas Centrales (Calle Chile, nº 1 28290 Las Rozas de Madrid) o a la Central de
Asistencia Técnica (Parque tecnológico de Paterna, C/Louis Pasteur, 1 Nave 2 C.P. 46980 Paterna –
Valencia), o bien por la vía de la jurisdicción ordinaria.
(5) Durante el tiempo que dure la reparación, no se abonarán los daños y perjuicios por el tiempo
que el aparato esté fuera de servicio.
(6)
Es responsabilidad del cliente guardar una copia de seguridad de los datos contenidos en el terminal
previo a su envío para reparación, realizar un borrado completo de la información contenida en el
dispositivo e inhabilitar todos los usuarios y contraseñas de acceso a sus cuentas en redes sociales y
demás Sites que contengan información confidencial (entidades financieras, correo electrónico, etc..).
En el transcurso del servicio, el contenido de los soportes de almacenamiento del producto podrá ser
borrado, reemplazado o reformateado. En consecuencia, LG Electronics España S.A.U. no garantiza ni
cubre las pérdidas financieras o de otra índole causadas por la pérdida de datos.
(7) LG Electronics España, S.A.U. no se hace responsable de los daños que un dispositivo pueda
causar a elementos externos.
PROTECCIÓN DE DATOS DE CARÁCTER PERSONAL
(1) De conformidad con la Ley Orgánica 15/1999 de 13 de Diciembre, de Protección de Datos de
Carácter Personal, le informamos que los datos personales solicitados, todos ellos obligatorios
para la prestación del servicio de Garantía, serán incorporados a un fichero/s debidamente
inscrito/s en el RGPD cuyo responsable es LG Electronics España S.A.U. con la finalidad de
prestarle el servicio, así como para mantenerle informado de productos o servicios similares.
Usted podrá ejercer sus derechos de acceso, rectificación, cancelación y oposición dirigiéndose
por escrito a la dirección: Calle Chile nº 1, 28029 Las Rozas de Madrid o bien remitiendo un
correo electrónico a la dirección: [email protected], acompañando su solicitud de una copia
de un documento oficial que acredite su identidad e indicando en la misma el derecho que desea
ejercitar.

EXCLUSIONES DE LA GARANTÍA
La garantía de su producto está sujeta a las siguientes exclusiones y
limitaciones:
(1) Incumplimiento de cualquiera de los requisitos citados anteriormente.
(2) Todo componente o accesorio interior o exterior del dispositivo, que no esté especificado e incluido en este
certificado de garantía o no forme parte del producto original.
(3) Puestas en marcha, configuraciones y demostraciones de funcionamiento al usuario.
(4) Si la avería es producida por incendio, inundación, agentes meteorológicos, humedad excesiva o corrosión, golpeo,
aplastamiento o aplicación de voltaje o energía inadecuada o mal conexionado.
(5) Los daños por el mal trato, incluso los de transportes, que deberán reclamarse en presencia del personal de la
compañía de transporte, por lo que conviene inspeccionar los paquetes antes de conformar los albaranes de
entrega correspondientes.
(6) Las averías producidas por rotura física, tales como carcasas, plásticos, pinturas, esmaltes, cristales,
embellecedores y similares.
(7) Los productos cuya avería se deba al mal uso y/o a no atender las instrucciones de funcionamiento y manejo que se
adjuntan con cada aparato.
(8) Por la utilización de accesorios o componentes electrónicos no adecuados.
(9) El uso inadecuado de elementos punzantes sobre las las pantallas táctiles.
(10) Los dispositivos que no llevan identificado número de IMEI y Nº de Serie o que éstos hayan sido alterados o
borrados o no coincidan con el número expresado en el certificado de garantía o factura de compra.
(11) Los problemas inherentes a la unión de IMEI-Número de Abonado para la activación en la Red.
(12) Si el dispositivo es reparado o manipulado por personal no autorizado por LG Electronics España S.A.U.
(13) Las averías producidas por el desgaste normal debido a su uso (incluido el de baterías, lentes de cámaras,
pantallas, auriculares o manos libres externos).
(14) Cuando la avería la produzca un componente o accesorio interno o externo al dispositivo no incluido o
especificado en este certificado de garantía o no forme parte del producto original.
(15) Los fallos de píxel que no excedan de la normativa vigente o la establecida por el fabricante (LG Electronics
España, S.A.U.).
(16) Cualquier tipo de pérdida de información en discos duros, discos en estado sólido o memorias. El cliente final es
responsable de realizar una copia de seguridad de sus datos previa a la cesión del dispositivo al servicio técnico
de conformidad con lo establecido en el punto (6) del apartado “Coberturas de la Garantía”.
(17) Cualquier tipo de soporte físico de información que estuviera en el equipo a la hora de cederlo al servicio oficial
para su reparación.
(18) Los sistemas operativos y/o programas no originales diferentes a los pre-cargados y/o su funcionamiento.
(19) Las actualizaciones o versiones posteriores de software, no homologadas ni soportadas oficialmente por el
fabricante (LG Electronics España, S.A.U.), cualquiera que sea su procedencia.
(20) Los daños y fallos del dispositivo ocasionados por virus u otro tipo de programas maliciosos.
(21) En los consumibles, como las baterías, pilas, etc, el periodo de garantía dependerá de la vida útil de aquéllos,
determinada por los ciclos de carga / descarga y modo de uso, si bien a modo de referencia será de 1 año
aproximadamente.
(22) LG Electronics España S.A.U puede instalar actualizaciones del software de sistema dentro del servicio de
garantía, lo que impedirá que el terminal vuelva a una versión anterior del software del sistema.

RELLENAR TODOS LOS DATOS DEL
CLIENTE Y DEL PRODUCTO EN EL
MOMENTO DE LA COMPRA
NOMBRE Y APELLIDOS:
MODELO: Nº DE IMEI:
OPERADOR DE TELEFONIA:
FECHA DE COMPRA: SELLO DEL ESTABLECIMIENTO /
OPERADOR:
ESTA TARJETA DE GARANTÍA ES
INTRANSFERIBLE Y APLICABLE SOLO AL
COMPRADOR ORIGINAL.
CUMPLIMENTE LOS DATOS REQUERIDOS
Y GUÁRDELA JUNTO CON LA FACTURA DE
COMPRA EN LUGAR SEGURO.
LG Electronics España- Central Asistencia
Técnica
Parque Tecnólogico de Paterna
C/ Louis Pasteur 1, Nave 2
(46980) Paterna (Valencia)

Este equipo puede utilizarse en todos los países europeos.
La banda de 5150 - 5350 MHz se restringe únicamente al uso en
interiores.
Wi-Fi (WLAN)
This equipment may be operated in all European countries.
The 5150 - 5350 MHz band is restricted to indoor use only.
Wi-Fi (WLAN)

Información general
<Centro de información al cliente de LG>
902-500-234
* Asegúrese de que el número es correcto
antes de realizar una llamada.
General Inquiries
<LG Customer Information Center>
902-500-234
* Make sure the number is correct before
making a call.
-
 1
1
-
 2
2
-
 3
3
-
 4
4
-
 5
5
-
 6
6
-
 7
7
-
 8
8
-
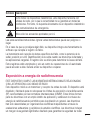 9
9
-
 10
10
-
 11
11
-
 12
12
-
 13
13
-
 14
14
-
 15
15
-
 16
16
-
 17
17
-
 18
18
-
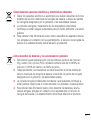 19
19
-
 20
20
-
 21
21
-
 22
22
-
 23
23
-
 24
24
-
 25
25
-
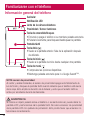 26
26
-
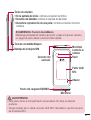 27
27
-
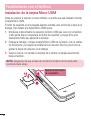 28
28
-
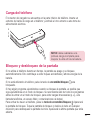 29
29
-
 30
30
-
 31
31
-
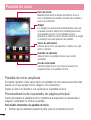 32
32
-
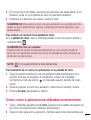 33
33
-
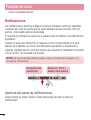 34
34
-
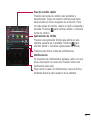 35
35
-
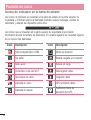 36
36
-
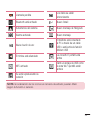 37
37
-
 38
38
-
 39
39
-
 40
40
-
 41
41
-
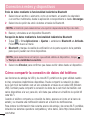 42
42
-
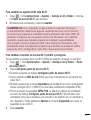 43
43
-
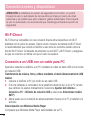 44
44
-
 45
45
-
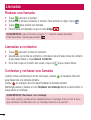 46
46
-
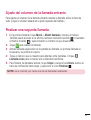 47
47
-
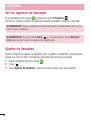 48
48
-
 49
49
-
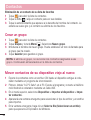 50
50
-
 51
51
-
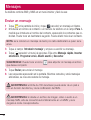 52
52
-
 53
53
-
 54
54
-
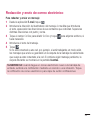 55
55
-
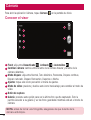 56
56
-
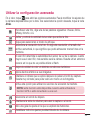 57
57
-
 58
58
-
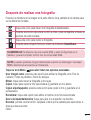 59
59
-
 60
60
-
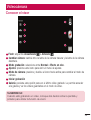 61
61
-
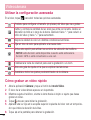 62
62
-
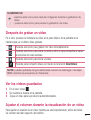 63
63
-
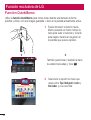 64
64
-
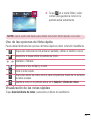 65
65
-
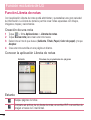 66
66
-
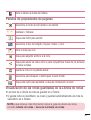 67
67
-
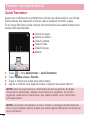 68
68
-
 69
69
-
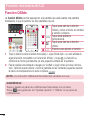 70
70
-
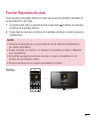 71
71
-
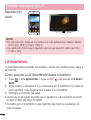 72
72
-
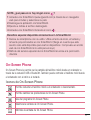 73
73
-
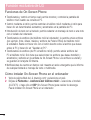 74
74
-
 75
75
-
 76
76
-
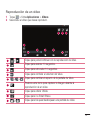 77
77
-
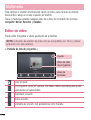 78
78
-
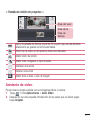 79
79
-
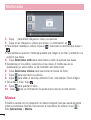 80
80
-
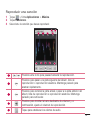 81
81
-
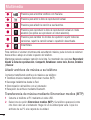 82
82
-
 83
83
-
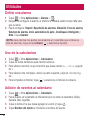 84
84
-
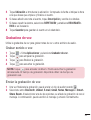 85
85
-
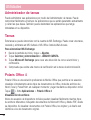 86
86
-
 87
87
-
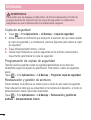 88
88
-
 89
89
-
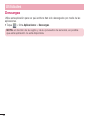 90
90
-
 91
91
-
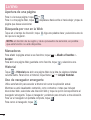 92
92
-
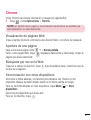 93
93
-
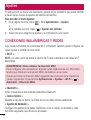 94
94
-
 95
95
-
 96
96
-
 97
97
-
 98
98
-
 99
99
-
 100
100
-
 101
101
-
 102
102
-
 103
103
-
 104
104
-
 105
105
-
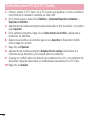 106
106
-
 107
107
-
 108
108
-
 109
109
-
 110
110
-
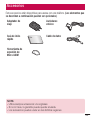 111
111
-
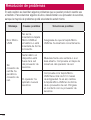 112
112
-
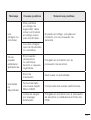 113
113
-
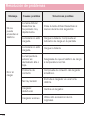 114
114
-
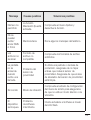 115
115
-
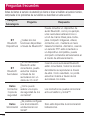 116
116
-
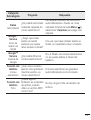 117
117
-
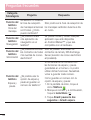 118
118
-
 119
119
-
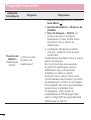 120
120
-
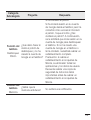 121
121
-
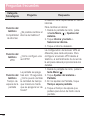 122
122
-
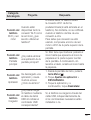 123
123
-
 124
124
-
 125
125
-
 126
126
-
 127
127
-
 128
128
-
 129
129
-
 130
130
-
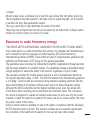 131
131
-
 132
132
-
 133
133
-
 134
134
-
 135
135
-
 136
136
-
 137
137
-
 138
138
-
 139
139
-
 140
140
-
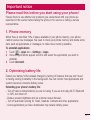 141
141
-
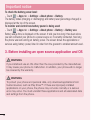 142
142
-
 143
143
-
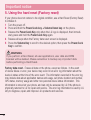 144
144
-
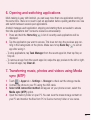 145
145
-
 146
146
-
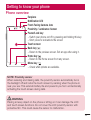 147
147
-
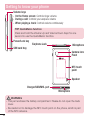 148
148
-
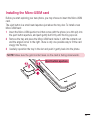 149
149
-
 150
150
-
 151
151
-
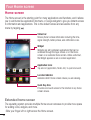 152
152
-
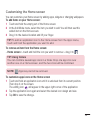 153
153
-
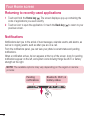 154
154
-
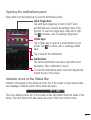 155
155
-
 156
156
-
 157
157
-
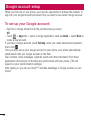 158
158
-
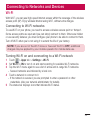 159
159
-
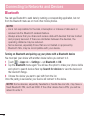 160
160
-
 161
161
-
 162
162
-
 163
163
-
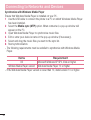 164
164
-
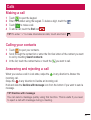 165
165
-
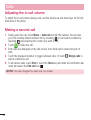 166
166
-
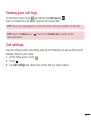 167
167
-
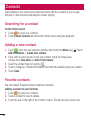 168
168
-
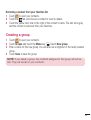 169
169
-
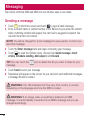 170
170
-
 171
171
-
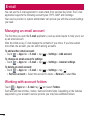 172
172
-
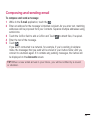 173
173
-
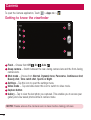 174
174
-
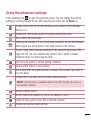 175
175
-
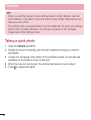 176
176
-
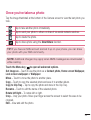 177
177
-
 178
178
-
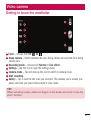 179
179
-
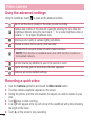 180
180
-
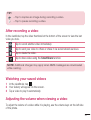 181
181
-
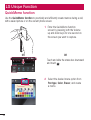 182
182
-
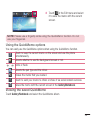 183
183
-
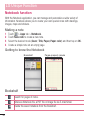 184
184
-
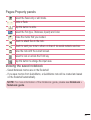 185
185
-
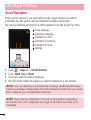 186
186
-
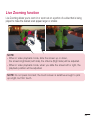 187
187
-
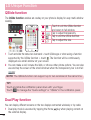 188
188
-
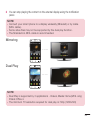 189
189
-
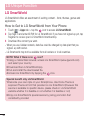 190
190
-
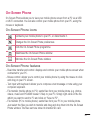 191
191
-
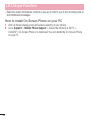 192
192
-
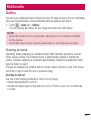 193
193
-
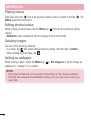 194
194
-
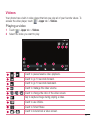 195
195
-
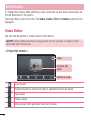 196
196
-
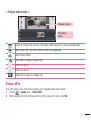 197
197
-
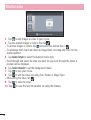 198
198
-
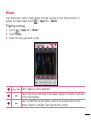 199
199
-
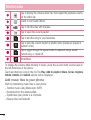 200
200
-
 201
201
-
 202
202
-
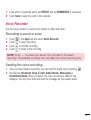 203
203
-
 204
204
-
 205
205
-
 206
206
-
 207
207
-
 208
208
-
 209
209
-
 210
210
-
 211
211
-
 212
212
-
 213
213
-
 214
214
-
 215
215
-
 216
216
-
 217
217
-
 218
218
-
 219
219
-
 220
220
-
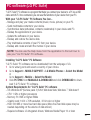 221
221
-
 222
222
-
 223
223
-
 224
224
-
 225
225
-
 226
226
-
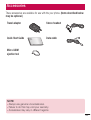 227
227
-
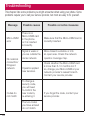 228
228
-
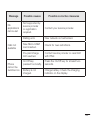 229
229
-
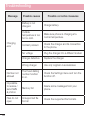 230
230
-
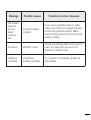 231
231
-
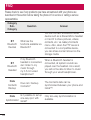 232
232
-
 233
233
-
 234
234
-
 235
235
-
 236
236
-
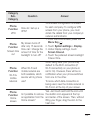 237
237
-
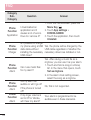 238
238
-
 239
239
-
 240
240
-
 241
241
-
 242
242
-
 243
243
-
 244
244
-
 245
245
-
 246
246


