ATEN CS74M Guía de inicio rápido
- Categoría
- Conmutadores KVM
- Tipo
- Guía de inicio rápido

Front View:
1. Port Selection Switches
2. Port LEDs
The Port LEDs are built into the Port
Selection Switches.
3. Keyboard Port
4. Mouse Port
5. Stand
Rear View:
1. CPU Port Connectors
2. Monitor Port
3. Power Jack
4. Microphone Jack
5. Speaker Jack
Installation
1. Plug your keyboard and mouse into
their ports on the front panel.
2. Plug your monitor, microphone, and
speakers into their ports on the rear
panel.
3. Use the custom KVM cables to
connect the CPU Ports to the
monitor, keyboard and mouse,
Microphone, Speaker ports of the
computers.
4. (Optional) Plug the power adapter
into an AC power source, then plug
the power adapter cable into the
power jack.
5. Turn on the power to the computers.
Operation
Manual Port Selection
Press the appropriate Port Selection
switch on the unit's front panel to give
the KVM focus to its corresponding port.
The Port LED lights to indicate that its
port has the KVM focus.
Hotkey Port Selection
All Hotkey operations begin by invoking
Hotkey Mode (HKM). To invoke HKM:
1. Press and hold down the Num Lock key
2. Press and release the asterisk key or the
minus key
3. Release the Num Lock key:
[Num Lock] + [*] or: [Num Lock] + [-]
Note: The asterisk or minus key must
released within one half second,
otherwise the hotkey invocation is
canceled.
Selecting the Active Port:
1. Invoke HKM
2. Press and release the appropriate Port
ID number (1, 2, 3, or 4)
Auto Scan Mode:
1. Invoke HKM
2. Press and release [A]
Once scanning begins, it continues until
you press [Esc] or [Spacebar] to exit Auto
Scan Mode.
Skip Mode:
1. Invoke HKM
2. Press [Left Arrow] to skip from the
current port to the port that comes
before it (3 to 2; 2 to 1, etc.).
3. ress [Right Arrow] to skip from the
current port to the port that comes
after it (1 to 2; 2 to 3, etc.).
Vue Avant:
1. Boutons de Sélection de Port
2. LEDs de Port
Les LEDs de Port sont incorporées dans
les Boutons de Sélection de Port.
3. Port de Clavier
4. Port de Souris
5. Support
Vue Arrière:
1. Connecteurs de Port CPU
2. Port Moniteur
3. Fiche d’Alimentation
4. Fiche de Microphone
5. Fiche des Haut-Parleurs
Installation
1. Branchez votre clavier et souris dans
leurs ports sur le panneau avant.
2. Branchez votre moniteur, microphone et
haut-parleurs dans leurs ports respectifs
sur le panneau arrière.
3. Utilisez les câbles KVM perso pour
connecter les Ports du CPU sur les
ports de moniteur, clavier et souris des
ordinateurs. Utilisez les câbles KVM
perso pour connecter les Ports du CPU
sur les ports de moniteur, clavier et
souris des ordinateurs. Branchez les
câbles du microphone et des haut-
parleurs dans les fiches de
microphone et haut-parleurs du CPU.
Assurez-vous que toutes les prises
soient bien identiques aux socles des
Ports du CPU (tout dans Port 1, tout
dans Port 2, etc.)
4. (Optionnel) Branchez l’adaptateur dans
une source électrique CA, puis branchez
le câble de l’adaptateur dans la fiche
d’alimentation.
5. Allumez tous les ordinateurs.
Opération
Sélection de Port Manuelle
Pressez le bouton de Sélection de Port
approprié sur le panneau avant de l’unité
pour donner le focus KVM à son port
correspondant. La LED de Port s’allume
pour indiquer que son port possède bien le
focus KVM.
Sélection de Port par Hotkey
Toutes les opérations par Hotkey
commencent en appelant le Mode Hotkey
(HKM). Pour appeler le Mode HK:
1. Pressez et maintenez la touche Num
Lock
2. Pressez et relâchez la touche
d’astérisque ou la touche Moins.
3. Relâchez la touche Num Lock:
[Num Lock] + [*] ou: [Num Lock] + [-]
Note: La touche Astérisque ou Moins doit
être relâchée en moins d’une demie
seconde, sinon l’appel d’hotkey sera
annulé.
Sélection du Port Actif:
1. Appelez le Mode HK.
2. Pressez et relâchez le numéro d’ID de
Port approprié (1, 2, 3 ou 4)
Mode Auto Scan:
1. Appelez le Mode HK.
2. Pressez et relâchez [A]
Une fois que le scanning commence, il
continuera jusqu’à ce que vous pressiez
[Esc] ou [Barre d’Espace] pour quitter le
Mode Auto Scan.
Mode Passer:
1. Appelez le Mode HK.
2. Pressez [Flêche de Gauche] pour passer
du port en cours au port précédent (3
vers 2; 2 vers 1, etc.).
3. Pressez [Flêche de Droite] pour passer du
port en cours au port suivant (1 vers 2; 2
vers 3, etc.)
Ansicht von vorne:
1. Port-Auswahlschalter
2. Port-LEDs
Die Port-LEDs sind in den Port-
Auswahlschaltern integriert.
3. Tastatur-Anschluss
4. Maus-Anschluss
5. Fuß
Ansicht von hinten:
1. CPU-Portanschlüsse
2. Monitor-Anschluss
3. Netzanschlussbuchse
4. Mikrofonbuchse
5. Lautsprecherbuchse
Installation
1. Schließen Sie Tastatur und Maus an die
entsprechenden Anschlüsse an, die sich
an der Vorderseite des Geräts befinden.
2. Schließen Sie Monitor, Mikrofon und
Lautsprecher an die entsprechenden
Anschlüsse an der Rückseite des Geräts
an.
3. Verbinden Sie mit den KVM-Kabeln die
CPU-Ports mit den Monitor-, Tastatur-
und Mausanschlüssen der Computer.
Verbinden Sie mit den KVM-Kabeln die
CPU-Ports mit den Monitor-, Tastatur-
und Mausanschlüssen der Computer.
Schließen Sie die dazugehörigen
Mikrofon- und Lautsprecher-Kabel an
die Mikrofon- und
Lautsprecherbuchsen des CPU-Ports
an. Achten Sie darauf, dass sich alle
Stecker in den Sockeln desselben CPU-
Ports befinden (alle in Port 1, alle in
Port 2, etc.).
4. Schließen Sie den Netzadapter an eine
Netzsteckdose (Wechselstrom) an,
stecken Sie das andere Ende des
Netzadapters in die
Netzanschlussbuchse (optional) .
5. Schalten Sie die Computer ein.
Betrieb
Manuelle Port-Auswahl
Drücken Sie auf den entsprechenden Port-
Auswahlschalter an der Vorderseite des
Geräts, um dem dazugehörigen Port den
KVM-Fokus zuzuweisen. Der KVM-Fokus
wird durch eine leuchtende Port-LED
angezeigt.
Auswahl des Ports mit Hotkeys
Alle Hotkey-Funktionen werden durch
Aufrufen des Hotkey-Modus (HKM)
gestartet. Um den HKM zu starten:
1. Halten Sie die Taste Numfl gedrückt.
2. Drücken Sie kurz auf die Stern- (*) oder
Minus-Taste (-).
3. Lösen Sie die Taste Numfl:
[Numfl] + [*] oder: [Numfl] + [-]
Hinweis: Die Stern- oder Minus-Taste muss
innerhalb einer halben Sekunde wieder
losgelassen werden, da sonst das Aufrufen
des HKM abgebrochen wird.
Auswahl des aktiven Ports:
1. Starten Sie den HKM.
2. Drücken Sie kurz auf die gewünschte ID-
Nummer (1, 2, 3 oder 4) des Ports.
Auto-Scan-Modus:
1. Rufen Sie den HKM auf.
2. Drücken Sie kurz auf die Taste [A].
Wenn der Scan-Vorgang läuft, können Sie
den Auto-Scan-Modus beenden, indem Sie
auf [Esc] oder auf die [Leertaste] drücken.
Wechsel-Modus:
1. Rufen Sie den HKM auf.
2. Drücken Sie auf die [Pfeil-nach-links]-
Taste , um vom aktuellen Port zum
nächsten davorliegenden Port zu
wechseln (3 nach 2, 2 nach 1, etc.).
3. Drücken Sie auf die [Pfeil-nach-rechts]-
Taste, um vom aktuellen Port zum
nächsten nachfolgenden Port zu
wechseln (1 nach 2, 2 nach 3, etc.).
Vista fronte
1. Switch di selezione delle porte
2. LED delle porte
I LED delle porte sono incorporati negli
interruttori di selezione delle porte.
1. Porta tastiera
2. Porta mouse
3. Supporto
Vista retro
1. Connettori porte CPU
2. Porta monitor
3. Presa di alimentazione
4. Presa microfono
5. Presa casse
Installazione
1. Inserire tastiera e mouse nelle porte sul
pannello anteriore.
2. Inserire il monitor, microfono e casse
nelle porte sul pannello posteriore.
3. Usare i cavi custom KVM per collegare
le porte CPU alle porte monitor,
tastiera e mouse dei computer. Usare i
cavi custom KVM per collegare le porte
CPU alle porte monitor, tastiera e
mouse dei computer. Collegare il
microfono in dotazione ed i cavi delle
casse alle prese microfono e casse
della porta CPU. Assicurarsi che tutte
le spine siano nelle stesse prese della
porta CPU (tutte nella Porta 1, tutte
nella Porta 2 ecc.)
4. (Opzionale) Inserire l'adattatore di
corrente in una presa AC, poi inserire il
cavo dell'adattatore di corrente nella
presa di alimentazione.
5. Accendere i computer.
Funzionamento
Selezione manuale della porta
Premete l'interruttore adatto di selezione
della porta sul pannello anteriore dell'unità
per focalizzare il KVM sulla porta
corrispondente. Il LED della Porta si
illumina ad indicare che la relativa porta ha
il fuoco del KVM.
Selezione porta con hotkey
Tutte le operazioni Hotkey cominciano
richiamando il modo Hotkey (HKM). Per
richiamare HKM:
1. Tenere premuto il tasto Bloc Num
2. Premere e lasciare il tasto asterisco o
meno
3. Lasciare il tasto Bloc Num:
[Bloc Num] + [*] o: [Bloc Num] + [-]
Nota: Il tasto asterisco o meno deve essere
lasciato entro mezzo secondo, altrimenti il
richiamo di Hotkey è annullato.
Selezione della porta attiva:
1. Richiamare HKM
2. Premere e lasciare il numero corretto
della Porta (1, 2, 3, o 4)
Modo Autoscan:
1. Richiamare HKM
2. Premere e lasciare il tasto A
Una volta cominciata la scansione,
continua fin quando si preme [Esc] o [Barra
spazio] per uscire dal modo Autoscan.
Modo Skip:
1. Richiamare HKM
2. Premere la [Freccia sinistra] per saltare
dalla porta attuale alla porta precedente
(da 3 a 2; da 2 a 1 ecc.).
3. Premere la [Freccia destra] per saltare
dalla porta attuale alla porta successiva
(da 1 a 2; da 2 a 3, etc.).
MiniTower 4 Port KVM Switch CS-74M Quick start Guide
Guide de Démarrage Rapide du CS-74M Commutateur KVM 4 Ports Mini Tower
Mini Tower KVM-Schalter (4 Ports) CS-74M Kurzanleitung
Guida di avvio rapido KVM Switch CS-74M Mini Tower 4 porte
Vista Fronta:
1. Interruptores de Selección de Puertos
2. LEDs de Puerto
Los LEDs de puerto vienen incorporados
en los interruptores de selección de
puertos.
3. Puerto de teclado
4. Puerto de Mouse
5. Estante
Vista Trasera:
1. Conectores de Puerto CPU
2. Puerto de Monitor
3. Poartador de electricidad
4. Puertoamicrófonos
5. Puertoaaltavoces
Instalación
1. Enchufa su teclado y mouse en los
puertos del panel frontal.
2. Enchufa su monitor, micrófono y
altavoces en los puertos del panel
trasero.
3. Usa los cables KVM hechos a medida
para conectar los Puertos CPU en los
puertos del monitor, teclado y mouse
de las computadoras. Usa los cables
KVM hechos a medida para conectar
los Puertos CPU en los puertos del
monitor, teclado y mouse de las
computadoras. Enchufa el micrófono
acompañante y los cables del altavoz
en el micrófono del Puerto CPU y los
portaaltavoces. Esté seguro de que
todos los enchufes están en los
mismos soquetes de Puerto CPU
(todos en Puerto 1, todos en Puerto 2,
etc.).
4. (Opcional) Enchufa el adaptador
eléctrico en una fuente de electricidad
AC, para luego enchufar el cable
adaptador de electricidad en el portador
de electricidad.
5. Prende las computadoras.
Operación
Manual de Selección de Puerto
Oprime el apropiado interruptor de
Selección de Puerto del panel frontal del
aparato para enfocar KVM al
correspondiente puerto. El LED de Puerto
LED se prende para indicar que el puerto
tiene el KVM enfocado.
Selección de Puerto Hotkey
Toda operación de Hotkey empieza con el
modo de Hotkey (HKM). Para HKM:
1. Oprime y detiene la tecla Num Lock.
2. Oprime y suelta la tecla de asterisco o la
tecla menos.
3. Suelta la tecla Num Lock:
[Num Lock] + [*] o: [Num Lock] + [-]
Nota: La tecla de asterisco o menos debe
ser soltada dentro de un segundo y medio,
de otra manera la acción de hotkey
quedaría cancelada.
Seleccionando el Puerto Activo:
1. Entrar en HKM
2. Oprime y suelta el apropiado número de
ID de Puerto (1, 2, 3, o 4.)
Modo de Escandir Automático:
1. Entrar en HKM
2. Oprime y suelta [A]
Una vez Ud. empieza a escandir, continúa
hasta que Ud. oprime [Esc] o [Spacebar]
para salir del Modo de Escandir
Automático.
Modo de Salto:
1. Entrar en HKM
2. Oprime [Flecha Izquierda] para saltar del
puerto corriente al que viene antes de
ello (3 a 2; 2 a 1, etc.).
3. Oprime [Flecha Derecha] para saltar del
puerto corriente al puerto que viene
después de ello (1 a 2; 2 a 3, etc.).
Guía de Inicio Rápido para Mini Tower 4 puerto KVM con interruptor CS-74M
© Copyright ATEN® 2003. All rights reserved. ATEN, MiniTower are
trademarks or registered trademarks of Aten International Co., Ltd. All
brand names and trademarks are the registered property of their
respective owners.
Manual Part No. PAPE-1223-G00
Printed in Taiwan 07/2003
4 M ini Tower CS-74M
4 M ini Tower CS-74M
1.
2.
3.
4.
5.
1.
2.
3.
4.
5.
1.
2. ,
3. KVM Cable SCSI20
.
.
(
1 2
)
4. ,
5. ,
, LED
, LED
KVM
1.
2. (1, 2, 3,
4)
1.
2. [A]
,
[Spacebar] [Esc]
1.
2.
(32,
21)
3.
(12
)
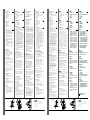
Diagram A. Diagram B.
4
2
1
5
(Front View)
(Rear View)
3
2
5
4
1 1
3
© Copyright ATEN® 2003. All rights reserved. ATEN, MiniTower are
trademarks or registered trademarks of Aten International Co., Ltd. All
brand names and trademarks are the registered property of their
respective owners.
Manual Part No. PAPE-1223-G00
Printed in Taiwan 07/2003
Diagram A. Diagram B.
4
2
1
5
(Front View)
(Rear View)
3
2
5
4
1 1
3
0800-289663
02-8692 6959
Transcripción de documentos
Installation (B) 1. Plug your keyboard and mouse into their ports on the front panel. 2. Plug your monitor, microphone, and speakers into their ports on the rear panel. 3. Use the custom KVM cables to connect the CPU Ports to the monitor, keyboard and mouse, Microphone, Speaker ports of the computers. 4. (Optional) Plug the power adapter into an AC power source, then plug the power adapter cable into the power jack. 5. Turn on the power to the computers. Operation Manual Port Selection Press the appropriate Port Selection switch on the unit's front panel to give the KVM focus to its corresponding port. The Port LED lights to indicate that its port has the KVM focus. 1. Connecteurs de Port CPU 2. Port Moniteur 3. Fiche d’Alimentation 4. Fiche de Microphone 5. Fiche des Haut-Parleurs Installation (B) 1. Branchez votre clavier et souris dans leurs ports sur le panneau avant. 2. Branchez votre moniteur, microphone et haut-parleurs dans leurs ports respectifs sur le panneau arrière. 3. Utilisez les câbles KVM perso pour connecter les Ports du CPU sur les ports de moniteur, clavier et souris des ordinateurs. Utilisez les câbles KVM perso pour connecter les Ports du CPU sur les ports de moniteur, clavier et souris des ordinateurs. Branchez les câbles du microphone et des hautparleurs dans les fiches de microphone et haut-parleurs du CPU. Assurez-vous que toutes les prises soient bien identiques aux socles des Ports du CPU (tout dans Port 1, tout dans Port 2, etc.) 4. (Optionnel) Branchez l’adaptateur dans une source électrique CA, puis branchez le câble de l’adaptateur dans la fiche d’alimentation. 5. Allumez tous les ordinateurs. Opération Sélection de Port Manuelle Pressez le bouton de Sélection de Port approprié sur le panneau avant de l’unité pour donner le focus KVM à son port correspondant. La LED de Port s’allume pour indiquer que son port possède bien le focus KVM. Hotkey Port Selection All Hotkey operations begin by invoking Hotkey Mode (HKM). To invoke HKM: Sélection de Port par Hotkey Toutes les opérations par Hotkey commencent en appelant le Mode Hotkey (HKM). Pour appeler le Mode HK: 1. Pressez et maintenez la touche Num Lock 2. Pressez et relâchez la touche d’astérisque ou la touche Moins. 3. Relâchez la touche Num Lock: 1. Press and hold down the Num Lock key 2. Press and release the asterisk key or the minus key 3. Release the Num Lock key: [Num Lock] + [*] or: [Num Lock] + [-] Note: The asterisk or minus key must released within one half second, otherwise the hotkey invocation is canceled. Selecting the Active Port: 1. Invoke HKM 2. Press and release the appropriate Port ID number (1, 2, 3, or 4) 1. CPU-Portanschlüsse 2. Monitor-Anschluss 3. Netzanschlussbuchse 4. Mikrofonbuchse 5. Lautsprecherbuchse Installation 1. Schließen Sie Tastatur und Maus an die entsprechenden Anschlüsse an, die sich an der Vorderseite des Geräts befinden. 2. Schließen Sie Monitor, Mikrofon und Lautsprecher an die entsprechenden Anschlüsse an der Rückseite des Geräts an. 3. Verbinden Sie mit den KVM-Kabeln die CPU-Ports mit den Monitor-, Tastaturund Mausanschlüssen der Computer. Verbinden Sie mit den KVM-Kabeln die CPU-Ports mit den Monitor-, Tastaturund Mausanschlüssen der Computer. Schließen Sie die dazugehörigen Mikrofon- und Lautsprecher-Kabel an die Mikrofon- und Lautsprecherbuchsen des CPU-Ports an. Achten Sie darauf, dass sich alle Stecker in den Sockeln desselben CPUPorts befinden (alle in Port 1, alle in Port 2, etc.). 4. Schließen Sie den Netzadapter an eine Netzsteckdose (Wechselstrom) an, stecken Sie das andere Ende des Netzadapters in die Netzanschlussbuchse (optional) . 5. Schalten Sie die Computer ein. Betrieb Manuelle Port-Auswahl Drücken Sie auf den entsprechenden PortAuswahlschalter an der Vorderseite des Geräts, um dem dazugehörigen Port den KVM-Fokus zuzuweisen. Der KVM-Fokus wird durch eine leuchtende Port-LED angezeigt. Auswahl des Ports mit Hotkeys Alle Hotkey-Funktionen werden durch Aufrufen des Hotkey-Modus (HKM) gestartet. Um den HKM zu starten: 1. Halten Sie die Taste Numfl gedrückt. 2. Drücken Sie kurz auf die Stern- (*) oder Minus-Taste (-). 3. Lösen Sie die Taste Numfl: [Numfl] + [*] oder: [Numfl] + [-] Note: La touche Astérisque ou Moins doit être relâchée en moins d’une demie seconde, sinon l’appel d’hotkey sera annulé. Hinweis: Die Stern- oder Minus-Taste muss innerhalb einer halben Sekunde wieder losgelassen werden, da sonst das Aufrufen des HKM abgebrochen wird. Mode Auto Scan: 1. Appelez le Mode HK. 2. Pressez et relâchez [A] Une fois que le scanning commence, il continuera jusqu’à ce que vous pressiez [Esc] ou [Barre d’Espace] pour quitter le Mode Auto Scan. Skip Mode: 1. Invoke HKM 2. Press [Left Arrow] to skip from the current port to the port that comes before it (3 to 2; 2 to 1, etc.). 3. ress [Right Arrow] to skip from the current port to the port that comes after it (1 to 2; 2 to 3, etc.). Ansicht von hinten: [Num Lock] + [*] ou: [Num Lock] + [-] Sélection du Port Actif: 1. Appelez le Mode HK. 2. Pressez et relâchez le numéro d’ID de Port approprié (1, 2, 3 ou 4) Auto Scan Mode: 1. Invoke HKM 2. Press and release [A] Once scanning begins, it continues until you press [Esc] or [Spacebar] to exit Auto Scan Mode. Diagram A. (A) Mode Passer: 1. Appelez le Mode HK. 2. Pressez [Flêche de Gauche] pour passer du port en cours au port précédent (3 vers 2; 2 vers 1, etc.). 3. Pressez [Flêche de Droite] pour passer du port en cours au port suivant (1 vers 2; 2 vers 3, etc.) Auswahl des aktiven Ports: 1. Starten Sie den HKM. 2. Drücken Sie kurz auf die gewünschte IDNummer (1, 2, 3 oder 4) des Ports. Auto-Scan-Modus: 1. Rufen Sie den HKM auf. 2. Drücken Sie kurz auf die Taste [A]. Wenn der Scan-Vorgang läuft, können Sie den Auto-Scan-Modus beenden, indem Sie auf [Esc] oder auf die [Leertaste] drücken. Wechsel-Modus: 1. Rufen Sie den HKM auf. 2. Drücken Sie auf die [Pfeil-nach-links]Taste , um vom aktuellen Port zum nächsten davorliegenden Port zu wechseln (3 nach 2, 2 nach 1, etc.). 3. Drücken Sie auf die [Pfeil-nach-rechts]Taste, um vom aktuellen Port zum nächsten nachfolgenden Port zu wechseln (1 nach 2, 2 nach 3, etc.). Vista fronte Vista retro Installazione (B) 1. Inserire tastiera e mouse nelle porte sul pannello anteriore. 2. Inserire il monitor, microfono e casse nelle porte sul pannello posteriore. 3. Usare i cavi custom KVM per collegare le porte CPU alle porte monitor, tastiera e mouse dei computer. Usare i cavi custom KVM per collegare le porte CPU alle porte monitor, tastiera e mouse dei computer. Collegare il microfono in dotazione ed i cavi delle casse alle prese microfono e casse della porta CPU. Assicurarsi che tutte le spine siano nelle stesse prese della porta CPU (tutte nella Porta 1, tutte nella Porta 2 ecc.) 4. (Opzionale) Inserire l'adattatore di corrente in una presa AC, poi inserire il cavo dell'adattatore di corrente nella presa di alimentazione. 5. Accendere i computer. Funzionamento Selezione manuale della porta Premete l'interruttore adatto di selezione della porta sul pannello anteriore dell'unità per focalizzare il KVM sulla porta corrispondente. Il LED della Porta si illumina ad indicare che la relativa porta ha il fuoco del KVM. Selezione porta con hotkey Tutte le operazioni Hotkey cominciano richiamando il modo Hotkey (HKM). Per richiamare HKM: 1. Tenere premuto il tasto Bloc Num 2. Premere e lasciare il tasto asterisco o meno 3. Lasciare il tasto Bloc Num: [Bloc Num] + [*] o: [Bloc Num] + [-] Nota: Il tasto asterisco o meno deve essere lasciato entro mezzo secondo, altrimenti il richiamo di Hotkey è annullato. Selezione della porta attiva: 1. Richiamare HKM 2. Premere e lasciare il numero corretto della Porta (1, 2, 3, o 4) Modo Autoscan: 1. Richiamare HKM 2. Premere e lasciare il tasto A Una volta cominciata la scansione, continua fin quando si preme [Esc] o [Barra spazio] per uscire dal modo Autoscan. Modo Skip: 1. Richiamare HKM 2. Premere la [Freccia sinistra] per saltare dalla porta attuale alla porta precedente (da 3 a 2; da 2 a 1 ecc.). 3. Premere la [Freccia destra] per saltare dalla porta attuale alla porta successiva (da 1 a 2; da 2 a 3, etc.). Vista Fronta: (A) 1. Interruptores de Selección de Puertos 2. LEDs de Puerto Los LEDs de puerto vienen incorporados en los interruptores de selección de puertos. 3. Puerto de teclado 4. Puerto de Mouse 5. Estante Vista Trasera: 1. 2. 3. 4. 5. 1 © Copyright ATEN® 2003. All rights reserved. ATEN, MiniTower are 1 trademarks or registered trademarks of Aten International Co., Ltd. All (A) CPUポートコネクタ モニターポート 電源ジャック マイクロフォンジャック スピーカージャック インストール (B) (B) 1. ご使用のキーボードとマウスをフロントパ ネルにあるそれぞれ対応するポートに差し 込んでください。 2. モニター、マイクロフォン、スピーカーを リアパネルにあるそれぞれ対応するポート に差し込んでください。 3. カスタムKVMケーブルを使用してCPUポ ートとコンピューターのモニター、キーボ ード、マウスポートを接続してください。 また、このケーブルについているマイクロ フォンとスピーカーケーブルをCPUポート のマイクロフォンとスピーカージャックに 差し込んでください。必ず全てのプラグが 同じCPUポートソケット(全てポート1、 全てポート2・・・等)に差し込まれてい ることを確認してください。 4. (オプション) ACアダプタを電源コンセン トに差込こんでから、アダプタケーブルを スイッチの電源ジャックに差し込んでくだ さい。 5. コンピューターの電源を入れてください。 1. Enchufa su teclado y mouse en los puertos del panel frontal. 2. Enchufa su monitor, micrófono y altavoces en los puertos del panel trasero. 3. Usa los cables KVM hechos a medida para conectar los Puertos CPU en los puertos del monitor, teclado y mouse de las computadoras. Usa los cables KVM hechos a medida para conectar los Puertos CPU en los puertos del monitor, teclado y mouse de las computadoras. Enchufa el micrófono acompañante y los cables del altavoz en el micrófono del Puerto CPU y los portaaltavoces. Esté seguro de que todos los enchufes están en los mismos soquetes de Puerto CPU (todos en Puerto 1, todos en Puerto 2, etc.). 4. (Opcional) Enchufa el adaptador eléctrico en una fuente de electricidad AC, para luego enchufar el cable adaptador de electricidad en el portador de electricidad. 5. Prende las computadoras. 操作方法 手動によるポートの選択 ユニットのフロントパネルにあるポートセレ クトスイッチを押して、KVMのフォーカスを 対応するポートへと切替えてください。ポー トLEDが点灯してKVMフォーカスがあたって いることを表示します。 Operación Manual de Selección de Puerto Oprime el apropiado interruptor de Selección de Puerto del panel frontal del aparato para enfocar KVM al correspondiente puerto. El LED de Puerto LED se prende para indicar que el puerto tiene el KVM enfocado. ホットキーによるポートの選択 全てのホットキー操作はまずホットキーモー ドを起動することからはじまります。ホット キーモードを起動するには: 1. Num Lockキーを押したまま 2. アスタリスクキーまたはマイナスキーを押 して放します。 3. 最後にNum Lockキーを放します。 Selección de Puerto Hotkey Toda operación de Hotkey empieza con el modo de Hotkey (HKM). Para HKM: 1. Oprime y detiene la tecla Num Lock. 2. Oprime y suelta la tecla de asterisco o la tecla menos. 3. Suelta la tecla Num Lock: [Num Lock] + [*] または [Num Lock] + [-] [Num Lock] + [*] o: [Num Lock] + [-] 注意:アスタリスクまたはマイナスキーは1.5 秒以内に放してください。さもなければ、ホ ットキー操作が無効となってしまいます。 Nota: La tecla de asterisco o menos debe ser soltada dentro de un segundo y medio, de otra manera la acción de hotkey quedaría cancelada. アクティブポートの選択 1. ホットキーモードを起動します。 2. 対応するポートID番号(1,2,3または4)を押 して放します。 Seleccionando el Puerto Activo: 1. Entrar en HKM 2. Oprime y suelta el apropiado número de ID de Puerto (1, 2, 3, o 4.) 1. ホットキーモードを起動します。 2. [A]を押して放します。 オートスキャンモードが起動すると、[Esc] キーまたはスペースバーを押してオートスキ ャンモードを解除するまでそれは継続されま す。 1. Entrar en HKM 2. Oprime y suelta [A] Una vez Ud. empieza a escandir, continúa hasta que Ud. oprime [Esc] o [Spacebar] para salir del Modo de Escandir Automático. スキップモード 1. ホットキーモードを起動します。 2. 左矢印キーを押すと現在のポートから前の ポートに切り替わります。(3から2、2 から1・・・等) 3. 右矢印キーを押すと現在のポートから次の ポートに切り替わります。(1から2、2 から3・・・等) Modo de Salto: 1. Entrar en HKM 2. Oprime [Flecha Izquierda] para saltar del puerto corriente al que viene antes de ello (3 a 2; 2 a 1, etc.). 3. Oprime [Flecha Derecha] para saltar del puerto corriente al puerto que viene después de ello (1 a 2; 2 a 3, etc.). respective owners. 5 3 4 4 1 1. 2. 3. 4. 5. (A) 電腦連接口 電腦屏幕連接口 電源連接口 麥克風連接口 喇叭連接口 安裝 (B) 1. 請將你的鼠標、鍵盤、插入電子切 換器前方面版上的主控端連接口 2. 將你的屏幕, 麥克風和喇叭插入電子 切換器後方的主控端連接口 3. 將特製的KVM Cable 的 SCSI20連 接頭插至切換器中沒有被佔用的電 腦連接口. 並將另一頭之(鍵盤、鼠 標、屏幕、)麥克風、喇叭的連接 頭插至電腦端對應的連接口. 請注意 麥克風和喇叭的連接線必須要插在 同一組電腦連接口 (例如 全部都在第 1 口 或者是全部都在第2口) 4. 如您欲使用外接電源, 請將電源轉換 器接頭插至切換器的電源連接口 5. 開啟電腦電源, 並開始操作使用 2. 連接埠的顯示燈內建於連接埠選擇切換 鍵 3. 鍵盤連接埠 4. 滑鼠連接埠 5. 腳座 後視圖 2. 電腦螢幕連接埠 3. 電源連接埠 4. 麥克風連接埠 5. 喇叭連接埠 安裝 (B) 1. 請將你的滑鼠、鍵盤、插入電子切換器 前方面版上的主控端連接埠 2. 將你的螢幕, 麥克風和喇叭插入電子切 換器後方的主控端連接埠 3. 將特製的KVM Cable 的 SCSI20連接頭 插至切換器中沒有被佔用的電腦連接埠 . 並將另一頭之(鍵盤、滑鼠、螢幕、 )麥克風、喇叭的連接頭插至電腦端對 應的連接埠. 請注意麥克風和喇叭的連 接線必須要插在同一組電腦連接埠 (例 如 全部都在第1 埠 或者是全部都在第2 埠) 4. 如您欲使用外接電源, 請將電源轉換器 接頭插至切換器的電源連接埠 5. 開啟電腦電源, 並開始操作使用 操作 操作 手動切換選擇 以切換器前方面版上的任何一按鈕來選 擇所欲連接的任一電腦, 當LED燈亮 手動切換選擇 熱鍵選擇 熱鍵選擇 啟動熱鍵模式 以切換器前方面版上的任何一按鈕來選 擇所欲連接的任一電腦, 當LED燈亮起 顯示對應連接的電腦已開機或是已被 KVM選擇 啟動熱鍵模式 以切換器前方面版上的任何一按鈕來選擇 所欲連接的任一電腦, 當LED燈亮 以切換器前方面版上的任何一按鈕來選擇 所欲連接的任一電腦, 當LED燈亮起顯示 對應連接的電腦已開機或是已被KVM選擇 選擇任一電腦 選擇任一電腦 1. 啟動熱鍵模式 2. 按下欲切換的電腦埠號碼如 (1, 2, 3, 或 4) 1. 啟動熱鍵模式 2. 按下欲切換的電腦埠號碼如 (1, 2, 3, 或 4) 自動掃描模式 自動掃描模式 1. 啟動熱鍵模式 2. 壓住並釋放 [A] 在執行自動掃描模式下,必須按下鍵盤 上的[Spacebar]鍵 或 [Esc]鍵才能跳出 自動掃描模式 1. 啟動熱鍵模式 2. 壓住並釋放 [A] 在執行自動掃描模式下,必須按下鍵盤上 的[Spacebar]鍵 或 [Esc]鍵才能跳出自動 掃描模式 切換模式 1. 啟動熱鍵模式 2. 按下鍵盤上的左箭頭鍵以切換至前 一台電腦接口 (如第3電腦接口切換 到第2電腦接口, 如第2電腦接口切換 到第1電腦接口) 3. 按下鍵盤上的右箭頭鍵以切換至後 一台電腦接口 (如第1電腦埠切換到 第2電腦接口) 1. 啟動熱鍵模式 2. 按下鍵盤上的左箭頭鍵以切換至前一台 電腦埠 (如第3電腦埠切換到第2電腦埠, 如第2電腦埠切換到第1電腦埠) 3. 按下鍵盤上的右箭頭鍵以切換至後一台 電腦埠 (如第1電腦埠切換到第 2 電腦 埠) 消費者服務專線: 0800-289663 技術服務專線: 02-8692 6959 brand names and trademarks are the registered property of their respective owners. 5 (A) 1. 電腦連接埠 trademarks or registered trademarks of Aten International Co., Ltd. All 3 Printed in Taiwan 07/2003 (A) 1. 連接埠選擇切換鍵 © Copyright ATEN® 2003. All rights reserved. ATEN, MiniTower are 1 3 4 Manual Part No. PAPE-1223-G00 2 4 5 後視圖 前視圖 (Rear View) 1 (Front View) Manual Part No. PAPE-1223-G00 2 (A) 1. 連接口選擇切換鍵 2. 連接口的顯示燈內建於連接埠選擇 切換鍵 3. 鍵盤連接口 4. 鼠標連接口 5. 腳座 Diagram B. 2 brand names and trademarks are the registered property of their 3 前視圖 切換模式 オートスキャンモード Modo de Escandir Automático: Diagram A. (A) 背面図: (A) 1. Conectores de Puerto CPU 2. Puerto de Monitor 3. Poartador de electricidad 4. Puertoamicrófonos 5. Puertoaaltavoces Instalación 前面図: 1. ポートセレクトスイッチ 2. ポートLED ポートLEDはポートセレクトスイッチの中 に組み込まれています。 3. キーボードポート 4. マウスポート 5. スタンド (Rear View) 1 (Front View) (A) 1. Connettori porte CPU 2. Porta monitor 3. Presa di alimentazione 4. Presa microfono 5. Presa casse Diagram B. 2 (A) 1. Switch di selezione delle porte 2. LED delle porte I LED delle porte sono incorporati negli interruttori di selezione delle porte. 1. Porta tastiera 2. Porta mouse 3. Supporto ド 1. Port-Auswahlschalter 2. Port-LEDs Die Port-LEDs sind in den PortAuswahlschaltern integriert. 3. Tastatur-Anschluss 4. Maus-Anschluss 5. Fuß 4埠 Mini Tower 電子切換器 CS-74M 快速安裝卡 1. CPU Port Connectors 2. Monitor Port 3. Power Jack 4. Microphone Jack 5. Speaker Jack Vue Arrière: Ansicht von vorne: 4埠 Mini Tower 電子切換器 CS-74M 快速安裝卡 (A) (A) 1. Boutons de Sélection de Port 2. LEDs de Port Les LEDs de Port sont incorporées dans les Boutons de Sélection de Port. 3. Port de Clavier 4. Port de Souris 5. Support Guía de Inicio Rápido para Mini Tower 4 puerto KVM con interruptor CS-74M Rear View: Vue Avant: Guida di avvio rapido KVM Switch CS-74M Mini Tower 4 porte (A) 1. Port Selection Switches 2. Port LEDs The Port LEDs are built into the Port Selection Switches. 3. Keyboard Port 4. Mouse Port 5. Stand Mini Tower KVM-Schalter (4 Ports) CS-74M Kurzanleitung Guide de Démarrage Rapide du CS-74M Commutateur KVM 4 Ports Mini Tower MiniTower 4 Port KVM Switch CS-74M Quick start Guide Front View: 5 Printed in Taiwan 07/2003-
 1
1

ATEN CS74M Guía de inicio rápido
- Categoría
- Conmutadores KVM
- Tipo
- Guía de inicio rápido
En otros idiomas
- français: ATEN CS74M Guide de démarrage rapide
- italiano: ATEN CS74M Guida Rapida
- English: ATEN CS74M Quick start guide
- Deutsch: ATEN CS74M Schnellstartanleitung
- 日本語: ATEN CS74M クイックスタートガイド
Documentos relacionados
-
ATEN CS1708 Guía de inicio rápido
-
-
ATEN CL1016 Guía de inicio rápido
-
-
-
ATEN CS62US Guía de inicio rápido
-
-
-
ATEN CS64U Guía de inicio rápido
-
ATEN CS1708A Guía de inicio rápido