•
—
•
•
•
•
•
—
—
—
•
•
•
• 1
CD changer
•Choose the mounting location carefully, observing the following:
— Do not install the unit where;
•the ambient temperature exceeds 55°C.
•it will be exposed to direct sunlight or hot air from a heater.
•it will be exposed to rain, water, or high humidity.
•it will be exposed to a lot of dust.
•it will be subject to excessive vibration.
— The fuel tank should not be damaged by the tapping screws.
— There should be no wire harnesses or pipelines under the place
where you are going to install the unit.
— The spare tire, tools, or other equipment in or under the trunk
should not be interfered with or damaged by the screws or the
unit itself.
Notes
• Be sure to use only the supplied mounting hardware for a safe and
secure installation.
• Make holes of ø 3.5 mm only after making sure there is nothing on the
other side of the mounting surface.
How to install the CD changer
•When you install the CD changer, be careful not to damage wiring
or equipment on the other side of the mounting surface.
•The brackets 1 provide two positions for mounting, high and low.
Use the appropriate screw holes according to your preference.
Cambiador de discos compactos
•Elija cuidadosamente el lugar de montaje teniendo en cuenta lo
siguiente:
— No instale la unidad donde:
•la temperatura ambiente sea superior a 55°C.
•quede expuesta a la luz solar directa o al aire caliente de un
calefactor.
•quede expuesta a lluvia, agua o mucha humedad.
•quede expuesta a polvo excesivo.
•quede sujeta a vibraciones excesivas.
— El depósito de combustible no deberá dañarse con los tornillos
autorroscantes.
— No deberá haber cables ni tubos debajo del lugar en el que vaya
a instalar la unidad.
— Ni los tornillos ni la propia unidad deberían dañar ni interferir
con la rueda de repuesto, las herramientas y demás equipos del
portaequipajes o situados debajo de éste.
Notas
• Para realizar una instalación firme y segura, cerciórese de utilizar
solamente la ferretería de montaje suministrada.
• Antes de hacer los orificios de ø 3,5 mm, compruebe que no haya nada
en el otro lado de la superficie de montaje.
Forma de instalar el cambiador de discos
compactos
•Cuando instale el cambiador de discos compactos, cerciórese de no
dañar el cableado ni los equipos que puedan encontrarse en la otra
parte de la superficie de montaje.
•Los soportes 1 proporcionan dos posiciones de montaje, alta y
baja. Utilice los orificios para tornillo apropiados según sus
preferencias.
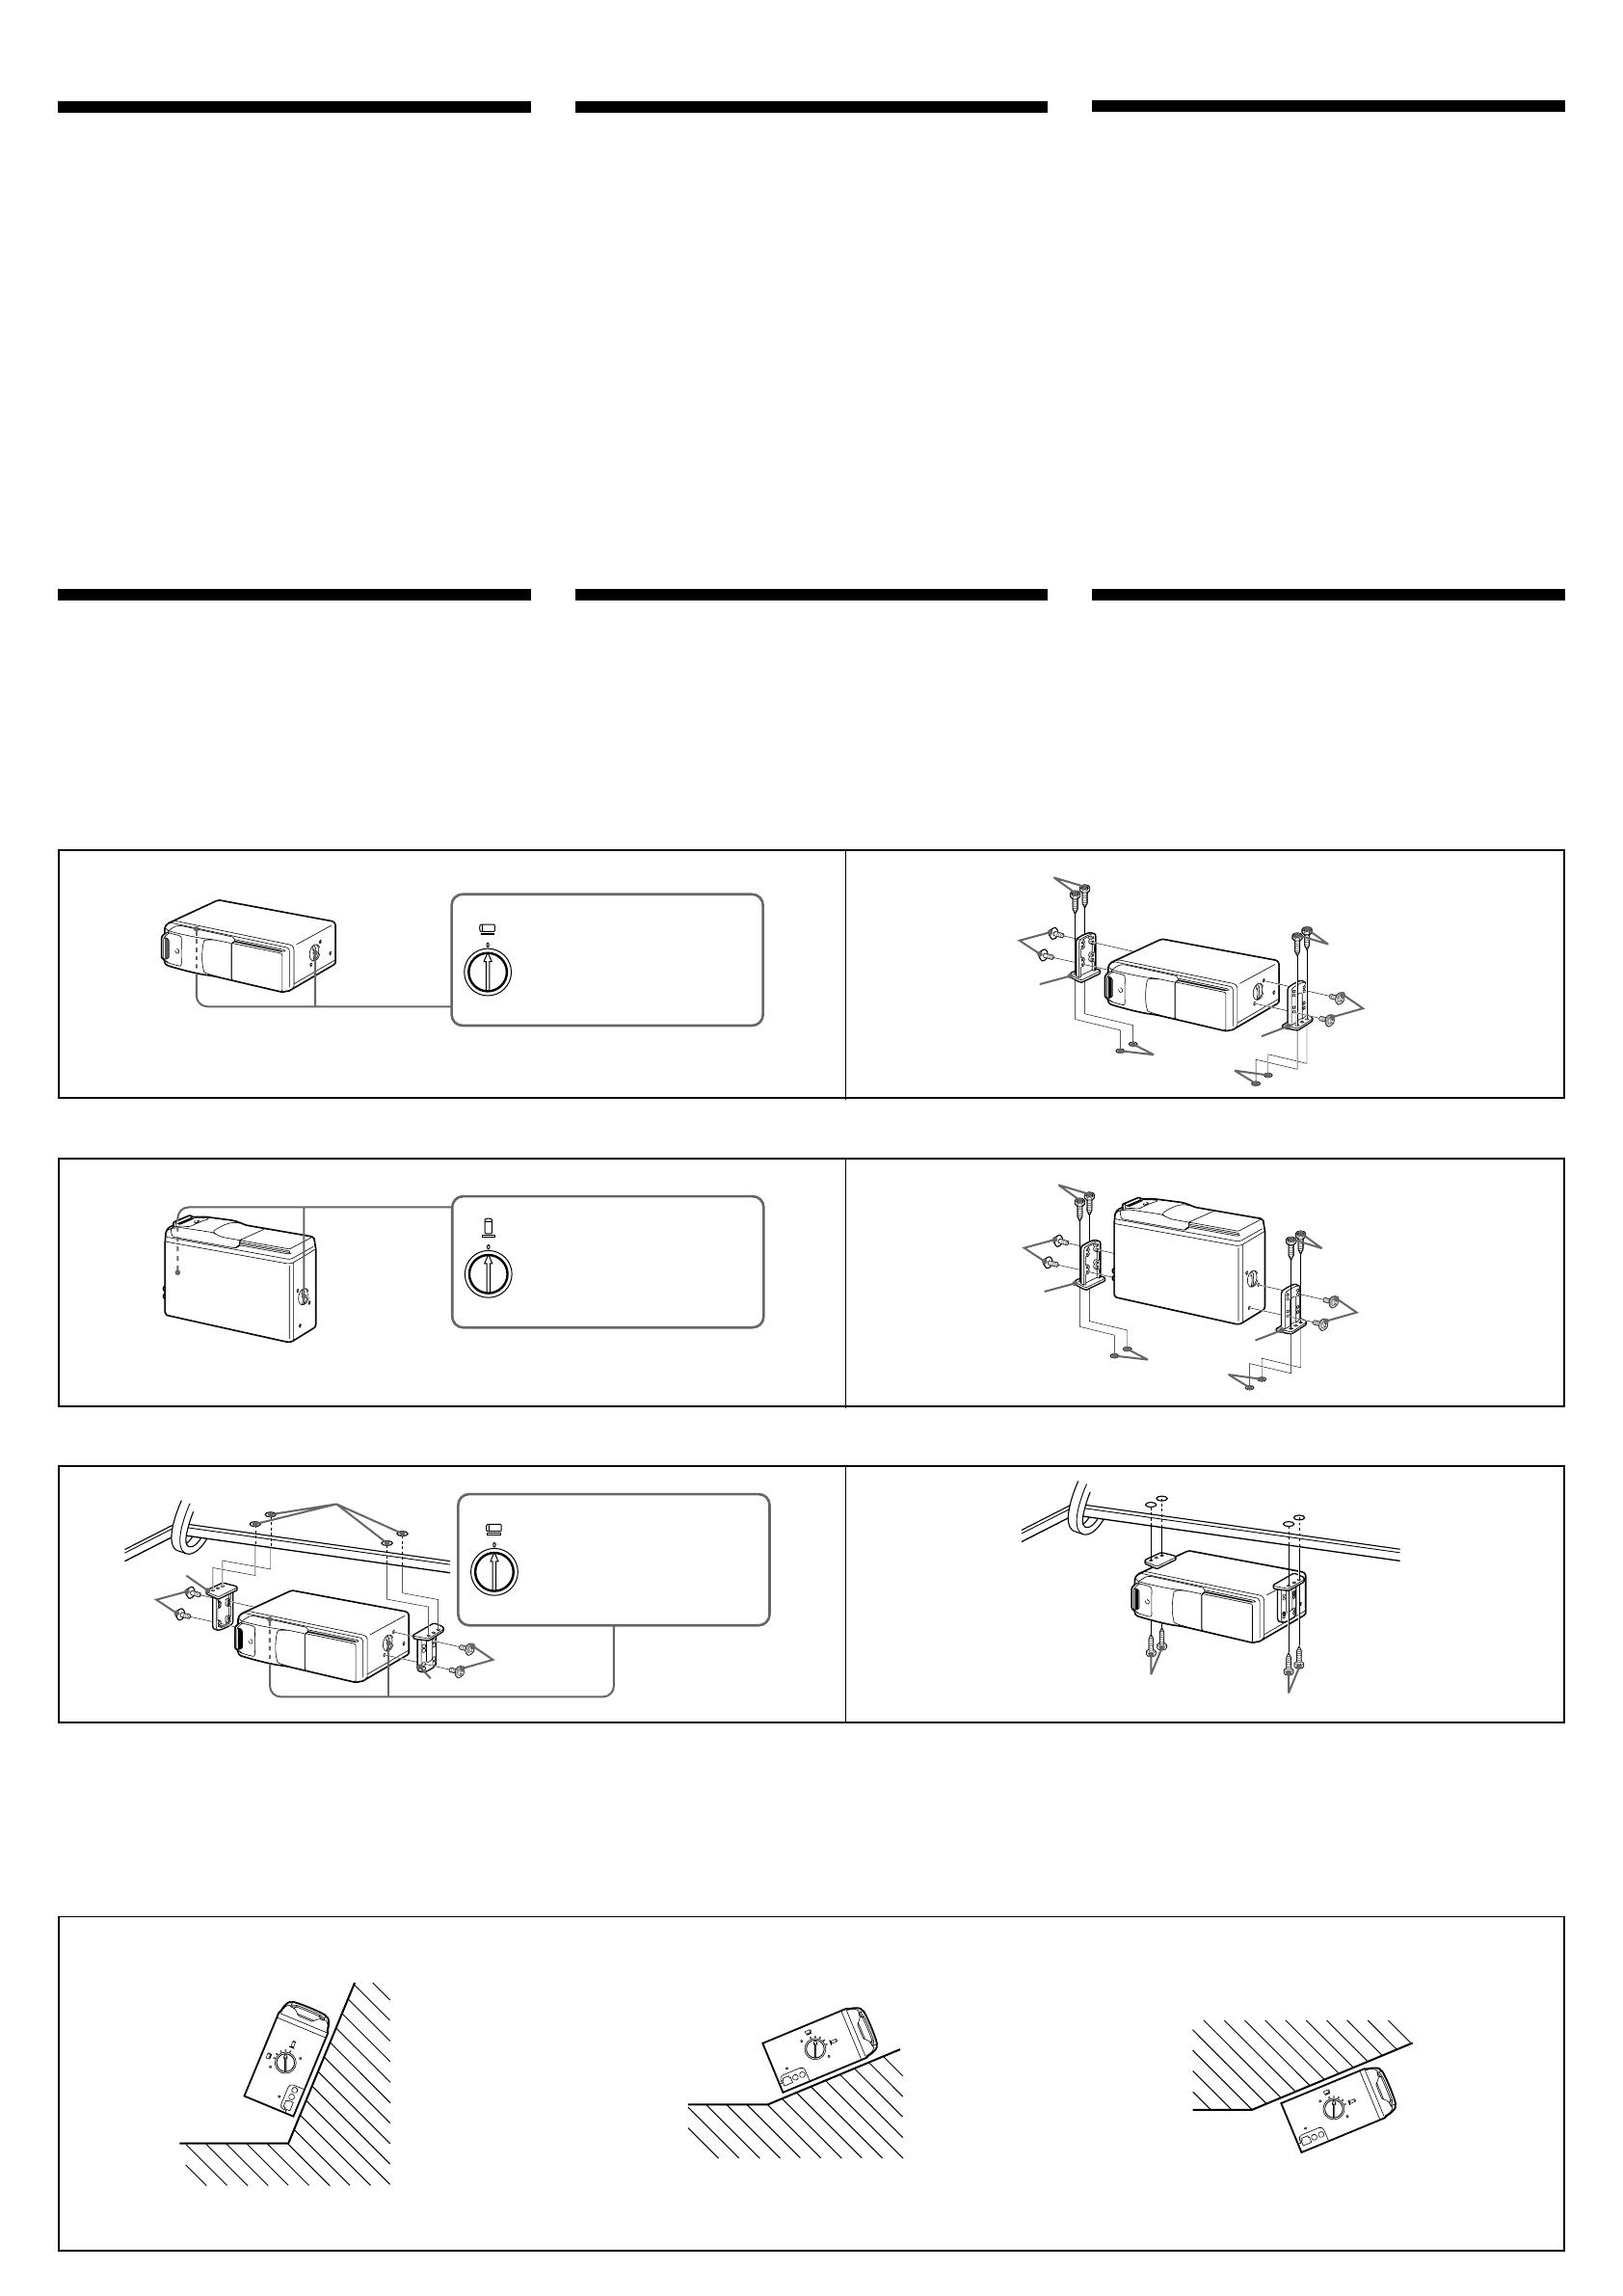
Instalación horizontal
1
Vertical installation Instalación vertical
1
2
Suspended installation Instalación suspendida
1
2
When the unit is to be installed under the rear tray or in the trunk,
observe the following.
•Choose the mounting location carefully so that the unit can be
installed horizontally.
•Make sure the unit does not hinder the action of the torsion bar
spring, hinge, etc. of the deck lid.
Cuando vaya a instalar la unidad debajo de la bandeja trasera o en el
portaequipajes, tenga en cuenta lo siguiente.
•Elija cuidadosamente el lugar de montaje de forma que la unidad
pueda instalarse horizontalmente.
•Asegúrese de que la unidad no dificulta la acción del resorte de la
barra de torsión, la bisagra, etc. de la tapa de la platina.
•
•
Inclined installation Instalación sobre una superficie inclinada
Después de instalar la unidad, alinee los diales con una de las
marcas, de forma que la flecha quede orientada en posición
vertical tanto como sea posible.
After installing the unit, align the dials with one of the marks
so that the arrow comes as close to a vertical position as
possible.
2
Nota
Asegúreses de alinear los diales derecho e izquierdo con la misma
marca.
Note
Be sure to align the left and right dials with the same mark.
H
O
R
IZ
O
N
T
A
L
V
E
R
T
I
C
A
L
H
O
R
IZ
O
N
T
A
L
V
E
R
T
IC
A
L
H
O
R
IZ
O
N
TA
L
VERTICAL
Horizontal installation
2
3
1
1
2
3
ø 3.5 mm
ø 3,5 mm
HORIZONTAL
Align with the marked position.
Alinee con la posición marcada.
VERTICAL
Align with the marked position.
Alinee con la posición marcada.
2
1
3
1
2
3
ø 3.5 mm
ø 3,5 mm
HORIZONTAL
Align with the marked position.
Alinee con la posición marcada.
2
1
1
2
ø 3.5 mm
ø 3,5 mm
3
3
Installation Instalación


